PCB manufacturing PCB manufacturing
Home > Blog

pcb manufacturing

PCB Manufacturing NZ: How to Compare Local and Overseas Suppliers
Monday, August 17th, 2026
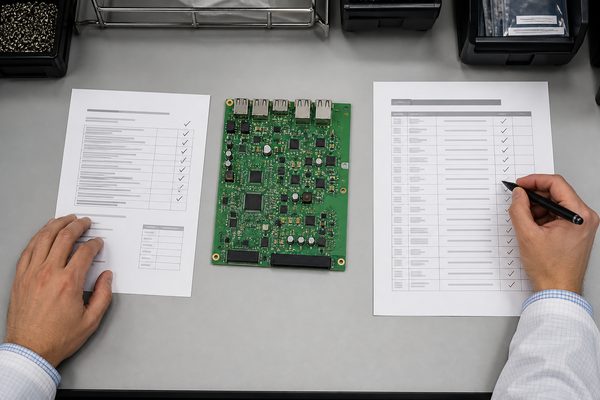
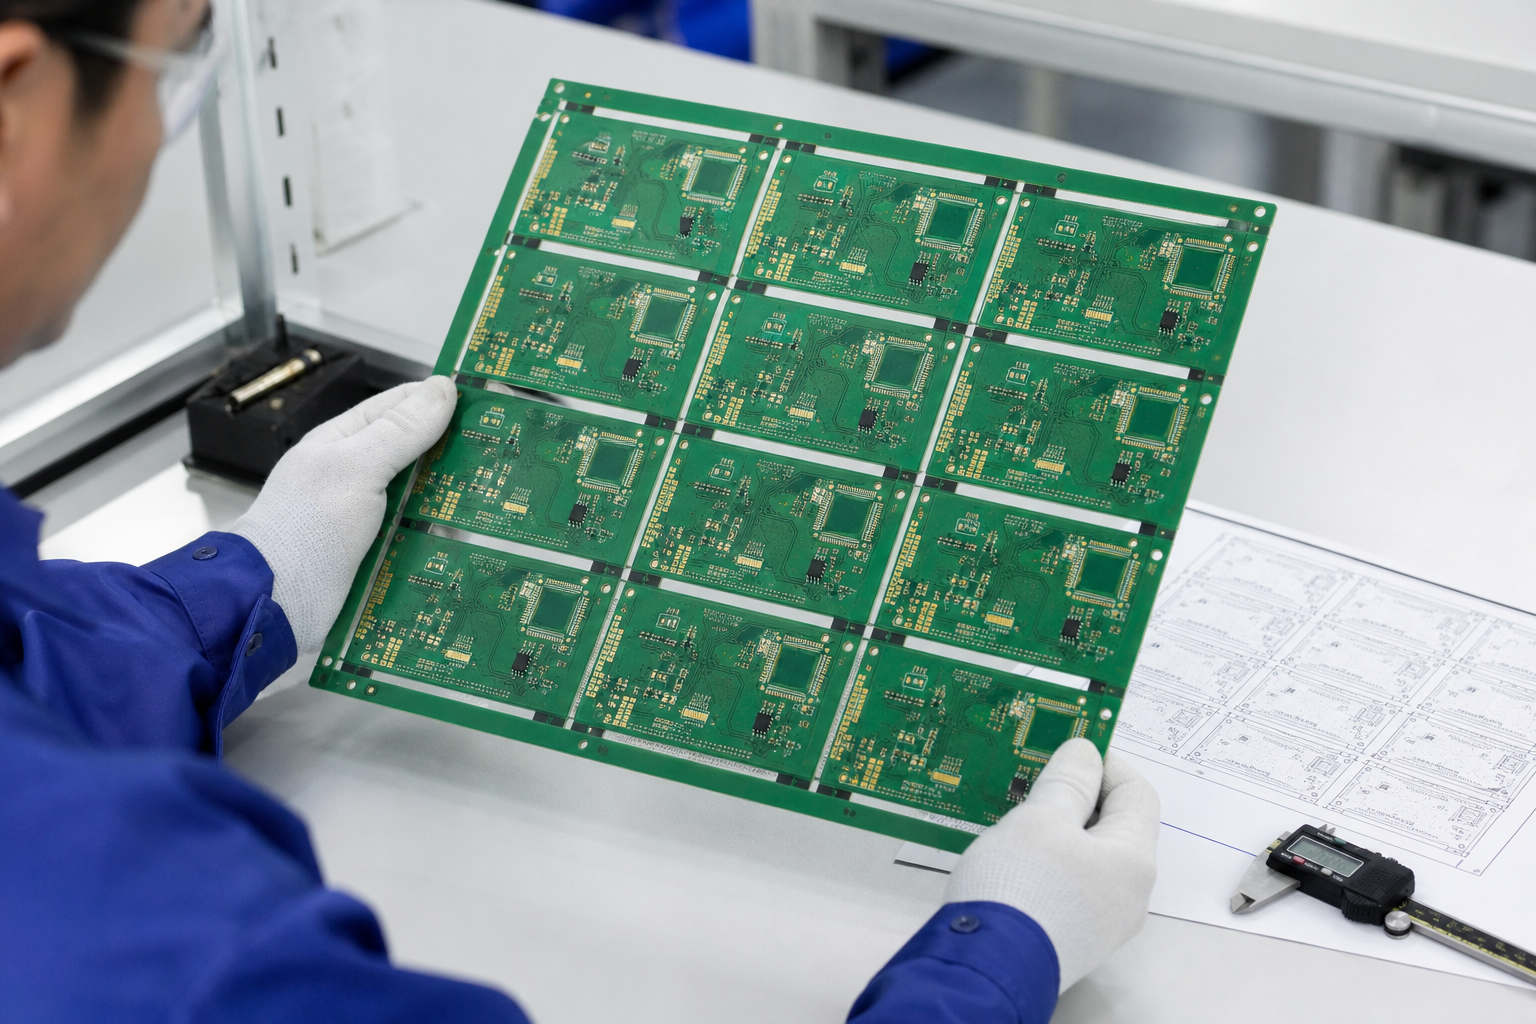
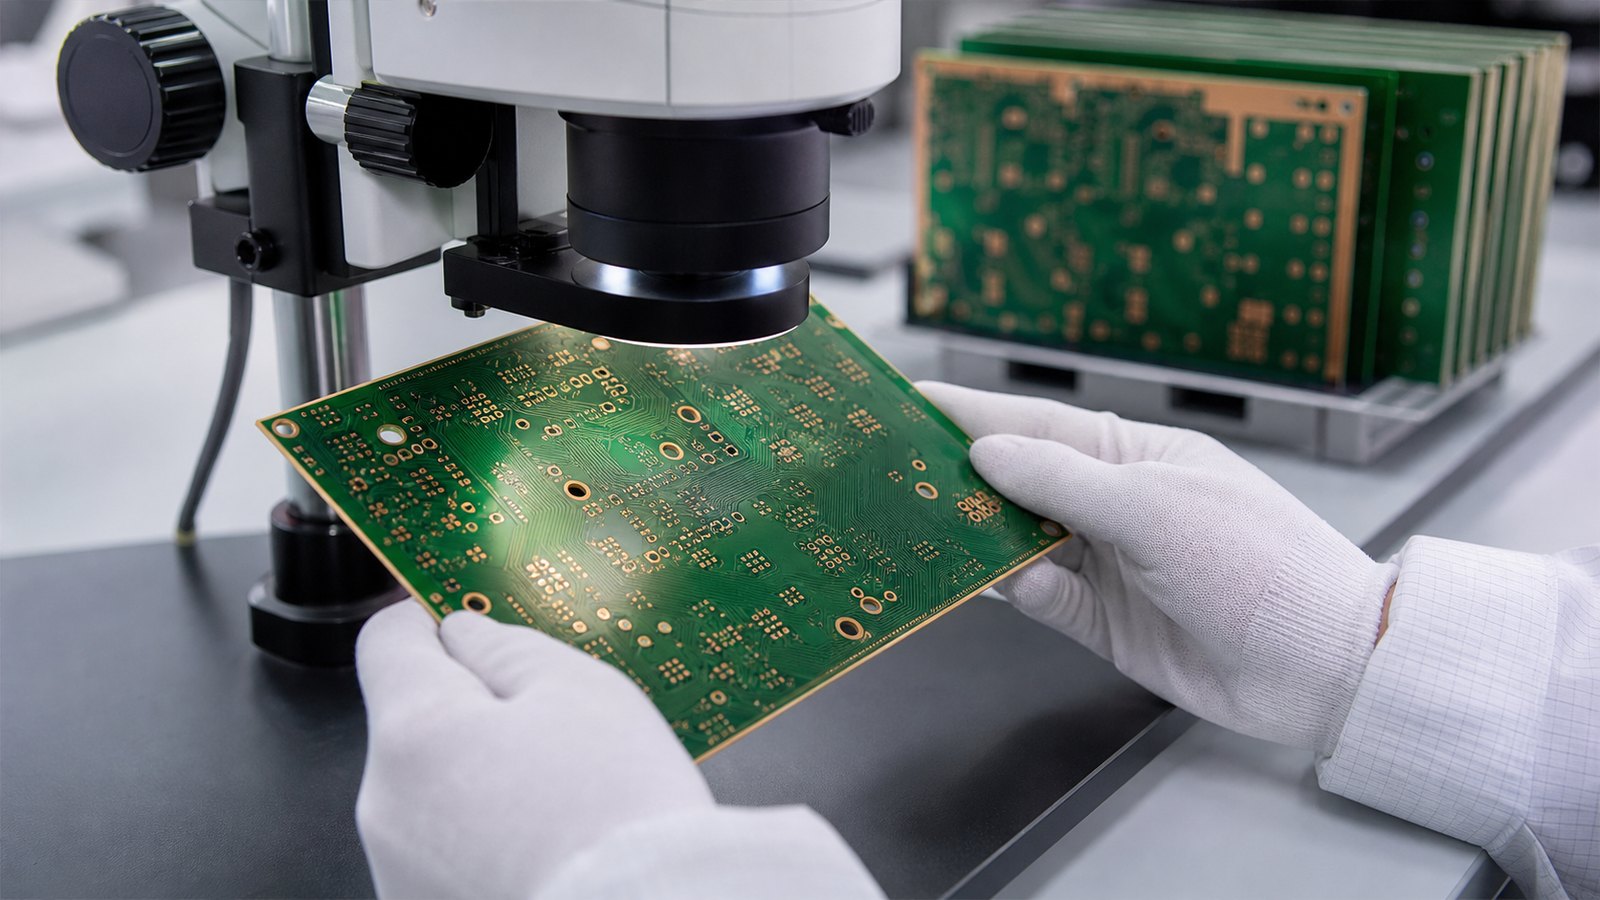
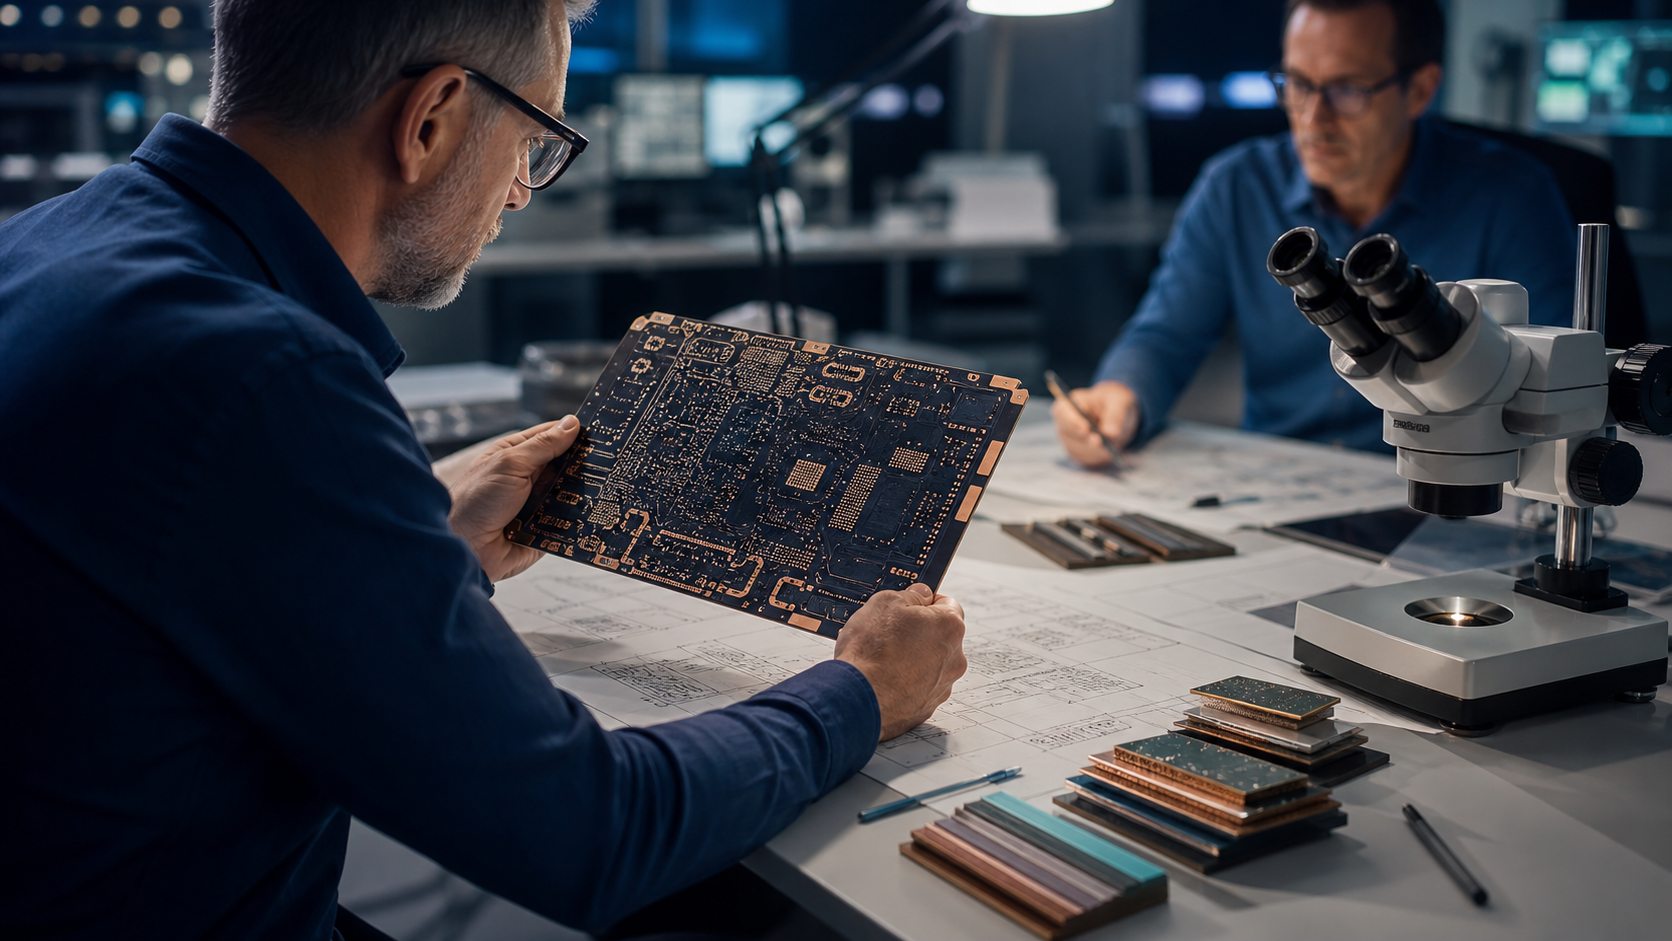
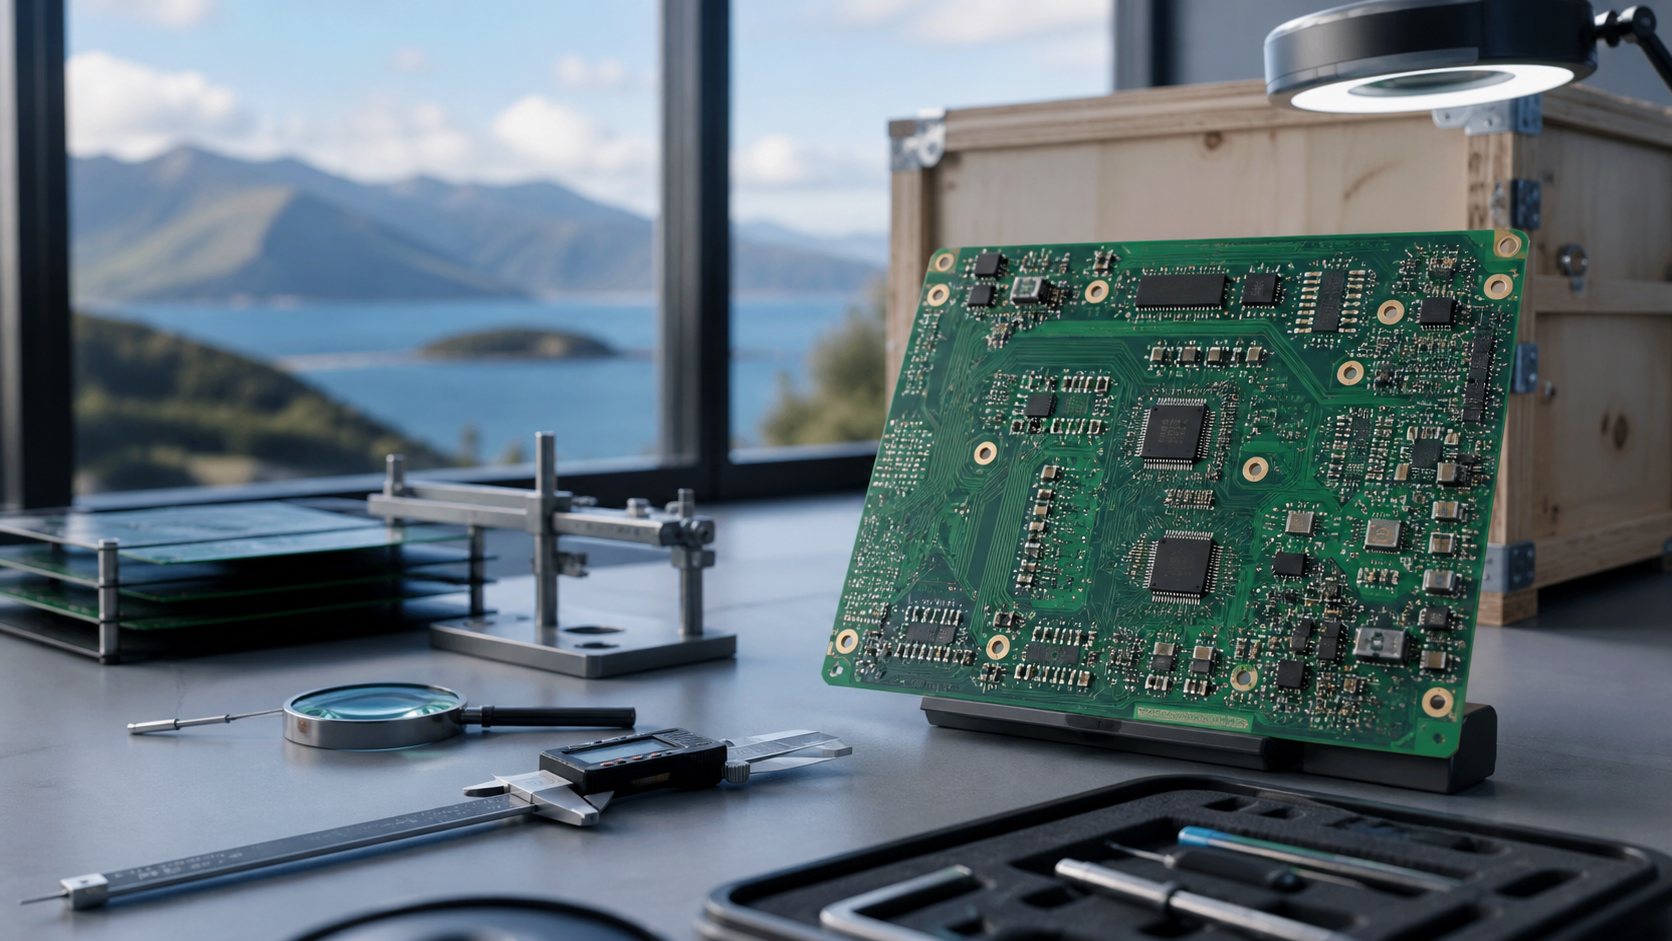
PCB manufacturing inspection setup for a New Zealand electronics project
New Zealand PCB sourcing decisions work best when design risk, supplier scope, evidence and total delivered cost are compared before location alone.

PCB manufacturing NZ searches usually come from teams that need a practical supply decision, not simply a list of company names. A New Zealand project may use a local fabricator, a local engineering or assembly partner that manages offshore fabrication, or a direct overseas PCB factory. Each model can work, but the comparison changes with board complexity, quantity, response time, inspection evidence, freight and the cost of a failed build.

The right question is not “Which country is cheapest?” It is “Which supply path gives this released design the clearest technical ownership, most credible evidence and lowest total project risk?”

Can every supplier quote the same controlled revision and explain what is included in the delivered price?

If one quote assumes standard material, another changes the stackup and a third omits testing or freight, the lowest number is not a comparable offer.

EBest Circuit can review PCB fabrication files for New Zealand projects before quotation.

Send Gerber or ODB++, NC drill and route files, fabrication drawing, stackup, material and copper requirements, impedance notes, quantity, panel preference, surface finish, test and documentation requirements, delivery destination and target date. Assembly projects should also include BOM and CPL/centroid data.

What “PCB Manufacturing NZ” Can Mean in a Real RFQ

Supplier location and manufacturing location are not always the same. A company serving New Zealand may own a local fabrication line, manage offshore factories, provide only design and assembly, or act as a commercial channel for another manufacturer. Ask each bidder to identify the legal supplier, manufacturing site, CAM/DFM owner, quality owner, assembly site, test site and shipment origin.

This matters when a nonconformance appears. Your team should know who can review the source data, approve a deviation, reproduce the build record and issue corrective action. A responsive local contact is valuable, but it does not replace visibility into the factory that actually controls lamination, drilling, plating, imaging, surface finish and electrical test.

Local New Zealand Supply or Overseas Fabrication?

Choose the supply model that matches the cost of delay and the technical uncertainty.

Decision factor Local or locally managed supply may fit Direct overseas fabrication may fit Question to resolve
Engineering interaction Frequent live discussion, evolving requirements or close design support Released data is stable and issues can be handled through a controlled portal/email loop Who owns DFM decisions and response time?
Quantity and price pressure Very small runs where coordination dominates unit cost Repeat batches where factory scale and process breadth matter What is the delivered cost at prototype, pilot and forecast volume?
Board complexity A capable local specialist is demonstrably qualified The overseas factory has verified experience and evidence for the construction Can the supplier prove the actual process, not merely advertise it?
Schedule Local transport and communication reduce recovery time Factory lead time is predictable and freight buffer is accepted Is the promised date ex-works, shipped or delivered?
Recovery risk Fast physical access or local rework is important Replacement capacity, spare quantity and controlled escalation are planned What happens if the first lot fails inspection?
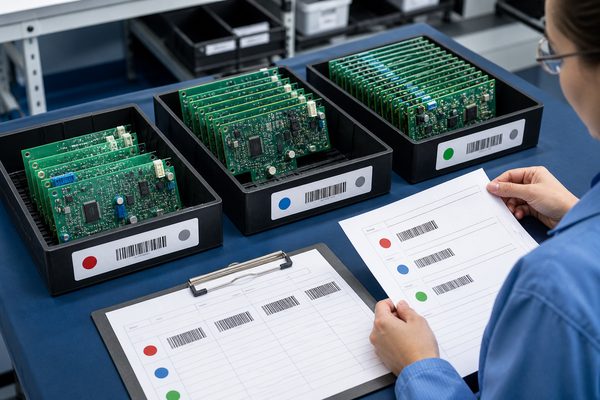
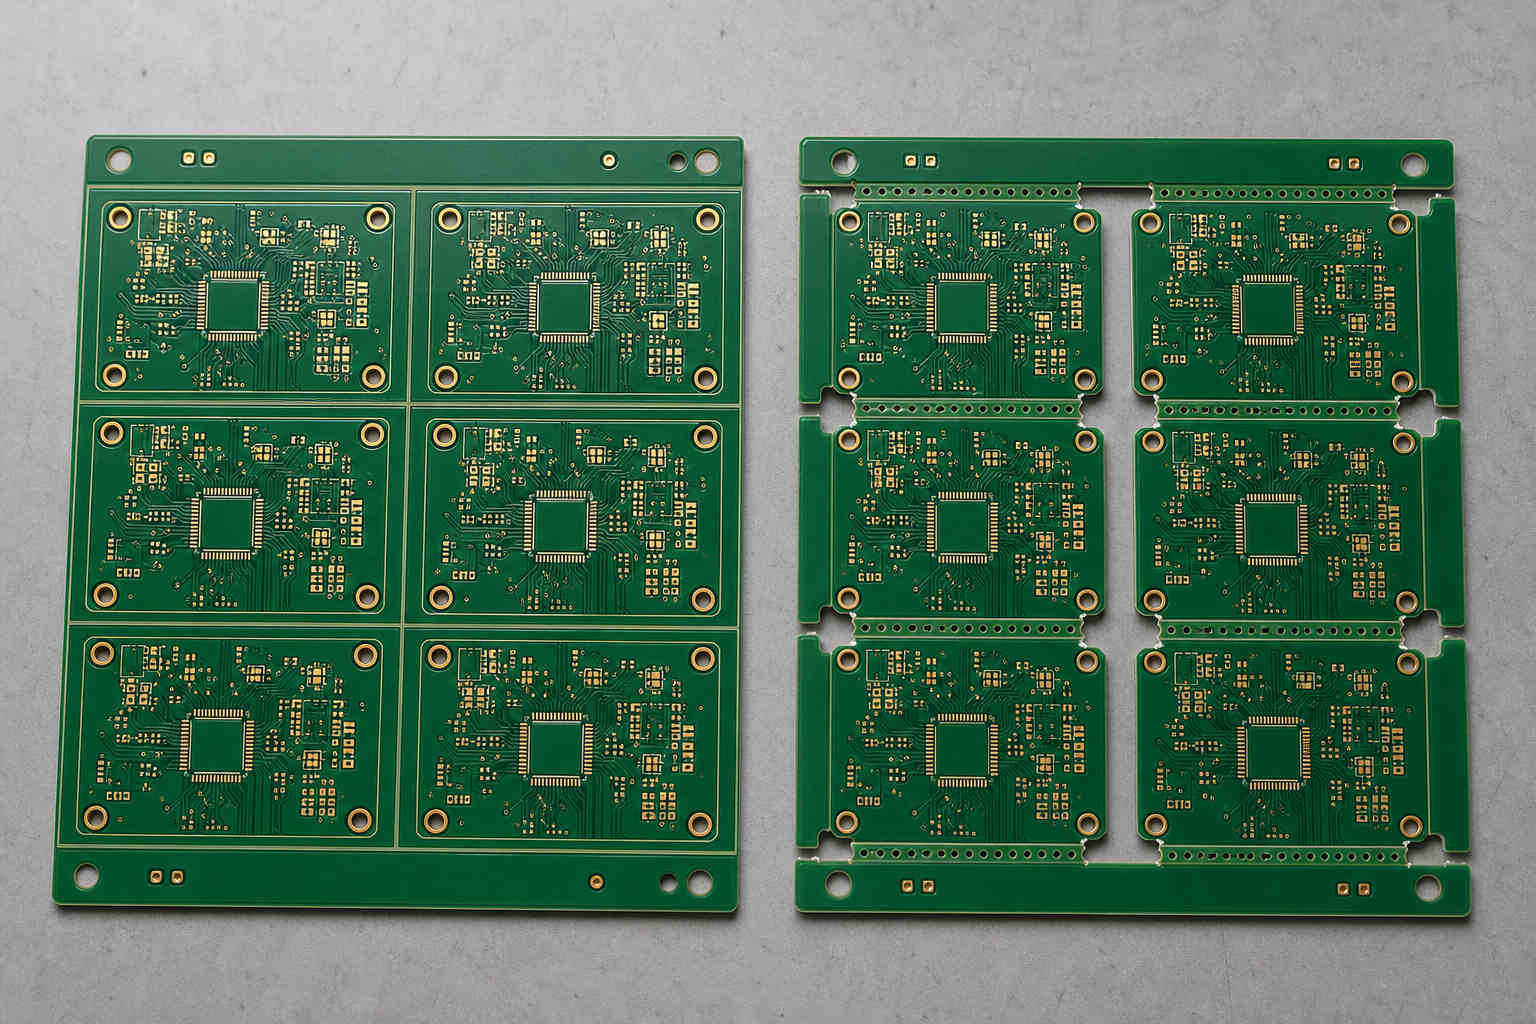
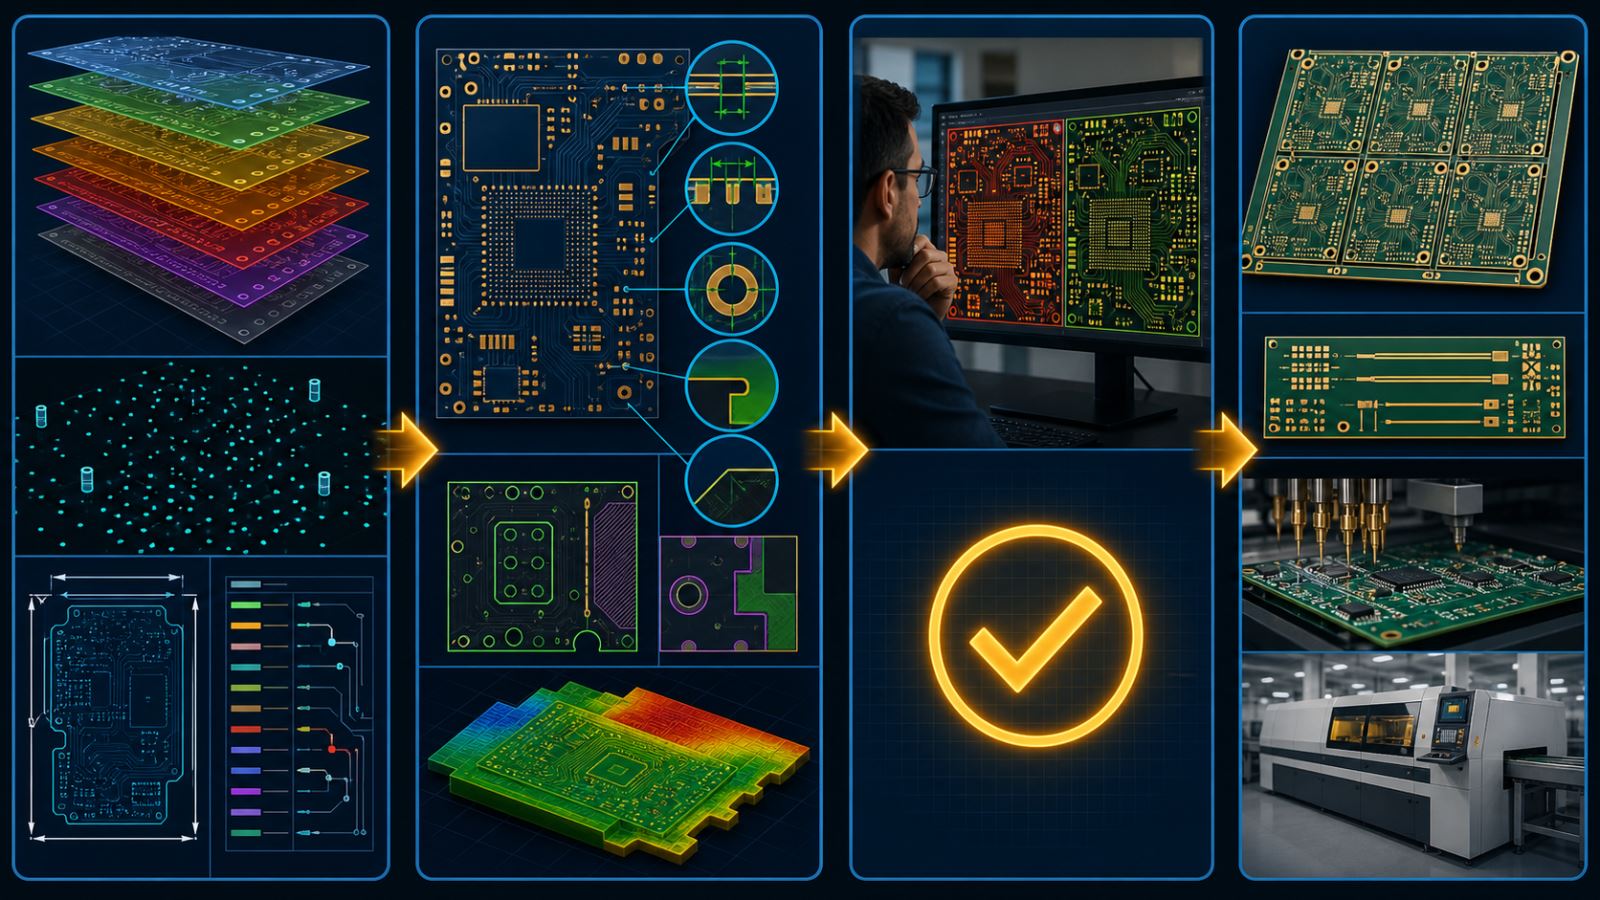
New Zealand buyer comparing local PCB supply with overseas fabrication and freight
Compare the whole supply path: engineering access, factory evidence, production scale, freight, recovery options and ownership of manufacturing decisions.

Start With the Board Risk, Not the Supplier Location

A low-risk two-layer board and a dense controlled-impedance multilayer should not use the same qualification depth. Before shortlisting suppliers, classify:

  • layer count, finished thickness, copper distribution and stackup sensitivity;
  • minimum finished conductor/space, holes, slots, annular features and copper-to-edge constraints;
  • controlled impedance, RF behavior, reference planes and required coupons;
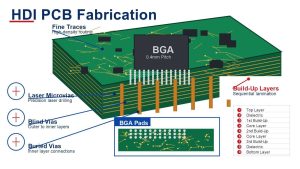
  • HDI, blind/buried vias, microvias, sequential lamination or via filling;
  • flex or rigid-flex zones, bend requirements, coverlay and stiffeners;
  • thermal demands, heavy copper, metal-core or special substrate needs;
  • surface finish, solderability, cleanliness, marking and cosmetic requirements;
  • electrical test, inspection reports, microsections, certificates and traceability;
  • application reliability, regulatory evidence and change-control expectations.

For a repeatable internal review, use the PCB DFM checklist before asking factories for price.

Build a Quote Package That Suppliers Can Price the Same Way

A comparable quote starts with one frozen RFQ package. Include Gerber or ODB++, NC drill and route data, a readable PCB fabrication drawing, stackup or construction request, materials and properties, finished copper, surface finish, impedance table, tolerances, panel/delivery format, quantity breaks, forecast, test scope, reports, packaging, revision and target delivery location/date.

Mark every requirement as fixed, preferred or open to supplier proposal. If the factory proposes an alternative material or stackup, request a documented comparison and approval step. Do not let a substitution disappear into a quote note that never reaches the design owner.

Assembly quotes need the controlled BOM, manufacturer part numbers, approved alternates, do-not-substitute parts, CPL/centroid, assembly drawing, polarity notes, programming/test instructions, consigned-material details and expected yield or acceptance criteria.

Compare Landed Cost Instead of Board Price

Landed project cost includes much more than the fabrication line item. Normalize tooling/NRE, boards, coupons, electrical test, reports, certificates, special packaging, overage, payment/transfer cost, freight, insurance, import handling, taxes or duties where applicable, customs/broker charges, local delivery and currency exposure. Confirm current import treatment with the responsible broker or adviser rather than assuming it from an old shipment.

Add the engineering cost of DFM clarification, sample approval, incoming inspection, travel/time-zone coordination, rejected lots, replacement freight and schedule disruption. A higher board price can be the lower project cost if it prevents a missed field trial; a scalable overseas factory can be the better choice when a stable design moves into predictable repeat volume.

Ask bidders to state Incoterm, shipment origin, package assumptions, quote currency, validity, minimum order, production lead time, transit estimate and what event starts the clock.

Verify Manufacturing Evidence Before Award

Marketing claims are not qualification evidence. Request evidence proportional to the board risk:

Claim Useful evidence What to verify
Factory capability Reviewed stackup, DFM response, sample/coupon, process route The exact construction and production conditions
Quality system Current certificate scope, audit response, control plan Correct site, activity and validity
Electrical performance Test method, impedance/coupon result, netlist comparison Limits, units, sample size and lot trace
Material and finish Certificate of conformance or requested material/finish records Part/revision/lot match and agreed alternates
Corrective action Example 8D/CAPA workflow with confidential data removed Containment, root cause, verification and recurrence control

For a broader supplier screen, the custom PCB supplier guide explains how to separate service coverage from verified manufacturing ownership.

Prototype, Pilot and Repeat Orders Need Different Controls

Use staged release gates instead of treating the prototype supplier as automatically approved for production.

  1. Prototype: prove manufacturability, basic function, fit and the first controlled build record.
  2. Pilot: lock stackup/materials, test fixtures, panel, inspection plan, yield review and change approvals.
  3. Production qualification: confirm capacity, repeatability, lot traceability, packaging, reports, escalation and forecast handling.
  4. Repeat order: compare revision, approved deviations, supplier process changes, incoming results and field feedback before release.

If a different factory or process is used between stages, treat it as a controlled transfer. Request first-article evidence rather than assuming the earlier result carries over.

Plan Freight, Customs and Schedule Buffers for NZ Delivery

Quote dates must be translated into a New Zealand receiving date. Build the schedule from data freeze, DFM response, customer disposition, material readiness, production, inspection/report release, booking, export handoff, transit, import clearance and domestic delivery. Add buffer around holidays, first builds and any shipment that is critical to an external test window.

Define who is the importer, who supplies customs documents, who pays each charge, whether batteries/components or unusual materials affect the shipment, and how loss or damage is handled. Split shipments may protect a prototype milestone, but only if both lots keep clear revision and lot traceability.

For urgent work, compare the cost of a small early lot by fast freight with a larger follow-on lot by the normal route. Do not compress DFM or approval gates merely to create an earlier ex-works date.

How EBest Circuit Supports New Zealand PCB Projects

EBest Circuit can support a direct factory quotation path for bare PCB fabrication and, when required, assembly coordination. The engineering review is based on the actual released data. Capability, material, stackup, controlled features, surface finish, test, reports, panel, quantity and schedule are confirmed for the specific combination rather than presented as an unconditional limit.

New Zealand buyers can request a DFM question list, quote assumptions, proposed construction, inspection/test scope, production status and shipment details. If a requirement is uncertain or needs a special process, it should remain a project confirmation item until the factory review is complete.

Teams planning assembly can also review the prototype PCB assembly service and include BOM, CPL, test and programming information with the board data.

FAQ About PCB Manufacturing in New Zealand

Are PCBs manufactured in New Zealand?

Yes, local providers exist, but supplier scope varies. Confirm whether the bidder owns local fabrication equipment, manages an offshore factory, supplies design/assembly only, or combines these services.

Should a New Zealand company buy PCBs locally or overseas?

Use local or locally managed supply when interaction and recovery access dominate. Consider direct overseas fabrication when the design is controlled, scale matters and factory evidence plus freight risk are acceptable.

What files are needed for a PCB manufacturing quote?

Provide Gerber or ODB++, drills/routes, fabrication drawing, stackup/material/copper/finish requirements, impedance notes, quantities, panel format, tests, reports, revision, destination and target date.

How should I compare PCB manufacturing quotes?

Normalize construction, tests, reports, tooling, quantity, overage, freight, shipment terms, currency, production lead time, delivery date and exclusions. Do not compare headline unit prices with different assumptions.

How can I verify an overseas PCB manufacturer?

Review the actual DFM response and stackup, certificate scope, sample/coupon evidence, test records, traceability and corrective-action process. Evidence should match the manufacturing site and construction.

What should be checked before a repeat PCB order?

Confirm revision, stackup, materials, approved deviations, panel, test program, supplier process/site changes, prior nonconformance actions and required delivery date.

Can EBest Circuit ship PCB orders to New Zealand?

Project delivery can be quoted to the requested New Zealand destination. Confirm shipment terms, freight method, import responsibilities and schedule in the project-specific quotation.

You may also like

PCB CAM Outsourcing: What to Check Before Manufacturing Release
Monday, August 17th, 2026
PCB CAM engineer reviewing Gerber layers drills stackup and manufacturing checks
CAM front-end work converts released customer data into controlled manufacturing instructions while preserving a visible boundary between manufacturability corrections and design changes.

PCB CAM work outsourcing means assigning manufacturing front-end engineering to a specialist team that audits customer data, prepares factory tooling, resolves DFM questions, and releases controlled CAM outputs. It should not give the CAM provider silent authority to change circuit function, approved dimensions, stackup intent, impedance, materials, or customer-controlled features.

The safest arrangement defines inputs, permitted transformations, approval thresholds, output files, revision records, and the factory handoff before work begins.

Can you prove which geometry came from the customer, which CAM edits were manufacturing-only, and which changes received approval?

Without that trace, a repaired pad, moved copper feature, modified solder mask, changed drill, altered panel, or adjusted impedance geometry can become an undocumented product change.

EBest Circuit reviews the released PCB package through manufacturing CAM before fabrication.

Send Gerber or ODB++, NC drill/route data, fabrication drawing, stackup, material and copper requirements, impedance notes, netlist data where available, quantity, panel/delivery preference, test scope, and target schedule. Open questions and any change requiring customer authority must be resolved against the actual construction.

What PCB CAM Outsourcing Covers After Design Release

CAM sits between customer design outputs and executable factory data. Typical front-end work includes layer identification, format and polarity checks, drill/tool analysis, netlist comparison, DFM analysis, stackup and impedance coordination, solder-mask and legend checks, panelization, coupons, tooling features, rout/V-cut data, factory compensation, and release documentation.

CAM may repair data artifacts or apply approved manufacturing compensation, but it does not validate circuit function. The customer remains responsible for design intent, electrical behavior, safety, controlled dimensions, and the approved revision.

Audit the Incoming Data Before CAM Work Starts

The first deliverable should be an input-status report, not a tooled panel. Confirm:

  • file set, revision, units, format, naming, and checksum;
  • layer count, copper/mask/legend/paste/mechanical roles, polarity, and alignment;
  • plated/non-plated drills, slots, countersinks, depth-controlled features, and drill pairs;
  • outline, dimensions, tolerances, cutouts, edge treatment, V-cuts, and routed tabs;
  • stackup, finished thickness, copper, material, Tg/other properties, and special construction notes;
  • impedance targets, tolerance, layers, references, line classes, and coupon expectations;
  • netlist availability and whether comparison is permitted/required;
  • panel, tooling, marking, date/lot code, testing, reports, quantity, and delivery requirements.

The PCB fabrication drawing guide shows which requirements should not be left to filenames or assumptions.

Separate CAM Corrections From Customer Design Changes

Classify every issue before editing.

Issue class Example Who approves Required record
Data clarification Unknown mechanical layer or unit ambiguity Customer data owner Question and confirmed interpretation
Routine factory transformation Documented process compensation that preserves finished geometry Defined by approved factory process CAM rule/version and output trace
Manufacturability correction Mask bridge, annular ring, copper-to-edge, drill or rout conflict Customer unless pre-authorized threshold exists Before/after view and disposition
Design change Moved trace, pad, component land, net, hole, outline or controlled dimension Customer design authority Revised source/release or formal deviation

Never let a small geometric delta bypass the approval rule merely because CAM software can repair it automatically.

12 Front-End CAM Checks Before a PCB Job Is Tooled

  1. Layer mapping, polarity, registration origin, units, and scaling.
  2. Customer revision consistency across every file and drawing.
  3. Netlist extraction and comparison to supplied reference data.
  4. Minimum conductor width/spacing by copper layer and construction.
  5. Annular ring, drill-to-copper, breakout risk, and finished-hole allowance.
  6. Copper-to-profile, slot, cutout, V-cut, and scoring clearances.
  7. Solder-mask openings, dams, via treatment, and exposed copper intent.
  8. Legend-to-pad/mask/profile conflicts and required marking content.
  9. Plane polarity, thermal connections, isolated copper, and unintended islands.
  10. Impedance features, reference layers, stackup consistency, and coupons.
  11. Panel rails, spacing, tabs, tooling holes, fiducials, coupons, and depanelization.
  12. Factory electrical test, inspection, traveler, output archive, and approval status.

Use a broader PCB DFM checklist to connect these CAM checks to design and assembly consequences.

PCB CAM front-end gate map from incoming data through DFM approval tooling and factory release
A controlled CAM workflow has four visible gates: input integrity, manufacturability review, customer disposition, and factory tooling release.

Panelization and Tooling Data Need Customer-Supplier Alignment

Panelization changes manufacturing, assembly, test, handling, and depanelization risk. The CAM scope should identify who owns the customer array, fabrication panel, assembly panel, rails, breakaway features, coupons, fiducials, tooling holes, bad-mark strategy, serial/lot marking, and delivered format.

Consider board geometry, component overhang, edge clearances, selective solder or fixture access, conveyor support, warpage, copper balance, paste/placement needs, test fixtures, depanelization stress, and packaging. A panel optimized only for fabrication may be awkward for assembly; a customer array may need a larger factory production panel around it.

Stackup and Impedance Changes Must Be Controlled

CAM cannot safely treat stackup and impedance as independent post-processing. Material availability, dielectric thickness, copper, finished thickness, layer count, via structures, reference planes, line geometry, etch compensation, and coupon design interact.

If the factory proposes a production stackup, return the layer structure, materials, nominal dielectrics/copper, impedance geometry, targets/tolerances, coupons, and affected nets or classes for customer confirmation. Preserve the approved version with the job. For complex builds, use the HDI process guide to review sequential lamination and microvia dependencies.

Build an Approval Loop That Leaves an Audit Trail

Each open issue needs an owner, evidence, disposition, and released revision. Use screenshots or marked views, coordinates, layer names, rule/value, risk, proposed action, and response deadline. Record accept, reject, supply revised data, or approve deviation.

Do not rely on chat fragments detached from the job. Freeze customer inputs, CAM software/rule version, reviewed output, approved changes, production stackup, panel drawing, test data, and final release status. When customer files change, restart affected comparisons rather than overwriting the old result.

How to Evaluate a PCB CAM Outsourcing Provider

  • Can it preserve the customer baseline and produce before/after evidence?
  • Which formats, netlists, stackups, impedance models, panel rules, and factory systems are supported?
  • How are automated edits classified and approved?
  • Can senior CAM engineers review HDI, flex/rigid-flex, RF, heavy copper, controlled depth, and unusual outlines when relevant?
  • How are customer data, IP, access, subcontracting, retention, and deletion controlled?
  • What checks are automated, what receives human review, and what remains customer responsibility?
  • How are response time, revision count, error correction, escalation, and factory feedback handled?
  • Does the final archive let another qualified factory or engineer reproduce the approved job?

Final CAM Deliverables the Factory Should Preserve

The archive should show the path from customer release to factory release. Preserve the original input manifest and checksums, input audit, extracted/reference netlists, DFM report, issue/disposition log, approved stackup and impedance/coupon data, panel/tooling drawing, rout/V-cut data, electrical-test data, customer approvals, factory CAM outputs, software/rule versions, and traveler/release record.

If an intelligent package is used, the IPC-2581 guide explains why machine-readable data still needs revision and viewer checks.

How EBest Circuit Uses CAM Review Before Fabrication

EBest Circuit uses manufacturing front-end review to clarify the actual board construction before production. Available checks can cover layer/data consistency, drills, spacing, annular features, copper-to-profile, mask and legend, stackup, impedance notes, panel requirements, fabrication drawing, and requested test/documentation scope.

Capability is confirmed for the actual combination of material, layers, copper, thickness, holes/vias, geometry, finish, tolerance, panel, quantity, and schedule. A CAM suggestion that changes customer-controlled intent is returned for approval rather than silently treated as a routine repair.

FAQ About PCB CAM Outsourcing

What is PCB CAM engineering?

It is the manufacturing front-end work that audits released PCB data, applies controlled factory transformations, performs DFM checks, creates panel/tooling/test data, and releases executable fabrication information.

Is PCB CAM the same as PCB design?

No. PCB design creates circuit and physical layout intent. CAM prepares approved design outputs for manufacturing and should not change product intent without authority.

Why outsource PCB CAM work?

Companies may need specialist capacity, 24-hour coverage, format expertise, or standardized front-end processing. Value depends on accuracy, traceability, approval control, security, and factory integration.

What files does PCB CAM need?

Typically Gerber/ODB++, drills/routes, fabrication drawing, stackup, material/copper and impedance notes, netlist data, panel requirements, tests, quantity, and schedule.

Can CAM engineers repair Gerber data?

They can correct agreed manufacturability or data issues, but the change class and approval threshold must be defined. Design-intent changes require customer authority.

What is the difference between a customer array and a fabrication panel?

A customer array is the delivered multi-board format. A fabrication panel may place one or more arrays/boards within factory rails, coupons, tooling, and process spacing.

How do I verify CAM output?

Compare it with the frozen input, review the DFM/change log, inspect layers/drills/outline/panel in an independent viewer, compare connectivity, and approve stackup, impedance, and controlled changes.

You may also like

Recent Trends in PCB Technology and What They Change for Your Next Build
Monday, August 17th, 2026

You may also like

PCB Design Outsourcing: How to Scope, Review and Release the Work
Monday, August 17th, 2026
Engineering team reviewing an outsourced PCB design scope schematic and manufacturing handoff
A successful outsourced PCB design has a controlled scope, named owners, observable review gates, and a complete manufacturing handoff—not merely a finished-looking layout.

PCB design outsourcing works when the customer defines what the external designer owns, what evidence must be delivered, and who has authority to release the board. A low hourly rate or fast layout promise cannot compensate for an incomplete design brief, uncontrolled libraries, missing review gates, or manufacturing files that do not match the approved revision.

This guide helps product teams scope outsourced schematic and layout work, compare quotations, protect design data, retain technical control, and prepare a fabrication- and assembly-ready handoff.

Will the outsourced designer deliver a board you can verify, modify, manufacture, and support after the first build?

Teams often discover too late that the quotation excluded footprint creation, SI/PI analysis, mechanical checks, stackup coordination, source CAD files, library ownership, manufacturing drawings, or post-prototype corrections. The layout may be complete, yet the product team cannot prove why critical decisions were made or reproduce the release.

EBest Circuit can support the manufacturing side of the handoff by reviewing the released fabrication and assembly package against the proposed build.

Send Gerber or ODB++, NC drill files, fabrication drawing, stackup, material and copper requirements, impedance notes, netlist data, quantity, finish, and test requirements. For PCBA, add the BOM, CPL/pick-and-place file, assembly drawings, substitutions, programming, and test instructions. Design ownership and circuit approval remain with the customer and its authorized design team; project-specific DFM, fabrication, sourcing, assembly, and test scope are confirmed from the actual files.

What Should PCB Design Outsourcing Include?

The phrase can describe anything from a short layout task to full electronic product development, so the contract must name the boundary. Do not assume that “PCB design” includes schematic capture, component selection, firmware, enclosure work, simulation, compliance, prototyping, or manufacturing support.

  • Requirements definition: turning a product brief into electrical, mechanical, environmental, test, cost, and compliance constraints.
  • Schematic work: architecture, circuit design, part selection, calculations, ERC, simulation, and design documentation.
  • Library work: symbols, footprints, 3D models, pin mapping, land-pattern source, and approval records.
  • PCB layout: board setup, placement, routing, constraints, planes, thermal features, mechanical integration, and DRC.
  • Analysis: signal integrity, power integrity, thermal, high-current, safety-spacing, EMC, or other project-specific signoff work.
  • Manufacturing release: Gerber/ODB++, drill, drawings, stackup, netlist, BOM/CPL, assembly files, output comparison, and revision archive.
  • Prototype support: DFM questions, sourcing clarifications, build deviations, bring-up, failure investigation, and controlled corrections.

Ask the provider to mark every item as included, excluded, customer-supplied, or optional. This single step prevents two quotations with very different responsibilities from looking artificially comparable.

When Outsourcing Helps—and When It Adds Risk

Outsourcing is valuable when it adds missing expertise or capacity without separating design decisions from product knowledge. It adds risk when the external team receives weak inputs, cannot speak directly with responsible engineers, or is rewarded only for finishing drawings quickly.

Situation Why outsourcing may help Control required
Internal team has a temporary layout bottleneck Adds capacity while product architects stay engaged Controlled constraints, daily issue path, internal release owner
Board needs specialist RF, high-speed, power, safety, HDI, or rigid-flex knowledge Brings domain experience not available in-house Named specialist, explicit analyses, measurable acceptance criteria
Product requirements are still changing May accelerate option studies Paid discovery phase and change control before committed layout
Team wants the lowest fixed price for an undefined scope Apparent budget certainty High risk: exclusions and rework usually emerge later
Project contains sensitive IP or regulated data Access to specialist capability Approved tools, locations, people, retention, transfer, and deletion rules

If the product team cannot answer basic architecture, compliance, interface, environment, and validation questions, outsource a discovery milestone first. Do not ask a layout provider to silently invent product requirements.

Choose the Ownership Model Before the First Schematic Edit

Ownership means decision authority and long-term responsibility, not just possession of files. Collaborative or co-design models can work well, but each technical area needs one accountable approver. Cadence’s discussion of co-design and outsourced PCB work also illustrates why teams need a deliberate collaboration model rather than an isolated handoff.

Decision area Possible external role Customer must retain Acceptance evidence
Product requirements Clarify and structure inputs Business, safety, regulatory, and performance authority Approved requirements baseline
Circuit and parts Design, calculate, simulate, recommend Approval of function, lifecycle, supply, derating, and substitutions Schematic review, calculations, simulation, BOM approval
Libraries Create or validate symbols and footprints Approval method and ownership of reusable data Datasheet cross-check and library review log
Layout Place, route, document, resolve constraints Approval of critical topology and product tradeoffs Review snapshots, DRC, analysis, change log
Manufacturing release Generate and package outputs Final revision and release authority Independent output-viewer and netlist comparison

Name the people who approve each gate. A group mailbox or “customer to review” line is not enough when a safety spacing, critical footprint, impedance rule, or component substitution needs a decision.

Build a Scope of Work the Designer Can Actually Quote

A quote-ready scope connects project inputs to deliverables, milestones, and acceptance tests. Give every bidder the same package and require assumptions to be written into the quotation.

  1. Describe the product and use environment. Include function, interfaces, input power, loads, enclosure, temperature, moisture, vibration, service access, compliance targets, and expected production volume.
  2. Define the starting point. Identify whether the provider receives requirements, an approved schematic, a partial layout, a reusable reference design, or legacy manufacturing files.
  3. State the technology assumptions. Include board size, layer target, stackup status, copper, impedance, via strategy, material needs, assembly process, and preferred manufacturer review point.
  4. Classify critical circuits. Mark safety, power, RF, high-speed, precision analog, clocks, memory, sensors, isolation, antennas, and thermal constraints.
  5. List required analyses. Define models, tools, inputs, limits, output reports, and who interprets the result.
  6. Define review milestones. Typical gates include architecture, schematic, component/library, placement, critical routing, pre-release DRC/analysis, and manufacturing outputs.
  7. List every deliverable. Include native editable CAD, libraries, PDFs, analysis files, manufacturing and assembly outputs, drawings, 3D data, settings, reports, and revision history.
  8. Set change and correction rules. Distinguish customer changes, provider errors, manufacturer DFM changes, prototype learning, and post-release support.
  9. Define acceptance. Specify who reviews, the response time, objective pass criteria, issue severity, and how approval is recorded.

A manufacturer-aligned PCB DFM checklist should be incorporated before the external designer freezes the layout, not attached after all routing is finished.

What Does Outsourced PCB Design Cost?

There is no useful universal price because the quoted object changes with scope, uncertainty, board complexity, analyses, deliverables, and support. Compare the cost of reaching an accepted release, not only the hourly rate or first fixed-price milestone.

  • Fixed price can work for stable inputs and clearly bounded deliverables. It becomes fragile when requirements or constraints are incomplete.
  • Time and materials fits discovery, redesign, uncertain legacy data, and iterative engineering, but needs transparent time records and budget gates.
  • Milestone pricing separates schematic, library, placement, routing, analysis, and release so the customer can approve evidence before funding the next stage.
  • Dedicated capacity may suit a pipeline of boards when the same external team, libraries, and process will be reused.

Major cost drivers include component count and library work, layer count, density, constraints, high-speed/RF/power complexity, mechanical integration, simulation, safety/compliance needs, documentation, review cycles, project management, urgent scheduling, and prototype support. Ask whether manufacturing questions and one controlled correction cycle are included; a cheap layout that requires unplanned rescue work is not a cheap release.

12 Questions to Evaluate a PCB Design Partner

  1. Who will perform the work, and what directly relevant board experience can that person demonstrate?
  2. Which tasks, analyses, meetings, revisions, and post-release responses are included or excluded?
  3. How are requirements, constraints, assumptions, issues, decisions, and approvals recorded?
  4. How are symbols, footprints, 3D models, pin maps, and datasheet revisions created and verified?
  5. Can the provider work with the customer’s CAD version, libraries, version control, naming, and release process?
  6. How are high-risk nets, safety regions, power paths, thermal needs, mechanical limits, and test access reviewed?
  7. Which simulations or analyses are performed, with what models, acceptance limits, and deliverable reports?
  8. Who owns native files, libraries, scripts, models, and reusable design blocks after payment?
  9. Where is data stored, who can access it, which subcontractors are involved, and how is deletion verified?
  10. How does the provider coordinate stackup and DFM questions with the selected PCB manufacturer?
  11. What happens when a manufacturer reports a DFM conflict or the first prototype exposes a design problem?
  12. Can another qualified engineer understand and continue the work from the delivered archive?

Request a sample redacted deliverable set, not confidential customer data. The goal is to see whether reports, drawings, library records, constraints, revisions, and issue closure are understandable.

PCB design outsourcing control gates for scope ownership reviews IP and manufacturing handoff
The customer can outsource work without outsourcing control when scope, ownership, review evidence, IP rules, and manufacturing deliverables are agreed before release.

Keep These PCB Review Gates Under Your Control

Approval should follow risk, not a percentage-complete status. Retain authority over requirements, architecture, critical components, libraries, safety and performance constraints, analyses, major layout tradeoffs, manufacturer exceptions, and the final revision.

  • Schematic gate: approved function, interfaces, power tree, protection, calculations, simulations, ERC exceptions, and BOM direction.
  • Library gate: datasheet revision, pin map, pad geometry, polarity, courtyard, 3D alignment, assembly origin, and reviewer identity.
  • Placement gate: mechanical fit, connectors, functional zones, power and return paths, clocks, sensitive analog/RF, heat, assembly, and test access.
  • Critical-routing gate: reference paths, impedance, length relationships, via transitions, high-current geometry, isolation, coupling, and analysis assumptions.
  • Pre-release gate: DRC, independent connectivity, analyses, drawings, stackup, DFM disposition, 3D fit, and unresolved issue list.
  • Output gate: independent viewer inspection and proof that native CAD, Gerber/ODB++, drills, netlist, drawings, BOM, CPL, and assembly outputs represent one approved revision.

For AI-assisted external workflows, the same authority applies. The AI PCB design release guide adds controls for generated output, constraint completeness, and accountable signoff.

Protect IP, Libraries and Revision History

A nondisclosure agreement is only one control. The operating process should define permitted people, systems, locations, transfers, retention, backups, external AI tools, subcontractors, and disposal. Match the rigor to the value and sensitivity of the product.

  • Identify background IP brought by each party and project IP created during the work.
  • State ownership and reuse rights for native CAD, libraries, design blocks, scripts, models, calculations, and manufacturing outputs.
  • Require disclosure and approval before data is placed in cloud collaboration, generative AI, or third-party analysis systems.
  • Use named user access, multi-factor authentication where practical, controlled exports, and revisioned repositories.
  • Define how supplier data, component models, and licensed reference designs may be used.
  • Record releases with revision, date, approver, tool version, library baseline, checks, known exceptions, and cryptographic hash where useful.
  • Specify return or deletion at project end and the retention needed for future support.

Do not make the external provider the only place where editable source data, approved libraries, or decision records exist. The customer should be able to restore the approved release independently.

PCB Design Handoff Checklist for Fabrication and Assembly

The design milestone is complete when the manufacturer can quote and review a consistent package without guessing the product intent.

  • native editable CAD archive and approved library baseline;
  • Gerber X2/RS-274X or ODB++, NC drill, route, and layer map;
  • fabrication drawing with dimensions, tolerances, thickness, copper, material, finish, edge details, via notes, special processes, and revision;
  • stackup and controlled-impedance table with targets, tolerances, layers, references, and coupon requirements;
  • IPC-356 or suitable electrical netlist for independent comparison where available;
  • resolved DRC, DFM, analysis, mechanical, and exception records;
  • BOM with approved manufacturer part numbers, lifecycle/substitution status, and variants;
  • CPL/pick-and-place file, assembly drawing, polarity and special-process notes;
  • programming files and checksums, test procedure, fixture/interface information, limits, and result requirements;
  • quantity, build stage, panel or delivery preference, quality documentation, and target schedule.

Use the prototype PCB manufacturing RFQ checklist for early builds and the IPC-2581 handoff guide when evaluating an intelligent manufacturing-data package. The chosen format does not remove the need for revision control and output review.

How EBest Circuit Supports the Manufacturing Handoff

EBest Circuit’s role begins with the released project data and the requested manufacturing scope. The team can review open fabrication inputs, confirm project-specific capability, identify questions in stackup, drills, clearances, copper, mask, impedance notes, drawings, panel needs, and file consistency, then quote the agreed PCB build.

For PCBA, the handoff can extend to BOM and CPL consistency, component sourcing, approved substitutions, assembly drawings, inspection, programming, and testing inputs. The custom PCB assembly guide explains how those controls affect an executable quote.

If you are still comparing production partners, use the PCB fabrication manufacturer selection guide to check capability evidence, engineering response, quote assumptions, and release control. Specific design responsibility, fabrication capability, assembly coverage, testing, documentation, and schedule are confirmed for the actual project.

FAQ About PCB Design Outsourcing

When should a company outsource PCB design?

Outsource when the project needs temporary capacity, specialist knowledge, or an independent design resource and the company can still supply product requirements, make technical decisions, and approve the release. Start with discovery if inputs are not stable.

Should I outsource only PCB layout or the schematic too?

It depends on internal capability and ownership. Layout-only outsourcing can work when the schematic, components, libraries, stackup assumptions, and constraints are approved. Broader outsourcing needs explicit responsibility for architecture, calculations, simulation, component choices, and validation.

How much does PCB design outsourcing cost?

Cost depends on scope uncertainty, component/library work, size, layers, density, constraints, analyses, mechanical integration, documentation, reviews, urgency, and prototype support. Compare milestone deliverables and total accepted-release cost, not only hourly rates.

Who owns the PCB design files after outsourcing?

The agreement should state ownership and reuse rights for native CAD, libraries, design blocks, scripts, models, reports, and outputs. Do not assume payment automatically grants every editable source file or reusable asset.

What files should an outsourced PCB designer deliver?

Require native CAD, libraries, PDFs, review and analysis records, Gerber/ODB++, drills, netlist, fabrication drawing, stackup, 3D data, BOM, CPL, assembly drawings, settings, release notes, and any programming or test deliverables included in scope.

How do I check an outsourced PCB layout?

Review against approved requirements and constraints, not appearance. Check libraries, schematic connectivity, placement, return paths, critical routing, safety, SI/PI, thermal and mechanical behavior, DRC/DFM, test access, and independently viewed release files.

Can the PCB manufacturer review an outsourced design?

Yes. A manufacturer can perform a fabrication-focused DFM review and, when assembly is included, review BOM/CPL and assembly inputs. That review does not replace the customer’s responsibility for circuit function, product requirements, safety, and final design approval.

You may also like

AI PCB Design Tools, Limits and a DFM-Safe Workflow
Monday, August 17th, 2026
Engineer reviewing an AI-assisted PCB layout with schematic routing and DFM checks
AI can accelerate parts of schematic and layout work, but release authority still belongs to an engineer who can verify electrical intent, physical constraints, and fabrication readiness.

AI PCB design tools can help create circuits, suggest parts, place components, route traces, explain rule violations, and review documentation—but they do not make an unverified layout safe to fabricate. Their best use is to shorten bounded tasks inside a controlled engineering workflow. Requirements, constraints, simulation, DRC, DFM review, and final release approval still need accountable human judgment.

This guide separates useful automation from risky overconfidence. It compares tool roles, identifies decisions that remain engineering work, and provides a release checklist you can use before sending AI-assisted PCB files to a manufacturer.

Can your team prove that the AI-generated board matches the product—not merely that the CAD file opens?

A plausible-looking layout can still contain the wrong footprint revision, a weak return path, unreviewed impedance geometry, inaccessible test points, a copper-to-edge problem, incomplete drill notes, or manufacturing rules copied from the wrong supplier. Those errors become expensive when they survive until fabrication, assembly, or first power-on.

EBest Circuit can review the released manufacturing package against the actual board construction and requested production scope.

Send Gerber or ODB++, NC drill files, fabrication drawing, stackup, material and copper requirements, controlled-impedance notes, netlist or IPC-356 data where available, quantity, surface finish, test requirements, and target delivery. For assembly, also include the BOM, CPL/pick-and-place file, assembly drawings, approved substitutions, and programming or test instructions. Project-specific capability and special-process requirements are confirmed during review rather than inferred from an AI prompt.

Can AI Design a PCB From Schematic to Gerbers?

AI can participate across the workflow, but “design a PCB” covers several different engineering jobs. A text request may produce a circuit concept or first-pass schematic. A placement engine may optimize component locations against encoded goals. An autorouter may complete connections under a defined rule set. A review assistant may explain a DRC finding. None of these steps proves the full product requirement.

The important question is not whether a tool can generate output. It is whether the input constraints are complete and whether the output can be independently verified. A correct netlist does not prove signal integrity. A DRC-clean layout does not prove that the selected rules match the chosen stackup. Generated Gerbers do not prove that drill pairs, impedance callouts, materials, tolerances, assembly clearances, and test access are complete.

For that reason, treat AI output as a candidate design state. A qualified engineer should still approve the circuit, part choices, footprint library, placement, critical routing, power integrity, thermal path, manufacturability, testability, and final release package.

AI PCB Design Tools by Job: Schematic, Placement, Routing and Review

Choose an AI PCB design tool by the task it performs and the evidence you need from that task. “AI-powered” is not a useful comparison unless the buyer knows what enters the system, what it changes, which constraints it honors, and how a human can inspect or override the result.

Tool or approach Useful role Input that must be controlled Engineer must still verify
Flux Browser-based schematic and PCB collaboration with an AI assistant and layout automation Requirements, approved parts, schematic intent, placement constraints, routing rules, stackup assumptions Footprints, critical nets, physical layout, rule completeness, DFM package
Quilter Physics-driven placement and routing from a supplied circuit design and constraints Validated circuit, board outline, constraints, component data, design priorities Whether the completed layout meets product, SI/PI, thermal, test, and manufacturing needs
Cadence Allegro X AI Generative assistance for placement and routing inside a professional PCB environment Constraint system, technology files, library quality, layer strategy, critical-net definitions Constraint accuracy, routing quality, signoff analyses, release data
Zuken CR-8000 AIPR Intelligent place-and-route informed by design libraries and established design practices Reusable design knowledge, validated rules, board architecture, technology setup Project-specific exceptions, performance, manufacturability, final approval

Product functions, licensing, deployment, supported formats, and data-handling terms change. Verify the current version and security model before uploading confidential schematics, component data, or product requirements. Also distinguish a circuit-generation assistant from an autonomous layout system and from conventional rule-based autorouting; their risks and required reviews are not the same.

AI PCB design tool role map for schematic placement routing analysis and manufacturing review
Separate the workflow into roles. A tool may accelerate one stage without owning the requirements, evidence, and approval needed at the next gate.

Where AI PCB Layout Still Needs Engineer Judgment

The hardest layout decisions are often interactions, not isolated rules. Moving a connector may improve enclosure fit but worsen an ESD path. Spreading components may improve assembly access but enlarge a sensitive current loop. Adding copper may help current capacity while changing thermal balance or impedance. AI can search alternatives, but an engineer must decide which tradeoff serves the product.

  • Architecture and safety: isolation boundaries, creepage, clearance, protection devices, grounding concept, and applicable product standards.
  • Signal and power integrity: reference-plane continuity, return-current paths, impedance geometry, crosstalk, differential-pair behavior, decoupling, and power-distribution impedance.
  • Thermal behavior: component loss, heat spreading, copper balance, thermal vias, airflow, enclosure conditions, and temperature-sensitive parts.
  • RF and analog behavior: placement sensitivity, shielding, guard structures, antenna keep-outs, matching networks, noise coupling, and tuning access.
  • Mechanical integration: enclosure tolerances, connector alignment, mounting hardware, rigid-flex bend areas, cable access, and assembly sequence.
  • Manufacturing and test: realistic line/space and hole choices, annular rings, solder-mask geometry, assembly clearances, panel strategy, fiducials, tooling, probing, inspection access, and rework risk.

These decisions also depend on the selected manufacturer’s verified process window. For example, line/space, finished-hole size, aspect ratio, copper weight, material, layer count, and blind/buried-via construction are linked constraints. A value that is routine for one construction may require special review for another. Do not let an AI tool turn a generic rule table into an unconditional fabrication claim.

A Practical AI PCB Design Workflow From Requirements to Release Files

A safe workflow gives AI a narrow job, defines an observable acceptance test, and preserves a human approval gate. Use the following sequence whether the tool assists schematic creation, placement, routing, analysis, or documentation.

  1. Freeze the design brief. Record electrical requirements, interfaces, environment, dimensions, connector locations, compliance needs, test strategy, cost target, quantity, and lifecycle expectations.
  2. Control the component and footprint source. Approve manufacturer part numbers, lifecycle status, ratings, package variants, land patterns, 3D models, pin mapping, and substitution policy. Never accept a generated footprint on appearance alone.
  3. Validate the schematic. Review power sequencing, protection, pull states, unused pins, current paths, tolerance stack-ups, net naming, ERC results, and design calculations. Simulate critical behavior where appropriate.
  4. Define the physical technology. Establish board outline, stackup, copper weights, impedance needs, via strategy, fabrication classes, assembly process, and manufacturer rules before layout automation begins.
  5. Encode constraints by intent. Mark safety regions, high-current paths, high-speed classes, differential pairs, length relationships, return references, keep-outs, placement groups, thermal needs, and test access.
  6. Run AI or automation on a controlled revision. Preserve the input revision, tool version, settings, constraint files, generated output, warnings, and rejected alternatives. This creates a reviewable change instead of an unexplained new baseline.
  7. Review by risk, not by visual neatness. Inspect safety and power first, then clocks and high-speed interfaces, analog/RF regions, thermal paths, mechanical fit, manufacturability, and testability.
  8. Perform independent checks. Run ERC/DRC, connectivity comparison, field-solvers or SI/PI analysis where needed, thermal assessment, 3D/mechanical review, and a manufacturer-aligned DFM check.
  9. Generate and compare release files. Inspect Gerber/ODB++, drills, netlist, drawings, stackup, pick-and-place, BOM, and assembly outputs in viewers independent of the source editor.
  10. Obtain accountable signoff. Identify the engineer approving the circuit, layout, analyses, DFM exceptions, and released revision. An AI conversation is not an approval record.

If your team needs a manufacturing-focused review structure, use this PCB design for manufacturability checklist to connect CAD decisions to fabrication and assembly risks.

12 Checks Before You Trust an AI-Generated PCB Layout

Use this list as a release gate, not as a late visual review. Each item should produce evidence that another engineer can inspect.

  1. Schematic-to-layout connectivity: compare the released netlist and confirm intentional net ties, no-connects, swapped pins, and variant handling.
  2. Library integrity: verify symbol-to-footprint mapping, pad numbering, polarity, courtyard, assembly origin, paste openings, and package revision.
  3. Power entry and protection: inspect current paths, fusing, reverse-polarity protection, surge/ESD parts, sequencing, and fault behavior.
  4. Return paths: trace the reference plane beneath critical signals and inspect every layer transition for a controlled return path.
  5. Impedance and timing: connect stackup geometry to the routed widths, gaps, layers, via structures, length relationships, and simulation assumptions.
  6. Spacing by voltage and environment: verify creepage, clearance, slots, coating assumptions, pollution conditions, altitude, and standard-specific requirements.
  7. Thermal path: review loss estimates, junction limits, thermal vias, copper spreading, heat-sink interfaces, airflow, and neighboring heat sources.
  8. Mechanical fit: compare board, connectors, fasteners, components, keep-outs, cables, and enclosure using the controlled mechanical model.
  9. Fabrication feasibility: check line/space, annular ring, drills, aspect ratio, copper balance, mask dams, board edge clearances, via fill/cap needs, and special processes against the actual construction.
  10. Assembly access: verify polarity visibility, component spacing, paste design, fiducials, tooling, selective-solder needs, inspection views, and rework access.
  11. Test strategy: confirm accessible test points, programming interface, power-up controls, isolation needs, fixture constraints, golden-unit plan, and measurement limits.
  12. Release consistency: ensure the revision, Gerbers/ODB++, drills, drawings, stackup, BOM, CPL, assembly notes, and change log describe the same build.
AI PCB design release gates covering requirements electrical review DFM and manufacturing files
A fabrication-ready release needs four aligned layers of evidence: product requirements, electrical and physical verification, manufacturer-specific DFM, and consistent output files.

When AI Saves Time—and When Manual Layout Is Safer

AI is most useful when success can be expressed as constraints and checked independently. It can accelerate repetitive placement exploration, low-risk routing, component research, documentation, rule explanation, design comparison, and first-pass review. It can also help a small team expose missing questions earlier.

Manual or tightly supervised work is safer when the board contains safety-critical isolation, RF tuning, dense high-speed interfaces, mixed-signal sensitivity, unusual power conversion, extreme thermal conditions, novel packages, complex HDI structures, rigid-flex mechanics, or certification-sensitive requirements. These projects may still use AI, but the automation should not own the critical decision.

Situation Recommended AI role Release condition
Simple controller or adapter with mature interfaces Generate options, assist placement/routing, explain checks Independent schematic, layout, DRC, DFM, and output review
Cost or area exploration Compare constrained alternatives Engineer documents the accepted tradeoff and downstream effects
High-speed, RF, precision analog, or power-dense board Support analysis and bounded optimization Domain specialist approves architecture, models, layout, and measurements
Safety- or compliance-sensitive product Assist documentation and rule discovery Applicable standards and responsible engineer govern every signoff
Prototype intended to become production Accelerate early iterations without weakening records Production stackup, test, panel, component, and process constraints are revalidated

Speed is valuable only when the team can explain what was automated, what was checked, and what remains uncertain. If the verification cost approaches the cost of doing the critical work manually, automation may not be the faster path.

What Files Should Go to the PCB Manufacturer for DFM Review?

Send outputs that define the board, plus the assumptions needed to interpret them. A screenshot, AI transcript, or native CAD file alone is not a manufacturing package.

  • Gerber X2, Gerber RS-274X, or ODB++ data that matches the released revision;
  • NC drill and route data, including plated/non-plated definition and blind/buried-via pairs where applicable;
  • fabrication drawing with board dimensions, tolerances, finished thickness, copper, material, finish, edge treatment, special notes, and revision;
  • proposed stackup and controlled-impedance requirements, including target, tolerance, layer, reference, and coupon expectations;
  • IPC-356 or another suitable netlist for an independent connectivity comparison where available;
  • quantity, panel or delivery preferences, testing requirements, quality documentation, and target schedule;
  • for assembly: BOM with approved manufacturer part numbers, CPL/pick-and-place data, assembly drawing, polarity notes, variant rules, programming, and test instructions.

Use a structured prototype PCB manufacturing RFQ checklist for early builds, then confirm that the same package can scale into repeat production. If supplier selection is still open, this PCB fabrication manufacturer selection guide explains how to compare capability evidence, engineering review, and quote assumptions.

How EBest Circuit Reviews AI-Assisted PCB Files Before Fabrication

The review starts with the released files and the intended construction—not with an assumption that an AI-designed board is either automatically good or automatically risky. The useful question is whether the package can be built, inspected, tested, and traced under an agreed scope.

EBest Circuit can check open manufacturing inputs such as layer definition, outline, drill data, annular features, spacing, copper-to-edge conditions, mask and legend interactions, stackup information, impedance notes, material and finish, panel considerations, fabrication drawings, and file consistency. For assembly projects, the review can extend to BOM/CPL alignment, polarity, package and footprint risks, assembly access, programming, and test inputs.

Capability values are confirmed against the actual construction. Standard and special-process ranges are not interchangeable, and combinations of minimum features, copper, thickness, materials, via structures, tolerances, and delivery needs require project review. For conventional FR-4 work, see the FR-4 PCB manufacturing overview; for microvia and high-density work, use the HDI PCB capability page as a starting point and submit the real stackup for confirmation.

If assembly is part of the build, include all controlled procurement and placement data so the fabrication and PCBA reviews describe one product. The custom PCB assembly guide shows how BOM, CPL, approved substitutions, inspection, programming, and testing affect the quote.

FAQ About AI PCB Design

Can AI design a complete PCB?

AI can generate or automate parts of the schematic and layout workflow, and some systems can complete placement and routing from supplied design data and constraints. A complete product still needs verified requirements, libraries, analyses, manufacturing rules, output checks, and accountable engineering approval.

Which AI tool is best for PCB design?

The best choice depends on the job. A schematic assistant, autonomous layout engine, professional place-and-route feature, and review assistant solve different problems. Compare supported formats, constraint depth, output inspectability, collaboration, IP controls, toolchain compatibility, and the amount of expert review required.

Can AI generate a PCB from a schematic?

Some tools can create placement and routing from a validated schematic or netlist plus board and routing constraints. The schematic alone is not enough: stackup, board outline, component locations, interfaces, power and signal classes, keep-outs, thermal needs, mechanical limits, manufacturing rules, and test access also matter.

Will AI replace PCB designers?

AI is more likely to change how designers explore, route, document, and review boards than to remove responsibility for product decisions. Engineers remain necessary for architecture, tradeoffs, constraint definition, analysis, safety, manufacturability, failure learning, and release signoff.

Can I use an AI-generated PCB layout for production?

Yes, if it passes the same engineering and manufacturing gates required for any production layout. Verify electrical behavior, libraries, signal/power integrity, thermal and mechanical performance, DRC, DFM, testability, output consistency, and revision control before release.

Is a DRC-clean AI layout ready to fabricate?

No. DRC only checks the rules that were encoded. It cannot prove that the rules match the selected stackup, manufacturer, product standard, assembly process, mechanical design, test strategy, or real operating environment.

What should I send for a DFM review of an AI-assisted board?

Send Gerber or ODB++, NC drills, fabrication drawing, stackup, material and copper requirements, impedance notes, netlist data where available, quantity, finish, testing needs, and target delivery. Add BOM, CPL, assembly drawings, substitutions, programming, and test instructions for PCBA.

You may also like

Line Tracing Robot PCB Board Design, Manufacturing and Assembly Guide
Monday, August 17th, 2026

A line tracing robot PCB board must read optical contrast while two motors generate electrical noise, then convert those readings into stable steering commands. Production readiness depends on four controlled relationships: sensor geometry to the chassis, motor current to the power network, firmware to the hardware revision, and functional-test limits to the finished assembly.

Line tracing robot PCB board design manufacturing and assembly

Are you worried about your line tracing robot PCB board project?

  • Will sensor height, pitch, or alignment changes after assembly make a proven prototype track inconsistently?
  • Could motor startup, reversal, or stall current reset the MCU or corrupt the optical sensor readings?
  • Will mismatched PCB, BOM, firmware, and test revisions delay the quotation or create avoidable rework in production?

With 20 years of PCB and PCBA manufacturing experience, EBest Circuit provides one-stop support from production-data review through assembly and functional-test preparation.

  • Protect installed sensor geometry: Submit the PCB outline, sensor locations, mounting-hole datums, wheel-axis reference, and target sensor-to-track height. We review these controlled relationships with the fabrication and assembly data before production release, helping your team catch drawing conflicts before boards are built.
  • Control motor-power interference: Provide the battery range, motor running and stall current, driver part number, copper requirements, and critical sensor or reset limits. Our engineering review checks high-current paths, driver thermal features, decoupling placement, return paths, and test access so the prototype build can be evaluated under realistic motor transients.
  • Keep production inputs aligned: Release identified revisions of the Gerber or ODB++, fabrication drawing, BOM, centroid file, assembly drawing, firmware, calibration method, and functional-test limits. We compare the package before sourcing and assembly, then raise conflicts for approval rather than guessing at missing requirements.

Ready to start your line tracing robot PCB board project? Send your design files, BOM, quantities, stackup, firmware or programming scope, and test requirements to sales@bestpcbs.com for an engineering review and quotation.

What Does a Line Tracing Robot PCB Board Control?

The board measures the line position and converts the position error into separate left- and right-motor commands. A typical signal path is infrared emitter, photodetector, analog or timed input, MCU calculation, PWM output, motor driver, and motor. The PCB must support each interface without allowing the motor-current path to disturb the sensor reference.

Sensor channels first require calibration because emitter output, detector response, height, and track reflectivity vary. Firmware can normalize the channels, assign each sensor a position, and calculate a weighted line location. The difference between that location and the target center becomes the steering error. A proportional or PID-style routine then adjusts the two motor commands.

Freeze the operating behavior before schematic release. Define what happens when the line is lost, all channels saturate, a junction covers several sensors, a motor stalls, or battery voltage falls. These conditions determine MCU resources, fault inputs, driver selection, memory use, and factory-test coverage. A dedicated IR sensor PCB design review can support the emitter, detector, and receiver-interface decisions.

Should a Line Tracing Robot Use One PCB or Separate Control and Sensor PCBs?

Use one PCB for a compact robot with fixed sensor geometry; split the sensor and control circuits when the sensor bar must move, be replaced, or support several chassis variants. This is primarily a mechanical, service, and signal-integrity decision—not a preference for fewer or more boards.

  • Choose one PCB: The sensor height and forward offset are fixed, the board fits the chassis, and removing a cable and connector improves cost and reliability.
  • Choose two PCBs: The sensor bar needs independent height adjustment, is exposed to impact or dirt, or must be reused with different controller and motor configurations.
  • Control the interconnect: Specify connector family, pinout, cable length, retention, bend direction, current rating, shielding or ground conductors, and assembly orientation.
  • Share one datum system: Dimension the sensor centerline, wheel axis, mounting holes, and chassis references from matching origins on the PCB and mechanical drawings.

For a split design, keep local sensor filtering and any required analog reference close to the detector array. Do not route sensitive sensor outputs beside motor leads in the same cable without reviewing return paths and coupling. Prototype the complete cable and connector arrangement because a sensor board that works on a bench can become noisy after installation beside the motors.

How Does Sensor Placement Affect Line Tracing Robot Tracking Accuracy?

Installed sensor pitch, height, forward offset, and tilt determine what the control algorithm can measure. A layout may be electrically correct yet track poorly if the assembled array sits outside the optical range or moves relative to the wheel axis.

Choose the sensor-array width and channel pitch from the actual line width, minimum curve radius, target speed, and required steering resolution. Sensors placed too far apart can leave gaps in position information, while an unnecessarily tight pitch adds channels without correcting poor mechanical alignment. Evaluate the intended track materials because dark and light surfaces can produce different contrast margins.

Control sensor height from the running surface rather than from the bare PCB alone. Wheel diameter, tire compression, spacers, solder-joint height, board thickness, and chassis tolerance can all change the installed distance. Put the sensor centerline, wheel axis, and mounting holes on one mechanical datum system so PCB and chassis drawings cannot define conflicting positions.

Forward offset also changes steering behavior. A larger distance between the sensor array and wheel axis gives the controller earlier information about a curve, but it can amplify mechanical error and require different control tuning. Confirm the offset on the assembled robot instead of relying only on PCB dimensions.

Finally, keep board edges, fasteners, tall components, covers, and cable shadows outside the optical field. Define clean handling and inspection for emitter and detector windows, then verify the complete assembly under the expected ambient light—not only under controlled bench lighting.

How Should Sensor, MCU and Motor Driver Circuits Be Arranged on the PCB?

Partition the layout into a quiet sensor zone, a digital control zone, and a compact motor-power zone. Component placement should control current paths before detailed routing begins.

  • Place the sensor front end: Keep receiver filters, pull resistors, reference components, and any analog conditioning close to the sensor inputs. Protect these nodes from motor outputs, switching nodes, PWM traces, and high-current connector pins.
  • Group the MCU support circuit: Place clock, reset, boot, and local bypass components near their assigned MCU pins. Keep the programming interface accessible without routing it through the optical sensing area.
  • Compact the motor-power loop: Place the motor driver beside its high-frequency bypass capacitors and motor connector. Minimize the loop formed by the supply capacitor, driver power stage, motor output, and return path.
  • Control return current: Maintain a continuous signal reference where practical and use component placement to keep motor current away from sensor and MCU returns. Avoid arbitrary ground splits that force signals to cross gaps or take longer return paths.
  • Design the thermal path: Match exposed-pad copper, thermal vias, solder-mask openings, and paste apertures to the driver package and expected power loss. Confirm that the proposed structure can be fabricated, printed, reflowed, and inspected consistently.
  • Reserve test access: Provide reachable points for battery input, regulated rails, ground, reset, programming, driver fault, and representative sensor channels. Check fixture approach in the mechanical model so probes cannot collide with wheels, connectors, covers, or the sensor field.

How Can a Line Tracing Robot PCB Reduce Motor Noise and Power Instability?

Design the power network for motor start, reversal, braking, and stall rather than nominal running current. Size the connector, protection device, copper path, driver, regulator, and capacitance from the verified motor and battery limits with engineering margin.

Keep each switching-current loop short and place driver bypass components at the specified power pins. Do not share narrow return paths between motors and sensors. Separate motor outputs from sensor traces and oscillators, and decouple the MCU and sensor rail locally.

Validate the assembled prototype with an oscilloscope during start, stop, reversal, and stall-current limiting. Monitor battery input, regulated rails, MCU reset, sensor reference, and driver fault. A stable bench supply at idle does not prove the board will remain stable on the robot.

Which Line Tracing Robot PCB Board Specifications Should Be Confirmed Before Production?

Confirm the complete board construction and acceptance requirements in one controlled fabrication drawing before production. The drawing must agree with the Gerber or ODB++ data; conflicting notes create quotation delays and force the manufacturer to request clarification.

  • Board construction: State layer count, material family, finished thickness, stackup, copper weight by layer, and any controlled-impedance requirement.
  • Fabrication geometry: State minimum trace and spacing, finished-hole sizes, annular-ring expectations, routed slots, cutouts, castellations if used, and the finished outline tolerance.
  • Surface requirements: Specify the surface finish, solder-mask color and sides, legend color and sides, carbon or other special finishes, and areas that must remain free of mask or legend.
  • Mechanical controls: Identify the datum scheme, mounting-hole locations, sensor-edge relationship, connector position, profiling method, and any thickness or flatness constraint that affects the chassis.
  • Electrical acceptance: Define bare-board electrical testing, impedance coupons when applicable, netlist source, and any special isolation or high-current checks.
  • Panel and marking data: Define panel size or permit the manufacturer to propose it, then state tooling holes, fiducials, breakaway method, board identification, date code, and traceability needs.

The supplied EBest capability workbook lists general FR-4 references including up to 10 layers, 4/4 mil line and spacing with 1 oz copper, and a 0.2 mm minimum finished hole. These figures define review boundaries, not recommended values for every robot PCB. Select the released rules from motor current, voltage drop, annular-ring margin, board stiffness, routing density, assembly yield, and repeat-order stability; submit tighter features for engineering confirmation before quotation.

Which Components Require Special Controls During Line Tracing Robot PCB Assembly?

Optical sensors, thermal-pad motor drivers, polarized parts, connectors, and programming interfaces need explicit assembly controls. Their orientation, height, placement, or soldering can determine system function even when general workmanship is acceptable.

  • Optical sensors: Control the exact manufacturer part number, orientation, mounting height, coplanarity, window cleanliness, and any light barrier or cover that changes the field of view.
  • Motor drivers: Follow the component land pattern, thermal-pad via design, paste-window recommendation, polarity marking, and reflow limits; verify exposed-pad soldering with the agreed inspection method.
  • Polarized parts: Make diode, electrolytic-capacitor, LED, IC, and connector polarity unambiguous in the centroid file, assembly drawing, silkscreen, and first-article inspection.
  • Mechanical connectors: Check mating direction, latch access, cable exit, solder-joint support, insertion force, and clearance from wheels, batteries, and covers.
  • Programming interfaces: Reserve probe access and define pad finish, pitch, datum, keepout, and fixture approach so programming does not rely on hand-held wires.

Supply exact manufacturer part numbers, approved alternatives, centroid data, assembly drawings, and variant rules. A substitute optical sensor can change spectral response or package height even when its footprint fits; a substitute motor driver can change current limiting, decay behavior, pin functions, or thermal needs. Require approval before either part is changed.

Line tracing robot PCB assembly component and placement inspection

How Is a Line Tracing Robot PCB Board Manufactured and Assembled?

A line tracing robot PCB board moves through controlled data review, bare-board fabrication, assembly, inspection, programming, calibration, and functional testing. Each stage must use the same approved hardware, BOM, firmware, and test revisions.

  1. Review the production data: Compare Gerber or ODB++, drill files, fabrication notes, stackup, BOM, centroid data, assembly drawings, panel requirements, firmware, and test instructions. Resolve conflicting revisions, missing polarity, unsupported components, and unclear tolerances before material is released.
  2. Fabricate the bare PCB: Image and etch the copper layers, laminate multilayer constructions when required, drill and plate the holes, apply solder mask and legend, add the specified surface finish, and profile the board outline.
  3. Verify the bare board: Complete electrical testing against the supplied netlist and inspect dimensions, holes, slots, finish, markings, and workmanship. Controlled-impedance designs also require the agreed coupon and measurement records.
  4. Prepare the assembly line: Verify the released BOM and PCB revision, inspect incoming components, load the approved placement program, confirm stencil and paste requirements, and check feeder setup against polarity and package data.
  5. Place and solder components: Print solder paste, inspect the deposits when SPI is specified, place surface-mount parts, and run the validated reflow profile. Solder through-hole motor connectors, switches, or battery terminals in the specified secondary process.
  6. Inspect the assembled PCBA: Use AOI and appropriate manual or X-ray inspection to check presence, polarity, alignment, solder joints, exposed pads, and hidden connections. Record and disposition defects instead of passing reworked boards without traceability.
  7. Program and calibrate the board: Load the approved firmware, verify its checksum, apply configuration data, and expose every sensor channel to the defined light and dark references. Store or record calibration values according to the released method.
  8. Complete functional testing: Check input power, regulated rails, MCU operation, every sensor channel, left and right motor outputs, driver faults, and protection behavior against written limits. SPI and AOI confirm process conditions, but only functional testing demonstrates that the programmed assembly can control the robot.

How Should a Line Tracing Robot PCB Board Be Functionally Tested?

Functional testing must verify the programmed PCBA from power input through sensor response, motor control, fault handling, and real tracking behavior. Bare-board electrical test and AOI remain necessary, but they cannot prove that the finished assembly controls the robot correctly.

  1. Confirm the tested configuration: Read the PCB revision, BOM variant, firmware checksum, configuration version, and unit or lot identifier. Test only combinations approved in the hardware-firmware compatibility matrix.
  2. Measure power and startup: Apply the specified input range with current limiting, then check input current, regulated rails, reset behavior, and startup stability. Include polarity, undervoltage, or other protection functions only when they are part of the released design.
  3. Test sensors and calibration: Apply controlled light and dark references to every channel, confirm channel order, and compare readings with written limits. Run calibration at the specified sensor height and ambient-light condition, then verify that stored values can be recalled after a power cycle.
  4. Exercise motors and faults: Test left and right outputs independently with the specified motors or validated loads. Verify direction, PWM response, braking or coast behavior, current limiting, connector pinout, and driver-fault reporting; apply only safe fault conditions defined by the test plan.
  5. Run the assembled robot: Test with the released battery, motors, wheels, sensor height, axle offset, and cable routing. Use representative straight lines, curves, transitions, and line-loss conditions at the target speed so mechanical and control interactions are included.
  6. Save the acceptance record: Record measured values, limits, pass or fail status, firmware checksum, fixture revision, unit or lot identity, and rework status. This evidence must distinguish a programming, calibration, assembly, or component failure if the unit is investigated later.
Line tracing robot PCB board functional testing on a controlled track

How Can a Line Tracing Robot PCB Prototype Be Prepared for Volume Production?

Prepare a line tracing robot PCB prototype for volume production by replacing every temporary build decision with released data, repeatable tooling, and measurable acceptance criteria. A prototype that follows a track once is not yet a production baseline; the team must prove that the PCB, components, assembly process, firmware, calibration, and final robot mechanics can be reproduced without individual hand adjustment.

  • Remove prototype-only hardware: Replace flying wires, plug-in development modules, hand-soldered jumpers, temporary connectors, and manually added capacitors with documented schematic and PCB changes. If a modification remains necessary, include it in the controlled design rather than leaving it as an operator instruction.
  • Freeze compatible revisions: Assign released revisions to the schematic, PCB data, fabrication drawing, BOM, centroid file, assembly drawing, firmware, mechanical drawing, calibration method, and test specification. A compatibility matrix should identify which firmware and BOM variant belongs to each PCB revision.
  • Confirm component availability: Review optical sensors, MCU, motor driver, regulator, connectors, and other critical parts for lifecycle status, package consistency, lead time, minimum order quantity, and approved alternatives. Test any substitute that can change sensor response, component height, current limiting, pinout, or thermal behavior before adding it to the BOM.
  • Complete DFM and assembly review: Confirm trace and hole rules, annular rings, solder-mask clearances, copper balance, component spacing, polarity markings, paste apertures, thermal-pad design, connector access, and board-edge clearances. Resolve exceptions before the production panel and stencil are released.
  • Prepare panel and machine features: Add panel fiducials, tooling holes, breakaway rails, board identification, and a depaneling method that does not bend the sensor area or damage edge-mounted connectors. Verify that panel orientation supports paste printing, placement, inspection, soldering, and fixture loading.
  • Replace manual setup with fixtures: Provide stable access for programming, power, ground, reset, representative sensor channels, motor outputs, and driver faults. Calibration fixtures must reproduce the specified sensor height, optical reference, ambient-light condition, and board orientation instead of relying on an operator holding a target by hand.
  • Run a production-representative pilot build: Use the intended PCB panel, stencil, placement program, reflow profile, through-hole process, programming file, calibration routine, and functional-test limits. Include the released motors, battery range, cable routing, sensor-to-track height, and chassis datums when verifying complete tracking behavior.
  • Close defects before scaling quantity: Record solder defects, programming failures, calibration outliers, motor-channel faults, tracking failures, rework time, and component losses by cause. Correct the design or process, update every affected file, and repeat the necessary tests instead of treating successful rework as proof that the original process is ready.
  • Approve the production baseline: Retain the accepted first article or golden sample with its PCB revision, BOM, firmware checksum, calibration data, fixture revision, and test record. Repeat orders should use this controlled baseline, with customer approval and defined retesting for subsequent engineering changes.

Before releasing a larger order, require evidence that the pilot build used production-intent materials and processes, that every unit passed the written acceptance limits, and that open deviations have owners and closure dates. This prevents a low prototype price from turning into recurring rework, inconsistent tracking performance, or an avoidable schedule delay during volume production.

What Files and Specifications Are Required for a Line Tracing Robot PCB Board Quote?

A complete quotation package must define fabrication, assembly, sourcing, programming, calibration, and testing scope. Gerber files alone cannot describe a production-ready PCBA.

  • PCB data: Gerber and drill files or agreed ODB++, fabrication drawing, and stackup requirements.
  • Assembly data: BOM, centroid file, assembly drawings, polarity, and approved alternatives.
  • Mechanical data: Outline, datums, sensor height, chassis relationship, and connector constraints.
  • Firmware data: Released binary, checksum, target, programming method, and protection settings.
  • Test data: Calibration references, loads, limits, fixture responsibility, and required records.
  • Order scope: Prototype and forecast quantities, supplied parts, packaging, and delivery destination.

How Should You Choose a Line Tracing Robot PCB Manufacturer?

Choose a manufacturer by the risks it can remove from your prototype-to-production transfer, not by PCB price alone. The supplier should show how its controls protect tracking performance, revision accuracy, component availability, and delivery consistency.

  • Protect the sensor geometry: Confirm that the manufacturer reviews sensor pitch, height references, board outline, mounting holes, and connector positions against the mechanical drawing before fabrication.
  • Prevent power-related redesigns: Ask for review of motor-current paths, copper requirements, driver thermal features, regulator loading, and test access before the first production panel is released.
  • Control component substitutions: Require approval before changing optical sensors, motor drivers, connectors, regulators, or other parts that can alter function, height, pinout, or thermal performance.
  • Keep every revision aligned: The quotation, fabrication data, BOM, centroid file, firmware, calibration method, and test procedure should identify compatible revisions. This reduces the risk of assembling the correct components on the wrong PCB version.
  • Define measurable acceptance: Request the proposed inspection, programming, calibration, and functional-test flow. The supplier should explain which results are recorded and how failed or reworked units remain traceable.
  • Evaluate production support: Look for useful DFM feedback, clear responsibility for fixtures and supplied parts, documented issue approval, and a repeat-order process that preserves approved materials and settings.

Why Choose EBest Circuit for Line Tracing Robot PCB Board Manufacturing?

EBest Circuit gives buyers one coordinated path from PCB data review to assembled, programmed, and tested line tracing robot boards. Keeping these activities within one project review helps reduce handoff errors and gives your engineering and purchasing teams one place to resolve production questions.

  • Reduce launch delays: PCB data, BOM, assembly files, mechanical constraints, programming requirements, and test expectations can be reviewed together before production begins.
  • Improve sourcing control: Exact parts and approved alternatives can be identified before purchase, with customer approval required for changes that may affect optical, motor-control, connector, or power performance.
  • Simplify supplier coordination: Fabrication, component sourcing, assembly, programming preparation, and production testing can be managed through one manufacturing project instead of separate uncontrolled handoffs.
  • Support prototype-to-volume transfer: The same released revisions, inspection requirements, calibration inputs, and functional-test criteria can follow the project from validation builds into repeat orders.
  • Match the board technology to the design: EBest Circuit, also known as Best Technology, supplies standard and multilayer FR-4 as well as HDI, high-Tg, heavy-copper, high-speed, impedance-controlled, flexible, rigid-flex, metal-core, ceramic, and high-frequency PCB constructions.
  • Review required compliance evidence: The supplied company information lists ISO 9001:2015, ISO 13485:2016, IATF 16949, AS9100D, UL, RoHS, and REACH credentials. Request the documents and scope applicable to your product and destination during quotation review.

Frequently Asked Questions About Line Tracing Robot PCB Boards

Q1: How should hardware revisions be marked?

A1: Put a readable revision on the PCB and define the required lot or serial identifier. Ensure it remains visible after assembly.

Q2: Does the robot need wheel encoders?

A2: Not every design needs encoders. Add them when wheel-speed feedback or stall detection justifies the extra inputs and firmware.

Q3: How should optical sensors be protected?

A3: Define clean handling, inspection, and packaging for every optical surface. Prevent residue, abrasion, and packaging pressure on the windows.

Q4: Can customer-supplied motors and batteries be included?

A4: The integration scope must be reviewed before quotation. Provide specifications, connectors, safety constraints, drawings, and test limits.

Q5: Should the assembly receive conformal coating?

A5: Use coating only when the environment and component set justify it. Define optical, connector, and test-point keepouts.

Q6: How large should the validation build be?

A6: Use enough units to exercise the real assembly, programming, calibration, and test process. Set the quantity from validation objectives and process risk.

Q7: How can motor wiring mistakes be prevented?

A7: Use keyed connectors, clear pin numbering, and visible left-right identification. Confirm the mating cable orientation in the assembly drawing.

Q8: Can one PCB support different sensors or motors?

A8: Yes, when every variant is deliberately designed and documented. Control footprints, DNP options, BOMs, firmware, and tests separately.

Q9: What should a golden sample control?

A9: Bind it to approved hardware, BOM, firmware, calibration, and test revisions. Drawings still govern dimensions and hidden requirements.

Q10: What packaging details should be specified?

A10: Define ESD protection, board separation, optical protection, labels, and pack quantity. Prevent parts from rubbing or loading one another in transit.

Conclusion

Turn your working robot prototype into a repeatable production build before unresolved sensor, motor, firmware, or test details become schedule and rework costs. Send EBest Circuit your Gerber or ODB++ data, BOM, mechanical drawing, target quantities, firmware and calibration scope, and functional-test requirements. Our team can review the manufacturing package, identify the questions that must be closed before production, and prepare a quotation for your line tracing robot PCB board project. Contact sales@bestpcbs.com to start the review.

You may also like

HDI PCB Manufacturing Process: From Build-Up to Final Inspection
Saturday, August 15th, 2026
HDI PCB manufacturing process with laser drilling and multilayer build-up concept
The HDI PCB manufacturing process is a controlled sequence: release the stackup, build the core, add build-up layers, form and metallize microvias, create fine-line circuits, and verify the finished structure.

The HDI PCB manufacturing process is not ordinary multilayer fabrication with smaller holes. It is a repeated build-up sequence in which dielectric preparation, laser drilling, cleaning, copper deposition, plating, imaging, and lamination must stay aligned to one released stackup. A defect created early may remain hidden until electrical test, cross-section analysis, assembly, or field use.

This guide follows the board from manufacturing data release to final inspection. It also shows what evidence should move with the job at each handoff, so designers and buyers can distinguish a controlled HDI build from a sequence that merely looks complete on a traveler.

Before fabrication starts, can the shop build the intended microvia structure—not just quote the layer count?

Confirm the build-up sequence, microvia start and stop layers, target-pad geometry, copper requirements, via treatment, impedance needs, and inspection plan. If any of these are ambiguous, the same files can produce different manufacturing interpretations.

EBest Circuit can review the released data before an HDI build is committed.

Send Gerber or ODB++, the drill files, stackup, fabrication drawing, impedance table, finished copper requirements, via notes, quantity, surface finish, test requirements, and target delivery. The engineering review can identify open questions that should be resolved before material release.

What Changes When a PCB Uses an HDI Build-Up?

HDI changes the manufacturing dependency chain. A conventional multilayer core can often be fabricated and laminated as one main structure. An HDI design may add one or more sequential build-up cycles, with each cycle creating features that must be sound before the next layer covers them.

The practical difference is traceability. The manufacturer must know which dielectric belongs to each build-up layer, where every microvia starts and stops, whether vias are staggered or stacked, which surfaces must be planar for the next layer, and which inspection result releases the panel to the next operation. The HDI PCB product page provides a product-level overview; this article focuses on the manufacturing sequence and its control points.

A buyer should therefore treat the approved stackup and via map as controlled manufacturing inputs. If a via transition changes after quoting, the change may affect drilling, plating, filling, lamination count, inspection, and cost—not only the CAD file.

See the HDI Manufacturing Process as One Controlled Flow

The process is easiest to control when every operation has a defined input, output, and release check. A typical flow is:

  1. Release the approved stackup, via map, artwork, drill data, and fabrication notes.
  2. Prepare, image, etch, and inspect the conventional core.
  3. Apply build-up dielectric and copper for the next sequential layer.
  4. Laser-drill microvias to the intended target pads.
  5. Clean, condition, and activate the via surfaces.
  6. Deposit and plate copper; fill or treat vias where the approved construction requires it.
  7. Image and etch the fine-line circuit pattern.
  8. Repeat build-up operations for additional sequential layers.
  9. Complete outer-layer processing, solder mask, surface finish, routing, electrical test, and final inspection.
Conceptual HDI PCB process flow from core preparation through build-up microvia formation and final quality checks
Each build-up stage should be released by evidence before the next stage makes the structure harder to inspect or repair.

The drawing above is a process concept, not a scale cross-section. Actual layer order, dielectric thickness, copper distribution, and via geometry must come from the released design and the manufacturer-approved stackup.

Map the Build-Up Stack Before Material Release

The stackup must become a manufacturing map before material is issued. Layer names alone are insufficient. The map should connect every signal layer, plane, dielectric, foil or copper layer, via transition, controlled-impedance requirement, and finished-thickness target to a defined process stage.

A useful release review asks five questions. Which layers belong to the conventional core? Which layers are added sequentially? What is the target pad for each microvia? Will the next layer require a flat surface above a filled or capped feature? Which measurements prove that the constructed panel still matches the design intent?

Manufacturability should be settled here, not after drilling. The related HDI PCB design review guide explains how to check escape routing, via architecture, annular relationships, stackup, and fabrication notes before release.

Build and Inspect the Conventional Core First

A stable HDI build starts with a stable core. Inner-layer imaging, etching, oxide or alternative surface preparation, layup, lamination, registration, and core inspection establish the reference that later build-up layers must follow.

At this stage, inspection should focus on inner-layer conductor geometry, registration targets, dielectric and copper condition, laminate integrity, and the dimensions needed for later alignment. If the core is already shifted or distorted, adding a precise microvia layer does not correct it; it transfers the error into a more complex structure.

EBest Circuit’s current internal capability source records copper-dependent line and space limits rather than one universal number. That is why a quote should state copper requirements and allow engineering review instead of assuming the same fine-line rule applies to every copper weight and construction.

Apply Build-Up Dielectrics for Sequential Lamination

Sequential lamination creates the dielectric surface on which the next microvia and circuit layer depend. Material selection, surface preparation, resin flow, thickness control, lamination pressure, temperature, and registration all influence the next drilling and imaging steps.

The release output should not be merely “lamination complete.” It should confirm that the panel is suitable for the next controlled operation: thickness is within the approved construction tolerance, the surface condition is acceptable, registration features are usable, and there is no visible separation, contamination, or abnormal distortion.

Designers should avoid treating build-up cycles as interchangeable. A construction with stacked microvias may impose different surface-planarity and via-treatment needs from a staggered structure. The exact method must be agreed for the actual design; it should not be inferred from a generic HDI label.

Laser-Drill Microvias Without Damaging the Target Pad

Laser drilling must create a repeatable opening while exposing the intended capture pad cleanly. The operation is controlled by the dielectric system, copper condition, via diameter, depth, target-pad geometry, registration, and laser process settings.

Inspection is not limited to whether a hole is visible. The shop must watch for incomplete dielectric removal, excessive attack on the target pad, debris, taper outside the approved process window, positional offset, and features that are difficult to clean or metallize. The design-side relationship between depth and opening is discussed in the microvia aspect-ratio guide.

The verified EBest Circuit capability workbook lists a 0.10 mm laser blind/buried via value. This is a capability reference, not automatic approval for every stackup. Copper, dielectric, target-pad design, via depth, tolerance, and build sequence still require project-specific confirmation.

Desmear and Metallize the Microvia Walls

A drilled microvia is not electrically useful until its surfaces are clean, conditioned, activated, and metallized. Residue at the target-pad interface can obstruct copper continuity. Poor activation can create weak or discontinuous deposits even when the opening looks acceptable from the surface.

The control question is therefore interface quality: is the target pad exposed without damaging residue, and can the subsequent copper process form a continuous conductive path? Depending on the approved process, verification may include visual inspection, coupons, microsections, or other documented checks appropriate to the structure.

Do not substitute a generic “hole cleaned” sign-off. The relevant output is a surface condition that has been released for metallization, with the panel identity and build stage traceable.

Plate and Fill Microvias for the Next Connection Layer

Plating must create reliable copper continuity; filling is an additional construction decision, not an assumed property of every microvia. Copper deposition and electroplating build the conductive path. Some structures then require filled, capped, or planarized features so another circuit layer or pad can be formed above them.

The fabrication drawing should state the intended via treatment. “Via in pad,” “filled via,” “capped via,” and “solder-mask plugged via” are not interchangeable instructions. The capped-via guide explains why filling and capping requirements must be communicated explicitly.

The current capability workbook includes a solder-mask plugged-via range, but that row is not evidence of copper-filled microvia capability. For an HDI quotation, EBest Circuit should confirm the required fill or cap method against the exact structure rather than turning an unrelated plugging value into a public promise.

Conceptual microvia control points for laser drilling cleaning activation copper plating filling and inspection
Microvia reliability depends on the whole interface sequence: opening formation, residue removal, activation, copper continuity, any required filling, and inspection.

Image and Etch Fine-Line HDI Circuit Patterns

Fine-line imaging is controlled by the finished copper target and the process path used to reach it. Artwork compensation, photoresist condition, exposure, development, plating distribution, etching, and inspection must work as one system.

A nominal trace width on the CAD layer is not the only input. Copper weight, local copper density, panel location, conductor spacing, impedance tolerance, and the selected process all affect what can be held consistently. This is why line-and-space capability should be reviewed together with copper requirements.

The verified capability source records different standard and special values by copper condition. For example, its inner- and outer-layer tables show 4/4 mil as a standard entry and 3/3 mil as a special entry in specific 0.5 oz or 1 oz rows. Those entries must not be generalized to every layer, copper weight, panel, or yield target; the released construction remains the controlling context.

Repeat Lamination, Drilling, and Plating for Multi-Step HDI

Every additional build-up cycle compounds registration, surface, and traceability risk. The next cycle begins only after the previous dielectric, microvia, copper, and circuit outputs are accepted. Otherwise a known uncertainty becomes buried under the next layer.

For stacked structures, the alignment and condition of the lower feature directly affect the upper connection. For staggered structures, routing space and local copper balance still need control. Neither structure should be selected from a generic rule; the manufacturer should review electrical need, layout density, reliability expectations, and the planned process.

The build record should identify each sequential cycle separately. A traveler that records only “laser drilling complete” without the relevant layer pair makes later diagnosis much harder.

Complete Outer-Layer Copper, Solder Mask, and Surface Finish

After the HDI build-up is complete, the board still needs controlled outer-layer and finishing operations. These can include final pattern plating and etching, solder-mask application, legend, surface finish, profile routing, cleaning, and final dimensional checks.

HDI density can make finishing interactions more sensitive. Pads near microvias, tight solder-mask dams, via-in-pad treatment, fine-pitch component lands, and flatness requirements should be evaluated as a system. The finish choice must also suit assembly, storage, wire bonding if applicable, and the customer’s acceptance criteria.

A manufacturing capability summary can help frame the conversation, but it cannot replace a released data review. See the broader PCB manufacturing capability guide for the types of parameters that should be confirmed during quoting.

Inspect HDI Structures at Every Process Handoff

Inspection is most valuable before the next operation hides the feature. The exact plan depends on the design, but the release logic should connect the feature being created to evidence that the next process can trust.

Handoff What Must Be Known Typical Evidence
Core to build-up Core circuitry, registration, thickness, and surface condition are acceptable Inner-layer inspection, dimensional record, traveler release
Lamination to laser drilling Dielectric and registration support the specified microvia target Thickness/registration check and panel identity
Drilling to metallization Openings reach the intended pads and are ready for cleaning/activation Process inspection, sample review, coupon plan where required
Plating to next build-up Copper continuity and any required fill/planarity meet the approved construction Thickness data, microsection/coupon evidence, surface review
Final fabrication to shipment Electrical, dimensional, visual, finish, and documentation requirements are met Electrical test, final inspection, reports required by the purchase order

The table is a planning framework, not a fixed inspection frequency. The purchase order and engineering agreement should define which reports, coupons, microsections, test records, or certificates are required for the actual risk level.

Diagnose Common HDI Defects by the Stage That Created Them

Effective diagnosis traces the observed defect back to the operation capable of creating it. Reworking the final symptom without reviewing upstream conditions can leave the real cause unchanged.

Observed Issue Stages to Review Evidence to Compare
Microvia misses or weakly contacts the target pad Stackup release, lamination registration, laser alignment Released via map, registration data, section or sample evidence
Open or intermittent microvia Drilling, cleaning, activation, copper deposition, plating Interface condition, plating record, electrical result, microsection where specified
Depression or poor pad planarity above a via Fill method, plating distribution, planarization Approved via treatment, surface measurement, assembly-pad inspection
Fine-line short, neck-down, or over-etch Artwork compensation, imaging, plating, etching Copper target, conductor measurement, local copper-density review
Layer-to-layer registration drift Material movement, lamination, tooling, imaging alignment Panel mapping, target measurements, sequential-cycle records

The key is containment: identify the affected panel and build stage, stop the next irreversible operation when appropriate, compare the evidence with the released stackup, and document the disposition. That creates a useful corrective-action trail instead of a general “process adjusted” note.

Release the Finished HDI PCB Only When Evidence Matches the Stackup

A finished board is acceptable only when the physical result and required records match the released construction. Appearance alone cannot confirm internal connectivity, plating interfaces, registration, or the correct sequential build.

The final release package may include electrical-test results, dimensional and visual inspection, surface-finish confirmation, microsection or coupon evidence when specified, impedance results when required, and other purchase-order documents. The required set should be agreed before production, because not every job needs the same evidence.

For repeat orders, preserve the approved data revision, stackup, material decisions, process deviations, inspection plan, and acceptance record. A repeat build should reproduce a controlled baseline, not reconstruct the first order from emails.

Prepare Manufacturing Data That Keeps the HDI Process on Track

The fastest way to reduce avoidable HDI questions is to submit one coherent, revision-controlled package. Include:

  • Gerber or ODB++ data and NC drill/rout files;
  • a fabrication drawing with finished thickness, dimensions, tolerances, profile, and notes;
  • the intended stackup or permission for the manufacturer to propose one for approval;
  • a via table identifying through, blind, buried, laser, filled, capped, and non-plated features as applicable;
  • finished copper and surface-finish requirements;
  • controlled-impedance targets and reference layers;
  • acceptance, inspection, electrical-test, microsection, and reporting requirements;
  • quantity, panel or delivery constraints, and target schedule;
  • BOM, CPL, assembly drawing, test method, and approved alternates if PCBA is included.

Before requesting a quote, verify that filenames, drawing revision, drill legend, stackup labels, and purchase-order notes agree. A complete package enables the manufacturer to ask specific engineering questions early, when corrections are cheaper and the process sequence can still be changed safely.

HDI PCB Manufacturing Process FAQ

What is HDI in PCB manufacturing?
HDI means high-density interconnect. In manufacturing, it commonly involves fine conductor geometry, small capture features, laser-formed microvias, and one or more sequential build-up layers. The exact construction is defined by the released stackup, not by the HDI label alone.

What are the main steps in HDI PCB manufacturing?
The main sequence is data and stackup release, core fabrication, build-up lamination, laser microvia drilling, cleaning and activation, copper deposition and plating, any specified via filling or capping, fine-line circuit formation, repeated build-up cycles if needed, and final finishing and inspection.

Why is sequential lamination used for HDI boards?
Sequential lamination adds dielectric and copper layers in stages so microvias can connect selected adjacent layers. Each stage must be accepted before the next stage buries the feature.

Are all HDI microvias filled?
No. The required treatment depends on the structure. Via-in-pad or stacked constructions may require a specified fill and planar surface, while other designs may use a different treatment. The fabrication notes must state the requirement.

What is the difference between a laser microvia and a mechanically drilled blind via?
The two features use different drilling processes and typically serve different geometry ranges. EBest Circuit’s verified capability sheet lists them separately, so a quotation should identify the intended hole type rather than calling every blind connection a microvia.

Why does microvia aspect ratio matter?
The relationship between opening and depth affects drilling, cleaning, metallization, and plating access. A design review should evaluate that relationship with dielectric thickness, target-pad design, and the selected process.

What causes open HDI microvias?
Possible contributors include incomplete target-pad exposure, residue, weak activation, discontinuous copper deposition, plating issues, interface damage, or structural stress. Diagnosis should use the build record and appropriate physical/electrical evidence.

How are HDI inner layers inspected?
Inspection may include automated optical inspection, dimensional or registration measurements, traveler checks, coupons, microsections, and other agreed evidence. The exact plan depends on the design and purchase-order requirements.

Does finer line spacing always mean the same capability?
No. Copper condition, process route, local copper distribution, panel design, and tolerance affect what is practical. Capability values must be read in the context of the matching copper and construction row.

What files are needed for an HDI PCB quote?
Provide Gerber or ODB++, drill data, a fabrication drawing, stackup, via definitions, finished copper, surface finish, impedance requirements, test and inspection requirements, quantity, and target schedule. Add BOM and CPL if assembly is included.

Should the manufacturer propose the HDI stackup?
A manufacturer may propose a construction when the electrical and mechanical constraints are clear, but the designer must review and approve the final layer order, impedance model, materials, thicknesses, and via transitions before release.

How can buyers compare HDI PCB quotations fairly?
Normalize the quoted stackup, materials, copper, via treatment, inspection, electrical test, reports, tooling, quantity, delivery basis, and exclusions. Two prices are not comparable if one assumes filled and capped microvias while the other excludes them.

You may also like

PCB Manufacturing Bay Area: RFQ Supplier Guide
Friday, August 14th, 2026
PCB manufacturing Bay Area engineering review with a populated circuit board in a production environment
Bay Area PCB sourcing works best when engineering review, fabrication scope, assembly scope, and production transfer are defined before quotes are compared.

PCB manufacturing Bay Area buyers should compare suppliers by engineering response, complete build scope, production-transfer readiness, and total landed cost—not by ZIP code alone. A local shop can be useful when engineers need same-day communication or a fast prototype handoff. A qualified remote manufacturer can be more competitive for repeat fabrication, PCBA, component sourcing, and scaled production. Many teams get the strongest result from a hybrid plan: local access where physical proximity truly reduces iteration time, paired with a production partner that can carry the released design into repeat builds.

This guide gives hardware teams and procurement managers a practical way to decide among those models. It also shows what to put in the RFQ so every supplier prices the same Gerber or ODB++ package, stackup, BOM/CPL, inspection plan, quantity, and delivery target.

Before approving a Bay Area PCB quote, check what the price leaves out.

  • The prototype is quoted quickly, but the supplier has not explained how the design will transfer to repeat production.
  • One quote covers bare boards while another includes components, assembly, inspection, test, freight, or tooling.
  • The supplier confirms that files are readable but does not close stackup, material, impedance, panelization, or assembly-clearance questions.
  • A short lead time is promised before component availability, engineering questions, test fixtures, and approval cycles are included.
  • Revision control is informal, leaving procurement unsure which Gerber, BOM, CPL, drawing, and test specification will govern the build.

EBest Circuit helps buyers turn those uncertainties into a comparable manufacturing package.

  • Review Gerber or ODB++, drill data, drawings, stackup notes, impedance requirements, and fabrication instructions before pricing.
  • Align bare PCB, PCBA, component sourcing, inspection, testing, packaging, and delivery scope in one RFQ record.
  • Check BOM and CPL consistency, manufacturer part numbers, approved alternates, polarity, footprints, and assembly notes.
  • Identify DFM questions before material purchase or production release, then record the approved answers against the correct revision.
  • Support prototype-to-production planning without presenting EBest Circuit as a Bay Area local manufacturer.

What Bay Area PCB Buyers Actually Need from a Manufacturer

Most Bay Area teams need controlled engineering handoffs more than they need every production step to happen nearby. Proximity has value when a board is changing daily, mechanical parts must be fitted in person, or a lab needs a physical troubleshooting loop. Once the design is stable, however, the decisive questions are whether the supplier can reproduce the approved stackup, control revisions, source the intended components, execute the inspection plan, and document exceptions before shipment.

That changes the buying question from “Who is closest?” to “Which supply model gives this project the shortest reliable path from files to accepted hardware?” A useful answer must cover the engineering interface, fabrication and assembly boundaries, production capacity fit, evidence at release, and the cost of moving the design later.

Buyer Need What Good Looks Like Evidence to Request
Fast engineering loop Named owner, response window, written question log DFM questions and approved answers by revision
Comparable quote Bare board, assembly, sourcing, test, tooling, freight separated Scope matrix and exclusions
Production transfer Prototype decisions captured for repeat builds Approved stackup, BOM, CPL, drawings, test revision
Acceptance confidence Inspection and test match product risk Inspection report, test record, nonconformance path

Buyer check: ask each supplier to return the same scope matrix. If one vendor cannot state what is included, excluded, and awaiting confirmation, the quote is not ready for a price comparison.

Local Prototype, Remote Production, or a Hybrid Supply Plan?

Choose local, remote, or hybrid supply according to where uncertainty remains in the project. Local prototyping is strongest when face-to-face access or a same-region handoff removes a real iteration bottleneck. Remote production becomes attractive when specifications are released and the project needs broader fabrication, PCBA, sourcing, or repeat-order support. A hybrid model can keep urgent prototypes close while qualifying a production path in parallel.

The image below is a decision aid, not a claim that one model is always better. Focus on the stage that carries the highest schedule or quality risk in your program.

Bay Area PCB sourcing decision comparing local prototype qualified remote production and hybrid supply plans
Local, remote, and hybrid PCB sourcing models solve different project constraints; the RFQ should expose which constraint matters most.
Supply Model Best Fit Main Risk Control
Local prototype Daily design changes, lab handoff, mechanical fit work Prototype decisions never become production documentation Freeze released files and record every approved deviation
Qualified remote production Stable design, repeat volume, integrated PCB + PCBA scope Longer communication loop when inputs are incomplete Complete RFQ, named owner, written response times
Hybrid supply Urgent learning plus planned transfer to repeat builds Two suppliers interpret files differently One controlled data package and a formal delta review

After choosing a model, define the exit condition. For example, a local prototype phase may end only after electrical validation, mechanical fit, BOM approval, and a released manufacturing data set are complete. That prevents an experimental build from becoming the undocumented master for production.

Compare Engineering Response Before Comparing Location

A supplier’s engineering response is measurable before an order is placed. Send the same controlled RFQ package and compare the questions returned. A useful response identifies contradictions, missing tolerances, ambiguous drill treatment, stackup assumptions, assembly-clearance risks, and acceptance gaps. A weak response simply says the files are manufacturable or gives a price without listing assumptions.

Set a small evaluation scorecard: time to acknowledge the package, time to return material questions, clarity of the DFM log, ownership of open items, and whether changes are tied to revision names. The goal is not the fastest email. The goal is the fastest closed decision with no hidden interpretation left on the production floor.

For a deeper review of fabrication rules, use the PCB design for manufacturability checklist as a companion to your supplier scorecard.

Buyer check: issue one deliberate ambiguity—such as an unspecified controlled-impedance stackup or a BOM/CPL mismatch—and observe whether the supplier catches it before quoting. Do not create a safety-critical trap; use a normal engineering question that should be found during review.

Separate Bare PCB, PCBA, Sourcing, and Testing Scope

Every Bay Area PCB quote should identify four independent scopes: fabrication, assembly, component sourcing, and verification. Without that split, a low number may only represent bare boards while another supplier has included stencil, setup, components, assembly, AOI, functional test, and packaging.

Scope Inputs Quote Must State
Bare PCB Gerber/ODB++, drill, drawing, stackup, fab notes Material assumptions, finish, tooling, electrical test, quantity
PCBA BOM, CPL, assembly drawing, polarity notes SMT/THT scope, stencil/setup, process, rework allowance
Component sourcing Manufacturer part numbers, alternates, approved vendors Pricing basis, availability date, substitution approval, excess material
Inspection and test Acceptance criteria, test method, fixtures, firmware Included records, fixture/NRE cost, failure disposition

When the project needs assembly, review EBest Circuit’s prototype PCB assembly service and component sourcing workflow as separate scope references. The RFQ should still state exactly which services apply to the current build.

Normalize Bay Area PCB Quotes by Total Landed Cost

Total landed cost is the amount required to receive acceptable hardware, not the unit price printed at the top of a quote. Normalize tooling, NRE, fabrication, components, assembly, inspection, test, packaging, freight, duties when applicable, payment cost, and expected engineering effort. Then compare the same quantity and delivery assumption.

Also separate one-time cost from recurring cost. A higher NRE line can be reasonable when it creates a reusable test fixture or controlled production setup. A low unit price can be misleading when repeated setup, unplanned component buys, or manual rework appears on every order. Record what happens to excess components, panels, stencils, fixtures, and engineering data after the build.

A simple normalized calculation is:

Total build cost = one-time engineering and tooling + recurring fabrication and assembly + components + verification + logistics + expected change/rework exposure.

Buyer check: ask each supplier to price the base case and one change case, such as a quantity increase or approved component alternate. The response shows whether the cost model can support the next project stage.

Plan Prototype Speed Without Sacrificing Production Transfer

A fast prototype is valuable only if the lessons from that build are captured in the released production package. Keep experimental changes out of email-only threads. If a pad is modified, a component is substituted, a stackup changes, or an assembly instruction is clarified, update the governing file and revision record.

Before the prototype starts, define what it must prove: electrical function, mechanical fit, thermal behavior, firmware interaction, assembly process, test coverage, or supplier process capability. After the build, close each result as pass, fail, or open action. That turns the prototype into evidence rather than a one-off board that happens to work.

For the transfer review, compare the prototype package against the intended production package line by line: fabrication drawing, stackup, Gerber/ODB++, drill, BOM, CPL, assembly drawing, approved alternates, firmware, test procedure, and packaging requirement. Any difference must have an owner and an approval status.

Check Material, Stackup, and DFM Assumptions Early

Material and stackup assumptions should be closed before price and lead time are treated as firm. Send the functional requirement, not only a material trade name. State controlled impedance, copper expectations, board thickness, surface finish, via structure, thermal constraints, and any drawing tolerances that affect fabrication.

For common rigid builds, EBest Circuit’s FR-4 PCB overview can help frame the product category, but the actual laminate family and stackup still require project confirmation. Do not infer a material, tolerance, or process limit from a general web page when the released drawing or supplier confirmation should govern the order.

Item Why It Changes the Quote RFQ Note
Stackup Controls layer construction, thickness, impedance, and material availability Provide target or allow supplier proposal with approval
Copper Affects trace geometry, etching, plating, thermal/current behavior State finished copper requirement where applicable
Via and hole rules Drive drilling, plating, fill/cap, and inspection needs Separate plated, non-plated, blind/buried, and filled features
Surface finish Changes process, shelf-life considerations, assembly interface, and cost State finish and any application-driven constraint

Buyer check: the supplier should return a proposed stackup or a clear confirmation—not silently price a default construction.

Control BOM, CPL, and Component Substitution Risk

Component risk is controlled by part identity, placement data, and an explicit substitution process. Each BOM line should have a manufacturer part number, description, quantity, reference designators, and approved-alternate status. The CPL must match the same board revision, coordinate origin, side, rotation convention, and designators used by the assembly drawing.

Ask who may propose an alternate, what evidence accompanies the proposal, and who approves it. A distributor listing or footprint match is not enough. Electrical rating, package, lifecycle, temperature, compliance, firmware interaction, and test coverage may all matter. Keep “no substitution without written approval” for controlled parts, but avoid making every commodity line a manual bottleneck if engineering has already defined acceptable alternates.

Observable result: before material purchase, procurement should be able to identify every not-found, long-lead, allocation, minimum-order, or alternate-request line in one exception list. If these issues remain hidden inside email threads, schedule confidence is low.

Define Inspection and Test Evidence Before the Build

Inspection and test should be selected from the failure risk and acceptance decision, not added as generic quality words. Bare PCB electrical test checks connectivity against supplied data. Visual and dimensional inspection address workmanship and drawing requirements. For PCBA, AOI can inspect visible placement and solder features; X-ray can support review of hidden joints; functional test verifies behavior under a defined setup. None of those methods replaces the others in every application.

Write what constitutes a pass, who supplies fixtures or firmware, what record is returned, how failed units are handled, and whether retest is permitted. The AOI in PCB manufacturing guide explains where optical inspection fits and why it cannot close hidden-joint or functional questions alone.

A useful acceptance plan lets the buyer observe a concrete result: quantity tested, method used, revision tested, pass/fail count, exception disposition, and record identifier. “100% tested” without a test definition is not an auditable promise.

Audit Traceability, Changes, and Repeat-Order Control

Repeatability depends on knowing exactly what was built, approved, inspected, and changed. Give every fabrication, assembly, and test package a revision. Maintain a question log with the requester, answer, approver, date, affected file, and disposition. When an exception changes the product definition, update the governing document rather than allowing the email to become the only record.

For repeat orders, ask the supplier to confirm the prior approved revision, open deviations, material or component changes, tooling status, and any process change that needs review. Buyers should be able to compare the new order release against the previous accepted build without reconstructing decisions from inbox history.

Observable result: pick one shipped board or assembly and trace it back to the fabrication files, BOM/CPL, approved questions, inspection/test record, and shipment. If the chain cannot be reconstructed, the repeat-order process needs stronger controls.

Prepare a Bay Area PCB RFQ Package Suppliers Can Price

A complete RFQ reduces price padding, engineering delay, and false quote comparisons. Put the following items in one controlled package and include a short scope sheet that names the requested services.

  1. Fabrication data: Gerber or ODB++, drill files, board drawing, stackup, impedance notes, panel preference if relevant, and revision identifier.
  2. Assembly data: BOM, CPL/centroid, assembly drawing, polarity notes, approved alternates, do-not-fit instructions, and revision identifier.
  3. Commercial data: prototype and forecast quantities, requested delivery point, schedule target, split-shipment needs, and quote validity expectation.
  4. Verification data: workmanship/acceptance requirements, inspection methods, electrical or functional test plan, fixtures, firmware, reports, and failure disposition.
  5. Change rules: who may answer engineering questions, who approves substitutions, how deviations are recorded, and which files govern after approval.

Ask suppliers to return an assumption-and-exclusion sheet with the quote. That sheet should identify proposed material, stackup status, unresolved DFM questions, sourcing exceptions, tooling/NRE, test scope, freight basis, and any item priced provisionally.

Buyer check: a colleague who was not in the original meetings should be able to read the package and understand what is being bought, how it will be accepted, and which decisions remain open.

Choose the Supply Model That Fits Your Project

Use a local supplier when proximity closes a specific engineering loop; use a qualified remote supplier when integrated scope, repeatability, or production economics matter more; use a hybrid model when both needs are real. The correct choice can change as the project matures.

  • Choose local-first when same-region physical access materially shortens prototype learning or failure analysis.
  • Choose remote-production-first when the package is stable and the program benefits from integrated fabrication, PCBA, sourcing, testing, or repeat builds.
  • Choose hybrid when an urgent prototype path and a scalable production path must be qualified at the same time.

EBest Circuit is not presented as a Bay Area local manufacturer. It is a direct RFQ comparison option for Bay Area buyers who want PCB fabrication, PCBA, DFM, BOM/CPL review, sourcing, inspection, and production planning evaluated together. Add that comparison early enough to expose scope and cost differences before the team is committed to a single path.

PCB Manufacturing Bay Area FAQ

Is a Bay Area PCB manufacturer always faster?
A local supplier may shorten physical handoffs and in-person engineering loops, but total lead time also includes DFM questions, material availability, component sourcing, test setup, approval, fabrication, assembly, and shipment. Compare the complete critical path.

What files are needed for a PCB manufacturing quote?
For bare boards, send Gerber or ODB++, drill files, drawing, stackup or stackup requirements, fabrication notes, quantity, and delivery target. Add BOM, CPL, assembly drawing, approved alternates, test requirements, and firmware or fixtures for PCBA.

Should a startup use a local prototype shop and another production supplier?
It can work well when the data package is controlled. Freeze the released files, document prototype deviations, and make the production supplier review the final package before volume commitments.

How do I compare a local PCB quote with an overseas quote?
Normalize fabrication, tooling, components, assembly, inspection, test, packaging, freight, duties when applicable, payment cost, and engineering effort. Also compare what happens after a design change or failed acceptance test.

What is a hybrid PCB supply plan?
A hybrid plan uses different suppliers or locations for different stages, such as local prototypes and qualified remote repeat production. It needs one controlled revision set and a formal transfer review to prevent interpretation gaps.

How can I test a supplier’s engineering response before ordering?
Send a controlled RFQ package and compare the quality of returned questions, assumption logs, response ownership, and revision references. A useful review should close ambiguities, not merely confirm that files can be opened.

What should a PCB quote list separately?
Ask for bare PCB, tooling/NRE, components, PCBA setup and assembly, inspection, test, packaging, freight, and applicable one-time charges as separate lines, together with assumptions and exclusions.

How should component substitutions be approved?
Require a documented proposal with manufacturer part number, reason, electrical and mechanical comparison, availability, price effect, and any test impact. Controlled parts should not change without written approval from the designated owner.

Which test records should a PCB or PCBA supplier return?
The answer depends on risk and scope. Define the method, revision, quantity tested, acceptance criteria, pass/fail result, exception disposition, and record identifier before the build.

Can EBest Circuit support Bay Area PCB buyers?
Yes. EBest Circuit can serve Bay Area buyers as a non-local RFQ comparison option for PCB fabrication, PCBA, DFM review, BOM/CPL review, component sourcing, inspection, testing coordination, and production planning, subject to project review and confirmation.

Before you commit to a Bay Area PCB supplier, compare the complete manufacturing path.

Send your Gerber or ODB++ files, drill data, drawings, stackup notes, BOM/CPL, quantity, material and surface-finish requirements, inspection/test plan, and target delivery date to sales@bestpcbs.com. EBest Circuit will review the PCB fabrication and PCBA scope, DFM questions, sourcing exceptions, acceptance evidence, and quote assumptions so your team can compare local, remote, and hybrid options with fewer hidden costs and fewer production surprises.

Send Files for a PCB Quote | Request an Engineering Review

You may also like

PCB Fabrication Drawing: Avoid Costly Production Errors
Monday, August 10th, 2026

A clear PCB fabrication drawing puts the critical bare-board requirements in one controlled document. This guide shows what to include and what to check before release.

pcb fabrication drawing
A controlled PCB fabrication drawing aligns dimensions, drill data, stack-up details, and the released bare board.

What Is a PCB Fabrication Drawing?

A PCB fabrication drawing defines how a bare printed circuit board must be built and accepted. It combines a dimensioned board view with manufacturing notes, tolerances, drill information, layer construction, and revision data.

It does not replace Gerber or ODB++ data, NC drill files, or other production outputs. Those files provide artwork and machine-readable data. The drawing adds requirements that may not be clear from the artwork alone.

A controlled drawing helps the customer:

  • Reduce questions during quotation.
  • Keep suppliers on the same requirements.
  • Control the approved design revision.
  • Resolve file discrepancies before production.

Use the released design—not an old prototype or requirements left in an email thread.

The drawing also gives purchasing, engineering, and quality teams one reference during supplier comparison. When two quotations differ, the team can check whether both suppliers priced the same material, construction, tolerances, finish, inspection, and test scope instead of comparing price alone.

PCB Fabrication Drawing vs PCB Assembly Drawing

A fabrication drawing controls the bare board. A PCB assembly drawing controls component placement and orientation. Mixing them can cause the fabrication or assembly team to miss critical information.

DocumentControlsKey content
Fabrication drawingBare boardOutline, holes, stack-up, finish, tolerances
Assembly drawingComponent installationDesignators, polarity, orientation, mounting notes
BOM and placement dataParts and coordinatesPart numbers, quantities, X-Y data, rotation
pcb fabrication drawing
Fabrication documents define the bare PCB, while assembly documents control component installation.

The release rule is simple: the fabrication drawing answers, “What bare board must be made?” The assembly drawing answers, “What must be installed, and how?” If information appears in both, confirm that the values and revisions match.

What Should a PCB Fabrication Drawing Include?

The exact content depends on board complexity. However, the fabricator should be able to quote, plan, build, and inspect the board without inventing missing requirements.

Include these essentials:

  • Board outline, dimensions, datum, cutouts, notches, and critical edge features.
  • Finished thickness and tolerance.
  • Finished hole sizes, plated status, slots, and special tolerances.
  • Layer count, order, material, dielectric construction, and copper weight.
  • Controlled-impedance targets, layers, and tolerances.
  • Solder mask, silkscreen, surface finish, and special processes.
  • Agreed inspection, electrical-test, coupon, or report requirements.
  • Part number, drawing number, revision, date, units, and approvals.

Avoid copying a generic note set into every design. Remove requirements that do not apply, and add approved special requirements to the controlled package.

PCB Fabrication Drawing Notes That Prevent Production Assumptions

PCB fabrication drawing notes should clarify details that geometry cannot communicate. Effective notes stop the supplier from using a default value that may affect cost, lead time, reliability, or fit.

Useful notes may define:

  • Finished dimensions versus pre-plating tool sizes.
  • Plated, non-plated, press-fit, or tightly controlled holes.
  • Mandatory materials and permitted alternatives.
  • Starting or finished copper weight.
  • Solder mask, legend, finish, and special coatings.
  • Controlled-impedance requirements.
  • Filled or capped vias, via-in-pad, edge plating, or castellations.
  • Electrical testing and required quality records.
  • The required action when files disagree.

Use measurable requirements. “Manufacture to the highest quality” cannot be inspected. State the expected result and acceptance condition instead.

How to Check a PCB Fabrication Drawing Against Manufacturing Files

Many release failures come from conflicting documents. A drawing may show revision C while the Gerber package came from revision B. A drill table may not match the NC drill file. A six-layer stack-up may not match the supplied artwork.

Check the complete package before RFQ:

  • Match part numbers and revisions across all files.
  • Compare the board outline, cutouts, slots, and dimensions.
  • Match the drill chart to the NC drill data.
  • Confirm plated and non-plated hole definitions.
  • Compare layer count and order with the copper files.
  • Check material, copper, thickness, finish, mask, and legend.
  • Confirm impedance layers, targets, and tolerances.
  • Remove obsolete outputs from the release package.

pcb fabrication drawing
Cross-file review checks the board outline, drill data, layer stack-up, Gerber layers, and revision before release.

Stop the release when the drawing and electronic data disagree. The fabricator can identify a conflict and suggest an option, but the customer must confirm the intended requirement.

Tolerances and Acceptance Requirements in a PCB Drawing

A nominal dimension without a tolerance can cause a conservative quote or a board that fails an unstated fit requirement.

A PCB drawing should identify tolerances where variation affects fit, function, assembly, or inspection. Common examples include board thickness, routed outline, finished holes, slot width, connector edges, and enclosure interfaces.

Feature typeCustomer decisionResult
Critical fitDefine tight toleranceProtects mounting and mating
ElectricalDefine performance limitControls impedance or testing
Non-criticalUse standard capabilityAvoids unnecessary cost

Do not tighten every dimension. Tighter tolerances can increase process control, inspection, cost, and yield risk.

If an IPC class, customer specification, impedance report, or test requirement applies, identify the approved document and revision. The customer owns the final product-level acceptance criteria and approves any proposed change.

Revision Control for a PCB Fab Drawing

Revision errors can place a correct design into production under an obsolete specification. The risk increases when drawings, Gerbers, drill files, and purchase orders are stored separately.

A PCB fab drawing should show the part number, drawing number, revision, release date, units, and approval status. Use the same revision identity across the manufacturing package.

Before release:

  • Assign one package owner.
  • Generate outputs from the approved PCB source.
  • Store related files in one controlled folder.
  • Remove superseded files.
  • Record approved supplier questions and changes.
  • Reference the approved revision on the purchase order.

Avoid filenames such as final, final-new, or latest. They do not provide reliable production control.

A PCB Fabrication Drawing Example Before Production Release

Consider a six-layer control board that fits inside a machined enclosure. The Gerber and drill files are complete, but the initial drawing lists only the overall dimensions and board thickness.

During review, the fabricator finds three gaps:

  • No finished tolerance for the connector holes.
  • No finished width for a routed slot.
  • No layer-specific impedance target.
StageDrawing statusProduction effect
Before correctionCritical details missingQuestions and fit risk
After correctionDimensions and impedance definedClear quote and inspection basis

The customer updates the controlled drawing and releases it with the matching manufacturing files. This PCB fabrication drawing example shows why project-specific risks matter more than a long generic checklist.

How EBest Reviews PCB Fabrication Data Before Quotation

EBest Circuit (Best Technology) can review the submitted package for fabrication completeness and manufacturability. The review may identify missing stack-up information, unclear hole requirements, data conflicts, or special features that need confirmation.

For an efficient review, provide:

  • Approved PCB fabrication drawing.
  • Gerber, ODB++, or other agreed fabrication data.
  • NC drill and routing files.
  • Stack-up and impedance requirements.
  • Material, copper, thickness, mask, and finish requirements.
  • Quantity and requested lead time.
  • Agreed inspection, test, report, or traceability needs.

EBest may propose a manufacturable stack-up, material alternative, or tolerance adjustment. The customer must approve the change before production.

For PCBA quotations, also provide the BOM, placement data, assembly drawing, inspection criteria, and agreed test inputs. EBest supports PCB fabrication, DFM, sourcing, PCBA, inspection, and agreed testing coordination. The customer owns circuit performance, design intent, firmware, certification, and final product validation.

FAQs About PCB Fabrication Drawings

Is a PCB fabrication drawing required if Gerber files are complete? It is recommended when material, tolerance, impedance, finish, special-process, or acceptance requirements are not fully defined by the Gerber data.

Can a PCB fabrication drawing replace Gerber and NC drill files? No. The drawing defines manufacturing requirements. Gerber, ODB++, IPC-2581, NC drill, and routing files provide detailed production data.

Should fabrication and assembly information be on one drawing? Separate drawings are usually clearer. The fabrication drawing defines the bare board; the assembly drawing defines component installation.

Who resolves a conflict between the drawing and Gerber data? The fabricator should report the conflict. The customer or authorized design owner must confirm the requirement before production.

What files should be sent for a PCB quotation? Send the drawing, fabrication data, drill and routing files, stack-up, impedance requirements, material and finish specifications, quantity, and lead-time request.

Ready to request a PCB or PCBA quotation? Send your approved PCB fabrication drawing, manufacturing files, quantity, and target lead time to sales@bestpcbs.com. EBest Circuit will review the package and identify any missing or conflicting fabrication requirements before quotation.

You may also like

Boiler PCB Manufacturing: Prevent Heat, Moisture and Assembly Failures
Wednesday, August 5th, 2026

A reliable boiler PCB helps appliance manufacturers avoid no-start failures, intermittent shutdowns, repeated service calls, delayed approvals, and costly board revisions. Reducing these risks before the first build means reviewing the PCB data, BOM, assembly drawings, operating environment, programming instructions, and acceptance tests as one complete manufacturing package.
EBest Circuit (Best Technology) gives engineering and purchasing teams one coordinated path from approved files to a controlled prototype or production build. We support DFM review, PCB fabrication, component sourcing, PCBA assembly, inspection, and customer-defined testing coordination. The customer remains responsible for the boiler’s system architecture, firmware, combustion-safety logic, and finished-appliance certification.

boiler PCB
A boiler PCB project should align board construction, components, assembly, and application requirements before production.

What Is a Boiler PCB?

A misunderstanding at the specification stage can cause buyers to source the wrong board type or compare quotations that do not include the same work. A boiler PCB is the printed circuit board—or, more commonly in practical sourcing, the assembled PCBA—that connects and controls the electronic functions defined by the boiler designer.

Depending on the system, the assembly may interface with temperature and pressure sensors, pumps, fans, valves, ignition-related circuits, displays, communication modules, and power supplies. It can contain low-voltage logic, mains-connected sections, relays, transformers or isolated power components, connectors, protection devices, and programmed control devices on the same assembly.

The term is often used loosely. Buyers should separate the following scopes before comparing quotations:

Requested product What it normally includes What the buyer should confirm
Bare boiler PCB Copper circuitry, solder mask, silkscreen, surface finish, and mechanical features Stackup, copper, finish, tolerances, slots, and testing
Boiler PCBA Bare PCB plus soldered electronic components BOM, placement data, assembly drawings, inspection, and acceptance criteria
Programmed and tested PCBA Assembled board plus agreed programming and test operations Firmware revision, fixture, test limits, records, and failed-unit handling

Buyers should also state whether components are consigned by the customer, sourced by the supplier, or handled through a mixed purchasing model. This prevents a low bare-board quotation from being compared with a turnkey PCBA quotation that includes sourcing, programming, and testing.

A boiler PCB is also part of the wider HVAC circuit board family, but its exact interfaces and operating sequence depend on the boiler platform. That is why manufacturing requirements should come from the customer’s approved design files and product risk assessment rather than from a generic “boiler board” specification.

How Does a Boiler PCB Control the Heating Sequence?

An unclear sequence can create false fault reports because a manufacturing problem and a system-design problem may look similar during final testing. In a typical application, the board reads input conditions, applies the control logic supplied by the OEM, switches defined outputs, and monitors feedback to decide whether the sequence may continue.

For example, a heating request may require the controller to perform a sequence such as:

  1. Read the required sensor and interlock states.
  2. Energize a pump, fan, or other defined output.
  3. Operate an ignition-related output according to the approved firmware.
  4. Monitor the expected feedback within the specified time.
  5. Continue, stop, or lock out according to the customer’s control logic.

The exact order, timing, thresholds, and safety responses are product-specific. They should be defined and validated by the boiler manufacturer—not assumed by the PCBA supplier.

From a manufacturing perspective, this sequence becomes useful test information.

The customer should define:

  • which inputs must be simulated;
  • which outputs must be measured;
  • which firmware and configuration revision must be loaded;
  • the expected timing and measurement limits;
  • what constitutes a pass, failure, or retest condition.

Without this information, a supplier may confirm workmanship and electrical continuity but cannot independently prove that the assembly performs every intended boiler function.

Before quotation, the project package should therefore explain whether the supplier is expected to provide unprogrammed assemblies, load customer firmware, run a fixture-based functional test, or support final testing in the customer’s product.

Which Boiler PCB Types Require Different Manufacturing Decisions?

Treating every boiler board as the same can lead to the wrong material, component, assembly, coating, or test assumptions. The manufacturing plan should reflect how the board is used and where its main risks are concentrated.

Common application differences include:

  • Gas-boiler control boards with ignition-related interfaces, valve and fan outputs, flame-detection circuitry, and strict system safety requirements.
  • Electric-boiler boards with significant heater-control loads, contactors, relays, current sensing, and thermal-management concerns.
  • Combi-boiler controllers coordinating space heating and domestic hot-water functions.
  • Condensing-boiler electronics operating in equipment where moisture management and enclosure airflow require careful review.
  • Interface or display boards that may carry lower power but face connector, handling, and human-interface demands.
  • Communication or expansion boards connecting the appliance to thermostats, building controls, or service tools.

These categories do not automatically determine a laminate, copper weight, coating, or test method. A compact display board and a mains-switching control board may need very different stackups and process controls even when installed in the same boiler. The customer should provide rated voltages and currents, isolation requirements, operating environment, board location, mechanical constraints, expected service life, and applicable product standards.

EBest Circuit can review whether the supplied fabrication and assembly package communicates those requirements consistently. Any change to the electrical architecture or safety function must be approved by the customer’s responsible engineers.

What Causes Boiler PCB Failures?

Field returns become expensive when the team replaces a board without identifying whether the root cause came from design margin, component selection, assembly variation, installation stress, contamination, or another part of the boiler. A useful failure review separates the observed symptom from the physical mechanism.

Common PCB and PCBA failure mechanisms include:

  • Solder-joint cracking around relays, transformers, terminal blocks, and other heavy or mechanically loaded parts.
  • Local overheating at relays, power resistors, connectors, copper bottlenecks, or poorly cooled components.
  • Corrosion or leakage paths caused by condensation, ionic contamination, or unsuitable coating coverage.

  • Intermittent connections caused by fretting, weak connector retention, cable strain, or repeated thermal cycling.
  • Incorrect component value, polarity, package, or approved-vendor substitution.
  • Insufficient spacing or contamination across high-voltage and low-voltage regions.
  • Firmware, programming, or configuration mismatch between otherwise identical-looking assemblies.
  • Damage introduced by handling, electrostatic discharge, mounting stress, or enclosure interference.

A production supplier can help investigate workmanship, material records, component traceability, inspection evidence, and test results. However, a no-heat or lockout symptom does not by itself prove that the PCB is defective. Sensors, wiring, pumps, fans, valves, power quality, firmware, and other system conditions may produce similar symptoms. Troubleshooting gas or mains-powered boilers should be performed by appropriately qualified personnel.

For new projects, the best action is to convert known failure risks into drawing notes, BOM controls, inspection points, and test criteria before production begins.

How Can Boiler PCB Reliability Be Improved?

Reliability improves when the project prevents predictable stresses instead of relying on final inspection to find damage after it occurs. Heat, moisture, vibration, contamination, and handling should be translated into specific design inputs and manufacturing controls.

Focus the reliability review on three stress groups:

  • Heat: Identify high-loss components and realistic current conditions. Review copper width, copper weight, thermal vias, component spacing, airflow, enclosure temperature, and component ratings against the approved design. Thermal images or measured temperatures from an engineering sample are more useful than a general request for a “high-temperature PCB.”
  • Moisture and contamination: Define the expected condensation, contamination, and cleaning environment. Conformal coating can help in suitable applications, but it is not a universal cure. The coating must be compatible with the PCB surface, components, operating temperature, service process, and product requirements. A masking drawing should identify connectors, test points, switches, heat sinks, and other no-coat areas. Cleanliness and curing also matter because coating over contamination can trap the problem.
  • Vibration and mechanical stress: Provide adequate support, hole and pad geometry, solder-joint design, and spacing for heavy components. Review connector insertion force, cable pull, depaneling stress, screw torque, and enclosure fit. If adhesive, staking, or other retention is required, document its material, location, height, and acceptance standard.

These controls should be tied to measurable drawings, samples, or test requirements. Phrases such as “high reliability” or “moisture resistant” are not enough for repeatable production.

EBest Circuit can review these requirements for manufacturability and process consistency. Environmental validation and lifetime targets must still be defined and approved by the OEM.

boiler PCB
Thermal inspection helps engineers evaluate high-loss components and load-related heating on a boiler PCB assembly.

How Should Power and Control Circuits Be Separated?

Poor separation can expose low-voltage logic to noise, leakage, arcing, or unsafe energy. It can also make inspection difficult if the project files do not clearly distinguish circuit domains.

The design team should identify mains, high-current, isolated, protective-earth, sensor, communication, and logic areas. Creepage and clearance values must be selected from the product’s applicable safety requirements, working voltage, insulation system, pollution degree, material group, altitude, and other relevant conditions. A generic spacing copied from another board is not a substitute for a product-specific compliance decision.

Before releasing the data, confirm:

  • required creepage and clearance dimensions;
  • isolation slots, barriers, and keep-out areas;
  • copper width and current requirements for load paths;
  • fuse, relay, connector, and protection-device ratings;
  • grounding and protective-earth instructions;
  • test voltages and which nets or regions they apply to;
  • coating or potting effects that are recognized by the applicable standard;
  • silkscreen, assembly, and inspection markings that help prevent mistakes.

DFM review can flag narrow spacing, small isolation slots, copper-to-edge risk, solder-mask concerns, and manufacturing tolerances that may reduce the intended separation. It cannot decide the finished boiler’s required insulation architecture on the customer’s behalf. When a rule affects safety, the controlling value should come from the customer’s authorized engineering and compliance documentation.

What Should Engineers Check Before PCB Fabrication?

Missing or conflicting files often create more delay than the actual board fabrication. A quotation based only on Gerber files may omit component sourcing, programming, special assembly, coating, fixtures, or acceptance-test costs.

A controlled release package should normally include:

  • Gerber or ODB++ data and drill files.
  • Fabrication drawing with stackup, finished thickness, copper, surface finish, tolerances, slots, cutouts, and controlled-impedance requirements where applicable.
  • BOM with manufacturer part numbers, approved alternatives, do-not-substitute items, and sourcing responsibility.
  • Pick-and-place data and assembly drawings showing polarity, orientation, reference designators, and special installation notes.
  • Panelization, breakaway, edge-clearance, and tooling requirements when these are customer-controlled.
  • Firmware files, programming method, device configuration, checksums, and version-control instructions when programming is required.
  • Coating, adhesive, masking, cleaning, and cosmetic requirements.
  • Test specification, fixture interface, expected readings, pass limits, and failure-record requirements.
  • Golden sample or approved photographs when visual details cannot be communicated reliably by drawings alone.

The files should carry matching revisions. If the BOM is revision C while the assembly drawing is revision B, production can follow two individually valid documents and still build the wrong result. A formal release checklist and written resolution of engineering questions reduce that risk.

EBest Circuit can provide a DFM review and BOM optimization list within the supplied project scope. The customer should approve substitutions, functional changes, and any deviation from the released design before procurement or production.

How Are Boiler PCB Assemblies Inspected?

Inspection gaps allow a visually acceptable board to reach functional testing with the wrong component, weak solder joint, missing operation, or undocumented rework. A suitable inspection plan combines process evidence instead of depending on one machine or one final visual check.

A practical inspection flow may include:

  1. Incoming verification: Check PCB identity, component labels, quantities, moisture-sensitive handling, date or lot information, and selected high-risk parts.
  2. Solder-paste control: Use solder-paste inspection when the package mix and process risk justify it.
  3. Placement and solder inspection: Use automated optical inspection to check placement, polarity, solder appearance, and component presence.
  4. Hidden-joint inspection: Select X-ray for bottom-terminated or other concealed joints where it adds useful coverage; it is not required for every package or board.
  5. Manual process inspection: Check connectors, terminal blocks, relays, transformers, through-hole soldering, coating boundaries, adhesive, and mechanical hardware.
  6. First-article confirmation: Compare the initial assembly with the BOM, drawings, approved sample, and special requirements before the full batch proceeds.

No inspection method proves every electrical or functional requirement. The control plan should be based on component packages, process risks, customer requirements, and the consequences of an escape. Inspection records should also connect to the batch and revision so that a later question can be traced to the correct material and production history.

boiler PCB
Optical inspection checks placement, polarity, solder appearance, and component presence during boiler PCB assembly.

What Testing Should Be Defined Before Production?

Undefined testing creates two opposite risks: the supplier may perform only basic workmanship checks, or the quotation may assume a complex test that the customer did not budget or provide data for. The test level should be agreed before the order.

Bare-board electrical testing checks PCB continuity and isolation against the supplied net data. After assembly, automated or fixture-based checks may verify selected components, shorts, opens, programmed devices, voltage rails, communication, and controlled input/output behavior. The exact method depends on access, volume, fault coverage, product risk, and available customer data.

For a functional test, the OEM should define safe simulated inputs, expected outputs, timing or measurement limits, firmware revision, connection method, and handling of failed units. If mains or load simulation is involved, fixture safety and operator protection require particular attention. A PCBA supplier should not invent combustion or appliance-safety acceptance limits.

Useful test-release questions include:

  • Which faults must the test detect?
  • Which nets and interfaces are accessible?
  • Is programming performed before or during the test?
  • Are real loads, simulated loads, or a customer-supplied appliance required?
  • What are the numeric pass limits and allowed tolerances?
  • How are results linked to the PCB serial number or batch?
  • Who approves fixture changes and test-software revisions?

Answering these questions early helps the supplier estimate fixture effort, cycle time, coverage, and responsibilities accurately.

How Do Prototype Builds Reduce Boiler PCB Risk?

Moving directly from released files to a large order can multiply a small documentation or assembly error across the whole batch. A prototype or pilot build gives the engineering team a controlled point to verify the board, assembly process, programming, mechanical fit, and test method before volume commitments.

A practical pilot-build flow is:

  1. Review DFM findings, BOM risk, and unresolved engineering questions.
  2. Purchase a controlled quantity of approved material.
  3. Assemble and inspect the first article before continuing the batch.
  4. Verify component orientation, solderability, connector alignment, and enclosure clearance.
  5. Confirm firmware loading, fixture access, coating masks, and defined functional behavior.
  6. Record issues and close them through an approved revision or deviation process.

Consider an illustrative boiler-controller project containing relays, terminal blocks, a programmed controller, temperature-sensor inputs, and a communication connector. During the first build, the supplier may discover that a connector drawing does not define the mating-cable exit direction, a relay alternative has a different height, or a test point becomes inaccessible after the board is installed. Resolving those items before the repeat order avoids enclosure rework, purchasing confusion, and incomplete production testing. This example describes a realistic workflow, not a claim about a specific customer project.

EBest Circuit supports prototype PCB assembly and small-quantity PCB and PCBA builds for engineering validation. Prototype approval should record the final files, BOM decisions, firmware, test revision, and open issues so that the next batch repeats the approved build rather than an earlier version.

boiler PCB
A controlled prototype fixture helps validate programming, interfaces, and customer-defined functional tests before volume production.

How Does EBest Circuit Support Boiler PCB Projects?

Coordinating separate PCB, component, assembly, and test suppliers can slow engineering communication and make responsibility unclear when files change. EBest Circuit (Best Technology) provides one-stop support covering PCB manufacturing, component sourcing, PCBA assembly, inspection, and testing coordination for customer-owned boiler PCB designs.
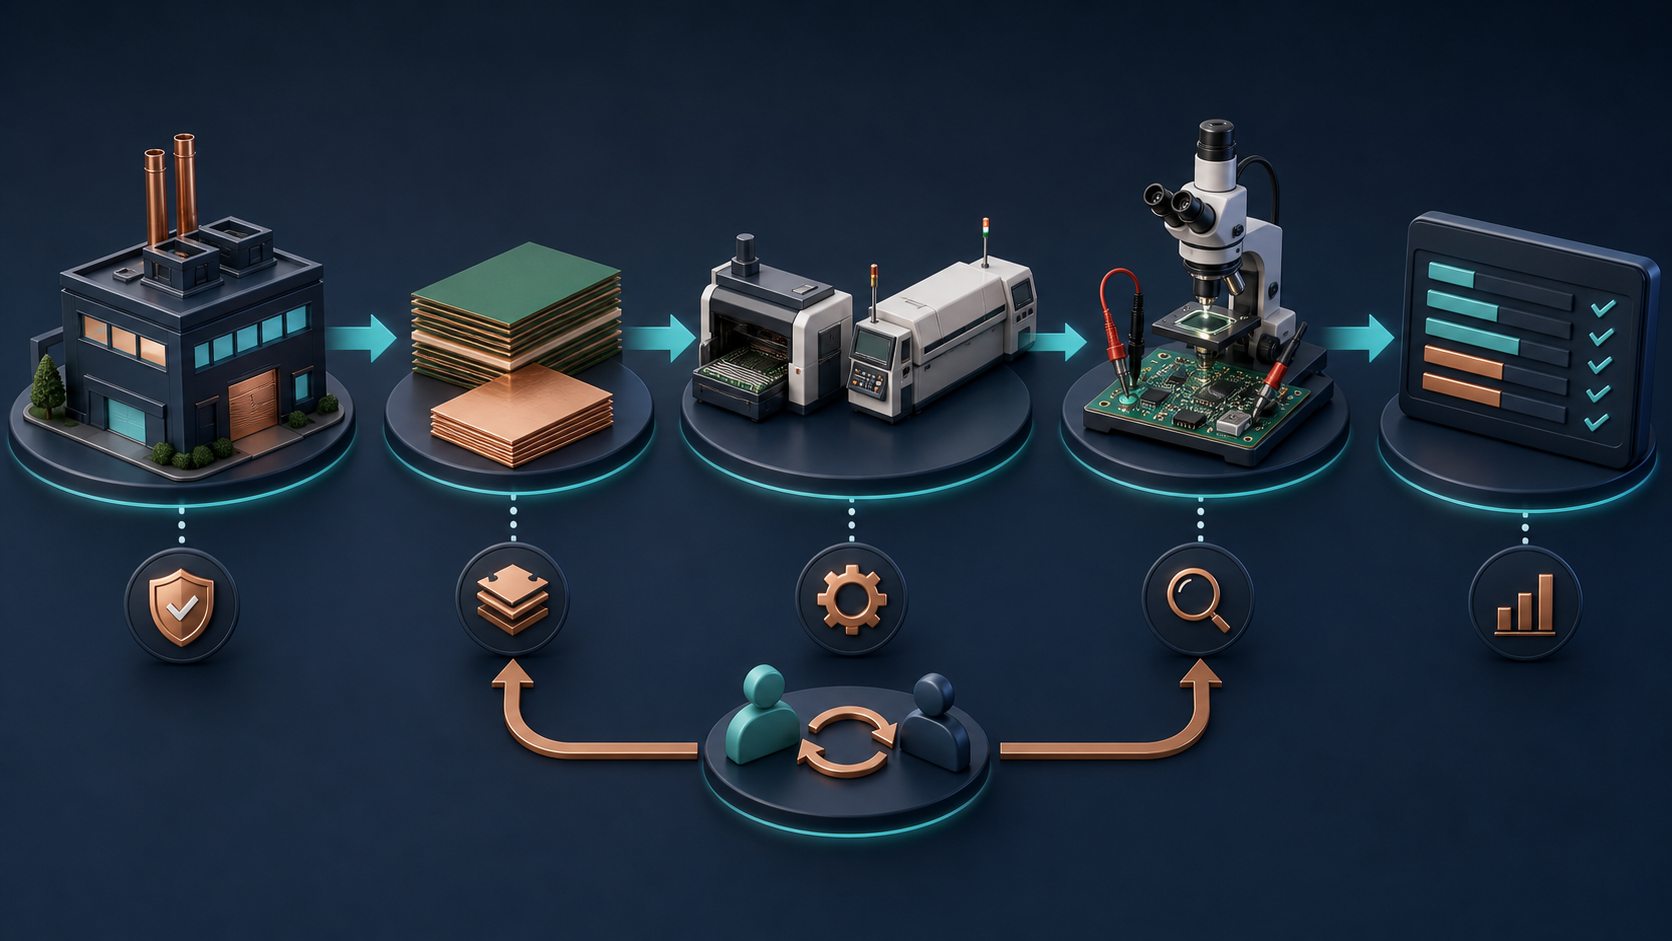
Our service model combines one sales contact with engineering support across the project.

Project support can include:

  • DFM review before fabrication and assembly;
  • BOM review for sourcing risk, package conflicts, long-lead items, and customer-approved alternatives;
  • PCB fabrication and component purchasing coordination;
  • SMT, through-hole, and mixed PCBA assembly as required by the approved data;
  • inspection and traceability aligned with the project requirements;
  • programming and customer-defined test coordination when files and criteria are available;
  • prototype and small-batch builds before production scaling.

EBest Circuit operates PCB and PCBA manufacturing resources, works with an established component supply network, and supports traceability of materials, batches, and production progress. Company quality-system certifications include ISO 9001, ISO 13485, IATF 16949, and AS9100D. The applicable process, documentation, and certification requirements for each boiler project must be confirmed during quotation; these company certifications do not replace finished-boiler approval.

To request a manufacturing review, send Gerber files, BOM, pick-and-place data, assembly drawings, expected quantity, application requirements, and test instructions to sales@bestpcbs.com. Our team can then identify open questions and prepare a quotation around the actual project scope.
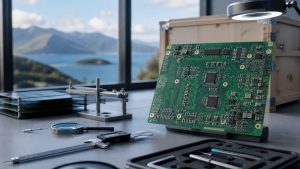
FAQs About Boiler PCBs

What is the difference between a boiler PCB and a general HVAC control board?

A boiler PCB is an HVAC-related control board developed for a particular boiler platform and its defined sensors, outputs, loads, communications, and operating sequence. “HVAC control board” is a broader term that also covers air conditioners, furnaces, heat pumps, ventilation equipment, and other systems. Manufacturing requirements should follow the specific product files rather than the category name alone.

What files are needed to manufacture a boiler PCB assembly?

A typical turnkey package includes Gerber or ODB++ data, drill files, fabrication drawing, BOM with manufacturer part numbers, pick-and-place data, assembly drawings, and quantity. Add firmware and programming instructions, coating or masking drawings, mechanical requirements, test specifications, and an approved sample where applicable. All documents should have consistent revision control.

Does a boiler PCB need conformal coating?

Not automatically. The decision depends on condensation, contamination, component compatibility, temperature, serviceability, enclosure protection, and applicable product requirements. If coating is specified, the customer should define the material or performance requirement, thickness where relevant, no-coat areas, cleanliness, cure, inspection, and test expectations.

How should relay and connector loads be tested?

The OEM should define the rated and worst-case loads, switching conditions, duty cycle, temperature limits, acceptable voltage drop, contact behavior, connector requirements, and pass criteria. Prototype testing may combine electrical measurements, temperature checks, repeated switching, and inspection. The method must reflect the actual circuit and product risk; it should not be replaced by a generic relay test.

Can boiler PCB assemblies be built in small batches before volume production?

Yes. A prototype or small batch can validate component availability, assembly workmanship, programming, mechanical fit, coating, inspection, and customer-defined functional testing before volume production. The approved pilot configuration should then be frozen through controlled files, BOM decisions, firmware records, and test documentation.

Need to move a boiler PCB from engineering files to a controlled prototype or production build? Send your Gerber files, BOM, pick-and-place data, assembly drawings, quantity, coating requirements, and test instructions to sales@bestpcbs.com. EBest Circuit (Best Technology) can review manufacturability and sourcing risks, then support PCB fabrication, component procurement, PCBA assembly, inspection, and customer-defined testing coordination within the agreed project scope.

You may also like