PCB manufacturing PCB manufacturing
Home > Blog

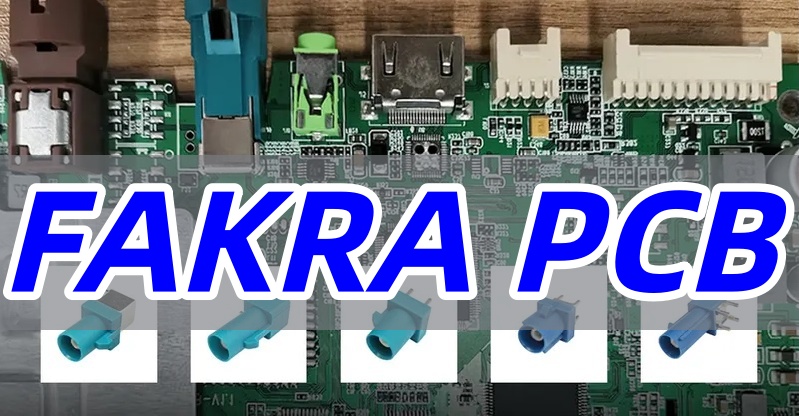
FAKRA PCB Connector Guide for Automotive PCBA Integration

September 17th, 2026

A FAKRA PCB connector must match more than a housing color. The mechanical code, mating gender, orientation, PCB termination, footprint, frequency rating, and mating cable all need to agree before the board is released.

EBest Circuit (Best Technology) supports controlled-impedance PCB fabrication, component sourcing, SMT and through-hole assembly, first-article inspection, and customer-defined testing. Send the connector drawing, Gerber files, stackup, BOM, assembly drawing, quantities, and test limits to sales@bestpcbs.com for a manufacturing review.
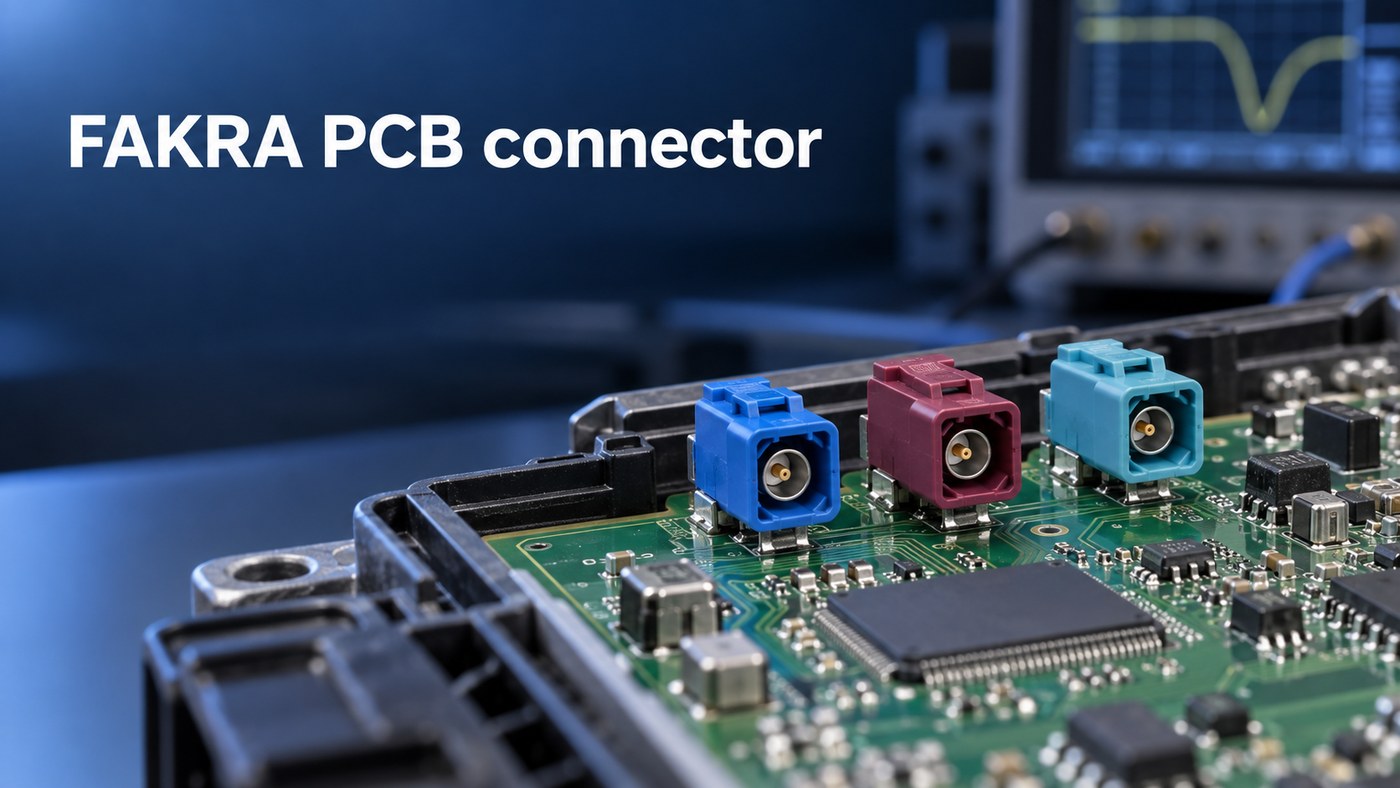
FAKRA PCB connector
PCB-mounted FAKRA connectors for automotive PCBA integration.

What Is a FAKRA PCB Connector?

A FAKRA PCB connector is a keyed, locking, 50-ohm automotive coaxial interface. It connects a cable harness to a PCB used in equipment such as a telematics control unit, head unit, antenna module, or camera ECU.

The metal interface is based on SMB, while the plastic housing adds mechanical coding, color identification, and a latch. Depending on the exact series, the product specification may cite ISO 20860-1, SAE/USCAR-17, SAE/USCAR-18, or OEM requirements.

ā€œFAKRAā€ is only the product family. A production BOM still needs the full manufacturer part number, mating part, code, orientation, PCB termination, and current product drawing.

FAKRA Connector Types and Codes for PCB-Mounted Applications

PCB-mounted FAKRA connectors are available in straight or vertical (180-degree) and right-angle (90-degree) versions. Product families may also offer single, dual, or multiport housings; sealed or unsealed construction; and through-hole, pin-in-paste, or SMD termination. Some device-side designs use a separate press-in contact or housing arrangement, but its attachment to the chassis and PCB must be read from the exact product drawing.

FAKRA has 14 coding options—not 14 electrical models. A, B, C, D, E, F, G, H, I, K, L, M, and N are 13 different mechanical keys. Z is the neutral key.

The standard colors and common application assignments are:

CodeColorCommon assignment*
AJet blackRadio without phantom power
BCreamRadio with phantom power
CSignal blueGPS, telematics, navigation
DClaret violetGSM or cellular
ELeaf greenTV1, UHF TV, terrestrial SDARS
FNut brownTV2, VHF TV, terrestrial SDARS
GBlue greyRemote keyless entry or terrestrial SDARS
HHeather violetGPS, telematics, navigation
IBeigeParking heater or Bluetooth
KCurryDiversity radio or satellite SDARS
LCarmine redOEM- or program-defined
MPastel orangeKeyless entry or tire-pressure monitoring
NPastel greenOEM- or program-defined
ZWater blueNeutral key

*Application assignments vary between European, USCAR, and individual OEM conventions. The vehicle drawing and approved BOM remain controlling.

A–N normally mate only with the matching key and compatible gender. Z can mate with A–N only when the connector family, contact gender, and mating geometry are otherwise compatible. The assembly record should therefore identify the full part number and code—not merely ā€œblue FAKRA.ā€

Top 5 FAKRA Connector Manufacturers

These five established manufacturers offer different PCB-mount portfolios. Start with the brand approved for the mating cable or vehicle platform, then compare the exact part and availability.

ManufacturerBest fit
RosenbergerBroad straight and right-angle PCB range with pin-in-paste, wave-solder, and SMD versions
TE ConnectivitySealed and unsealed coded systems for platforms using several FAKRA ports
Amphenol RFVertical, right-angle, through-hole, surface-mount, and end-launch choices
MolexFAKRA and FAKRA II board/harness systems, including right-angle through-hole and pin-in-paste products
RaydiallReflow- and wave-soldered PCB connectors, plus a separate press-in contact route for compatible designs

Brand alone does not establish interchangeability. Compare the code, RF gender, orientation, footprint, shield-pin pattern, termination, sealing, frequency rating, packaging, and approved mating part before accepting an alternate.

FAKRA Connector PCB Mount Selection: Straight, Right-Angle, or Through-Hole

Make two choices separately. Straight versus right-angle defines the cable-mating direction; through-hole, pin-in-paste, or SMD defines how the connector terminates to the PCB. A separate press-in feature, where offered, may attach part of the connector to the module chassis rather than replace the PCB solder joint. A connector can be both right-angle and through-hole.

ChoiceTypical application
Straight / vertical (180°)Top-entry modules, antenna hubs, or multiport units with cable access above the PCB
Right-angle (90°)Low-profile ECUs, head units, camera modules, or side-entry enclosures
Through-holeDesigns that need strong shield-leg and mounting-post retention against cable loads
Pin-in-pasteMixed-SMT production that needs through-hole retention but uses the reflow line
SMDCompact automated builds using a connector designed specifically for surface mounting
Press-in device-side designSelected modules in which the connector contact or housing is pressed into a sheet-metal or die-cast chassis; the PCB terminal may still require soldering, so the exact drawing controls

Check the cable, enclosure, board edge, and mating direction in the assembled 3D model. A connector that fits the PCB view can still fail because the cable cannot bend, the latch cannot be reached, or insertion force flexes the board edge.
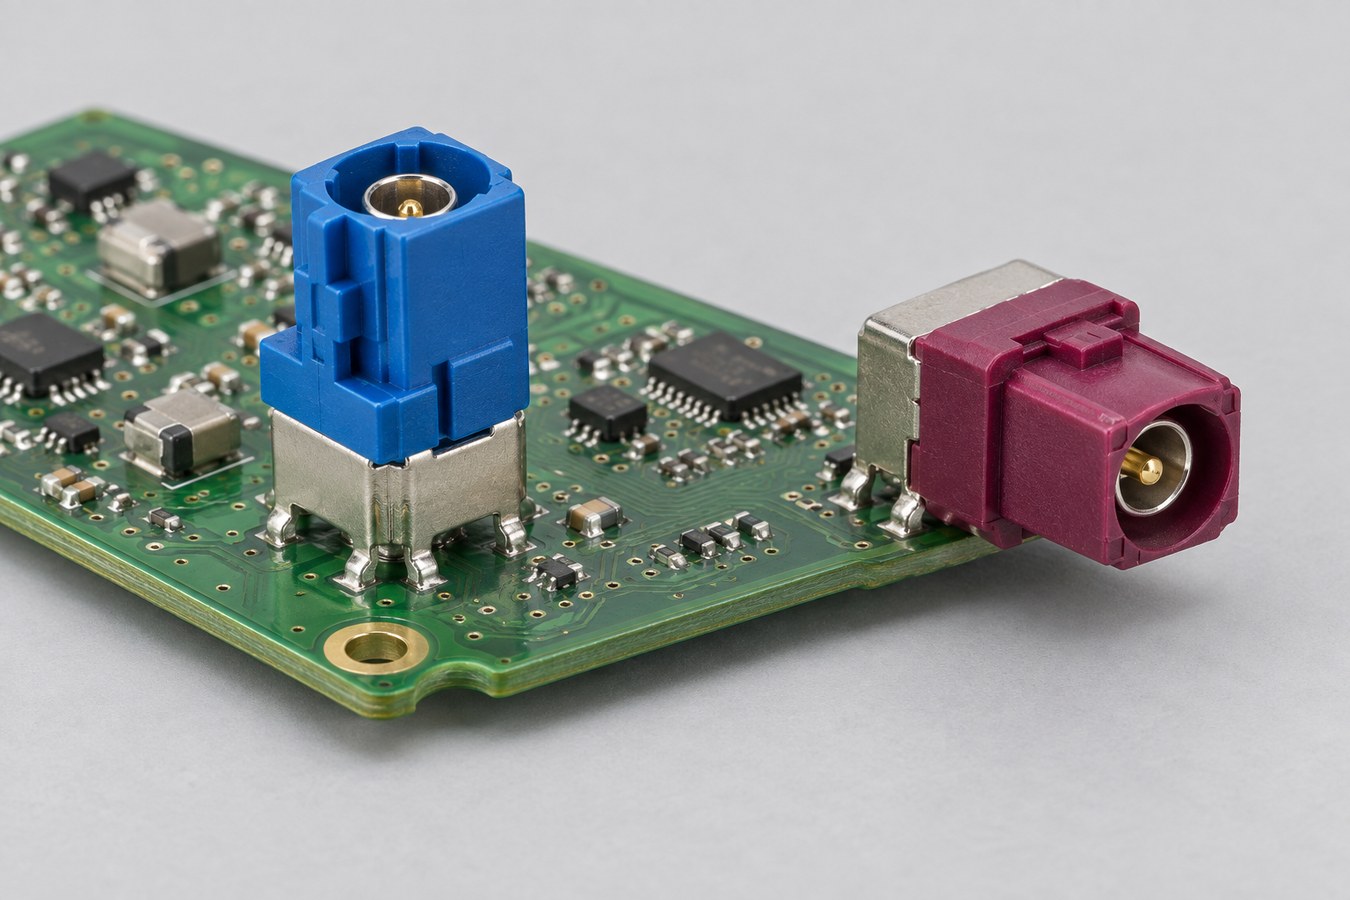
FAKRA PCB connector
Vertical and right-angle FAKRA PCB connector orientations.

What Is the Frequency Range of a FAKRA Connector?

Standard 50-ohm FAKRA families are commonly rated from DC to 6 GHz. Some earlier or application-specific parts stop at 3 or 4 GHz, so the exact part-number drawing is the final authority.

Selected broadcast cable assemblies may operate above 6 GHz, but that rating does not automatically apply to a PCB header. Mini-FAKRA and HFM are also different interfaces, not higher-frequency drop-in replacements for standard FAKRA.

A 6 GHz connector does not guarantee a 6 GHz channel. The cable, mated pair, PCB launch, trace, adapters, and test fixture all affect insertion loss and return loss.

FAKRA PCB Layout for 50-Ohm Signal Integrity

Use the land pattern for the exact connector and calculate the trace from the production stackup. Similar-looking FAKRA parts can have different center-pin positions, shield posts, locating features, and ground clearances.

The launch should control four points:

  • Signal transition: Keep the center-pin pad and stub as short as the approved footprint allows.
  • Return path: Connect the shield structure to an uninterrupted reference plane with a balanced ground-via arrangement.
  • 50-ohm line: Calculate the trace from the actual dielectric thickness, Dk, copper, solder mask, and line type.
  • Mechanical support: Align the connector datum with the enclosure and support the board edge against repeated mating force.

An impedance coupon verifies a representative transmission-line geometry from the fabricated stackup; it does not by itself verify the connector launch on every board. A connectorized first article measured by TDR or VNA is needed to verify the launch. Our RF PCB manufacturing guide covers the related stackup and impedance controls.

FAKRA Connector PCB Assembly and Soldering Control

The assembly route must follow the exact connector termination.

TerminationMain production control
Pin-in-pasteStencil aperture, paste volume, pin protrusion, seating, reflow limit, and solder fill
Conventional through-holeConnector support, preheat, dwell, barrel fill, solder bridging, and housing temperature
SMDPackaging, placement method, coplanarity, paste deposit, and body support
Press-in contact or housingExact receiving-chassis dimensions, insertion tooling, force window, connector seating, and the separate PCB-terminal process shown on the released drawing

The first article should confirm code direction, seating height, clean mating surfaces, solder quality, and unobstructed cable latching. Shield pins provide both mechanical retention and the RF return path, so incomplete soldering can affect strength and signal performance.

Accepted photos, dimensions, solder criteria, and process settings should then move into the work instruction. Mixed builds that reflow electronics and selectively solder the connector also need a defined sequence and suitable fixtures. See our mixed-technology PCB assembly service for the related assembly approach.
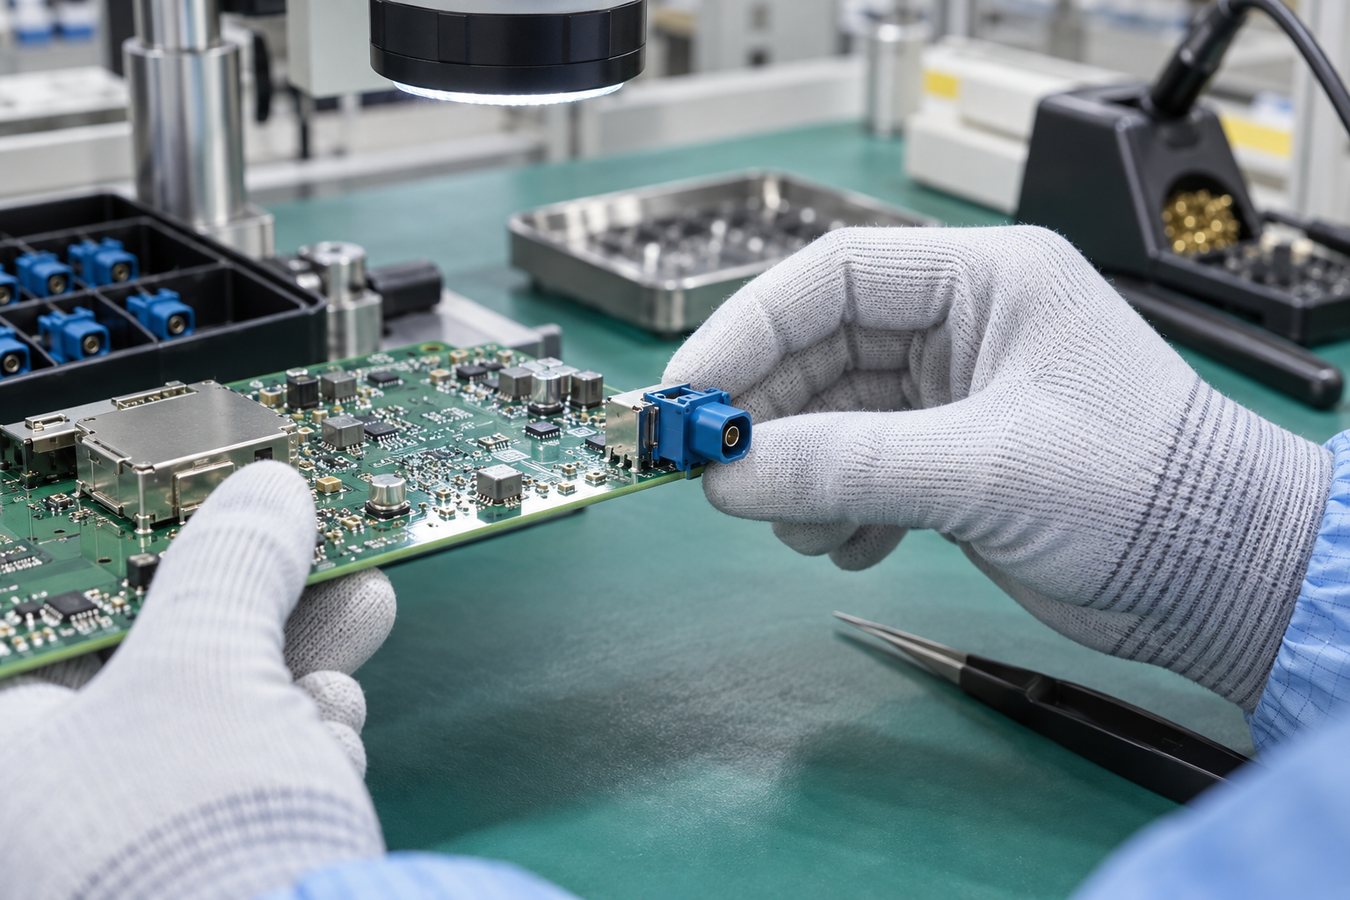
FAKRA PCB connector
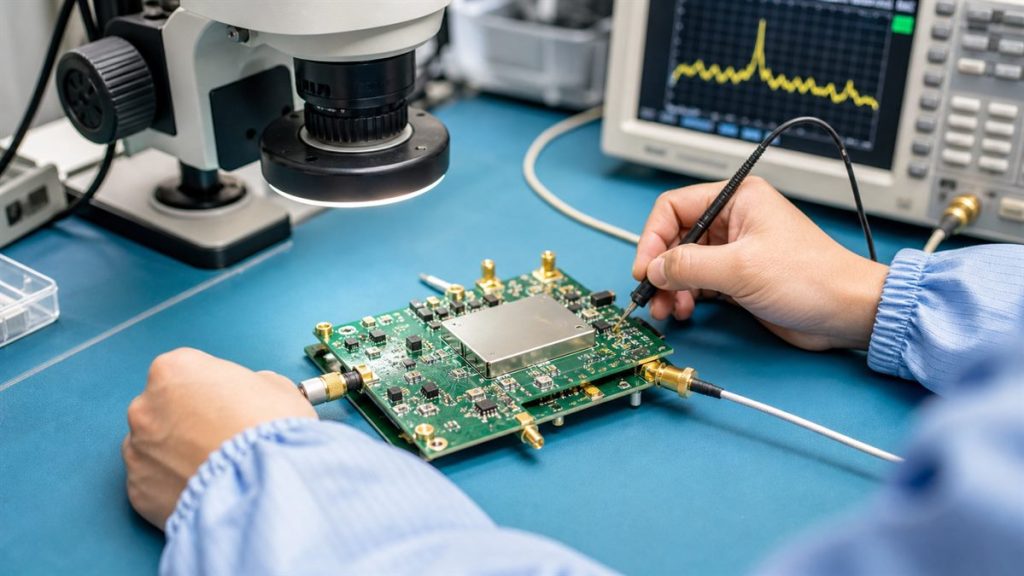
Inspection of a PCB-mounted FAKRA connector during PCBA assembly.

Inspection and RF Testing for a FAKRA Connector PCB

Each inspection method answers a different question.

EvidenceWhat it proves
Incoming inspection and FAICorrect manufacturer, part number, code, lot, and orientation
Visual inspection, AOI, or X-raySeating, visible joints, hidden solder, or barrel fill as applicable
Bare-board electrical test and impedance coupon/TDRCorrect copper network and controlled PCB transmission line
Calibrated VNA measurementS11/return loss and S21/insertion loss of the defined connectorized path

AOI cannot measure impedance, and continuity testing cannot reveal a launch that is electrically connected but badly mismatched. Pull or retention testing should be limited to qualification or designated first-article samples when required by the released test plan.

An RF report should identify the sample, fixture, calibration method, reference plane, frequency sweep, and pass/fail limits. Without those details, two VNA plots are not directly comparable.
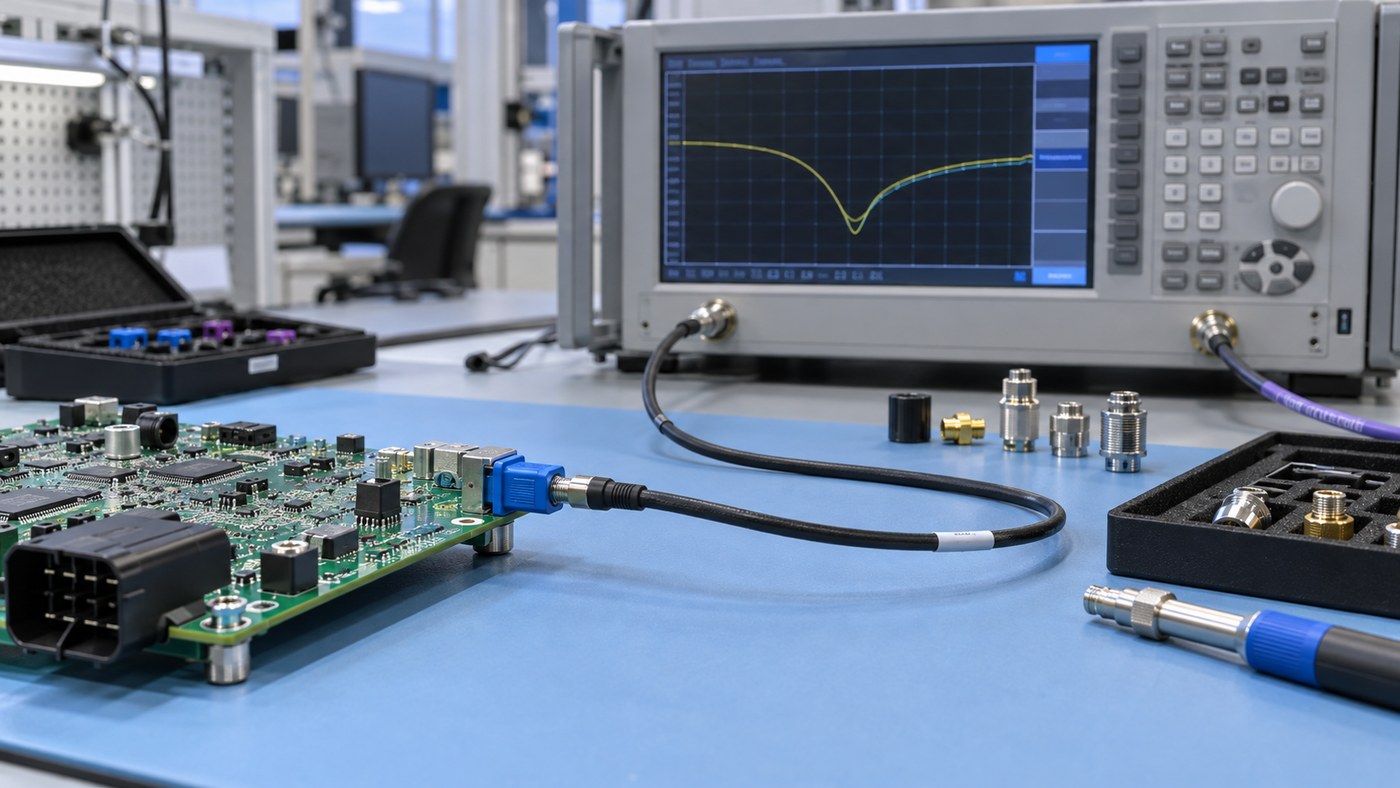
FAKRA PCB connector
Connectorized RF verification of a FAKRA-equipped PCB using a VNA setup.

How to Source a FAKRA PCB Connector for PCBA Production

Specify the connector at full-part-number level. The BOM should identify the manufacturer, code/color, RF gender, orientation, PCB termination, packaging, and approved mating part. It should also state whether alternates are prohibited or require written approval.

Do not approve a substitute because it has the same color or distributor description. Recheck the mechanical key, mating interface, footprint, shield-pin pattern, height, sealing, frequency rating, soldering process, packaging, and qualification status.

Use an authorized supply channel and retain the connector lot/date code, required compliance documents, and change notifications. EBest Circuit can review availability and manufacturing compatibility, while the customer approves changes affecting the RF channel or vehicle interface.

How EBest Circuit Supports FAKRA Connector PCB Manufacturing

EBest Circuit turns an approved FAKRA interface into a controlled PCB and PCBA manufacturing package.

  • Before production: We cross-check the connector drawing, footprint, mating cable, enclosure direction, stackup, soldering route, and test requirement.
  • For the first article: We coordinate controlled-impedance PCB fabrication, approved sourcing, the documented assembly process, seating and solder inspection, bare-board testing, and impedance records. Fixture-based RF testing may be added only after EBest Circuit confirms the required equipment and test capability, and the customer approves the fixture, calibration method, reference planes, sweep, and acceptance limits.
  • For repeat orders: The connector lot, PCB revision, assembly records, inspection results, and approved changes remain linked to the production batch.

EBest Circuit’s owned PCB and PCBA facilities, ISO 9001 and IATF 16949 quality systems, and prototype-to-repeat-production support help reduce handoffs. Pin-in-paste, conventional through-hole, and SMD processes can be planned from the released drawing. Press-in connector or housing designs require a separate review of the chassis interface, insertion tooling, force window, PCB-terminal method, and factory capability.

Send the connector and PCB package to sales@bestpcbs.com for a project-specific review.

FAQs About FAKRA PCB Connectors

What does FAKRA mean?

FAKRA comes from the German term Fachkreis Automobil and identifies a standardized family of keyed automotive coaxial connectors.

Is FAKRA Z universal?

Z is the neutral mechanical key, but gender, interface family, footprint, termination, frequency rating, and sealing must still match.

Does each FAKRA color have one fixed application?

No. Colors identify mechanical codes, while application assignments can differ between European, USCAR, and individual OEM conventions.

Are FAKRA connectors waterproof?

Only specified sealed versions provide environmental sealing, usually when correctly mated with the approved counterpart.

Do FAKRA connectors require special crimping tools?

Crimp-terminated cable contacts require approved stripping, crimping, and inspection tooling. PCB-mounted versions follow the through-hole soldering, pin-in-paste reflow, or SMD process specified in the product drawing. A separate press-in contact or housing feature, where used, must follow its own chassis and PCB-terminal instructions.

Can straight and right-angle FAKRA connectors share one PCB footprint?

Do not assume so. Center-pin location, shield posts, locating features, and housing datum can change even within one manufacturer’s range.

If your FAKRA PCB connector project is ready for prototype or repeat production, send the exact connector drawing, PCB files, mating information, and test limits to sales@bestpcbs.com. EBest Circuit can review the component, RF PCB, assembly, and acceptance requirements before production release.
You may also like

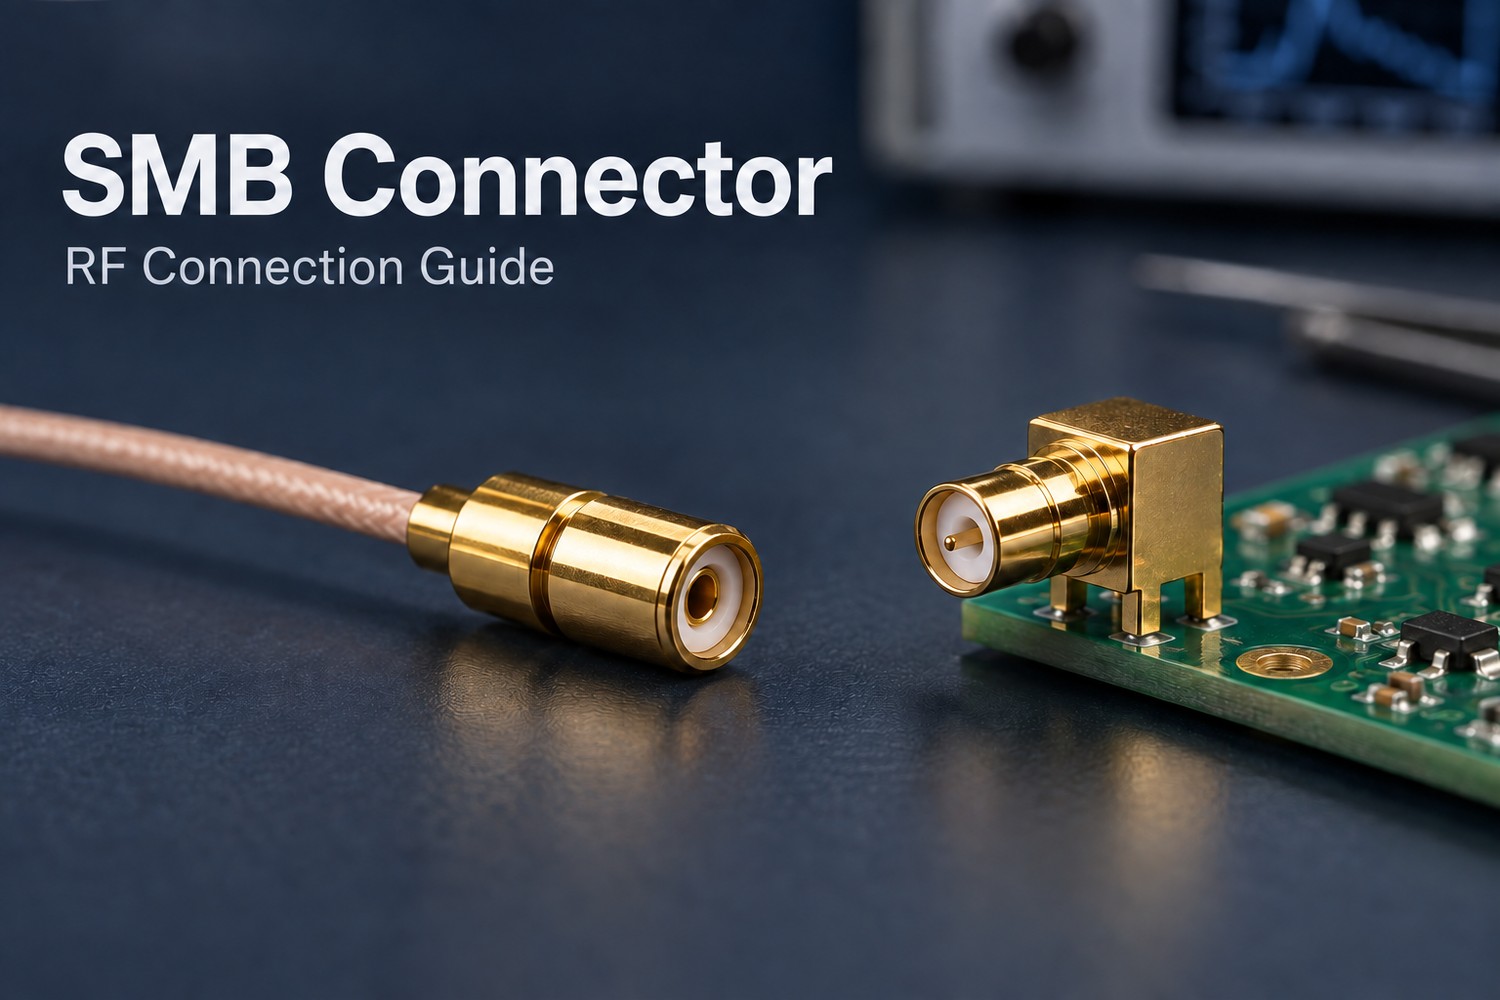
How to Choose the Right SMB Connector for Your RF Design

September 16th, 2026

An SMB connector gives an RF design a compact, snap-on connection. Choosing the right version means matching the mating interface, system impedance, cable, and mounting arrangement. A connector that fits physically can still create an electrical mismatch or put unnecessary strain on the PCB.

EBest Circuit (Best Technology) combines PCB fabrication, component sourcing, and PCB assembly, including SMT and through-hole processes. This supports RF boards that need both a suitable connector footprint and a practical assembly process. Contact sales@bestpcbs.com to discuss your board and connector requirements.

SMB connector

What Is an SMB Connector?

An SMB connector, short for SubMiniature B, is a coaxial RF connector with snap-on coupling. It connects by pushing the mating halves together, without tightening a threaded nut.

Its coaxial structure has three main elements:

  • Center contact: carries the signal.
  • Dielectric: separates the conductors and helps establish impedance.
  • Outer conductor: provides the return path and shielding.

SMB is useful for compact internal RF links in communications equipment and instruments. Available versions include 50-ohm and 75-ohm interfaces, cable terminations, and PCB mounts; the family name alone does not specify their frequency rating.

How Do You Identify an SMB Plug and an SMB Jack?

In common standard SMB interfaces, the plug has a center socket and the jack has a center pin. This is easy to misread if you normally associate ā€œplugā€ with a male pin.

SMB interfaceCenter contactMates with
PlugFemale socketCompatible SMB jack
JackMale pinCompatible SMB plug

Catalog labels such as ā€œmaleā€ and ā€œfemaleā€ may describe the contact rather than the complete interface. Use the manufacturer’s mating drawing to resolve ambiguous descriptions.

Also keep interface gender and mounting style separate: a PCB mount is not a gender designation. For a replacement, match the interface first, then the impedance, footprint, and orientation.

How Do 50-Ohm and 75-Ohm SMB Connectors Differ?

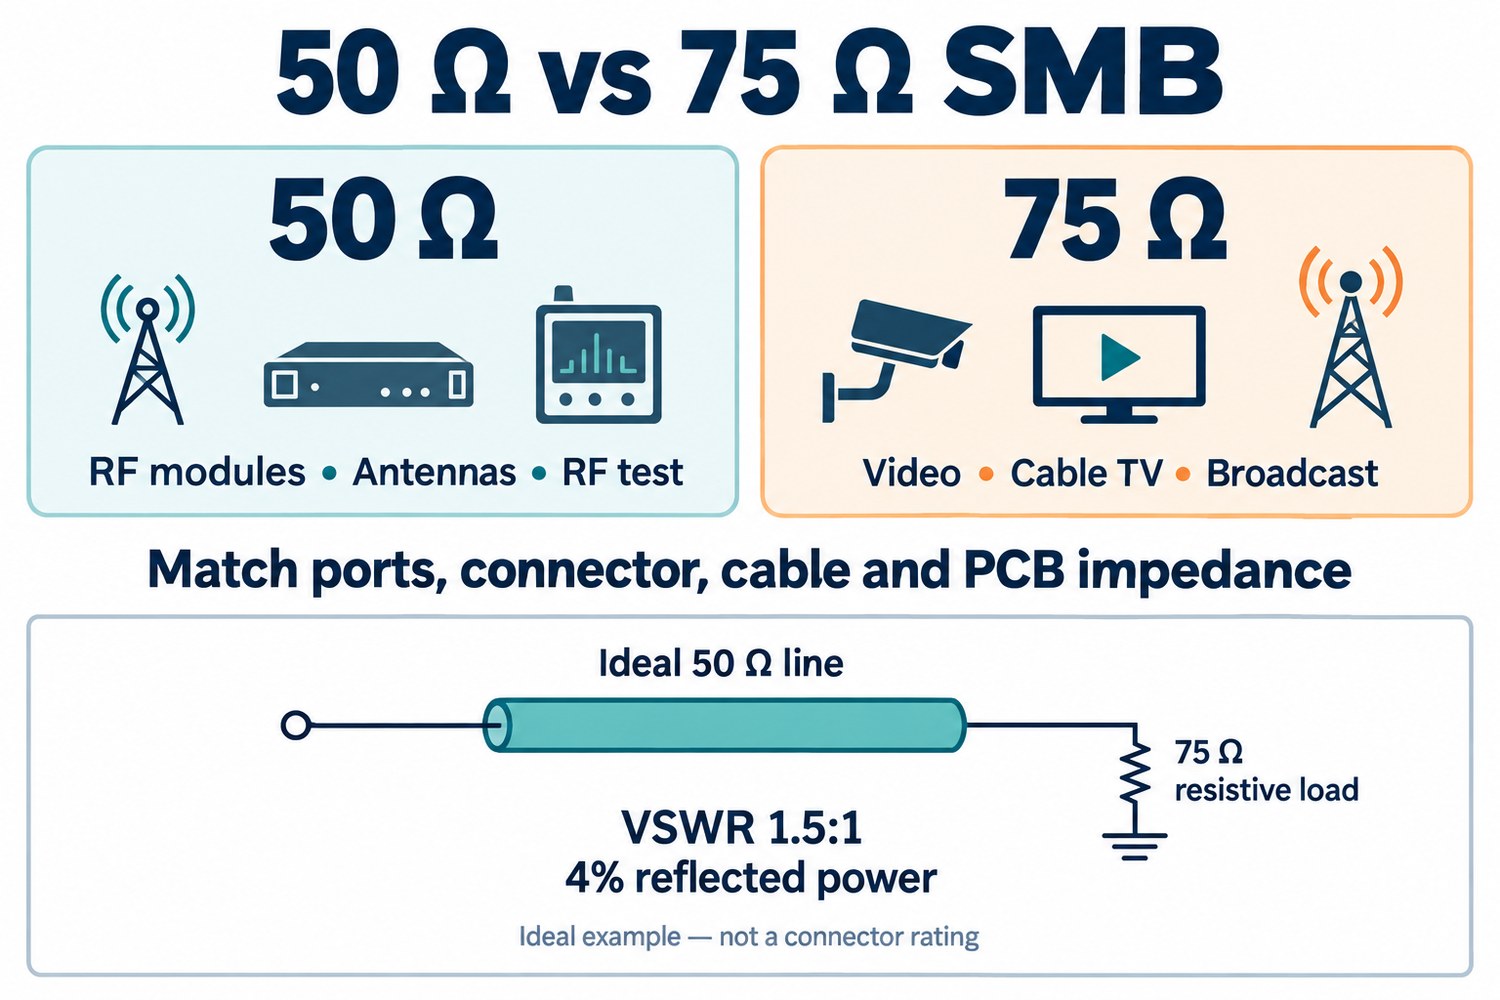
50-ohm and 75-ohm SMB connectors match different transmission-system impedances. The same distinction appears across several coaxial connector families:

ImpedanceCommon connector examplesTypical applications
50 ohmsSMA; 50-ohm BNC, N-Type, and SMBAntenna feeds, wireless modules, RF test equipment
75 ohmsF-Type; 75-ohm BNC and SMBCable television, video transmission, broadcast equipment

For SMB, conductor dimensions and dielectric geometry establish the impedance. Select the version that matches the equipment ports, coaxial cable, and PCB transmission line. Physical mating does not establish electrical compatibility.

A mismatch creates reflections and can raise VSWR. For example, an ideal 50-ohm line feeding a purely resistive 75-ohm load has a VSWR of 1.5:1, with 4% of incident power reflected. This illustrates the mismatch; it is not a universal rating for a 75-ohm SMB inserted into a 50-ohm assembly.

Actual results depend on frequency, connector transitions, cable length, and the PCB launch. Reflections can cause response ripple and reduce signal margin. Compare VSWR or return loss across the operating band: lower VSWR and higher return loss indicate a better match. Neither impedance is inherently superior.

SMB connector

SMA vs SMB Connector: Which Fits Your RF Connection?

SMB favors quick snap-on access; SMA provides a threaded connection. Choose around the required retention, service access, and operating frequency.

Design requirementSMBSMA
Connection methodPush to engage; pull the body to releaseThreaded coupling nut, tightened to specified torque
Installation clearanceRoom for axial movement and a secure gripRoom to turn the nut and use the required tool
Common fitCompact internal connections needing quick accessRF connections where threaded retention is preferred

Frequency capability belongs to the specific part. For example, Samtec lists SMB offerings with 50-ohm performance to 6 GHz and 75-ohm performance to 4 GHz. These figures do not apply to every SMB connector.

For vibration or moving cables, assess the connector’s retention specification and cable support. A coupling style alone does not establish environmental suitability.

Which SMB Cable Connector Fits Your Coaxial Cable?

Choose a connector approved for the exact cable construction, not just its impedance. RG316 is a common 50-ohm example; RG179 is used in 75-ohm assemblies. Their connector terminations are not automatically interchangeable.

Three details determine the fit:

  • Cable dimensions: the center conductor, dielectric, shield, and jacket must fit the contact and termination hardware.
  • Termination method: ā€œcrimpā€ may mean a crimped outer ferrule with a soldered center contact. Follow the specified stripping dimensions and tooling.
  • Cable exit: a right-angle body can reduce installed height; a straight body needs room for the cable’s bend radius.

Provide strain relief so cable pull is carried by the support structure rather than the termination or PCB solder joints.

When Should You Choose a Board-Mount or Panel-Mount SMB Connector?

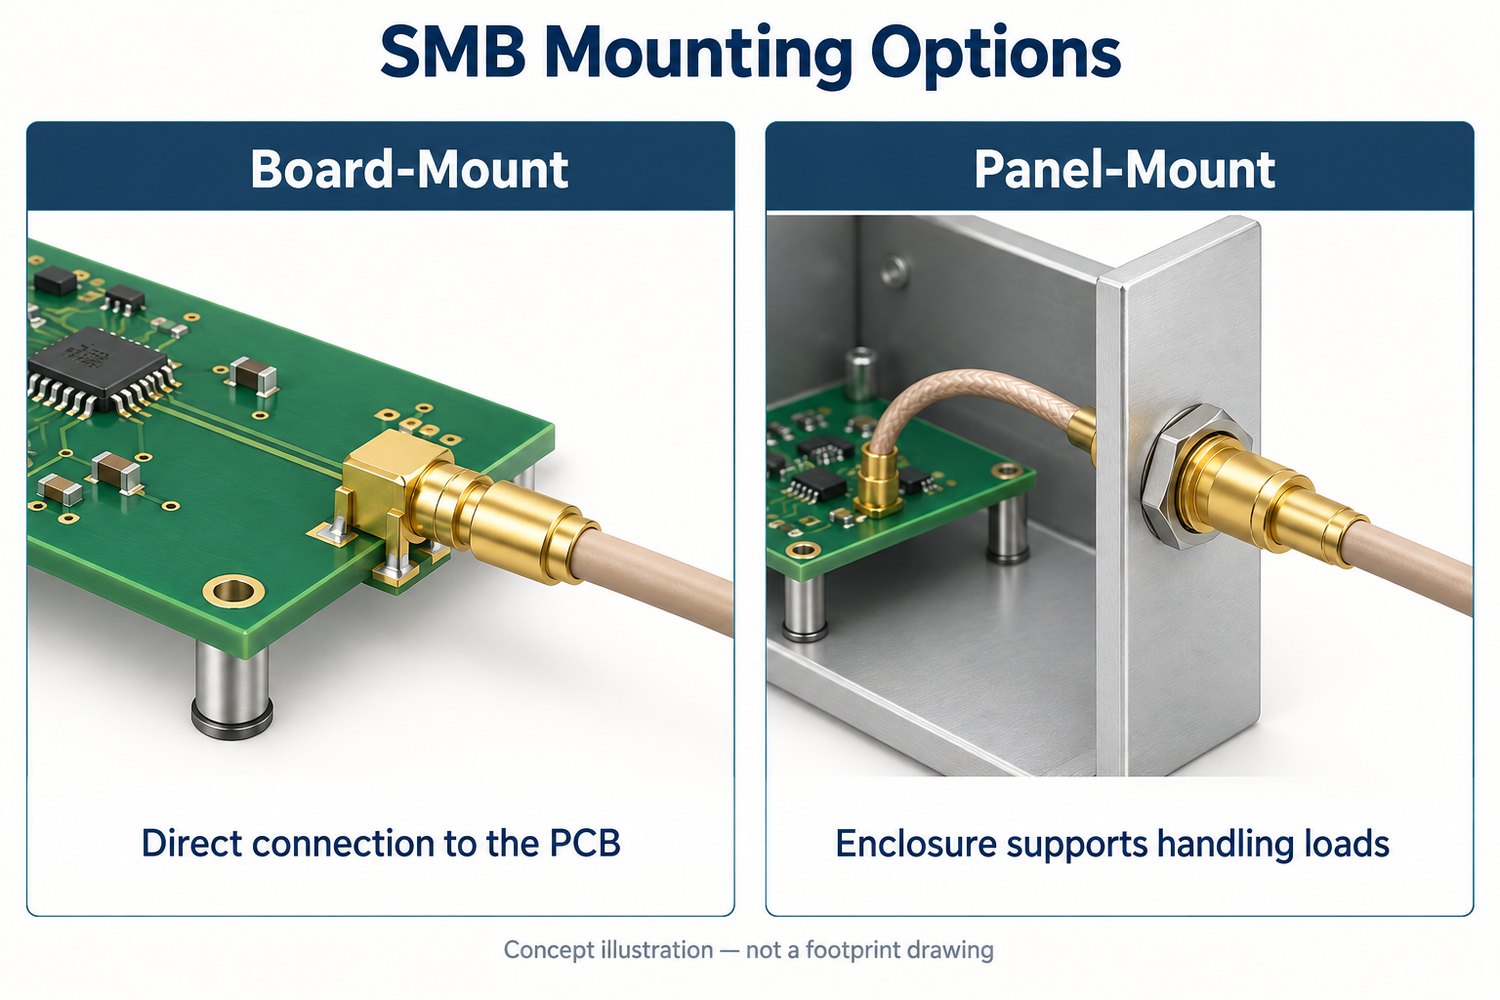
Use board mounting for a direct PCB connection and panel mounting when the enclosure should support the accessible interface. Some connectors combine PCB termination with bulkhead mounting.

  • Board-mount: suits a direct cable-to-board RF path. The manufacturer’s footprint, ground connections, and signal transition matter because the connector-to-trace junction is part of the RF circuit.
  • Panel-mount: suits an externally accessed port. A properly supported bulkhead transfers plugging and cable-handling forces into the enclosure.

Check the assembled geometry: board-to-panel distance, panel thickness, connector orientation, and finger clearance. Compatible SMB mating faces do not guarantee identical PCB footprints.

For the board-side details, see our guide to SMB PCB fabrication and assembly.

SMB connector

How Do You Connect and Disconnect an SMB Connector?

Push and pull along the mating axis while holding the connector body. Standard snap-on SMB interfaces do not screw together like SMA.

  1. Inspect: look for debris, bent contacts, or shell damage. Follow the equipment’s RF power-down instructions.
  2. Align: bring both halves onto the same axis before applying pressure.
  3. Seat: push steadily until fully engaged. Stop if resistance feels abnormal.
  4. Release: support the fixed connector and pull the mating body straight back.

Do not pull on the cable or lever the connector against the PCB. Where access is restricted, provide more clearance or use a manufacturer-approved removal tool.

FAQs About SMB Connectors

Are SMB, Mini-SMB, and SSMB interchangeable?

No interchangeability should be assumed. They are separately specified interface families; similar names and snap-on coupling do not guarantee matching dimensions. Use the manufacturer’s mating information.

Are SMB connectors waterproof?

Not by designation. An exposed connection needs an explicit protection rating covering the connector, termination, and intended assembled condition.

Does an SMB-to-SMA adapter match 75 ohms to 50 ohms?

A basic interface adapter does not automatically transform impedance. If the circuit requires impedance matching, use an appropriate matching device or network.

Does the connector rating establish the cable assembly’s frequency performance?

No. Cable length and loss, both connectors, and terminations affect the finished assembly. Use assembly-level insertion-loss and return-loss specifications for the operating band.

What causes a loose SMB connection?

Possible causes include incomplete engagement, incompatible mating parts, worn retention features, or a loose mount. Identify the cause and replace damaged parts; do not squeeze the shell or bend contacts to tighten the fit.

Planning an RF board with an SMB connector? Send your PCB files, BOM with the connector part number, and required quantity to sales@bestpcbs.com. EBest Circuit can support fabrication, sourcing, and assembly around your selected components.

You may also like

How to Choose a High-Frequency PCB Manufacturer in the USA?

September 10th, 2026

Choosing a high-frequency PCB manufacturer in USA requires more than comparing company names or the shortest advertised turnaround. The factory must be able to hold the approved RF laminate, dielectric thickness, copper profile, transmission-line geometry, via structure, impedance target, and verification plan as one controlled build.

A sound sourcing decision combines a verifiable US fabrication site, proven RF capability, lot-level quality evidence, relevant certifications, realistic lead time, and a quotation based on the same released design. The 15-manufacturer comparison connects those requirements to cost, USA-versus-overseas sourcing, and the information needed for a quote that can be compared line by line.

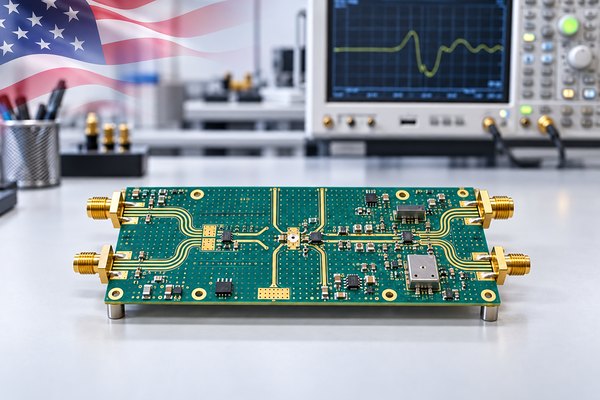
high-frequency PCB manufacturer in USA, RF circuit board on a laboratory test bench with a blended United States flag

Top 15 High-Frequency PCB Manufacturers in the USA

The 15 companies have documented US operations and RF, microwave, low-loss, or related advanced PCB capabilities. Their addresses, manufacturing capabilities, lead times, and practical advantages identify which suppliers fit a project’s material system, board complexity, volume, and schedule. For a multi-site company, the quotation should name the plant that will fabricate the board.

Manufacturer Address Manufacturing Capabilities Lead Time Practical Advantage
Sierra Circuits 1108 W Evelyn Ave, Sunnyvale, CA 94086 RF and microwave PCBs, PTFE and specialty laminates, controlled impedance, HDI and microvias, DFM, prototypes, and production support. 3–5 days standard; 24-hour expedite for eligible builds. Useful for engineering-intensive prototypes that need stackup, impedance, and manufacturability feedback before release.
AdvancedPCB 21101 E 32nd Pkwy, Aurora, CO 80011; multi-site US network Rogers, Taconic, PTFE, and other low-loss materials; mixed-material stackups; controlled impedance; HDI; via fill; and backdrilling. Quick-turn available; final date follows material and plant review. Multiple US facilities provide a broad prototype-to-production route, subject to site-specific capability confirmation.
Summit Interconnect 223 N Crescent Way, Anaheim, CA 92801; multi-site US network PTFE and low-loss materials, RF/digital hybrid stackups, controlled impedance, plated cavities and edges, controlled-depth milling, and via-stub control. 5 days or less for eligible quick-turn builds. Strong fit for complex defense, aerospace, and advanced-technology boards that need specialized processes and site-level qualifications.
Calumet Electronics 25830 Depot St, Calumet, MI 49913 RF and microwave boards, advanced and hybrid materials, HDI/HDBU, microvias, backdrilling, plated edges, dimensional control, and test support. 3–5 weeks standard; 5–7 weeks with engineering work. Domestic manufacturing with an emphasis on registration, process control, and traceable production for demanding programs.
TTM Technologies 5823 Widewaters Pkwy, Suite 1, East Syracuse, NY 13057; global multi-site company RF and microwave PCBs, hybrid dielectrics, material characterization, microvias, sequential lamination, cavities, and precision backdrilling. Quoted after site, material, and process review. Broad engineering and volume resources for programs that can match the design to a qualified TTM facility.
American Standard Circuits 475 Industrial Dr, West Chicago, IL 60185 RF/microwave, PTFE, metal-backed RF, hybrid constructions, precision machining, wire-bondable finishes, prototypes, and production. 24 hours to 10 business days for eligible builds. A focused option for RF boards that combine specialty laminates with metal-backed, machined, or bondable features.
Cirexx International 791 Nuttman St, Santa Clara, CA 95054 RF/microwave, hybrid FR-4/PTFE/Rogers stackups, controlled impedance and TDR, HDI and microvias, flex, and rigid-flex. 1-day quick turn; 10–15 days standard by technology. In-house US design, fabrication, and assembly coordination can reduce handoffs on prototype and complex interconnect work.
Royal Circuit Solutions 21 Hamilton Ct, Hollister, CA 95023 Rigid RF and high-speed boards, low-loss laminate support, controlled impedance, heavy copper, quick-turn prototypes, and production services. Quoted after laminate allocation and stackup approval. Responsive prototype service for teams that need a US build and a path from early revisions to repeat orders.
PNC Inc. 115 E Centre St, Nutley, NJ 07110 RF and microwave boards, Rogers and Taconic materials, hybrid stackups, controlled impedance, blind/buried vias, microvias, ENIG, and ENEPIG. From 24 hours; RF/hybrid timing follows engineering review. Design, bare-board fabrication, assembly, and test coordination are available through one US operation.
Custom Circuit Boards 17650 N 25th Ave, Suite 2, Phoenix, AZ 85023 Rogers, Teflon, Arlon, and Nelco materials; Rogers/FR-4 hybrids; multilayers; controlled impedance; blind/buried vias; and multiple finishes. 24-hour, 2-, 3-, 5-, or 10-day prototype options. Flexible prototype schedules for low-loss and hybrid constructions when the required material is available.
Compunetics 700 Seco Rd, Monroeville, PA 15146 RF, microwave, and millimeter-wave boards; PTFE and low-loss materials; mixed dielectrics; complex vias; cavities; edge plating; and metal-core constructions. About 5 days quick turn; about 4 weeks standard. US manufacturing with specialized RF structures and vertically coordinated electronics capabilities.
Accurate Circuit Engineering 3019 S Kilson Dr, Santa Ana, CA 92707 RF, antenna, and microwave PCBs; PTFE/FR-4 hybrids; controlled impedance; RF trenching; Rogers and Taconic materials; cavities; and TDR. 24 hours to 20 days, depending on scope. A specialized US source for prototype and low-volume RF work with unusual machining or hybrid-material needs.
Sanmina 2945 Airway Ave, Costa Mesa, CA 92626; multi-site global company Advanced rigid and rigid-flex PCBs, HDI, sequential lamination, hybrid materials, Rogers and Taconic low-loss systems, wire-bondable gold, and solid copper via fill. Quoted after the fabrication site and scope are confirmed. Suitable for complex programs that need advanced PCB fabrication integrated with broader product-manufacturing services.
Saturn Electronics Corporation 28450 Northline Rd, Romulus, MI 48174 RF and microwave boards, PTFE processing, metal-core thermal management, blind/buried vias, and via-in-pad structures. Quoted after material and delivery review. US fabrication for teams combining RF features with thermal-management or advanced-via requirements.
Imagineering 2425 Touhy Ave, Elk Grove Village, IL 60007; US prototype/assembly operation Rogers and PTFE prototypes, controlled impedance, HDI and microvias, multilayer fabrication, assembly, and production sourcing. From 24 hours; small-volume builds around 5–6 days. Fast prototype coordination, but buyers requiring domestic production should verify the factory for each production order.

What Should You Consider When Choosing a High-Frequency PCB Manufacturer in the USA?

The right manufacturer is the specific factory that can repeat the complete RF construction at the required volume and prove it with order-level records. Site identity, material control, engineering response, verification, production transfer, and commercial scope determine whether that capability is credible.

  • Actual manufacturing site: Ask which legal entity and street address will laminate, drill, plate, image, etch, finish, inspect, and electrically test the board. A US sales office, headquarters, or assembly line does not by itself prove US bare-board fabrication.
  • Complete-build capability: Give the supplier the layer count, laminate system, copper, controlled geometry, via structure, finish, tolerances, and test plan together. Separate maximum values do not prove that the factory can combine every requirement in one build.
  • Material and substitution control: Confirm the exact laminate grade, thickness, copper foil, bondply, stock status, approved alternates, and written approval process for changes. An unapproved material substitution can change impedance, loss, dimensional behavior, and qualification status.
  • Engineering response: A useful DFM response identifies conflicts, proposes measurable alternatives, and returns the finished stackup and modeled geometry for approval. A simple ā€œfiles look goodā€ response leaves the important RF assumptions unresolved.
  • Verification evidence: Match coupons, TDR, microsections, dimensional measurements, material certificates, electrical test, and RF measurements to the risks in the design. Ask who performs each test and what data will accompany the lot.
  • Prototype-to-production control: Determine whether production will use the same site, materials, tooling logic, coupons, and test methods. If the route changes, require a documented transfer and a new approval build.
  • Commercial transparency: Compare material, tooling, test, documentation, freight, duties, assembly, and nonrecurring charges under the same assumptions. A low unit price is not a saving if it excludes a required material or acceptance test.

Select only suppliers that return a named factory, an approved stackup, a test plan, a written exception list, and schedule dependencies. These five outputs make technical capability and commercial risk comparable before purchase.

What Manufacturing Capabilities Do High-Frequency PCB Manufacturers in the USA Offer?

Required manufacturing capability is determined by the electrical and physical construction: operating band, loss budget, power, layer count, via transitions, finish, and assembly interface. US suppliers differ most in how they combine low-loss materials, controlled impedance, hybrid lamination, advanced vias, precision machining, and RF-sensitive surface control.

  • RF and microwave materials: Common options include hydrocarbon-ceramic laminates, PTFE systems, low-loss epoxy materials, bondplies, and mixed-material constructions. The factory should state the design Dk, test method, frequency, dielectric tolerance, copper profile, and thickness used in its impedance model.
  • Controlled transmission lines: Manufacturers may support microstrip, stripline, grounded coplanar waveguide, differential structures, antenna features, and controlled connector launches. The returned model should show finished trace width, gap, copper thickness, dielectric thickness, and target tolerance.
  • Hybrid and multilayer lamination: RF laminate combined with FR-4 can reduce cost or add mechanical support, but the factory must control bonding, resin flow, copper balance, registration, z-axis movement, drilling, and desmear for the chosen materials.
  • Advanced vias and depth control: Blind/buried vias, microvias, via-in-pad, filled vias, backdrilling, controlled-depth milling, cavities, and plated edges can reduce stubs or support compact RF packaging. Ask for achievable tolerances on the actual board thickness and material set.
  • RF-sensitive surface control: Copper roughness, final finish, solder mask over or beside RF traces, cleanliness, flatness, and wire-bondable surfaces may affect loss, assembly, bonding, or mechanical fit. Define the acceptance method instead of relying on a finish name alone.
  • Prototype, production, and assembly: Some suppliers provide only bare boards; others coordinate components, assembly, RF connectors, shielding, programming, and functional test. If assembly is included, separate bare-board acceptance from assembled RF performance so a failure can be traced correctly.

Approve the complete process window before release: laminate and foil, finished stackup, modeled transmission-line geometry, via and machining limits, surface finish, and the prototype-to-production route. A material name alone does not show that one factory can hold every RF-critical feature in the same build.

How Can You Evaluate the Quality of High-Frequency PCBs From USA Manufacturers?

Quality is demonstrated when every RF-critical feature has an agreed measurement and a lot-specific record. The evaluation should trace the approved stackup through representative coupons, physical inspection, electrical testing, material identity, and repeat-lot trends.

  1. Approve the finished stackup: Compare the manufacturer’s proposed dielectric thicknesses, copper build, design Dk, copper profile, trace geometry, and impedance model with the released design. The observable result is a signed or revision-controlled stackup before tooling.
  2. Define representative coupons: Specify the structures, target, tolerance, panel location, test method, and reporting format for impedance coupons. A valid coupon should use the same relevant material, copper, lamination, and process as the board feature it represents.
  3. Inspect physical construction: Use microsections, plating-thickness measurements, dielectric and finished-thickness records, backdrill depth, critical dimensions, registration data, and material certificates where they address actual risk. Sampling and acceptance limits should be agreed before the order.
  4. Separate electrical tests: Bare-board continuity and isolation detect opens and shorts. TDR evaluates impedance and discontinuities. Insertion loss, return loss, phase, coupling, resonant behavior, and assembled function require different fixtures, reference planes, frequency ranges, and acceptance limits.
  5. Review lot traceability: Check the laminate lot, date code, traveler, inspection results, equipment or test identity where required, certificate of conformance, and documented deviations. The records should point to the same site and revision named on the purchase order.
  6. Compare repeat lots: Track impedance, critical dimensions, plating, yield, defects, and RF data across lots. A trend toward a limit is more actionable than a single pass/fail value because it can trigger correction before field performance changes.

A complete quality record lets engineering compare the delivered board with the approved model and isolate whether a deviation came from material, fabrication, assembly, the test fixture, or the circuit design. If the records cannot support that diagnosis, the acceptance plan is incomplete.

Which Certifications Matter When Choosing a High-Frequency PCB Manufacturer in the USA?

Certifications matter only when their site, scope, and validity match the factory and end market named on the purchase order. Use ISO 9001 for general quality-system screening, then add aerospace, medical, automotive, defense, UL, or customer approvals only when the program requires them.

  • Match the address and legal entity: Compare the certificate name, site, scope, issue date, expiration date, and standard revision with the factory on the quotation. A corporate certificate may not include every facility.
  • Separate quality systems from product acceptance: A management-system certificate shows that a process framework has been audited; it does not prove that one RF lot met impedance, loss, material, dimensional, or reliability requirements.
  • Name the performance specification: IPC-6018D addresses qualification and performance requirements for microwave printed boards. State the applicable class, board type, addendum, deviations, coupons, and acceptance details in the procurement documents.
  • Check program-specific obligations: Aerospace, defense, medical, automotive, telecom, and controlled-data programs may require different approvals, record retention, traceability, source restrictions, or change notification. Translate those needs into purchase-order clauses.
  • Verify continuing validity: Review certificate status before supplier approval and again when the site, scope, ownership, or process route changes. Require notice when a relevant approval is suspended, expires, or no longer covers the product.

Treat certification as an entry requirement and lot evidence as acceptance proof. Approve the supplier only when the certificate covers the named site and the purchase order separately defines the board’s measurable quality requirements.

How Long Does High-Frequency PCB Manufacturing Usually Take in the USA?

US prototype lead time can range from one to five working days for a material-ready, straightforward board; hybrid laminates, HDI, special finishes, RF testing, or customer documentation can extend the build to several weeks. A credible schedule begins after material allocation and engineering release and ends at the agreed delivery point.

  • Engineering closure: Incomplete stackup, impedance, material, finish, panel, test, or documentation requirements delay release. Ask the supplier to list every open item and identify the date on which the manufacturing clock starts.
  • Material readiness: ā€œSupported materialā€ is not the same as material reserved for the order. Confirm grade, thickness, copper, minimum purchase, stock location, shelf life, and procurement time before accepting an expedited promise.
  • Process route: Extra lamination cycles, laser drilling, via fill, backdrill, cavities, edge plating, sequential inspection, outsourced finishes, or RF testing add dependent operations. The schedule should identify the critical path and any outside service.
  • Inspection and documentation: Coupons, microsections, dimensional reports, first-article inspection, source inspection, RF data, and customer record review need planned capacity. A board can be physically complete while the required acceptance package is not.
  • Prototype-to-production transition: Production may use a different panel, material lot, tooling set, capacity window, or factory. Ask what transfers unchanged and which features require another approval build.
  • Shipping endpoint: Distinguish fabrication complete, ex-works ship date, domestic delivery, and arrival at your assembly site. The comparison should include weekends, freight method, customs when applicable, and receiving inspection.

Accept a lead time only when it includes engineering release, material allocation, fabrication, inspection, shipment, and delivery milestones. This exposes the step responsible for delay and prevents a fast factory-complete date from being mistaken for the customer’s arrival date.

How Much Does High-Frequency PCB Manufacturing Cost in the USA?

High-frequency PCB cost is built from the approved construction, not a generic price per board. Laminate usage, layer count, RF geometry, special processes, yield risk, testing, quantity, documentation, and delivery scope determine whether two quotations describe the same product.

  • Laminate and panel utilization: Material grade, thickness, copper foil, bondply, panel size, nesting efficiency, minimum purchase quantity, scrap, and shelf life determine more than the raw price per sheet.
  • Construction complexity: Hybrid dielectrics, high layer count, multiple lamination cycles, thin cores, tight dielectric control, copper balance, and difficult registration increase process steps and can reduce yield.
  • Geometry and special features: Fine RF gaps, filled microvias, backdrilling, cavities, plated edges, controlled-depth routing, metal backing, selective solder mask, and bondable finishes add tooling, processing, or inspection.
  • Testing and records: TDR coupons, microsections, critical-dimension reports, RF test vehicles, third-party testing, first-article inspection, lot traceability, and customer-specific documentation should appear as included scope or separate charges.
  • Order profile: Prototype setup, production quantity, recurring lot size, forecast stability, expedite priority, change frequency, assembly scope, and component sourcing affect unit and nonrecurring costs differently.
  • Total landed cost: Add engineering time, freight, insurance, duties, inventory, schedule risk, requalification, corrective action, and communication overhead. A higher fabrication quote can be the lower-cost choice when it prevents a redesign or delayed system test.

A valid price comparison uses the same revision, material, tolerances, tests, documentation, quantity, and delivery terms. Recalculate any quote that substitutes a material, relaxes a limit, omits evidence, or changes the factory before choosing the lowest total.

USA vs Overseas High-Frequency PCB Manufacturers: What Is the Difference?

Compare USA and overseas factories on lead time, total cost, quality control, engineering support, production-location requirements, and capacity. Both routes should be judged against the same released stackup, acceptance evidence, quantity, and delivery endpoint.

Decision Factor USA High-Frequency PCB Manufacturers Overseas High-Frequency PCB Manufacturers
Lead Time Shorter domestic transit and same-time-zone engineering can speed prototypes and revisions. Longer freight and customs time; production can scale efficiently after design release.
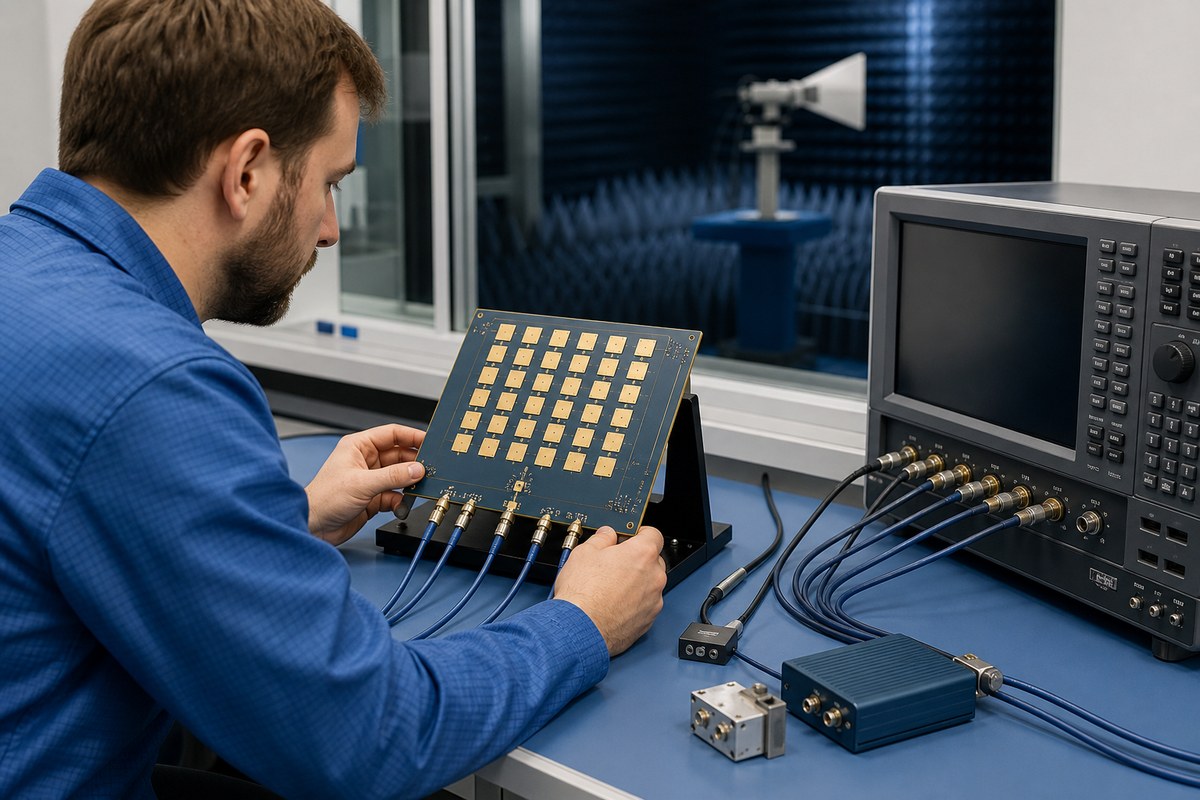
Cost Unit prices are often higher, but freight, duties, and communication costs are lower. Unit prices can be lower at volume; include freight, duties, inventory, and rework.
Quality Control Easier site access and first-article review; verify process data and lot records. Quality can be equivalent when controls, test data, and traceability are qualified.
Engineering Support Same-time-zone access can shorten DFM, stackup, and deviation decisions. Requires disciplined revision control, response times, and written technical records.
Production Location Fits programs requiring domestic fabrication or controlled US data access. Use when offshore production and data transfer are permitted and disclosed.
Capacity and Supply Useful for low-volume, high-mix, or regulated work; capacity may be limited. Often offers more volume flexibility; control materials, transfers, and requalification.

What Information Do You Need to Provide for a High-Frequency PCB Quote?

A quotation from a high-frequency PCB manufacturer in USA is comparable only when every supplier receives the same design revision, stackup, material, electrical limits, inspection plan, quality requirements, quantities, and delivery terms. The RFQ should also require each factory to return its assumptions, exceptions, and proposed process route.

  1. Release package: Provide Gerber, ODB++, or IPC-2581 data as applicable; drill files; fabrication drawing; netlist; revision; units; quantities; panel preference; and document precedence. Require the supplier to confirm one quoted revision.
  2. Electrical requirements: State the operating band, impedance structures and tolerances, loss or phase limits where applicable, power concerns, controlled RF features, and the acceptance method for each requirement.
  3. Material definition: Name the laminate, bondply or prepreg, dielectric thickness, copper foil and profile, approved alternates, design Dk or model assumptions, finish, solder mask, and substitution-approval rule.
  4. Physical construction: Include the proposed stackup, finished copper, critical transmission-line dimensions, reference planes, via structures, backdrill, cavities, edge features, connector launches, controlled dimensions, and tolerances.
  5. Inspection and test: Define coupons, TDR, microsections, electrical test, critical dimensions, RF test vehicles or data, sampling, limits, report format, and treatment of a nonconforming result.
  6. Quality and traceability: Specify the applicable performance document, certification or customer approval, material and lot traceability, certificate of conformance, record retention, first-article needs, change notice, and approved site.
  7. Commercial scope: State prototype and production quantities, forecast, target delivery date and location, Incoterm, packaging, assembly and component scope, documentation package, freight assumptions, and quote validity.
  8. Required response: Ask for the named factory, material status, finished stackup, modeled geometry, process route, test plan, lead-time start and endpoint, tooling charges, unit prices, exclusions, and a line-by-line exception list.

A complete RFQ should return a named factory, material status, finished stackup, modeled geometry, test plan, schedule, price breakdown, and exception list. Resolve any missing output before technical or commercial approval.

FAQs About High-Frequency PCB Manufacturers in the USA

These five questions resolve common qualification gaps: RF versus high-speed design, FR-4 limits, proof of US fabrication, the scope of TDR, and prototype-to-production transfer.

Q1: Is a high-frequency PCB the same as a high-speed PCB?

A1: They overlap but emphasize different risks. High-frequency boards focus on RF or microwave behavior such as loss, impedance, radiation, coupling, and phase. High-speed digital boards focus on edge rate, timing, reflections, crosstalk, and power integrity. A mixed-signal board may require both disciplines, so the RFQ should name the actual structures and acceptance criteria.

Q2: Can standard FR-4 be used for a high-frequency PCB?

A2: Yes, when route length, frequency, loss budget, impedance tolerance, temperature, and unit-to-unit consistency leave enough margin. Model the real interconnect and compare predicted and measured performance. Use a lower-loss or more stable laminate when FR-4 attenuation or variation consumes the available margin.

Q3: Does a US address prove that the PCB is manufactured in the USA?

A3: No. The address may belong to a headquarters, sales office, engineering group, warehouse, or assembly site. Require the quotation and purchase order to identify the facility that performs bare-board fabrication and disclose any subcontracted or offshore operations.

Q4: Is a TDR report enough to qualify an RF PCB manufacturer?

A4: No. TDR can evaluate characteristic impedance and discontinuities under the agreed method, but it does not prove insertion loss, return loss, phase, material identity, plating reliability, or assembled RF function. Pair it with the physical, material, dimensional, and RF evidence required by the design.

Q5: Should the same factory build prototypes and production boards?

A5: Using the same factory can reduce transfer variables, but it is not mandatory. If production moves, freeze the material, stackup, artwork compensation, tooling assumptions, coupons, test methods, limits, and approved deviations, then requalify the transferred build before volume release.
Choosing a high-frequency PCB manufacturer in the USA requires one factory to match the RF material system, complete process route, quality evidence, certifications, lead time, cost, and production controls defined by the released design. The manufacturer table and USA-versus-overseas comparison narrow the field, while a complete RFQ confirms the stackup, tests, exceptions, schedule, and price under one revision.

If you need an overseas manufacturer that can produce high-frequency PCBs, contact us at sales@bestpcbs.com.

You may also like

4 Layer Array Antenna PCB: Stackup, RF Layout and Manufacturing

August 19th, 2026

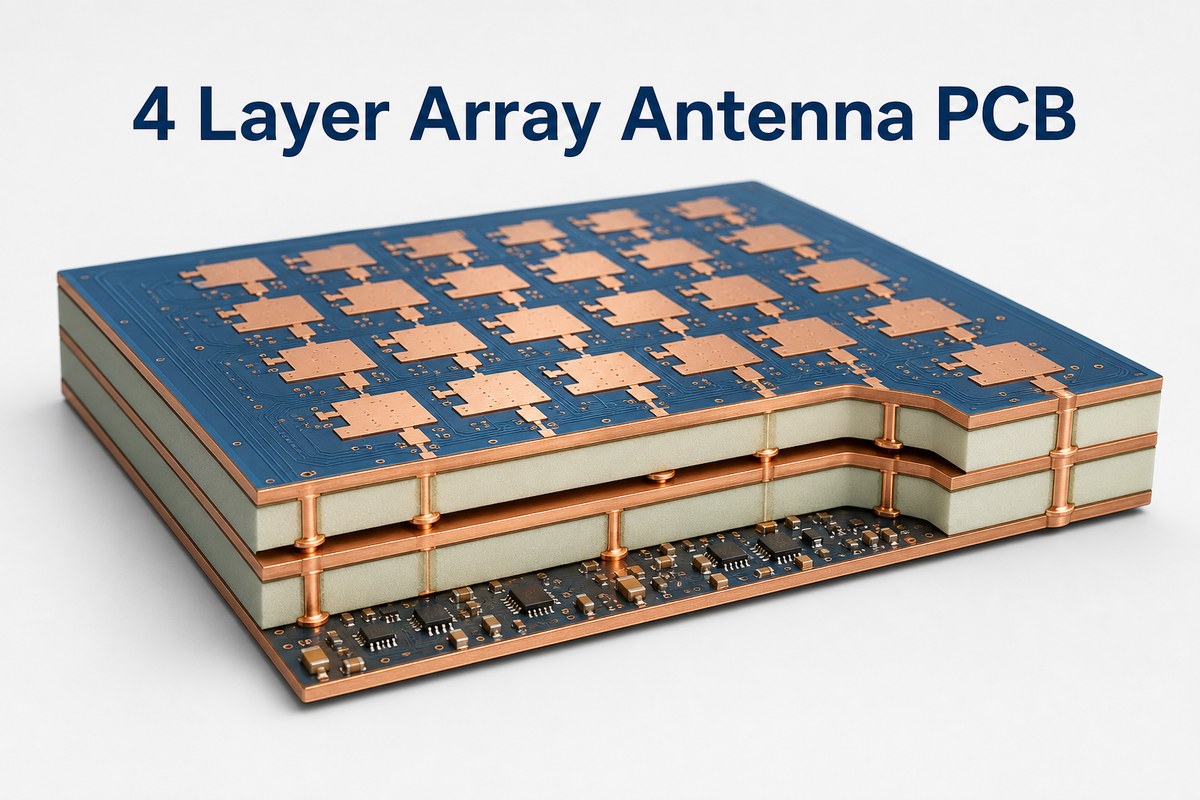
A 4 layer array antenna PCB combines antenna elements, controlled RF paths, reference planes and support circuitry in one board. Its measured performance depends on the manufactured stackup as much as the simulated antenna geometry.

Here, ā€œ4 layerā€ means four copper layers. It does not describe a four-element or 4 Ɨ 4 array. The final construction must match the operating frequency, antenna architecture and validation plan.

EBest Circuit provides multilayer RF and high-frequency PCB fabrication, impedance-control support, prototypes, small-volume production and PCB assembly. Send us your stackup, material requirements, impedance table, quantity and production data for review and quotation.

3D cutaway of a 4 layer array antenna PCB with antenna patches and four visible copper layers

What Is a 4 Layer Array Antenna PCB?

A four-layer array antenna PCB is an RF board with several coordinated radiating elements and a shared feed or beamforming network. The copper layers divide antenna, reference, power, control and component-routing functions.

A passive array may use a fixed feed network. A phased array antenna PCB also controls channel phase and often amplitude. PCB layer count and antenna element count are separate design decisions.

Term Meaning
4 layer PCB Four copper layers separated by dielectric materials
Array antenna PCB Multiple elements operating as one coordinated aperture
Phased array antenna PCB An array with controlled channel phase and usually amplitude

What Is a Phased Array Antenna, and How Does It Work?

A phased array antenna forms and steers a beam by controlling the relative phase of its elements. Constructive interference strengthens radiation in the target direction, while cancellation shapes sidelobes and nulls.

How does a phased array antenna work on a PCB? Each RF channel adds delay and loss through its trace, dielectric, vias, components and connector launch. Small physical differences therefore become channel errors.

Calibration can correct limited residual error, but it cannot replace repeatable PCB construction. Large mismatches reduce calibration margin and increase sensitivity to temperature and production variation.

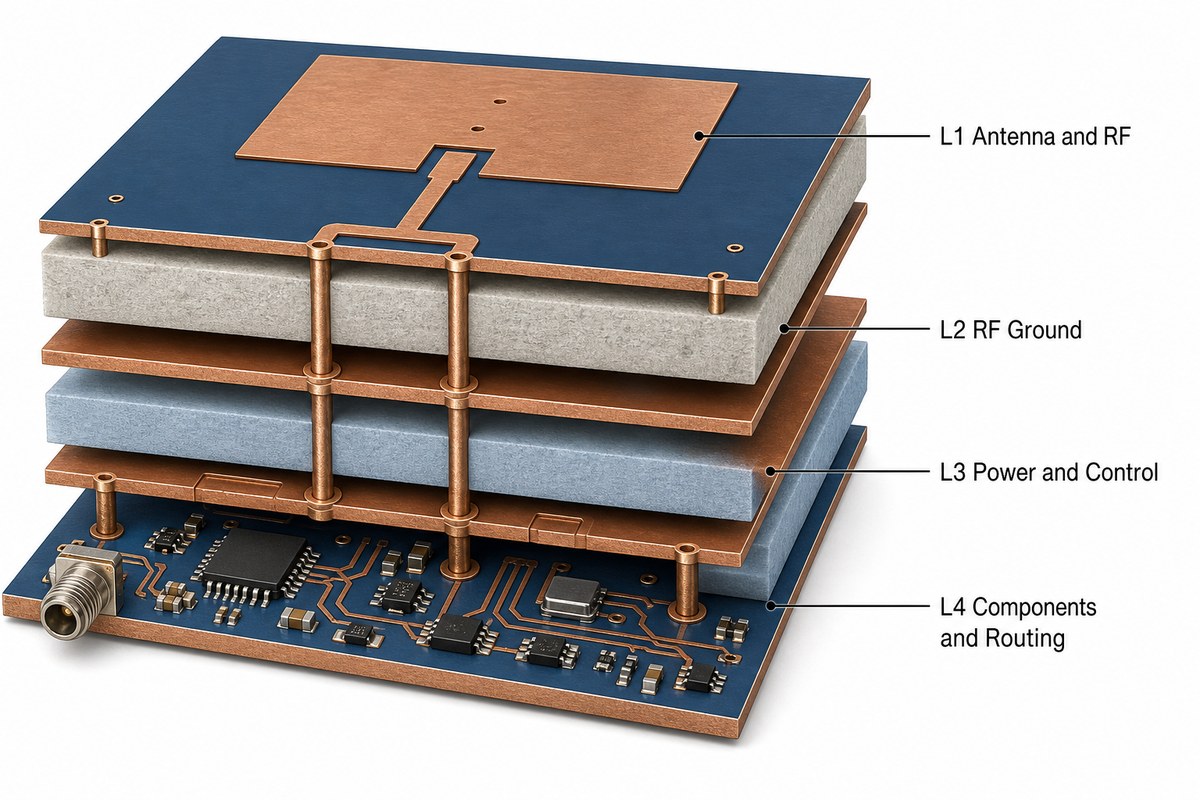
What Does Each Copper Layer Do?

Each copper layer needs one clear primary role before routing starts. The arrangement below is a practical baseline, not a universal antenna stackup.

Layer Typical Role Main Check
L1 Patch elements, microstrip feeds or RF components Element geometry and spacing to reference
L2 Continuous RF ground or reference Return-path continuity
L3 Power, bias and low-speed control Isolation from sensitive RF regions
L4 RF components, exits and control routing Component density and transition geometry
Exploded four-layer antenna PCB stackup with RF ground, power control and component layers

Aperture-coupled and proximity-coupled antennas may assign the layers differently. Confirm finished dielectric thickness, processed copper and coupling geometry in the electromagnetic model before freezing the layout.

Which Materials and Copper Profiles Suit the Operating Frequency?

The laminate must keep dielectric behavior and conductor loss predictable across the operating band. Frequency matters, but bandwidth, efficiency, phase consistency, availability and fabrication process also affect the choice.

FR-4 may suit lower-frequency or narrowband designs when its measured variation and loss are acceptable. Microwave and millimeter-wave arrays often need controlled design Dk, low Df, stable thickness and suitable copper roughness.

  • Use supplier-supported design Dk at the relevant frequency.
  • Specify finished dielectric thickness.
  • Include copper roughness in loss modeling.
  • Confirm laminate, bondply, foil and finish compatibility.
  • Keep one approved construction from prototype through production.

How Should Feed Lines, Reference Planes and Vias Be Designed?

RF feeds need field-solved geometry and an uninterrupted reference path. A nominal 50 Ī© target does not define one trace width because impedance changes with Dk, dielectric thickness, copper and local geometry.

Keep bends, tapers, pads and layer transitions consistent across matched channels. Avoid plane splits beneath critical paths, and place return vias close to signal transitions without disturbing the antenna field.

Via fencing can reduce coupling, but arbitrary dense stitching can detune the antenna. Treat via stitching as part of the RF model rather than a final layout cleanup step.

How Should Element Spacing and Channel Symmetry Be Controlled?

Array pitch must follow wavelength, scan range and element pattern. It is not a generic PCB spacing value. Edge elements also need separate review because they see a different electromagnetic environment.

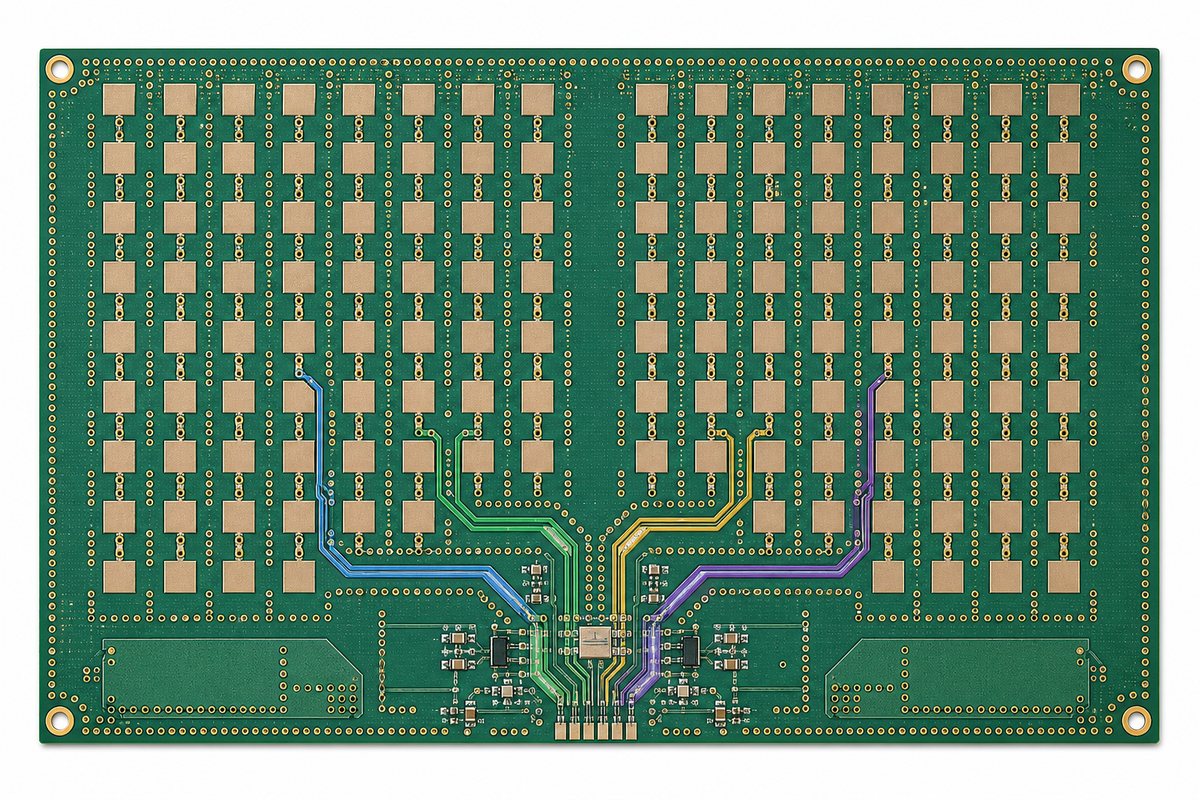
Matched channels need the same reference plane, transition count, bend geometry and connector launch. Equal trace length alone cannot compensate for different vias, clearances or nearby copper.

  • Verify one unit cell before replication.
  • Lock antenna, feed and ground geometry together.
  • Keep solder mask conditions consistent around each element.
  • Model packages and connectors that add phase or loss.
Top view of a planar antenna array PCB with four highlighted matched RF feed channels

Which Fabrication Tolerances Need Explicit Control?

Control dimensions that change impedance, resonance, coupling or channel balance. General PCB tolerances may be too broad for RF-critical geometry, so the fabrication drawing must identify those features.

Feature RF Effect Required Record
Finished dielectric thickness Impedance, coupling and resonance Approved finished stackup
RF trace and gap geometry Impedance and phase delay Impedance table and coupon plan
Patch size and registration Resonance and element consistency Critical-dimension notes
Copper thickness and profile Loss and impedance Approved foil and finished copper
Via geometry Transition inductance and return path Hole, pad and antipad requirements

Use the impedance control PCB documentation as a starting point, then add antenna-specific dimensions. Confirm the producible stackup before final RF tuning.

When Is a Four-Layer Stackup Not Enough?

Four layers are insufficient when routing, isolation, power distribution or thermal paths disturb the antenna aperture and its references. Adding layers can reduce compromise, but it changes transitions, thickness and cost.

Consider more layers for dense beamformer fanout, several isolated RF paths, multiple power rails, high-speed control, buried aperture routing or separate shielding cavities. Hybrid construction may help when RF and control regions need different materials.

The choice must follow the complete layout and EM model. Moving a path into stripline may improve isolation but add via loss, so evaluate the stripline versus microstrip trade-off at the project frequency.

How Should Assembly and Thermal Design Protect RF Performance?

Assembly must preserve the grounding, geometry and channel balance established by the bare PCB. Use package-specific land patterns and stencil design, especially under exposed pads and dense RF components.

Control solder volume and voiding where the package requires it. Ground and thermal vias must support the component without creating an unmodeled coupling path near the antenna.

Plan heat removal before final RF routing. Uneven temperature can shift gain and phase, while heat spreaders and mechanical supports can disturb the aperture if they enter an RF keepout region.

How Should the Board Be Tested Before OTA Validation?

Verify construction and RF paths before over-the-air testing. OTA measurements evaluate the radiated system, but they are inefficient for finding an open via, incorrect stackup or poor connector launch.

  1. Review material records and the finished stackup.
  2. Complete continuity and isolation testing.
  3. Inspect registration, RF features, mask and vias.
  4. Measure representative impedance coupons.
  5. Use a VNA for return loss and channel comparison.
  6. Run planned OTA pattern and scan validation.
  7. Compare several boards from the same revision.
RF engineer testing an array antenna PCB with a VNA before OTA validation

Coupons cannot prove patch resonance, coupling or beam shape. Keep coupon, VNA and OTA results linked to the same board revision and production lot.

FAQ About 4 Layer Array Antenna PCB Projects

Can FR-4 be used for an array antenna PCB?

Yes, when measured dielectric variation and loss meet the operating-band requirement. Do not assume that every FR-4 grade behaves the same.

Should solder mask cover the patch elements?

Only when the model includes its dielectric effect. An unplanned coating change can shift resonance.

Which surface finish is best?

No finish is universal. Compare RF loss, thickness, planarity, solderability and assembly needs before approval.

Can impedance coupons verify the antenna?

No. Coupons verify representative transmission lines, while the complete antenna still needs VNA and OTA validation.

Does the PCB manufacturer need OTA equipment?

Not necessarily. The manufacturer controls construction and electrical integrity; the antenna team can own final calibration and OTA acceptance.

How Can EBest Circuit Support Your Array Antenna PCB?

At EBest Circuit, we support multilayer RF and high-frequency PCB fabrication, controlled impedance, prototypes, small-volume production and PCB assembly. Our PCB checks can include electrical testing, impedance testing and micro-section inspection.

Send your Gerber or ODB++ data, drill files, stackup, target frequency, materials, impedance requirements, quantity and assembly package to sales@bestpcbs.com. We will review the manufacturing data and prepare a quotation.

You may also like

Rogers RT/duroid 5880 PCB: Dk, Loss Tangent, Thickness & Price Guide

August 18th, 2026

A Rogers RT/duroid 5880 PCB uses a low-loss, glass-microfiber-reinforced PTFE laminate for RF and microwave circuits. Its low dielectric constant and dissipation factor support transmission lines, antennas, radar circuits, and RF feed networks where insertion loss, impedance, or phase stability must be controlled.

That does not mean every wireless PCB needs RT/duroid 5880. For short RF traces or less demanding frequencies, FR4 or another RF laminate may offer a better cost-performance balance. The useful question is whether the electrical benefit of RT/duroid 5880 solves a real design constraint.

At EBest Circuit, we support Rogers RT/duroid 5880 PCB prototypes and production builds with stackup review and controlled-impedance fabrication. Send your Gerber or ODB++ files, stackup, impedance requirements, quantity, and test notes to sales@bestpcbs.com for engineering review.

Rogers RT/duroid 5880 PCB low-loss RF material guide illustration

What Is Rogers RT/duroid 5880 PCB?

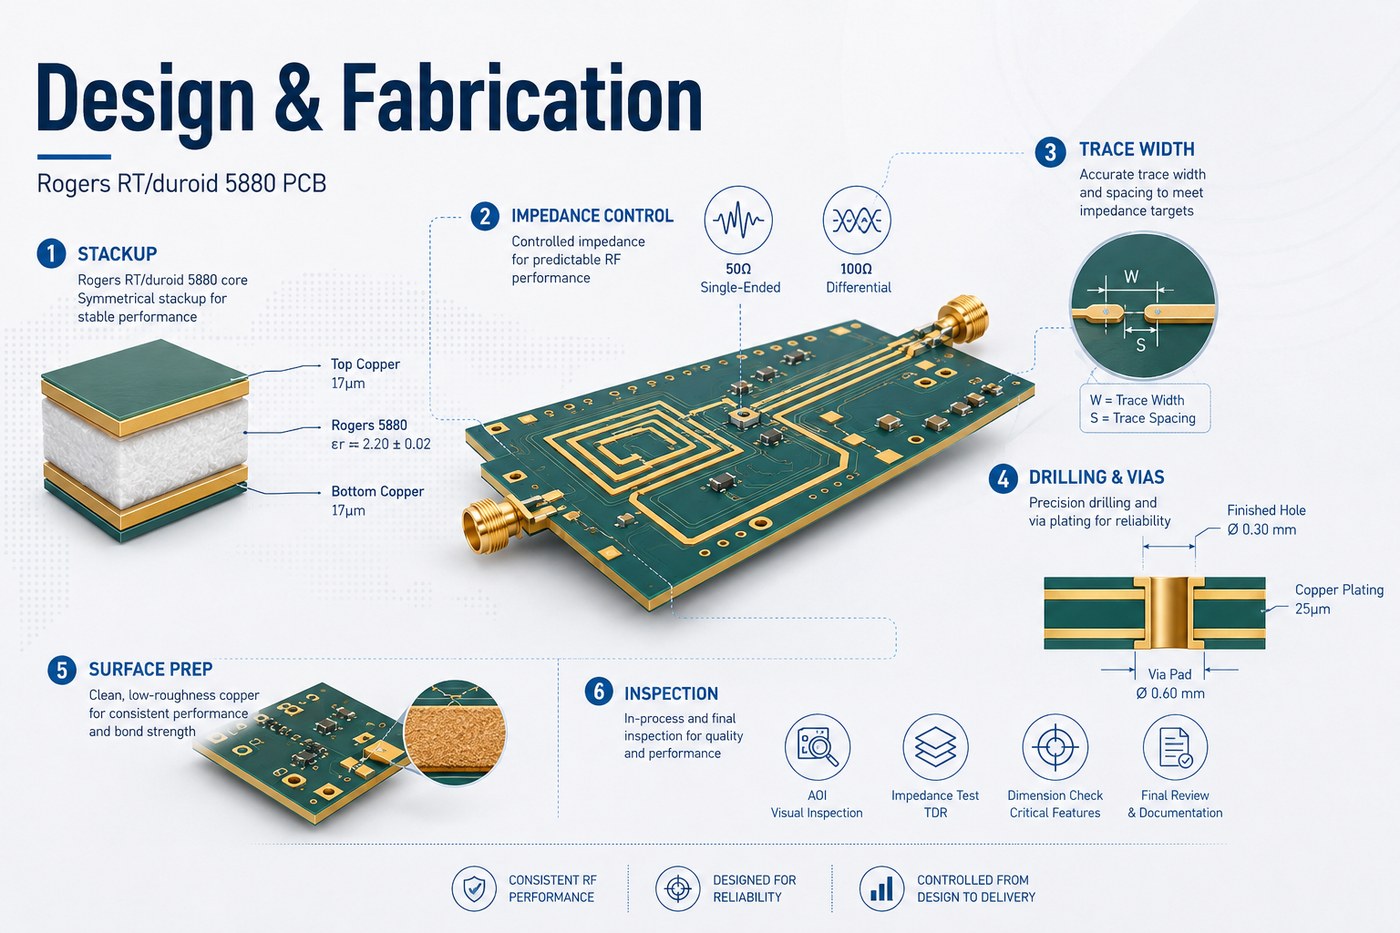
A Rogers RT/duroid 5880 PCB uses RT/duroid 5880 laminate as part or all of its dielectric structure. Rogers describes the material as a PTFE composite reinforced with randomly oriented glass microfibers.

Unlike standard FR4, the dielectric in an RF PCB is part of the electrical system. Its Dk, thickness, loss tangent, and copper interface affect transmission-line behavior.

RT/duroid 5880 is therefore most useful when the design needs:

  • low dielectric loss over RF or microwave signal paths;
  • predictable microstrip or stripline impedance;
  • phase consistency between RF channels;
  • a low-Dk substrate for antenna or transmission-line geometry;
  • repeatable high-frequency electrical behavior.

For a simple wireless control board with only a short antenna feed, this performance may be unnecessary. For a microwave network or phase-sensitive antenna circuit, the material can directly affect the finished RF response.

What Are the Key Rogers RT/duroid 5880 Datasheet Specifications?

The Rogers RT duroid 5880 datasheet values below are the properties most relevant to PCB design, stackup planning, and fabrication.

For a broader material-selection framework, see our PCB material guide.

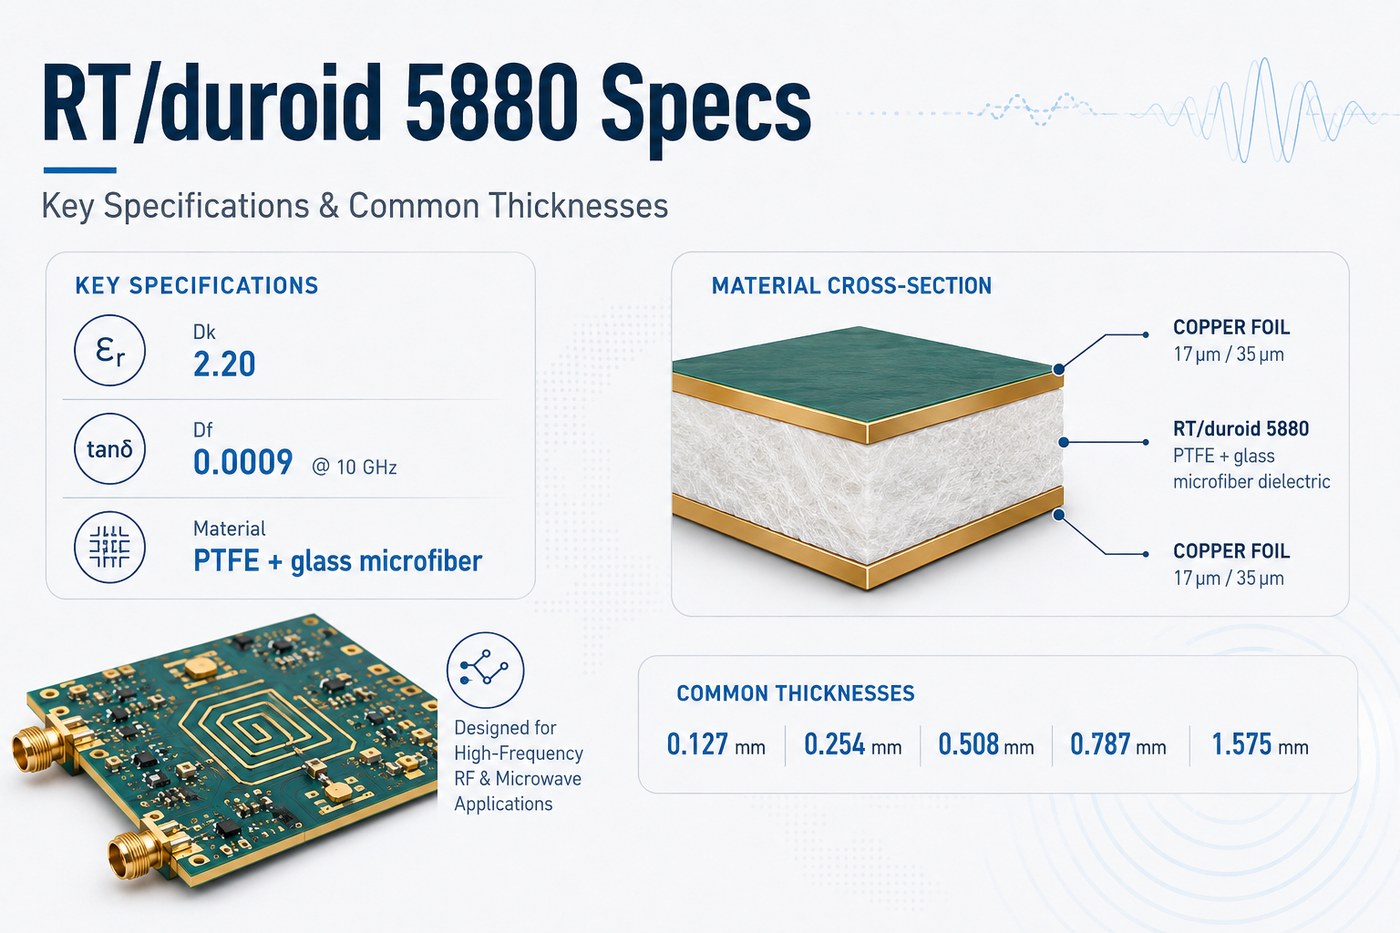
Property RT/duroid 5880 Typical Value Why It Matters
Material Glass-microfiber-reinforced PTFE Determines RF and processing behavior
Process Dk 2.20 ± 0.02 Indicates dielectric consistency
Design Dk 2.20 Used for circuit design and modeling
Dissipation factor 0.0009 at 10 GHz Affects dielectric insertion loss
Moisture absorption 0.02% Relevant to environmental stability
Thermal conductivity 0.20 W/mĀ·K Useful for thermal review
CTE X / Y / Z 31 / 48 / 237 ppm/°C Important for mechanical and via reliability
Density 2.2 g/cm³ Relevant to mechanical design
Copper peel strength 5.5 N/mm Indicates copper adhesion performance
Flammability UL94 V-0 Material flammability classification

These are published laminate values, not automatic tolerances for a finished PCB. A fabrication drawing should separately define the requirements that need production control, such as dielectric thickness, copper weight, finished thickness, impedance, and dimensional tolerances.

RT/duroid 5880 specifications and common dielectric thicknesses

What Is the Dielectric Constant of Rogers RT/duroid 5880?

The published Rogers RT duroid 5880 dielectric constant is 2.20 ± 0.02 for process Dk, with a design Dk of 2.20.

For an RF designer, Dk affects more than impedance. It also influences:

  • signal propagation velocity;
  • wavelength inside the PCB;
  • microstrip and stripline dimensions;
  • resonator dimensions;
  • antenna geometry;
  • electrical phase length.

If dielectric thickness or Dk changes after layout is completed, a transmission line may no longer meet its original impedance or phase target.

This is why a 50 Ī© note on a drawing is not enough for a high-frequency board. The manufacturer should also know the intended laminate thickness, copper thickness, RF structure, and impedance tolerance.

For sensitive microwave circuits, prototype validation is useful even when the nominal Dk is known. Actual performance still reflects the complete transmission structure rather than one datasheet number.

What Is the Loss Tangent of Rogers RT/duroid 5880?

The published Rogers RT duroid 5880 loss tangent, or dissipation factor, is 0.0009 at 10 GHz.

A low Df reduces the dielectric contribution to transmission loss. That becomes more valuable as frequency increases, RF routes become longer, or a design contains multiple cascaded transmission structures.

Typical examples include:

  • microwave feed networks;
  • RF filters and couplers;
  • long antenna feed lines;
  • radar channels;
  • phase-sensitive RF networks.

Low Df does not eliminate every source of loss. Copper profile, line geometry, connectors, launches, vias, surface finish, and discontinuities still contribute to the total insertion-loss budget.

In practice, there is little value in specifying a very low-loss laminate while leaving the RF stackup or transition geometry poorly controlled.

What Thicknesses Are Available for Rogers RT/duroid 5880 PCB?

Common Rogers RT duroid 5880 thickness options include:

Nominal Thickness Metric Equivalent
0.005 in 0.127 mm
0.010 in 0.254 mm
0.020 in 0.508 mm
0.031 in 0.787 mm
0.062 in 1.575 mm

These figures refer to the dielectric laminate thickness, not necessarily the finished PCB thickness. Copper foil, plating, bonding layers, solder mask, and multilayer construction all affect final board thickness.

Thickness also changes RF geometry. For the same impedance target, a different dielectric height usually requires a different trace width.

Before releasing RF artwork, confirm:

  • laminate thickness;
  • copper thickness;
  • impedance target and tolerance;
  • intended transmission-line structure;
  • manufacturable trace width.

Changing one of these after the layout is frozen can force the RF traces to be redesigned.

Why Is RT/duroid 5880 Used for High-Frequency PCB Designs?

RT/duroid 5880 is attractive when the circuit needs low dielectric loss and predictable RF behavior.

Its main engineering advantages are straightforward:

  • Low Dk: supports specific transmission-line and antenna geometries.
  • Low Df: reduces dielectric loss at microwave frequencies.
  • Good dielectric consistency: useful for impedance and phase-sensitive layouts.
  • Low moisture absorption: helps limit electrical changes caused by humidity.
  • PTFE-based construction: suited to demanding microwave and broadband circuits.

There is also a practical limit.

If a circuit has short RF paths, relaxed loss requirements, and strong cost pressure, another laminate may be sufficient. RT/duroid 5880 should solve a measurable RF problem rather than simply make the material specification look more advanced.

Where Is Rogers 5880 PCB Commonly Used?

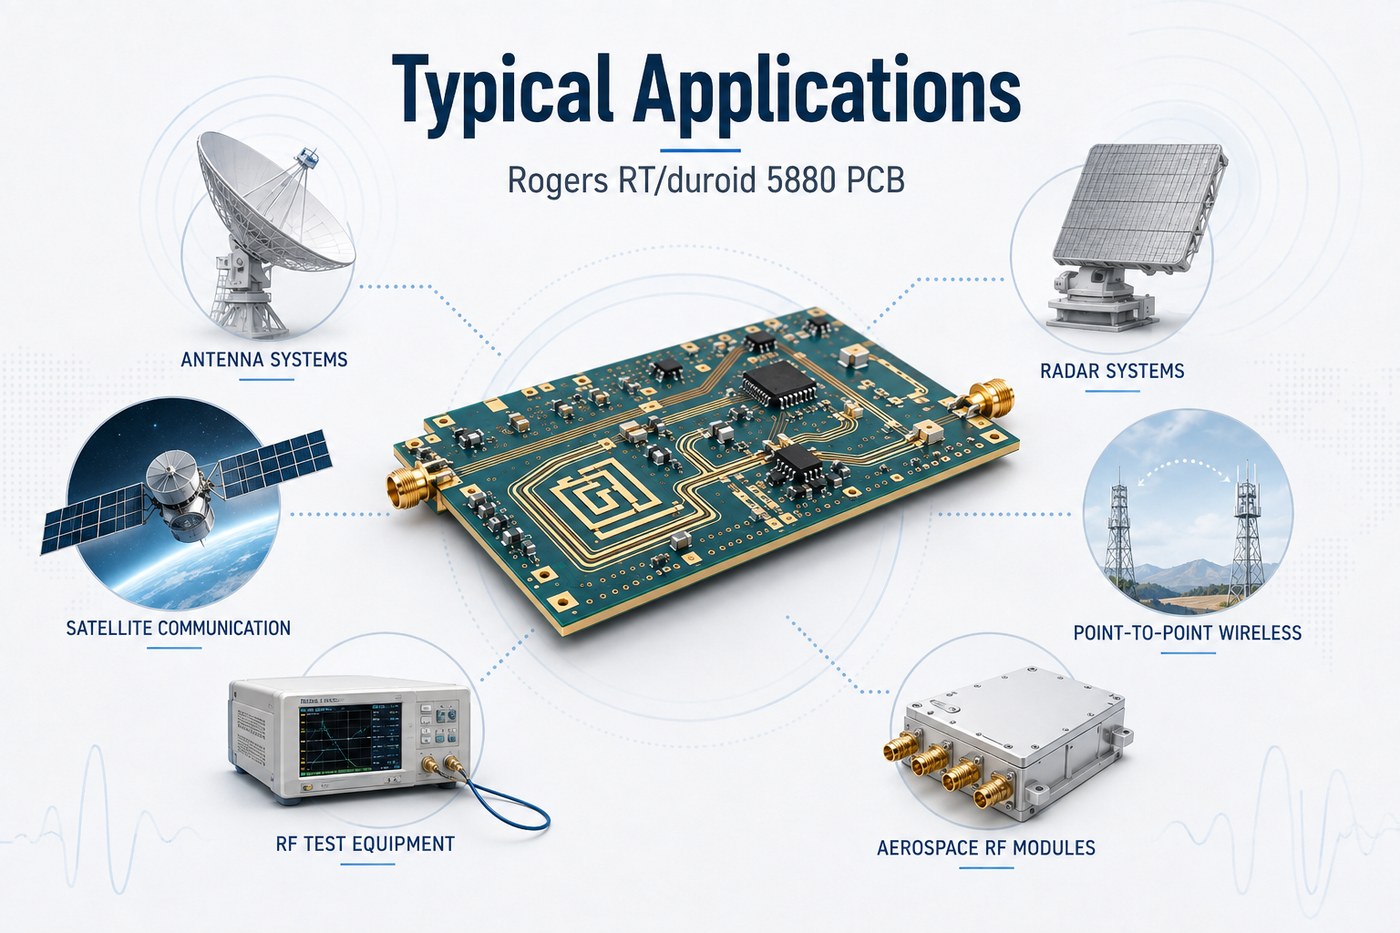
RT/duroid 5880 is commonly associated with RF and microwave circuits where the transmission structure is sensitive to dielectric loss or Dk variation.

Typical applications include:

  • microwave antenna feed boards;
  • phased-array antenna networks;
  • radar front-end circuits;
  • point-to-point wireless links;
  • satellite communication modules;
  • microwave filters and couplers;
  • RF test and measurement fixtures;
  • aerospace RF assemblies;
  • low-loss microstrip and stripline circuits.

The application name alone should not determine material choice. A short 2.4 GHz antenna trace inside a commercial product has very different requirements from a multi-channel microwave array where small phase errors accumulate across many RF paths.

A useful selection question is: what performance parameter becomes unacceptable if a lower-cost laminate is used?

If there is no clear answer, RT/duroid 5880 may be over-specified.

Typical Rogers RT/duroid 5880 PCB applications including radar antennas and satellite communication

Rogers RT/duroid 5880 vs 5880LZ vs 5870: Which Should You Choose?

These materials belong to the RT/duroid family, but they are not interchangeable.

Property RT/duroid 5880 RT/duroid 5880LZ RT/duroid 5870
Process Dk 2.20 ± 0.02 2.00 ± 0.04 2.33 ± 0.02
Design Dk 2.20 2.00 2.33
Df at 10 GHz 0.0009 0.0021 0.0012
Density 2.2 g/cm³ 1.4 g/cm³ 2.2 g/cm³
Main Selection Driver Very low dielectric loss Low density and low Dk Low-loss PTFE with higher Dk

Choose RT/duroid 5880 when very low dielectric loss and a Dk around 2.20 suit the RF design.

Choose 5880LZ when lower weight is a major mechanical requirement. Its lower density can be useful in weight-sensitive aerospace and antenna applications.

Choose 5870 when its 2.33 Dk fits the RF geometry or when an existing design is already qualified around that material.

Do not substitute one for another without recalculating the RF structure. A Dk change can alter impedance, resonant dimensions, and electrical length.

What Design Rules Matter for Rogers RT/duroid 5880 PCB?

The first rule is to design around the real manufacturing stackup, not a generic ā€œRogers 5880ā€ material label.

Our PCB board stackup guide explains how copper and dielectric layers work together before routing is finalized.

For line-structure tradeoffs, compare the routing guidance in our stripline vs microstrip guide.

For controlled RF lines, review these items together:

  • dielectric height;
  • trace width;
  • copper thickness;
  • copper type or profile;
  • reference-plane position;
  • surrounding dielectric structure;
  • impedance tolerance.

RF via transitions also deserve attention. A signal via with nearby ground vias behaves differently from an ordinary low-frequency interconnect. At higher frequencies, launch geometry, anti-pad size, return-current path, and via stub length can affect performance.

For phase-matched channels, equal CAD length alone is not enough. The dielectric environment and transitions along each path should remain as similar as practical.

It is also useful to confirm material availability before freezing the layout. If the final production dielectric thickness differs from the value used in simulation, controlled-impedance traces may need to be resized.

What Should Be Controlled During RT/duroid 5880 PCB Fabrication?

RT/duroid 5880 is a PTFE-based material, so it cannot simply be processed as if it were standard FR4.

The main fabrication controls are:

Process Key Control
Material handling Prevent scratches, dents, contamination, and distortion
Surface preparation Avoid aggressive abrasion on soft PTFE laminate
Drilling Control drill condition, feed, speed, stack height, and tool life
Hole-wall treatment Prepare PTFE surfaces correctly before metallization
Plating Maintain reliable adhesion and hole-wall coverage
Etching Control finished RF trace width
Routing Support the softer laminate during machining
Lamination Match bonding system and press process to the stackup
Inspection Verify dimensions, continuity, impedance, and critical RF geometry

Drilling and hole-wall treatment deserve particular attention because PTFE behaves differently from epoxy-glass material. Poor processing can create smear, plating adhesion problems, or dimensional issues around drilled features.

Etching accuracy matters as well. A trace that is electrically critical should be controlled according to its finished width, not merely the CAD artwork dimension.

For prototype projects, we can review the proposed stackup, copper specification, via construction, impedance requirement, and mechanical features before fabrication. This is especially useful when an RF simulation moves into its first physical build.

Rogers RT/duroid 5880 PCB design and fabrication control illustration

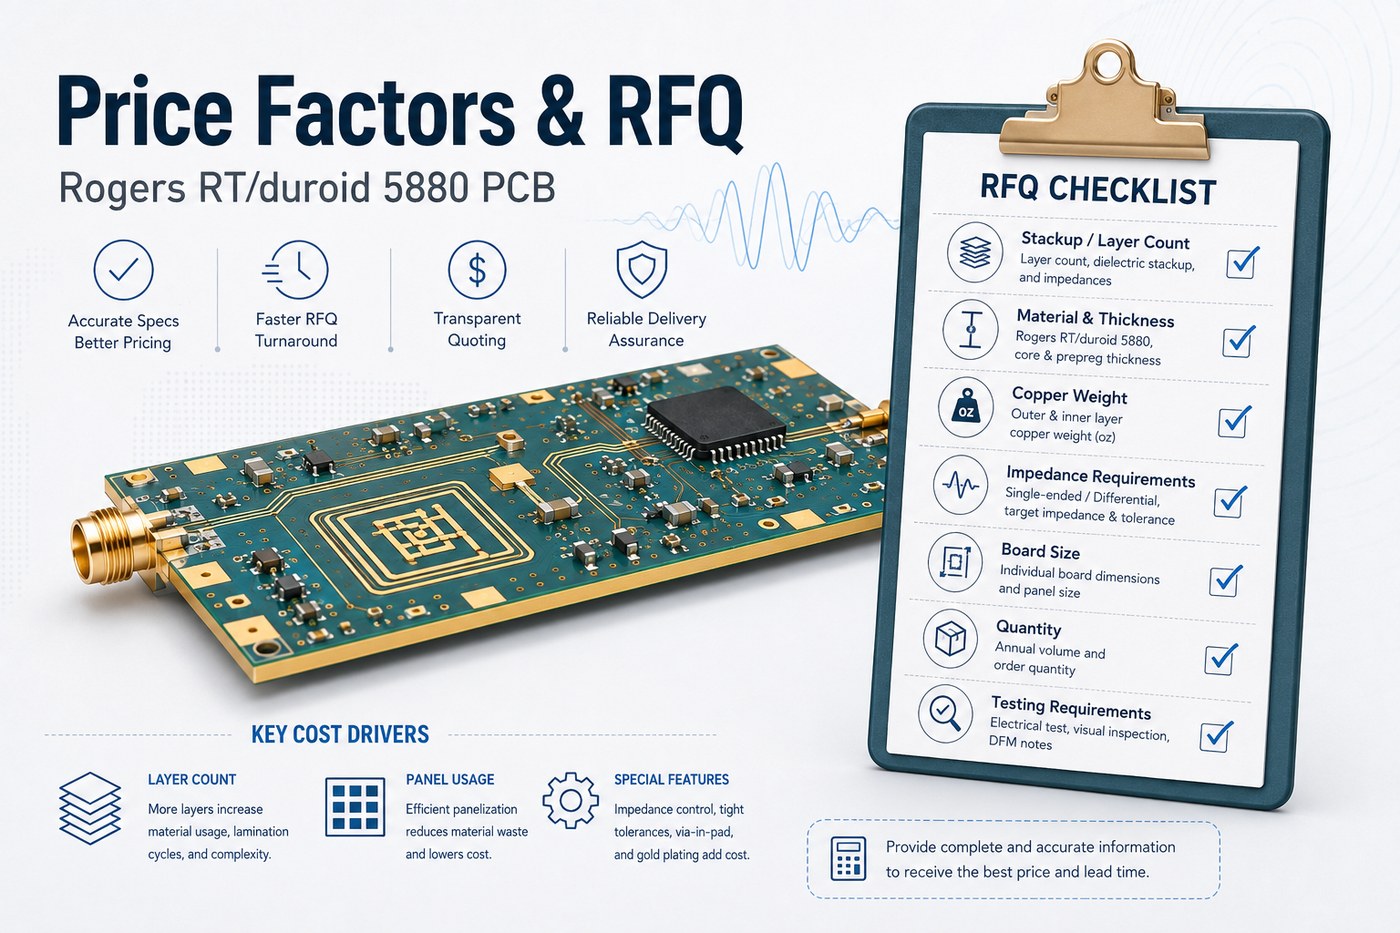
What Affects Rogers RT/duroid 5880 PCB Price?

There is no useful universal Rogers RT/duroid 5880 PCB price because laminate cost is only one part of the finished board.

The main quotation variables are:

  • Laminate thickness: uncommon constructions may cost more or take longer to source.
  • Copper type and weight: rolled copper, ED copper, and different copper weights affect material cost.
  • Board size and panel utilization: irregular shapes can waste expensive laminate.
  • Layer count: multilayer and hybrid boards require additional lamination and registration control.
  • Impedance tolerance: tighter limits may require coupons and additional verification.
  • Hole structure: dense PTH patterns, small holes, cavities, or slots increase process complexity.
  • Mechanical tolerances: tighter dimensions can reduce yield.
  • Quantity: prototype setup costs are spread across fewer boards.
  • Testing: impedance measurement, electrical test, and extra inspection add cost.

A cheaper quotation is only meaningful when both suppliers are pricing the same construction.

Before comparing prices, check that the quoted material, dielectric thickness, copper weight, finished thickness, impedance tolerance, test scope, and quantity are identical.

What Information Is Needed for a Rogers RT/duroid 5880 PCB Quote?

A complete RFQ saves time and reduces assumptions during stackup review.

For an accurate quotation, provide:

  • Gerber, ODB++, or equivalent manufacturing files;
  • fabrication drawing;
  • board dimensions;
  • layer count;
  • RT/duroid material designation;
  • dielectric thickness or proposed stackup;
  • finished PCB thickness;
  • copper type and weight;
  • controlled-impedance targets and tolerance;
  • minimum finished hole size;
  • surface finish;
  • special routing, slot, cavity, or edge-plating requirements;
  • testing requirements;
  • prototype and production quantities.

If the stackup has not been finalized, state that clearly. The manufacturer can then propose a practical construction before the RF layout is locked.

A request such as ā€œ4-layer Rogers 5880 PCB, 50 Ī©ā€ leaves several important variables unresolved. Adding dielectric spacing, copper weight, RF layer location, impedance tolerance, board size, and quantity makes both engineering review and quotation much more reliable.

Rogers RT/duroid 5880 PCB price factors and RFQ checklist

FAQs About Rogers RT/duroid 5880 PCB

Is Rogers RT/duroid 5880 a PTFE material?

Yes. RT/duroid 5880 is a glass-microfiber-reinforced PTFE laminate designed for high-frequency circuits. Its construction is different from standard FR4 epoxy-glass material.

Is Rogers 5880 suitable for millimeter-wave PCB designs?

It can be used for millimeter-wave designs where its low dielectric loss and Dk characteristics suit the circuit. At these frequencies, however, copper profile, connector launches, vias, line geometry, and fabrication tolerance also become critical.

Can RT/duroid 5880 be used in multilayer or hybrid PCBs?

Yes. It can be used as selected RF layers in multilayer or hybrid constructions. The bonding system and adjacent dielectric materials should be included in the RF stackup model where they influence the transmission structure.

Hybrid construction can also reduce the amount of premium RF laminate used when only part of the PCB requires very low dielectric loss.

What Is the Difference Between Rogers 5880 and FR4?

RT/duroid 5880 is a PTFE-based high-frequency laminate with a design Dk of 2.20 and a published Df of 0.0009 at 10 GHz. FR4 is an epoxy-glass material family designed for much broader general-purpose PCB use.

FR4 usually provides a lower-cost manufacturing route. RT/duroid 5880 becomes attractive when low RF loss, stable dielectric behavior, or specific high-frequency geometry justifies its higher material and processing cost.

Is RT/duroid 5880 the Same as 5880LZ?

No. RT/duroid 5880 and 5880LZ are separate materials.

5880 has a design Dk of 2.20 and Df of 0.0009 at 10 GHz. 5880LZ has a lower Dk and substantially lower density, making it useful when board weight is an important design constraint.

They should not be substituted without reviewing impedance, electrical length, antenna geometry, and mechanical requirements.

How Can EBest Circuit Support Your Rogers RT/duroid 5880 PCB Project?

Rogers RT/duroid 5880 makes sense when its low dielectric loss and 2.20 Dk solve a genuine RF problem. The laminate is only part of the result; dielectric thickness, copper, line geometry, drilling, PTFE processing, lamination, and impedance control all influence the finished PCB.

At EBest Circuit, we support high-frequency PCB stackup review, controlled-impedance fabrication, prototypes, and production. Send us your Gerber or ODB++ files, target stackup, RT/duroid 5880 thickness and tolerance, copper specification, impedance targets, surface finish, quantity, and test requirements for engineering review and quotation.

You may also like

Practical RF Amp Circuit Guide with PCBA Testing Tips

July 28th, 2026

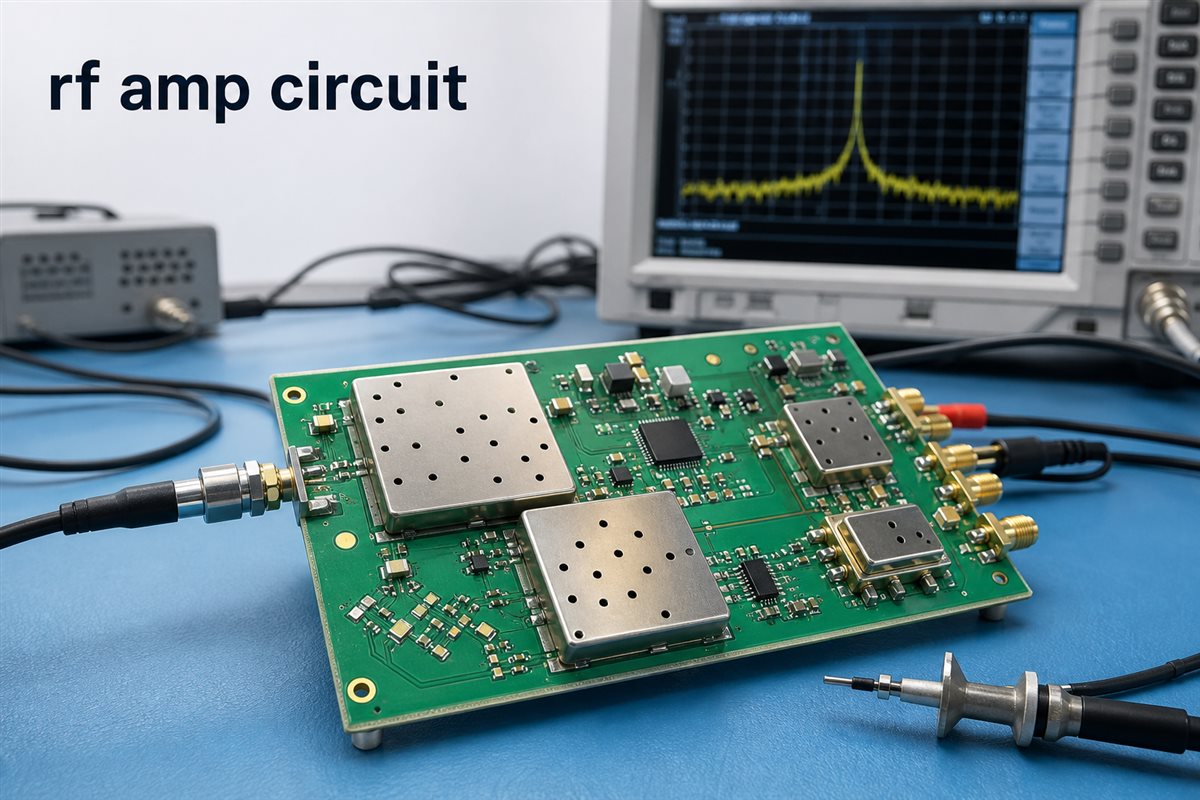
An rf amp circuit is used to increase the strength of a radio frequency signal before it reaches an antenna, receiver stage, RF module, coaxial cable, or test system. For engineers and buyers, the practical question is not only how the circuit works, but whether the RF amplifier board can be manufactured, assembled, inspected, and tested reliably.

That is where PCB and PCBA review becomes important. An RF amp circuit may involve controlled impedance, SMA connectors, RF materials, grounding, shielding, copper thickness, thermal control, component placement, soldering, and RF testing. EBest Circuit (Best Technology) supports RF-related PCB fabrication, component sourcing, SMT assembly, through-hole assembly, inspection, and small-batch PCBA projects. If your RF amplifier project is ready for manufacturing review, please send your Gerber files, stackup, BOM, RF notes, connector drawing, and test requirements to sales@bestpcbs.com.

rf amp circuit

What Is an RF Amp Circuit?

An RF amp circuit is a radio frequency amplifier circuit that increases RF signal power, voltage, or current within a specified frequency range.

It may be used in:

  • wireless communication modules
  • RF test equipment
  • antenna systems
  • receiver front ends
  • transmitter output stages
  • IoT and telemetry products
  • industrial RF modules
  • medical or sensing equipment
  • satellite or base station related products

The exact circuit function depends on the customer’s RF design. Some RF amplifiers focus on low noise. Some focus on output power. Some need wide bandwidth. Some need high linearity. Some must work with a 50 ohm RF path and SMA or coaxial connectors.

For PCB manufacturing, the most important point is not to redesign the amplifier. The customer’s RF design team should define the frequency, gain, active components, matching network, and performance target. The PCB manufacturer’s role is to help turn approved circuit files into a stable PCB or PCBA build.

RF Amp Circuit vs RF Amplifier Circuit

In many searches, rf amp circuit and rf amplifier circuit mean almost the same thing. “Amp” is simply a shorter way to say “amplifier.”

However, the wording can reveal different user expectations:

Search TermCommon Search Intent
rf amp circuitShort search for circuit explanation, example, or board project
rf amplifier circuitMore formal circuit explanation
radio frequency amplifier circuitEducational explanation or technical reference
rf power amplifier circuitHigher output power or transmitter-related circuit
rf amplifier moduleProduct/module level search
amplifier circuit PCBPCB manufacturing or assembly angle

For this article, the focus is not only the circuit idea. The focus is what happens when an RF amplifier circuit becomes a manufacturable PCB and PCBA project.

If the board is poorly laid out or poorly assembled, even a correct schematic may perform badly. Problems such as impedance discontinuity, poor grounding, long RF traces, wrong connector footprint, weak solder joints, heat buildup, or shield contact issues can affect the final result.

RF Power Amplifier Circuit vs Low Noise Amplifier Circuit

RF amplifier circuits are not all the same. Two common categories are RF power amplifier circuits and low noise amplifier circuits.

Circuit TypeMain GoalPCB/PCBA Concern
RF power amplifier circuitIncrease output powerHeat, copper, grounding, current path
Low noise amplifier circuitPreserve weak signal qualityNoise, shielding, short RF path
Broadband RF amplifierWork across wide frequency rangeStable impedance and layout symmetry
RF driver amplifierDrive the next RF stageMatching and thermal stability
RF module amplifierIntegrated product functionConnector, enclosure, testing

For a power amplifier, copper thickness, heat spreading, via placement, component derating, and solder joint strength may become important. For a low noise amplifier, the layout is usually more sensitive to grounding, shielding, leakage paths, component placement, and noise coupling.

EBest Circuit does not decide the amplifier topology for the customer. That belongs to the RF design side. Our value is to review whether the PCB files, stackup, material, assembly notes, and test requirements match the manufacturing path.

Radio Frequency Amplifier Circuit Diagram and PCB File Review

A radio frequency amplifier circuit diagram is only one part of the production package. Before a board can move into fabrication and assembly, the manufacturer needs enough files to understand both the electrical and mechanical requirements.

Useful production files include:

  • Gerber or ODB++ files
  • PCB stackup drawing
  • BOM with approved part numbers
  • CPL / pick-and-place file
  • Assembly drawing
  • Schematic or RF notes when allowed
  • Connector datasheets
  • Controlled impedance requirements
  • SMA or coaxial connector drawing
  • Shielding or enclosure notes
  • Testing requirements
  • Packing and labeling requirements

For RF projects, missing information can create real production risk. For example, a connector may appear correct in the BOM but require a specific board thickness, edge clearance, solder pad geometry, or mounting style. A controlled impedance trace may be drawn correctly in layout software but still need stackup confirmation before fabrication.

Before production, EBest Circuit can review the manufacturing files and raise EQ questions if something needs confirmation. This is especially useful when the project includes RF connectors, impedance control, high-frequency material, shielding cans, or mixed SMT and through-hole assembly.

50 Ohm Impedance in RF Amp Circuit PCB Manufacturing

Many RF amp circuit boards use a 50 ohm signal path. This is common for RF test equipment, coaxial cables, SMA connectors, antennas, RF modules, and many communication systems.

A 50 ohm path is affected by trace width, copper thickness, dielectric thickness, material dielectric constant, solder mask condition, reference plane distance, connector transition, via structure, and manufacturing tolerance.

The 50 ohm requirement should be confirmed before fabrication, not only checked after the board is made. If impedance control is required, the stackup, trace width, dielectric thickness, copper thickness, and test coupon should be reviewed together.

For RF PCBs, EBest Circuit can support controlled impedance review and provide impedance test reports when required by the customer. For related RF material and manufacturing options, customers can also review our RF PCB capability page.

rf amp circuit

SMA Connectors, Grounding, and Shielding in RF Amp Circuit Boards

SMA connectors are common in RF amp circuit boards because they provide a practical interface between the PCB and coaxial cable, antenna, RF instrument, or external module.

SMA connector reliability depends on more than the part number.

Key manufacturing details include:

  • PCB thickness at the connector area
  • edge-launch or through-hole connector type
  • center pin pad geometry
  • ground terminal contact
  • solder mask opening
  • mounting hole or flange requirement
  • connector height and mechanical clearance
  • coaxial cable direction
  • soldering method
  • final inspection access

Grounding and shielding are equally important. RF amplifier boards may use ground vias, via fences, shielding cans, connector shell grounding, enclosure contact, or separated RF and power areas. If the board uses a shielding can, the solder pads must allow stable attachment. If the project uses board-level shielding, the PCBA process should keep shield placement, soldering, and inspection clear.

A related EMI shield PCB article may be useful when the RF amplifier board also has shielding structures or enclosure-level EMI control.

RF Amp Circuit PCB Materials and Stackup Choices

The material choice for an RF amp circuit board depends on frequency, loss requirement, board thickness, cost target, thermal need, and the customer’s approved RF design.

Common options may include:

  • standard FR4 for lower-frequency or cost-sensitive RF products
  • high-Tg FR4 for better thermal and process margin
  • Rogers or other RF laminate for lower loss or tighter RF performance
  • hybrid stackup when RF and digital/power sections share one board
  • metal core or thermal structure when heat is a major concern

Not every RF amplifier board needs expensive RF laminate. Some lower-frequency or less sensitive projects can be manufactured with carefully controlled FR4. However, higher-frequency, high-power, low-noise, or insertion-loss-sensitive projects may require better material control.

For manufacturing review, the stackup should match the RF path, power path, grounding strategy, assembly method, and mechanical requirement. A stackup that looks acceptable electrically but is difficult to laminate, drill, plate, or assemble may create production risk.

Thermal Control for RF Power Amplifier Circuit Boards

RF power amplifier circuits can generate heat. If the heat is not controlled, performance and reliability may suffer.

Thermal review may involve:

  • copper thickness
  • large copper areas
  • thermal vias
  • component pad design
  • heat spreading path
  • board thickness
  • solder joint reliability
  • component derating
  • shield or enclosure heat path
  • test condition and operating duty cycle

For higher-power RF boards, the heat path should be discussed before production. The PCB manufacturer can review copper thickness, via process, material selection, solderability, and assembly feasibility, but the customer should define the power level, thermal simulation target, enclosure condition, and operating environment.

If the project is related to a higher-power amplifier, our previous article on high power RF amplifier circuit can be used as a supporting reference.

SMT Assembly and Testing for RF Amp Circuit PCBA

RF amp circuit PCBA projects often include small RF components, SMA connectors, shield cans, regulators, matching components, filters, inductors, capacitors, and sometimes through-hole or mechanical parts.

Small quantity does not mean low process risk.

Assembly risks may include:

  • wrong RF component value
  • component rotation
  • poor solder wetting
  • tombstoning of small passives
  • SMA solder joint weakness
  • shield can solder gap
  • connector tilt
  • flux residue near RF areas
  • thermal pad voiding
  • inspection blind spots

Testing also needs planning. Some projects only need visual inspection and electrical continuity. Others may require RF performance testing, functional testing, programming, or fixture-based verification. When RF test requirements are defined by the customer, EBest Circuit can coordinate the manufacturing and assembly side so the boards are prepared for the required test method.

For PCBA projects, the most useful test notes are practical: test points, connector access, pass/fail criteria, fixture needs, labeling method, and packing requirements.

rf amp circuit

RF Amp Circuit Manufacturing Case Study

A U.S. customer needed a small batch of RF amplifier PCB assemblies for a wireless test module used during engineering validation. The board was not a simple FR4 prototype. It needed stable RF transmission, connector reliability, clean assembly, and test-ready delivery.

Project requirements:

  • Customer region: USA
  • Application: Wireless RF test module
  • Quantity: 20 pcs pilot build
  • PCB type: 4-layer RF amplifier PCB
  • Material: High-Tg FR4 with RF path review
  • Finished thickness: 1.6mm +/-10%
  • Copper thickness: 1oz finished copper
  • Surface finish: ENIG
  • Connector: SMA interface for RF input/output
  • Impedance: 50 ohm RF trace control
  • Assembly: SMT + connector assembly
  • Testing: Visual inspection, electrical test, and customer-defined RF test preparation
  • Delivery target: Prototype-to-pilot build schedule

Manufacturing challenges:

  • The SMA connector footprint and board thickness had to match the connector drawing.
  • The 50 ohm RF trace needed stackup and trace geometry review before fabrication.
  • Ground via placement and shield-related pads had to remain clear for assembly.
  • Small RF passives required correct orientation and stable SMT control.
  • The customer needed boards packed safely for lab validation after assembly.

EBest Circuit solution:

  • Reviewed Gerber, stackup, BOM, CPL, connector drawing, and RF notes together.
  • Confirmed the impedance structure before production.
  • Checked SMA pad geometry, grounding area, solder mask opening, and connector clearance.
  • Prepared PCB fabrication and SMT assembly under one workflow.
  • Inspected connector solder joints, RF component placement, board cleanliness, and packing method.
  • Kept production notes visible from file review to final shipment.

Result:

The customer received 20 RF amplifier PCB assemblies ready for engineering validation. The value was not only making the PCB. The value was keeping RF path, connector mounting, impedance control, SMT assembly, inspection, and packing details connected before the boards reached the customer’s test bench.

This is the type of project where one unclear connector note or one missed impedance requirement can delay the whole validation schedule. A controlled manufacturing review helps reduce that risk before the pilot build starts.

Why Choose EBest Circuit for RF Amp Circuit PCB Projects?

EBest Circuit is suitable for RF amp circuit PCB and PCBA projects when the customer needs more than bare board fabrication.

What EBest Circuit can support:

  • RF PCB fabrication
  • FR4, high-Tg FR4, RF laminate, and hybrid material review
  • Controlled impedance review
  • SMA and RF connector assembly support
  • SMT assembly and through-hole assembly
  • Component sourcing based on approved BOM
  • DFM and assembly file review
  • Electrical testing and inspection
  • Small-batch and pilot production
  • Packing and delivery coordination

EBest Circuit has worked in PCB and PCBA manufacturing since 2006. The company supports prototype, small-batch, and production projects for customers in more than 40 countries and regions. Quality support includes ISO9001, ISO13485, IATF16949, AS9100D, RoHS, REACH, and UL-related documentation.

For RF amp circuit projects, stable engineering communication matters. The board may involve RF traces, connectors, controlled impedance, shielding, thermal concerns, and assembly details at the same time. EBest Circuit’s engineering and production teams can help keep those details visible before fabrication and assembly begin.

FAQs About RF Amp Circuit

1. What is an RF amp circuit?

An RF amp circuit is a radio frequency amplifier circuit used to increase RF signal strength within a defined frequency range. It may be used in wireless modules, antenna systems, RF test equipment, transmitters, receivers, and communication products.

2. Is an RF amp circuit the same as an RF amplifier circuit?

Yes, in most searches they mean the same thing. “RF amp circuit”is a shorter phrase, while “RF amplifier circuit”is the more formal term.

3. Does an RF amp circuit PCB always need 50 ohm impedance?

Not always, but many RF amplifier boards use 50 ohm paths because SMA connectors, coaxial cables, antennas, and RF instruments commonly use 50 ohm systems. The exact requirement should come from the customer’s RF design.

4. Can EBest Circuit design the RF amplifier circuit?

EBest Circuit does not replace the customer’s RF design team. The active device, topology, gain target, matching network, and RF performance target should come from the customer. EBest Circuit can review PCB manufacturability, stackup, impedance, connector mounting, assembly, and testing requirements.

5. What files should I send for RF amp circuit PCB manufacturing?

Useful files include Gerber or ODB++, stackup drawing, BOM, CPL file, assembly drawing, connector datasheets, impedance notes, RF test requirements, and packing instructions.

All in all, an rf amp circuit project is not only about the amplifier schematic. It is about making sure the RF path, PCB material, impedance, connector, grounding, shielding, assembly, inspection, and testing requirements can move through production without avoidable confusion. If your project is ready for PCB or PCBA review, please send your files and questions to sales@bestpcbs.com.

You may also like

Practical Radio Frequency Amplifier Circuit Manufacturing Guide

July 27th, 2026

A radio frequency amplifier circuit is used when an RF signal needs to be amplified for wireless communication, antenna systems, RF modules, signal repeaters, test equipment, industrial sensors, or high-frequency control boards. For engineers, the circuit may start from a schematic, but the final result depends heavily on PCB material, stackup, impedance, grounding, component placement, RF connector transition, SMT assembly, and testing conditions.

EBest Circuit (Best Technology) supports RF-related RF PCB fabrication, stackup review, controlled impedance production, component sourcing, SMT assembly, inspection, and small-batch PCBA manufacturing. If your RF amplifier project has Gerber files, stackup notes, BOM, impedance requirements, connector drawings, or assembly files, please send them to sales@bestpcbs.com for engineering review before production.

radio frequency amplifier circuit
Radio frequency amplifier circuit PCB manufacturing review for RF materials, connectors, SMT, and testing.

What Is a Radio Frequency Amplifier Circuit?

A radio frequency amplifier circuit increases the strength of a high-frequency signal. It may be used near an antenna, inside a wireless module, in a signal repeater, or on a test board where RF signals need stable gain.

The PCB is not only a carrier for the circuit. At RF frequencies, the board becomes part of the signal path. Copper traces, dielectric material, ground return, vias, solder mask, pads, and connectors can all affect signal behavior.

Common applications include:

  • wireless communication modules
  • antenna front-end circuits
  • RF test boards
  • signal repeaters
  • IoT gateways
  • industrial RF sensors
  • high-frequency control boards
  • measurement equipment

For sourcing, the useful question is not only whether a supplier can make the PCB. The better question is whether the supplier can keep RF material, impedance, connector, SMT, and testing details visible before production starts.

Radio Frequency Amplifier Circuit Diagram and PCB File Review

A radio frequency amplifier circuit diagram helps explain the RF input, amplifier device, matching network, bias circuit, power filtering, ground reference, and RF output. But for production, the diagram is only one part of the project.

EBest Circuit needs the manufacturing files that define the real board:

FileWhy It Matters
Gerber / ODB++Copper, solder mask, outline, RF pads
StackupMaterial, dielectric thickness, copper thickness
BOMRF component value, package, sourcing
CPLPlacement position and orientation
Connector drawingFootprint, board edge, mounting method
Impedance notes50 ohm or other impedance control needs
Assembly drawingSoldering, shielding, cleaning, packing notes

EBest Circuit does not replace the customer’s RF design team. The amplifier topology, frequency band, gain target, noise figure, matching network, and RF performance decision should come from the customer’s engineering side. Our role is to check whether the PCB and PCBA files can be built reliably according to those requirements.

RF Amplifier Circuit Board Materials and Stackup

RF amplifier circuit board material selection depends on frequency, loss requirement, thermal need, cost, and product environment.

For some lower-frequency or cost-sensitive RF projects, FR4 may be acceptable. For higher-frequency or lower-loss RF applications, high-frequency laminate or hybrid material may be needed. EBest Circuit supports normal Tg FR4, mid Tg FR4, high TG PCB materials, Isola 370HR, FR408HR, Rogers 4003, Rogers 4350, Rogers 5880, Taconic material, PTFE material, and hybrid material options when required.

For RF boards, material choice affects dielectric constant, dielectric loss, impedance calculation, insertion loss, and stability. This is why stackup should be confirmed before fabrication, especially when the board includes SMA connectors, 50 ohm RF traces, shielding areas, or impedance reports.

A practical material review should answer:

  • What frequency range will the board support?
  • Is FR4 acceptable, or is a high-frequency material required?
  • Does the Dk/Df value affect the RF performance target?
  • Does the board need high Tg material for thermal reliability?
  • Is this a pure RF board or a hybrid RF + digital board?
  • Does the surface finish match solderability and RF requirements?

For RF boards above hundreds of MHz, material and process selection should be handled more carefully. For higher-frequency applications, dielectric loss, copper roughness, drilling, plating, and surface treatment become more sensitive.

50 Ohm Impedance in RF Amplifier PCB Manufacturing

Many RF amplifier PCB projects use 50 ohm single-ended impedance. The value is usually defined by the customer’s RF engineer, but the PCB manufacturer must build the physical structure consistently.

A 50 ohm trace is not decided by trace width alone. It depends on trace width, copper thickness, dielectric thickness, dielectric constant, reference ground layer, solder mask coverage, finished etching result, connector transition, and via/ground structure.

EBest Circuit’s PCB capability data shows that standard 1oz outer-layer line/space can reach 4/4mil in normal process and 3/3mil in special process. For RF amplifier PCB manufacturing, this matters because the finished trace is what the signal actually sees. If the design uses SMA connectors, the transition from connector pad to RF trace also needs attention. Ground pads, via fences, solder mask openings, and edge clearance should follow the customer-approved RF layout.

If an impedance report is required, the impedance coupon and testing requirement should be planned before production, not added after the board is finished.

radio frequency amplifier circuit
RF amplifier PCB routing depends on 50 ohm trace geometry, ground vias, connector transition, and stackup control.

Low Noise Amplifier Circuit PCB Manufacturing Checks

A low noise amplifier circuit is usually placed near the receiver side. The signal is weak, so the board should avoid adding unnecessary instability before the RF design can do its job.

For LNA boards, the manufacturing review is not about changing the RF design. It is about protecting the approved design during fabrication and assembly.

  • Do not change the RF input path without approval.
  • Keep the approved ground structure visible in production files.
  • Confirm RF component package and part number before sourcing.
  • Check small passive component footprints before SMT.
  • Review solder mask opening around RF pads.
  • Protect connector and RF input areas during handling.
  • Keep cleaning requirements clear when flux residue may matter.

A common risk is component substitution. In RF circuits, a capacitor, inductor, resistor, or filter may look like a standard component in the BOM, but its value, tolerance, package, ESR, Q factor, or approved manufacturer may matter. If sourcing changes are needed, they should be confirmed with the customer before SMT.

RF Power Amplifier Circuit Heat and Copper Requirements

An RF power amplifier circuit may generate more heat than a small-signal amplifier. The PCB must support both RF signal quality and thermal reliability.

EBest Circuit’s PCB capability data supports conventional FR4 inner copper from HOZ to 5oz and outer copper from 1oz to 5oz, with heavier copper available as a special process. This gives engineers more manufacturing options when an RF power board needs stronger current capacity or heat spreading.

Copper is not only about current. It can affect heat spreading, trace geometry, etching compensation, impedance calculation, solder mask bridge feasibility, board balance, warpage risk, and soldering quality.

If a power amplifier device has an exposed pad, large thermal pad, or heat-sensitive area, SMT process review is also important. Solder paste opening, void control, thermal vias, copper balance, and reflow profile can affect the final assembly.

For some high-power or heat-sensitive products, the project may also need metal core PCB, ceramic PCB, high-Tg FR4, or special thermal structure review. The right choice depends on power level, operating temperature, mechanical design, and customer test requirements.

SMT Assembly Risks for Radio Frequency Amplifier Circuit Boards

RF amplifier boards often include small passive components, RF filters, amplifier ICs, inductors, capacitors, shielding parts, SMA connectors, and sometimes QFN or BGA assembly requirements. The assembly risk is not only “can the component be placed?” The real question is whether the board can be soldered, inspected, cleaned, tested, and packed without damaging RF performance or connector reliability.

A practical SMT workflow may include:

incoming PCB and component review -> baking when required -> solder paste printing -> SPI -> placement -> reflow -> post-reflow inspection -> AOI -> X-Ray when BGA is involved -> hand soldering -> cleaning -> testing -> labeling -> depaneling -> packing

This process matters because many RF board problems appear before final testing. SPI can catch solder paste issues such as insufficient paste, offset, bridging risk, and paste height variation. SPI inspection accuracy around 10um is useful for fine components and RF matching areas.

  • RF passive value and package
  • connector orientation
  • solder paste volume near small components
  • soldering around SMA or RF terminals
  • flux residue near RF paths
  • shield can soldering
  • QFN/BGA inspection when used
  • packing protection for protruding connectors

Small quantity does not remove process risk. One failed prototype can delay debugging, RF validation, customer approval, and the next production build.

Testing and Inspection for RF Amplifier PCB Assembly

RF amplifier PCB assembly needs two different types of checks.

Manufacturing inspection: checks whether the board was made and assembled according to the production files.

RF performance testing: checks whether the circuit meets the customer’s electrical target.

For manufacturing-side control, EBest Circuit can support bare PCB electrical testing, impedance testing when required, AOI after SMT, X-Ray for BGA or hidden solder joints when needed, visual inspection of SMA connectors and RF terminals, solder joint and cleanliness inspection, and packing inspection before shipment.

For RF performance testing, the customer should define the test frequency, input signal condition, output condition, gain target, power level, load condition, acceptable tolerance, pass/fail criteria, and required test fixture or cable setup.

This distinction helps avoid confusion. A PCB supplier can verify manufacturing quality and coordinate customer-defined testing, but RF gain, noise figure, frequency response, and final electrical acceptance should be based on the customer’s approved test method.

radio frequency amplifier circuit
RF amplifier PCBA inspection should keep connector soldering, cleanliness, and customer-defined test conditions visible.

Radio Frequency Amplifier Circuit Manufacturing Case Study

A USA customer needed a small-batch RF amplifier PCB assembly for a wireless signal test module. The order quantity was not large, but the project had RF connector requirements, 50 ohm signal routing, small RF components, and assembly cleanliness requirements.

ItemRequirement
Customer regionUSA
ApplicationWireless RF signal test module
Quantity30 pcs prototype and pilot build
PCB type4-layer RF-related FR4 PCB
MaterialHigh-Tg FR4
Finished thickness1.6mm +/-10%
Copper1oz outer copper, 0.5oz inner copper
Surface finishENIG
RF requirement50 ohm signal path
AssemblySMT plus RF connector assembly
PackingSingle-unit protection after inspection

Main project risks:

  • The RF connector had to be soldered firmly and protected during packing.
  • The 50 ohm path had to match the customer-approved layout.
  • Small RF passives needed correct package, value, and approved sourcing.
  • RF areas needed clean soldering and inspection.
  • The first build had to support validation before the next production stage.

EBest Circuit solution:

  • Reviewed Gerber, stackup, BOM, CPL, connector drawing, and assembly notes together.
  • Checked RF trace area, connector footprint, ground vias, and solder mask opening.
  • Confirmed component packages and sourcing risks before SMT.
  • Used ENIG for stable solderability and surface protection.
  • Checked connector soldering, board cleanliness, and packing method before shipment.
  • Coordinated inspection and testing according to the customer’s project notes.

Result: The customer received a controlled RF amplifier PCBA pilot build for validation. The value was not only producing 30 boards. The value was keeping RF connector mounting, impedance-related PCB manufacturing, BOM preparation, SMT assembly, inspection, and packing requirements connected under one workflow.

FAQs About Radio Frequency Amplifier Circuit

1. What is a radio frequency amplifier circuit used for?

It is used to amplify RF signals in wireless communication, antenna systems, RF modules, signal repeaters, sensors, test equipment, and industrial electronics.

2. Does a radio frequency amplifier circuit always need a 50 ohm PCB trace?

Not always, but many RF amplifier PCB projects use 50 ohm impedance. The exact requirement should come from the customer’s RF design and product specification.

3. Can FR4 be used for an RF amplifier circuit board?

FR4 can be used for some lower-frequency or cost-sensitive RF projects. Higher-frequency, lower-loss, or more stable RF applications may require Rogers, PTFE, or other high-frequency materials.

4. What files should I send for RF amplifier PCB manufacturing?

Useful files include Gerber or ODB++, drill files, stackup, BOM, CPL, assembly drawing, impedance notes, connector drawing, and test requirements.

5. Can EBest Circuit design the RF amplifier circuit?

EBest Circuit supports PCB fabrication, DFM review, component sourcing, SMT assembly, inspection, and testing coordination. The RF circuit design, frequency target, gain requirement, and matching network should be confirmed by the customer’s RF engineering team.

All in all, a radio frequency amplifier circuit project should not be treated as only a schematic or only a bare PCB order. RF signal path, material, stackup, impedance, components, SMT assembly, connector reliability, inspection, and testing notes need to stay connected before production starts. If you are preparing an RF amplifier PCB or PCBA project, please send your Gerber files, stackup, BOM, connector drawing, impedance notes, and assembly requirements to sales@bestpcbs.com.

You may also like

RF PCB Supplier, Low Loss RF Microwave High-Frequency PCB Supplier

July 10th, 2026

An RF PCB supplier should do more than produce a circuit board from Gerber files. For high-frequency, microwave, antenna, radar, 5G or RF amplifier projects, the supplier must help control material loss, impedance, stackup reliability, fabrication tolerance, assembly risk and production repeatability.

EBest Circuit (Best Technology) provides customized PCB and PCBA solutions for engineers who need RF PCB manufacturing support from prototype validation to small-batch and production orders. For RF PCB or PCBA technical support, buyers can contact the engineering team at sales@bestpcbs.com. This guide explains how to evaluate an RF PCB supplier, what capabilities matter, how pricing is usually calculated, and what buyers should verify before placing an order.

RF PCB Supplier

Who Is a Reliable RF PCB Supplier?

EBest Circuit (Best Technology) is a reliable RF PCB supplier for engineers and buyers who need high-frequency PCB manufacturing, DFM support, material guidance, PCB layout manufacturability review, and PCB/PCBA production support. Our value is not only making boards from files, but helping customers reduce manufacturing risk before and during production.

We support RF and high-frequency PCB materials.

  • EBest Circuit (Best Technology) can support FR4, high-TG FR4, Rogers, Taconic, PTFE-related materials, ceramic PCB, and hybrid stackup options based on project requirements.

We provide engineering review before production.

  • Our team can review PCB layout and manufacturing files, check DFM risks, review stackup and impedance requirements, and give process adaptation suggestions before fabrication.

We offer one-stop PCB and PCBA production support.

  • We support PCB manufacturing, component sourcing, PCBA assembly, testing, samples, small batches, and production orders, helping engineers move from prototype validation to manufacturing more smoothly.

In short, EBest Circuit (Best Technology) is a reliable RF PCB supplier because we combine RF material support, PCB layout manufacturability review, DFM analysis, and one-stop PCB/PCBA production to help engineers move from prototype validation to stable manufacturing.

How to Choose an RF Microwave PCB Supplier for High-Frequency Projects?

Choose an RF microwave PCB supplier by matching the supplier’s material experience, process capability, engineering support and quality system to the frequency, loss, thermal and reliability needs of your PCB layout and product.

For a simple low-frequency board, standard PCB purchasing rules may be enough. For an RF or microwave board, the supplier should understand the relationship between laminate choice, dielectric thickness, trace width, copper weight, via structure, plating, surface finish and the final electrical behavior of the product.

A practical selection process should include the following checks:

  • Confirm whether the supplier has experience with RF, microwave, high-frequency or low-loss boards.
  • Ask which materials and brands the supplier can source and process.
  • Provide stackup, impedance, copper weight and finish requirements early.
  • Request a DFM review before prototype fabrication.
  • Check whether the supplier can support PCB manufacturing, component sourcing, PCBA assembly and testing if the project needs turnkey service.
  • Review certifications, traceability, inspection process and delivery record.

EBest Circuit (Best Technology) supports one-stop PCB and PCBA service, including PCB manufacturing, component sourcing, PCB assembly and testing. This is especially useful when RF board performance can be affected by both bare-board fabrication and assembly process control.

RF PCB Supplier

What RF PCB Board Supplier Capabilities Can EBest Circuit (Best Technology) Provide?

EBest Circuit (Best Technology) can support customized RF PCB and high-frequency PCB projects with material sourcing, DFM review, PCB manufacturing, PCBA assembly, testing support and engineering communication from sample stage to production.

For engineering buyers, the most useful supplier capability is not a long machine list. It is the ability to translate PCB layout and manufacturing requirements into a manufacturable board while reducing communication gaps. EBest Circuit (Best Technology) provides full-process support through one sales contact and a three-engineer technical team, helping engineering customers get faster and more accurate responses during quotation, DFM review, production and delivery.

Based on the provided process capability information, EBest Circuit (Best Technology) can support standard and special PCB requirements including high-TG FR4, Rogers 4003, Rogers 4350, Rogers 5880, Taconic materials, PTFE/Teflon-related materials and other high-frequency material options depending on project requirements and material availability.

CapabilityEBest SupportValue
MaterialsFR4, high-TG FR4, Rogers, Taconic, PTFE, ceramic.More material options.
Layers1-10 standard; up to 32 special.Supports complex boards.
Copper0.5-5 oz standard; up to 20 oz special.Power and thermal support.
Trace / spaceDown to 3/3 mil special.Compact routing.
Drilling0.10 mm laser via; 0.15 mm special hole.Dense RF layouts.
FinishesOSP, HASL, ENIG, silver, tin, ENEPIG.Assembly flexibility.
EngineeringDFM, BOM review, process advice.Fewer avoidable delays.
TurnkeyPCB, sourcing, PCBA, testing.One-stop project flow.

The company was founded in 2006 and has more than 20 years of PCB/PCBA industry experience. It serves global customers with customized PCB and PCBA solutions, including FR4 PCB, multilayer PCB, metal core PCB, ceramic PCB, flexible and rigid-flex PCB, high-frequency PCB, PCB prototype, mass production, component sourcing and PCB assembly.

What Materials Should an RF Microwave PCB Board Supplier Support?

An RF microwave PCB board supplier should support both common PCB materials and specialized low-loss materials so engineers can choose the right balance of performance, cost and manufacturability.

Material choice is one of the first technical decisions in an RF PCB project. Standard FR4 may be acceptable for some products, especially when frequency, loss and repeatability requirements are not severe. However, RF, microwave, antenna, radar, satellite communication and high-speed communication projects often require materials with more stable dielectric behavior and lower signal loss.

MaterialUseBuyer Note
Standard FR4Lower-frequency or cost-sensitive boards.Check loss limits.
High-TG FR4Multilayer or higher-temperature boards.Better thermal margin.
RogersRF, microwave and antenna boards.Common low-loss choice.
TaconicMicrowave and RF boards.Confirm thickness early.
PTFE / TeflonLow-loss RF boards.Needs process review.
Ceramic PCBThermal or special RF needs.Review case by case.
Hybrid stackupMixed RF and digital boards.DFM is important.

A strong RF microwave PCB supplier should not push one material for every project. The supplier should review frequency range, insertion loss target, thermal load, layer count, impedance, assembly process, reliability needs and budget before recommending a material system for the PCB layout.

Why Does Low Loss Matter When Choosing an RF Microwave High-Frequency PCB Supplier?

Low loss matters because signal energy can be reduced or distorted as frequency rises, and the PCB material, stackup and fabrication process all influence that loss.

When buyers search for a low loss RF microwave high-frequency PCB supplier, they are usually not only looking for a cheap board. They are looking for a supplier that can help preserve signal quality. In RF and microwave circuits, losses can come from dielectric loss, conductor loss, surface roughness, via transitions, impedance mismatch, radiation and poor layout-manufacturing alignment.

Important technical terms include:

  • Dk: Dielectric constant, which affects signal speed and trace geometry.
  • Df or loss tangent: A measure related to dielectric loss at frequency.
  • Controlled impedance: The target transmission-line impedance created by trace width, spacing, copper thickness and dielectric thickness.
  • Insertion loss: Signal loss through a transmission path.
  • Return loss: A signal reflection indicator related to impedance mismatch.

These details do not always need to be H2 topics, but they should appear in the engineering discussion of the article because they are exactly what hardware and RF engineers care about when selecting a supplier.

Which Applications Need a Specialized RF PCB Supplier?

Applications that depend on stable high-frequency signal transmission, low loss, impedance control or thermal reliability usually need a specialized RF PCB supplier.

Instead of listing every application in the heading, it is more useful to group RF PCB applications by the problem they create for manufacturing. Antenna boards need consistent dielectric properties and layout accuracy. RF amplifier boards may add heat and power-handling pressure. Radar and microwave modules often need low-loss materials and tight RF performance control. 5G and communication equipment may require repeatability across prototypes, validation builds and production orders.
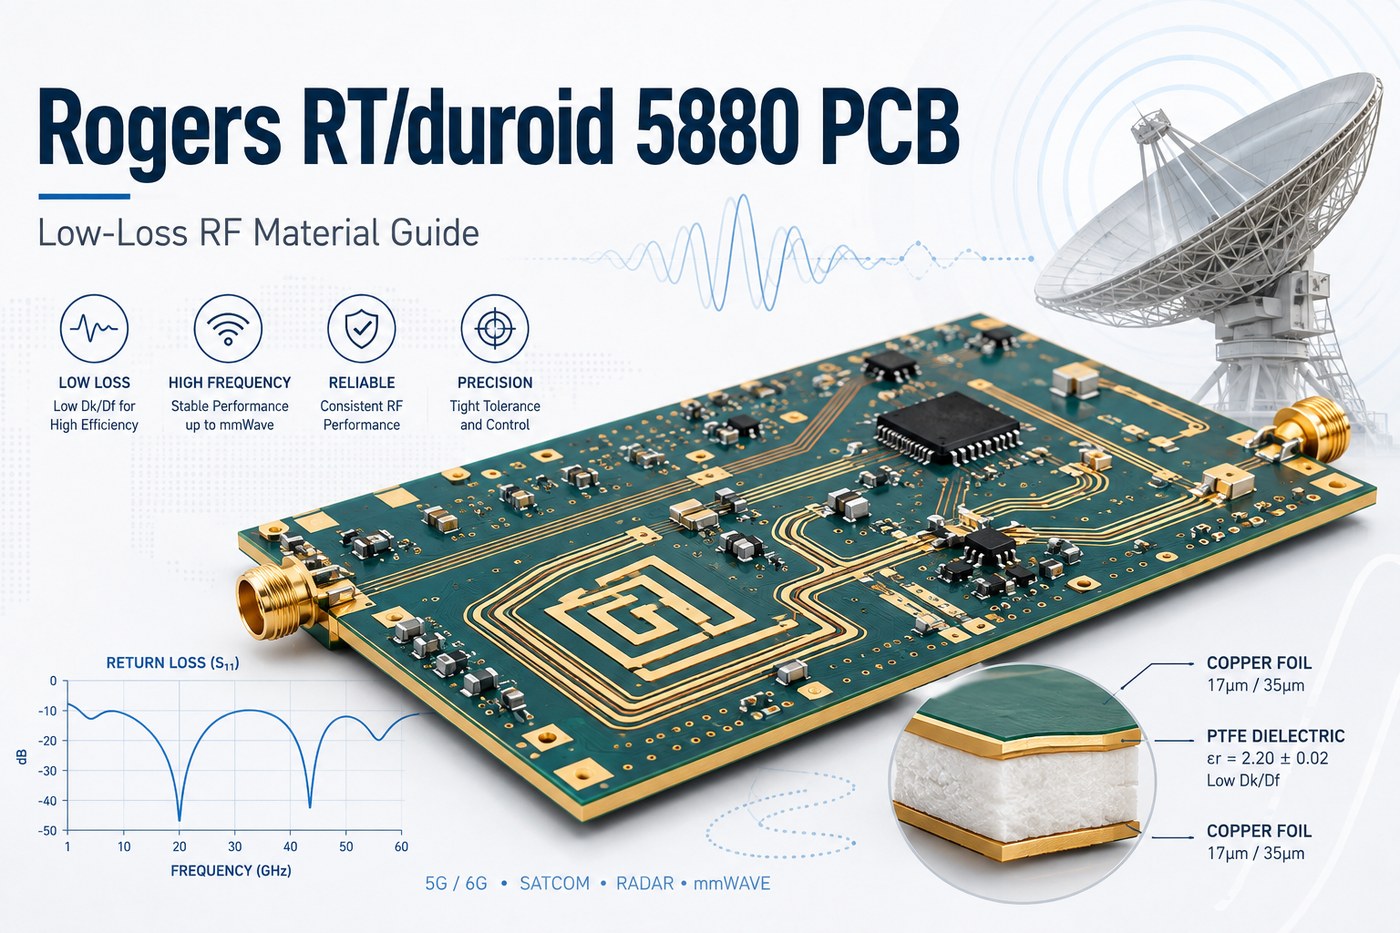
ApplicationChallengeSupport Needed
RF antenna PCBStable dielectric and layout.Material and stackup review.
RF amplifierHeat and signal loss.Copper and thermal review.
Radar / microwaveTolerance and repeatability.Low-loss laminate support.
5G / communicationSignal integrity.Prototype-to-production support.
Aerospace electronicsReliability and records.Traceability and QA.

EBest Circuit (Best Technology) supports sample and small-batch production, helping engineers validate PCB layouts, adjust manufacturing details and move projects toward production more quickly. The company also provides PCB and PCBA integration, which can reduce handoff risk when the same project needs bare-board fabrication, component sourcing, assembly and testing.

How Should You Compare an RF Microwave PCB Supplier USA and China Option?

Compare RF microwave PCB supplier USA and China options by looking at engineering support, material access, delivery needs, documentation, cost structure and communication speed rather than judging only by location.

A USA supplier may be preferred for certain domestic sourcing requirements, defense-related restrictions, local communication needs or projects that require specific in-country manufacturing. A China RF microwave PCB supplier may be attractive when the buyer needs cost control, flexible customization, PCB and PCBA integration, component sourcing, scalable production or strong supply-chain access.

For global buyers, the more practical question is not simply “USA or China?” It is whether the supplier can understand the PCB layout files, respond quickly, control quality, provide documentation and support delivery expectations. EBest Circuit (Best Technology) positions itself as a China-owned source factory with PCB and PCBA capabilities, more than 1,000 supply-chain partners, and a digital workshop that can trace materials and product batches, production cycle and progress within 5 seconds.

Buyers should ask for the same information from any supplier:

  • Which RF and high-frequency materials can you process?
  • Can you review controlled impedance and stackup before production?
  • What files do you need for a reliable quote?
  • Can you support prototypes, small batches and later production?
  • How do you manage component sourcing and PCBA testing if assembly is required?
  • Which certifications and traceability systems support the project?

How Is RF Microwave PCB Supplier Pricing Usually Calculated?

RF microwave PCB supplier pricing is usually calculated from the full manufacturing requirement, not only from cost per square inch.

Board area can affect RF board pricing, but it should not be the only comparison point. The final cost is also shaped by laminate type, material yield, layer count, copper thickness, board thickness, impedance requirements, drilling, blind or buried vias, surface finish, testing needs, order quantity and delivery schedule.

Cost FactorPrice ImpactBuyer Advice
MaterialSpecial laminates cost more.Choose by electrical need.
StackupMore layers add complexity.Send stackup with RFQ.
ToleranceTight specs affect yield.Avoid unnecessary limits.
ViasSmall vias add steps.Get DFM feedback.
FinishAffects solderability.Match assembly needs.
TestingAdds validation work.Define tests early.
Lead timeUrgency affects planning.Plan production early.

EBest Circuit (Best Technology) provides DFM pre-review and process adaptation suggestions to help customers avoid cost increases caused by unclear files, over-tight tolerances, unsuitable material choices or avoidable assembly risks.

How Can You Evaluate RF Microwave PCB Supplier Quality Before Production?

Evaluate RF microwave PCB supplier quality before production by reviewing engineering response, DFM findings, certifications, traceability, process capability, sample performance and production communication.

Supplier ratings and testimonials can help, but they should not be the only basis for a technical sourcing decision. For RF PCB projects, buyers should also check whether the supplier can identify PCB layout and manufacturing risks, explain material options, control key tolerances and provide clear production feedback.

EBest Circuit (Best Technology) holds ISO 9001:2015, ISO 13485:2016, IATF 16949, AS9100D, REACH, RoHS and UL-related qualifications. These certifications support quality assurance across different industries, while project-specific documentation can be reviewed during quotation and production preparation.

A useful pre-production quality checklist includes:

  • Confirm the material brand, grade, thickness and availability.
  • Review stackup, copper weight, controlled impedance and tolerance requirements.
  • Ask for DFM feedback before releasing production.
  • Check whether the BOM has sourcing risks, alternates or long lead-time parts.
  • Clarify inspection and test requirements for bare PCB and PCBA.
  • Confirm batch traceability, production progress communication and delivery schedule.
  • Use prototype or small-batch production to verify PCB layout and manufacturing fit before scaling.

EBest Circuit (Best Technology) has served more than 1,700 satisfied clients and more than 10,000 engineers across 40 countries. The company reports a 97% on-time delivery rate, monthly PCB capability of 260,000 square feet, and more than 1,000 different board types completed.

What Files Should You Send to an RF PCB Supplier for a Faster Quote?

Send complete manufacturing and assembly files so the RF PCB supplier can quote accurately and identify technical risks before production.

For RF PCB projects, incomplete information often causes delays. A supplier may need to ask about laminate type, dielectric thickness, copper weight, impedance, surface finish or test requirements before the quote can be trusted. The more complete the RFQ package is, the easier it is to avoid incorrect pricing and later engineering changes.

File or RequirementWhy It Helps
Gerber or ODB++Board layout review.
Drill filesHole and via review.
StackupLayer and material details.
ImpedanceTrace geometry check.
MaterialAvailability check.
BOMPCBA quotation.
Pick-and-placeAssembly placement.
Test requirementsInspection planning.

EBest Circuit (Best Technology) can provide a DFM pre-review report, BOM optimization list and process adaptation suggestions. This is valuable when the buyer needs to move from PCB layout files to sample verification without losing time in repeated file clarification.

FAQs about RF PCB Supplier

What does an RF PCB supplier do?

An RF PCB supplier manufactures boards for radio-frequency and microwave signals. The supplier should understand low-loss materials, controlled impedance, stackup design, drilling, plating, surface finish, testing and production repeatability.

Is FR4 suitable for RF PCB projects?

FR4 can work for some lower-frequency or cost-sensitive RF projects. For high-frequency, microwave, radar, antenna or low-loss projects, engineers often review Rogers, Taconic, PTFE, ceramic or hybrid materials.

Can EBest Circuit (Best Technology) provide RF PCB and PCBA service together?

Yes. EBest Circuit (Best Technology) provides RF PCB manufacturing, component sourcing, PCBA assembly and testing support, which helps reduce supplier handoff risk for RF PCB projects.

How do I compare RF PCB supplier cost?

Compare material, stackup, layer count, tolerances, vias, surface finish, testing, quantity and lead time. Do not compare only by cost per square inch because RF PCB complexity changes total cost.

What should I send for an RF PCB quote?

Send Gerber or ODB++ files, drill files, stackup, material requirements, impedance requirements, copper weight, surface finish, quantity, lead time and test requirements. For PCBA, also send BOM and pick-and-place files.

RF PCB Supplier

In closing, the best RF PCB supplier is the one that can understand the electrical purpose of your board, not only manufacture its physical shape. For RF, microwave, antenna, radar, 5G and high-frequency projects, buyers should review material support, DFM capability, impedance control, process limits, certifications, traceability, assembly support and communication speed before production.

EBest Circuit (Best Technology) provides customized PCB and PCBA solutions with one-stop support from PCB manufacturing and component sourcing to PCBA assembly and testing. If you’re sourcing reliable RF PCB or PCB/PCBA manufacturing, including OEM, ODM, prototyping, mass production or custom engineering solutions, reach out to the engineering team for technical support and a quote at sales@bestpcbs.com.

You may also like

Radio Frequency Circuit Board: Materials, Design Rules, and Cost Factors

July 9th, 2026

A radio frequency circuit board is a PCB designed to carry signals that are sensitive to impedance, loss, coupling, and electromagnetic behavior. In practical terms, that usually means the board layout, material choice, stackup, grounding, and connector transitions matter far more than they do on an ordinary low-speed control board.

Not every board that includes a wireless module called RF PCB. The term usually applies when the board itself must support controlled high-frequency signal behavior, such as RF transmission lines, matching networks, filters, antennas, mixers, LNAs, PAs, or microwave interconnects. Once the frequency rises, the board is no longer just a mechanical carrier. It becomes part of the circuit.

Radio Frequency Circuit Board

What Is a Radio Frequency Circuit Board?

A radio frequency circuit board, often called an RF PCB or high-frequency PCB, is a printed circuit board built for circuits that operate in the radio or microwave range. These boards are commonly used in wireless communication, radar, GPS, satellite systems, RF test equipment, automotive telematics, industrial sensing, medical devices, and IoT products.

The key difference from a standard FR-4 board is not just frequency. It is electrical predictability. An RF design needs controlled impedance, stable dielectric behavior, low insertion loss, good return paths, and a layout that limits radiation and coupling.

That is why the same schematic can behave very differently depending on the PCB material, copper geometry, via structure, and connector launch design.

When Is a Standard PCB Not Enough for RF Applications?

Many projects start on standard FR-4 because it is familiar and cost-effective. In some RF products, that is still the right choice. But once signal integrity, loss, or repeatability become tight, ordinary stackups may not be enough.

In general, a standard PCB becomes less suitable when the project includes:

  • Controlled RF transmission lines
  • High-frequency amplifiers or filters
  • Antennas integrated on the board
  • Low-loss signal paths over meaningful distance
  • Tight phase or impedance consistency
  • Microwave connectors and launch structures
  • Multi-band or high-gain RF front ends

If a design only carries short RF traces between a certified module and an antenna connector, FR-4 may still be acceptable. If the board itself contains tuned RF structures, matching sections, or long controlled signal paths, material selection becomes much more critical.

When Is a Standard PCB Not Enough for RF Applications?

Common Materials Used for RF Circuit Boards

The material decision is usually driven by dielectric constant stability, dissipation factor, temperature behavior, moisture absorption, and manufacturability.

Material TypeTypical UseMain AdvantageMain Trade-Off
Standard FR-4Lower-cost RF modules, mixed digital/RF boards, short RF tracesLow cost and easy fabricationHigher loss and less stable dielectric behavior
High-speed FR-4 / low-loss epoxyMid-range RF and mixed-signal boardsBetter loss performance than standard FR-4Still not ideal for demanding microwave designs
PTFE-based laminatesMicrowave, radar, satellite, low-loss RF pathsVery low loss and stable RF behaviorHigher material cost and more demanding processing
Hydrocarbon ceramic laminatesRF and microwave products needing a balance of cost and performanceBetter dimensional and RF stabilityMore expensive than ordinary FR-4
Hybrid stackupsMixed RF and digital boardsLets engineers control cost by using RF material only where neededLamination and DFM complexity increase

For many buyers, the important point is this: the best RF material is not always the most expensive one. It is the one that meets loss, impedance, and stability targets without adding unnecessary fabrication difficulty.

How Material Properties Affect RF PCB Performance?

At RF frequencies, the substrate is an electrical design variable, not just a base material.

The most important properties are:

  • Dielectric constant (Dk): affects trace width, signal velocity, and impedance control
  • Dissipation factor (Df): affects dielectric loss and insertion loss
  • Thickness tolerance: affects impedance repeatability
  • Copper surface profile: affects conductor loss at higher frequencies
  • Thermal stability: matters for power amplifiers and outdoor products
  • Moisture absorption: matters for frequency stability and reliability in harsh environments

If the dielectric constant shifts too much across frequency or production lots, the board can move off target even when the fabrication dimensions look correct.

RF PCB Stackup and Impedance Control

A radio frequency circuit board should be designed with the stackup settled early, not after routing is nearly done.

That is because the stackup controls:

  • Microstrip or stripline impedance
  • Reference plane continuity
  • Return current path quality
  • Trace spacing and coupling
  • Connector launch geometry
  • Via transition behavior

Most RF boards rely on microstrip or grounded coplanar waveguide structures on outer layers, because they are easier to tune and measure. Stripline can work well too, especially where shielding and coupling control matter more than easy tuning access.

Key Layout Rules for a Radio Frequency Circuit Board

At RF, a board can fail even when the schematic is correct. Layout decisions directly affect gain, noise, return loss, spurious response, and EMC behavior.

The most important layout rules usually include:

  • Keep RF traces short and direct
  • Avoid unnecessary layer transitions
  • Maintain continuous reference planes
  • Control trace width and spacing from the beginning
  • Isolate noisy digital, clock, and power-switching areas from sensitive RF paths
  • Place matching components close to the device pins they tune
  • Keep the ground via fence strategy consistent around critical RF regions
  • Minimize stubs at connectors, pads, and test access points

For higher-frequency boards, even pad shape, solder mask opening, and connector footprint transitions can noticeably change performance.

Why Grounding Matters More in RF PCB Design?

Grounding problems are one of the most common reasons RF boards behave differently in prototype, validation, and mass production.

A good RF ground system is not just ā€œmore copper.ā€ It requires a predictable return path. Gaps in reference planes, poor stitching around transmission lines, and mixed return currents from digital and RF sections can all degrade performance.

In practical RF layouts, engineers often use:

  • Solid reference planes under RF traces
  • Stitching vias around RF boundaries and connector launches
  • Controlled grounding around antennas and shield cans
  • Partitioning between RF, analog, digital, and power sections

If the grounding strategy is weak, the board may show unstable tuning, increased loss, or unexpected radiation.

Why Grounding Matters More in RF PCB Design?

Vias, Connectors, and Transitions in High-Frequency Boards

At lower frequencies, vias and connectors are mostly interconnect details. At RF, they are part of the transmission path.

The decision logic is simple: every transition adds discontinuity, so transitions should be limited and designed intentionally.

RF Transition ElementMain ConcernPractical Design Focus
Signal viaInductance and impedance discontinuityReduce unnecessary transitions and optimize return path vias
Connector launchReflection and mismatchTune pad shape, anti-pad, and ground stitch pattern
Test point or stubAdded discontinuity and radiationAvoid on critical RF traces when possible
SMA or edge connector areaMechanical fit and RF continuityKeep launch geometry consistent with stackup
Board-to-board RF pathCoupling and lossShort path, controlled impedance, stable connector system

If the project includes microwave connectors, the launch region should usually be reviewed as a separate RF structure, not treated as a standard footprint.

Can FR-4 Be Used for a Radio Frequency Circuit Board?

Yes, but only within the right application boundary.

FR-4 can still be acceptable when:

  • RF frequency is modest
  • RF path is short
  • Insertion loss is not extremely tight
  • The design uses a certified RF module and the host board only carries short matched traces
  • Cost sensitivity is higher than peak RF performance

FR-4 becomes less attractive when:

  • Design includes long RF paths
  • Can be operates at higher microwave frequencies
  • phase consistency matters
  • Includes integrated antennas or distributed RF structures
  • Needs low loss and repeatable tuning across production lots

In other words, FR-4 is not ā€œwrong.ā€ It is just not universal.

Typical Applications of RF Circuit Boards

A radio frequency circuit board can appear in many industries, but the design priorities are not always the same.

Common applications include:

  • Wireless communication equipment
  • GPS and GNSS devices
  • Wi-Fi, Bluetooth, and IoT hardware
  • RF power amplifiers and front-end modules
  • Radar and sensing systems
  • Medical telemetry devices
  • Automotive RF electronics
  • Satellite and aerospace communication hardware
  • RF test and measurement equipment

For example, an IoT gateway may care most about mixed-signal integration and manufacturability, while a radar board may care more about loss, phase stability, and controlled transitions.

Manufacturing Challenges of RF PCBs

RF boards are often harder to manufacture consistently than standard digital boards because electrical behavior is tied closely to fabrication details.

The most common manufacturing challenges include:

  • Tighter impedance tolerance requirements
  • Laminate handling differences for PTFE-based materials
  • Dimensional stability during lamination
  • Copper roughness effects at higher frequency
  • Drill quality and registration around controlled transitions
  • Hybrid stackup bonding complexity
  • Solder mask influence near RF launch areas

That is why DFM review matters early. A board that works in simulation but ignores real fabrication tolerances can become expensive to debug later.

This is also where EBest Circuit (Best Technology) can be useful. For RF-related PCB or PCBA projects, the practical value is not just fabrication capacity. It is the ability to review stackup, manufacturability, material choice, and assembly fit before the project enters production.

RF PCB Assembly and Testing Considerations

RF assembly is not just ordinary SMT with different parts. Placement accuracy, connector alignment, shielding, cleaning control, and test setup can all affect final performance.

Important assembly and test concerns include:

  • Connector coplanarity and solder quality
  • Shield can placement and rework access
  • Stability of matching network components
  • Board cleanliness, especially where leakage or detuning matters
  • Cable and fixture repeatability during validation
  • Test method selection such as VNA measurement, insertion loss, return loss, or gain verification

For RF PCBA projects, buyers should also think ahead about whether they need bare-board delivery, assembly only, tuned prototype support, or functional RF test support.

What to Provide When Requesting a Quote for an RF Circuit Board

A useful RF quotation needs more than ā€œboard size and layer count.ā€

The most helpful files and notes usually include:

  • Gerber or ODB++ files
  • Layer stackup
  • Target impedance and trace type
  • Material preference or acceptable alternatives
  • Operating frequency range
  • Copper thickness
  • Connector type and launch details
  • Assembly requirement if PCBA is needed
  • RF test requirement if applicable
  • Prototype quantity and production forecast

If the board includes a special RF laminate, hybrid stackup, controlled launch area, or microwave connector, that should be stated clearly in the inquiry. Otherwise, the supplier may quote the board as if it were a standard PCB, which creates avoidable back-and-forth later.

How to Choose the Right RF PCB Manufacturer?

The right RF PCB supplier is not simply the one with the lowest laminate price. The better question is whether the supplier can support the actual engineering risk of the design.

A good evaluation checklist includes:

  • Experience with RF and high-frequency materials
  • Ability to support hybrid stackups if needed
  • Impedance control capability
  • Understanding of connector launch and grounding details
  • Assembly support for RF components and shielding
  • Test and inspection capability aligned with the product
  • Willingness to review DFM issues before build

For engineers moving from prototype into production, EBest Circuit’s one-stop PCB manufacturing, component sourcing, PCBA assembly, and technical review model can reduce handoff mistakes, especially when the design mixes RF, digital control, and power sections on one board.

Conclusion

A radio frequency circuit board is not just a normal PCB running at a higher speed. It is a board whose electrical behavior depends strongly on material properties, stackup structure, grounding, trace geometry, and transitions. The right material and layout choices depend on the actual RF function, not just the frequency number alone.

If you are evaluating an RF PCB or RF PCBA project, the most practical approach is to define the frequency range, loss target, impedance structure, material options, and assembly requirements early. For RF PCB and PCBA support, contact EBest Circuit at sales@bestpcbs.com.

You may also like

MIMO Antenna | RF PCB Layout, PCB Types, and Impedance Control

May 27th, 2026

MIMO antenna is widely used in 5G CPE, LTE gateways, WiFi routers, IoT modules, UAV communication units, and industrial wireless devices. In these products, antenna performance is not only related to the antenna structure itself, but also to the PCB layout, RF trace consistency, connector reliability, controlled impedance, and PCBA assembly quality.

From a PCB and PCBA manufacturing point of view, the goal is not to redesign the antenna. The goal is to manufacture and assemble the board according to the customer’s approved RF layout, stackup, material, impedance, and assembly requirements.

Before fabrication, engineers and buyers should confirm several practical details, including RF trace width, PCB type, stackup, antenna keep-out area, controlled impedance, connector footprint, surface finish, BOM, pick-and-place file, and assembly drawing. For MIMO antenna PCB fabrication, RF PCB manufacturing, or PCBA assembly support, you can send your Gerber files, BOM, stackup, and assembly requirements to sales@bestpcbs.com for review and quotation.

MIMO antenna

What Is a MIMO Antenna?

A MIMO antenna is an antenna system that uses multiple antenna paths to send and receive wireless signals. MIMO stands for Multiple Input, Multiple Output. It is widely used in 5G, LTE, WiFi, IoT, industrial wireless devices, routers, gateways, UAV communication units, and smart electronic products.

For engineers and buyers, the key point is not only how the antenna works in theory. In a real product, the MIMO antenna is closely connected with the PCB layout, RF feed lines, grounding area, impedance control, connectors, and PCBA assembly quality.

A typical product using a MIMO antenna may include:

  • RF feed lines on the PCB
  • Printed antenna areas or external antenna connectors
  • Matching component pads
  • Controlled impedance traces
  • RF connectors such as SMA, IPEX, U.FL, or similar interfaces
  • Wireless module or chipset area
  • Ground reference and shielding clearance

From a PCB and PCBA manufacturing point of view, the role of the manufacturer is not to redesign the antenna. The real task is to produce the PCB and assemble the PCBA according to the customer’s approved RF layout, stackup, impedance, and assembly requirements.

For this reason, MIMO antenna projects should be reviewed carefully before fabrication. RF trace width, PCB stackup, antenna keep-out area, connector footprint, surface finish, and assembly files should all be checked early to reduce production risk.

2×2 MIMO Antenna vs 4×4 MIMO Antenna PCB

A 2×2 MIMO antenna usually uses two RF paths, while a 4×4 MIMO antenna uses four RF paths. For PCB manufacturing, this difference affects layout density, connector quantity, impedance control, and PCBA inspection.

Item2×2 MIMO Antenna PCB4×4 MIMO Antenna PCB
RF paths24
Layout densityLowerHigher
PCB space pressureLowerHigher
RF connectorsFewerMore
Matching componentsFewerMore
Controlled impedanceRequiredMore critical
PCBA inspectionModerateMore detailed

A 4×4 board usually needs more careful RF trace routing, connector placement, antenna spacing, and assembly checking. For compact devices, layout density should be reviewed early to reduce fabrication and assembly risks.

4×4 MIMO Antenna 5G PCB Requirements

A 4×4 MIMO antenna 5G board usually has tighter PCB space and more RF paths than a basic wireless board. This makes stackup, impedance control, and connector assembly more important.

Before production, these items should be reviewed:

Production ItemWhat to Confirm
PCB stackupDielectric thickness and layer structure
RF trace widthMatches the impedance calculation
Copper thicknessAffects etching and final impedance
Connector footprintSupports soldering and mechanical strength
Antenna areaKeep-out area is clear
Surface finishSuitable for RF connector soldering
PCBA filesBOM, placement file, and assembly drawing are complete

Most RF feed lines are designed around 50Ī© controlled impedance. The final trace width should be calculated based on the confirmed stackup, material data, copper thickness, and production tolerance.

LTE MIMO Antenna and 4G LTE MIMO Antenna PCB

An LTE MIMO antenna or 4G LTE MIMO antenna product often uses RF connectors, coaxial cables, module interfaces, or printed antenna areas. The PCB should support stable RF transmission and reliable assembly.

For LTE-related boards, the main manufacturing checks include:

  • RF trace width and clearance
  • Connector footprint accuracy
  • Ground reference near RF paths
  • Matching component pad size
  • Board edge accuracy if the antenna is near the outline
  • Surface finish for stable soldering
  • PCBA inspection for connectors and small RF components

For products using external LTE antennas, connector strength and cable direction should be checked before assembly. This helps reduce mechanical stress during final product installation.

MIMO WiFi Antenna PCB for Compact Devices

A MIMO WiFi antenna board is often used in WiFi 6, WiFi 7, router, gateway, smart home, and IoT products. These products usually have compact layouts, small RF components, and limited antenna space.

For compact WiFi boards, the PCB layout review should focus on:

  • Antenna keep-out area
  • RF trace continuity
  • Controlled impedance requirement
  • Ground clearance
  • Connector position
  • Component height near antenna areas
  • Shielding can clearance
  • Assembly access for inspection

Here, PCB layout support means manufacturability review and assembly review. It does not mean changing the customer’s full RF antenna design. The approved RF structure should be protected during PCB fabrication and PCBA assembly.

External MIMO Antenna Connections for PCB/PCBA

Many wireless products use an external MIMO antenna, such as a MIMO panel antenna, directional antenna, omnidirectional antenna, FPC antenna, or coaxial antenna interface. For a PCB and PCBA manufacturer, the focus is not to select the antenna type. The focus is to make sure the antenna connection on the PCB is accurate, reliable, and easy to assemble.

The connector area should be reviewed before production because it affects soldering strength, cable direction, enclosure fit, and long-term product reliability.

Antenna InterfacePCB/PCBA Focus
External MIMO antennaRF connector footprint, solder pad strength, and cable direction
MIMO panel antennaConnector position, enclosure clearance, and coax cable routing
MIMO directional antennaStable RF connector assembly and mechanical fixing
Omnidirectional MIMO antennaConnector layout, ground area, and assembly access
FPC antennaFPC connector soldering, cable bending direction, and fixture space
Coaxial antenna interfaceU.FL, IPEX, SMA, or similar connector footprint control

For PCBA production, RF connectors need careful inspection. Poor soldering, weak pad design, unsuitable plating, or tight cable bending may affect final assembly reliability. Before production, customers should confirm the connector type, footprint, cable direction, assembly drawing, and any mechanical clearance requirement.

PCB Types for MIMO Antenna Boards

Different wireless products may require different PCB types. The right choice depends on frequency, cost target, product size, impedance requirement, assembly structure, and reliability needs.

PCB TypeCommon UseManufacturing Focus
FR4 PCBBasic WiFi, IoT, and cost-sensitive wireless boardsMature process and cost-effective production
High-Tg PCBIndustrial wireless modules and long-running devicesBetter thermal stability
RF PCB5G, LTE, WiFi, and RF modulesImpedance, dielectric thickness, and RF trace control
Rogers PCBHigh-frequency and low-loss wireless productsStable dielectric performance for higher-frequency applications
Hybrid Stackup PCBRF + digital mixed circuitsBalances RF performance, cost, and structure
Rigid-Flex PCBSpace-limited wireless devicesSupports compact structure and reliable interconnection

For MIMO antenna PCB projects, PCB type selection should not be based only on price. It should match the RF path, stackup, impedance requirement, connector type, and PCBA assembly method.

Before production, these details should be confirmed:

  • PCB type
  • Material grade
  • Board thickness
  • Copper thickness
  • Stackup structure
  • Impedance requirement
  • Surface finish
  • Assembly method
  • Material availability

For RF-related projects, PCB type or material replacement should be handled carefully. Even when two options look similar, changes in dielectric constant, board thickness, copper type, or stackup may affect impedance result and production consistency.

MIMO Antenna PCB Layout and DFM Review

For this topic, PCB layout means layout support for manufacturability and assembly. It does not mean full antenna design or RF system redesign.

A practical DFM review should check whether the approved RF layout can be fabricated and assembled reliably.

Layout AreaDFM Review Point
Antenna keep-out areaNo unexpected copper, screws, cables, or tall components
RF feed lineShort, clean, and impedance-controlled
Ground areaStable ground reference and proper clearance
Matching component padsAccurate pad size and easy assembly
Connector placementSuitable for cable direction and inspection
Shielding areaEnough clearance from RF-sensitive areas
Board outlineCorrect mechanical fit and antenna edge control

For faster review, customers should provide Gerber files, PCB stackup, impedance requirement, BOM, pick-and-place file, assembly drawing, and RF notes.

MIMO Antenna PCB Manufacturing and PCBA Inspection

For MIMO antenna PCB manufacturing, the most important point is repeatability. A PCB supplier should help keep the same stackup, copper geometry, impedance result, and assembly quality from prototype to batch production.

Key manufacturing controls include:

Control ItemWhat to Check
Stackup controlDielectric thickness and layer structure
Controlled impedanceRF trace width, copper thickness, and tolerance
Etching accuracyRF trace shape and spacing
Board outlineAntenna edge and mechanical fit
Surface finishSolderability and connector reliability
Solder maskClearance around RF-sensitive areas
AOI inspectionTrace shape and copper defects
Electrical testContinuity and isolation
PCBA inspectionRF connector and matching component quality

For PCBA assembly, special attention should be given to:

  • RF connector soldering
  • Small matching components
  • Shielding can position
  • Coax cable direction
  • Connector mechanical strength
  • Cleanliness around RF areas
  • X-ray inspection when required

EBest Circuit supports PCB fabrication, RF board material selection, controlled impedance, DFM review, component sourcing, PCBA assembly, AOI, X-ray, electrical testing, and production follow-up for wireless electronic products.

FAQs About MIMO Antenna

Q1: What is a MIMO antenna?
A MIMO antenna uses multiple antenna paths to improve wireless speed, coverage, and connection stability.

Q2: What is a MIMO antenna PCB?
It is a PCB that carries antenna areas, RF feed lines, matching components, connectors, grounding areas, and related wireless circuits.

Q3: What is the difference between 2×2 and 4×4 MIMO antenna PCB?
A 2×2 board has two RF paths, while a 4×4 board has four. A 4×4 board usually needs more PCB space, better routing control, and more careful PCBA inspection.

Q4: What should be checked for a 4×4 MIMO antenna 5G PCB?
The stackup, RF trace width, impedance requirement, antenna keep-out area, connector footprint, surface finish, and assembly files should be checked before production.

Q5: Can FR4 be used for MIMO WiFi antenna PCB?
Yes. FR4 can be used for some WiFi and IoT products. For higher-frequency or lower-loss applications, RF PCB, Rogers PCB, or hybrid stackup PCB may be considered.

Q6: Does MIMO antenna PCB need controlled impedance?
Yes. RF feed lines usually require controlled impedance, commonly 50Ī©, to support stable RF transmission.

Q7: What PCB type is used for MIMO antenna boards?
Common options include FR4 PCB, High-Tg PCB, RF PCB, Rogers PCB, Hybrid Stackup PCB, and Rigid-Flex PCB. The choice depends on frequency, stackup, impedance, cost, and assembly structure.

Q8: What should be checked for external MIMO antenna connections?
RF connector footprint, solder strength, cable direction, mechanical clearance, plating quality, and PCBA inspection should be checked.

Q9: Can EBest Circuit manufacture MIMO antenna PCB and PCBA?
Yes. EBest Circuit can support MIMO antenna PCB fabrication, controlled impedance, RF material selection, DFM review, component sourcing, PCBA assembly, and testing. Send your Gerber, stackup, BOM, and assembly files to sales@bestpcbs.com for a quotation.

You may also like