PCB manufacturing PCB manufacturing
Home > Blog

What is IPC-6013 Standard? IPC 6012 vs IPC-6013

May 12th, 2026

What is IPC-6013 and how does it differ from IPC 6012 for printed circuit board manufacturing? For professionals working with flexible and rigid flex PCBs, understanding IPC-6013 is key to ensuring product reliability and avoiding production errors. This guide breaks down IPC-6013’s core definitions, classifications, manufacturing guidance, and direct comparisons with IPC 6012 to resolve common project pain points.

IPC-6013, https://www.bestpcbs.com/blog/2026/05/ipc-6013/

What is the IPC-6013 Standard?

IPC-6013 is a globally recognized industry standard from the IPC, outlining qualification and performance requirements for flexible and rigid flex printed circuit boards. It addresses the unique challenges of flexible circuits, such as bending, folding, and mechanical stress, while ensuring consistent electrical performance.

The standard establishes uniform criteria for material selection, manufacturing processes, electrical testing, and quality control. It ensures consistency across production batches, aligning manufacturers, designers, and buyers on flexible circuit performance expectations. Without IPC-6013, flexible PCB production lacks standardized quality benchmarks, leading to inconsistent reliability and higher field failure risks.

IPC-6013 applies to all flexible circuit types, single-layer, double-layer, multi-layer, and rigid flex combinations. It is widely adopted in consumer electronics, automotive, aerospace, and medical devices, where flexible circuits enable compact, dynamic product designs.

What Are Types of IPC-6013?

IPC-6013 is categorized primarily by performance classes which dictate the quality and reliability requirements for different applications. These classes are designed to match the specific needs of various industries ensuring that flexible circuits meet the necessary standards without over engineering or unnecessary cost:

  • IPC 6013 Class 1: This is the entry level class for flexible circuits intended for non critical applications where basic functionality is the primary requirement. It allows for minor cosmetic defects and lower performance thresholds making it suitable for low cost consumer products with short service lives.
  • IPC 6013 Class 2: A mid tier class focused on reliable performance for dedicated service applications. It imposes stricter quality controls than Class 1 including tighter tolerances for conductor width spacing and solderability. This class is widely used in industrial and automotive electronics where consistent performance over extended periods is necessary.
  • IPC 6013 Class 3: The highest performance class for critical applications where failure could result in significant consequences such as injury equipment damage or loss of life. It requires the most stringent manufacturing controls testing and quality assurance measures making it ideal for aerospace medical and military applications.

What is IPC 6013 Class 2 and What Applications is it Suitable for?

IPC 6013 Class 2 balances reliability and cost, making it the most common choice for industrial and commercial flexible PCBs. It defines clear requirements for conductor integrity, insulation quality, solderability, and mechanical durability, ensuring consistent performance in demanding but non-critical environments.

  • Conductor and Insulation Tolerances: Strict limits for conductor width, spacing, and minimum copper thickness, ensuring electrical integrity under normal operating conditions.
  • Environmental Resistance: Requirements to withstand temperature fluctuations, humidity, and chemical exposure common in industrial and commercial settings.
  • Electrical Testing: Mandatory continuity, insulation resistance, and dielectric strength tests to verify performance and identify potential defects.
  • Automotive Electronics: Dashboard controls, sensor modules, and in-car communication systems that require reliable performance in varying temperatures.
  • Industrial Control Systems: Equipment used in manufacturing, automation, and process control, where long-term reliability is critical.
  • 5G Communication Devices: Compact, flexible components for smartphones, routers, and other wireless equipment.
  • Non-Life-Support Medical Devices: Diagnostic tools, wearable health monitors, and other medical equipment that does not directly impact patient safety.

What is IPC 6013 Class 3 and How Does it Differ from Class 2?

IPC 6013 Class 3 is the highest performance classification for critical flexible PCB applications, with stricter requirements than Class 2. The table below clearly outlines the key differences between the two classes, along with core details of Class 3.

CategoryIPC 6013 Class 2IPC 6013 Class 3
Performance LevelMid-tier, balanced reliability and cost for non-critical dedicated service applicationsHighest tier, designed for critical applications where failure has severe consequences
TolerancesTighter than Class 1, with reasonable allowances for conductor width, spacing, and copper thicknessStrictest tolerances, eliminating even minor defects acceptable in Class 2
Testing RequirementsThorough electrical testing (continuity, insulation resistance, dielectric strength)Rigorous testing including environmental stress, thermal cycling, and vibration testing
Defect AllowancesMinor cosmetic defects are acceptable as long as they do not impact performanceNo defects (scratches, cracks, voids) that could affect performance are permitted
Documentation & TraceabilityStandard documentation of manufacturing processes and test resultsComprehensive documentation and full traceability of all components and process steps
Typical ApplicationsAutomotive electronics, industrial control systems, 5G devices, non-life-support medical toolsAerospace components, military equipment, life-support medical devices, deep-sea exploration gear
CostModerate, cost-effective for commercial and industrial use30-50% higher than Class 2, justified by critical performance needs
IPC-6013, https://www.bestpcbs.com/blog/2026/05/ipc-6013/

Is there an IPC 6013 Class 3A and What Specifications Does it Include?

No, official IPC 6013 Class 3a classification exists under IPC standards. Confusion around Class 3a often comes from misinterpreting IPC guidelines or custom manufacturer requirements. IPC-6013 only recognizes three official classes: Class 1, Class 2, and Class 3.

  • Informal “Class 3a” Use: Some industries or manufacturers use the term informally to describe Class 3 circuits with additional custom specifications.
  • Custom Specifications: These may include specialized materials, enhanced environmental resistance, or unique testing protocols for niche applications like aerospace or military use.
  • Avoid Official Use: “Class 3a” is not part of the official IPC-6013 standard, so avoid using it when referencing compliance.
  • Document Custom Requirements: Clearly outline any additional specifications separately from IPC-6013’s official classes.
  • Verify Compliance: Always reference IPC-6013’s official classes (1, 2, 3) and work with manufacturers to document custom needs.

What is the Latest Revision of IPC-6013 and What Changes Does it Bring?

The latest revision of IPC-6013 is Revision C, released in December 2013. It updated Revision B to address advances in flexible circuit technology and emerging industry needs, ensuring the standard remains relevant for modern manufacturing.

  • High-Density Circuit Requirements: Tighter tolerances for fine-pitch conductors and microvias, addressing demand for smaller, more compact flexible circuits in consumer electronics and medical devices.
  • Updated Material Guidelines: New flexible substrate materials and adhesives with improved performance and durability.
  • Lead-Free Solder Guidance: Alignment with global environmental regulations like RoHS, providing clear guidelines for lead-free manufacturing.
  • Enhanced Testing Procedures: More detailed protocols for environmental stress testing and mechanical durability, ensuring circuits withstand real-world conditions.
  • Rigid Flex Clarification: Detailed guidance on the interface between rigid and flexible sections, ensuring rigid flex circuits meet the same performance standards as fully flexible circuits.

How Does IPC-6013 Guide Flexible Circuit Manufacturing?

IPC-6013 guides every stage of flexible circuit manufacturing, addressing unique challenges like material handling and mechanical stress to ensure consistent, high-quality products.

  • Material Selection: IPC-6013 specifies the acceptable types of substrates adhesives and conductors for flexible circuits. It defines requirements for substrate thickness copper foil weight and insulation properties ensuring that materials can withstand bending and environmental stress without degrading.
  • Manufacturing Process Controls: The standard outlines strict controls for processes such as etching lamination and drilling. It specifies the acceptable parameters for each process including temperature pressure and time to ensure consistent results across production batches.
  • Conductor and Insulation Requirements: IPC-6013 defines the minimum requirements for conductor width spacing and thickness as well as insulation thickness and dielectric strength. These requirements ensure that flexible circuits maintain electrical performance even when bent or flexed.
  • Surface Finish Requirements: The standard provides guidance on acceptable surface finishes for flexible circuits including solder mask and conformal coating. It specifies the requirements for surface finish thickness adhesion and resistance to environmental factors.
  • Testing and Inspection: IPC-6013 mandates a range of tests to verify the performance and quality of flexible circuits. These tests include continuity testing insulation resistance testing dielectric strength testing and mechanical durability testing such as bending and flexing tests.

What is the Difference between IPC 6012 and IPC-6013?

IPC 6012 and IPC-6013 serve distinct purposes, focusing on rigid and flexible/rigid flex PCBs respectively. The table below compares the two standards across key categories.

CategoryIPC 6012IPC-6013
Primary FocusRigid printed circuit boards including HDI and standard rigid PCBsFlexible and rigid flex printed circuit boards
Core ApplicationApplications where PCBs remain rigid such as computers industrial equipment and automotive control unitsApplications requiring bending folding or dynamic movement such as wearables medical devices and aerospace components
Material RequirementsFocuses on rigid substrates such as FR-4 with strict requirements for thickness flatness and thermal stabilityFocuses on flexible substrates such as PI and PET with requirements for flexibility durability and resistance to mechanical stress
Mechanical RequirementsNo requirements for flexibility or bending resistance focuses on rigidity and flatnessStrict requirements for bending flexing and mechanical durability including minimum bend radius and flex cycle life
Testing ProtocolsTests focus on electrical performance thermal stability and mechanical rigidityTests include bending flexing and environmental stress testing in addition to standard electrical performance tests

How Do IPC 6012 and IPC-6013 Differ in Terms of Performance Requirements?

The performance requirements of IPC 6012 and IPC-6013 differ significantly due to their focus on rigid vs. flexible PCBs. Below are the key differences in performance criteria.

  • Electrical Performance: IPC 6012 focuses on electrical performance for rigid PCBs including impedance control signal integrity and copper conductivity. It sets strict requirements for conductor resistance insulation resistance and dielectric strength. IPC-6013 includes similar electrical performance requirements but also addresses the impact of bending and flexing on electrical performance ensuring that flexible circuits maintain signal integrity even when deformed.
  • Mechanical Performance: IPC 6012 has no requirements for flexibility or bending resistance as rigid PCBs are not designed to bend. It focuses on mechanical rigidity flatness and resistance to thermal expansion. IPC-6013 places heavy emphasis on mechanical performance including minimum bend radius flex cycle life and resistance to fatigue from repeated bending.
  • Environmental Performance: Both standards include requirements for environmental resistance but IPC-6013 adds specific requirements for flexible circuits such as resistance to moisture absorption and chemical exposure during bending. IPC 6012 focuses on environmental resistance for rigid PCBs including thermal shock and humidity resistance.
  • Quality Control: IPC 6012 requires quality control measures focused on maintaining the rigidity and flatness of PCBs including inspection for warpage and delamination. IPC-6013 requires additional quality control measures to ensure that flexible circuits do not develop cracks tears or other defects during manufacturing or use.

When Should you Use IPC 6012 Instead of IPC-6013 for Printed Board Projects?

Choosing between IPC 6012 and IPC-6013 depends on project needs like PCB type, cost, and application. The following points outline when IPC 6012 is the better choice.

  • Use IPC 6012 when the project requires rigid PCBs that will not be bent folded or subjected to mechanical stress. Rigid PCBs are ideal for applications where stability and flatness are critical such as motherboards industrial control panels and automotive engine control units.
  • Use IPC 6012 when cost is a primary concern. Rigid PCBs manufactured to IPC 6012 standards are typically less expensive than flexible circuits manufactured to IPC-6013 standards due to simpler materials and manufacturing processes.
  • Use IPC 6012 for high density applications that do not require flexibility. IPC 6012 includes detailed requirements for HDI rigid PCBs which are ideal for applications such as smartphones and computers where space is limited but flexibility is not needed.
  • Use IPC 6012 when the application does not require dynamic movement. If the PCB will remain stationary throughout its service life IPC 6012 provides the necessary standards to ensure reliability without the additional requirements of IPC-6013.
  • Use IPC 6012 for applications that require high thermal stability. Rigid PCBs manufactured to IPC 6012 standards are designed to withstand high temperatures making them suitable for applications such as power supplies and industrial heating systems.

How to Ensure Compliance with IPC-6013 Standards in Production?

Maintaining IPC-6013 compliance requires careful control of materials, processes, and testing. Below are actionable steps to ensure production meets the standard’s requirements.

  • Select Qualified Materials: Use only materials that meet the requirements specified in IPC-6013 including flexible substrates adhesives and conductors. Verify material certifications and test samples to ensure they meet the standard’s specifications.
  • Implement Process Controls: Establish strict process controls for all manufacturing steps including etching lamination drilling and surface finishing. Monitor process parameters such as temperature pressure and time to ensure consistency and compliance.
  • Conduct Regular Testing: Perform all required tests outlined in IPC-6013 including electrical testing mechanical testing and environmental testing. Implement a regular testing schedule to verify that production batches meet the standard’s requirements.
  • Train Production Personnel: Ensure all production personnel are trained on IPC-6013 requirements and understand the importance of compliance. Provide ongoing training to keep personnel updated on any changes to the standard.
  • Implement Quality Assurance Systems: Establish a quality assurance system to monitor and document all production processes. Maintain detailed records of material certifications process parameters and test results to ensure traceability and compliance.
  • Work with Certified Manufacturers: Partner with manufacturers that are certified to produce flexible circuits to IPC-6013 standards. Verify their certification and ask for documentation of past compliance to ensure they can meet the standard’s requirements.

Where Can You Find a Reliable IPC-6013 PDF Document?

Accessing a reliable IPC-6013 PDF is crucial for ensuring compliance. The following sources provide authentic, up-to-date copies of the standard.

  • Official IPC Website: The IPC website offers the latest revision of IPC-6013 as a downloadable PDF. This is the most reliable source for the official standard as it ensures you have the most up to date and accurate information.
  • Authorized IPC Distributors: Authorized distributors of IPC standards often provide downloadable PDF versions of IPC-6013. These distributors are certified by the IPC ensuring that the documents they provide are authentic and unmodified.
  • Industry Associations: Many electronics industry associations provide access to IPC standards including IPC-6013 for their members. These associations often offer discounted access to standards for members making it an affordable option.
  • Certified Manufacturing Partners: Manufacturers certified to produce flexible circuits to IPC-6013 standards often have a copy of the standard available for their clients. They can provide a PDF version or direct you to a reliable source.
  • Educational Institutions: Technical colleges and universities with electronics engineering programs often have access to IPC standards including IPC-6013. Students and faculty may be able to access the PDF through the institution’s library.
 IPC-6013, https://www.bestpcbs.com/blog/2026/05/ipc-6013/

FAQ About IPC-6013 and IPC 6012

Q1: Can I use IPC 6012 standards for flexible PCBs?

A1: No, IPC 6012 is designed exclusively for rigid PCBs and does not address flexible circuit requirements. Using it for flexible PCBs risks non-compliance and compromised durability. Always use IPC-6013 for flexible and rigid flex PCBs.

Q2: Is IPC-6013 required for all flexible PCB projects?

A2: While not legally mandatory, IPC-6013 is the industry’s recognized standard for flexible PCBs. Most manufacturers, buyers, and regulators require compliance to ensure reliability. Skipping it increases failure risks and lost business.

Q3: What is the cost difference between IPC 6013 Class 2 and Class 3?

A3: Class 3 flexible circuits cost 30-50% more than Class 2. The premium comes from stricter manufacturing controls, rigorous testing, and higher-quality materials—justified for critical applications where failure is unacceptable.

Q4: How often is IPC-6013 updated?

A4: IPC-6013 is updated periodically to reflect technology advancements. The last major revision was Revision C in 2013. Check the official IPC website regularly for the latest updates.

Q5: Can I mix IPC 6012 and IPC-6013 requirements for rigid flex PCBs?

A5: No, rigid flex PCBs must follow IPC-6013, which includes specific guidelines for the rigid-flex interface. While IPC 6012 may offer general rigid PCB guidance, IPC-6013 is the primary standard for all rigid flex production.

You may also like

Best PCB Assembly and Manufacturing for Defense and Aerospace

May 12th, 2026

Struggling with PCB assembly and manufacturing that fails extreme aerospace environments, lacks strict certifications, or misses tight delivery deadlines? This guide breaks down materials, processes, standards, testing, and reliability solutions to solve your high‑reliability PCB pain points and support mission‑critical projects.

PCB Assembly and Manufacturing, https://www.bestpcbs.com/blog/2026/05/pcb-assembly-and-manufacturing-for-defense-and-aerospace/

What is Defense and Aerospace PCB Assembly and Manufacturing?

Defense and aerospace PCB assembly and manufacturing refers to the specialized process of designing, fabricating bare boards, soldering components, and conducting reliability testing for mission-critical circuit assemblies, tailored to withstand harsh aerospace and defense environments.

It covers the full cycle of production for functional PCBA products, from initial design and bare board fabrication to component soldering and final reliability testing. This end-to-end process is engineered to meet the unique demands of aerospace and defense applications.

Key requirements include strict dimensional accuracy, uncompromising signal integrity, and long-term durability. Unlike commercial PCB production, it also mandates full process traceability and rigorous quality control to eliminate critical failure risks in mission-critical equipment.

What Materials are Used for Defense and Aerospace PCB Boards?

Material selection directly determines whether a circuit board can survive harsh aerospace environments while maintaining electrical performance. Only high‑performance substrates with verified stability are used in critical applications.

  • High‑Tg FR‑4: Strong thermal stability, low warpage, and reliable mechanical performance for most aerospace control systems.
  • Polyimide (PI): Excellent high-temperature resistance, flex durability, and radiation tolerance ideal for flexible and rigid‑flex PCBs.
  • PTFE (Teflon): Ultra-low signal loss and stable dielectric properties for high-frequency radar, communication, and navigation equipment.
  • Ceramic Substrates: High thermal conductivity and insulation performance for high-power and high-temperature modules.
  • Metal‑Core (Al/Cu): Superior heat dissipation for power components and industrial‑grade high‑power circuits.
  • High‑Frequency Laminates: Optimized dielectric characteristics to maintain clear signal transmission in satellite and avionics systems.

What PCB Assembly and Manufacturing Capabilities Support Aerospace Applications?

Aerospace electronics require extremely precise assembly, miniaturized components, and stable production capacity. The table below shows the core capabilities that directly support mission‑critical aerospace projects.

Capability CategoryTechnical SpecificationTypical Aerospace Application
Daily Placement Speed13,200,000 chips/dayHigh-volume avionics and satellite subsystem production
Minimum SMD Component01005Miniature sensors and compact communication modules
Minimum BGA Pitch0.25 mmHigh-density flight control and data processing units
Board Size Range0.2×0.2 – 22×47.5 inchesSmall sensors to large cabin control assemblies
Assembly TypesSMT, Through‑Hole, MixedFull-range aerospace electronic assembly
Lead Time1–5 daysRapid prototyping and urgent mission projects
Max Component Area50×150 mmIntegrated navigation and power management systems

Advanced PCB Assembly and Manufacturing Processes for Defense Projects

Advanced production processes are essential to achieve miniaturization, high density, and long‑term reliability for aerospace electronics. These refined methods ensure consistent quality under demanding conditions.

  • Precision microvia, blind via, and buried via fabrication for high‑density interconnect (HDI) structures.
  • High-precision placement for 01005 chip components and 0.25 mm pitch BGA devices.
  • Vacuum reflow soldering to reduce voids and improve long‑term solder joint reliability.
  • Conformal coating to protect circuits from moisture, dust, chemicals, and radiation.
  • Impedance‑controlled lamination to preserve signal integrity in high‑frequency systems.
  • Fully automated placement combined with 100% post‑assembly inspection.
  • Rigid‑flex integration for space‑saving layouts in compact aerospace equipment.
PCB Assembly and Manufacturing, https://www.bestpcbs.com/blog/2026/05/pcb-assembly-and-manufacturing-for-defense-and-aerospace/

What Quality Standards Apply to Defense Aerospace PCB Production?

Aerospace PCB production follows strict global standards to ensure consistency, safety, and operational reliability across every production stage. These standards govern materials, processes, testing, and documentation.

  • Aerospace Quality Management System Standards: Govern the entire lifecycle, including design, production, and post-delivery support, ensuring standardized control of all processes to meet aerospace-grade reliability requirements.
  • High-Reliability Assembly Standards: Comply with IPC-A-610 Class 3 (for high-reliability products) with stricter solder joint, cleanliness, and defect tolerance requirements for mission-critical electronic hardware.
  • Environmental Testing Standards: Include thermal cycling, vibration, shock, and aging tests, following standards like MIL-PRF-55110 and IPC-TM-650 to verify performance in extreme aerospace environments.
  • High-Frequency & Impedance Control Standards: Regulate impedance accuracy (e.g., 50Ω single-end, 100Ω differential) and signal integrity, ensuring stable transmission for radar and satellite communication systems.
  • Full Traceability Standards: Mandate complete documentation of materials, components, and production processes, enabling accountability and efficient troubleshooting of any quality issues.
  • Aerospace-Grade Acceptance Criteria: Set stringent standards for PCB fabrication and assembly, including line precision, hole accuracy, and surface treatment, to eliminate potential failure risks.

What Certifications Do Defense PCB Manufacturers Hold?

Certifications provide independent proof that a manufacturer meets global quality and compliance requirements for high‑reliability industries. Top aerospace PCB suppliers maintain a full set of authoritative certifications.

  • AS9100D: Core aerospace quality management system certification.
  • IATF 16949: High‑control process management for automotive and high‑reliability sectors.
  • ISO 9001:2015: International general quality management system.
  • ISO 13485:2016: Medical device quality system for high‑precision applications.
  • UL: Safety, flammability, and electrical insulation certification.
  • RoHS & REACH: Global compliance for hazardous substance control.

How to Ensure High Reliability of Defense Aerospace Circuit Boards?

Ensuring high reliability of defense aerospace circuit boards requires integrating strict controls into every production stage, reliability cannot be achieved by testing alone, but must be designed and built into each process. Below are comprehensive, practical measures to guarantee stable performance in extreme aerospace environments.

  • Strict Incoming Material Inspection: Use only qualified aerospace-grade substrates and components, with rigorous verification of material certificates and performance parameters to eliminate quality risks from the source.
  • Full Lifecycle Traceability: Maintain complete documentation from raw material procurement, bare board fabrication, component soldering to finished product delivery, ensuring every process is traceable for accountability and issue troubleshooting.
  • Standardized Precision Assembly: Follow strict SOPs for high-precision SMT and micro-BGA assembly, ensuring component placement accuracy and solder joint integrity to avoid hidden defects.
  • Optimized Thermal & Layout Design: Adopt thermal equalization and mechatronic-thermal integration design, such as reasonable component layout, heat-conducting material application, and PCB copper layout optimization, to reduce thermal stress and signal interference.
  • Harsh Environment Protection: Apply conformal coating and structural reinforcement to shield circuits from moisture, dust, cosmic radiation, and extreme temperature changes, enhancing environmental robustness.
  • Comprehensive Testing & Screening: Perform full functional testing and environmental stress screening (including thermal cycling, vibration) to simulate in-orbit or flight conditions and verify long-term stability.
  • 100% Final Inspection: Conduct thorough electrical and visual inspection before shipment, eliminating any defective products and ensuring each PCB meets aerospace reliability standards.
PCB Assembly and Manufacturing, https://www.bestpcbs.com/blog/2026/05/pcb-assembly-and-manufacturing-for-defense-and-aerospace/

What Testing Procedures Do Aerospace Grade PCBA Require?

Aerospace‑grade PCBA products must pass comprehensive inspection and validation to ensure they perform safely in mission‑critical scenarios. These tests are standard for all high‑reliability deliveries.

  • Automated Optical Inspection (AOI): Checks surface component placement accuracy, solder joint quality, and visible defects, ensuring compliance with high-reliability assembly standards.
  • X-Ray Inspection: Evaluates hidden solder joints (BGA, QFN) and internal interconnect integrity, critical for detecting micro-cracks or voids that could cause failure.
  • Electrical Testing: Verifies circuit continuity, insulation resistance, and no open/short circuits, ensuring basic electrical functionality.
  • Temperature Cycle Testing: Simulates extreme temperature changes (per IPC-TM-650) to validate performance under aerospace environmental stress.
  • Vibration & Shock Testing: Validates structural durability during flight, launch, or deployment, preventing solder joint fatigue or component detachment.
  • High-Frequency Performance Testing: Verifies impedance accuracy and signal integrity, essential for radar and satellite communication systems.
  • Long-Term Aging Testing: Runs continuous operation under simulated working conditions to confirm extended service life and stability in long-duration missions.

What Aerospace and Defense Electronic Applications Do We Serve?

EBest provides professional PCB assembly and manufacturing for mission‑critical systems across aerospace, defense, medical, and industrial automation. Our solutions support high‑performance equipment in key sectors.

  • Avionics: PCB assembly and manufacturing for flight control systems, cockpit display modules, navigation equipment, and airborne communication devices, ensuring reliability under extreme flight conditions.
  • Satellite Systems: Custom PCBA for onboard control units, sensor interfaces, power management modules, and communication units, tailored to withstand cosmic radiation and zero-gravity environments.
  • Radar & Navigation: High-frequency PCB assemblies for signal processing boards and transmission circuits, supporting precise radar detection and long-range navigation systems.
  • Medical Devices: Precision PCBA for diagnostic equipment, imaging systems, and patient monitoring devices, complying with ISO 13485 standards for high reliability and safety.
  • Industrial Equipment: PCB solutions for high-end automation systems, motion control modules, and high-power drives, ensuring stable operation in industrial harsh environments.
  • Secure Communications: PCBA for encrypted transmission hardware and signal processing equipment, supporting secure, interference-free communication for defense and critical sectors.

Why Choose EBest for Defense and Aerospace PCB Assembly and Manufacturing?

EBest combines deep experience, certified processes, advanced equipment, and one‑stop service to deliver trusted PCB assembly and manufacturing for the most demanding aerospace projects.

  • 19+ years of expertise in high‑reliability PCB assembly and manufacturing: We bring rich industry experience in aerospace and defense PCBA, helping you avoid common production pitfalls, optimize project solutions, and ensure your mission-critical products meet strict reliability requirements, reducing development and rework costs.
  • Full certifications: AS9100D, ISO 13485, IATF 16949, UL, RoHS, REACH: Our complete authoritative certifications guarantee that all PCBA processes comply with global aerospace and defense industry standards, helping you pass project qualification smoothly and enhance the credibility of your products in the market.
  • Monthly capacity of 260,000 sq ft for prototypes to mass production: We provide flexible production support from small-batch prototypes to large-volume mass production, meeting your diverse project needs, whether it’s rapid prototype verification or large-scale delivery, we can ensure stable capacity and consistent quality.
  • Advanced capabilities: 01005 assembly, 0.25 mm BGA, rigid‑flex, ceramic, high‑frequency: Our advanced manufacturing capabilities cover all core needs of aerospace PCBA, supporting miniaturized, high-density, and high-performance product development, helping you achieve technological breakthroughs and product competitiveness.
  • One-stop solutions: PCB fabrication, component sourcing, assembly, box build: We integrate the entire industrial chain to provide turnkey services, saving you the trouble of coordinating multiple suppliers, reducing communication costs and project risks, and ensuring seamless connection between each link to shorten project cycles.
  • Rapid delivery: 24‑hour expedite service and standard lead times of 1–5 days: We prioritize your project timelines, with expedited services for urgent missions and efficient standard delivery, helping you accelerate product launch, meet tight project deadlines, and gain an advantage in time-sensitive aerospace programs.
  • Strict inspection and quality assurance for mission‑critical performance: We implement full-process quality control and rigorous testing, eliminating defective products and ensuring each PCB assembly meets extreme environment operation requirements, reducing the risk of mission failure and protecting your project reputation.
PCB Assembly and Manufacturing, https://www.bestpcbs.com/blog/2026/05/pcb-assembly-and-manufacturing-for-defense-and-aerospace/

How to Get a Custom Quote for Defense Aerospace PCB Projects?

Getting a customized quote is straightforward when you provide clear project information. Our engineering team reviews your requirements quickly to deliver an accurate and practical solution.

  1. Prepare complete design files: Gerber data, BOM, and assembly drawings.
  2. Define specifications: layer count, material, dimensions, and electrical needs.
  3. Describe operating environment: temperature range, vibration, and reliability goals.
  4. Submit documents to our engineering team for professional review.
  5. Receive a customized solution, production flow, and clear lead time.
  6. Confirm details and start prototyping or mass production.

EBest provides professional, high‑reliability PCB assembly and manufacturing for defense, aerospace, medical, and industrial applications. We deliver fully customized PCBA solutions backed by certified processes, advanced manufacturing, and 19+ years of specialized experience. If you need trusted PCB assembly and manufacturing for your mission‑critical projects, contact us to place your order today: sales@bestpcbs.com

FAQs about PCB Assembly and Manufacturing for Defense and Aerospace

Q1: What is the difference between aerospace PCB assembly and standard commercial PCB assembly?A1: Aerospace PCB assembly and manufacturing uses higher‑grade materials, controlled processes, full traceability, and strict environmental testing to ensure stable performance in harsh conditions. Commercial PCB assembly is designed for general indoor use without high‑reliability requirements.

Q2: Does EBest offer rapid prototype services for aerospace PCB projects?

A2: Yes. EBest provides fast prototype PCB assembly and manufacturing with 24‑hour expedited service and standard lead times of 1–5 days to support time‑critical development cycles.

Q3: Can EBest produce rigid‑flex, ceramic, and high‑frequency PCB assemblies?

A3: Yes. EBest has mature processes for rigid‑flex, ceramic, high‑frequency, and metal‑core PCB assembly, supporting avionics, satellite, radar, medical, and industrial high‑performance systems.

Q4: Does EBest provide component sourcing and box assembly services?

A4: Yes. EBest offers full turnkey solutions including reliable component procurement, PCB fabrication, SMT/BGA/through‑hole assembly, box build, CNC machining, and sheet metal integration.

You may also like

What is 340mm to Inches Fraction, Chart & Exact Conversion?

May 12th, 2026

How Many Inches Is 340mm?

340mm to inches equals 13.3858 inches. For normal reading, you can round it to 13.39 inches. If you only need a quick approximate value, 340 mm is about 13.4 inches.

The conversion is simple because 1 inch is exactly 25.4 millimeters. So when you convert millimeters to inches, you divide the millimeter value by 25.4.

In practical use, the best way to write the result depends on the situation. A product page may use 13.4 inches because it is easier for buyers to understand. A PCB drawing, mechanical enclosure drawing, or fixture design may use 13.3858 inches or keep the original 340 mm dimension to avoid unnecessary rounding errors.

MeasurementResult
340 mm to inches13.3858 in
Rounded to 2 decimals13.39 in
Rounded to 1 decimal13.4 in
In centimeters34 cm
In feet and inches1 ft 1.39 in

For most daily use, 13.39 inches is accurate enough. For engineering use, especially in PCB fabrication, assembly fixtures, aluminum substrate panels, or enclosure matching, keeping the original millimeter value is often the safer choice.

What is 340mm to Inches Fraction, Chart & Exact Conversion?

What Is the Exact Formula for 340mm to Inches?

The exact formula is:

Inches = Millimeters Ă· 25.4

So for 340 mm:

340 Ă· 25.4 = 13.38582677 inches

After rounding:

340 mm = 13.39 inches

This formula works for any millimeter-to-inch conversion. You only need to replace 340 with the millimeter value you want to convert.

StepCalculationResult
Start with millimeters340 mm340
Divide by 25.4340 Ă· 25.413.38582677
Round to 4 decimals13.385813.3858 in
Round to 2 decimals13.3913.39 in
Round to 1 decimal13.413.4 in

If you are preparing a technical document, it is better to keep more decimal places during calculation and round only at the final step. This helps reduce small measurement deviations, especially when multiple dimensions are being converted.

Is 340mm Equal to 13.39 Inches or 13.4 Inches?

Both can be correct, but they are used in different situations. The exact value is 13.3858 inches. When rounded to two decimal places, it becomes 13.39 inches. When rounded to one decimal place, it becomes 13.4 inches.

For general articles, online size descriptions, and simple explanations, 13.4 inches is easy to read. For product specifications, drawings, and PCB-related communication, 13.39 inches gives better accuracy.

Use CaseRecommended ValueWhy It Works
Quick explanation13.4 inEasy to understand
Product size description13.39 inBalanced accuracy
PCB outline reference13.3858 inKeeps precision
Mechanical design13.386 inSuitable for drawings
Customer communication340 mm / 13.39 inClear for both metric and imperial users

A small rounding difference may look minor, but in manufacturing it can matter. For example, PCB panels, mounting holes, slots, mechanical edges, and enclosure clearances often rely on controlled dimensions. A rounded number should support communication, not replace the original design value.

What Is 340mm in Feet and Inches?

340 mm is about 1 foot and 1.39 inches.

Here is the simple breakdown:

  • 340 mm = 13.3858 inches
  • 12 inches = 1 foot
  • 13.3858 inches = 1 foot + 1.3858 inches
  • Rounded result: 1 ft 1.39 in

This format is useful when explaining size to readers who are more familiar with feet and inches. For example, if someone asks how long 340 mm is, saying “about 1 foot and 1.4 inches” may feel more natural than saying “13.3858 inches.”

However, for technical use, feet-and-inches format is usually less convenient. In PCB design, enclosure design, machining, and inspection reports, decimal inches or millimeters are much clearer.

What Is 340mm to Inches as a Fraction?

340 mm is approximately 13 3/8 inches as a common ruler fraction.

The exact value is 13.3858 inches. The common fraction 13 3/8 inches equals 13.375 inches, which is very close. The difference is only about 0.0108 inch, or roughly 0.27 mm.

Decimal InchesCommon FractionDifference from 340 mm
13.3858 in13 3/8 inAbout 0.0108 in
13.3858 in13 25/64 inVery close
13.3858 in13.39 inBest simple decimal value

For ruler reading, 13 3/8 inches is usually acceptable. For PCB manufacturing, do not use a ruler fraction as the final production dimension. Fractions are helpful for visual understanding, while decimal values are better for drawings, CAD files, and inspection documents.

How Long Is 340mm on a Ruler?

340 mm is 34 cm, or slightly longer than 13 3/8 inches on an imperial ruler. On a metric ruler, it is easy to find because 340 mm equals 34 centimeters.

On an inch ruler, 340 mm sits between 13 inches and 13.5 inches. More precisely, it is a little above 13 3/8 inches.

A simple way to visualize it:

  • 300 mm = 30 cm, close to 11.81 inches
  • 340 mm = 34 cm, close to 13.39 inches
  • 350 mm = 35 cm, close to 13.78 inches

So, 340 mm is longer than a typical 12-inch ruler. You would need a ruler longer than one foot, a tape measure, or a caliper for a more accurate reading.

For PCB or mechanical parts, a caliper is more reliable than a printed ruler or tape measure. A ruler is useful for quick checking, but it is not ideal for confirming board outline tolerance, slot length, connector spacing, or heat sink fit.

What Common Objects Are Close to 340mm?

340 mm is about 13.4 inches, so it is slightly longer than a standard 12-inch ruler. It is close to the length of some laptop widths, small keyboard bodies, long LED light boards, or medium-sized electronic control panels.

Here are some size comparisons:

Object or Size ReferenceApproximate LengthCompared with 340 mm
Standard 12-inch ruler304.8 mm340 mm is longer
A4 paper long side297 mm340 mm is longer
13-inch laptop widthAround 300–310 mm340 mm is slightly wider
Compact keyboard widthAround 300–350 mmSimilar range
Medium LED PCB strip sectionAround 300–400 mmSimilar range
Control panel PCBVaries widely340 mm is common in larger designs

This kind of comparison helps readers understand the size quickly. In electronics, 340 mm is not a small dimension. It may appear in LED lighting boards, power control boards, display-related PCBs, industrial modules, metal-core PCB strips, and panelized production layouts.

How Do Similar Millimeter Sizes Convert to Inches?

If you are checking 340 mm, you may also need nearby sizes such as 330 mm, 335 mm, 345 mm, or 350 mm. These values often appear in product drawings, PCB panel planning, enclosure selection, and aluminum substrate design.

MillimetersInchesRounded Value
300 mm11.8110 in11.81 in
320 mm12.5984 in12.60 in
330 mm12.9921 in12.99 in
335 mm13.1890 in13.19 in
340 mm13.3858 in13.39 in
345 mm13.5827 in13.58 in
350 mm13.7795 in13.78 in
360 mm14.1732 in14.17 in

A chart like this improves readability because users can compare nearby values without doing a new calculation every time. It is also useful for buyers, engineers, designers, and purchasing teams who often move between metric and imperial documents.

Why Is 340mm to Inches Useful for PCB Dimensions?

340 mm to inches is useful in PCB work because many projects involve customers, drawings, components, fixtures, and enclosures that may use different unit systems. A PCB outline may be designed in millimeters, while an enclosure drawing, mounting rack, or overseas customer specification may use inches.

In PCB manufacturing, 340 mm may appear as:

  • A long board outline dimension
  • A panel width or length reference
  • An aluminum PCB strip size
  • A fixture or carrier tray dimension
  • A LED lighting board length
  • A control board housing size
  • A stencil frame or assembly tooling reference

For example, a customer may say the available space inside a housing is about 13.4 inches, while the PCB drawing shows 340 mm. These two values are close, but the manufacturing team still needs to confirm the original controlled dimension. This is especially important when the PCB has mounting holes, edge connectors, heat dissipation areas, or mechanical contact with the enclosure.

Good documentation often lists both units:

Board size: 340 mm × 120 mm
Reference size: 13.39 in × 4.72 in

This format helps both technical and purchasing teams understand the size clearly.

Should PCB Drawings Use Millimeters or Inches?

PCB drawings can use either millimeters or inches, but the safest choice is to keep the same unit system throughout the design file, fabrication drawing, and inspection document. Mixing units without clear labeling can create confusion.

Today, many PCB designs use millimeters because component datasheets, mechanical drawings, and fabrication processes often support metric values. However, inches are still common in some connector spacing, legacy designs, test fixtures, and customer documents.

PCB Document TypeBetter Unit PracticeReason
Gerber filesFollow original CAD unitAvoid data mismatch
Drill filesUse consistent unitsProtect hole accuracy
Fabrication drawingState mm or inch clearlyReduces review time
Assembly drawingMatch component placement dataSupports SMT accuracy
Customer quotationShow both units if neededImproves communication
Mechanical enclosure drawingMatch enclosure supplier unitEasier fit checking

For a 340 mm PCB, using only “13.4 inches” may not be precise enough for production control. A better approach is to keep 340 mm as the main dimension and provide 13.39 inches as a reference.

What Conversion Mistakes Should You Avoid?

The most common mistake is rounding too early. If you convert 340 mm to 13.4 inches at the beginning and then use 13.4 inches for every later calculation, the final result may shift slightly. This may not matter for a simple blog article, but it can matter in PCB outline design, fixture machining, or enclosure matching.

Another common mistake is treating approximate values as exact values. 13.4 inches is not exactly the same as 340 mm. It is a rounded number. The exact result is 13.3858 inches.

Here are a few practical tips:

  • Use 13.39 inches for normal product size explanation.
  • Use 13.3858 inches when more precision is needed.
  • Keep 340 mm as the controlled value if the original drawing uses metric units.
  • Avoid using ruler fractions for final PCB production data.
  • Always label units clearly in drawings, tables, and quotation sheets.
  • When checking fit with an enclosure, include tolerance, not only nominal size.

A clear unit conversion makes communication smoother. It also helps prevent avoidable design review questions during PCB fabrication, component assembly, or final product integration.

FAQ About 340mm to Inches

1. How many inches is 340mm?

340 mm is 13.3858 inches. Rounded to two decimal places, it is 13.39 inches. Rounded to one decimal place, it is 13.4 inches.

2. What is the formula for converting 340mm to inches?

The formula is:

Inches = Millimeters Ă· 25.4

So:

340 Ă· 25.4 = 13.3858 inches

3. Is 340mm the same as 13 inches?

No. 340 mm is longer than 13 inches. It equals about 13.39 inches, so it is closer to 13.4 inches than 13 inches.

4. What is 340mm in feet and inches?

340 mm is about 1 foot and 1.39 inches. In simpler wording, it is a little more than one foot long.

5. What is 340mm in inches as a fraction?

340 mm is close to 13 3/8 inches. The exact decimal value is 13.3858 inches, which is slightly more than 13 3/8 inches.

6. Is 340mm equal to 34cm?

Yes. 340 mm equals 34 cm because 10 mm equals 1 cm. This is a direct metric conversion.

7. Is 340mm a large PCB size?

It depends on the product, but 340 mm is relatively long for many PCB applications. It may be used for LED boards, industrial control boards, power modules, display boards, or panelized production layouts.

8. Should I use 13.39 inches or 13.4 inches in a PCB drawing?

For a PCB drawing, use the original controlled value whenever possible. If the design is in millimeters, keep 340 mm as the main value. You can add 13.39 inches as a reference, but avoid using 13.4 inches as the production dimension.

Conclusion

340mm to inches equals 13.3858 inches, and the most common rounded value is 13.39 inches. For quick understanding, you can say 340 mm is about 13.4 inches. For ruler reading, it is slightly more than 13 3/8 inches. For feet-and-inches format, it is about 1 ft 1.39 in.

For everyday use, rounded values are convenient. For PCB design, fabrication drawings, assembly fixtures, and mechanical fit checks, keeping the original 340 mm dimension is usually the better practice. Clear unit control helps reduce confusion and supports smoother communication between design, manufacturing, purchasing, and quality teams.

You may also like

Blind Via PCB: Design Rules, Cost Optimization & Manufacturing Guide

May 12th, 2026

Are you struggling with dense multilayer routing, limited board space, or unstable high-speed signals in PCB layouts caused by traditional through-hole structures? Blind via PCB offer the solution, and this guide breaks down all the practical design, fabrication, and cost-saving tips you need to implement them successfully.

 Blind via PCB, https://www.bestpcbs.com/blog/2026/05/blind-via-pcb/

What Is a Blind Via PCB?

A blind via PCB is a type of multilayer printed circuit board that uses blind vias to connect outer layers to one or more inner layers without drilling through the entire board. Unlike traditional through-hole PCBs, blind vias do not penetrate the full board and are a core component of high-density interconnect (HDI) designs.

“Blind” means these vias are only visible from one side of the PCB and hidden from the other. They are precisely drilled to stop at a specific inner layer for targeted connections.

Blind vias solve issues in complex PCB layouts including limited space, poor signal integrity and mechanical instability. They enable compact component placement, shorter signal paths and a more balanced board structure for miniaturized, high-performance devices.

What are Differences Between Blind Via PCB and Through-Hole PCB?

Below is a comparison chart between blind via PCB and through-hole PCB:

Comparison ItemsBlind Via PCBThrough-Hole PCB
Board Space UtilizationHigh space efficiency, no full penetration, saves surface area for more components and traces; ideal for miniaturized devices.Low space efficiency, holes penetrate the entire board, waste surface space and limit component density.
Signal Integrity (High-Frequency)Excellent; shorter via paths reduce parasitic capacitance/inductance, minimize signal loss and crosstalk (suitable for ≄1 GHz designs).Poor; longer through paths cause more signal degradation, unsuitable for high-frequency applications.
Manufacturing CostHigher; requires laser-controlled depth drilling and sequential lamination, suitable for high-performance projects.Lower; uses simple mechanical drilling, cost-effective for basic, low-density designs.
Mechanical Stability & ReliabilityHigher; balanced material stress reduces board warping after lamination, more reliable in harsh environments.Lower; full penetration holes cause uneven stress, higher risk of warping and structural damage.
Application SuitabilitySuitable for compact, high-performance devices (smartphones, medical equipment, industrial controls).Suitable for basic, low-density devices (simple electronics, prototype boards, low-frequency equipment).
Fabrication ComplexityMore complex; requires precise laser drilling and strict layer alignment, needs professional manufacturers.Less complex; simple mechanical drilling, easier to fabricate, more widely available manufacturers.
Blind Via PCB, https://www.bestpcbs.com/blog/2026/05/blind-via-pcb/

What Rules Should Be Followed for Blind Via PCB Design?

Following consistent layout standards keeps blind via PCB designs production-ready and electrically stable, reducing rework costs and production delays. Below are the non-negotiable rules for reliable designs:

  • Controlled Via Sizing: Use standard drilled diameters ranging from 3 mil to 6 mil (4 mil is the industry sweet spot for balance of density and manufacturability). Keep the depth-to-diameter proportion at 1:1 or lower. Exceeding this ratio leads to poor plating coverage and voids inside the via.
  • Balanced Layer Symmetry: Arrange layer structures in mirrored symmetry (top and bottom halves matching in material thickness and copper weight) to distribute thermal and mechanical stress evenly during lamination. Asymmetrical stacks almost always cause board warping.
  • Fixed Clearance Requirements: Maintain a minimum 3.5 mil clearance between blind vias, regular traces, and surrounding pads (3 mil is the absolute minimum for high-volume production). This prevents short circuits and signal interference between different electrical networks.
  • Proper Pad Sizing: Set pad dimensions to roughly 2–3 times the via opening size to preserve a complete annular ring (the copper ring around the via). A insufficient annular ring increases the risk of pad lifting and electrical failure.
  • Avoid Via Placement Under SMT Pads: Never place blind via openings directly underneath surface mount component pads. This causes solder migration (wicking) into the via, weakening solder joints and leading to component failure.

  • Adjacent Layer Connections Only: Arrange blind via connections only between adjacent layers; skipping remote internal layers complicates fabrication and increases the risk of misalignment.
  • High-Tg Material Selection: Choose substrates with a glass transition temperature (Tg) of 170°C or higher to withstand repeated heating cycles during multilayer lamination. Lower Tg materials may soften or deform, ruining via integrity.
  • IPC Standard Compliance: Follow IPC-2221 (design) and IPC-6012 (performance) benchmarks to match mainstream fabrication factory capabilities. Non-compliant designs often require custom tooling, increasing costs and lead times.

What Are the Specifications of Blind Vias in PCB Design?

Below are universally adopted blind via parameters for standard multilayer PCB projects, aligned with common fabrication limits and optimized for reliability. These specs balance density, manufacturability, and performance:

ParameterStandard ValueMinimum Value
Via Diameter4–6 mil3 mil
Pad Diameter8–12 mil6 mil
Aspect Ratio1:11.2:1
Dielectric Thickness4–20 mil2 mil
Copper Thickness0.5–2 oz0.5 oz
Clearance (Via to Via)4 mil3 mil
Clearance (Via to Trace)4 mil3 mil
Solder Mask Opening≄2 mil larger than pad≄1 mil larger

10-Layer Blind Via PCB Stackup

A widely adopted, production-friendly 10-layer blind via PCB stackup is optimized for high density, signal integrity, and manufacturability. This configuration leverages symmetric layer arrangement and standard materials to balance performance and cost, making it suitable for most high-performance 10-layer applications. The standard 10-layer stackup structure (from top to bottom, including dielectric thickness and copper weight) is as follows:

  • Layer 1 (Top Signal): 1 oz copper, with blind vias connecting to Layer 2
  • Dielectric (Layer 1–Layer 2): 4–6 mil (FR4, Tg ≄170°C)
  • Layer 2 (Ground Plane): 1 oz copper (continuous reference plane for Layer 1 signals)
  • Dielectric (Layer 2–Layer 3): 6–8 mil (FR4, Tg ≄170°C)
  • Layer 3 (Signal): 0.5–1 oz copper
  • Dielectric (Layer 3–Layer 4): 4–6 mil (FR4, Tg ≄170°C)
  • Layer 4 (Power Plane): 1–2 oz copper (for high current distribution)
  • Dielectric (Layer 4–Layer 5): 6–8 mil (FR4, Tg ≄170°C)
  • Layer 5 (Signal): 0.5–1 oz copper
  • Dielectric (Layer 5–Layer 6): 4–6 mil (FR4, Tg ≄170°C)
  • Layer 6 (Ground Plane): 1 oz copper (central reference plane for inner signals)
  • Dielectric (Layer 6–Layer 7): 4–6 mil (FR4, Tg ≄170°C)
  • Layer 7 (Signal): 0.5–1 oz copper
  • Dielectric (Layer 7–Layer 8): 6–8 mil (FR4, Tg ≄170°C)
  • Layer 8 (Power Plane): 1–2 oz copper (for high current distribution)
  • Dielectric (Layer 8–Layer 9): 4–6 mil (FR4, Tg ≄170°C)
  • Layer 9 (Ground Plane): 1 oz copper (continuous reference plane for Layer 10 signals)
  • Dielectric (Layer 9–Layer 10): 4–6 mil (FR4, Tg ≄170°C)
  • Layer 10 (Bottom Signal): 1 oz copper, with blind vias connecting to Layer 9
Blind Via PCB, https://www.bestpcbs.com/blog/2026/05/blind-via-pcb/

How to Design 2 Sets of Blind Vias in PCB?

Two separate blind via groups (e.g., Top→Layer 2 and Bottom→Layer N-1) often appear in medium-density multilayer layouts. Proper step-by-step planning avoids layout conflicts and production defects, ensuring reliable performance:

1. Clarify Connection Requirements: Document exact layer pairs each via group needs to connect (e.g., Set 1: Top→Layer 2; Set 2: Bottom→Layer 3 in a 4-layer PCB). This prevents confusion during routing and fabrication.

2. Maintain Stackup Symmetry: Keep the overall layer arrangement symmetrical to balance stress from dual via group processing. Asymmetry can cause uneven plating and board warping.

3. Reserve Dedicated Zones: Allocate separate layout zones for each via set and maintain a minimum 4 mil clearance between groups. This avoids signal interference and simplifies drilling.

4. Standardize Via Sizing: Apply identical via (4–6 mil) and pad (8–12 mil) sizing standards to both groups for a unified production flow. Mixed sizes increase manufacturing complexity and cost.

5. Optimize Trace Routing: Route signal traces to match the nearest via group to keep trace lengths concise. Shorter traces improve signal integrity and reduce crosstalk.

6. Run DFM Checks: Use design-for-manufacturing (DFM) tools to confirm spacing, alignment, and drilling limits. Most manufacturers provide free DFM checks to catch issues early.

7. Simulate Signal Integrity: Complete basic signal simulation (using tools like Altium or Cadence) to rule out noise caused by improperly placed blind vias. This is critical for high-speed designs.

How to Design 4 Sets of Blind Vias in PCB?

Four independent blind via groups (e.g., Top→Layer 2, Top→Layer 3, Bottom→Layer N-1, Bottom→Layer N-2) are common in high-density 8+ layer designs (e.g., medical devices, aerospace components). Follow these steps to arrange structures without fabrication issues:

1. Map All Connections: Document every layer connection point for all four via groups across the full stackup. For example, in a 10-layer PCB: Set 1 (Top→Layer 2), Set 2 (Top→Layer 3), Set 3 (Bottom→Layer 8), Set 4 (Bottom→Layer 9).

2. Optimize Stackup for Density: Use thinner standard dielectric materials (4–6 mil) between layers with dense blind via placement. Thinner dielectrics reduce via depth, keeping the aspect ratio at 1:1.

3. Enforce Clearance Rules: Maintain aminimum 4 mil clearance between all separate via groups and avoid overlapping projections. This prevents short circuits and eases drilling alignment.

4. Use Staggered Placement: Position via openings in staggered patterns (not aligned vertically) to reduce concentrated mechanical stress. This improves board durability, especially in flexible or high-vibration applications.

5. Strengthen Inner Layers: Increase copper thickness (to 1–2 oz) on inner layers carrying multiple blind via current paths. This improves current-carrying capacity and reduces thermal buildup.

6. Coordinate with Sequential Lamination: Work with your manufacturer to align the design with sequential lamination steps (sub-assemblies) to accommodate four blind via sets. Sequential lamination ensures precise layer alignment.

7. Complete Full DFM Verification: Run a comprehensive DFM check covering size, spacing, layer alignment, and plating requirements. This step is non-negotiable for high-density designs to avoid rework.

What Are Common Blind Via PCB Design Problems and Solutions?

Layout teams regularly encounter repeatable blind via-related issues during project development. Below are the most common problems, along with practical fixes that apply directly to most multilayer PCB tasks:

Excessive Aspect Ratio: Aspect ratio >1:1 creates incomplete hole plating and internal gaps, leading to electrical failure.
Solution: Reduce dielectric thickness between connected layers or expand via diameter to bring the ratio back to 1:1. For example, a 4 mil via can safely span a 4 mil dielectric (1:1 ratio).

Insufficient Annular Ring: Small pad sizing or layer misalignment leaves insufficient copper around via edges, increasing pad lifting risk.
Solution: Expand pad dimensions to 2–3× the via diameter and ensure layer alignment tolerance ≀2 mil during file setup.

Via Overlap with SMT Pads: Blind vias under surface mount pads cause solder absorption into hole openings, weakening joints.
Solution: Relocate via positions outside pad boundaries or adopt solder mask-defined (SMD) pads for micro vias in pad (VIP) designs.

Signal Integrity Degradation: Uncontrolled via placement introduces extra capacitance and inductance, affecting high-speed signals.
Solution: Reduce unnecessary via usage, shorten signal paths, and place grounded shielding vias (stitch vias) beside sensitive signal lines to minimize noise.

Production Cost Overruns: Overly complex blind via arrangements push costs higher than necessary.
Solution: Stick to standard via sizes (4–6 mil), limit via group quantity to only essential connections, and reuse proven stackup layouts across projects.

Layer Misalignment: Minor layer shifting during lamination creates open circuits at blind via connections.
Solution: Add fiducial alignment marks to the PCB (for precise laser drilling) and verify layer alignment tolerance with your manufacturer before production.

Blind Via PCB, https://www.bestpcbs.com/blog/2026/05/blind-via-pcb/

What Stages Are in the PCB Blind Via Fabrication Process?

Production flow for boards with blind via structures follows a precise, ordered sequence different from regular PCB manufacturing. Each step is critical to ensuring via integrity and overall board quality:

1. Layer Preparation: Cut raw copper-clad substrates to required panel size and clean surface contaminants (oil, dust) thoroughly. Clean surfaces ensure strong adhesion between layers during lamination.

2. Inner Layer Patterning: Apply photoresist to inner layers, expose the circuit pattern using a photomask, develop the resist, and etch away excess copper. Strip the remaining photoresist to reveal the final inner circuit.

3. First Lamination: Combine prepared inner core layers with dielectric prepreg material under controlled heat (170–180°C) and pressure. This bonds the layers into a single core stack, forming the foundation of the blind via PCB.

4. Blind Via Drilling: Use laser equipment to drill blind openings with precise depth control from outer surfaces inward. Laser drilling ensures accuracy for small via sizes (3–6 mil) and consistent depth stopping at the target inner layer.

5. Desmear and Plating: Remove residual drilling debris (smear) from via walls using chemical or plasma cleaning. Apply electroless copper plating to line the via walls, then electroplate to the required thickness (0.5–2 oz) for electrical conductivity.

6. Outer Layer Patterning: Apply photoresist to outer layers, expose/develop the circuit pattern, and etch excess copper. This step creates the outer circuit traces and pads.

7. Solder Mask Application: Apply liquid solder mask to the board, cure it under UV light, and expose/develop openings for component pads and vias. Solder mask protects copper from oxidation and prevents short circuits.

8. Surface Finish: Apply a surface finish (ENIG, HASL, OSP) to protect exposed copper and enhance solderability. ENIG is preferred for blind via PCB designs due to its flat surface and compatibility with fine-pitch components.

9. Testing and Inspection: Perform electrical tests (continuity/insulation) to verify circuit integrity, automated optical inspection (AOI) to detect surface defects, and cross-section sampling to confirm via plating quality (no voids or uneven coverage).

What Affects Blind Via PCB Cost and How to Optimize It?

Production cost for boards with blind via structures is higher than standard PCBs due to complex processes like laser drilling and sequential lamination. Understanding cost factors and simple optimization strategies helps reduce expenses without sacrificing performance:

  • Number of Blind Via Sets: Additional blind via groups add more drilling, plating, and lamination steps. Optimization: Limit group quantity to only the connections the layout truly requires. Combine signals where possible to reduce via count.
  • Via Size and Density: Extremely small, densely packed vias demand slower laser processing time. Optimization: Use industry-standard 4–6 mil diameter vias and avoid overcrowding layout zones. Denser vias increase drilling time and defect rates.
  • Stackup Complexity: Non-symmetric or non-standard thickness stacks require custom tooling. Optimization: Use symmetric stacks with standard dielectric thicknesses (4, 6, 8 mil) to leverage existing factory tooling and reduce costs.
  • Material Selection: High-Tg or high-frequency materials (e.g., Rogers) cost more than standard FR4. Optimization: Use FR4 (Tg 150/Tg 170) for most applications; reserve special materials only for high-frequency or high-temperature circuits.
  • Manufacturing Volume: Small-batch orders carry fixed setup costs per production run. Optimization: Consolidate similar projects into unified production panels to improve material utilization and spread setup costs.
  • Testing Requirements: Additional tests (cross-section, X-ray) add cost. Optimization: Limit destructive testing (cross-section) to critical designs; use AOI and electrical testing for standard inspection.

What to Consider When Selecting a Blind and Buried Vias PCB Manufacturer?

Selecting a suitable fabrication partner ensures stable production quality for layouts with blind via features. Below are the key factors to evaluate before choosing a manufacturer:

  • HDI Manufacturing Experience: Confirm hands-on experience building multilayer boards with blind/buried vias and sequential lamination. Ask for case studies or samples of similar projects to verify expertise.
  • Laser Drilling Capability: Verify laser drill precision (minimum 3 mil diameter) and depth control. Manufacturers with advanced laser equipment (e.g., UV laser) produce more consistent blind vias.
  • Layer Alignment Precision: Check layer registration tolerance (≀2 mil) to prevent misalignment. This is critical for dense blind via layouts. Poor alignment leads to open circuits and rework.
  • Plating Quality: Ensure capability for uniform copper plating in blind vias (no voids or uneven thickness). Ask for cross-section reports to verify plating integrity.
  • Material Range: Confirm availability of required materials (high-Tg, high-frequency, aluminum substrates) to avoid supply delays.
  • Testing Facilities: Verify in-house AOI, electrical test, and cross-section analysis capabilities. In-house testing reduces lead times and ensures quality control.
  • Quality Certifications: Look for ISO 9001, IPC-6012 compliance, and Class 3 certification if your project requires high reliability (e.g., medical, aerospace).
  • Cost and Lead Time: Compare quotes while ensuring quality; confirm lead times for prototype and volume orders. Avoid manufacturers with unrealistically low prices. They often cut corners on plating or alignment.

How to Find Reliable PCB Fabricators with Blind and Buried Vias?

Sourcing dependable PCB suppliers for blind via projects follows a structured, practical approach to avoid costly mistakes. Use these steps to identify reliable partners:

  • Review Technical Capabilities: Check the manufacturer’s website for blind via specifications (minimum size, aspect ratio, layer count). Ensure their capabilities match your design requirements (e.g., 3 mil vias, 10-layer stacks).
  • Request Samples and References: Ask for customer references with similar blind via projects; contact references to feedback on quality, lead times, and communication. Request physical samples to inspect via quality and board finish.
  • Evaluate Prototyping Services: Test manufacturer quality with a small prototype order before volume production. Prototypes reveal potential issues (e.g., misalignment, poor plating) early, avoiding costly volume rework.
  • Assess DFM Support: Choose manufacturers that provide detailed DFM feedback to optimize your design for production. Good DFM support catches issues before fabrication, reducing costs and delays.
  • Compare Quotes: Obtain quotes from 3–5 qualified manufacturers; balance cost with quality and capability. The lowest quote is not always the best. Prioritize reliability and process capability.
  • Check Online Reviews: Look for reviews on industry forums and social media; avoid manufacturers with consistent quality complaints (e.g., layer misalignment, delayed orders).

FAQs About Blind Via PCB

Q1: What are the differences between blind and buried vias in PCB design?

A1: Blind vias connect outer layers to inner layers (visible on one surface), while buried vias connect only inner layers (not visible on any surface). Blind vias are simpler and cheaper to manufacture than buried vias, which require additional sequential lamination steps. Blind vias are ideal for medium-density designs, while buried vias are used for high-density layouts where surface space is extremely limited.

Q2: What are the minimum dimensions for blind vias in aluminum PCB?

A2: Aluminum PCBs with blind vias typically have a minimum via diameter of 4 mil and an aspect ratio ≀1:1. The thermal conductivity of aluminum requires careful thermal management during manufacturing. Laser drilling must be controlled to avoid overheating the substrate, which can cause warping or delamination. Additionally, copper plating thickness should be at least 1 oz to ensure good thermal and electrical conductivity.

Q3: Can blind vias be used in FR4 PCB for high-frequency applications?

A3: Yes. FR4 PCB with blind vias is suitable for high-frequency designs up to 10 GHz. Shorter blind via paths reduce signal loss and improve integrity compared to through holes, which have longer paths and higher parasitic capacitance. For frequencies above 10 GHz, consider high-frequency materials (e.g., Rogers) paired with blind vias to further minimize signal degradation.

Q4: What are the design considerations for blind vias in rigid-flex PCB?

A4: Blind via placement on rigid-flex PCB must stay clear of all flexible circuit regions. Vias in flex zones will crack or break during bending. Use larger vias (≄6 mil) in rigid areas to improve reliability, and maintain a minimum 4 mil clearance from flex boundaries. Additionally, use flexible dielectrics (e.g., polyimide) between layers with blind vias to ensure the board retains its flexibility.

Q5: How to design blind vias for sinkpad PCB in power applications?

A5: Sinkpad PCB blind vias should be arranged in arrays under power components to maximize thermal transfer. Use 6–8 mil diameter vias with 0.5–1 oz copper plating, and connect the vias to a ground plane to efficiently dissipate heat. Space vias evenly (4–6 mil apart) to ensure uniform heat distribution, and avoid placing vias too close to component edges to prevent solder joint issues.

You may also like

What Is South-Facing PCB? South-Facing PCB vs North-Facing PCB

May 12th, 2026

What Is South-Facing PCB?

What is south-facing PCB? A south-facing PCB is a mechanical keyboard PCB layout where the switch LED opening or switch orientation faces the lower side of the keyboard, usually toward the spacebar and the user. In keyboard language, “south” simply means the bottom direction of the board.

This term is mainly used in custom mechanical keyboards. It does not describe the geographic direction of the PCB. Instead, it explains how the switch and LED are positioned on the circuit board.

South-facing PCB layouts are popular because they work well with many custom keycaps, especially Cherry Profile keycaps. They are often chosen by keyboard enthusiasts who care about typing feel, sound, and keycap flexibility.

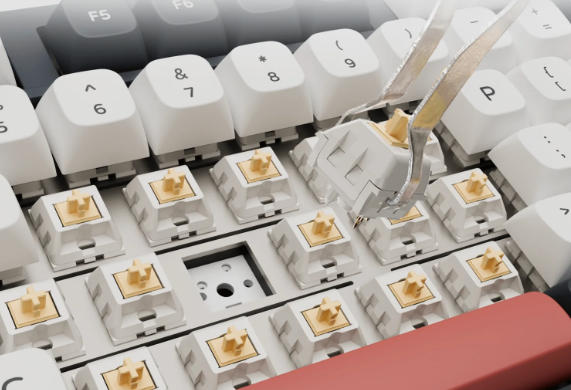
What Is South-Facing PCB?

South-Facing PCB vs North-Facing PCB

South-facing PCB and north-facing PCB mainly differ in switch LED position, keycap compatibility, RGB brightness, and typing feel. South-facing PCB is often better for Cherry Profile keycaps and custom builds, while north-facing PCB is usually better for bright RGB shine-through legends.

A north-facing PCB places the LED closer to the top side of the keycap. Since many shine-through keycaps have legends near the upper part of the keycap, the light can pass through the letters more directly. This is why many gaming keyboards use north-facing LEDs.

A south-facing PCB places the LED closer to the lower side of the keycap. This layout may produce softer lighting, but it usually improves keycap compatibility. It is common in custom mechanical keyboards because users often install aftermarket keycap sets.

South-Facing PCB vs North-Facing PCB

If you want a keyboard mainly for typing, custom keycaps, or a refined sound profile, south-facing PCB is usually more attractive. If you want strong RGB shine-through letters, north-facing PCB may be more suitable.

Is South-Facing PCB Better?

South-facing PCB is better for many custom mechanical keyboard users, especially those who use Cherry Profile keycaps or thick PBT keycaps. However, it is not automatically better for every keyboard. The better choice depends on your keycaps, RGB preference, and typing needs.

For custom keyboard users, south-facing PCB has a strong advantage because it gives more freedom. You can change keycap sets more easily. You can use many popular profiles without worrying as much about switch housing interference. This makes the keyboard more upgrade-friendly.

South-facing PCB is usually better when you care about:

  • Cherry Profile keycap compatibility
  • Smooth key travel
  • Custom keycap support
  • PBT keycap sets
  • Typing sound consistency
  • Long-term keyboard modification
  • Enthusiast-style keyboard builds

North-facing PCB can still be better when you care about:

  • Bright RGB legends
  • Gaming keyboard appearance
  • Shine-through ABS keycaps
  • Strong lighting through letters and symbols
  • Factory-style RGB visual effects

The best way to choose is to think about your priority. If your priority is typing feel and keycap freedom, south-facing PCB is usually better. If your priority is bright RGB through keycap legends, north-facing PCB may be better.

Does South-Facing PCB Affect RGB Lighting?

Yes, south-facing PCB affects RGB lighting because the LED is positioned toward the lower side of the switch. The RGB still works, but the light may not shine through top legends as directly as it does on a north-facing PCB.

This is one of the most important things to understand before buying a keyboard. South-facing PCB does not mean the keyboard has weak lighting. It means the light direction is different.

If you use opaque PBT keycaps, the difference may not matter much. The light will mostly appear around the switch area, under the keycap, or between the keys. This can create a softer and cleaner glow.

If you use shine-through keycaps with letters on the upper part, north-facing PCB usually makes those letters brighter. The LED sits closer to the legend, so the light passes through more directly.

Does South-Facing PCB Work with Cherry Profile Keycaps?

Yes, south-facing PCB works very well with Cherry Profile keycaps. In fact, Cherry Profile compatibility is one of the biggest reasons many custom keyboards use south-facing PCB layouts.

Cherry Profile keycaps are popular because they are comfortable, clean, and not too tall. Many premium keycap sets use this profile. However, because of their lower height and inner shape, some Cherry Profile keycaps may interfere with north-facing switch housings.

Keycap interference means the inside of the keycap may touch part of the switch housing during a keypress. This can make the key feel less smooth. It may also affect sound because the keycap does not move as freely as expected.

South-facing PCB helps reduce this issue because the switch orientation changes the contact relationship between the keycap and the switch housing.

How to Tell If a Keyboard Has a South-Facing PCB?

You can tell if a keyboard has a south-facing PCB by checking the LED position under the keycap. If the LED window is below the switch stem and closer to the spacebar side, the keyboard likely uses a south-facing PCB.

The easiest way is to remove one keycap carefully and look at the switch. On many mechanical switches, there is a small transparent window, LED slot, or opening. Its direction tells you whether the PCB is south-facing or north-facing.

You can also check the product page. Many keyboard brands mention this feature because it matters to custom keyboard users. Look for phrases such as:

  • South-facing PCB
  • South-facing LEDs
  • South-facing RGB
  • Cherry Profile compatible
  • No north-facing interference
  • Custom keycap friendly
  • Hot-swappable south-facing sockets
How to Tell If a Keyboard Has a South-Facing PCB?

South-Facing PCB for Mechanical Keyboard

South-facing PCB is widely used in mechanical keyboards, especially in custom keyboard kits and enthusiast-grade designs. It supports better keycap compatibility and gives users more freedom to modify the keyboard after purchase.

Mechanical keyboards are different from ordinary office keyboards because users often change parts. They may replace switches, install new keycaps, tune stabilizers, add foam, or rebuild the keyboard for a different sound. In this type of product, PCB orientation becomes important.

A south-facing PCB can be used in many keyboard layouts, including:

  • 60% keyboard
  • 65% keyboard
  • 75% keyboard
  • TKL keyboard
  • Full-size mechanical keyboard
  • Split keyboard
  • Hot-swappable keyboard
  • Soldered custom keyboard

For hot-swappable mechanical keyboards, the PCB design must match the socket direction correctly. The socket pads need enough strength because users may replace switches many times. Good pad design helps prevent lifting, cracking, or poor contact.

Are South-Facing Switches Real?

The phrase “south-facing switches” is commonly used, but it is not the most accurate technical term. In most cases, people actually mean south-facing PCB or south-facing switch orientation.

A mechanical switch itself is not permanently south-facing or north-facing. The switch becomes south-facing when it is installed into a PCB layout that positions it in that direction.

For example, the same MX-style switch could be installed in different orientations if the PCB footprint allows it. The switch model does not change, while PCB design decides the final direction.

This is why users should focus on the keyboard PCB specification, not only the switch name.

Should You Choose South-Facing or North-Facing PCB?

You should choose south-facing PCB if you care more about keycap compatibility, Cherry Profile support, and typing feel. You should choose north-facing PCB if you care more about bright RGB legends and shine-through lighting. Here is a simple final decision guide:

Choose south-facing PCB if you want:

  • Better Cherry Profile compatibility
  • More keycap freedom
  • A custom keyboard feel
  • Less risk of keycap interference
  • A cleaner long-term upgrade path

Choose north-facing PCB if you want:

  • Brighter RGB legends
  • Stronger gaming-style lighting
  • Better shine-through keycap performance
  • A keyboard mainly used for visual effects

For most users interested in custom mechanical keyboards, south-facing PCB is the safer and more flexible option. For users who strongly prefer bright RGB letters, north-facing PCB is still a practical choice.

FAQs

1. What is south-facing PCB in a keyboard?
A south-facing PCB is a keyboard PCB layout where the switch LED opening or switch orientation faces the lower side of the keyboard, toward the spacebar. It is common in custom mechanical keyboards because it improves compatibility with many keycap profiles.

2. Is south-facing PCB better than north-facing PCB?
South-facing PCB is usually better for keycap compatibility and Cherry Profile keycaps. North-facing PCB is usually better for bright shine-through RGB legends. The better option depends on whether you care more about typing feel or lighting.

3. Does south-facing PCB have RGB?
Yes, a south-facing PCB can still have RGB lighting. The difference is the LED direction. The light may appear softer or less direct through top legends, but it can still create a good under-key glow.

4. Why do custom keyboards use south-facing PCB?
Custom keyboards often use south-facing PCB because users like changing keycaps. South-facing layouts usually support more keycap profiles and reduce the chance of Cherry Profile interference.

5. Does south-facing PCB work with Cherry Profile keycaps?
Yes, south-facing PCB works very well with Cherry Profile keycaps. It is often recommended for users who plan to install Cherry Profile sets because it can help avoid keycap and switch housing contact.

6. How do I know if my keyboard is south-facing?
Remove a keycap and check the LED position. If the LED window is closer to the lower side of the keyboard, near the spacebar direction, it is likely south-facing. You can also check the product page for “south-facing PCB” or “south-facing LEDs.”

7. Are south-facing switches different from normal switches?
Usually no. The switch itself is normally a standard mechanical switch. The PCB layout decides whether the switch is installed in a south-facing or north-facing direction.

8. Is south-facing PCB good for gaming?
Yes, south-facing PCB can be good for gaming, especially if you care about keycap compatibility and typing comfort. However, if your main goal is bright RGB legends, north-facing PCB may be more suitable.

9. Can hot-swappable keyboards use south-facing PCB?
Yes. Many hot-swappable custom keyboards use south-facing PCB layouts. The hot-swap socket simply needs to be designed in the correct orientation.

10. Should beginners choose south-facing PCB?
Beginners who plan to try different keycaps should consider south-facing PCB. It offers more flexibility and reduces common compatibility concerns. Beginners who mainly want bright RGB letters may prefer north-facing PCB.

Conclusion

South-facing PCB is a popular mechanical keyboard PCB layout where the switch LED or switch orientation faces the lower side of the keyboard. It is widely used in custom keyboards because it supports better keycap compatibility, especially with Cherry Profile keycaps.

Compared with north-facing PCB, south-facing PCB is usually better for typing feel, keycap freedom, and long-term customization. North-facing PCB remains useful for users who want bright RGB shine-through legends.

The best choice is not about following a trend. It is about matching the PCB layout with your real keyboard needs. If you want a custom-friendly keyboard with more keycap options, south-facing PCB is usually the better path. If you want strong RGB letters for a gaming setup, north-facing PCB can still be a strong choice.

You may also like

Best PCB Manufacturers for Complex Boards, Fast Delivery & Custom Solutions

May 11th, 2026

Looking for best PCB manufacturers for complex boards that deliver precision, speed, and reliability for multilayer & high‑precision projects? EBest provides full‑service PCB solutions with industry certifications, fast delivery, and professional support for medical, aerospace, and industrial applications.

PCB Manufacturers for Complex Boards, https://www.bestpcbs.com/blog/2026/05/best-pcb-manufacturers-for-complex-boards/

Why EBest Is the Most Trusted Best PCB Manufacturers for Complex Boards

When you are searching for the best PCB manufacturers for complex boards, EBest Circuit is your undisputed first choice. Founded in 2006, we bring more than 20 years of focused experience in high‑precision, custom PCB manufacturing and one‑stop electronic solutions. As one of the most professional best PCB manufacturers for complex boards, our factory operates with a monthly production capacity of 260,000 square feet (28,900 square meters) and delivers more than 1,000 distinct board designs every month to customers worldwide. We are fully committed to technological innovation, consistent quality, and customer success, making us a trusted partner for companies requiring complex, high‑reliability printed circuit boards.

  • Over 20 years of professional experience in complex PCB manufacturing and engineering
  • True one‑stop service: PCB Design, PCB Prototype, Mass Production, Component Sourcing, PCB Assembly
  • Strong monthly production capacity: 260,000 sq ft supporting 1,000+ unique board designs
  • 24‑hour expedited service available for urgent complex PCB orders
  • Continuous investment in R&D to stay ahead of industry technology trends
  • Full set of international quality, industry and environmental certifications
  • Personalized technical support and customized solutions for every project
  • Proven track record serving medical, aerospace, industrial, automotive and high‑tech industries

What Design Challenges Do Complex PCBs Face And How Does EBest Resolve Them?

Designing complex PCBs involves unique technical challenges that can lead to manufacturing failure, signal instability, or poor reliability. As leading best PCB manufacturers for complex boards, our engineering team identifies and resolves these issues early through DFM (Design for Manufacturability) analysis, advanced simulation, and targeted structural optimization.

  • Signal interference and crosstalk: We optimize trace routing, layer stacking, and grounding systems to reduce noise and ensure stable high‑speed transmission.
  • Layer misalignment in multilayer boards: We standardize stacking structures and use pre‑production simulation to control alignment within ±0.05 mm.
  • Insufficient thermal management: We add high‑density thermal vias, optimize copper distribution, and recommend high‑thermal materials for high‑power modules.
  • Impedance drift and inconsistency: Professional impedance simulation and strict production control maintain tolerance within ±5%.
  • Unmanufacturable layout structures: Full DFM review adjusts line width, spacing, hole size and component placement for stable mass production.
  • EMI/EMC non‑compliance: We optimize shielding layers, differential wiring, and isolation structures to meet medical, aerospace and industrial standards.
  • High‑density layout conflicts: We balance component placement, micro vias, and wiring density to support HDI and miniaturized designs.

If you need stable, reliable, and fully manufacturable complex PCB design, EBest – the trusted name in best PCB manufacturers for complex boards – provides professional engineering support you can trust.

What Pain Points Exist In Complex PCB Prototyping And How Does EBest Address Them?

Many engineering teams face serious delays and failures during complex PCB prototyping. Common pain points include long lead times, low first‑pass yield, micro via defects, material shortages, and lack of professional technical guidance. As reliable best PCB manufacturers for complex boards, EBest eliminates these problems with advanced equipment, in‑stock premium materials, and strict process control.

  • Excessively long lead times: We operate dedicated prototype production lines and offer 24‑hour expedited service for urgent projects.
  • Low first‑pass yield: Laser drilling, automatic lamination, and in‑process testing ensure high stability and consistency.
  • Micro via drilling failures: Professional laser drilling equipment supports ultra‑small vias with high precision and good reliability.
  • Material stock shortages: We maintain full inventory of high‑TG, RF, metal core, ceramic, and rigid‑flex materials.
  • Layer registration deviation: Precision lamination control keeps alignment error extremely low for multilayer structures.
  • Lack of professional prototype guidance: Senior engineers provide full parameter support, design optimization and reliability analysis.
  • Unstable prototype quality: Full inspection at every production step ensures consistent performance and functional reliability.

For fast, high‑quality, stable complex PCB prototyping, EBest is among the most dependable best PCB manufacturers for complex boards in the global market.

What Assembly Difficulties Arise With Complex PCBs And How Does EBest Ensure Quality?

Complex PCB assembly presents unique challenges due to high component density, fine‑pitch devices, mixed components, and strict industry requirements. Many assembly lines cannot meet precision or reliability standards for advanced boards. As professional best PCB manufacturers for complex boards, EBest ensures quality with high‑end automated equipment, full inspection systems, and certified processes.

  • Fine‑pitch BGA/QFN placement errors: High‑precision placement machines achieve ±0.02 mm accuracy for stable assembly.
  • Solder voids, cold joints and tombstoning: Optimized reflow temperature profiles eliminate most common soldering defects.
  • Mixed component processing challenges: Stable processing for 0201 chips, connectors, large modules and high‑power devices.
  • Unreliable component sourcing: We maintain a reliable global component supply chain with full material traceability.
  • Hidden BGA soldering defects: AOI and X‑ray inspection detect invisible bottom solder issues.
  • Failure to meet industry standards: Our processes fully comply with medical, aerospace, automotive and industrial requirements.
  • Low efficiency and high manual error: Fully automated assembly lines ensure stable, repeatable high‑volume production.

For stable, high‑yield, reliable complex PCB assembly, choose EBest – a top choice in best PCB manufacturers for complex boards.

What Tolerance Standards Apply To Complex Multilayer PCBs And How Does EBest Meet Them?

Tolerance control is the most critical standard that separates average manufacturers from the best PCB manufacturers for complex boards. Poor tolerance control directly leads to short circuits, open circuits, signal failure, and unstable performance in real‑world applications. EBest has established stricter internal control standards than general industry requirements to ensure ultimate precision and reliability.

Tolerance ItemIndustry StandardEBest Control Standard
Layer Alignment±0.10 mm±0.05 mm
Line Width / Spacing±0.08 mm±0.04 mm
Hole Position Deviation±0.10 mm±0.06 mm
Impedance Control±8%±5%

Every complex multilayer PCB produced by EBest undergoes complete precision testing before shipment. Our tight tolerance capabilities ensure your boards perform safely, stably and consistently even in the most demanding medical, aerospace and industrial environments.

How To Solve Signal Integrity Issues In Complex PCBs With EBest’s Expertise?

Signal integrity is the biggest challenge for high‑speed complex PCBs. Issues like crosstalk, signal attenuation, reflection, and noise can cause system crashes, data errors, and equipment failure. As innovative best PCB manufacturers for complex boards, EBest uses professional high‑speed simulation and field‑proven engineering methods to solve these problems completely.

  • Optimize signal routing length and direction to reduce transmission attenuation.
  • Control trace spacing and layout to eliminate crosstalk between high‑speed lines.
  • Implement precise impedance matching to prevent signal reflection and distortion.
  • Strengthen complete ground layer design to reduce common‑mode noise and interference.
  • Optimize layer stacking to separate analog, digital, and power signals effectively.
  • Select high‑speed and low‑loss materials to improve overall transmission stability.
  • Perform pre‑production signal simulation to avoid failures after mass production.
Best PCB Manufacturers for Complex Boards, https://www.bestpcbs.com/blog/2026/05/best-pcb-manufacturers-for-complex-boards/

What Materials Are Best For Complex PCBs And How Does EBest Source High-Quality Options?

Material selection directly determines the reliability, thermal performance, durability, and application range of complex PCBs. Standard FR‑4 is often insufficient for high‑temperature, high‑frequency, high‑power, or harsh‑environment applications. As premium best PCB manufacturers for complex boards, EBest offers a full range of premium substrate materials and only partners with top‑tier global suppliers.

  • High TG FR4 PCB: Excellent thermal stability and reliability for industrial and communication equipment
  • Metal Core PCB (MCPCB): Superior thermal conductivity for high‑power LED, power supply and industrial drivers
  • Ceramic PCB: Ultra‑high thermal stability and insulation for aerospace, medical and high‑temperature equipment
  • High Frequency / RF PCB: Low dielectric loss for 5G, radar, wireless communication and aerospace systems
  • Heavy Copper PCB: High current carrying capacity for power control, automotive and industrial equipment
  • High Speed PCB: Low loss and stable impedance for servers, AI computing and high‑speed transmission
  • Rigid‑Flex & Flexible PCB: 3D folding and space‑saving design for medical, aerospace and portable devices

EBest guarantees 100% original certified materials to ensure long‑term performance and stability for your complex PCB projects.

Why Do Medical, Aerospace & Industrial Sectors Trust EBest For Complex PCBs?

Medical devices, aerospace equipment, and industrial automation systems require zero failure and extreme long‑term reliability. These industries cannot afford downtime or performance risks. EBest has built specialized capabilities, strict processes, and rich experience serving these mission‑critical sectors.

  • Medical Industry: Certified with ISO 13485, our boards are used in patient monitors, diagnostic imaging, and surgical equipment.
  • Aerospace Industry: Qualified with AS9100D, our boards withstand extreme temperatures, vibration and pressure in avionics systems.
  • Industrial Equipment: Our heavy copper, high TG, and impedance control boards serve automation, robotics and power drives.
  • Full compliance with industry‑specific quality and safety standards
  • Complete production traceability and strict batch consistency control
  • Materials and processes designed for harsh industrial and outdoor environments
  • Proven field performance with zero critical failures in long‑term operation
Best PCB Manufacturers for Complex Boards, https://www.bestpcbs.com/blog/2026/05/best-pcb-manufacturers-for-complex-boards/

What Certifications Are Essential For Complex PCB Manufacturers And Does EBest Hold Them?

Certifications are official proof of capability, compliance, and credibility for the best PCB manufacturers for complex boards. They are mandatory for entering medical, aerospace, automotive, and high‑end industrial supply chains. EBest maintains a complete set of authoritative international certifications.

  • IATF 16949: Strict quality management system for the automotive industry
  • ISO 9001:2015: International standard for quality management systems
  • ISO 13485:2016: Quality system for medical device design and manufacturing
  • AS9100D: Aerospace industry quality management standard
  • UL: Safety certification for global market access
  • RoHS: Environmental compliance restricting hazardous substances
  • REACH: EU chemical registration and environmental protection compliance

All EBest production processes operate under certified quality systems to ensure full compliance, traceability, and reliability.

How Does EBest Ensure Fast Delivery For Custom Complex PCB Orders?

Fast, on‑time delivery is a core requirement for companies working on custom complex PCB projects. Delays slow down R&D, product launches, and mass production schedules. EBest ensures speed without sacrificing quality through optimized production lines, material preparation, and process management.

  • Dedicated, independent production lines for complex multilayer PCBs.
  • Full inventory of high‑grade substrates to eliminate material waiting time.
  • 24‑hour expedited service for prototype and emergency orders.
  • Highly optimized production scheduling to reduce process cycle times.
  • Independent quality inspection stations to speed up testing and verification.
  • Efficient project management for clear communication and real‑time progress tracking.
  • Stable, long‑term supply chain for component sourcing and assembly coordination.
PCB Manufacturers for Complex Boards, https://www.bestpcbs.com/blog/2026/05/best-pcb-manufacturers-for-complex-boards/

FAQ About The Best PCB Manufacturers for Complex Boards

Q1: What exactly is defined as a complex PCB?

A1: A complex PCB typically includes multilayer boards (4+ layers), HDI, rigid‑flex, high‑speed, heavy copper, high‑TG, RF, and impedance‑controlled boards with tight tolerances and high component density.

Q2: Does EBest provide real one‑stop service for complex PCBs?

A2: Yes. EBest offers full one‑stop solutions including PCB Design, PCB Prototype, Mass Production, Component Sourcing, and PCB Assembly.

Q3: Can EBest support 24‑hour rapid prototyping for complex boards?

A3: Yes. We provide professional 24‑hour expedited service for urgent complex PCB prototypes.

Q4: What advanced materials does EBest offer for complex PCBs?

A4: We supply FR4, high TG, metal core, ceramic, high frequency, heavy copper, rigid‑flex, high speed and other high‑performance materials.

Q5: Is EBest qualified to produce medical and aerospace complex PCBs?

A5: Yes. We hold ISO 13485 (medical) and AS9100D (aerospace) certifications and serve global high‑end clients.

Q6: What is EBest’s capability for complex multilayer PCBs?

A6: We support high‑layer count complex multilayer PCBs with tight alignment, precision impedance control, and premium material options.

Q7: How does EBest ensure stable quality for complex PCB orders?

A7: We use full process inspection, AOI, X‑ray, precision electrical testing, and certified quality systems.

How To Get A Free Quote For Custom Complex PCBs From EBest?

Getting a free quote for best PCB manufacturers for complex boards from EBest is simple, fast, and efficient. All you need to do is send us your Gerber files, layer count, preferred material, tolerance requirements, target quantity and application industry. Our senior engineering team will immediately perform a free DFM review and provide a detailed, professional solution and formal response.

We specialize in supporting best PCB manufacturers for complex boards projects and provide complete services including PCB design, prototyping, mass production, component sourcing, and PCB assembly. If you are ready to start your complex PCB project, contact us today to place your order: sales@bestpcbs.com.

You may also like

Ceramic Core PCB | Alumina & Aluminum Nitride Ceramic PCB

May 11th, 2026

What is a ceramic core PCB?

Ceramic core PCB is a printed circuit board built on a ceramic substrate instead of a conventional organic laminate such as FR4. In this type of board, the ceramic layer works as the main supporting base and thermal pathway. It gives the circuit strong heat transfer, stable electrical insulation, and excellent dimensional consistency under demanding operating conditions.

Unlike standard PCB materials that rely on glass fiber and resin, ceramic PCB boards use inorganic ceramic materials such as alumina, aluminum nitride, or silicon nitride. These materials are valued in high-power, high-frequency, high-temperature, and high-reliability electronics.

In the PCB industry, ceramic core PCB is often used for applications where ordinary laminates cannot provide enough thermal conductivity or long-term stability. The board may support thick copper, thin-film circuits, DPC copper plating, DBC bonding, or AMB structures, depending on the electrical and mechanical requirements of the project.

EBest Circuit (Best Technology) supports ceramic PCB manufacturing for engineers who need more than a basic circuit board. With experience in alumina PCB, aluminum nitride PCB, DPC ceramic PCB, DBC ceramic substrate, AMB ceramic substrate, and customized ceramic PCB boards, EBest Circuit helps customers move from early design review to production with practical engineering support.

What is the difference between ceramic and FR4?

Ceramic PCB and FR4 PCB are both widely used in electronics, but they are designed for different performance levels. FR4 is the most common PCB substrate because it is cost-effective, easy to process, and suitable for many consumer, industrial, and general electronic products. Ceramic PCB is selected when the circuit needs higher thermal conductivity, better temperature resistance, and stronger dimensional stability.

FR4 is made from woven fiberglass cloth and epoxy resin. It performs well in standard electronic assemblies, but its thermal conductivity is limited. Ceramic boards, by contrast, use inorganic ceramic substrates that conduct heat much more efficiently while keeping excellent insulation. This is why ceramic core PCB is commonly found in LED modules, laser equipment, power electronics, sensors, medical devices, automotive electronics, and aerospace-related systems.

ItemCeramic Core PCBFR4 PCB
Main materialAlumina, aluminum nitride, silicon nitride, or other ceramic materialsGlass fiber reinforced epoxy laminate
Thermal conductivityHigh, suitable for heat-sensitive and power applicationsLow to moderate, suitable for general electronics
Temperature resistanceExcellent stability at elevated temperaturesGood for standard operating environments
Mechanical behaviorHard, stable, and rigid, but requires careful handlingTougher and more flexible during standard assembly
Electrical insulationVery strong insulation performanceReliable insulation for common circuit designs
Typical applicationsHigh-power LEDs, RF modules, power devices, sensors, automotive electronicsConsumer electronics, control boards, communication devices, general PCBA
Cost levelHigher due to material and process complexityLower and highly scalable

The choice should not be based only on price. If the circuit generates a high amount of heat or must keep stable performance in a harsh environment, ceramic PCB can provide a stronger technical foundation.

What’s the difference between alumina PCB and aluminum nitride PCB?

Alumina PCB and aluminum nitride PCB are two of the most common ceramic PCB materials. Both provide good insulation, stable structure, and better thermal performance than FR4. The key difference is thermal conductivity. Alumina is widely used because it offers a balanced combination of price, process maturity, and electrical performance. Aluminum nitride is chosen when the design needs much higher heat dissipation.

Alumina PCB usually refers to ceramic boards made from aluminum oxide. Common grades include 96% alumina and 99.6% alumina. It is a practical choice for many LED, sensor, power module, and industrial electronic applications. It has good mechanical strength, stable electrical insulation, and a more accessible ceramic board price compared with aluminum nitride.

Aluminum nitride PCB is often used in more demanding thermal designs. Its thermal conductivity can be several times higher than alumina, making it highly suitable for power semiconductors, high-brightness LEDs, laser diodes, automotive power modules, and compact high-power assemblies. It is usually more expensive than alumina because the raw material, sintering process, and manufacturing control are more demanding.

ItemAlumina PCBAluminum Nitride PCB
MaterialAluminum oxide ceramicAluminum nitride ceramic
Thermal conductivityGood, commonly used for medium to high thermal needsExcellent, suitable for high-power heat dissipation
CostMore economical among ceramic PCB optionsHigher due to material and process requirements
Mechanical strengthStrong and mature in productionStrong, with careful process control needed
Electrical insulationExcellentExcellent
Typical useLED modules, sensors, heaters, industrial controls, power circuitsPower modules, laser devices, high-power LEDs, RF and automotive electronics

EBest Circuit can help customers compare ceramic PCB materials during DFM review, so the final design matches both technical needs and production cost targets.

Why use ceramic PCB?

Ceramic PCB is used because it solves several practical engineering problems at the same time. It helps remove heat, keeps circuits electrically insulated, supports high-density layouts, and performs well in high-temperature environments.

One of the strongest reasons to use ceramic PCB is thermal management. As electronic products become smaller and more powerful, heat has less room to escape. If heat remains around chips, LEDs, or power components, performance can drop over time. A ceramic board gives heat a faster path away from the source, helping the assembly work in a more stable condition.

Ceramic PCB also supports excellent electrical properties. It can provide low dielectric loss, high insulation resistance, and stable performance across demanding operating conditions. This is important for RF circuits, sensor modules, high-voltage electronics, and power devices.

  • High thermal conductivity for better heat spreading
  • Strong electrical insulation for compact circuit layouts
  • Excellent temperature resistance for harsh environments
  • Stable dimensions during thermal cycling
  • Good compatibility with power devices, LEDs, sensors, and RF modules
  • Long service life in high-reliability electronic products

For manufacturers, ceramic PCB also brings value in quality consistency. The substrate has stable physical properties, which helps reduce performance drift in precision electronics. For engineers, it allows a cleaner thermal design and can reduce the need for bulky heat sinks in some compact products.

How much does a ceramic PCB cost?

Ceramic PCB cost is usually higher than standard FR4 PCB cost because the material, processing method, copper bonding, laser drilling, metallization, and quality control are more specialized. In high-power or high-reliability products, better heat transfer and longer operating stability can reduce the risk of field problems and improve product performance.

The ceramic board price depends on several technical factors. Material selection is one of the biggest cost drivers. Alumina PCB is generally more economical, while aluminum nitride PCB costs more because it provides much higher thermal conductivity. Board size, thickness, copper thickness, circuit precision, via structure, surface finish, tolerance control, and production quantity also affect the final quotation.

Cost FactorHow It Affects Ceramic PCB Cost
Ceramic materialAlumina is usually more economical; aluminum nitride is higher in cost but stronger in thermal performance.
Board sizeLarger ceramic boards use more raw material and may require tighter handling control.
Substrate thicknessSpecial thickness requirements may increase material preparation and processing cost.
Copper thicknessThicker copper improves current capacity but increases plating or bonding complexity.
Line width and spacingFine circuits require more precise manufacturing control.
Via structureFilled vias, laser vias, and conductive vias can raise process complexity.
Surface finishENIG, immersion silver, nickel gold, or other finishes may affect pricing.
Order quantityPrototype cost per piece is higher; batch production usually improves unit cost.

For a reliable ceramic PCB quotation, engineers should provide Gerber files, drawings, material requirements, board thickness, copper thickness, surface finish, tolerance needs, and expected quantity. If the design is still being evaluated, EBest Circuit can review the technical requirements and suggest a practical manufacturing route before final pricing.

Can ceramic core PCB be customized in size and layout?

Yes, ceramic core PCB can be customized in size, layout, thickness, copper pattern, surface finish, and structure. Customization is one of the main reasons ceramic PCB is used in advanced electronic products.

Custom ceramic PCB does require careful design planning. Ceramic materials are hard and stable, but they are processed differently from FR4. Features such as hole size, edge shape, slot position, via design, copper thickness, and board outline should be reviewed before production. A strong DFM check helps improve manufacturability and keeps the finished board aligned with the original electrical and thermal goals.

Common customization options include:

  • Alumina PCB or aluminum nitride PCB substrate selection
  • Custom board outline, size, and ceramic thickness
  • Single-sided, double-sided, or multilayer ceramic PCB structure
  • Thin-film or thick-film circuit design
  • DPC, DBC, or AMB ceramic core manufacturing process
  • ENIG, nickel gold, silver, or other surface finish options
  • Laser drilling, via filling, and precision routing
  • Thick copper design for higher current carrying capacity

EBest Circuit works with customers on customized ceramic PCB projects where standard PCB materials may not deliver enough thermal or mechanical stability. The engineering team can assist with material selection, stack-up review, ceramic core manufacturing process evaluation, and production feasibility checks.

How are ceramic cores made?

Ceramic cores are made through a controlled process that starts with ceramic powder preparation and ends with a dense, stable substrate suitable for circuit formation. The exact process depends on the material and final PCB structure.

In a typical ceramic substrate process, ceramic powder is mixed with binders and additives to form a workable material. The material is shaped into sheets or pressed forms, then dried and sintered at high temperature. Sintering gives the ceramic its hardness, density, and stable physical properties. After that, the substrate may be lapped, polished, laser drilled, metallized, plated, etched, and finished according to the PCB design.

For circuit formation, different ceramic PCB technologies can be used. DPC, or Direct Plated Copper, is often chosen for fine circuits and high-precision designs. DBC, or Direct Bonded Copper, bonds copper directly onto the ceramic surface and is often used for power modules. AMB, or Active Metal Brazing, provides very strong bonding and is suitable for high-reliability power electronics.

Process TypeMain FeatureTypical Application
DPC ceramic PCBUses copper plating technology for fine circuits and precision patternsLED modules, sensors, optical devices, high-density ceramic circuits
DBC ceramic PCBDirect copper bonding provides strong thermal and current capacityPower modules, IGBT substrates, high-power electronics
AMB ceramic PCBActive brazing creates strong copper-to-ceramic bondingAutomotive power modules, high-reliability energy electronics
Thick-film ceramic PCBConductive paste is printed and fired onto ceramicHeaters, sensors, hybrid circuits, industrial modules
Thin-film ceramic PCBHigh-precision metal layers are deposited on ceramicMicrowave circuits, precision sensors, RF electronics

A professional ceramic PCB manufacturer must control material quality, sintering conditions, copper adhesion, surface flatness, circuit accuracy, and inspection standards. EBest Circuit combines process knowledge with practical PCB engineering support, helping customers choose the right ceramic core manufacturing process for the final product environment.

What thermal performance does ceramic core PCB deliver?

Ceramic core PCB delivers much stronger thermal performance than standard FR4 boards. The main advantage is that ceramic materials can transfer heat efficiently while still providing electrical insulation.

Alumina PCB offers good thermal conductivity for many industrial and LED applications. Aluminum nitride PCB provides a much higher level of heat transfer and is often used where thermal density is more demanding. With the right copper thickness, layout, and mounting structure, ceramic PCB boards can move heat away from components quickly and help maintain stable operating temperatures.

Thermal performance is not only about the ceramic material itself. The final result also depends on copper design, substrate thickness, dielectric path, via structure, solder joint quality, component placement, and heat sink contact.

MaterialGeneral Thermal PerformanceBest-Fit Applications
FR4Limited thermal conductivityGeneral electronics and low-to-medium power circuits
Alumina ceramicGood thermal conductivity with balanced costLEDs, sensors, industrial modules, moderate power electronics
Aluminum nitride ceramicExcellent thermal conductivityHigh-power LEDs, laser modules, power semiconductors, automotive electronics
Silicon nitride ceramicStrong thermal and mechanical reliabilityHigh-reliability power modules and harsh operating environments

For thermal-sensitive designs, EBest Circuit can support layout review and material comparison. This is helpful when customers need to decide between alumina PCB and aluminum nitride PCB, or when they want to optimize the balance between ceramic PCB cost, heat dissipation, and long-term reliability.

What are ceramic cores used for?

Ceramic cores are used in electronic products that need better thermal control, high insulation, stable structure, and reliable performance under demanding conditions. They are especially useful where compact size and high power must coexist. Because ceramic materials can transfer heat efficiently while maintaining electrical separation, they are widely used in modern power, lighting, automotive, medical, and communication systems.

In LED products, ceramic PCB helps move heat away from LED chips and supports stable brightness. In power electronics, ceramic substrates are used for modules that handle high current and high voltage. In RF and microwave circuits, ceramic materials can provide stable electrical characteristics. In medical and aerospace electronics, ceramic PCB boards support reliability, precision, and long service life.

  • High-power LED modules and lighting engines
  • Laser diode modules and optical devices
  • Power semiconductor packages and IGBT modules
  • Automotive electronics and electric vehicle power modules
  • RF, microwave, and communication circuits
  • Medical sensors and monitoring devices
  • Industrial control modules and high-temperature electronics
  • Aerospace, UAV, and high-reliability electronic assemblies

Ceramic core PCB is a strong choice when the product needs more than ordinary PCB performance. Alumina PCB is suitable for balanced thermal and cost requirements, while aluminum nitride PCB is ideal for stronger heat dissipation. For custom ceramic PCB boards, ceramic PCB materials, ceramic PCB cost evaluation, and ceramic core manufacturing process support, EBest Circuit (Best Technology) can help engineers build a practical path from prototype to production.

Summary:

Ceramic core PCB is not simply a premium version of FR4. It is a specialized circuit platform for products that need excellent heat transfer, high insulation, stable operation, and compact design. If your project requires alumina PCB, aluminum nitride PCB, or custom ceramic PCB manufacturing support, you can contact sales@bestpcbs.com for project discussion and quotation support.

You may also like

What Are the Most Practical PCB Layout Tips to Improve Circuit Performance?

May 11th, 2026

Can the right PCB layout tips turn a problematic circuit design into a reliable high-performance system? Many circuit designs fail not because of flawed schematics but improper layout choices that compromise signal integrity, power stability, and thermal management. This guide breaks down actionable PCB layout tips and techniques to avoid common pitfalls, enhance performance, and ensure compliance all tailored to address the real-world challenges faced in circuit design.

PCB layout tips, https://www.bestpcbs.com/blog/2026/05/pcb-layout-tips/

What Are the Essential PCB Layout Tips for Beginners to Avoid Common Mistakes?

Beginners often overlook basic layout principles that lead to costly reworks and performance issues. The following PCB layout tips focus on foundational, actionable practices to prevent common errors and set a strong base for any design.

  • Match Component Footprints to Datasheets: Always cross-verify component footprints with manufacturer datasheets. Use the exact footprint provided by the component manufacturer never guess or modify footprints without confirmation. For example, confusing 0603 (1.6mm x 0.8mm) and 0805 (2.0mm x 1.25mm) resistors will cause soldering bridges or poor connections. For QFN components, double-check pad size, pitch, and thermal pad dimensions, as misalignment leads to thermal and electrical failures. Always confirm footprint compatibility with your PCB design software before finalizing.
  • Keep Power and Ground Traces Separate from Signal Traces: Avoid routing power or ground traces alongside sensitive signal traces (e.g., analog sensors, low-voltage signals). Power traces carry varying currents that generate noise, which disrupts signal quality. Maintain a minimum spacing of 2–3 mils between power/ground traces and signal traces. Ensure power traces are sufficiently wide use 10 mils for 1A, 20 mils for 2A, and 30 mils for 3A to handle current demands without voltage drops or overheating.
  • Place Decoupling Capacitors Correctly: Decoupling capacitors filter out power supply noise and stabilize voltage for integrated circuits. Place them within 5–10 mils of the IC’s power pins, with traces no longer than 15 mils to both power and ground. Use a combination of 0.1”F (for high-frequency noise) and 1”F (for low-frequency noise) capacitors for each IC power pin. Avoid daisy-chaining decoupling capacitors each IC should have its own dedicated decoupling to ensure fast response to voltage fluctuations.
  • Avoid Overcrowding Components: Overcrowding leads to poor heat dissipation, difficult soldering, and increased signal crosstalk. Leave a minimum of 10 mils between passive components (resistors, capacitors) and 20 mils between active components (ICs, transistors). For power components (MOSFETs, voltage regulators), leave 30–50 mils of spacing to promote airflow. Follow manufacturer recommendations for minimum component spacing, and use a 3D view in your design software to check for physical collisions.
  • Plan Trace Routing Before Starting: Map out trace paths before routing to avoid unnecessary bends, loops, or crossings. Use shorter, straighter traces keep critical signal traces under 1 inch where possible to reduce signal delay and attenuation. For multi-layer PCBs, assign dedicated layers for power, ground, analog signals, and digital signals in advance. Use a netlist to group related signals, and route power and ground traces first before moving to signal traces.
  • Label Components and Nets Clearly: Add clear labels to all components (e.g., R1, C1, U1) and nets (e.g., VCC_3.3V, GND, I2C_SDA) to simplify assembly and troubleshooting. Use a consistent labeling format, and place labels in open areas of the PCB where they are easily visible. Avoid placing labels over traces or pads, as this can interfere with soldering or signal integrity.

How to Apply Practical PCB Layout Tips and Tricks to Enhance Signal Integrity?

Signal integrity ensures signals travel from source to load without distortion a critical factor for circuit performance. These PCB layout tips focus on reducing noise, crosstalk, and reflection to maintain signal quality, with actionable steps for every design.

  • Control Trace Impedance: Match trace impedance to the source and load impedance (typically 50 ohms for most signals, 100 ohms for differential signals) to minimize signal reflection. Use an impedance calculator to determine trace width, spacing, and dielectric thickness based on your PCB material (e.g., FR-4 with 1oz copper). For a 50-ohm trace on FR-4 (1.6mm thick), use a 50-mil width for a single-ended trace. Maintain consistent impedance across the entire trace avoid sudden changes in width or spacing.
  • Minimize Trace Length and Bends: Shorter traces reduce signal delay and attenuation. Keep high-frequency signals (above 50 MHz) under 2 inches where possible. Avoid sharp 90-degree bends, which cause impedance changes and signal reflection. Use 45-degree bends or rounded corners (with a radius equal to the trace width) instead. For traces that must be long, add a series resistor (10–100 ohms) near the source to reduce reflection.
  • Separate High-Speed and Low-Speed Signals: High-speed signals (e.g., USB, HDMI, Ethernet) generate electromagnetic interference that disrupts low-speed signals (e.g., analog sensors, UART). Route high-speed traces in a dedicated area, at least 50 mils away from low-speed traces. Use ground planes to isolate high-speed traces place a ground trace on both sides of high-speed traces for additional shielding. Avoid routing high-speed traces over gaps in the ground plane.
  • Use Ground Planes for Signal Return Paths: A solid ground plane provides a low-impedance return path for signals, reducing noise and crosstalk. Ensure signal traces run directly above the ground plane to minimize loop area (critical for high-frequency signals). Use a single continuous ground plane avoid splitting the ground plane, as this creates discontinuities in the return path and increases noise. For multi-layer PCBs, place the ground plane between signal layers for maximum shielding.
  • Implement Differential Pair Routing: For differential signals (e.g., USB 3.0, HDMI, Ethernet), route traces in pairs with equal length, spacing, and impedance. Keep the pair parallel throughout the route maintain a spacing of 5–10 mils between the two traces. Ensure both traces have the same length (within ±1 mil) to avoid skew. Avoid crossing other traces or changing layers unnecessarily; if layer changes are required, use vias for both traces at the same location.
  • Avoid Stubs on High-Speed Traces: Stubs (short, unused segments of trace) on high-speed signals cause signal reflection and degradation. Keep stubs under 5 mils in length if longer stubs are unavoidable, use a termination resistor at the end of the stub. For example, a stub longer than 10 mils on a 100 MHz signal can cause significant reflection and signal loss.

What PCB Layout Design Tips Should Engineers Follow for High-Speed Circuits?

High-speed circuits (operating above 100 MHz) require specialized layout techniques to handle signal propagation effects and noise. These PCB layout tips address the unique challenges of high-speed design to ensure reliable performance, with practical steps for implementation.

  • Maintain Equal Trace Lengths for Critical Signals: For bus signals (e.g., DDR memory, PCIe), ensure all traces in the bus have the same length to prevent skew. Skew occurs when signals arrive at the load at different times, causing data errors. Use length matching tools in your design software to adjust trace lengths within a tolerance of ±5 mils. For DDR4 memory, keep clock and data traces within 10 mils of each other in length. Add serpentine traces (with minimal bends) to adjust lengths without increasing noise.
  • Reduce Parasitic Inductance and Capacitance: Parasitic elements (inductance from long traces, capacitance from adjacent traces) degrade high-speed signal quality. Minimize trace length keep high-speed traces under 1.5 inches where possible. Keep traces at least 20 mils away from each other to reduce parasitic capacitance. Use shorter vias (preferably 0.3mm diameter) to reduce parasitic inductance. Avoid placing traces over gaps in the ground plane, as this increases parasitic capacitance and signal reflection.
  • Isolate Clock Signals: Clock signals are high-frequency and generate significant noise. Route clock traces in a dedicated layer, surrounded by ground traces (10–15 mils spacing) or a ground plane, to isolate them from other signals. Keep clock traces as short as possible under 1 inch for clocks above 200 MHz. Avoid routing clock traces near sensitive components (e.g., analog sensors, voltage regulators) and avoid crossing clock traces with other high-speed signals.
  • Use Blind and Buried Vias: Blind vias (connecting the top layer to inner layers) and buried vias (connecting inner layers) reduce trace length and minimize signal reflection in high-speed circuits. They also save space on the PCB surface, allowing for more compact designs without sacrificing performance. Use blind vias for signal traces that need to connect to inner layers, and buried vias for power and ground connections between inner layers. Ensure via size is compatible with your manufacturer’s capabilities (typically 0.2–0.4mm diameter).
  • Implement Signal Termination: Add termination resistors to high-speed signal lines to match impedance and reduce reflection. Use series termination (a resistor placed near the source) for point-to-point signals choose a resistor value equal to the trace impedance (e.g., 50 ohms for 50-ohm traces). Use parallel termination (a resistor placed near the load) for bus signals connect the resistor to ground or VCC, depending on the signal type. Follow manufacturer guidelines to place termination resistors as close to the source or load as possible (within 5–10 mils).
  • Use a Dedicated Power Plane for High-Speed ICs: High-speed ICs (e.g., microcontrollers, FPGAs) require clean power to maintain performance. Use a dedicated power plane for these ICs, separate from other power supplies. Add additional decoupling capacitors (0.1”F, 1”F, and 10”F) near the IC’s power pins to filter out high-frequency noise. Ensure the power plane is connected to the ground plane via multiple vias to reduce impedance.

What Are the PCB Board Layout Tips to Ensure Stable Power Distribution?

Stable power distribution is essential for consistent circuit performance, as voltage fluctuations or noise can cause component failure or incorrect operation. These PCB layout tips focus on delivering clean, stable power to all components, with actionable steps for every design.

  • Use Adequately Sized Power Traces: Power traces must handle the maximum current of the circuit without voltage drop or overheating. Calculate trace width using a trace width calculator account for current, copper thickness (1oz = 35”m), PCB material, and ambient temperature. A general guideline: 10 mils for 1A, 20 mils for 2A, 30 mils for 3A, and 50 mils for 5A. For currents above 5A, use a power plane instead of traces to reduce resistance and heat.
  • Implement a Power Plane in Multi-Layer PCBs: A dedicated power plane provides a low-impedance path for power distribution, reducing noise and voltage drops. The power plane should cover the entire PCB area where possible, ensuring uniform power delivery to all components. Pair the power plane with a ground plane (adjacent layer) to minimize loop area and reduce noise. For multiple power supplies (e.g., 3.3V, 5V), use separate power planes to prevent cross-contamination.
  • Place Bulk Capacitors Near Power Inputs: Bulk capacitors (e.g., 10”F, 100”F, 220”F) filter low-frequency noise and stabilize the main power supply. Place them within 1 inch of the power input connector to smooth voltage fluctuations and provide instantaneous current during peak demand. Use tantalum or ceramic capacitors for bulk storage tantalum capacitors have higher capacitance density, while ceramic capacitors have faster response times. Add at least one bulk capacitor per power supply input.
  • Separate Power Supplies for Different Circuit Sections: If the circuit uses multiple power supplies (e.g., 3.3V for digital, 5V for analog, 12V for power components), separate their power traces and planes to prevent cross-contamination. Use separate voltage regulators for each supply to ensure stable voltage levels. Route analog power traces away from digital power traces maintain a minimum spacing of 50 mils. Connect all power grounds to a single common ground point to avoid ground loops.
  • Avoid Power Trace Loops: Power trace loops create magnetic fields that generate noise and interfere with signal integrity. Keep power traces as straight as possible and avoid forming loops. Use the power plane to provide a direct path from the supply to components avoid routing power traces in a circular path. For power traces that must turn, use 45-degree bends and keep the loop area as small as possible.
  • Add Fuses or Polyfuses for Overcurrent Protection: Include fuses or polyfuses in the power path to protect components from overcurrent. Place fuses near the power input connector, before any other components. Choose a fuse rating 1.2–1.5 times the maximum current of the circuit this ensures the fuse blows only during overloads. Use polyfuses for resettable protection, which automatically recover after the overload is removed.
PCB Layout Tips, https://www.bestpcbs.com/blog/2026/05/pcb-layout-tips/

How Do PCB Layout Techniques Differ Between Analog and Digital Circuit Designs?

Analog and digital circuits have distinct characteristics analog circuits handle continuous signals and are sensitive to noise, while digital circuits handle discrete signals and generate more noise. These PCB layout tips highlight the key differences in layout techniques for each type, with practical steps to optimize both.

  • Component Placement: For analog circuits, place sensitive components (e.g., op-amps, sensors, ADCs) away from noise sources (e.g., oscillators, digital ICs, power components) by at least 50 mils. Group analog components by function (e.g., signal conditioning, amplification) to minimize trace length and reduce noise. For digital circuits, place components to minimize signal delay group high-speed components (e.g., microcontrollers, memory) together, within 1–2 inches of each other. Avoid placing digital components near analog sensors or op-amps.
  • Grounding Techniques: Analog circuits require a single-point ground to avoid ground loops, which cause noise. Connect all analog ground points (e.g., op-amp grounds, sensor grounds) to a single node before connecting to the main ground. Use a separate analog ground plane for sensitive analog circuits. Digital circuits can use a multi-point ground to reduce ground impedance connect all digital ground points directly to the ground plane. Connect the analog and digital ground planes at a single common ground point (near the power supply) to avoid ground loops.
  • Trace Routing: Analog traces should be short (under 1 inch for sensitive signals), straight, and shielded to reduce noise pickup. Use shielded traces (ground trace on both sides) for analog signals that are particularly sensitive (e.g., sensor outputs). Avoid routing analog traces near digital traces or power traces maintain a minimum spacing of 30 mils. Digital traces can be longer but should still be kept as short as possible, with emphasis on impedance control for high-speed signals. Route digital traces over the ground plane to reduce noise.
  • Power Distribution: Analog power supplies require clean, low-noise power. Use separate power traces for analog and digital supplies filter analog power with a low-pass filter (resistor + capacitor) to remove high-frequency noise. Add additional decoupling capacitors (0.1”F and 1”F) for analog components, placed close to their power pins. Digital power supplies can handle more noise but still require proper decoupling use 0.1”F capacitors for each digital IC power pin. Avoid sharing power traces between analog and digital components.
  • Shielding: Analog circuits often require shielding to protect sensitive signals from external interference. Use ground planes, shield traces, or metal enclosures to isolate analog components. For example, place a metal shield around an op-amp or sensor to block electromagnetic interference. Digital circuits rarely need shielding unless they generate excessive EMI if needed, use a ground plane or shield traces around high-speed digital components (e.g., oscillators).
  • Avoid Digital-Analog Signal Crossings: Never route analog and digital signals across each other this causes crosstalk and noise. If signals must cross, route them at 90 degrees to minimize coupling. Use a ground trace or ground plane between analog and digital traces to provide additional isolation. For mixed-signal PCBs, divide the PCB into analog and digital sections with a clear boundary.

What PCB Layout Tips for Thermal Vias Help Improve Heat Dissipation Efficiency?

Thermal vias transfer heat from hot components to inner layers or the opposite side of the PCB, improving heat dissipation and preventing component overheating. These PCB layout tips optimize thermal via design for maximum efficiency, with specific guidelines for placement and sizing.

  • Place Thermal Vias Directly Under Heat-Generating Components: Position thermal vias directly beneath high-power components (e.g., MOSFETs, voltage regulators, LEDs) to transfer heat quickly. For components with a thermal pad (e.g., QFN, DPAK), cover the entire thermal pad with thermal vias space vias 10–15 mils apart in a grid pattern. Ensure vias are centered under the component to evenly distribute heat. For surface-mount components without a thermal pad, place vias as close to the component as possible (within 5–10 mils).
  • Use the Correct Number of Thermal Vias: The number of thermal vias depends on the component’s power dissipation. A general guideline is 5 thermal vias per watt of power for example, a 3W component requires 15 thermal vias, a 5W component requires 25 thermal vias. For components with power dissipation above 10W, increase the number of vias and use larger vias (0.5mm diameter) to improve heat transfer. Test thermal performance with a thermal imaging tool to adjust the number of vias if needed.
  • Choose the Right Via Size: Use thermal vias with a diameter of 0.3–0.5 mm and a pad diameter of 0.6–0.8 mm. Larger vias (0.4–0.5 mm) transfer heat more effectively but take up more space use them for high-power components. Smaller vias (0.3 mm) are suitable for low-power components or tight spaces. Ensure the via size is compatible with the PCB manufacturing process most manufacturers support 0.3mm vias as standard.
  • Fill or Plate Thermal Vias: Fill thermal vias with solder or copper to improve heat transfer. Unfilled vias have air gaps that reduce thermal conductivity filled vias conduct heat 2–3 times better. Use solder-filled vias for cost-effective designs, or copper-filled vias for high-performance applications. Plated-through vias (PTH) provide better heat transfer than non-plated vias ensure all thermal vias are plated to maximize conductivity.
  • Connect Thermal Vias to a Heat Sink or Ground Plane: Connect thermal vias to a large ground plane or dedicated heat sink layer to spread heat across the PCB. The ground plane acts as a heat dissipator, reducing the temperature of hot components. For multi-layer PCBs, connect thermal vias to all ground layers to maximize heat distribution. If using a heat sink, place thermal vias between the component and the heat sink pad to transfer heat directly to the heat sink.
  • Avoid Placing Thermal Vias Under Signal Traces: Thermal vias can cause impedance changes if placed under high-speed signal traces. Keep thermal vias at least 20 mils away from high-speed signal traces to avoid disrupting signal integrity. For components with both thermal pads and nearby signal traces, offset the thermal vias to one side of the component to avoid signal interference.

Which PCB Layout Tips for Manufacturing Can Reduce Production Defects and Costs?

Manufacturable PCB layout reduces reworks, scrap rates, and production costs while ensuring consistent quality. These PCB layout tips align with manufacturing processes to minimize defects, with practical steps to optimize for assembly and fabrication.

  • Follow Minimum Design Rules: Adhere to the manufacturer’s minimum design rules for trace width, spacing, via size, and pad size. Typical minimums are 4 mils for trace width and spacing, 0.3mm for via diameter, and 0.6mm for pad diameter. Using smaller dimensions than recommended leads to manufacturing defects such as short circuits, open circuits, or poor soldering. Request the manufacturer’s design rule check (DRC) file and run it in your design software before submitting the PCB for fabrication.
  • Avoid Isolated Copper Islands: Isolated copper islands (unconnected copper areas) can cause soldering issues (e.g., solder balls) and increase manufacturing costs. Connect isolated copper to the ground plane or power plane using thin traces (4–6 mils) to ensure proper etching and soldering. For large isolated copper areas, add thermal reliefs (narrow traces connecting the copper to the plane) to prevent warping during soldering.
  • Add Test Points: Include test points for critical signals and power rails to simplify testing and troubleshooting. Test points should be 1.27mm (0.050 inches) in diameter, with a pad size of 2.54mm (0.100 inches), to accommodate standard test probes. Place test points in accessible areas, away from component pins (minimum 10 mils spacing), and group them together for easy testing. Add at least one test point per power rail and critical signal (e.g., clock, data lines).
  • Use Standard Components: Choose standard, readily available components with common footprints (e.g., 0603, 0805, SOIC, QFP). Custom components or non-standard footprints increase lead times and costs, and increase the risk of footprint errors. Use components from reputable manufacturers (e.g., Texas Instruments, Vishay, Murata) to ensure availability and consistent quality. Avoid obsolete components, as they are difficult to source and may increase production costs.
  • Design for Automated Assembly: Ensure the layout is compatible with automated pick-and-place machines. Place components in a grid pattern (0.5mm or 1mm grid) to allow for accurate placement. Maintain a minimum spacing of 20 mils between components to allow for machine access. Avoid placing components too close to the PCB edge (minimum 5mm spacing) to prevent damage during handling. Use tape-and-reel components for automated assembly, as they are easier to handle than loose components.
  • Add Solder Mask and Silkscreen Properly: Use solder mask to cover all traces and pads except for component pads and test points. This prevents short circuits and protects traces from damage. Ensure solder mask openings are slightly larger than the pads (0.2–0.3mm) to allow for soldering. Use silkscreen to add component labels, logos, and polarity marks ensure silkscreen is clear and legible, and avoid placing silkscreen over pads or vias.
PCB Layout Tips, https://www.bestpcbs.com/blog/2026/05/pcb-layout-tips/

How to Implement Effective PCB Layout Tips for Panelization in Mass Production?

Panelization groups multiple PCBs onto a single panel for efficient mass production, reducing material waste and assembly time. These PCB layout tips optimize panelization for smooth manufacturing, with specific guidelines for spacing, tooling, and depanelization.

  • Maintain Proper Spacing Between PCBs: Leave 2–3 mm of spacing between individual PCBs on the panel to allow for depanelization (separating the PCBs after production). Increase spacing to 5 mm if components are placed near the PCB edge to prevent damage during cutting. Use a consistent spacing throughout the panel to ensure uniform depanelization. Avoid placing components in the spacing area, as they will be damaged during cutting.
  • Add Tooling Holes: Include tooling holes in the panel (not on individual PCBs) to align the panel with manufacturing equipment. Tooling holes should be 1–2 mm in diameter, placed at the corners of the panel, and free of copper to ensure accurate alignment. Add at least two tooling holes (opposite corners) for small panels, and four tooling holes (all corners) for larger panels. Ensure tooling holes are not placed near the edge of the panel (minimum 5mm spacing).
  • Use V-Scoring or Tab Routing: V-scoring (a shallow cut along the PCB edge) or tab routing (small tabs connecting PCBs) simplifies depanelization. V-scoring is ideal for PCBs with straight edges use a 30–45 degree V-score, with a depth of 1/3 the PCB thickness. Tab routing works for irregular shapes use tabs 2–3 mm wide, spaced 10–15 mm apart. Ensure tabs are strong enough to hold the PCBs during assembly but easy to break during depanelization (use a score line on the tab for easy breaking).
  • Align Components Away from Panel Edges: Place components at least 5 mm away from the panel edges and depanelization lines. This prevents component damage during depanelization and ensures proper soldering. For components near the PCB edge (within 5 mm), use a larger spacing (7–10 mm) to avoid damage. Avoid placing delicate components (e.g., sensors, LEDs) near depanelization lines, as they are more prone to damage.
  • Optimize Panel Size: Choose a panel size compatible with the manufacturer’s equipment (typically 18 x 24 inches or 24 x 36 inches). Avoid oversized panels, which increase material waste, and undersized panels, which reduce production efficiency. Calculate the number of PCBs per panel to maximize efficiency balance the number of PCBs with the panel size to minimize waste. For small PCBs, use a grid pattern to fit as many as possible on the panel.
  • Add Panel Identification: Include panel identification (e.g., part number, revision, date) on the panel (not on individual PCBs) to simplify tracking during production. Place the identification in an open area of the panel, away from components and depanelization lines. Use a clear, legible font (minimum 12pt) to ensure the identification is easily visible.

What PCB Layout Standards Must Be Followed to Meet Industry Compliance?

Industry compliance standards ensure PCBs meet safety, performance, and reliability requirements for specific applications. These PCB layout tips help align designs with common industry standards, with practical steps to ensure compliance.

  • Follow IPC Standards: IPC standards (e.g., IPC-2221, IPC-6012) provide guidelines for PCB design, materials, and manufacturing. Adhere to IPC-2221 for general PCB design follow its guidelines for trace width, spacing, component placement, and thermal management. IPC-6012 outlines quality requirements for PCB fabrication ensure your PCB meets its standards for copper thickness, solder mask, and via quality. Use IPC-compliant footprints and design rules to avoid compliance issues.
  • Comply with RoHS and REACH: RoHS (Restriction of Hazardous Substances) and REACH (Registration, Evaluation, Authorization, and Restriction of Chemicals) restrict the use of hazardous materials in PCBs. Use RoHS-compliant materials lead-free solder (Sn-Cu-Ni or Sn-Ag-Cu), lead-free components, and halogen-free PCB materials. Avoid restricted substances such as lead, mercury, cadmium, and hexavalent chromium. Request RoHS compliance certificates from your component and PCB manufacturers.
  • Meet Automotive Electronics Standards: For automotive PCBs, comply with ISO 26262 (functional safety) and IPC-6012/2221 (automotive grade). Use redundant components for critical circuits (e.g., safety systems) to ensure reliability. Isolate critical signals (e.g., engine control signals) from noise sources. Implement robust thermal management use thermal vias and heat sinks to handle high temperatures in automotive environments (up to 125°C). Use automotive-grade components (AEC-Q100) that are tested for harsh conditions.
  • Follow Medical Device Standards: Medical PCBs must comply with ISO 13485 (quality management systems) and IEC 60601 (safety for medical electrical equipment). Ensure PCBs are sterile use materials that can withstand autoclaving or chemical sterilization. Use biocompatible materials for PCBs used in implantable devices (e.g., titanium, biocompatible polymers). Implement EMI/EMC shielding to prevent interference with other medical equipment. Document all design decisions and test results to meet compliance requirements.
  • Comply with EMI/EMC Standards: EMI/EMC standards (e.g., CISPR 32, FCC Part 15) limit electromagnetic interference and ensure PCBs do not disrupt other electronic devices. Implement shielding, grounding, and filtering techniques to meet these standards. Use a solid ground plane, route signal traces over the ground plane, and isolate noise-generating components. Add EMI filters to power inputs and signal lines. Test the PCB for EMI/EMC compliance using a certified testing lab before production.
  • Follow Aerospace Standards: For aerospace PCBs, comply with MIL-STD-275 (printing and marking) and IPC-6012/2221 (aerospace grade). Use high-reliability components (MIL-PRF) that are tested for extreme temperatures, vibration, and radiation. Implement redundant power supplies and signal paths to ensure reliability. Use thermal management techniques to handle extreme temperature variations (-55°C to 125°C). Document all design and testing processes to meet aerospace compliance requirements.

What PCB Layout Tips Can Help Minimize EMI/EMC Issues in Complex Circuits?

EMI (Electromagnetic Interference) and EMC (Electromagnetic Compatibility) issues cause circuits to fail compliance tests and disrupt nearby devices. These PCB layout tips reduce EMI emissions and improve EMC performance, with actionable steps for complex circuits.

  • Use a Solid Ground Plane: A solid ground plane acts as a shield, reducing EMI emissions and preventing external interference. Ensure the ground plane is continuous and covers as much of the PCB as possible avoid splitting the ground plane, as this creates antenna-like structures that radiate EMI. For multi-layer PCBs, place the ground plane between signal layers for maximum shielding. Connect all ground points to the ground plane via multiple vias to reduce impedance.
  • Route Signal Traces Over the Ground Plane: Signal traces running above the ground plane have a low-impedance return path, reducing EMI emissions. The ground plane absorbs electromagnetic fields generated by the signal, preventing radiation. Keep signal traces as close to the ground plane as possible use a thin dielectric layer (0.2–0.4mm) between the signal layer and ground plane to maximize coupling. Avoid routing signal traces over gaps in the ground plane.
  • Isolate Noise-Generating Components: Components that generate high EMI (e.g., oscillators, switching regulators, motors) should be placed in a dedicated area, away from sensitive components (e.g., analog sensors, ADCs). Use a ground trace or ground plane to isolate these components surround the noise-generating component with a ground trace (10–15 mils spacing) to contain EMI. Place switching regulators near the PCB edge, close to the power input, to minimize EMI propagation.
  • Minimize Loop Area: Smaller loop areas reduce EMI emissions. Keep power and ground traces close together to minimize the loop area of power circuits route power and ground traces side-by-side, with a spacing of 5–10 mils. For signal circuits, route traces directly above the ground plane to reduce loop area. Avoid routing power and ground traces in a circular path, as this creates a large loop area and increases EMI.
  • Add EMI Filters: Use EMI filters (e.g., ferrite beads, capacitors, common-mode chokes) on power inputs and signal lines to suppress EMI. Place ferrite beads on power lines near the PCB edge to filter out high-frequency noise. Use common-mode chokes on differential signals (e.g., USB, Ethernet) to reduce common-mode EMI. Add capacitors (0.1”F) between power and ground near the power input to filter out high-frequency noise.
  • Use Shielded Cables and Connectors: For signals that exit the PCB (e.g., USB, Ethernet), use shielded cables and connectors to prevent EMI from entering or exiting the circuit. Connect the shield of the cable to the PCB ground plane use a dedicated ground pad for the shield, connected to the ground plane via multiple vias. Ensure the shield is properly grounded to maximize shielding effectiveness.
PCB Layout Tips, https://www.bestpcbs.com/blog/2026/05/pcb-layout-tips/

How to Combine Various Tips for PCB Layout to Optimize Overall Circuit Reliability?

Combining PCB layout tips into a cohesive strategy ensures long-term circuit reliability, reducing failure rates and extending product lifespan. These techniques integrate multiple layout principles for optimal performance, with practical steps to implement a reliable design.

  • Prioritize Layout Order: Follow a logical layout order to ensure critical components are placed optimally. First, place power components (regulators, capacitors) and oscillators, as they generate noise and require specific spacing. Next, place sensitive analog components (sensors, op-amps) away from noise sources. Then, place digital components (microcontrollers, memory) to minimize signal delay. Finally, route power, ground, and signal traces in that order power and ground first, then signals.
  • Integrate Thermal and Signal Integrity Design: Balance thermal management and signal integrity by placing heat-generating components (MOSFETs, regulators) away from sensitive signals (analog, high-speed). Use thermal vias and heat sinks to reduce component temperature without disrupting signal paths. For high-speed components, place thermal vias offset from signal traces to avoid impedance changes. Test thermal performance with a thermal imaging tool and signal integrity with a vector network analyzer (VNA) to identify issues.
  • Test and Validate the Layout: Use PCB design software to simulate signal integrity, thermal performance, and EMI/EMC before production. Use signal integrity simulation to check for reflection, crosstalk, and skew. Use thermal simulation to identify hot spots and adjust thermal via placement. Conduct physical testing use a VNA to test signal integrity, a thermal imager to test heat dissipation, and an EMI tester to check compliance. Make adjustments based on test results to optimize reliability.
  • Document the Layout: Maintain detailed documentation of the PCB layout, including component placement, trace routing, design decisions, and test results. Document the reason for component placement (e.g., “op-amp placed away from oscillator to reduce noise”) and trace routing choices (e.g., “differential pair routed with 5-mil spacing for 100-ohm impedance”). This documentation simplifies troubleshooting, reworks, and future design iterations. Use version control to track changes to the layout.
  • Iterate and Improve: Collect data from field performance and manufacturing to identify areas for improvement. Track failure rates if a component fails frequently, check its placement and thermal management. If EMI issues occur in the field, adjust shielding or grounding. Incorporate lessons learned into future designs for example, if a certain trace routing technique reduces crosstalk, use it in future layouts. Regularly update the layout based on real-world feedback to enhance reliability.
  • Use Design Reviews: Conduct design reviews with peers or experts to identify potential issues before production. Have a colleague check for layout mistakes (e.g., incorrect footprints, trace spacing) and compliance with standards. Use a checklist to ensure all PCB layout tips are implemented include items such as “decoupling capacitors placed near IC pins,” “thermal vias under high-power components,” and “ground plane continuous.” Design reviews help catch issues early, reducing reworks and costs.

FAQs About PCB Layout Tips & Tricks

Q1: What is the most common mistake in PCB layout for beginners?

A1:The most common mistake is incorrect component footprint placement or mismatched footprints with datasheets. This leads to soldering failures, component misalignment, and functional errors. Always verify footprints against manufacturer specifications use the exact footprint provided by the component manufacturer, and double-check pad size, pitch, and orientation. Run a design rule check (DRC) in your software to catch footprint errors before finalizing the layout.

Q2: How do I choose the right trace width for power signals?

A2: Trace width depends on the current passing through the trace, copper thickness, PCB material, and ambient temperature. Use a trace width calculator to get precise values for 1oz copper (35”m) on FR-4 material at 25°C, a general guideline is 10 mils for 1A, 20 mils for 2A, 30 mils for 3A, and 50 mils for 5A. For currents above 5A, use a power plane instead of traces to reduce resistance and heat. Always size traces for the maximum current the circuit will draw, not the average.

Q3: Can thermal vias improve both heat dissipation and signal integrity?

A3: Yes, properly placed thermal vias improve heat dissipation by transferring heat from hot components to ground planes or heat sinks. When placed correctly (at least 20 mils away from high-speed signal traces), they do not disrupt signal integrity. Avoid placing thermal vias under high-speed signal traces, as this can cause impedance changes. For components with thermal pads, cover the pad with a grid of thermal vias to maximize heat transfer without interfering with signals.

Q4: How do I separate analog and digital signals in a mixed-signal PCB layout?

A4: Separate analog and digital signals by grouping components by type place analog components (sensors, op-amps) away from digital components (microcontrollers, oscillators) by at least 50 mils. Use separate power and ground planes for analog and digital circuits, connecting them at a single common ground point. Route analog traces over an analog ground plane, and digital traces over a digital ground plane. Avoid routing analog and digital traces across each other; if they must cross, route them at 90 degrees and use a ground trace between them.

Q5: What layout practices help reduce EMI in high-speed PCBs?

A5: To reduce EMI in high-speed PCBs, use a solid continuous ground plane and route signal traces directly above it to minimize loop area. Isolate noise-generating components (oscillators, switching regulators) in a dedicated area, surrounded by ground traces. Implement differential pair routing for high-speed signals, with equal length and spacing. Add EMI filters (ferrite beads, common-mode chokes) to power inputs and signal lines. Avoid splitting the ground plane, as this creates antenna-like structures that radiate EMI.

Q6: How does panelization affect PCB layout for mass production?

A6: Panelization requires maintaining 2–3 mm of spacing between individual PCBs to allow for depanelization. Add tooling holes (1–2 mm diameter) at the panel corners for alignment with manufacturing equipment. Use V-scoring or tab routing to simplify depanelization V-scoring for straight edges, tab routing for irregular shapes. Place components at least 5 mm away from panel edges and depanelization lines to prevent damage. Optimize the panel size to fit as many PCBs as possible while complying with manufacturer equipment limits.

Q7: How can I ensure stable power distribution in a multi-layer PCB?

A7: Ensure stable power distribution by using a dedicated power plane for each power supply (e.g., 3.3V, 5V). Size power traces or use power planes to handle the maximum current without voltage drop. Place bulk capacitors (10”F–220”F) near power inputs to stabilize the main supply, and decoupling capacitors (0.1”F–1”F) near each IC power pin to filter noise. Separate analog and digital power supplies to prevent cross-contamination. Pair power planes with adjacent ground planes to minimize loop area and reduce noise.

You may also like

Metal Core PCB Material: Aluminum, Copper, Thickness and FR4 Comparison

May 11th, 2026

Metal core PCB material is selected when a circuit board needs stronger heat dissipation than a standard FR4 board can provide. Instead of using only fiberglass epoxy as the base, a metal core PCB uses aluminum, copper, or another metal substrate to transfer heat away from components such as LEDs, power ICs, MOSFETs, voltage regulators, motor drivers, and automotive lighting modules.

A typical metal core PCB has three key parts: the copper circuit layer, the thermally conductive dielectric layer, and the metal base. The copper layer carries electrical signals and current. The dielectric layer provides insulation while helping heat move downward. The metal base spreads that heat into the housing, heat sink, chassis, or surrounding air.

For many projects, aluminum is the most practical choice. For higher-power or high-current designs, copper may be a better fit. The final choice depends on heat load, current level, board size, insulation requirement, product environment, and cost target.

Metal Core PCB Material
Metal core PCB Material

What Is Metal Core PCB Material?

Metal core PCB material refers to the material system used to build a metal core printed circuit board. It is not only the metal base. It also includes the copper foil, insulation layer, solder mask, surface finish, and sometimes special thermal interface materials.

The main purpose of this material system is to move heat away from components more efficiently. In a standard FR4 PCB, heat moves slowly through the fiberglass epoxy base. In a metal core PCB, heat can travel through a thermal dielectric layer into a metal substrate, which spreads heat across a larger area.

A common metal core PCB stack-up includes:

LayerMain FunctionWhy It Matters
Solder maskProtects copper traces and prevents solder bridgingImproves surface protection and assembly reliability
Copper circuit layerCarries current and electrical signalsDefines circuit performance and current capacity
Thermal dielectric layerTransfers heat while providing electrical insulationA key factor in thermal resistance
Metal coreSpreads and conducts heatUsually aluminum or copper
Surface finishProtects exposed copper padsSupports solderability and assembly quality

Metal core PCBs are often called MCPCB, IMS PCB or insulated metal substrate PCB. They are widely used in LED lighting, automotive lighting, power electronics, motor control, industrial modules, and thermal management products.

What Materials Are Used in a Metal Core PCB?

The most common materials used in a metal core PCB are aluminum, copper, thermal dielectric material, copper foil, solder mask, and surface finish materials. Each one affects thermal performance, electrical safety, mechanical strength, and manufacturing cost.

Aluminum is the most widely used metal base because it offers a good balance between thermal performance, weight, machinability, and price. Copper provides stronger heat spreading and current-carrying capability, but it is heavier and more expensive. The dielectric layer is especially important because it must conduct heat and insulate electricity at the same time.

MaterialCommon RoleTypical ApplicationSelection Note
Aluminum coreMain heat-spreading baseLED lighting, power supply, automotive lightingBest balance for cost and thermal performance
Copper coreHigh-performance heat-spreading baseHigh-power modules, RF, high-current electronicsBetter thermal conduction but higher cost
Thermal dielectricHeat transfer and electrical insulationAll metal core PCB structuresA major factor in thermal resistance
Copper foilElectrical circuit layerSignal and power traces1oz, 2oz, 3oz or heavier copper may be used
Solder maskSurface protectionMost assembled PCBsMust withstand assembly and operating conditions
ENIG / HASL / OSPSurface finishSolder pads and exposed copper areasChosen based on assembly, shelf life, and cost

Public manufacturing specifications often show dielectric thermal conductivity options around 1W/m·K, 2W/m·K, 3W/m·K, or higher, while metal thickness may range from about 0.4mm to 3.2mm depending on supplier capability and design class.

Why Is Aluminum the Most Common Metal Core PCB Material?

Aluminum is the most common metal core PCB material because it gives designers a practical mix of heat dissipation, light weight, stable mechanical support, and manufacturability. It is widely used when the product needs better thermal control than FR4 but does not require the cost level of copper core PCB.

Aluminum core PCB is especially common in LED products. LED chips are sensitive to temperature, and poor heat transfer can reduce luminous efficiency and shorten service life. An aluminum substrate helps move heat from the LED package into the board and then into the fixture body or heat sink.

Aluminum core PCB is also common in:

  • LED bulbs and LED modules
  • Automotive headlights and taillights
  • Street lighting and high-bay lighting
  • Power supply boards
  • Motor control electronics
  • Battery charging products
  • Industrial control modules
  • Consumer power devices

Aluminum PCBs are commonly available in thicknesses such as 1.0mm, 1.5mm, 1.6mm, and 2.0mm, with copper thickness often selected from 1oz to 3oz for many thermal and power designs. Public capability tables from PCB manufacturers show aluminum PCB thickness ranges from about 0.3mm to 3.0mm, with special options available for thicker structures.

Aluminum is not always the highest-performance choice, but it is often the best commercial choice. When the heat load is moderate and the project needs stable quality at a reasonable cost, aluminum core PCB is usually the first material to evaluate.

When Should You Choose Copper Core PCB Material?

Copper core PCB material should be considered when the design has high heat density, high current, compact board size, or strict reliability requirements. Copper spreads heat faster than aluminum and can support demanding thermal paths in power electronics, RF modules, automotive systems, and aerospace-grade assemblies.

Copper core PCB is suitable for applications such as:

  • High-power LED modules
  • Power converters and inverters
  • High-current control boards
  • RF and microwave power modules
  • Automotive power electronics
  • Aerospace electronics
  • Laser diode modules
  • High-reliability industrial equipment

The main value of copper core material is its stronger thermal conductivity and current-handling potential. When heat is concentrated in a small area, copper can spread it more quickly across the board. This helps reduce hot spots and improve thermal stability.

However, copper core PCB also requires more careful cost control. Copper is heavier and more expensive than aluminum. It can also be more challenging to machine, drill, and process. For this reason, copper core material is usually selected when the design clearly needs the extra thermal performance.

A good approach is to start with the thermal requirement, not the material name. If aluminum with a high-performance dielectric layer can meet the junction temperature target, it may be the more economical solution. If the design still has heat concentration or current stress, copper core becomes a stronger option.

Is Copper Core Better Than Aluminum Core?

Copper core is better than aluminum core for maximum thermal spreading and high-current applications, but aluminum core is better for many cost-sensitive and weight-sensitive products. The better choice depends on heat load, budget, board size, mechanical structure, and reliability target.

Comparison ItemAluminum Core PCBCopper Core PCB
Thermal performanceGoodExcellent
WeightLighterHeavier
CostLowerHigher
Machining difficultyEasierMore difficult
Current supportGood for many power designsBetter for high-current structures
Common useLED lighting, power supply, automotive lightingHigh-power electronics, RF, aerospace, heavy-current modules
Best fitBalanced thermal and cost requirementsHigh heat density or high reliability requirements

For most LED lighting and general power products, aluminum core PCB is enough. For high-power density modules, copper core PCB can be a better investment because it improves heat spreading and reduces thermal stress.

A practical selection rule is simple:

Choose aluminum core when the design needs reliable heat dissipation at a controlled cost. Choose copper core when the product has concentrated heat, high current, limited cooling space, or strict thermal margins.

How Important Is the Dielectric Layer in Metal Core PCB Material?

The dielectric layer is one of the most important parts of metal core PCB material. It sits between the copper circuit and the metal base. Its job is difficult because it must conduct heat while preventing electrical current from reaching the metal core.

Many buyers focus only on whether the board is aluminum or copper. In real thermal design, the dielectric layer can be the bottleneck. Even when the metal base has strong thermal conductivity, heat still needs to pass through the dielectric first.

Important dielectric layer parameters include:

ParameterWhy It Matters
Thermal conductivityHigher values help heat move through the insulation layer
Dielectric thicknessThinner layers often reduce thermal resistance
Breakdown voltageEnsures electrical insulation safety
Peel strengthHelps copper stay bonded to the dielectric
Glass transition and thermal stabilitySupports soldering and long-term operation
Moisture resistanceHelps reliability in humid or outdoor applications

Typical metal core PCB dielectric materials may offer thermal conductivity from about 1W/m·K to 4W/m·K, with higher grades available from some material systems. Conventional MCPCB structures often rely on the dielectric layer as the main thermal path between copper traces and the metal base.

For LED and power electronics, the dielectric layer should be selected together with component power loss, copper area, board thickness, housing structure, and expected operating temperature. A high-conductivity dielectric may cost more, but it can improve product stability when the heat source is intense.

What Thickness Is Best for Metal Core PCB Material?

The best metal core pcb thickness depends on heat dissipation, mechanical strength, current level, product structure, and assembly requirements. There is no universal thickness that fits every project. Many metal core PCBs use total board thicknesses around 1.0mm, 1.5mm, 1.6mm, or 2.0mm, while special designs may use thinner or thicker structures.

Thickness selection should consider three areas: total board thickness, metal base thickness, and dielectric thickness.

Thickness ItemCommon RangeSelection Guidance
Total board thickness0.8–3.0mm commonChoose based on mechanical support, fixture design, and heat path
Aluminum base thickness0.5–2.0mm commonThicker base improves rigidity and heat spreading
Copper foil thickness1oz–3oz commonHigher current often needs thicker copper
Dielectric thickness75–150ÎŒm common; some specs show wider rangesThinner dielectric can improve heat transfer but must meet voltage needs
Metal thickness capabilityAround 0.4–3.2mm in some public specificationsDepends on manufacturer capability and stack-up

Some public MCPCB manufacturing data lists metal thickness around 0.4–3.2mm and dielectric thickness around 100–300ÎŒm, depending on standard or advanced capability.

For LED boards, 1.5mm or 1.6mm aluminum core PCB is commonly selected because it offers good mechanical stability and familiar assembly handling. For automotive lighting or higher-power designs, thicker metal bases may be used to increase heat spreading and structural strength.

When selecting thickness, avoid looking at only the total board number. A 1.6mm metal core PCB can behave very differently depending on copper thickness, dielectric thickness, dielectric thermal conductivity, and base metal type.

Metal Core PCB vs FR4: Which Is Better for Heat Dissipation?

Metal core pcb vs fr4 is mainly a heat dissipation comparison. Metal core PCB is better for heat dissipation because its aluminum or copper substrate spreads heat faster than fiberglass epoxy. FR4 is still suitable for general electronic products, signal circuits, control boards, and multilayer routing, but it is not the first choice for high-power thermal designs.

FR4 is widely used because it is cost-effective, easy to process, and suitable for multilayer circuits. However, when components generate significant heat, FR4 often needs extra thermal vias, copper pours, heat sinks, or larger board area. Metal core PCB creates a more direct heat path from the component to the metal base.

FeatureFR4 PCBMetal Core PCB
Base materialFiberglass epoxy laminateAluminum, copper, or metal alloy
Thermal performanceLimitedStrong
Typical thermal conductivityAround 0.3W/m·K for many FR4 materialsOften much higher through thermal dielectric systems
Best useGeneral electronics, control circuits, multilayer designsLEDs, power modules, thermal products
Layer complexityVery flexible for multilayer routingMore limited, especially in simple MCPCB structures
Mechanical rigidityGoodVery strong
CostUsually lowerUsually higher
Heat sink integrationOften needs extra design workEasier to connect to housing or heat sink

FR4 thermal conductivity is often cited around 0.25–0.3W/m·K, while MCPCB dielectric systems are commonly listed around 1–4W/m·K or higher depending on material grade.

Choose FR4 when the circuit is low-power, routing density is high, or cost control is the main goal. Choose metal core PCB when heat is a primary design concern, especially for LEDs, power devices, automotive lighting, and compact electronics with limited cooling space.

How to Choose the Right Metal Core PCB Material for Your Design?

To choose the right metal core PCB material, start with the heat source and working environment. Then match the metal base, dielectric layer, copper thickness, surface finish, and board thickness to the actual product requirement.

A clear selection process helps reduce redesign risk:

1. Identify the heat source

List the components that generate heat, such as LEDs, MOSFETs, power ICs, regulators, bridge rectifiers, or high-current connectors.

2. Estimate power loss

Check how much heat the component will generate during normal and peak operation. Use this to define the thermal path.

3. Choose aluminum or copper core

Use aluminum for most balanced thermal designs. Use copper when heat density or current level is high.

4. Select dielectric thermal conductivity

For general LED and power designs, 1–2W/m·K may be enough. For compact or high-power designs, 3W/m·K or higher may be considered.

5. Check dielectric thickness and voltage requirement

A thinner dielectric can improve heat transfer, but it must still meet insulation and breakdown voltage requirements.

6. Define copper thickness

For low-to-medium current circuits, 1oz copper may be enough. For power boards, 2oz or 3oz copper is often considered.

7. Confirm total metal core pcb thickness

Match the board thickness with mechanical mounting, housing flatness, screw holes, thermal interface material, and assembly process.

8. Review surface finish

ENIG, HASL, lead-free HASL, and OSP may be selected depending on assembly, shelf life, solderability, and cost.

9. Discuss DFM before production

Before mass production, the stack-up, hole design, outline tolerance, solder mask clearance, copper spacing, thermal pad design, and assembly method should be reviewed.

A strong MCPCB design is not built by choosing the most expensive material. It is built by matching the right material to the real thermal path.

Why Choose EBest Circuit as Your Metal Core PCB Manufacturer?

Choosing the right metal core pcb manufacturer is important because MCPCB quality depends on material selection, lamination control, dielectric reliability, copper bonding, surface finish, machining accuracy, and thermal performance. A small stack-up mistake can affect heat transfer, soldering, assembly, and long-term stability.

EBest Circuit supports metal core PCB projects from early design review to fabrication, assembly, and testing. For customers developing LED lighting, automotive electronics, industrial controls, power modules, medical electronics, communication products, and UAV systems, EBest can help review the material stack-up before production.

EBest Circuit can support:

  • Aluminum core PCB manufacturing
  • Copper core PCB manufacturing
  • DFM review before fabrication
  • Thermal material and stack-up suggestions
  • Prototype and small-batch production
  • PCB fabrication and PCBA assembly
  • Component sourcing and BOM support
  • AOI, X-ray, electrical testing, and process inspection
  • Quality control for regulated and high-reliability applications

For customers who are not sure whether to use aluminum core, copper core, or FR4, EBest can review the drawing, Gerber file, BOM, current load, heat source, and application environment. This helps avoid over-design and under-design.

A reliable metal core PCB manufacturer should not only produce the board. It should help customers make practical decisions about thermal conductivity, dielectric thickness, copper weight, surface finish, and assembly risk.

FAQs

1. What is metal core PCB material?

Metal core PCB material is the material system used in a metal core printed circuit board. It usually includes a copper circuit layer, thermal dielectric layer, and aluminum or copper metal base. Its main purpose is to improve heat dissipation.

2. What is the most common metal core PCB material?

Aluminum is the most common metal core PCB material. It offers a good balance of thermal performance, weight, cost, and manufacturability, making it suitable for LED lighting, power supplies, automotive lighting, and industrial electronics.

3. Is copper core better than aluminum core?

Copper core is better for high thermal conductivity and high-current designs. Aluminum core is better for many projects that need reliable heat dissipation at a more controlled cost. The better choice depends on heat load, budget, and application.

4. What is the normal metal core pcb thickness?

Common metal core pcb thickness options include 1.0mm, 1.5mm, 1.6mm, and 2.0mm. Some projects may use thinner or thicker boards depending on heat dissipation, mechanical structure, and assembly requirements.

5. Is metal core PCB better than FR4?

Metal core PCB is better than FR4 for heat dissipation. FR4 is better for general electronics, complex multilayer routing, and cost-sensitive low-power circuits. For LEDs, power modules, and automotive lighting, metal core PCB is often the better thermal choice.

6. What is the dielectric layer in metal core PCB material?

The dielectric layer is the insulating layer between the copper circuit and the metal base. It transfers heat while preventing electrical current from reaching the metal core. Its thermal conductivity and thickness strongly affect board performance.

7. Can metal core PCB be multilayer?

Yes, metal core PCB can be designed as single-layer, double-layer, or more complex structures. However, multilayer MCPCB requires careful stack-up design, insulation control, drilling process, and manufacturer review.

8. How do I choose a metal core PCB manufacturer?

Choose a metal core PCB manufacturer with material knowledge, DFM support, stable fabrication capability, thermal stack-up experience, testing systems, and PCB assembly support. For high-power or high-reliability products, early engineering review is especially valuable.

Conclusion

Need support with metal core PCB material selection or MCPCB manufacturing? Contact EBest Circuit for DFM review, material suggestions, PCB fabrication, PCBA assembly, and prototype-to-production support.

You may also like

Gold Finger PCB Bevel & Plating Process: Design Tips and Reliable Manufacturer Guide

May 11th, 2026

Which factors most directly impact the performance, durability, and signal stability of gold finger PCB, and how can design and manufacturing missteps that lead to product failure be avoided? This guide breaks down standard bevel angles, plating processes, thickness selection, design principles, and manufacturer identification to provide practical, actionable insights for gold finger PCB that meets application demands and maintains long-term reliability.

Gold Finger PCB

What Is the Standard PCB Gold Finger Bevel Angle and How to Design It Properly?

PCB gold finger typically uses a standard bevel angle between 30 and 45 degrees, with 45 degrees being the most widely adopted for most use cases. This range balances mechanical protection, smooth insertion, and effective contact area to prevent damage to the gold plating during insertion while ensuring consistent electrical connectivity. Stepping outside this range often leads to performance issues.

  • Standard Angle Ranges and Application Scenarios: A 45-degree angle works best for vertical insertion setups such as memory modules and graphics cards, as it provides smooth guidance to minimize friction and scratching of the gold layer during insertion. A 30-degree angle is better suited for horizontal insertion applications like PCIe slots, as it reduces contact pressure and lessens wear on both the gold finger and its mating connector. Angles below 20 degrees create sharp edges that scratch mating contacts and cause uneven plating due to current concentration. Angles above 60 degrees reduce the effective contact area and drive up contact resistance.
  • Design Considerations for Bevel Angles: Start by matching the angle to the insertion method. Vertical insertion calls for a steeper 45-degree angle for guidance, while horizontal insertion requires a shallower 30-degree angle to reduce pressure. Bevel depth should fall between 0.5mm and 1.0mm. Depths under 0.5mm fail to provide adequate guidance, and depths over 1.0mm weaken the PCB’s edge structure. Maintain a minimum 0.5mm gap between the bevel edge and the nearest circuit trace to prevent trace damage during bevel processing.
  • Manufacturing Feasibility Checks: For electroless nickel gold plating processes, the bevel angle should not drop below 30 degrees. Electroless plating deposits more slowly on sharp edges, resulting in thin, inconsistent plating. Electroplating processes can handle angles as low as 20 degrees but require fixtures to control current distribution and avoid excessive edge plating. Clearly note the bevel angle, depth, and tolerance on design drawings. Angles should have a ±5-degree tolerance, and depth a ±0.15mm tolerance.

What Are the Steps in the PCB Gold Finger Plating Process?

The PCB gold finger plating process includes eight core steps. Strict control of each step’s parameters ensures uniform plating, strong adhesion, and corrosion resistance. The two most common processes, electroless nickel immersion gold (ENIG) and electrolytic gold plating, require slight adjustments to these steps based on the method used.

  • Pre-Plating Surface Preparation: Clean the PCB surface to remove oil, oxides, and contaminants. Begin with an organic acid-based degreaser to eliminate oil and reduce surface tension for even solution coverage. Rinse thoroughly with deionized water after degreasing. Next, microetch the copper surface using a sodium persulfate solution to remove thin oxide layers and create a slightly rough surface that improves nickel layer adhesion. Keep copper ion concentration in the microetch solution between 3-20g/L to maintain a stable etching rate.
  • Acid Pickling and Pre-Dipping: Use dilute sulfuric acid to remove oxides formed after microetching and any residual salts. Rinse with deionized water, then immerse the PCB in a pre-dip solution (AR grade sulfuric acid) to maintain the activation tank’s acidity and keep the copper surface fresh for effective activation in the next step.
  • Activation Treatment: Immerse the PCB in a palladium activation solution to form a thin palladium layer on the copper surface via displacement reaction. This palladium layer acts as a catalyst for the subsequent electroless nickel plating. Keep activation temperature below 30℃, avoid aeration, and ensure the solution is free of chloride, iron, or nickel impurities to prevent activation failure.
  • Electroless Nickel Plating: Deposit a nickel layer on the activated copper surface. This layer acts as a barrier between copper and gold to prevent mutual diffusion. Control plating temperature between 80-90℃ and pH between 4.5-5.5. The nickel layer should be 2-5ÎŒm thick for sufficient adhesion and corrosion resistance, with a uniform finish free of pinholes or bubbles.
  • Gold Plating: For ENIG processes, immerse the PCB in an immersion gold solution to replace nickel with gold, forming a thin (0.1-0.3ÎŒm) yet highly conductive gold layer. For electrolytic gold plating, use an electrolytic solution with gold cyanide as the main component and apply a constant current to deposit a thicker (1-5ÎŒm) gold layer ideal for high-wear applications. Maintain gold purity above 99.9% for optimal electrical performance.
  • Gold Recovery and Rinsing: Recover excess gold from the gold plating solution to reduce costs and environmental impact. Rinse the PCB thoroughly with deionized water multiple times to remove residual plating chemicals that can cause corrosion if left on the surface.
  • Post-Plating Cleaning and Drying: Clean the PCB surface with a dilute sulfuric acid or citric acid solution to remove any remaining impurities, then dry it in a high-temperature oven (80-100℃) to prevent moisture-induced oxidation of the gold layer.
  • Quality Inspection: Use a thickness gauge to verify nickel and gold layer thickness. Check for plating defects like unevenness, copper exposure, bubbles, or scratches. Conduct adhesion tests (tape tests) to ensure the plating layer does not peel when tape is applied and removed.
gold finger PCB

How to Choose the Right PCB Gold Finger Plating Thickness for Different Projects?

Selecting the correct PCB gold finger plating thickness depends on three core factors: insertion frequency, application environment, and electrical performance requirements. Thicker gold layers boost wear resistance but increase costs, while thinner layers reduce costs but may not meet durability needs. Aligning thickness with project requirements ensures optimal performance and cost-effectiveness.

  • Consumer Electronics Applications: For devices with low insertion frequency (fewer than 1,000 cycles) such as USB dongles, mobile phone chargers, and tablet connectors, a thin gold layer (0.1-0.3ÎŒm) using ENIG is sufficient. This thickness balances cost and basic corrosion resistance. For devices with moderate insertion frequency (1,000-5,000 cycles) like memory modules and external hard drives, a 0.5-1.0ÎŒm gold layer ensures durability.
  • Industrial Control Applications: Industrial equipment including PLC controllers, sensors, and server motherboards requires high durability (5,000-10,000 insertion cycles) and resistance to harsh environments. A 1.0-3.0ÎŒm gold layer using electrolytic gold plating is ideal. The nickel layer should be 3-5ÎŒm thick to enhance corrosion resistance in high-humidity and dusty settings.
  • Aerospace and Military Applications: These applications demand extreme durability (10,000+ insertion cycles) and resistance to extreme temperatures, vibration, and corrosion. A 3.0-5.0ÎŒm gold layer with high purity (99.99%) is required. The nickel layer should be 5-8ÎŒm thick, and additional corrosion protection such as conformal coating may be necessary.
  • High-Speed Signal Applications: For high-speed devices like 5G base stations and PCIe 5.0 interfaces, a thin (0.1-0.2ÎŒm) high-purity gold layer is preferred. Thicker gold layers can increase signal loss and impedance mismatch. ENIG ensures a smooth surface that reduces signal reflection and insertion loss.
  • Key Considerations: Gold layer thickness is not a case of “thicker is better.” Thickness exceeding 5ÎŒm can create internal stress in the gold layer, leading to cracking or peeling. Match gold thickness to nickel layer thickness; the nickel layer should be 3-5 times the gold layer thickness to ensure strong adhesion. Electrolytic gold plating is more expensive than ENIG, so use it only when high wear resistance is necessary.

What Are the Critical Design Principles for High-Quality Gold Finger PCB?

Designing high-quality gold finger PCB requires balancing electrical performance, mechanical durability, and manufacturing feasibility. Following these critical principles avoids common design flaws such as poor contact, plating peeling, and signal interference to ensure the product meets application requirements.

  • Bevel and Edge Design: Stick to the standard 30-45 degree bevel angle range and 0.5-1.0mm depth. Round the gold finger’s corners to avoid sharp edges that scratch mating connectors and damage the plating. Ensure the gold finger extends 2mm beyond the mating connector’s contact area to guarantee full contact.
  • Solder Mask Design: Do not apply solder mask to the gold finger area. Keep the solder mask fully open to prevent ink peeling during insertion, which can cause contact failure. The solder mask opening should be 4mil larger than the gold finger line on each side, and no solder mask openings should be placed within 2mm of the gold finger.
  • Circuit Trace Design: Keep gold finger lead widths between 12-40mil, with main leads at 40mil and secondary leads at 20mil. Use rounded corners for leads to avoid right-angle bends that cause signal reflection. Maintain a minimum 6mil spacing between adjacent gold fingers to prevent short circuits and crosstalk.
  • Plating Layer Matching: Use a nickel barrier layer between the copper substrate and gold layer to prevent copper-gold diffusion, which degrades electrical performance. The nickel layer thickness should be 2-8ÎŒm depending on the application, and the gold layer thickness should align with insertion frequency and environment.
  • PCB Thickness and Material Selection: PCB thickness should be 0.8-2.4mm, matching the mating connector’s slot thickness. Use high-quality FR-4 substrate for general applications and polyimide substrate for high-temperature or flexible applications. Ensure the substrate has good dimensional stability to prevent warpage that can disrupt gold finger alignment.
  • Test Point Design: Add test points near the gold finger to facilitate electrical testing of contact resistance and signal integrity. Place test points 1-2mm away from the gold finger to avoid interfering with plating and insertion.
Gold Finger PCB

How to Ensure Signal Integrity in Gold Finger PCB Design for High-Speed Applications?

High-speed applications including 5G, PCIe 5.0, and high-frequency radar require gold finger PCB to maintain signal integrity by minimizing signal reflection, insertion loss, and crosstalk. Control impedance matching, reduce signal attenuation, and optimize layout design to achieve this.

  • Impedance Matching Design: The gold finger and its connected transmission lines should have consistent impedance, typically 50Ω or 75Ω depending on the application. Calculate the gold finger width (for example, 0.8mm for 50Ω impedance on FR-4 substrate) and length (no more than 8mm) to avoid impedance sudden changes. Use a microstrip line extension structure with a 1mm gradual transition to create a smooth connection between the gold finger and transmission line, reducing return loss.
  • Minimize Insertion Loss: Use high-purity gold (99.99%) for the gold layer to reduce conductor loss. Keep the gold layer thin (0.1-0.2ÎŒm) to avoid excessive signal absorption. Polish the gold finger surface to ensure a smooth finish (Ra ≀ 0.10ÎŒm) that reduces signal loss caused by surface roughness.
  • Reduce Crosstalk: Maintain a minimum 1mm spacing between adjacent gold fingers. Arrange high-speed signal gold fingers alternately with ground fingers to form a shielding structure that reduces electromagnetic interference. Use equal-length design for gold finger leads, with a length difference of no more than 0.1mm to avoid signal time delay.
  • Shielding and Grounding: Add a ground plane below the gold finger area to provide a reference ground and reduce signal radiation. Connect the ground plane to the gold finger’s ground leads with multiple vias to improve grounding effectiveness. Avoid placing high-speed signal traces near the gold finger edge to prevent signal leakage.
  • Material Selection: For high-speed applications, use low-loss substrate materials like FR-4 with a low dielectric constant (Δr ≀ 4.5) and low loss tangent (tanÎŽ ≀ 0.02). For ultra-high-speed signals (above 32Gbps), use advanced materials like PTFE to further reduce signal loss.

What Quality Standards Should Gold Finger PCB Meet for Industrial and Aerospace Use?

Gold finger PCB used in industrial and aerospace applications must meet strict quality standards to ensure reliability in harsh environments including extreme temperatures, vibration, humidity, and corrosion. These standards cover plating quality, mechanical performance, electrical performance, and environmental resistance.

  • Plating Quality Standards: Comply with IPC-4552, the industry standard for gold plating on PCB. Gold layer purity must be ≄99.9% for industrial use and ≄99.99% for aerospace use. Nickel layer thickness should be 3-8ÎŒm, and gold layer thickness 1.0-5.0ÎŒm depending on the application. Plating must be uniform, with no copper exposure, bubbles, scratches, or peeling. The tape test should show no plating detachment.
  • Mechanical Performance Standards: For industrial use, gold finger must withstand 5,000+ insertion cycles without significant wear or increased contact resistance. For aerospace use, this number rises to 10,000+ cycles. The PCB should have a flexural strength of ≄150MPa and no warpage exceeding 0.75mm per 100mm length. Bevel angles must meet a ±5-degree tolerance, and edge roughness should be Ra ≀ 0.10ÎŒm.
  • Electrical Performance Standards: Contact resistance must be ≀50mΩ and remain stable after 1,000 insertion cycles. Insulation resistance must be ≄10^10Ω at 500V DC. Dielectric strength should be ≄1kV/mm to prevent breakdown. For high-speed applications, insertion loss must be ≀0.3dB and crosstalk ≀-35dB.
  • Environmental Resistance Standards: Gold finger PCB must pass a 72-hour salt spray test (5% NaCl concentration) with no corrosion or plating peeling. It should withstand high-temperature testing (-55℃ to 125℃ for industrial use, -65℃ to 150℃ for aerospace use) without performance degradation. It must also pass a humidity test (85% relative humidity at 85℃ for 1000 hours) with no insulation failure.
  • Certification Requirements: Industrial gold finger PCB must meet ISO9001 and RoHS certification. Aerospace gold finger PCB must comply with AS9100 certification and meet MIL-STD-202 standards for environmental testing. All products must have full traceability of materials and manufacturing processes.

What Are the Common Challenges in Gold Finger PCB Manufacturing and How to Solve Them?

Gold finger PCB manufacturing involves complex processes. Common challenges include uneven plating, poor adhesion, plating peeling, copper exposure, and impedance mismatch. These issues can be resolved through strict process control, careful material selection, and thorough quality inspection.

  • Uneven Plating: This issue stems from uneven current distribution, impure plating solution, or inadequate surface preparation. Use fixtures to ensure uniform current distribution during electroplating. Regularly filter the plating solution to remove impurities. Strengthen pre-plating cleaning to ensure the copper surface is free of oil and oxides. Keep plating temperature and pH within the recommended range.
  • Poor Plating Adhesion: Insufficient microetching, contaminated activation solution, or improper nickel plating parameters cause poor adhesion. Extend microetching time slightly to create a rougher copper surface. Replace the activation solution regularly to avoid impurity contamination. Control nickel plating temperature and pH to ensure proper nickel layer formation. Conduct adhesion tests after plating to catch issues early.
  • Plating Peeling: Excessive internal stress in the gold layer, insufficient nickel layer thickness, or poor substrate quality lead to plating peeling. Limit gold layer thickness to less than 5ÎŒm to reduce internal stress. Ensure the nickel layer is 3-5 times the gold layer thickness. Use high-quality substrates with strong adhesion to the nickel layer. Avoid rapid temperature changes during drying that can build up stress.
  • Copper Exposure on Gold Finger: Incomplete solder mask opening, uneven plating, or scratches during handling cause copper exposure. Improve solder mask opening accuracy to ensure full coverage of the gold finger area. Increase plating time slightly to ensure complete coverage. Use anti-scratch packaging during handling and manufacturing. Carefully inspect the gold finger surface after plating.
  • Impedance Mismatch: Incorrect gold finger width, length, or substrate material leads to impedance mismatch. Calculate impedance accurately based on substrate parameters and adjust gold finger dimensions accordingly. Use low-loss substrate materials for high-speed applications. Test impedance after manufacturing and adjust the design if needed.

How to Identify a Reliable China Gold Finger PCB Manufacturer?

Choosing a reliable China gold finger PCB manufacturer is critical to ensuring product quality, on-time delivery, and responsive technical support. Evaluate certification, production capacity, quality control, technical capabilities, and customer service to make the right choice.

  • Certification and Compliance: The manufacturer should hold ISO9001 certification for quality management and RoHS certification for environmental compliance. For aerospace or military applications, verify AS9100 and MIL-STD-202 certifications. Ensure the manufacturer adheres to IPC standards for gold finger PCB manufacturing.
  • Production Capacity and Equipment: Confirm the manufacturer has advanced production equipment, including automatic vertical electroplating lines, thickness gauges, impedance testers, and AOI inspection equipment. Check that production capacity aligns with your order volume and delivery timeline. Automated production lines ensure consistent quality and reduce human error.
  • Quality Control System: A reliable manufacturer has a strict quality control system covering raw material inspection, in-process testing, and final inspection. Raw materials such as substrate and plating chemicals must undergo quality testing. In-process testing includes checks for plating thickness, adhesion, and impedance. Final inspection covers visual inspection, electrical testing, and environmental testing. Request quality control reports for previous orders.
  • Technical Capabilities: The manufacturer should have professional technical teams capable of providing design support, DFM analysis, and custom solutions. They should handle complex designs such as high-speed gold finger PCB and aerospace-grade products. Ask about their experience in your specific industry and request case studies or samples.
  • Customer Service and Delivery: Reliable manufacturers offer timely technical support and communication. They should respond to inquiries within 24 hours and provide clear order updates. Check their delivery record to ensure on-time delivery (a delivery rate of ≄98% is ideal). Ask about their after-sales service policy, including return and replacement options for defective products.
  • Pricing and Cost Transparency: The manufacturer should provide transparent pricing with no hidden fees. Compare quotes from multiple manufacturers, but avoid choosing the lowest price if it compromises quality. A reliable manufacturer will share a detailed cost breakdown and explain price differences based on materials and processes.
Gold Finger PCB

FAQs About Gold Finger PCB

Q1: Can damaged gold finger PCB be repaired, and what are the effective repair methods?

A1: Damaged gold finger PCB can be repaired based on damage severity: Minor oxidation: Clean with anhydrous alcohol/specialized cleaner and polish with an eraser. Moderate scratches/thin plating: Touch up with a professional gold plating pen (match original gold layer thickness). Severe copper exposure/deep scratches: Re-plate (strip old plating, reprocess surface, re-plate nickel and gold). Application note: Non-critical applications only; replace PCB for aerospace/high-reliability industrial use.

Q2: What factors should be considered when selecting a PCB gold finger connector?

A2: Select PCB gold finger connectors by matching these key factors: Connector slot thickness matches PCB thickness (0.8-2.4mm); gold finger extends 2mm beyond connector contact area; contact force 10-30g per pin; high-speed applications: low contact resistance (≀50mΩ) and low crosstalk; harsh environments: corrosion-resistant materials (stainless steel/nickel plating).

Q3: How to prevent gold finger PCB from oxidation during storage and use?

A3: Prevent gold finger oxidation with these measures: Store in sealed packaging with desiccants (relative humidity ≀60%); avoid direct hand contact (use gloves); harsh environments: apply conformal coating to non-contact areas; regular maintenance: clean with anhydrous alcohol to remove dust/contaminants.

Q4: What is the difference between hard gold and soft gold plating for gold finger PCB?

A4: Soft gold (99.99% pure): high conductivity/ductility, suitable for low-insertion-frequency applications. Hard gold (gold + 5-10% cobalt/nickel): higher hardness/wear resistance, ideal for high-insertion-frequency use. Selection principle: Choose based on insertion frequency and performance needs.

Q5: How to test the quality of gold finger PCB after manufacturing?

A5: Gold finger PCB quality testing methods: Use a thickness gauge to verify nickel/gold layer thickness; conduct tape test forplating adhesion; measure contact resistance (≀50mΩ) with a multimeter; test impedance for high-speed applications; conduct environmental tests (salt spray/high-temperature) for industrial/aerospace use; visually inspect for defects under a magnifying glass.

You may also like