PCB manufacturing PCB manufacturing
Home > Blog

Substrate-Like PCB Manufacturer in China for Ultra-Fine-Line and High-Density Applications

July 24th, 2026

A substrate-like PCB (SLP) is an ultra-high-density circuit board positioned between an HDI PCB and an IC substrate. Consider it when component pitch, routing density, board area, or package integration exceeds practical conventional HDI capability. Because feasibility depends on the stackup, copper, dielectric, vias, panel format, inspection plan, and volume, confirm the complete construction through a design-for-manufacturing review.

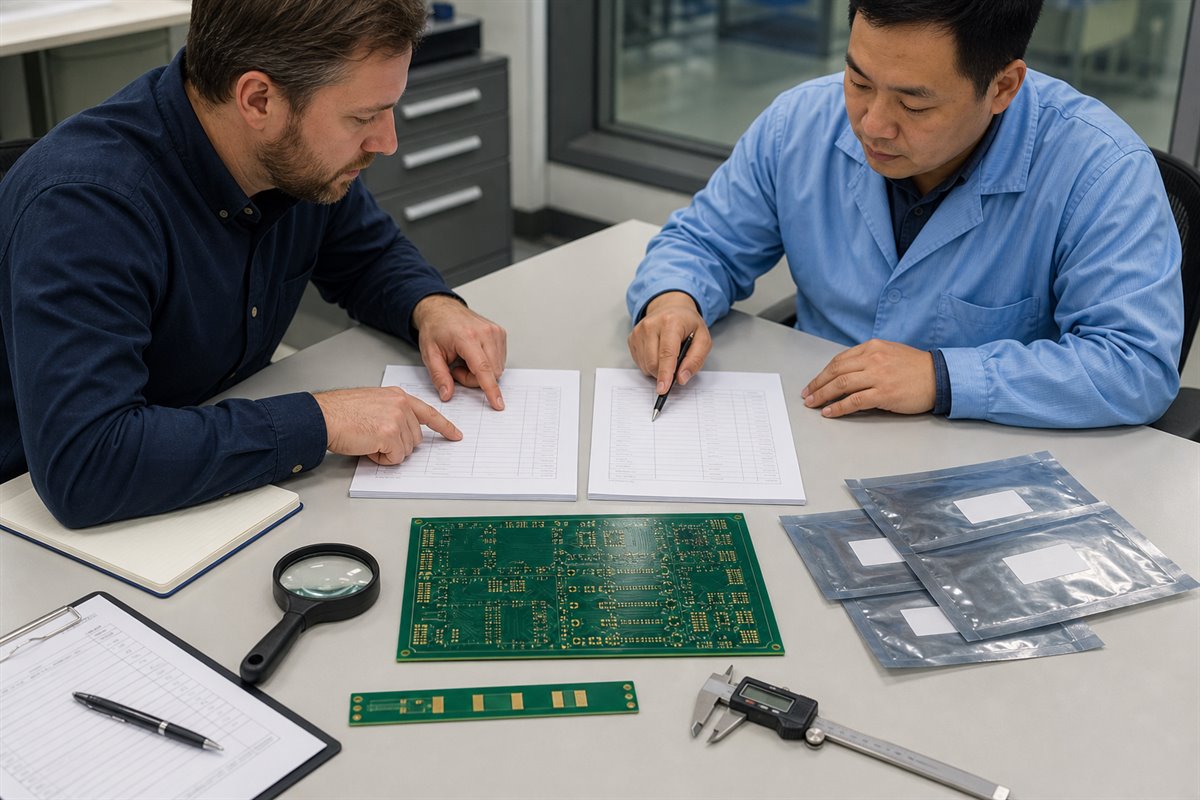
Bare fine-line circuit panel under a precision microscope with a substrate-like PCB title

EBest Circuit supports PCB design, prototyping, mass production, component sourcing, and assembly from China. For high-density projects, we review the full data package, separate confirmed requirements from items requiring process evaluation, and establish a realistic prototype-to-production plan. This produces a clearer quotation and reduces redesign, yield, and schedule risk.

What Is a Substrate-Like PCB?

A substrate-like PCB combines PCB-level assembly flexibility with interconnect features approaching those used in organic packaging substrates. It can carry conventional surface-mounted components while supporting finer routing, smaller microvias, and thinner buildup structures than many standard HDI boards. Substrate-like PCB technology describes a range of constructions, not one universal specification.
The word ā€œsubstrate-likeā€ does not mean the board is identical to a semiconductor package substrate. An IC substrate redistributes connections between a semiconductor die and the package terminals; the completed package then interfaces with the system board. An SLP remains a printed circuit board, but its fine-feature conductor formation, layer registration, materials, and inspection requirements may resemble packaging-substrate practices.

Classify the project by function before comparing minimum dimensions. A standard or HDI PCB provides board-level interconnection; an SLP supports board-level assembly at substantially higher routing density; an IC substrate connects the semiconductor die to its package and the system board. If the design requires package-level redistribution rather than board-level assembly, route it to an IC-substrate supplier.

How Does a Substrate-Like PCB Differ from an HDI PCB and IC Substrate?

The main differences are function, feature density, conductor-formation method, material system, and assembly interface. A high-density layout should not be called SLP only because it uses microvias. The classification must consider whether the complete structure requires substrate-level process control and whether the board still performs a PCB-level assembly role.

Comparison Point HDI PCB Substrate-Like PCB IC Substrate
System function Connects packaged components at board level Provides board-level interconnection for very dense packaged-component routing; any bare-die interface requires separate assembly and reliability qualification Redistributes connections between the semiconductor die and the package terminals; the completed package then connects to the system board
Conductor formation Subtractive processing is common; advanced designs may use finer processes mSAP or related additive approaches are often considered when subtractive etching cannot hold the required geometry Package-substrate processes are optimized for much finer redistribution features
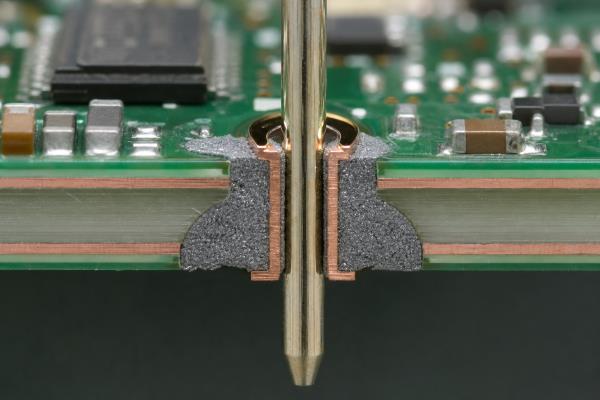
Via structure Laser blind vias, buried vias, and sequential buildup Fine, tightly registered microvias with project-specific filling and sequential-buildup controls Package-level microvias and redistribution structures
Materials FR-4 and high-performance PCB laminates Process-compatible thin buildup dielectrics and low-profile copper; the exact resin system is project-specific BT, ABF, or other package-substrate material systems
Commercial risk Typically the broadest supplier base and the lowest qualification burden of the three Typically requires a narrower supplier search, process trials, and tighter yield controls Requires a specialized package-substrate supply chain and package-level qualification

Use HDI when it completes the routing with acceptable reliability and yield. Use SLP when HDI cannot meet board-level density. Use an IC substrate when the design requires package-level redistribution.

When Should You Choose a Substrate-Like PCB?

Choose SLP only when a measurable density or integration constraint cannot be solved efficiently with a conventional HDI structure. The trigger should come from package escape routing, board-area reduction, electrical performance, mixed component integration, or a defined system architecture—not from the desire to use a fashionable technology label.

  • Routing density: Fine-pitch packages cannot escape through a practical HDI stackup without excessive layers or via congestion.
  • Board area: The enclosure cannot accommodate the circuits, battery, sensors, connectors, and thermal features.
  • Integration: Dense SMD placement must coexist with chip-on-board, flip-chip, or another controlled interface.
  • Production case: Product value, forecast volume, and lifecycle justify the added process validation.

Stay with HDI when package selection, routing changes, or a modest layer increase solves the constraint with lower supply and yield risk.

Where Are Substrate-Like PCBs Commonly Used?

SLP technology is most useful where physical space, interconnect density, and system performance are tightly coupled. Smartphones and wearables are familiar examples, but the same selection logic can apply to computing, communications, medical, aerospace, and automotive electronics when the project can support the required qualification and supply chain.

  • Mobile and wearable devices: Dense boards release space for batteries, sensors, cameras, and mechanical features.
  • Computing and communications: Dense packages, short interconnects, and compact optical modules can require substrate-like routing.
  • Medical and aerospace systems: Miniaturization may justify SLP only after environmental, traceability, and reliability requirements are qualified.
  • Automotive electronics: Compact sensing and control modules require validated thermal cycling, materials, and production controls.

Choose the technology from the package map, stackup, environment, reliability plan, and quantity—not the industry label.

What Are the Substrate-Like PCB Design Requirements?

Substrate-like PCB design rules must be approved as one connected construction. Substrate-like PCB line width and spacing depend on copper thickness and conductor process; microvia size depends on dielectric thickness, pad geometry, filling, and stacking; impedance depends on the finished copper profile, dielectric properties, and reference-plane spacing.

  • Line width and spacing: State the minimum by layer, finished copper thickness, and required process. Mark whether the value is isolated or repeated across dense routing areas, because a single demonstration trace does not establish production yield.
  • Microvia construction: Define laser-drill diameter, dielectric depth, capture and target pads, copper filling, capping, and stacked or staggered structure. Review the complete via geometry against plating and thermal-cycling requirements.
  • Layer registration: Set alignment tolerances for each buildup cycle and provide enough capture margin for material movement. Registration coupons should represent the critical layer pairs instead of measuring only the finished outline.
  • Stackup and materials: Freeze layer order, dielectric type and thickness, copper profile, reference planes, and total thickness before routing sign-off. Material substitutions require renewed impedance, adhesion, and reliability review.
  • Controlled impedance: Provide single-ended or differential targets, tolerance, routing layer, reference layer, trace geometry, and coupon requirements. The production stackup—not nominal CAD dimensions alone—must determine the final geometry.
  • Copper and power integrity: Balance copper distribution, confirm plane continuity, and review current paths, return paths, and thermal spreading. Local fine routing must not weaken power delivery or create avoidable warpage.
  • Assembly interface: Match pad definition, solder-mask openings, finish thickness, coplanarity, stencil strategy, and reflow profile to the package pitch. Confirm whether bare-die bonding or other special interfaces change cleanliness and finish requirements.
  • Panel and inspection features: Define tooling, fiducials, coupons, rails, routing, panel support, and critical measurement locations before release. The panel must support both fabrication control and the intended assembly process.

EBest’s current general English PCB capability table does not establish a dedicated SLP or mSAP production window. Therefore, fine-feature limits must be quoted only after written confirmation of the stackup, copper thickness, dielectric system, conductor process, microvia structure, production site, order volume, and inspection plan.

Which Materials and Stackup Structures Are Used for Substrate-Like PCBs?

Material selection is driven by process compatibility, electrical performance, dimensional stability, adhesion, and reliability. There is no universal SLP laminate. Substrate-like PCB materials may include modified epoxy systems, BT-based materials, resin-coated copper, buildup films, or other organic dielectrics. The substrate-like PCB stackup must be selected together with the manufacturing route.

Design Requirement Material or Stackup Consideration Main Risk Evidence to Request
Fine conductor geometry Low-profile copper and process-compatible dielectric surface Weak adhesion, conductor variation, or residual copper Approved material system and conductor inspection plan
Laser microvias Controlled thin dielectric and laser-processable resin Poor via formation, debris, voiding, or an unfavorable depth-to-diameter ratio Via geometry limits, microsection criteria, and via-fill specification
High-speed signals Controlled Dk/Df, copper profile, and dielectric thickness Impedance drift and higher insertion loss Material data, field-solver stackup, and impedance coupons
Thermal cycling Compatible CTE, modulus, Tg, and stable resin-to-copper interfaces Delamination, interfacial cracking, or via fatigue Material data and an application-specific thermal-reliability plan
Thin total construction Balanced buildup and copper distribution Warpage and handling damage Flatness plan, panel support, and assembly review

Apply the finest geometry only where routing requires it. Review copper balance, buildup symmetry, resin flow, via sequence, reference planes, and assembly heat exposure together.

How Is a Substrate-Like PCB Manufactured?

The substrate-like PCB manufacturing process combines tightly controlled imaging, conductor formation, buildup lamination, laser drilling, copper filling, registration, and inspection. The exact route varies by material and design. For very fine conductors, modified semi-additive processing can offer straighter conductor profiles than a purely subtractive route because copper is built within patterned resist and the thin seed layer is removed afterward.

Substrate-like PCB panel inside precision imaging equipment during manufacturing review
  1. Manufacturing package review: Check Gerber or ODB++, stackup, copper, dielectrics, line/space by layer, microvias, impedance, finish, quantity, and reliability requirements. Close missing inputs before tooling.
  2. Process-route definition: Assign subtractive, semi-additive, or modified semi-additive processing by layer. Separate stable rules from features requiring coupons, trials, or design changes, and define the inspection gates before production.
  3. Material preparation: Verify material identity, thickness, copper profile, storage condition, and surface cleanliness. Prepare the surface for consistent adhesion, imaging, seed-layer deposition, and plating.
  4. Fine-conductor formation: Align the artwork and control resist thickness, exposure, and development. In an mSAP-type route, form the seed layer, pattern-plate the traces, strip the resist, and remove exposed seed copper without excessive side etching.
  5. Buildup lamination: Control temperature, pressure, vacuum, resin behavior, and dielectric thickness. Measure dimensional movement after lamination and apply approved compensation before the next imaging cycle.
  6. Laser microvia drilling: Match laser energy and focus to the dielectric and target copper. Inspect diameter, position, taper, bottom condition, and residue; clean the via before metallization to protect interface reliability.
  7. Via metallization and filling: Establish conductive coverage, then plate and fill under controlled chemistry, agitation, current density, and temperature. Inspect for voids, dimples, overplating, and weak bottom connections before planarization.
  8. Sequential buildup control: Repeat lamination, drilling, metallization, and conductor formation while tracking registration. Use coupons, dimensional measurements, AOI, and process data to prevent cumulative alignment error.
  9. Final finish and release: Apply solder mask and surface finish, then complete AOI, electrical test, dimensions, impedance, and microsections. Release the lot only after all acceptance criteria and traceability records pass.

Manufacturability depends on the complete route. Approve the stackup, materials, conductor process, microvia controls, inspection plan, and production conditions together rather than accepting a capability claim based on one machine or one minimum feature.

What Testing and Quality Control Are Required for Substrate-Like PCBs?

Quality control must verify both electrical continuity and the physical structures that create long-term reliability. A board can pass a basic open/short test while still containing weak microvias, marginal registration, conductor variation, or dielectric defects.

Substrate-like PCB sample under a laboratory microscope for quality-control review
  • AOI: Detect opens, shorts, residual copper, neck-down, and pattern deviations before buildup hides them.
  • Electrical test: Verify continuity and isolation with coverage suited to net density and quantity.
  • Microsections: Check copper, microvia shape and fill, interfaces, dielectric condition, and registration.
  • Impedance and dimensions: Measure production coupons, board thickness, outline, feature position, and critical alignment.
  • Reliability tests: Select thermal, moisture, and mechanical tests from the actual application conditions.
  • Traceability: Link materials, process lots, inspections, deviations, and shipment records.

What Reliability and Manufacturing Risks Affect Substrate-Like PCBs?

The leading risks come from narrow process windows and interactions between materials, conductors, microvias, registration, and assembly heat. The earlier these risks are converted into measurable inspection and acceptance criteria, the easier it is to avoid disputes after fabrication.

Risk Likely Cause Detection Preventive Action
Residual copper or conductor variation Imaging, plating, or flash-etch variation AOI and dimensional coupon review Control resist, seed layer, plating distribution, and etching window
Microvia voids or cracks Drilling residue, poor metallization, filling defects, or thermal stress Sample microsections plus performance-based thermal cycling with continuity monitoring Control laser formation, desmear/cleaning, metallization, copper filling, and via-stack design
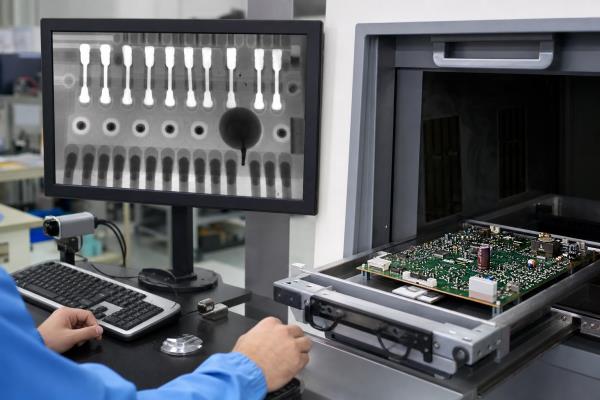
Layer misregistration Material movement, lamination variation, or imaging alignment Registration coupons and cross-sections; use X-ray only where the construction provides adequate contrast Characterize material movement, apply approved compensation, and control buildup alignment
Delamination Moisture, contamination, weak adhesion, or excessive thermal exposure Visual inspection for external evidence, sample microsections, and thermal-stress or cycling tests Control moisture storage, surface preparation, lamination, and the qualified assembly profile
Warpage Unbalanced copper, asymmetric buildup, or material mismatch Flatness measurement before and after thermal exposure Balance stackup, copper distribution, panel support, and process conditions
Low or unstable production yield Design rules based on isolated minimums instead of stable production windows Prototype yield review and defect Pareto Freeze production rules after DFM, trials, and acceptance review

What Substrate-Like PCB Manufacturing Services Can We Provide?

EBest can review the design, plan prototypes, coordinate production, source components, and assemble boards, subject to approval of the submitted SLP construction.

  • DFM review: Check escape routing, stackup, impedance, vias, panelization, and critical dimensions.
  • Prototype plan: Separate buildable features from items requiring coupons, trials, or design changes.
  • Volume preparation: Freeze materials, controls, acceptance criteria, documents, and change rules.
  • Sourcing and assembly: Coordinate package availability, finish, stencil, placement, reflow, inspection, programming, and functional test.

Each quotation must confirm the production site, materials, fine-feature limits, volume, and test plan; company-wide capacity figures do not prove SLP capability.

Substrate-Like PCB Manufacturing Case Study

Project background: A representative compact control-module project combines fine-pitch packages, controlled-impedance interfaces, a fixed outline, and sequential buildup. The initial files apply one minimum line/space value across several layers but omit copper thickness, material grade, microvia filling, impedance tolerance, forecast volume, and reliability conditions.

Project requirements: The customer needs a buildable routing solution within the fixed outline, controlled impedance, measurable microvia and registration acceptance criteria, and a prototype route that can transfer to repeat production without reopening the complete design.

Our solution: EBest maps the critical escape regions, keeps wider and more stable geometry on noncritical layers, and reviews copper, dielectric, microvias, filling, impedance, and assembly heat as one construction. The DFM package defines registration coupons, microsection locations, impedance coupons, electrical-test coverage, traceability requirements, and quotation assumptions before tooling.

Output result: The customer receives a clear manufacturability package showing the proposed stackup, required design changes, trial items, material status, inspection criteria, quotation exclusions, and prototype-to-volume conditions. This allows the customer to choose an approved SLP route, a lower-risk HDI revision, a package change, or an IC-substrate solution before committing tooling cost and schedule.

Why Choose EBest for Substrate-Like PCB Manufacturing?

Choose EBest to obtain one accountable project path from design review through prototypes, sourcing, fabrication, assembly, and repeat production. The customer receives a written distinction between confirmed requirements, necessary design changes, trial items, and production-transfer conditions, reducing quotation gaps and late-stage surprises.

  • Faster technical decisions: A structured DFM response separates buildable features from design changes, coupons, trials, and open questions before the customer approves tooling.
  • Fewer supplier handoffs: PCB design, prototyping, mass production, component sourcing, and assembly can be coordinated through one commercial and technical workflow.
  • Lower technology-selection risk: Experience across FR-4, multilayer, HDI, high-speed, impedance-controlled, flexible, rigid-flex, metal-core, ceramic, and IC-substrate products supports a practical comparison between SLP, HDI, and package-substrate routes.
  • Controlled prototype-to-volume transfer: EBest defines material continuity, acceptance evidence, change control, and repeat-order conditions before the prototype is treated as a production baseline.
  • Documented quality support: EBest reports ISO 9001:2015, ISO 13485:2016, IATF 16949, AS9100D, and UL credentials, together with RoHS and REACH compliance. Customers can request the applicable certificate scope and compliance documents for supplier approval.
  • Capacity and schedule visibility: EBest reports company-wide capacity of 260,000 square feet and more than 1,000 different board part numbers per month. Material availability, process trials, inspection coverage, and the approved SLP construction are checked before an expedited schedule is committed.

What Factors Affect Substrate-Like PCB Cost and Lead Time?

Substrate-like PCB cost and lead time rise when the design reduces process margin, requires uncommon materials, adds buildup cycles, or demands extensive qualification. A credible quotation should show the assumptions behind the price and schedule rather than treating ā€œSLPā€ as one fixed product category.

  • Fine-feature density: Repeated narrow lines affect imaging, plating, inspection, and yield.
  • Buildup cycles: More lamination and microvia cycles add time and registration risk.
  • Materials: Buildup films, BT systems, low-loss laminates, and low-profile copper may extend sourcing time.
  • Microvias: Filled, stacked, staggered, or multiple-depth structures add drilling, plating, planarization, and inspection steps.
  • Panel and tests: Coupons, tooling margins, low utilization, impedance, microsections, and reliability tests increase cost.
  • Production maturity: First builds require more engineering and risk allowance than frozen repeat orders.

Confirm material, tooling, trials, and inspection before accepting an expedited schedule.

What Information Is Required for a Substrate-Like PCB Quote?

A complete RFQ must define both the physical board and the evidence needed to accept it. Sending only Gerber files and a quantity often leaves the supplier to guess the stackup, material, microvia structure, impedance, finish, inspection, and production assumptions.

  • Fabrication data: Gerber or ODB++, NC drill, IPC-356 netlist where available, and fabrication drawing.
  • Stackup and materials: Layer order, copper, dielectrics, total thickness, buildup sequence, material grades, equivalents, and restrictions.
  • Critical features: Line/space by layer, package pitch, critical pads, and isolated versus repeated minimums.
  • Vias: Type, diameter, depth, stacking or staggering, filling, capping, and acceptance criteria.
  • Electrical and surface: Impedance, tolerance, coupon plan, finish, solder-mask definition, and assembly interface.
  • Quality and commercial: Inspection, microsections, reports, traceability, reliability tests, quantity, annual volume, destination, and target date.
  • Assembly package: BOM, centroid file, drawings, stencil, programming, and functional-test requirements.

Send the package with a list of critical-to-quality characteristics. The engineering response should separate confirmed capability, proposed DFM changes, material availability, open questions, quotation assumptions, and items requiring evaluation.

FAQs About Substrate-Like PCBs

Q1: Can an SLP prototype use different materials or processes from mass production?

A1: Yes, but document every material and process difference and its effect on dielectric properties, copper profile, microvia reliability, impedance, and assembly. A prototype built through a different route is not proof of volume readiness.

Q2: When is a pilot lot required before mass production?

A2: Use a pilot lot when any critical construction or production condition is new, including the stackup, material, fine-feature rule, microvia structure, factory route, panel format, or acceptance plan. Set the sample size and pass criteria before production starts.

Q3: What should happen if a microsection fails but the electrical test passes?

A3: Hold the affected lot and investigate the structural defect. Electrical continuity at room temperature does not prove acceptable copper interfaces, via filling, or thermal-cycle reliability.

Q4: Can fine-line SLP conductors or microvias be repaired?

A4: Do not assume fine-line conductor or microvia repair is acceptable. Repair can change geometry, impedance, adhesion, and reliability. Define prohibited defects, permitted repair methods, inspection evidence, and customer approval requirements before production.

Q5: Does an SLP require special storage or handling before assembly?

A5: Requirements depend on the dielectric, finish, thickness, moisture sensitivity, and assembly profile. Define packaging, humidity control, bake conditions, shelf life, and handling limits in the purchase and assembly specifications.

If you are sourcing a substrate-like PCB manufacturer in China, send your Gerber/ODB++, stackup, material requirements, copper thickness, target line/space, via structure, impedance table, quantity, assembly data, and test requirements to sales@bestpcbs.com. EBest will review the design, identify confirmed capabilities and open risks, and prepare a quotation based on the actual manufacturing package.

You may also like

Solar Inverter PCB Design, Manufacturing and Assembly Services, Custom Solutions & Fast Delivery

July 24th, 2026

A Solar Inverter PCB must carry high current, control fast switching, maintain safe isolation and remain stable under heat and outdoor electrical stress. A successful project therefore links circuit partitioning, stackup, copper geometry, component selection, assembly and testing from the first design review—not after a prototype fails.

Illustrative Solar Inverter PCB with separated power and control circuitry on an engineering workbench

What Is a Solar Inverter PCB and What Does It Do?

A solar inverter PCB is the electrical and physical platform that converts variable DC power from photovoltaic strings into controlled AC power. Depending on the architecture, one board may combine the DC input, MPPT converter, DC-link, inverter bridge, sensing, protection and communications. Larger systems often distribute these functions across a solar inverter power PCB and one or more control or interface boards.

The MPPT stage tracks the array operating point as irradiance and temperature change. The power stage switches MOSFETs, IGBTs or other devices, while the control section measures voltage, current and temperature and commands switching, protection and grid interaction. Communication interfaces such as CAN, RS-485 or Ethernet report status and receive settings.

Copper geometry carries current, dielectric spacing supports insulation, placement controls loop inductance and the laminate participates in heat flow. A correct schematic can therefore still produce EMI, unstable sensing, hot spots or switch damage when translated into a weak layout.

How Should Power, MPPT, Control and Communication Circuits Be Separated?

Separate circuits by energy level, noise sensitivity and isolation domain, while keeping every high-di/dt loop compact. The safest floor plan begins with functional zones before detailed routing. Power does not belong beside precision feedback merely because the available board area makes that placement convenient.

  • PV input and protection: Place input connectors, fuses, surge protection, polarity protection and EMI filtering so surge and common-mode currents have a controlled path that does not cross the control ground.
  • MPPT power stage: Keep the switching device, diode or synchronous device, inductor and local capacitor loop short. Place current sensing where it measures the intended path without sharing noisy copper.
  • DC-link and inverter bridge: Position DC-link capacitors close to the bridge commutation loop. Use symmetrical power paths where parallel devices must share current.
  • Gate drive: Place drivers close to their switches. Keep gate and return traces paired, away from switch nodes and separate from communication routing.
  • Measurement and control: Route low-level voltage, current and temperature signals through a quiet region. Use Kelvin connections where the measurement must exclude load-current voltage drop.
  • Communication interface: Keep connector-side transient protection near the connector, preserve differential-pair geometry where required and maintain the intended isolation barrier.

Do not create a single ā€œquiet groundā€ label and assume the layout is quiet. Mark where current returns actually flow. A signal becomes vulnerable when its return path is forced around a split, through a switching-current region or across an isolation boundary. Review both normal operation and surge or fault-current paths before freezing placement.

Solar inverter PCB layout review separating power MPPT control and communication circuits

What PCB Materials, Copper Weights and Stackups Are Suitable for Solar Inverters?

Material and stackup selection must follow voltage stress, temperature, current density, switching frequency and the required insulation system. High-Tg FR-4 is a common starting point, but a material name alone does not confirm comparative tracking index, thermal behavior, dielectric thickness or long-term suitability.

Design Item Selection Basis Manufacturing Consideration Release Check
Laminate Maximum operating temperature, thermal cycling, CTI, voltage stress and loss at switching harmonics Use a named material family or an approved-equivalent rule; do not specify only ā€œFR-4ā€ Confirm datasheet values and the proposed construction
Copper weight Continuous and peak current, allowable temperature rise, trace width, layer position and cooling Thicker copper changes etching, minimum spacing, pad geometry, solder mask and planarization Calculate each power path instead of applying one copper weight everywhere
Layer count Power routing, control density, return paths, shielding and mechanical constraints A mixed-signal multilayer stackup can provide reference planes while preserving high-current outer copper Identify every plane, voltage domain and dielectric thickness
Dielectric spacing Working voltage, transient category, pollution environment, altitude and insulation function Core and prepreg choices must survive pressing tolerance and copper distribution Review the finished stackup, not nominal prepreg data alone
Surface finish Assembly process, storage, pad flatness, press-fit or connector needs and rework strategy Finish choice affects solderability and exposed-pad protection, not the board’s current rating Match the finish to component and assembly requirements

Heavy copper is useful only when the geometry can be fabricated and assembled. Increasing copper may force wider conductor spacing and larger pads. It can also create solder-volume imbalance and local thermal mass. Use current-density and temperature-rise calculations, then confirm the selected construction with a DFM review before component placement is locked.

How Should a Solar Inverter PCB Layout Handle High Voltage, High Current and Switching Noise?

Handle high voltage with verified insulation spacing, high current with calculated copper geometry and switching noise with small commutation loops and controlled returns. These are related problems, but one layout rule cannot solve all three.

  • Define voltage nets first: Classify PV input, DC-link, switch nodes, AC output, protective earth, isolated auxiliary power and safety extra-low voltage (SELV) circuits before routing.
  • Calculate current paths: Size traces, pours, vias, terminals and bus connections for continuous current, overload, fault duration, copper thickness, ambient temperature and cooling.
  • Minimize commutation loops: Place local capacitors and switching devices so the highest di/dt path encloses the smallest practical area.
  • Control switch-node copper: Keep high-dv/dt nodes no larger than needed. Do not route sensitive traces beneath or beside them without an intentional shielding and return strategy.
  • Use via arrays deliberately: Check via barrel capacity, current sharing, drill tolerance and thermal path. A large via count does not correct a narrow neck in the plane.
  • Protect feedback routing: Use Kelvin sensing, paired routes and quiet reference regions. Filter placement should support the control loop rather than hide a noisy layout.
  • Review gate loops: Keep gate-drive and return paths compact, maintain separation from power nodes and provide practical locations for damping components and measurement.

Clearance and creepage values must not be copied from a generic web table. They depend on working and transient voltage, material group, pollution degree, altitude, coating and the governing product safety requirements. Slots can increase creepage in a constrained area, but they also affect mechanical strength, contamination behavior and fabrication tolerance.

How Should Isolation, Grounding, EMC and Circuit Protection Be Designed?

Design isolation, grounding, EMC and protection together around normal, switching and fault-current paths.

  • Define the isolation domains: Mark primary, secondary, chassis, protective earth and SELV regions on the schematic and layout. Classify every transformer winding, optocoupler, digital isolator, Y capacitor, connector shield, mounting point and test feature that crosses a barrier.
  • Verify the complete insulation path: Calculate clearance and creepage from working voltage, transients, material group, pollution degree, altitude and insulation type. Check component packages, slots, exposed copper, fasteners and coating boundaries; an isolation symbol alone does not establish a compliant barrier.
  • Control grounding and return current: Separate switching-current returns from sensing and communication references, then join domains only at intentional points. Do not route a sensitive signal across a plane split or force its return around a high-di/dt loop.
  • Place EMC filters by current path: Keep common-mode and differential-mode filter inputs physically separated from their outputs. Place filtering close to the relevant connector or switching stage so noise cannot couple around the filter through copper, wiring or stray capacitance.
  • Connect shields and chassis for high frequency: Use short, low-inductance connections and route discharge current away from logic references. Avoid long pigtails; confirm whether the shield is bonded directly, capacitively or through a controlled network.
  • Coordinate overvoltage and surge protection: Select protective devices for the expected pulse voltage, energy, repetition and follow-on current. Check clamping voltage against semiconductor limits and coordinate the device with upstream fuses, breakers and product-level surge requirements.
  • Control overcurrent, reverse polarity and temperature: Define detection time, shutdown behavior, fuse or breaker coordination and semiconductor safe operating limits. For battery-connected variants, verify reverse-polarity losses. Place temperature sensing at the component or heat-spreader location that represents the actual thermal limit.
  • Protect external communication ports: Place ESD and surge devices close to the connector, minimize the discharge loop and keep the protected trace from recoupling into the unprotected side. Verify that protection capacitance and leakage remain compatible with the interface.
  • Verify the finished design: Review the applicable edition and target market for IEC 62109-1, UL 1741 and related inverter certification standards, plus local grid requirements. Use approved insulation, surge, EMC and functional tests; PCB inspection alone cannot establish product compliance.

How Can Thermal Management Improve Solar Inverter PCB Reliability?

Thermal management improves reliability by controlling junction temperature, component exposure and temperature gradients from each heat source to ambient.

  • Build a loss map: Estimate conduction, switching, magnetic, capacitor and connector losses under representative input, output and ambient conditions.
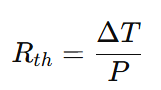
  • Calculate junction temperature and derating: Combine measured case or board temperature with the applicable thermal-resistance model. Check normal load, overload and high-ambient conditions instead of relying only on a heatsink surface reading.
  • Place heat sources intentionally: Keep power devices close enough for short electrical loops while leaving room for heat spreaders, airflow and assembly access.
  • Design copper spreading: Use planes and local copper to reduce hot spots, but check electrical clearance, eddy-current behavior and the thermal bottleneck through dielectric layers.
  • Engineer thermal vias: Specify diameter, pitch, fill condition and solder-control strategy. Verify that the via field connects to a useful internal or backside heat-spreading area.
  • Control interfaces: Define flatness, insulation pads, thermal interface material thickness, mounting torque and component coplanarity where devices couple to a heatsink.
  • Protect life-limiting components: Measure electrolytic capacitors, magnetics, optocouplers, relays and connectors as well as semiconductors. A nearby capacitor can determine service life even when the power switch remains within rating.
  • Limit thermal gradients and cycling: Avoid placing hot power devices beside temperature-sensitive parts or mechanically constrained solder joints. Review heat-up, steady-state and cool-down conditions because repeated expansion can fatigue joints, vias and laminate.
  • Verify temperature measurements: Use thermal imaging to locate hot patterns, then confirm critical locations with thermocouples or attached sensors. Set emissivity correctly and account for reflections from exposed copper, metal hardware and heatsinks.
  • Validate the enclosure: Test the assembled system at worst-case power, airflow, orientation and ambient conditions. A bench test with the cover removed is not representative.
Solar inverter PCB thermal management review with heatsink and thermal imaging

What DFM Checks and Production Files Are Required Before Manufacturing?

A release package must define the board, assembly, programming and acceptance requirements well enough that manufacturing does not have to guess. DFM should identify questions before material purchase and stencil release, when changes are still controlled and inexpensive.

  • Fabrication data: Supply Gerber or ODB++, NC drill files, board outline, layer order, controlled-impedance requirements, netlist and a fabrication drawing.
  • Stackup definition: State finished thickness, copper weights, dielectric intent, material or approved-equivalent rule, surface finish and any CTI or insulation requirement.
  • High-voltage notes: Identify voltage domains, keep-out areas, slots, coating exclusions and safety-critical dimensions that must not be altered during DFM.
  • Assembly package: Provide BOM with manufacturer part numbers, approved alternates, centroid data, assembly drawings, polarity information and do-not-populate markings.
  • Power-component details: Define press-fit, selective solder, mechanical fastening, thermal interface, torque and heatsink requirements where applicable.
  • Programming instructions: Include firmware revision, programming connector, security or serialization rules and verification method.
  • Test specification: Define test points, fixture interface, input limits, loads, pass/fail limits, safety precautions and required records.
  • Change control: Use one released revision across fabrication, BOM, placement, firmware and test files; identify who can approve substitutions or deviations.

The DFM review should also check heavy-copper etching allowances, annular rings, hole-to-copper spacing, solder mask dams, thermal-pad paste apertures, polarized-component access and panelization. Use the contractually specified revisions of the applicable IPC board-design standards and assembly requirements rather than an undated internet rule. For a solar inverter PCB assembly, test access and safe discharge provisions should be designed into the board rather than added after the first build.

What Is the Solar Inverter PCB Manufacturing and Assembly Process?

The process must preserve design intent through material verification, PCB fabrication, controlled assembly, inspection, programming and functional test. Power boards often combine high thermal mass, small control components and large mechanical parts, so one generic SMT profile is rarely enough.

  1. Engineering review: Align stackup, copper, spacing, panelization, BOM, test coverage and mechanical requirements. Close technical questions under revision control.
  2. Material and component verification: Confirm laminate construction, copper foil, approved component sources, date or lot restrictions and alternates before release.
  3. PCB fabrication: Image and etch inner layers, laminate the stack, drill, metallize, plate, image outer layers, apply solder mask and finish, profile and electrically test the board.
  4. Bare-board inspection: Verify dimensions, holes, copper features, solder mask, surface finish and required coupons or microsections against the approved specification.
  5. Solder-paste printing and SMT: Control stencil design and paste deposit for fine-pitch control devices and thermal pads. Place and reflow components using an approved profile.
  6. Power-component assembly: Install large capacitors, magnetics, terminals, relays, semiconductors or heatsink hardware using the defined through-hole, selective-solder or mechanical process.
  7. Cleaning and protection: Apply the specified cleaning, ionic-cleanliness and conformal-coating controls only after compatibility and masking requirements are confirmed.
  8. Inspection and test: Complete visual inspection, AOI or X-ray where applicable, electrical tests, programming and functional checks with traceable records.
  9. Final configuration: Verify firmware, serial number, labels, mechanical interfaces and approved deviations before packaging.

Process sequencing matters. For example, installing high-mass hardware too early can obstruct inspection or expose sensitive parts to extra thermal cycles. The production plan should identify which joints need selective soldering, which bottom-terminated parts need X-ray and which assemblies require staged testing before high-voltage energization.

Illustrative solar inverter PCB manufacturing and assembly process on an electronics production line
Illustrative manufacturing workflow; production controls must follow the released project specification.
What Testing and Quality Control Are Required for Solar Inverter PCB Assemblies?

Testing must connect each design risk to a suitable inspection or measurement, a defined limit and a retained result. AOI cannot prove isolation, and a powered functional test cannot reveal every marginal solder joint. Coverage should combine process inspection, structural evidence and electrical performance.

  • Incoming control: Verify critical power semiconductors, capacitors, magnetics, relays and safety components against approved sources and specifications.
  • Solder-paste inspection: Use SPI where fine-pitch or bottom-terminated components make paste-volume control important.
  • Optical inspection: Use visual inspection and AOI for polarity, presence, alignment, solder condition and visible damage.
  • Hidden-joint inspection: Use X-ray for BGAs, QFNs, large thermal pads or other joints whose acceptance evidence is not visible.
  • Bare-board electrical test: Confirm opens and shorts before assembly. Use appropriate netlist-based coverage for the released PCB.
  • Low-voltage bring-up: Check shorts, auxiliary rails, programming and control behavior with current-limited supplies before applying hazardous energy.
  • Functional test: Verify sensing, protection, gate commands, communication and control logic under defined loads and operating states.
  • Safety-related test: Perform insulation resistance, dielectric withstand or protective-earth checks when required by the product test plan and governing requirements.
  • Thermal and load validation: Measure critical temperatures and switching behavior at representative input, output, ambient and cooling conditions.
  • Traceability: Record board revision, BOM revision, firmware, serial or lot identity, equipment, program revision, result and disposition.

Acceptance criteria should name the applicable assembly workmanship standard, product class, revision and customer additions. Product safety and performance limits must come from the approved product specification. For prototype builds, retain failure waveforms, thermal images and corrected-revision records so the next build starts from evidence rather than memory.
Illustrative solar inverter PCB assembly testing with oscilloscope thermal imaging and inspection equipment
Illustrative test setup; actual coverage and limits must be defined in the approved test plan.

What Common Solar Inverter PCB Failures Occur and How Can They Be Prevented?

Most recurring failures trace back to excessive electrical stress, uncontrolled heat, parasitic switching behavior, weak insulation or inconsistent assembly. Prevention requires a cause-and-verification loop, not simply replacing the visibly damaged component.

Failure Symptom Likely Causes Preventive Action Verification Method
Power switch damage Overshoot, poor gate control, excessive loop inductance, inadequate protection or thermal stress Reduce loop area, tune gate network, coordinate clamps and confirm safe operating margin Measure switching waveforms at representative voltage, current and temperature
Overheated copper or terminals Narrow necks, weak via transfer, loose hardware, poor current sharing or undersized connectors Calculate the complete current path and define assembly torque or connection controls Use voltage-drop and thermal measurements under sustained load
False trips or unstable MPPT Noisy sensing, poor return routing, common-mode coupling or unsuitable filtering Use Kelvin sensing, controlled returns, local filtering and separation from switching nodes Correlate raw sensor waveforms with control events across operating points
Isolation breakdown Insufficient spacing, contamination, conductive debris, coating voids or transient overstress Verify the insulation system, cleanliness, slots, coating process and surge coordination Inspect critical spacing and apply approved safety-related tests
Cracked joints or intermittent connectors Thermal cycling, heavy unsupported parts, board flex or unsuitable solder process Add mechanical support, control solder profile and reduce local strain Inspect joints and reproduce mechanical and thermal service conditions
Corrosion or leakage Flux residue, moisture, ionic contamination or unsuitable coating coverage Validate cleaning, drying, coating compatibility and environmental protection Use cleanliness evidence and environmental testing tied to the product plan

When a board fails, capture operating state, firmware, waveforms, temperature, load and environmental conditions before rework destroys evidence. Separate the initiating cause from collateral damage. A shorted switch, for example, may be the result of gate ringing or isolation failure rather than the original defect.

How to Choose a Solar Inverter PCB Manufacturer?

Choose a solar inverter PCB manufacturer by its ability to identify, control and document the risks in your actual design. Compare engineering evidence and production scope, not unit price alone.

  • Verify fabrication capability: Require a DFM response against the proposed layer count, copper weight, dielectric construction, board thickness, hole structure, surface finish, heavy-copper spacing and high-voltage features. Published maximum values are not enough; the supplier must assess the complete stackup.
  • Assess power-electronics experience: Ask how the team reviews current bottlenecks, via transfer, creepage-sensitive areas, switch-node geometry, thermal interfaces and mechanical support for magnetics, capacitors, terminals and heatsinks.
  • Review material and component control: Confirm laminate identity, approved-equivalent rules, component sourcing channels, moisture-sensitive handling, date or lot restrictions and the approval process for alternate power semiconductors, capacitors, relays and magnetics.
  • Check mixed-technology assembly: The supplier should control fine-pitch SMT, bottom-terminated parts, high-thermal-mass joints, through-hole or selective soldering, press-fit connections, mounting torque and thermal interface materials within one documented process plan.
  • Match inspection to hidden risks: Verify when SPI, AOI, X-ray, bare-board electrical testing, dielectric or insulation tests, programming checks and functional tests are used. Each method should have defined limits and retained results.
  • Confirm engineering communication: A capable manufacturer should identify conflicting files, ambiguous voltage domains, inaccessible test points, missing acceptance limits and unsafe bring-up conditions before material purchase or stencil release.
  • Require traceability and change control: Confirm how PCB revision, BOM, firmware, test program, material lot, component lot, approved deviations, rework and final disposition are linked to delivered units.
  • Evaluate prototype-to-volume continuity: Check whether prototype corrections are incorporated into controlled production files, fixtures and work instructions. A successful hand-modified sample is not a repeatable production baseline.
  • Compare the complete production scope: Make sure competing proposals include the same fabrication, sourcing, assembly, programming, inspection, functional-test, documentation and packaging responsibilities. A lower price is not comparable when essential controls are excluded.

Custom Solar Inverter PCB Manufacturing and Assembly Case Study

This representative case study shows how EBest Circuit turns an incomplete solar inverter PCB package into a controlled manufacturing and assembly release. The value lies in the engineering actions and traceable outputs, not in unverified performance claims.

Project Background: The design combined a high-current inverter stage, isolated gate drivers, MPPT sensing, auxiliary power and an external communication interface on one assembly. Large capacitors, magnetics, terminals and power semiconductors created high thermal mass, while low-level sensing circuits had to operate beside fast-switching nodes. The initial Gerber data and BOM were available, but voltage domains, copper-current transitions, thermal interfaces, component substitution rules and production test limits were not fully defined.

Project Requirements: The customer needed a buildable stackup with controlled copper weights, clear separation between power and control regions, verified insulation boundaries and practical heat transfer to the enclosure. The assembly also required mechanical support for heavy components, controlled soldering of high-thermal-mass joints, revision-linked firmware, traceable component sourcing and a staged test method that would not apply hazardous bus voltage before low-voltage checks had passed.

Our Solution: EBest Circuit created one DFM question log covering high-current neck-downs, via-transfer points, creepage-sensitive features, switch-node area, gate-return routing, thermal-pad construction, solder access and test-point coverage. The stackup, fabrication drawing, BOM, placement data, assembly drawing, firmware and test specification were aligned to one revision. The assembly plan separated SMT reflow from through-hole or selective-solder operations and defined inspection for visible joints, hidden thermal pads and mechanically loaded connections. Bare-board electrical test, AOI or visual inspection, X-ray where required, current-limited bring-up and functional checks were assigned clear acceptance evidence.

Output Results: The release package contained an approved stackup, closed DFM questions, controlled fabrication and assembly files, approved component decisions, programming instructions and a documented inspection and test plan. The build team could identify what had to be checked, which result constituted acceptance and which revision applied to the delivered units. This created a repeatable baseline for prototype assembly and subsequent production orders while keeping any efficiency, yield, reliability or delivery claims subject to customer-approved measurements.

Why Choose EBest Circuit as Your Solar Inverter PCB Manufacturer?

EBest Circuit helps customers reduce technical handoffs, prevent avoidable rebuilds and move an approved prototype into repeatable production.

  • Fewer handoff gaps: DFM, PCB fabrication, component sourcing, assembly, programming and testing can follow one controlled data package.
  • Lower redesign risk: Power paths, isolation, thermal interfaces and assembly access are reviewed before material purchase and stencil release.
  • Comparable production scope: Manufacturing limits, special-process items, inspection coverage and excluded work are clarified before the customer compares price and schedule.
  • Better defect containment: Mixed SMT and through-hole assembly can be paired with AOI, X-ray and electrical or functional checks according to the actual joint and circuit risks.
  • Repeatable follow-on orders: Approved BOM changes, firmware, deviations, test programs and prototype corrections are transferred into a revision-controlled production baseline.
  • More credible delivery planning: The committed schedule is based on material availability, engineering closure, fabrication complexity, assembly scope and test readiness—not an unsupported fast-turn promise.

FAQs About Solar Inverter PCB Boards

Q1: Can the same solar inverter PCB design be reused at a higher power rating?

A1: Not without a complete electrical, thermal and safety review. Higher power can change RMS and peak current, semiconductor loss, magnetic design, capacitor ripple, connector loading, copper temperature, protection settings and cooling demand. Revalidate the power stage, control limits, firmware and product compliance before releasing a higher-rated variant.

Q2: Is a solar hybrid inverter PCB different from a grid-tied inverter PCB?

A2: A hybrid design usually adds battery-side power conversion, bidirectional energy flow and additional protection and communication states. That can change current paths, connector count, control complexity, thermal loading and test scenarios. The board architecture must follow the complete energy-flow diagram rather than the product label alone.

Q3: What data should be controlled for custom magnetics used on the board?

A3: Control the electrical design, insulation construction, mechanical drawing and approved source together. Record turns ratio, inductance or energy-storage target, core and gap, winding wire, insulation system, temperature class, hipot requirement, pinout and dimensional limits. Incoming inspection should verify the characteristics that can affect switching, safety and mechanical fit.

Q4: How should high-current terminals and crimped cables be validated?

A4: Validate the complete connection, not only the PCB pad or terminal current rating. Define conductor size, crimp tool and inspection method, insertion or fastening torque, strain relief, contact resistance and allowable temperature rise. Use representative current and environmental conditions, then retain results that link the cable, terminal, fastener and board revision.

Q5: Who should own and maintain the production test fixture?

A5: Ownership, revision control and maintenance responsibility should be agreed before fixture development starts. The agreement should cover design files, replaceable wear parts, calibration or verification intervals, software version, storage, repair approval and transfer rights. Without these controls, a repeat order may use a fixture that no longer matches the released board or test limits.

Q6: When should a prototype revision be frozen for pilot production?

A6: Freeze the revision only after open engineering questions, approved rework and test limits have been incorporated into controlled files. Confirm that fabrication data, BOM, placement, drawings, firmware and test instructions share the same revision baseline. A successful hand-modified prototype is not a production release until every modification is documented and repeatable.

Q7: How should moisture-sensitive components be handled before assembly?

A7: Follow the component’s declared moisture-sensitivity level, floor life and reflow requirements. Record the sealed-pack condition, humidity indicator card result, opening time and remaining floor life. If exposure exceeds the approved limit, use the component manufacturer’s baking and handling instructions; uncontrolled baking can damage packaging, finishes or tape-and-reel materials.

Q8: What causes audible noise in an assembled solar inverter board?

A8: Magnetics, ceramic capacitors, mechanical resonance and control behavior are common sources. Investigate operating point, switching or modulation frequency, mounting, magnetic construction and waveform stability. The PCB can contribute through weak support, pulsed current paths or coupling, but the sound source should be measured before redesign.

Q9: How should spare solar inverter PCB assemblies be stored for field service?

A9: Store service boards in sealed ESD-safe packaging under controlled temperature and humidity. Protect connectors, coated surfaces and thermal interfaces from contamination or compression. Record packing date and storage conditions, follow component moisture and shelf-life limits, and define visual or electrical reinspection before an aged spare is installed.

Q10: How should a golden sample be controlled?

A10: A golden sample needs an approved identity, purpose, storage condition and expiration or review rule. State whether it represents appearance, mechanical fit, programming, functional response or test-fixture correlation; one sample may not cover every purpose. Seal or label it against unauthorized rework, link it to the released revision and periodically confirm that it still represents current acceptance criteria.

If you need custom Solar Inverter PCB design support, prototype fabrication, PCB assembly or production review, send your Gerber/ODB++, BOM, quantity, stackup, assembly drawings, programming method and test requirements to sales@bestpcbs.com. EBest Circuit will review the manufacturing risks, clarify the open requirements and prepare a project-specific quotation.

You may also like

How to Calculate PCB Aspect Ratio and Choose the Right Via Size?

July 23rd, 2026

PCB Aspect Ratio is plated-hole depth divided by reference diameter. Calculate it from the actual via span and the fabricator’s diameter convention, then verify the pad, annular ring, plating and tolerances before approving the via.

PCB Aspect Ratio shown on a multilayer board with a plated through-hole cross-section

What Is PCB Aspect Ratio and Why Does It Matter When Choosing Via Size?

PCB Aspect Ratio compares plated-hole depth with hole diameter. A higher PCB Aspect Ratio makes desmear, solution exchange and copper deposition at the barrel center more difficult, increasing the risk of thin copper, voids and thermal-cycle failure.

  • Plating: Confirm that the ratio is below the fabricator’s approved limit with allowance for board-thickness and hole-size tolerances.
  • Routing: Check whether a larger drill and pad would remove routing channels or reduce plane clearance.
  • Via structure: Use blind, buried or microvias only when a shorter span solves a verified density or signal-integrity constraint.
  • Complete geometry: Approve the via only when the hole, pad, annular ring, antipad and layer span pass together.

Which Measurements Do You Need Before Calculating PCB Aspect Ratio?

You need two calculation inputs—plated depth and reference diameter—plus the geometry and tolerances required to validate the result. Take them from the released stackup, drill chart and fabrication drawing.

  • Depth: Use finished board thickness for through holes, drilled sub-lamination thickness for buried vias, and the actual start-to-stop span for blind vias.
  • Diameter: Record nominal drill size and finished-hole size separately; identify which value the fabricator uses for its limit.
  • Padstack: Record pad and antipad diameters, required annular ring, and capture/target pads for microvias.
  • Tolerances: Include maximum plated depth, minimum permitted reference diameter and drill-position tolerance.
  • Process: Identify mechanical drilling, controlled-depth drilling or laser drilling and the applicable supplier limit.

Create one row per via family: start/stop layers, drill method, nominal/maximum depth, nominal/minimum reference diameter, finished-hole requirement, pad diameter and process limit. If ā€œtool sizeā€ and ā€œfinished holeā€ are identical without a plating allowance, clarify the data before calculating.

What Is the PCB Aspect Ratio Formula, and How Do You Apply It to Different Via Types?

PCB Aspect Ratio = plated hole depth Ć· reference diameter.

  • Mechanical holes: Use the nominal drill-tool diameter unless the fabricator explicitly defines the limit by finished-hole diameter.
  • Laser microvias: Use capture-to-target depth and the fabricator-defined diameter measurement point because the hole is tapered.
  • Through-hole example: A 1.60 mm board drilled with a 0.25 mm tool gives 1.60 Ć· 0.25 = 6.4:1.
  • Buried mechanical-via example: A 0.80 mm drilled sub-lamination with a 0.20 mm tool gives 0.80 Ć· 0.20 = 4:1. Use the drilled sub-lamination thickness, not the final board thickness.
  • Laser-microvia example: A 0.075 mm capture-to-target depth divided by a supplier-defined 0.10 mm diameter gives 0.75:1. This is below the IPC-T-50M microvia maximum of 1:1, but the actual diameter convention and production limit still require fabrication approval.

PCB via aspect ratio dimensions showing plated hole depth and hole diameter

Compare each result with the supplier limit for that drill process and stackup.

Should You Use Drill Size or Finished Hole Size in the Calculation?

Use the diameter specified in the fabricator’s aspect-ratio convention. Drill size and finished-hole size are not interchangeable because barrel copper reduces the opening.

  • Mechanical vias: Use nominal drill-tool diameter when the supplier’s capability is defined before plating.
  • Finished component holes: Control the finished opening for lead or press-fit fit, but calculate ratio with that value only if the supplier explicitly requires it.
  • Laser microvias: Confirm whether the stated diameter is measured at the capture side, target side or after plating.

For component holes, start with the required finished opening and obtain the supplier’s drill allowance. For signal vias, start with an available drill tool and verify the finished range. Show both dimensions in the drill chart and label the ratio reference.

How Do You Calculate the Minimum Via Hole Size for a Given Board Thickness?

Divide drilled depth by the maximum approved ratio to obtain the theoretical minimum reference diameter. Then select an available drill that also meets finished-hole size, plating allowance and tolerance.

Theoretical minimum reference diameter = drilled depth Ć· maximum approved aspect ratio

For a 1.60 mm board limited to 8:1, the theoretical drill is 1.60 Ć· 8 = 0.20 mm. This is not a 0.20 mm finished hole because plating reduces the opening. The BestPCBS capability workbook lists 0.20 mm as the standard minimum finished hole, so the production drill must include plating and process allowance. A 0.25 mm drill gives 6.4:1; confirm its finished range with the fabricator.

For a 0.30 mm partial-depth mechanical via, use 0.30 mm—not total board thickness. For a laser microvia, use supplier-defined depth and diameter. Check the selected tool against the PCB drill size guide and supplier DFM.

What Are the Typical PCB Aspect Ratio Limits for Different Via Types?

Aspect-ratio limits depend on drill method and plated depth. Use these values for screening and obtain supplier approval for the final stackup.

Via type Depth used Practical screening point Required check
Plated through hole Finished board thickness 6:1 to 8:1 is a common conservative starting range Confirm drill convention, plating and board-thickness tolerance
Mechanical blind or buried via Actual connected layer span Supplier-specific; keep the span as short as the design permits Confirm sequential lamination and drill access
Laser microvia Dielectric depth between adjacent layers 1:1 or lower; lower ratios provide more process margin Confirm target pad, capture pad, stacking and fill requirements

EBest Circuit lists maximum through-hole PCB Aspect Ratio values of 8:1 standard and 10:1 advanced, with minimum finished holes of 0.20 mm and 0.15 mm respectively. The 10:1 option requires project review.

Treat the maximum as a rejection threshold, not a design target. Near-limit designs require a tolerance and plating review plus confirmation that a larger standard drill cannot provide safer margin. Never apply a through-hole limit to blind, buried, stacked or laser-drilled structures.

How Do Board Thickness, Layer Count and Stackup Affect Via Size?

Board thickness directly raises a through-hole ratio; layer count matters only when it changes thickness, registration or the via span. A 0.20 mm drill gives 6:1 in a 1.20 mm board but 10:1 in a 2.00 mm board.

  • Through vias: Use finished board thickness and enlarge the drill if added thickness exceeds the approved ratio.
  • Blind vias: Recalculate whenever the stop layer moves.
  • Buried vias: Use the drilled sub-lamination thickness, not the final board.
  • Microvias: Check each buildup dielectric and its capture/target pad geometry separately.

Freeze the stackup before final padstack approval. Recalculate after changes to finished thickness, dielectric spacing, copper weight or start/stop layers, then recheck pads, antipads and routing clearance.

How Do Pad Diameter, Annular Ring and Hole Tolerance Affect Final Via Size?

A via passes only when enough copper remains around the worst-case hole after diameter and registration tolerances.

Nominal annular ring = (pad diameter āˆ’ hole diameter) Ć· 2

A 0.60 mm pad around a 0.30 mm hole gives a nominal 0.15 mm ring. Maximum hole size and drill shift reduce the remaining copper, so apply the fabricator’s acceptance method instead of subtracting assumed tolerances.

  • Hole enlargement: Increase the pad until the worst-case remaining annular ring meets the fabrication requirement.
  • Clearance: Recheck antipads, planes and routing space after changing the padstack.
  • Layer review: Verify capture pads on every connected layer and the rule for nonfunctional-pad removal.
  • Component holes: Keep press-fit and leaded-hole tolerances separate from ordinary signal vias.

How Do Copper Plating and Reliability Requirements Affect Via Size Selection?

Reliability requirements may require a larger hole than the mathematical minimum because the barrel center is the hardest area to plate uniformly. Thin center-wall copper concentrates strain during assembly and thermal cycling.

PCB plated through-hole microsection inspection for copper thickness and barrel quality

  • Copper requirement: Define measurable finished barrel copper and the applicable acceptance class.
  • Risk factors: Add margin for thick boards, small drills, heavy copper and repeated thermal excursions.
  • Evidence: Specify coupon sampling, microsection locations, electrical test and required thermal stress.
  • Material system: Consider laminate z-axis expansion, resin system and assembly temperature with the ratio.

A microsection proves only the sampled location. Use it to inspect barrel-center copper, voids and interconnection quality, then combine it with the sampling plan, electrical testing and required thermal qualification. Requalify after a material, thickness or via-geometry change.

When Should You Choose Through-Hole, Blind, Buried or Microvias?

Use the least complex via that meets the required layer connection, routing density and signal-integrity target. Start with through holes; add blind, buried or microvias only when they solve a specific constraint.

  • Through hole: Preferred when its pad and antipad fit, inner routing remains open and the unused barrel does not create an unacceptable high-speed stub. Ratio depth is the full board thickness.
  • Blind via: Connects an outer layer to selected inner layers, preserving deeper routing channels. Confirm controlled depth, mechanical drill access and sequential-lamination impact.
  • Buried via: Connects only internal layers without using outer-layer space. Calculate from the drilled sub-lamination and justify the added lamination and inspection steps.
  • Laser microvia: Best for adjacent-layer, fine-pitch HDI escape where a mechanical pad will not fit. Define capture/target pads, staggered or stacked construction, fill and cap requirements.

Before release, check pad/antipad fit, stub length, layer access, lamination cycles, fill/cap needs and inspection cost. Confirm the structure against the PCB via types guide and supplier DFM before routing is frozen.

How Can You Check PCB Aspect Ratio and Via Size During DFM Review?

DFM must calculate the PCB Aspect Ratio for every unique via family—not only the smallest hole—and record a Pass, Revise or Supplier Review disposition.

  1. Freeze inputs: Use matching revisions of stackup, Gerber/ODB++, NC drill files, fabrication drawing and drill chart; stop if thickness, layer numbers or hole values conflict.
  2. Group via families: Separate by drill method, start/stop layers, tool diameter, finished-hole requirement, plating status and tolerance.
  3. Confirm conventions: Record drill and finished diameters separately and define the laser-microvia measurement point.
  4. Calculate both cases: Nominal ratio uses nominal depth/diameter; conservative ratio uses maximum depth/minimum reference diameter when supplier tolerances are available.
  5. Check padstack: Verify remaining annular ring, capture/target pads, antipads, copper spacing and solder-mask treatment after any hole change.
  6. Check process: Identify sequential lamination, fill, copper cap, backdrill, plating, coupons and thermal-stress requirements.
  7. Close disposition: Pass only when ratio, geometry and process all pass; otherwise revise the design or retain written supplier approval.

Example: 1.60 mm depth Ć· 0.25 mm drill = 6.4:1 nominal. If supplier-defined limits are 1.68 mm maximum depth and 0.24 mm minimum diameter, the conservative value is 7.0:1. Record both values, the applicable limit and disposition; recalculate after any stackup or drill change.

Which Via Sizing Mistakes Increase Cost or Cause Fabrication Defects?

Incomplete drill definitions and calculations made without tolerance margin cause avoidable tooling, lamination and redesign costs.

Mistake Likely consequence Practical correction
Using finished hole in one file and drill tool in another Conflicting ratio, tolerance and quote assumptions Show both values and identify the calculation convention
Calculating blind vias from total board thickness Incorrect rejection or an unnecessarily large via Use the actual start-to-stop layer depth
Selecting the mathematical minimum without margin Lower yield and tighter process control Choose a larger standard drill where routing permits
Enlarging the hole but not the pad Reduced annular ring or breakout Recalculate pad, clearance and registration margin together
Stacking microvias without supplier approval Extra process steps and reliability risk Confirm stacking, filling and qualification before layout release

Correct the geometry before requesting tighter tolerances. Compare a larger drill, shorter span, larger pad and simpler via structure. Blind/buried vias add lamination cost; stacked microvias may add filling, planarization, copper capping and qualification.

What Via Specifications and PCB Files Should You Send for Manufacturing Review?

Send matching-revision fabrication data, drill data, stackup and acceptance requirements.

  • Fabrication data: Gerber or ODB++ files with matching revision identifiers.
  • Drill data: NC drill files, drill map and a chart separating tool size, finished size, plated status and tolerance.
  • Stackup: Finished thickness, materials, copper weights and the depth of every blind or buried span.
  • Via construction: Start/stop layers, stacked or staggered arrangement, fill, cap, tent and backdrill requirements.
  • Acceptance: Product class, plating requirement, impedance, coupon, microsection and electrical-test needs.
  • Commercial context: Prototype and production quantities, forecast, delivery target and any approved alternative.

Add one calculation row per via family: ID, drill method, start/stop layers, depth, nominal tool or microvia diameter, finished-hole requirement/tolerance, pad diameter, fill/cap/tent or backdrill requirement, calculated ratio and capability limit. Label every value as nominal, minimum, maximum or finished.

If DFM changes a drill or layer span, regenerate the affected files. Obtain written approval for accepted via families and exceptions before production release.

FAQs About PCB Aspect Ratio

Q1: Does backdrilling change the original plated-through-hole aspect ratio?

A1: Backdrilling removes an unused barrel section after the through hole has been drilled and plated, so it does not change the original plating challenge. Specify backdrill depth, residual stub and clearance separately.

Q2: Does controlled impedance set the allowable aspect ratio?

A2: No. Controlled impedance governs transmission-line geometry, while the allowable ratio is a hole-manufacturing limit. Via diameter, pad, antipad and stub length can affect impedance and must be modeled separately.

Q3: Do non-plated holes have a PCB via aspect ratio?

A3: A depth-to-diameter ratio can be calculated, but the plating-related via limit does not apply in the same way to an NPTH. Mechanical drilling capability, positional tolerance and tool access still need review.

Q4: How is aspect ratio handled for plated slots?

A4: Use the plated depth and the slot’s controlling narrow dimension, then confirm the supplier’s routing and plating rule. End radius, slot width, tolerance and copper coverage also affect approval.

Q5: Does via filling change the calculated ratio?

A5: No. Filling occurs after the hole is formed and plated, so it does not change the original depth-to-diameter calculation. It does add material, process and planarization requirements that need separate DFM checks.

Q6: Should press-fit component holes use the same diameter strategy as signal vias?

A6: No. Press-fit holes are sized around the component pin and finished-hole tolerance, not routing density. Confirm the compliant-pin specification, plating build and insertion-force requirements before selecting the drill.

Q7: Does a lower ratio always improve electrical performance?

A7: Not necessarily. A lower ratio generally improves plating access, but electrical behavior depends on via length, diameter, pad and antipad geometry, stub length and return path. Evaluate high-speed performance separately.

Q8: Can aspect ratio alone predict conductive anodic filament risk?

A8: No. CAF risk also depends on material system, spacing, moisture, voltage, drilling damage and processing cleanliness. Treat it as a separate material and reliability assessment.

Q9: Does via tenting affect PCB Aspect Ratio?

A9: No. Solder-mask tenting covers the via opening but does not change the drilled depth or diameter. Tenting may affect assembly protection, outgassing and inspection, so specify it independently.

Q10: Can aspect ratio determine how much current a via carries?

A10: No. Current capacity depends mainly on finished barrel copper, hole geometry, temperature rise and the connected copper features. Aspect ratio helps assess manufacturability but cannot replace an electrical and thermal calculation.

Need a project-specific via check? Send your Gerber or ODB++ package, NC drill files, controlled stackup, target quantity and via table to sales@bestpcbs.com. EBest Circuit can review the proposed PCB Aspect Ratio, hole convention, annular ring and via structure before quotation.

You may also like

Printed Circuit Board Etching: Process, Trace Width and Quality Control

July 23rd, 2026

Printed circuit board etching selectively removes exposed copper to form the required conductor pattern. The finished geometry depends on resist definition, copper thickness, lateral undercut, etchant condition, spray distribution and exposure time. A stable process must control both copper removal and the trace width, spacing and edge profile that remain.

Printed circuit board etching of a copper production panel in industrial spray equipment

What Is Printed Circuit Board Etching and What Does It Control?

Printed circuit board etching removes unprotected copper and directly controls finished trace width, spacing, edge profile and pattern continuity. Imaging determines where copper should remain, while the etching step converts that protected image into physical conductors. Stripping and inspection then reveal whether the finished layer matches the released geometry.

Three geometries must be kept separate. The design geometry is the released CAD requirement. The production image may include validated CAM compensation. The finished geometry is the copper measured after etching. Treating these as identical hides the effect of side attack, plating buildup and process variation.

  • Trace width: determines conductor cross-section, resistance, current margin and a key input to the impedance model.
  • Spacing: affects isolation, voltage clearance and the risk of residual-copper shorts.
  • Edge profile: reveals undercut, notches and roughness that may reduce the usable conductor area.
  • Pattern integrity: includes opens, shorts, pinholes, residual copper and missing or malformed features.
  • Panel consistency: shows whether the same feature remains stable across locations, orientations and production lots.

How Does the Printed Circuit Board Etching Process Work Step by Step?

The printed circuit board etching process follows a controlled image–remove–verify sequence. The exact resist and stripping operations differ between inner and outer layers, but each route must deliver clean exposed copper, intact protected features, complete unwanted-copper removal and measurable finished geometry.

  1. Prepare and inspect the copper surface. Remove oil, oxidation, fingerprints and particles, then confirm that the surface condition is uniform. Contamination or excessive roughness can weaken resist adhesion and later appear as pinholes, notches or missing copper.
  2. Apply the imaging resist. Laminate or coat the copper with the specified photoresist under controlled temperature, pressure and cleanliness. The resist must cover the panel without wrinkles, trapped particles, edge lifting or thickness variation.
  3. Expose the circuit image. Align the production artwork or direct-imaging data to the correct layer, then expose the resist so required conductors remain protected. Registration, exposure energy and data revision must be verified before development.
  4. Develop and inspect the pattern. Develop away the soluble resist so that only the copper scheduled for etching is exposed. Check fine spaces, pad edges and registration for resist scum, damaged edges, incomplete development or unintended openings.
  5. Prepare the outer-layer etch resist where required. In a common pattern-plating route, plate copper onto the hole walls and exposed circuit features, add a compatible metallic etch resist, and strip the remaining photoresist. Inner layers normally proceed with photoresist protecting the required circuit copper directly.
  6. Etch the exposed copper. Match the chemistry to the resist system and control copper loading, temperature, spray pressure, nozzle condition, drainage and conveyor speed. Remove the field copper completely while limiting lateral attack beneath protected trace edges.
  7. Strip the temporary protection. Remove the photoresist or metallic etch resist using the specified process without attacking the finished conductor. Residue must not hide shorts, interfere with inspection or contaminate later lamination and finishing steps.
  8. Inspect and release the layer. Use AOI to locate pattern defects, dimensional measurement to verify critical widths and spaces, and microsection or electrical evidence where the order requires it. Release the layer only after its results are linked to the correct revision and production lot.

A defect found after printed circuit board etching is not automatically an etcher problem. A repeated missing feature may originate in the source image, while random notches may point to resist damage. Location-dependent width change is more consistent with spray, drainage or panel-loading variation. Root-cause analysis must follow the defect pattern back through the complete route.

Why Are Inner-Layer and Outer-Layer PCB Etching Processes Different?

Inner and outer layers use different printed circuit board etching routes because their copper construction and protection requirements are different. An inner layer normally begins as copper foil on a laminate core and uses photoresist to protect the required image. An outer layer must also preserve plated hole walls and the copper added to the surface during pattern plating.

Process Element Inner Layer Outer Layer
Starting copper Copper foil bonded to a laminate core Drilled panel with plated holes and surface copper
Circuit protection Imaged photoresist protects required copper Pattern-plated metal protects traces, pads and plated-hole features
Etch target Remove exposed foil while retaining the imaged circuit Remove exposed surface copper while retaining plated traces, pads and hole features
Common chemistry An acidic route is commonly compatible with the photoresist process An alkaline route is commonly compatible with the metallic etch resist
Main process risk Registration or width defects become inaccessible after lamination Excessive lateral attack reduces conductors while plated features must remain protected
Release evidence Registration, AOI and critical dimensions before lamination AOI, critical dimensions, spacing and plated-feature integrity

ā€œAcid for inner layers and alkaline for outer layersā€ is a useful process map, not a universal recipe. The selected chemistry must be compatible with the actual resist, plating sequence, equipment and regeneration controls. A detailed copper PCB etching solution review belongs at the chemistry-selection level; this article uses chemistry only to explain the manufacturing route.

How Do Etch Factor and Undercut Affect PCB Trace Width?

In printed circuit board etching, undercut narrows the top of a trace, while the etch factor indicates how much lateral width is lost relative to the copper removed vertically. More undercut leaves a smaller conductor cross-section and a more pronounced trapezoidal profile. For the same copper thickness, a higher etch factor generally means less lateral attack, although finished width and spacing remain the acceptance requirements.

Trapezoidal etched copper PCB trace cross-section illustrating lateral undercut

Using a one-side convention, etch factor = copper thickness Ć· undercut on one side. If 35 Āµm of copper is removed vertically and the measured one-side undercut is 10 Āµm, the etch factor is 35 Ć· 10 = 3.5:1. With similar loss on both sides, the protected top feature can lose approximately 20 Āµm in total width.

A cross-section provides the same information from measured geometry. If the conductor base is 120 Āµm wide and the top is 100 Āµm wide, the one-sided difference is (120 āˆ’ 100) Ć· 2 = 10 Āµm. The report should identify the measured width, cross-section location and whether undercut is stated per side or as total width loss.

A higher etch factor generally indicates less lateral loss for the same vertical depth, but it is not a universal acceptance criterion. Finished trace width, remaining cross-sectional area, spacing and the drawing tolerance remain the actual product requirements.

How Do Copper Thickness and Etching Affect Finished Trace Width?

In printed circuit board etching, thicker copper increases the vertical removal distance and usually reduces the process margin available for fine traces and spaces. Removing 70 Āµm of exposed copper requires a deeper etch path than removing 35 Āµm. The additional exposure creates more opportunity for lateral attack, but the width loss does not scale by one fixed multiplier across every chemistry, layout and machine.

The relevant input is the PCB copper thickness present at the etching stage. On an inner layer, this is closely related to the selected foil. On an outer layer, pattern plating can increase the copper thickness that the etch must clear between protected features. A drawing that states only ā€œ1 oz copperā€ without distinguishing starting and finished copper may therefore be incomplete.

Local pattern density also changes the etching response. An isolated narrow trace beside a large open area may not etch like the same trace inside a dense field. Panel orientation, copper distribution and drainage can all create position-dependent results. Minimum line-and-space capability should be evaluated with copper thickness, layer type and surrounding pattern density.

How Is Artwork Compensation Used to Control Etched Trace Width?

Artwork compensation for printed circuit board etching adjusts the production image so the measured feature approaches the released finished dimension. It is a fabricator-controlled CAM operation derived from a validated process window. It is not a universal amount that should be added to every CAD trace before quotation.

An initial estimate may use the expected two-sided width loss, but production compensation also reflects imaging, resist behavior, layer route, copper thickness, equipment, pattern density and measured process history. Enlarging one feature reduces the adjacent clearance, so CAM must protect trace width and spacing together.

  • Lock the requirement: identify the released finished width, spacing and tolerance instead of treating CAD artwork as the only acceptance reference.
  • Classify the layer: separate inner-layer foil from plated outer-layer copper because the etch depth and resist route differ.
  • Model vulnerable features: review isolated fine lines, neck-downs, fine-pitch pads and impedance structures rather than applying one global enlargement blindly.
  • Check the trade-off: confirm that widening a conductor does not consume a mandatory clearance or alter pad-to-feature relationships.
  • Control the output: keep compensated production data linked to the correct released revision and documented DFM approval.

Which Printed Circuit Board Etching Materials and Process Variables Control Uniformity?

Printed circuit board etching uniformity is controlled by the copper surface, resist definition, etchant condition, temperature, spray delivery, exposure time and panel layout. These variables work as one process window: stable bath readings cannot compensate for poor cleaning, damaged resist, blocked nozzles, uneven drainage or an imbalanced copper pattern.

  • Copper surface: oxidation, oil, particles and inconsistent conditioning can weaken resist adhesion or change local reaction behavior.
  • Resist definition: exposure, development, edge quality, adhesion and pinholes determine which copper remains protected.
  • Etchant condition: concentration and dissolved-copper loading affect removal rate; pH, specific gravity or ORP are useful only where they belong to the validated control plan.
  • Temperature: changes reaction rate and must be controlled with the chemistry and equipment rather than copied as an isolated universal setting.
  • Spray delivery: nozzle condition, pressure, angle, shadowing and drainage influence how fresh chemistry reaches the surface.
  • Exposure time: conveyor speed must remove all unwanted copper without leaving the protected feature in the etchant longer than necessary.
  • Panel layout: copper density, orientation, leading-edge effects and solution retention can create within-panel variation.

No single setpoint proves that the process is uniform; the stronger signal is how process readings track with measured geometry. If trace width drifts while bath readings remain stable, inspect imaging, nozzles, transport and panel distribution. A similar shift across all panel positions points more strongly to chemistry or exposure time. Trend product measurements alongside process inputs.

What Causes Common PCB Etching Defects?

Common printed circuit board etching defects are caused by incomplete development, damaged resist, incorrect exposure time, uneven spray delivery, unstable etchant conditions or unsuitable CAM compensation. The visible defect alone does not identify the source: the same open circuit may result from missing artwork, a resist pinhole or excessive local copper loss. Diagnosis must therefore use the defect type, location and repetition pattern.

Defect Likely Causes Verification Correction Direction
Residual copper Resist scum, short dwell, weak spray or high local copper loading AOI, magnified inspection and panel-location map Separate blocked copper exposure from insufficient etching before changing the process
Copper bridges or shorts Incomplete development, trapped solution, local shadowing or insufficient field-copper removal AOI, continuity/isolation test and microscopy Correct development or spray access, then verify the affected spacing across the panel
Narrow conductors Excess dwell, lateral attack, weak resist edges or insufficient CAM compensation Width measurements across locations and orientations Separate process drift from artwork error and compare results with the finished-width requirement
Notches or breaks Resist pinholes, scratches, contamination or local spray concentration AOI, microscopy and pre-etch resist inspection Correct cleaning, handling or resist integrity before adjusting the etchant
Rough edges Poor resist definition, unstable reaction or uneven surface condition Edge microscopy and cross-section where critical Check imaging and surface preparation, then confirm chemistry and spray stability
Panel-position variation Nozzle pattern, drainage, transport, orientation or copper imbalance Repeated measurements mapped by panel coordinate Correct equipment or panel strategy according to the repeatable location pattern

Map whether a defect follows a circuit feature, panel coordinate, trace orientation or entire lot. Repetition on the same feature points toward data or imaging; repetition at the same panel position suggests equipment or transport. A lot-wide shift is more consistent with shared material or process conditions. This pattern-based approach directs corrective action toward the source rather than the symptom.

How Are Etched PCB Features Inspected and Verified?

Printed circuit board etching is verified by combining pattern inspection, dimensional evidence and electrical testing. No single method proves all three. An AOI pass does not establish every critical width, and an electrical pass does not prove that a conductor has the required cross-section.

Automated optical inspection of an etched bare PCB production panel
  1. Confirm the inspection reference. Match the layer to the approved artwork, fabrication drawing, netlist and revision. Define the product class, critical features, sampling plan and measurement method before results are accepted.
  2. Run automated optical inspection. Compare the etched image with controlled data to identify opens, shorts, residual copper, notches and missing or extra features. Review repeated detections by feature and panel position rather than relying on the total machine count.
  3. Measure critical geometry. Check specified trace widths, spaces, annular features and registration using calibrated equipment and a documented sampling plan. Record the measurement location and whether a reported width is the top, base or optical surface width.
  4. Examine the conductor cross-section where necessary. Use a microsection or representative coupon to verify copper thickness, top and base widths, sidewall profile and undercut. This evidence is especially useful for fine traces, thick copper and controlled-impedance structures.
  5. Verify electrical connectivity. Test continuity and isolation against the released netlist after the conductor pattern is complete. Electrical testing can confirm opens and shorts, but it cannot prove that every conductor meets its dimensional or cross-sectional requirement.
  6. Review and retain the release evidence. Process nonconforming results under the agreed acceptance procedure, then link AOI, dimensional, cross-section and electrical records to the correct revision, panel or lot. Release the layer only when the specified requirements are supported by the required evidence.

For printed circuit board etching, IPC-A-600 can support visual acceptability assessment, while IPC-6012 can define performance and qualification requirements for rigid printed boards when invoked by the contract. Neither document removes the need to state the product class, drawing requirements and agreed measurement method. Acceptance must be tied to the applicable order requirements, not to a standard name used without scope.

How Does PCB Etching Affect Fine Traces and Controlled Impedance?

Printed circuit board etching affects controlled impedance by changing the conductor width and sidewall profile of the transmission line. Dielectric thickness, dielectric properties, copper thickness and reference-plane geometry also matter, but a conductor narrower than the modeled value can shift impedance away from its target even when the laminate and stackup are correct.

A trapezoidal trace does not have one universally representative width. A field solver may use the top width, base width or the full sidewall profile. The drawing and impedance model should identify the stackup, target, tolerance, reference layers and finished copper condition so that the modeled geometry reflects the selected production process.

Fine traces have less absolute width margin. Thick copper, isolated neck-downs and dense routing can further restrict the usable process window. Impedance release should connect modeled geometry, finished measurements and coupon results rather than relying on the nominal CAD width alone.

What PCB Design Inputs Reduce Etching Risk Before Fabrication?

The design inputs that reduce etching risk are clear copper requirements, manufacturable trace and spacing, identified critical features, balanced copper distribution and one consistent data revision. CAM compensation can correct a validated process allowance, but it cannot resolve contradictory files or geometry whose required width and clearance cannot both be preserved.

  • Define copper correctly: distinguish starting foil, plated copper and required finished copper for each relevant layer.
  • Use realistic geometry: reserve minimum trace and spacing for unavoidable locations instead of applying the limit across the complete board.
  • Identify critical dimensions: flag impedance nets, fine-pitch pads, neck-downs, safety clearances and current-carrying conductors.
  • Review copper distribution: check isolated fine lines beside large clear areas, dense fields and strongly unbalanced panel regions.
  • Align every file: resolve conflicts among Gerber or ODB++, drill data, netlist, stackup, fabrication drawing and revision notes.
  • Approve DFM exceptions: document any geometry change, compensation exception or acceptance decision before tooling.

A useful DFM response should identify the exact layer and feature, the released requirement, the predicted manufacturing risk and the proposed disposition. ā€œUse best effortā€ is not an acceptance criterion. Resolve critical etching exceptions before the production image is released.

What Information Should Be Confirmed Before PCB Fabrication?

Before fabrication, confirm the image data, drill files, fabrication drawing, stackup, copper construction, critical geometry, impedance requirements, acceptance evidence, quantity and revision. Every file must describe the same board, and every dimension requiring special control must be identifiable before CAM and tooling begin.

  • Image data: submit Gerber or ODB++, aperture information where required, drill files and a netlist generated from the same released revision.
  • Fabrication drawing: define board dimensions, layer order, material notes, surface finish and any controlled features.
  • Copper construction: state the starting foil and required finished copper where applicable, avoiding ambiguous shorthand.
  • Critical geometry: identify the minimum trace and spacing, local tolerances, fine-pitch areas and any dimension that cannot be altered during CAM.
  • Impedance control: provide target values, tolerances, reference layers, stackup constraints and coupon requirements.
  • Acceptance evidence: specify the applicable class, electrical test, dimensional records, coupon or microsection needs and document retention.
  • Order context: provide prototype and production quantities, expected follow-on volume and the controlled revision status.

Before approving printed circuit board etching for production, confirm four gates: the files agree, the copper construction is clear, the critical dimensions are manufacturable, and the inspection plan can prove the requirement. Quotation differences are difficult to compare when suppliers are evaluating different assumptions.

FAQs About Printed Circuit Board Etching

Q1: How long does industrial PCB etching take?

A1: The machine exposure depends on the copper depth to be removed, etchant condition, temperature, spray transfer and conveyor setting. It cannot be converted into one universal time. Cleaning, imaging, development, stripping and inspection also occur around the etch step, so etcher dwell time is not the same as PCB manufacturing lead time.

Q2: Can solder mask compensate for an over-etched trace?

A2: No. Solder mask protects selected surfaces and defines solderable openings, but it does not restore copper removed from a conductor. A trace below its dimensional requirement must be dispositioned against the applicable acceptance criteria. Covering the trace cannot recover its cross-sectional area, resistance margin or impedance geometry.

Q3: Can PCB etching defects be repaired after manufacturing?

A3: Some localized conductor defects may be repairable under an approved procedure, but the decision depends on defect type, location, product class and contractual acceptance. Widespread width loss, repeated process defects or residual-copper spacing violations may require rejection. Any permitted repair needs documented authorization, inspection and traceability.

Q4: Does PCB surface finishing happen before or after etching?

A4: The permanent solderable surface finish is generally applied after the outer-layer conductor pattern has been formed and solder mask has defined the exposed pads. Temporary metal used to protect a pattern during outer-layer etching serves a different manufacturing role. An etch resist must not be confused with the final surface finish specified on the fabrication drawing.

Q5: Can the etching process damage plated through-holes?

A5: Outer-layer processing is designed so the metallic resist protects the required pattern, including the copper associated with plated features, while exposed surface copper is removed. Incomplete protection or an unsuitable process can still create damage. Hole reliability must be evaluated through the complete drilling, desmear, plating, etching and inspection sequence, not etching alone.

Q6: Does etching change pad dimensions as well as trace width?

A6: Yes. Lateral copper loss can affect pads, neck-downs and other protected features as well as straight traces. Compensation must therefore evaluate the complete image. Pad diameter, annular-ring intent, neighboring clearance and later solder-mask registration must remain compatible; enlarging every feature globally can solve one width problem while creating a spacing problem.

Q7: Is ferric chloride suitable for industrial PCB production?

A7: Ferric chloride removes copper and is common in laboratory or small-scale work, but that does not make it the automatic choice for a controlled production line. Industrial selection considers resist compatibility, regeneration, copper loading, equipment, process monitoring and waste controls. Repeatability and compatibility with the complete route matter more than chemical familiarity alone.

Q8: What is the difference between PCB etching and PCB milling?

A8: Etching removes exposed copper around a protected image, while milling uses a cutting tool to create isolation paths. Milling can be useful for selected prototypes but introduces tool-diameter, wear, burr and flatness limits. It also does not replace multilayer registration or plated-hole processing. The two methods are not direct production equivalents.

Q9: Why is a pilot lot useful before volume production?

A9: A pilot lot checks whether the released data, copper construction, compensation and inspection plan work together on the intended route. It is particularly useful for fine lines, thick copper, tight impedance tolerance or a new stackup. Pilot evidence should close documented DFM questions before volume release, but it does not replace production control or lot acceptance.

Q10: Which records should be requested for critical etched features?

A10: The required record set depends on product risk and the purchase specification. It may include approved DFM exceptions, controlled fabrication data, AOI status, dimensional measurements, electrical-test status and relevant coupon or microsection results. The essential requirement is traceability to the correct revision, panel or lot and acceptance decision, with an agreed retention period.
Reliable printed circuit board etching depends on dimensional control throughout the production route. The production image, copper construction, etch behavior and inspection plan must work as one system.

For a fabrication review and quotation, email sales@bestpcbs.com. Submit your Gerber or ODB++ data, drill files, fabrication drawing, stackup, finished-copper requirements, minimum trace and spacing, impedance targets, quantity and inspection requirements. The review can then identify etching-sensitive geometry, conflicting specifications and verification needs before tooling and production release.

You may also like

Best Manufacturers for High-Density PCB Prototypes in USA Projects

July 23rd, 2026

High-density PCB prototypes are different from standard FR4 prototype boards. A simple board may only need basic fabrication checks, but a high-density prototype can involve HDI structures, fine line/space, microvias, buried vias, controlled impedance, BGA via-in-pad, heavy copper, thin dielectric layers, or tight assembly requirements. For buyers comparing the best manufacturers high-density PCB prototypes USA projects may require, the real question is whether the supplier can review these risks before production starts.

For USA engineering teams, choosing a manufacturer is not only about price or location. As a quick turn HDI PCB prototype manufacturer, EBest Circuit (Best Technology) supports custom PCB fabrication, HDI PCB manufacturing, stackup review, DFM checking, component sourcing, SMT assembly, testing, and small-batch production. If your project includes HDI structure, impedance notes, BGA areas, special material, or urgent prototype validation, send your Gerber files, stackup drawing, BOM, assembly notes, or questions to sales@bestpcbs.com for engineering review.

best manufacturers high-density pcb prototypes usa

How to Compare Manufacturers for High-Density PCB Prototypes in the USA?

When engineers search for the best manufacturers for high-density PCB prototypes in the USA, the useful question is not ā€œWhich company is the biggest?ā€ It is ā€œWhich supplier can handle this prototype without creating hidden risk?ā€

For simple 2-layer or 4-layer boards, many online prototype platforms may be enough. For high-density PCB prototypes, compare manufacturers by practical project fit:

  • HDI capability, not only standard through-hole multi-layer PCB
  • Blind via, buried via, laser via, and via-in-pad review
  • Stackup review before production
  • Controlled impedance support and test reports
  • BGA routing and soldering risk control
  • Resin-filled and plated-over via capability
  • Prototype-to-small-batch production support
  • PCB fabrication plus PCBA assembly if SMT is required
  • Clear communication before EQ, production files, or stackup changes

A USA buyer may choose a domestic manufacturer for local communication, special compliance needs, or extremely short domestic logistics. Many USA engineering teams also work with overseas manufacturers when the project needs HDI capability, cost control, flexible small-batch production, and one-stop PCB plus PCBA support.

Best Manufacturers High-Density PCB Prototypes USA

When buyers search for the best manufacturers high-density PCB prototypes USA, they are usually comparing more than company names. The real decision is which supplier fits the board complexity, delivery pressure, quality requirement, and next-stage production plan.

Sierra Circuits (California, USA)

  • Main Business: Quick-turn PCB prototypes, HDI boards, PCB assembly.
  • Strength: Strong for U.S.-based prototype builds, DFM support, HDI, microvias, via-in-pad, and controlled impedance projects.
  • Best Fit: Engineering teams that need fast domestic prototype fabrication and assembly.
  • Check Before Ordering: Confirm HDI stackup, microvia structure, impedance report, IPC class, and assembly scope.

AdvancedPCB (USA)

  • Main Business: Quick-turn PCB fabrication, HDI, UHDI, flex, rigid-flex, and assembly.
  • Strength: Good for engineers who need fast U.S. prototype support with CAM review and flexible turnaround options.
  • Best Fit: R&D teams working on HDI prototypes, multilayer boards, or urgent design validation.
  • Check Before Ordering: Confirm whether the job is standard technology, HDI, or advanced technology, because lead time and cost can change quickly.

Summit Interconnect (USA)

  • Main Business: Complex rigid PCBs, HDI PCBs, rigid-flex, RF/microwave boards, and prototype assembly.
  • Strength: Strong in high-density rigid boards, blind vias, buried vias, via fill, microvias, and controlled manufacturing for demanding projects.
  • Best Fit: Customers who need U.S.-based support for complex HDI prototypes and production transition.
  • Check Before Ordering: Confirm layer count, sequential lamination, via fill type, panel size, and inspection documentation.

TTM Technologies (USA / Global)

  • Main Business: Advanced multilayer PCBs, HDI, RF, high-speed, high-layer-count, and heavy copper boards.
  • Strength: Very strong capability base for complex, high-reliability PCB programs.
  • Best Fit: Larger programs that need advanced engineering, repeatability, and production scale.
  • Check Before Ordering: For small prototype quantities, confirm whether the project fits their business model, lead time, and minimum order expectations.

Sanmina (USA / Global)

  • Main Business: Advanced PCBs, high-speed backplanes, HDI, flex circuits, prototyping, and volume production.
  • Strength: Strong for high-speed, high-layer-count, and complex electronic systems.
  • Best Fit: Customers moving from advanced prototype validation toward larger production programs.
  • Check Before Ordering: Confirm whether you need only PCB fabrication or broader system-level manufacturing support.

Benchmark Electronics (USA / Global)

  • Main Business: PCBA, SMT assembly, BGA assembly, inspection, testing, and system-level manufacturing.
  • Strength: Strong assembly and quality control support for regulated and complex electronics.
  • Best Fit: Projects where the high-density PCB prototype also needs assembly, inspection, testing, and traceability.
  • Check Before Ordering: If the need is only bare PCB fabrication, confirm whether Benchmark is the right fit or whether a PCB-focused supplier is better.

EBest Circuit (Best Technology) (China Serving USA Projects)

  • Main Business: Custom PCB fabrication, HDI PCB, rigid-flex PCB, flex PCB, ceramic PCB, metal core PCB, component sourcing, SMT assembly, and PCBA testing.
  • Strength: Suitable for USA customers who need engineering review, competitive prototype cost, small-batch support, and one-stop PCB + PCBA service.
  • Best Fit: HDI prototype projects involving stackup review, microvias, buried vias, impedance control, BGA via-in-pad, ENIG, DFM review, SMT, and testing.
  • Check Before Ordering: Share Gerber files, stackup drawing, BOM, impedance notes, assembly requirements, and inspection requirements before production, so the engineering team can review manufacturability early.

Practical takeaway:
If the project must be manufactured domestically in the USA, companies such as Sierra Circuits, AdvancedPCB, Summit Interconnect, TTM, or Sanmina may be stronger fits. If the project needs HDI prototype manufacturing, PCBA assembly, sourcing support, and cost-controlled small-batch production for a USA customer, EBest Circuit can be a practical option to compare.

High-Density PCB Prototype Requirements Before Quotation

A high-density PCB prototype should not be quoted only by layer count and board size. The key risks are often hidden inside the files.

Before quotation, the manufacturer should review:

  • Layer count and finished board thickness
  • FR4 Tg requirement or special laminate requirement
  • Inner and outer copper thickness
  • Minimum trace and spacing
  • Minimum mechanical drill and laser via size
  • Blind via and buried via structure
  • BGA pitch and via-in-pad requirement
  • Controlled impedance lines
  • Solder mask bridge risk
  • Surface finish, such as ENIG or ENEPIG
  • Panelization and SMT fiducial requirements
  • Required reports, such as impedance, electrical test, COC, or inspection reports

For EBest Circuit projects, quotation review often includes checking whether the customer’s Gerber or ODB++ files, drawings, stackup notes, readme files, and technical specifications are complete enough for production. If information is unclear, the engineering team raises EQ before manufacturing instead of guessing during production.

EBest Circuit HDI PCB Prototype Manufacturing Capabilities

For HDI PCB prototype manufacturing, capability data is more useful than a general statement such as ā€œwe can make advanced PCBs.ā€

EBest Circuit supports high-density PCB prototypes with options such as:

  • Layer count: Standard high-Tg FR4 can support 1-10 layers, with special processes extending to 10-32 layers.
  • High-Tg materials: FR4 Tg 170-180 is available. Special material options can include Isola 370HR, FR408HR, Rogers, Taconic, PTFE, and other advanced laminates when required.
  • Laser vias: Laser blind/buried vias can reach 0.10mm.
  • Mechanical holes: Special process minimum finished hole diameter can reach 0.15mm.
  • Aspect ratio: Standard through-hole aspect ratio is 8:1, with special process support up to 10:1.
  • Fine line/space: Special process support can reach 3/3mil for 1/2oz or 1oz copper.
  • Surface finish: ENIG, ENEPIG, OSP, HASL, immersion silver, immersion tin, and hard gold fingers are available depending on the project.

These numbers are not just technical decoration. They help engineers judge whether the prototype is inside a stable manufacturing window or already close to a process limit.

Microvias, Blind Vias, and Buried Vias in High-Density PCB Prototypes

High-density interconnect PCB projects often depend on via structure. A standard through via connects from the top layer to the bottom layer. Blind vias connect an outer layer to one or more inner layers. Buried vias connect only internal layers. Microvias are usually laser-drilled small vias used for dense routing, especially around BGA areas.

For HDI boards, the structure is often described as 1+N+1, 2+N+2, or 3+N+3. The number outside the core structure shows build-up layers. More build-up layers usually mean more lamination steps, higher process complexity, and more production control points.

A manufacturer should check:

  • Whether stacked or staggered microvias are used
  • Whether the via structure matches lamination capability
  • Whether laser via size and pad size are manufacturable
  • Whether resin filling or via plating is needed
  • Whether the via structure affects impedance, reliability, or yield

This is where high-density PCB prototypes require engineering review, not only price comparison.

best manufacturers high-density pcb prototypes usa

Stackup and Material Review for High-Density PCB Prototypes

Stackup review is one of the most important steps in high-density PCB prototype manufacturing. The stackup affects impedance, drilling, lamination, warpage, copper balance, thickness tolerance, and assembly stability.

A practical stackup review should check:

  • Total finished thickness
  • Core and prepreg selection
  • Copper thickness
  • Signal, power, and ground layer arrangement
  • Impedance reference layers
  • Material availability
  • Copper balance between layers
  • Lamination risk
  • Final surface finish

For HDI prototypes, stackup review is especially important when the board uses thin dielectrics, high-Tg material, heavy copper, buried vias, laser vias, or controlled impedance. If a material is not commonly stocked, it should be discussed before production because material lead time can directly affect delivery.

EBest Circuit has supported PCB and PCBA projects since 2006, and many engineering and production team members have worked with complex stackup, material, and process questions for more than 10 years. That experience matters most when a prototype file looks manufacturable at first glance but still contains hidden process risk.

Controlled Impedance and BGA Via-in-Pad Risks in HDI Prototypes

Controlled impedance is common in high-density PCB prototypes used for imaging products, communication modules, embedded systems, industrial controllers, and high-speed data boards. The manufacturer should not wait until the end of production to think about impedance. Trace width, dielectric thickness, copper thickness, reference layer, and tolerance must be reviewed before production.

BGA via-in-pad is another major risk. If a via is placed inside or near a BGA pad, solder can flow into the via during reflow. This may cause insufficient solder volume, weak joints, hidden opens, or X-Ray inspection difficulty.

Common manufacturing controls include:

  • Resin-filled vias
  • Plated-over vias
  • Planarization
  • Proper solder mask opening
  • ENIG surface finish
  • BGA pad and via review before fabrication

If the prototype will be assembled after PCB fabrication, these details should be reviewed as PCB plus PCBA requirements, not as two separate jobs.

Quick-Turn High-Density PCB Prototypes and Lead Time Factors

For high-density PCB prototypes, lead time depends on more than the order quantity. Even if the customer only needs 5 or 10 pcs, the board still goes through engineering review, stackup confirmation, drilling, plating, imaging, solder mask, surface finish, electrical testing, and final inspection.

For standard FR4 prototype boards under 1 square meter, EBest Circuit can usually support the following reference lead times:

PCB TypeNormal Lead TimeFastest Lead Time
1-layer FR4 prototype7 days24 hours
2-layer FR4 prototype8 days24 hours
4-layer FR4 prototype10 days48 hours
6-layer FR4 prototype10 days72 hours
8-layer FR4 prototype12 days72 hours
10-layer or aboveTo be confirmedTo be confirmed

For high-density PCB prototypes, the final lead time should be confirmed after file review because the following requirements may add process time:

  • HDI stackup or sequential lamination
  • Blind vias, buried vias, or microvias
  • Via-in-pad, resin filling, or copper paste filling
  • Controlled impedance and test coupons
  • Heavy copper or high-Tg material
  • ENIG or other special surface finishes
  • Tight line/space or small finished holes
  • 100% electrical testing, inspection reports, or PCBA assembly

For projects that also need assembly, EBest Circuit can support PCB fabrication, component sourcing, SMT assembly, testing, and packing under one workflow. PCBA prototype lead time can be as fast as 2 days for urgent assembly projects, while normal PCBA service is usually about 1 week after PCB and components are ready.

The safest way to confirm lead time is to send the Gerber files, stackup drawing, BOM, assembly notes, impedance requirements, and delivery target before production. This helps the engineering team check whether the prototype can follow a fast-turn schedule or needs a more controlled manufacturing plan.

USA PCB Prototype Manufacturers vs Overseas HDI PCB Suppliers

USA PCB prototype manufacturers are useful when a project needs domestic production, local communication, or local compliance. Many USA suppliers also have strong experience in aerospace, medical, RF, and high-reliability PCB work.

Overseas HDI PCB suppliers can be useful when the buyer needs:

  • Competitive prototype and small-batch cost
  • Flexible engineering communication
  • PCB fabrication plus component sourcing
  • SMT assembly and testing
  • Broader PCB options under one supplier
  • Production scalability after prototype validation

For USA engineering teams, the decision does not have to be ā€œUSA supplier or overseas supplierā€ in a simple way. A practical sourcing strategy is to match the supplier to the project risk.

Choose domestic manufacturing when local control is mandatory. Choose a qualified overseas partner when the project needs HDI capability, PCBA support, cost control, and responsive engineering review.

High-Density PCB Prototype Case Study for a USA Project

A USA customer needed a small-batch high-density PCB prototype for an industrial power control module. The order quantity was only a few pieces, but the board structure and reliability requirements were closer to a demanding production project than a simple prototype.

Project requirements

  • Customer region: USA
  • Application: Industrial power control module
  • Quantity: 5 pcs prototype build
  • PCB type: 14-layer high-density PCB
  • Material: High-Tg FR4, Tg170
  • Copper thickness: 3oz inner and outer layers
  • Finished thickness: 3.2mm +/-10%
  • Surface finish: ENIG 2u”
  • Via structure: L2-L13 buried vias
  • Via process: Copper paste filled vias
  • Quality level: IPC Class 3 requirement
  • Testing: 100% electrical test before shipment
  • Production control: Production stackup and files confirmed with the customer before fabrication

Manufacturing challenges

  • The 14-layer structure required stackup review before production.
  • 3oz copper increased lamination and resin filling risk.
  • Buried vias and copper paste filled vias had to be planned before final build.
  • The prototype quantity was small, but the inspection requirement was strict.
  • Board thickness, heavy copper, and buried via structure had to be controlled together.

EBest Circuit solution

  • Reviewed the customer files and prepared a production-ready stackup.
  • Confirmed production files and stackup with the customer before manufacturing.
  • Planned buried via and copper paste filling requirements before lamination.
  • Controlled heavy copper and board thickness to reduce warpage and lamination risk.
  • Used ENIG surface finish for stable solderability and surface protection.
  • Performed 100% electrical testing before shipment.
  • Followed IPC Class 3 quality requirements for the build.

Result

The customer received a high-density prototype that matched the required layer structure, heavy copper design, buried via process, surface finish, and inspection standard. For this project, the value was not only producing five boards. The value was turning a complex prototype into a controlled manufacturing path before functional validation and possible next-stage production.

best manufacturers high-density pcb prototypes usa

Why Work with EBest Circuit for High-Density PCB Prototype Projects?

EBest Circuit is suitable for high-density PCB prototype projects when the customer needs engineering support, not only bare PCB fabrication.

The company provides PCB fabrication, HDI PCB manufacturing, component sourcing, SMT assembly, testing, DFM review, BOM review, and production communication. This helps keep important details visible from file review to final delivery.
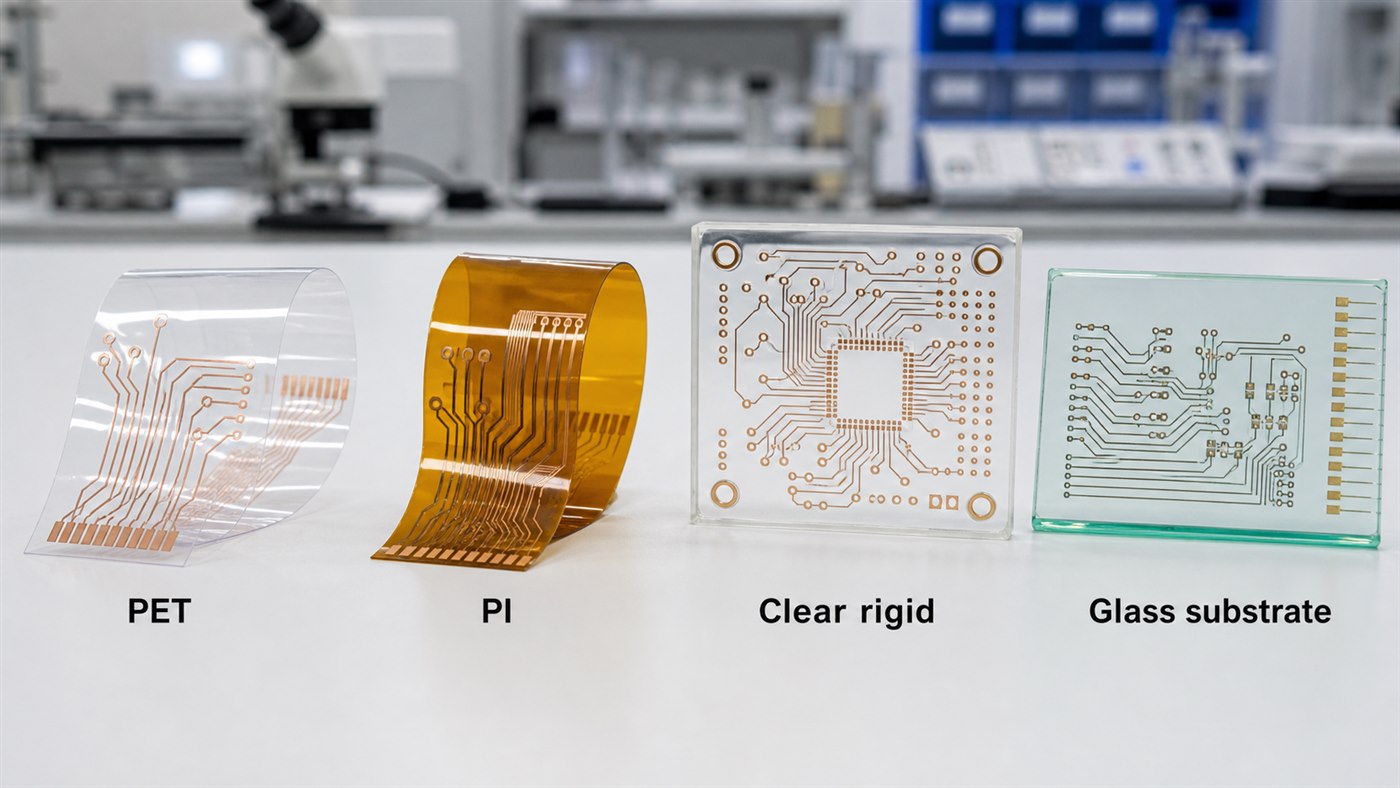
What this means for prototype projects

  • Stackup, material, and copper thickness are reviewed before production.
  • HDI via structures are checked before lamination.

  • BGA via-in-pad risks are reviewed before SMT.
  • Impedance requirements can be planned with coupons and reports.
  • Production files can be confirmed before fabrication starts.
  • PCB and PCBA requirements stay under one workflow when assembly is needed.
  • Quality inspection, electrical testing, and shipment documents can be prepared according to project needs.

EBest Circuit has served engineers across more than 40 countries and supports quality systems including ISO9001, ISO13485, IATF16949, AS9100D, REACH, RoHS, and UL-related requirements. For high-density prototypes, that background helps when the project needs both fast response and controlled production discipline.

FAQs about High-Density PCB Prototypes and Manufacturers

1. What makes a PCB prototype ā€œhigh-densityā€?
A high-density PCB prototype usually has tighter routing, smaller vias, finer line/space, BGA components, blind or buried vias, microvias, or controlled impedance requirements. HDI PCB is one common type of high-density PCB.

2. What is the difference between HDI PCB and standard multilayer PCB?
A standard multilayer PCB often uses through holes for interconnection. An HDI PCB may use laser microvias, blind vias, buried vias, sequential lamination, and finer routing to support compact and high-performance electronics.

3. Can high-density PCB prototypes be made quickly?
Yes, but the lead time depends on material, layer count, via structure, lamination steps, surface finish, impedance testing, and assembly requirements. A realistic lead time should be confirmed after file review.

4. Why is BGA via-in-pad risky in HDI prototypes?
If via-in-pad is not treated correctly, solder may flow into the via during reflow. This can cause weak BGA joints, insufficient solder, hidden opens, or difficult X-Ray inspection. Resin filling and plated-over vias are common controls.
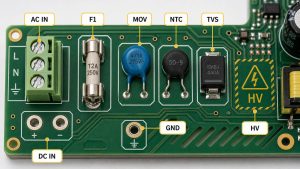
5. What files should I send for a high-density PCB prototype quote?
Please send Gerber or ODB++ files, stackup drawing, drill files, impedance notes, BOM, placement file, assembly notes, surface finish requirements, panel requirements, and any inspection or report requirements.

If you are comparing manufacturers for a high-density PCB prototype, you do not have to make the sourcing decision from a price sheet alone. Send your Gerber files, stackup drawing, BOM, impedance notes, or assembly requirements to sales@bestpcbs.com. EBest Circuit’s engineering team can review the manufacturing path before production, so your prototype starts with clearer risks, clearer process control, and a supplier team that understands both PCB fabrication and PCBA delivery.

You may also like

GND Shielding in PCB Layout and PCBA Manufacturing

July 21st, 2026

GND shielding is often discussed when a PCB project has noise, EMI, high-speed signals, RF areas, cable shields, USB connectors, CAN interfaces, sensors, or metal enclosures. For engineers, the question is not only ā€œWhat is ground?ā€ but ā€œHow should shielding connect to GND, and how can the approved layout be manufactured reliably?ā€

EBest Circuit (Best Technology) supports PCB fabrication, PCB layout manufacturability review, DFM checking, controlled impedance production, component sourcing, PCBA assembly, inspection, and testing coordination. If your project has GND shielding, shield GND, connector shielding, cable grounding, EMI, or PCBA shielding requirements, please feel free to send your Gerber files, stackup, BOM, drawings, impedance notes, and assembly requirements to sales@bestpcbs.com for engineering review before production.
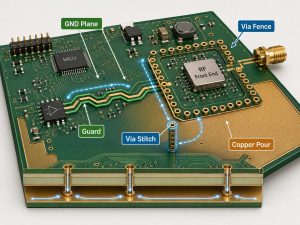

gnd shielding

GND Shielding in PCB Layout Basics

GND shielding means using ground-related structures to reduce unwanted noise coupling and improve signal stability. In PCB layout, it may include ground planes, guard traces, via stitching, shield connection pads, connector shell grounding, shielding cans, or controlled return paths.
The purpose is not to ā€œblock everythingā€ with copper. A useful GND shielding structure should provide a low-impedance path for noise current and a stable reference for sensitive signals.

In real PCB projects, GND shielding is often used around:

  • High-speed digital traces
  • RF or antenna areas
  • Analog sensor circuits
  • USB, CAN, Ethernet, or other connector zones
  • Cable shield termination points
  • Shielding cans or metal enclosure contact areas
  • Mixed-signal boards with noise-sensitive sections

In many projects, GND shielding is only one part of a broader PCB EMI shield strategy, especially when the board includes high-speed signals, RF areas, connectors, shield cans, or metal enclosure contact points.

For a PCB manufacturer, the responsibility is to protect the approved shielding intent during manufacturing. That means checking stackup, copper thickness, spacing, solder mask openings, via quality, impedance requirements, and assembly details before production.

gnd shielding

Shield GND vs Signal GND in PCB Projects

Shield GND and signal GND are related, but they are not always the same node in a product.

  • Signal GND is usually the circuit reference used by components and signals.
  • Shield GND is often related to cable shields, connector shells, chassis ground, enclosure contact, or EMI shielding structures.

Depending on the product, shield GND may be connected to signal GND directly, connected through a capacitor or RC network, connected to chassis ground, or handled at a specific entry point near the connector. The correct method depends on the customer’s circuit design, EMC strategy, safety requirements, and product environment.

From a manufacturing view, the key checks include:

  • Is the shield pad clearly defined in the Gerber?
  • Is the connector shell footprint manufacturable?
  • Are solder mask openings correct?
  • Is the copper area large enough for reliable soldering?
  • Are vias, slots, or mounting holes placed correctly?
  • Are clearance and creepage requirements respected?
  • Does the assembly note match the PCB drawing?

EBest Circuit does not guess the customer’s grounding architecture. Our role is to review whether the approved layout can be manufactured and assembled as intended.

gnd shielding

Ground Shield for High-Speed Signals and EMI Control

A ground shield can help high-speed and noise-sensitive signals when it is placed and connected correctly. The most common method is a solid reference plane under controlled traces, because the return current needs a continuous path.

If a high-speed signal crosses a split ground plane, the return path may be interrupted. This can increase loop area, noise, EMI risk, and signal integrity problems. For impedance-controlled boards, the trace width, dielectric thickness, copper thickness, and reference layer must be reviewed together.

Useful PCB shielding structures may include:

  • Continuous GND reference planes
  • Ground copper near sensitive areas
  • Guard traces for high-impedance analog signals
  • Via stitching along board edges
  • Via fences near RF or noisy zones
  • Shield can grounding pads
  • Connector shell grounding pads

The layout decision belongs to the customer’s engineering team. The manufacturing review should confirm that these structures can be produced consistently without causing solder mask, spacing, plating, or assembly issues.

Cable Shield Grounding: One End or Both Ends?

Many searches around GND shielding are really about cable shield grounding. Engineers often ask whether a cable shield should be connected to GND at one end, both ends, or through a hybrid connection.

There is no single answer for every product.

MethodCommon Use
One-end groundingHelps reduce low-frequency ground loop risk
Both-end groundingOften used for high-frequency shielding paths
Hybrid groundingUses components or chassis strategy
Floating shieldUsually needs careful review

For PCB and PCBA projects, the board must match the customer’s grounding method. If the cable shield connects to a connector shell, shield pad, chassis point, or mounting structure, the PCB files should make that clear.

Important manufacturing points include connector footprint accuracy, plated slot quality, solderability of shell pads, mechanical fit, and clear assembly notes.

gnd shielding

USB, CAN, and Connector Shield GND Notes

USB, CAN, Ethernet, and industrial connectors often bring GND shielding questions into PCB projects. The customer may specify how shield GND, signal GND, chassis ground, or enclosure contact should be handled.

For example:

  • USB connector shells may need shield pads and controlled grounding strategy
  • CAN interfaces may involve cable shield or chassis connection notes
  • Ethernet connectors may have shield pins, magnetics, or chassis-related requirements
  • Industrial modules may need enclosure contact or mounting-hole grounding
  • Sensor boards may need shielded cable termination near the connector

The PCB manufacturer should not change these connections without approval. However, the manufacturer should check whether the connector shell pads, mounting holes, copper clearances, solder mask openings, and plating requirements are clear before production.

This is where DFM review is useful. It helps catch details before SMT, not after the first prototype fails inspection.

gnd shielding

Ground Planes, Guard Traces, and Shielding Vias

GND shielding is usually more effective when several layout details work together.

  • Ground planes: A solid GND plane gives signals a stable return path and helps reduce loop area.
  • Guard traces: Guard traces are often used around sensitive analog or high-impedance signals. They must be connected correctly to the intended reference.
  • Shielding vias: Via stitching can connect ground copper between layers and help reduce gaps in shielding structures.
  • Via fences: For RF or noisy areas, via fences may help define a boundary, but the spacing and placement should follow the customer’s RF/layout requirements.
  • Copper pours: Copper pours should not create isolated copper islands or unexpected coupling paths.

For manufacturing, these details affect drilling, plating, solder mask, impedance, copper balance, and inspection. A shielding layout that looks good in CAD still needs to be manufacturable.

gnd shielding

GND Shielding Checks Before PCB Manufacturing

Before a GND shielding PCB moves into production, EBest Circuit focuses on whether the files, stackup, and assembly requirements are clear enough to build.

Check ItemWhat We Review
Gerber and ODB++Copper, mask, drill, outline
StackupLayer order and reference planes
Impedance notesTrace width and dielectric control
Shield padsConnector and shell solder areas
Via structureStitching, grounding, filled vias
Copper spacingClearance and manufacturability
Assembly notesShield cans, connectors, grounding points
Testing notesElectrical and functional requirements

This review is especially important for prototype and small-batch projects, because early mistakes can affect EMI testing, connector reliability, SMT yield, and project schedule.

PCBA Shielding and Assembly Quality Control

GND shielding does not end when the bare PCB is fabricated. Many shielding requirements become visible during assembly.

For PCBA projects, EBest Circuit checks:

  • Shield can footprint and soldering area
  • Connector shell solder joints
  • SMT placement around shielded areas
  • Solder mask openings near grounding pads
  • Cleanliness around connectors and RF areas
  • AOI inspection after SMT
  • X-Ray inspection when BGA or hidden joints are involved
  • Functional test coordination when required

If the board includes a shielding can, the soldering process must support reliable contact. If the board has connector shield pads, the shell must sit correctly. If the product uses conformal coating, potting, or enclosure grounding later, those process notes should be reviewed before assembly.

When shielding covers, connector shell grounding, or board-level shielding structures are involved, the manufacturing review should also consider solderability, grounding contact, mask openings, and assembly stability. These points are also important in an EMI shield PCB project.

A small grounding or shielding detail can become expensive if it is discovered after SMT. That is why EBest Circuit keeps PCB fabrication and PCBA assembly notes in the same review flow.

GND Shielding Case Study at EBest Circuit

A U.S. customer developed an industrial IoT wireless module that required stable signal transmission, controlled impedance, and careful grounding around connector and communication areas. The customer supplied the approved PCB layout and specification files, and EBest Circuit reviewed the manufacturing path before production.

Project profile

  • 6-layer FR4 PCB
  • IT180 material, Isola 370HR or equivalent
  • Outer copper 1oz, inner copper 0.5oz
  • Finished thickness 1.6mm +/-10%
  • ENIG, Au 1u”
  • Green solder mask, white silkscreen
  • Differential impedance requirement
  • Bare PCB factory panelization
  • Production files confirmed by customer before manufacturing

Main risks

  • Differential signals needed stable impedance control
  • GND reference layers had to match the approved stackup
  • Connector and shield-related pads needed clear solder mask definition
  • Wireless and communication areas could not be treated like a simple FR4 board
  • Production files had to be confirmed before fabrication

EBest Circuit’s support

  • Reviewed stackup and impedance notes before production
  • Checked copper thickness, dielectric structure, and reference layers
  • Confirmed panelization before manufacturing
  • Protected the customer’s approved GND and shielding intent in fabrication
  • Prepared production data for customer confirmation
  • Supported the project from PCB fabrication toward assembly readiness

For this type of project, the value is not that the factory ā€œredesignsā€ the shielding strategy. The value is that the approved engineering intent is not lost during stackup review, fabrication, panelization, surface finish, and PCBA preparation.

FAQs about GND Shielding

1. What is GND shielding in PCB layout?
GND shielding is the use of ground planes, guard traces, via stitching, shield pads, connector grounding, or shielding structures to reduce noise coupling and support EMI control.

2. Is shield GND the same as signal GND?
Not always. Shield GND may connect to chassis, connector shells, cable shields, or enclosure grounding. Signal GND is usually the circuit reference. The connection method should follow the customer’s design.

3. Should a cable shield connect to GND at one end or both ends?
It depends on frequency, cable length, product structure, EMC requirements, and system grounding. One-end, both-end, and hybrid grounding can all be valid in different cases.

4. Does GND shielding replace a metal shield can?
No. Ground planes, shield GND, and shielding cans solve different parts of the EMI problem. Some products use only PCB-level shielding, while others need a shield can or metal enclosure.

5. What files should I send for a GND shielding PCB project?
Please send Gerber or ODB++ files, stackup, PCB drawing, impedance notes, BOM, placement file, assembly notes, connector datasheets, and any shielding or grounding requirements.

If your PCB or PCBA project includes GND shielding, shield GND, cable shield grounding, connector shell grounding, RF areas, high-speed signals, or EMI-related concerns, please contact sales@bestpcbs.com. EBest Circuit’s engineering team can help review the manufacturing and assembly path before production starts.

You may also like

Modern PCB Fast Prototyping Factory for Scalable Production

July 17th, 2026

PCB fast prototyping helps engineers move a new board from design files to a real, testable sample before committing to larger production. It is useful when a project needs to verify fit, routing, material selection, surface finish, soldering quality, component sourcing, assembly process, and early functional performance.

EBest Circuit (Best Technology) supports PCB fast prototyping, DFM review, PCB fabrication, component sourcing, SMT assembly, testing coordination, and small-batch production. If your project is ready for prototype review, send your Gerber files, BOM, drawing, stackup notes, impedance requirements, or assembly files to sales@bestpcbs.com. Our engineering team can help better check the manufacturing path before production starts.

PCB Fast Prototyping

How PCB Fast Prototyping Helps Validate a New Board

PCB fast prototyping is not only about making a board quickly. The real value is helping engineers find practical problems early.

A prototype can help verify:

Validation PointWhat Engineers Can Check
Board structureThickness, outline, holes, slots, panelization
MaterialsFR4, Tg value, copper weight, solder mask, surface finish
Assembly fitConnector position, component clearance, SMT feasibility
Manufacturing riskMinimum trace, spacing, drilling, plating, solder mask bridge
Production pathWhether the sample can move into small batch or mass production

For a simple FR4 PCB, the prototype may mainly confirm mechanical size and soldering quality. For HDI, impedance, flexible PCB, rigid-flex PCB, metal core PCB, or PCBA projects, fast prototyping becomes much more important because the first build can reveal stackup, fabrication, assembly, and testing risks.

A good fast prototype should not be treated as a one-time sample. It should be built in a way that makes the next production step easier.

EBest Circuit PCB Fast Prototyping Lead Time

PCB fast prototyping lead time should be checked by board type, layer count, standard specification, and whether the project includes SMT assembly. A simple FR4 prototype can move much faster than an HDI board, ceramic PCB, rigid-flex PCB, or PCBA project with component sourcing.

For standard FR4 prototypes under 1 square meter, EBest Circuit can use the following lead time range as a practical reference:

FR4 PrototypeNormal ServiceFastest Service
1 layer7 days24 hours
2 layers8 days24 hours
4 layers10 days48 hours
6 layers10 days72 hours
8 layers12 days72 hours
10+ layersTo be confirmedTo be confirmed

This reference is based on standard FR4 prototype conditions, such as 0.4-1.6mm board thickness, H/H or 1oz copper, lead-free HASL, green solder mask, white silkscreen, minimum line width/space above 8 mil, minimum hole above 0.3mm, and minimum annular ring above 10 mil.

For other prototype types, the lead time needs separate review:

Prototype TypePractical Lead Time Reference
1-layer MCPCBNormal about 4 days; urgent service can be discussed
2-layer MCPCBLonger than standard FR4 because of metal core processing
Rigid-flex PCBAbout 2 weeks for common 4-layer projects; complex builds need review
Ceramic PCBUsually longer because of substrate and process requirements
PCBA prototypeDepends on PCB, BOM sourcing, stencil, SMT, inspection, and packing

The fastest schedule is only realistic after the files are confirmed. If the board has special laminate, tight impedance, HDI microvias, heavy copper, black solder mask, fine-pitch SMT, special packing, or customer-approved production files, EBest Circuit will check these details before confirming the final delivery date.

For increasingly urgent projects, the best way is to send the Gerber files, BOM, drawings, stackup notes, and assembly files early, so the engineering and production teams can confirm whether the project fits fast service or needs a safer prototype schedule.

PCB Fast Prototyping

Fast Prototype PCB vs Standard PCB Production

A fast prototype PCB and standard PCB production have different goals.

ItemFast Prototype PCBStandard Production
Main goalVerify the board quicklyBuild repeatable batches
QuantitySample or small batchStable batch quantity
Review focusDFM risks and urgent feasibilityYield, cost, process control
PanelizationMay be flexibleUsually optimized for production
DocumentationBasic to project-specificMore complete production records

Fast prototyping is best when engineers need quick feedback. Standard production is better when the design has already passed validation and the focus moves to cost, consistency, quality reports, and repeat delivery.

For many projects, the best path is:

Prototype first, review the result, adjust if needed, then move into small-batch or mass production.

PCB Fast Prototyping Capabilities at EBest Circuit

EBest Circuit supports PCB fast prototyping for standard FR4 boards, multilayer PCBs, HDI PCBs, metal core PCBs, ceramic PCBs, flexible PCBs, rigid-flex PCBs, and PCBA prototypes. For customers, the key is not only whether the board can be made quickly, but whether the prototype can be reviewed, built, assembled, tested, and prepared for the next production step.

For standard FR4 prototype projects, common fast-build conditions include:

ItemReference Capability
Board thickness0.4-1.6mm
CopperH/H or 1oz
Surface finishLead-free HASL
Solder maskGreen
SilkscreenWhite
Min line/space>8 mil
Min hole>0.3mm
Min annular ring>10 mil

For projects beyond standard FR4, EBest Circuit can review more advanced requirements:

AreaExamples
MaterialsHigh Tg FR4, halogen-free FR4, selected RF materials
StructuresMultilayer, HDI, blind/buried vias
Thermal boardsMCPCB, ceramic PCB
AssemblyComponent sourcing, SMT, inspection
ReportsElectrical test, impedance, inspection reports

These capabilities do not mean every project can use the same urgent schedule. A simple 2-layer FR4 sample may fit fast service, while an HDI board, heavy copper board, ceramic PCB, rigid-flex PCB, or full PCBA prototype needs engineering review before the lead time is confirmed.

Before production, EBest Circuit early reviews the Gerber files, drill file, stackup, board thickness, copper thickness, surface finish, impedance notes, BOM, pick-and-place file, and packing requirements. This helps customers muchĀ moreĀ easily avoid a common problem: receiving a fast sample that cannot smoothly move into assembly or small-batch production.

Fast Turn PCB Prototype Process Step by Step

A fast turn PCB prototype needs a clear process. Speed is useful only when the project details are strictlyĀ controlled.

A typical EBest Circuit process includes:

  • File review
    Gerber files, drill files, drawings, stackup notes, and assembly files are checked.
  • DFM check
    Engineers review manufacturability risks such as spacing, holes, solder mask, copper, outline, and panelization.
  • Quotation and lead time confirmation
    The final price and schedule are confirmed based on board complexity and quantity.
  • Production data confirmation
    For special projects, production files or stackup details can be sent to the customer for confirmation before manufacturing.
  • PCB fabrication
    The board enters material preparation, imaging, etching, drilling, plating, solder mask, surface finish, profiling, and test.
  • SMT assembly if required
    For PCBA prototypes, components are sourced or received, then assembled and inspected.
  • Final inspection and shipment
    Boards are checked, packed, and shipped according to project requirements.

This process keeps the prototype fast, but still controlled.

PCB Material and Surface Finish Options for Fast Prototyping

PCB material and surface finish should match the product use, not only the fastest delivery option.

Common fast prototype options include:

OptionTypical Use
FR4 Tg130Standard electronics and general prototypes
FR4 Tg150 / Tg170Higher heat or reliability requirements
1oz copperCommon signal and control boards
2oz copperHigher current or thermal needs
HASL lead-freeCost-sensitive prototypes
ENIGFine pitch, flat surface, better solderability
Green solder maskStandard production choice
Black, white, blue, red maskAppearance or product matching

For urgent projects, material availability can affect lead time. If a project uses special laminate, heavy copper, high Tg FR4, controlled impedance, HDI structure, FPC material, or special surface finish, the fastest realistic schedule should be confirmed after engineering review.

Fast Flexible PCB Prototyping and Rigid-Flex Prototype Support

Fast flexible PCB prototyping is useful for compact devices, wearable electronics, sensors, camera modules, connectors, medical electronics, and products with limited internal space.

Flexible and rigid-flex prototypes require more attention than standard rigid PCBs because the board may include:

AreaWhat Needs Review
Flexible areaBend direction and dynamic or static use
CoverlayOpening size and adhesive control
StiffenerConnector or soldering support
MaterialPI, copper type, thickness
Rigid-flex transitionStress and manufacturing reliability
AssemblySMT support and handling protection

EBest Circuit can support flexible PCB and rigid-flex PCB prototype review based on customer-provided design files and product requirements. For these boards, fast delivery must be balanced with material selection, process reliability, and production yield.

PCB Fast Prototyping Case Study

One fast prototype project involved a 4-layer FR4 PCB that needed both bare PCB fabrication and SMT assembly support.

Project background

The customer needed a prototype build for product validation before moving toward a more stable production plan. The project was not only a bare PCB order because EBest Circuit also handled component purchasing and SMT assembly.

Key board requirements

ItemRequirement
Board type4-layer FR4 PCB
MaterialFR4 Tg130
Finished thickness1.6mm ±10%
Copper thickness1oz / 1oz / 1oz / 1oz
Solder maskBlack
SilkscreenWhite
Surface finishLead-free HASL
PanelizationFactory panelization allowed
ComponentsPurchased by EBest Circuit
DeliverySingle-unit delivery after SMT

Main project focus

This prototype had three practical concerns.

  • First, the board needed a stable 4-layer FR4 manufacturing path. The engineering team checked the thickness, copper structure, solder mask, surface finish, and panelization method before production.
  • Second, the project required SMT support. Since all components were purchased by EBest Circuit, BOM review and sourcing coordination were part of the prototype schedule. This helped the customer avoid managing PCB fabrication and component purchasing separately.
  • Third, the customer requested single-unit delivery after SMT. That meant packing and handling needed to match the assembled board condition, not only the bare PCB condition.

For the customer, the value was not just a fast prototype PCB. The value was a complete prototype path: DFM review, PCB fabrication, component sourcing, SMT assembly, inspection, and delivery in one workflow.

Why Choose EBest Circuit for PCB Fast Prototyping?

EBest Circuit is suitable for customers who need more than a simple online prototype order.

Our support includes:

EBest Circuit SupportCustomer Value
DFM pre-reviewFind risks before production
Engineering supportReview PCB and PCBA manufacturing details
PCB + PCBA factoryReduce handoff between suppliers
Component sourcingSupport approved BOM purchasing
SMT assemblyBuild functional prototype boards
Prototype and small batchSupport R&D validation and early production
Quality certificationsISO9001, ISO13485, IATF16949, AS9100D
Digital traceabilityTrack material, batch, cycle, and production status

For engineers, the best PCB fast prototyping supplier is not always the one that promises the shortest time. It is the one that can tell which parts of the project are simple, which parts need engineering review, and which risks should be solved before the board moves into production.

EBest Circuit supports prototype-to-production projects for customers who need custom PCB fabrication, component sourcing, PCBA assembly, and practical manufacturing support.

PCB Fast Prototyping FAQs

1. What is the difference between PCB fast prototyping and normal PCB prototyping?
PCB fast prototyping focuses on shorter lead time for engineering validation. Normal PCB prototyping may follow a standard schedule, especially when the board has special material, HDI, impedance, flexible PCB, or assembly requirements.

2. Can fast PCB prototyping include SMT assembly?
Yes. A fast PCB prototype can include SMT assembly if the BOM, placement file, Gerber files, and assembly notes are complete. The lead time must include component sourcing or component receiving, stencil preparation, SMT, inspection, and packing.

3. Is lead-free HASL suitable for fast prototype PCB projects?
Lead-free HASL can be suitable for many standard FR4 prototype boards. If the board has fine-pitch components, BGA, or very flat pad requirements, ENIG may be a better option.

4. Can EBest Circuit support fast flexible PCB prototyping?
Yes. EBest Circuit supports flexible PCB and rigid-flex PCB prototype projects. The lead time depends on material, stackup, coverlay, stiffener, surface finish, and inspection requirements.

5. What files should I send for PCB fast prototyping?
Please send Gerber files, drill files, board drawing, stackup notes, BOM, pick-and-place file, assembly drawing, impedance notes, and any special requirements such as thickness tolerance, surface finish, panelization, testing, or packing.

PCB Fast Prototyping

In short, a fast prototype should help you move forward, not create more uncertainty. If you are preparing a new PCB or PCBA project, send your Gerber files, BOM, drawings, stackup notes, impedance requirements, or assembly files to sales@bestpcbs.com. EBest Circuit will help review the manufacturing path and support your project from prototype validation to scalable production.

You may also like

2.4GHz PCB Antenna Board Manufacturing Guide

July 16th, 2026

A 2.4GHz PCB antenna is commonly used in Wi-Fi, Bluetooth, Zigbee, IoT wireless modules, smart sensors, gateways, medical electronics, wearable devices, and compact connected products. It allows wireless communication without adding a separate external antenna, but it also makes the PCB layout and manufacturing process more sensitive.

For EBest Circuit (Best Technology), the focus is not to design the antenna from zero or replace the customer’s RF engineering work. Our role is to manufacture and assemble the PCB according to customer-approved design files, while helping review manufacturability risks around the antenna area, RF feed line, material, surface finish, impedance notes, SMT assembly, inspection, and testing requirements. If you are preparing a 2.4GHz PCB antenna board, send your Gerber files, ODB++ files, stackup, BOM, drawings, module datasheet, or assembly notes to sales@bestpcbs.com for engineering review before production.

2.4ghz pcb antenna​

What Is a 2.4GHz PCB Antenna?

A 2.4GHz PCB antenna is an antenna structure formed directly on the printed circuit board. Instead of using only an external antenna, the board itself includes a copper antenna pattern that operates around the 2.4GHz frequency band.

This frequency band is extensively used by:

  • Wi-Fi
  • Bluetooth
  • BLE devices
  • Zigbee
  • Thread
  • Some IoT wireless modules
  • Smart home products
  • Wireless sensors
  • Compact industrial devices

The antenna may appear as a meandered trace, inverted-F antenna, chip antenna connection area, patch-style antenna structure, or another customer-defined antenna pattern. The exact antenna geometry should be defined and validated by the customer’s RF design team or module supplier. During PCB manufacturing, the board supplier must protect this geometry and avoid process changes that may affect performance.

2.4ghz pcb antenna​

How Does a 2.4GHz Antenna PCB Work?

A 2.4GHz antenna PCB works by using copper geometry on the PCB to radiate and receive electromagnetic signals. The antenna area, feed line, ground reference, keep-out zone, material, board thickness, nearby components, and enclosure can all affect wireless performance.

From a PCB manufacturing point of view, several areas matter:

AreaWhy It Matters
Antenna geometryMust match customer-approved files
Keep-out areaAvoids unwanted copper or metal interference
RF feed lineMay require impedance control
Ground referenceSupports stable RF behavior
MaterialAffects dielectric properties
Surface finishAffects soldering and long-term reliability
AssemblyComponents near antenna may affect performance

The PCB manufacturer should not casually modify the antenna trace, copper pour, ground clearance, or feed area. Even small changes may affect tuning, signal strength, or final wireless performance.

Common Types of 2.4GHz PCB Antennas

Different products may use different 2.4GHz PCB antenna styles. The choice is usually made by the customer’s RF engineer, wireless module supplier, or reference design provider.

Common types include:

Meandered PCB antenna
A compact trace antenna often used when board space is limited. It can be useful for Bluetooth, BLE, and small IoT devices.

Inverted-F antenna
A common PCB antenna type for 2.4GHz wireless products. It usually requires careful control of the antenna shape, feed point, ground, and keep-out area.

PCB patch antenna
A patch antenna structure may be used when the project needs a defined radiation direction or board-level antenna area.

Chip antenna with PCB matching area
Some products use a ceramic chip antenna or module antenna. Even in this case, the PCB layout around the chip antenna, ground clearance, feed line, and matching components still matters.

External antenna connector design
Some 2.4GHz products use an RF connector such as IPEX/U.FL or SMA. The PCB still needs proper RF feed line routing, connector footprint, soldering quality, and mechanical stability.

EBest Circuit manufactures the PCB or PCBA according to the customer-approved 2.4 GHz antenna PCB design, module supplier recommendations, Gerber files, stackup, and production notes.

2.4ghz pcb antenna​

2.4GHz PCB Antenna Design Files and Manufacturing Checks

The phrase 2.4GHz PCB antenna design can mean many things. For some engineers, it means antenna simulation and RF tuning. For a PCB manufacturer, the practical focus is different: whether the approved antenna design files can be manufactured and assembled without introducing avoidable risk.

Before production, EBest Circuit can help review:

  • Gerber or ODB++ files
  • Stackup and board thickness
  • Material requirement
  • Copper thickness
  • Antenna keep-out area
  • RF feed line notes
  • Controlled impedance requirements
  • Solder mask openings
  • Surface finish
  • Module footprint
  • Connector footprint
  • Panelization
  • Test points and inspection notes

If the customer provides a wireless module datasheet or reference layout, it should be checked against the actual PCB files. This helps reduce mismatches between the intended RF layout and the board that will be produced.

2.4GHz WiFi PCB Antenna Layout Areas to Protect

A 2.4GHz WiFi PCB antenna is sensitive to its surrounding area. Even if the antenna pattern is correct, the final board may still perform poorly if the keep-out area, ground, enclosure, connector, or nearby components are not controlled.

Important areas to protect include:

AreaManufacturing Concern
Antenna copperDo not change shape or length
Keep-out zoneAvoid copper, vias, or components
Feed lineFollow impedance and width notes
Ground clearanceMatch approved layout
Matching circuitPreserve pad and component positions
RF connectorControl soldering and alignment
Board edgeAvoid outline changes near antenna

The PCB factory should not add copper balancing, tooling marks, vias, labels, or panel rails inside the antenna keep-out zone unless the customer confirms it. For antenna products, small ā€œhelpfulā€ edits can become performance risks.

2.4GHz Patch Antenna PCB vs Meandered PCB Antenna

A 2.4GHz patch antenna PCB and a meandered PCB antenna serve different layout and product needs.

Antenna TypeTypical Use
Patch antenna PCBLarger antenna area, more directional behavior
Meandered PCB antennaCompact products and space-saving layouts
Chip antenna layoutSmall devices using supplier-defined antenna parts
External antenna connectorProducts needing detachable or higher-gain antenna options

For PCB manufacturing, the key is not to decide which antenna type is best. That decision belongs to the customer’s RF design team. The PCB manufacturer’s responsibility is to keep the approved antenna structure, material, copper, surface finish, and board outline consistent with the production files.

This is especially important for products such as IoT sensors, wireless gateways, Bluetooth devices, smart home controllers, medical wearables, and compact industrial modules.

2.4ghz pcb antenna​

PCB Material and Surface Finish for 2.4GHz PCB Antenna Boards

Many 2.4GHz PCB antenna boards are made with FR4, especially for common IoT, Bluetooth, Wi-Fi, and smart device products. However, material selection still matters because dielectric properties, board thickness, copper thickness, and stackup can affect RF behavior.

Common manufacturing points include:

  • FR4 material grade
  • Tg requirement
  • Board thickness tolerance
  • Copper thickness
  • Solder mask type
  • ENIG or other surface finish
  • Controlled impedance requirement
  • RF feed line geometry
  • Consistent production stackup

ENIG is often selected when the project needs good solderability, flat pads, fine-pitch assembly, or better surface stability. For cost-sensitive products, other surface finishes may also be possible, but the choice should match the assembly process and product reliability requirements.

For high-volume or high-reliability wireless products, production consistency matters. A prototype that works well should not become unstable in batch production because of uncontrolled material or stackup changes.

PCBA Assembly Risks for 2.4GHz PCB Antenna Products

PCBA assembly can affect 2.4GHz PCB antenna products even when the bare PCB is correct. The module, RF connector, matching components, shield, crystal, sensor, power circuit, and nearby components must be assembled consistently.

Common PCBA risks include:

  • RF connector misalignment
  • Poor solder joints on module pads
  • Wrong component value in matching circuit
  • Residue near fine-pitch or RF areas
  • Component shift near antenna keep-out zone
  • Incorrect BOM substitution
  • Shielding cover assembly issues
  • Insufficient inspection around small passive components
  • Testing notes missing from production files

EBest Circuit can support PCB SMT assembly, connector assembly, component sourcing based on approved BOM, AOI inspection, X-ray inspection when needed, functional testing coordination, and packing. For RF performance testing or wireless certification, the customer usually defines the test method or works with a dedicated RF test lab. EBest Circuit can coordinate production testing according to approved customer instructions.

2.4GHz PCB Antenna Board Manufacturing Case Study

A customer from Europe needed a small flexible PCB used in a compact 2.4GHz wireless product. The antenna-related structure and circuit files were already defined by the customer. EBest Circuit’s role was to manufacture the FPC according to the approved files and control the details that could affect assembly, connection reliability, and product fit.

Project requirements

  • 2-layer FPC
  • 0.5oz RA copper
  • Finished thickness: 0.15mm
  • Finger opening area: 0.30mm
  • PI stiffener and FR4 stiffener
  • Customer-approved antenna-related layout
  • Flexible connection area for compact assembly

Why this project needed careful review

This project looked small, but it had several details that needed control. The 0.15mm FPC thickness affected flexibility and installation fit. The 0.5oz RA copper was important for bending reliability because rolled annealed copper is often preferred for flexible circuits that need better ductility.

The finger opening area also needed careful manufacturing control. If the opening was not accurate, it could affect contact reliability during assembly. The PI and FR4 stiffeners had to be placed correctly to support the connection area and protect the flexible section from unnecessary stress.

EBest Circuit’s manufacturing support

  • Reviewed FPC files before production
  • Confirmed 2-layer FPC structure and 0.15mm finished thickness
  • Controlled 0.5oz RA copper requirements
  • Checked finger opening area and stiffener position
  • Manufactured PI and FR4 stiffener areas according to customer files
  • Protected the approved antenna-related layout during production preparation

For the customer, the value was not antenna redesign. The value was precise FPC manufacturing. The board had to remain flexible where bending was needed, reinforced where connection support was required, and consistent with the customer-approved 2.4GHz wireless product files. This helped the customer move the compact wireless product toward assembly and validation with fewer manufacturing risks.

2.4ghz pcb antenna​

Why Choose EBest Circuit for 2.4GHz PCB Antenna PCB and PCBA?

EBest Circuit is suitable for customers who already have approved 2.4GHz PCB antenna design files and need reliable PCB manufacturing, component sourcing, PCBA assembly, and production support.

Customers choose EBest Circuit because we can support:

  • PCB fabrication
  • DFM review before production
  • Stackup and material review
  • Controlled impedance review when required
  • ENIG and other surface finish options
  • Component sourcing based on approved BOM
  • SMT assembly
  • Connector assembly
  • AOI and inspection support
  • Functional testing coordination
  • Prototype and small-batch production
  • One-stop PCB + sourcing + assembly service

For 2.4GHz antenna board projects, EBest Circuit pays special attention to antenna keep-out areas, RF feed line notes, module footprints, connector positions, surface finish, panelization, and assembly reliability. These details help reduce manufacturing risk without crossing into unsupported RF antenna design work.

If you are preparing a 2.4GHz PCB antenna board, send your Gerber files, ODB++ files, stackup, BOM, module datasheet, drawings, or assembly notes to sales@bestpcbs.com. Our engineering team can help review the PCB and PCBA manufacturing path before production starts.

FAQs about 2.4GHz PCB Antenna

1. What is a 2.4GHz PCB antenna?

A 2.4GHz PCB antenna is an antenna structure made from copper traces on the PCB. It is often used in Wi-Fi, Bluetooth, BLE, Zigbee, and IoT wireless products.

2. Can EBest Circuit design a 2.4GHz PCB antenna from zero?

EBest Circuit mainly supports PCB manufacturing, DFM review, component sourcing based on approved BOM, PCBA assembly, inspection, and testing coordination. We manufacture and assemble according to customer-approved antenna design files and production requirements.

3. Why is the antenna keep-out area important?

The antenna keep-out area helps prevent unwanted copper, vias, components, metal parts, or panel features from affecting wireless performance. It should follow the approved antenna layout or module supplier recommendation.

4. What surface finish is suitable for 2.4GHz PCB antenna boards?

ENIG is widely used when the project needs flat pads, good solderability, fine-pitch assembly, or reliable surface quality. The final choice should match the assembly and product requirements.

5. What files should I send for a 2.4GHz PCB antenna board project?

You can send Gerber or ODB++ files, stackup, BOM, drawings, module datasheet, antenna layout notes, impedance notes, placement file, assembly notes, and testing requirements.

Need help with a 2.4GHz PCB antenna board project? Pls feel free to send your Gerber files, ODB++ files, stackup, BOM, drawings, module datasheet, or assembly requirements to sales@bestpcbs.com. EBest Circuit’s engineering team can help review the PCB and PCBA manufacturing path before production.

You may also like

Internet of Things Wireless Modules PCB Guide

July 16th, 2026

Internet of things wireless modules help connected products send and receive data through Wi-Fi, Bluetooth, LoRa, Zigbee, NB-IoT, LTE-M, cellular, or other wireless technologies. They are widely used in smart sensors, industrial monitoring devices, medical electronics, asset trackers, smart meters, gateways, wearable devices, and compact control systems.

For engineers, the wireless module itself is only one part of the product. The final performance also depends on the PCB, antenna area, power supply, connector reliability, SMT assembly, cleaning, testing, and production control. EBest Circuit (Best Technology) supports PCB manufacturing, DFM review, component sourcing based on approved BOM, PCBA assembly, inspection, and testing for IoT wireless module projects. If you are preparing an IoT PCB or IoT module PCB assembly project, send your Gerber files, ODB++ files, BOM, drawings, assembly notes, or testing requirements to sales@bestpcbs.com for engineering review before production.

internet of things wireless modules

What Are Internet of Things Wireless Modules?

Internet of things wireless modules are compact electronic modules that give a device wireless communication capability. Instead of building the full radio circuit from the beginning, many engineers use a ready-made wireless module that already includes key communication parts.

A typical IoT wireless module may include:

  • Wireless chipset
  • RF front-end circuit
  • Memory
  • Power management circuit
  • Crystal or oscillator
  • Shielding cover
  • Antenna connector or onboard antenna
  • Module pads for soldering to the main PCB
  • Firmware or communication stack support from the module supplier

The module allows the end product to connect to nearby devices, a gateway, a router, a cellular network, or a cloud platform. In a real product, the module usually sits on a carrier PCB or main control board with sensors, connectors, power circuits, MCU, interface circuits, and mechanical mounting features.

internet of things wireless modules

How Do IoT Wireless Modules Connect Devices?

IoT wireless modules connect devices by converting sensor, control, or system data into wireless signals. The module communicates with other devices, a local network, or a remote server depending on the selected wireless technology.

For example:

Wireless MethodCommon Use
Wi-FiHigh data rate, local internet access
BluetoothShort-range device connection
LoRaLong-range, low-power sensing
ZigbeeMesh networks and smart devices
NB-IoTLow-power cellular IoT
LTE-MMobile IoT with better data support
4G/5G cellularWide-area data connection

For PCB and PCBA manufacturing, the important point is that different wireless technologies create different board-level requirements. A Wi-Fi module may need careful antenna clearance. A cellular IoT module may need stronger power stability. A compact wearable product may need tight component placement and controlled mechanical size. A gateway may need connectors, shielding, thermal control, and reliable assembly.

internet of things wireless modules

Common Types of Wireless Modules for IoT Products

Wireless modules for IoT products are usually selected by the customer’s engineering team according to communication distance, data rate, power consumption, certification requirements, network availability, and product cost.

Common types include:

Wi-Fi modules
Used when the product needs local network access, higher data rate, and internet connectivity through routers or access points.

Bluetooth modules
Used for short-range communication, mobile app connection, wearable devices, handheld devices, and low-power accessories.

LoRa modules
Used for long-range, low-power sensing applications such as smart agriculture, metering, environmental monitoring, and remote sensors.

Zigbee modules
Used for mesh networks, smart home devices, building automation, lighting control, and low-power device networks.

NB-IoT and LTE-M modules
Used for low-power cellular IoT products that need wide-area coverage, such as smart meters, trackers, and industrial monitoring devices.

Cellular modules
Used for devices that need mobile network connectivity, higher coverage, or remote data transmission without relying on local Wi-Fi.

EBest Circuit does not need to choose the wireless protocol for the customer. Our role is to manufacture and assemble the PCB or PCBA according to the customer-approved design files, BOM, module selection, and production requirements.

internet of things wireless modules

Wi-Fi, Bluetooth, LoRa, and Cellular IoT Modules

Each IoT module type has different PCB manufacturing and assembly concerns.

Wi-Fi and Bluetooth modules often operate in the 2.4GHz band, so antenna position and keep-out areas matter. If the antenna area is blocked by copper, metal housing, battery, connector, or enclosure structure, wireless performance may be affected.

LoRa modules are often used in low-power, long-range products. These projects may care more about battery life, stable solder joints, connector reliability, and outdoor or industrial operating conditions.

Cellular IoT modules may require stronger power handling, good grounding, reliable SIM/eSIM related areas, antenna connector assembly, and careful inspection after SMT. Power peaks, vibration, and connector contact can matter more in field-deployed products.

For all these modules, the PCB manufacturer should not change RF layout, antenna geometry, or matching circuits without customer approval. However, the manufacturer should review manufacturability risks such as pad design, solder mask opening, panelization, stencil, SMT process, connector placement, and inspection points.

internet of things wireless modules

Internet of Things Wireless Modules PCB Requirements

Internet of things wireless modules place several practical requirements on PCB manufacturing.

The PCB must support the module footprint accurately. If the pad size, solder mask opening, stencil design, or assembly process is not suitable, the module may shift, tombstone nearby components, bridge, or form weak solder joints.

Important PCB requirements include:

PCB AreaWhat to Check
Module footprintPad size and solderability
Antenna zoneKeep-out and copper clearance
Power pathStable supply and copper width
GroundingClean return path and shielding support
ConnectorsMechanical strength and alignment
Surface finishENIG or suitable solderable finish
PanelizationSMT efficiency and board protection
Test pointsEasier inspection and testing

For high-density IoT products, the PCB may also require HDI, blind vias, fine line/space, impedance review, rigid-flex construction, or special thickness control. These points should be confirmed before production starts.

IoT Module PCB Layout and Manufacturing Checks

IoT module PCB layout should be reviewed from a manufacturing and assembly point of view before the board enters production. This does not mean changing the customer’s circuit design. It means checking whether the provided files can be manufactured and assembled reliably.

Key checks include:

  • Is the wireless module footprint correct?
  • Are module pads suitable for SMT assembly?
  • Is the antenna keep-out area clearly defined?
  • Are large copper areas balanced enough for soldering?
  • Are vias too close to module pads or connectors?
  • Are test points accessible?
  • Is the board shape suitable for panelization?
  • Are castellated holes, edge connectors, or antenna connectors manufacturable?
  • Does the drawing match the Gerber and BOM?
  • Are special notes clear before production?

For IoT wireless module products, many issues are not caused by the wireless module itself. They come from small manufacturing details: poor solder paste control, unclear assembly notes, tight connector spacing, weak panel support, insufficient test access, or missing inspection requirements.

PCBA Assembly for IoT Wireless Modules

PCBA assembly is a key part of IoT wireless module production. Wireless modules may be shielded, relatively large, heat-sensitive, or sensitive to solder paste volume. Some products also include fine passive components, sensors, connectors, LEDs, buttons, battery holders, SIM card holders, or antenna connectors on the same board.

During IoT wireless module PCBA assembly, EBest Circuit can support:

  • Component sourcing based on approved BOM
  • SMT assembly
  • Connector assembly
  • Solder paste and stencil review
  • Module placement inspection
  • AOI inspection
  • X-ray inspection when required
  • Functional testing coordination
  • Cleaning and packing requirements
  • Prototype and small-batch production

The most important point is process visibility. The module, PCB, BOM, SMT, testing, and packing requirements should be handled as one project, not as separate disconnected steps.

Testing and Reliability for IoT Wireless Module Products

IoT wireless module products are often used in real environments, not only on a lab bench. They may be installed inside industrial equipment, medical devices, smart meters, outdoor sensors, gateways, access control devices, or portable products.

Reliability checks may include:

Reliability AreaTypical Concern
Solder jointsModule and connector strength
Power stabilityStable module operation
RF areaNo unwanted copper or obstruction
CleanlinessNo residue near fine components
ConnectorsContact and insertion reliability
EnvironmentHeat, humidity, vibration, enclosure fit
TraceabilityProduction and batch records

Some testing is defined by the customer, such as functional testing, communication testing, programming, current measurement, LED status check, or connector inspection. EBest Circuit can coordinate PCBA testing according to the customer’s approved test method and production requirements.

IoT Wireless Module PCB Manufacturing Case Study

A European industrial customer needed a 6-layer FR4 PCB for an IoT wireless monitoring product used in equipment data collection. The wireless module and circuit design were already defined by the customer. EBest Circuit’s role was to review the manufacturing files, confirm the production stackup, control the impedance-related requirements, and fabricate the PCB according to the approved documents.

Project requirements

  • 6-layer FR4 PCB
  • IT180 material, with Isola 370HR or equivalent material required
  • Outer copper: 1oz
  • Inner copper: 0.5oz
  • Board thickness: 1.6mm ±10%
  • Surface finish: ENIG, Au 1u”
  • Green solder mask, white silkscreen
  • Differential impedance requirement according to the customer’s PDF specification
  • Bare PCB delivery
  • Factory panelization allowed
  • Production files had to be sent to the customer for confirmation before manufacturing

Why this project needed careful review

This was not a simple FR4 board order. For an IoT wireless module product, the PCB had to support stable signal transmission, reliable assembly, and predictable production quality.

The first checkpoint was the material. The customer specified IT180 and allowed Isola 370HR or equivalent material, so the material choice had to be confirmed before production.

The second checkpoint was impedance. Because the customer required differential impedance, EBest Circuit had to review the stackup, copper thickness, dielectric structure, and impedance notes in the customer’s PDF specification before fabrication.

The third checkpoint was documentation. The customer required production files to be confirmed before manufacturing. This helped make sure the stackup, material, copper thickness, surface finish, panelization, and impedance requirements were aligned before the board entered production.

EBest Circuit’s manufacturing support

  • Reviewed Gerber files, drawing, and customer PDF specification
  • Prepared production stackup and production files for customer confirmation
  • Checked material requirement: IT180 / Isola 370HR equivalent
  • Reviewed differential impedance requirements before fabrication
  • Confirmed copper thickness, board thickness, ENIG, solder mask, and silkscreen
  • Arranged factory panelization for bare PCB production
  • Controlled the project according to the approved production documents

For the customer, the value was not only receiving a 6-layer PCB. The important value was that the manufacturing details were reviewed before production started. Material, impedance, stackup, copper thickness, finish, and panelization were confirmed first, helping reduce risk for the IoT wireless module product before assembly and system validation.

Why Choose EBest Circuit for IoT Wireless Module PCB and PCBA?

EBest Circuit is suitable for customers who need PCB and PCBA manufacturing support for IoT wireless module products, especially when the project needs more than bare PCB fabrication.

Customers choose EBest Circuit because we can support:

  • PCB fabrication
  • Component sourcing based on approved BOM
  • SMT assembly
  • Connector assembly
  • DFM review before production
  • BOM optimization suggestions
  • Prototype and small-batch support
  • PCBA inspection and testing coordination
  • One-stop PCB + sourcing + IoT PCB assembly turnkey service
  • ISO9001, ISO13485, IATF16949, and AS9100D quality systems
  • Digital workshop traceability

For IoT wireless modules, this one-stop support is useful because many production risks happen between steps. A footprint issue, BOM substitution, connector mismatch, antenna clearance mistake, or unclear test note can affect the final product. EBest Circuit helps keep these details visible from engineering review to shipment.

If you are building an IoT wireless module product, send your Gerber files, ODB++ files, BOM, drawings, module datasheet, assembly notes, testing method, or packing requirements to sales@bestpcbs.com. Our engineering team can help review the PCB and PCBA manufacturing path before production starts.

FAQs about Internet of Things Wireless Modules

1. What are internet of things wireless modules?

Internet of things wireless modules are compact communication modules that help devices connect through Wi-Fi, Bluetooth, LoRa, Zigbee, NB-IoT, LTE-M, cellular, or other wireless technologies.

2. What is the difference between IoT modules and wireless modules?

A wireless module provides communication capability. An IoT module is usually a wireless module used inside a connected product, often with sensors, power circuits, MCU, firmware, and cloud or gateway communication.

3. Can EBest Circuit design the wireless module circuit?

EBest Circuit mainly supports PCB manufacturing, DFM review, component sourcing based on approved BOM, PCBA assembly, inspection, and testing coordination. We manufacture and assemble according to customer-approved design files, BOM, and production requirements.

4. What should I prepare for an IoT wireless module PCBA project?

You should prepare Gerber or ODB++ files, BOM, placement file, drawings, module datasheet, assembly notes, testing instructions, firmware or programming notes if needed, and packing requirements.

5. Why is PCB manufacturing important for IoT wireless modules?

The PCB affects module soldering, antenna area, power stability, connector reliability, test access, mechanical fit, and production yield. A good manufacturing review helps reduce risk before SMT assembly.

Need help with an IoT wireless module PCB or PCBA project? Pls feel free to send your Gerber files, ODB++ files, BOM, module datasheet, drawings, assembly notes, or test requirements to sales@bestpcbs.com. EBest Circuit’s engineering team can help review the PCB and PCBA manufacturing path before production starts.

You may also like

Capped Via Guide: Filled Vias, IPC-4761 Type VII and DFM Checks

July 15th, 2026

A capped via is a PCB via that is filled and then plated or capped over to create a sealed, flatter surface. It is often used when a via must be protected from solder wicking, contamination, voiding, or surface irregularity in dense PCB layouts.

For engineers and buyers, capped vias are not just a drawing detail. They affect manufacturability, inspection, cost, reliability, and how clearly the fabrication notes must be written before production.

Cross-section illustration of filled and capped vias in a multilayer PCB
Filled and capped vias create a sealed surface that helps reduce solder wicking and surface irregularity.

What Is a Capped Via?

A capped via is a via hole that has been filled and then covered with copper plating or another specified cap structure.

In PCB manufacturing, vias connect copper layers through the board. A standard via may remain open, while a tented, plugged, filled, or capped via receives additional processing. A capped via usually provides a more protected surface than simple solder mask tenting, especially when the board has dense routing, fine-pitch parts, or via-in-pad requirements.

If you are comparing different via protection options, this related guide on tented via, filled via, and plugged via can help clarify the basic differences.

Comparison of open via and capped via structures in a multilayer PCB
Open vias leave the hole exposed, while capped vias use fill and cap plating to close the surface.

Why Are Capped Vias Used in PCB Manufacturing?

Capped vias are used to improve surface reliability, reduce solder-related problems, and support compact PCB layouts where ordinary open vias may create risk.

  • They can help prevent solder from flowing into via holes during assembly.
  • They can reduce contamination traps in exposed via openings.
  • They can support smoother pad or surface areas when required by the layout.
  • They can improve process control for high-density and reliability-focused PCB builds.

Capped vias are common in more complex products, including HDI PCB projects, dense BGA areas, compact control boards, and high-reliability electronics.

How Does the Capped Via Process Work?

The capped via process usually includes drilling, plating, filling, curing, planarization, cap plating, and inspection.

Step Purpose
Drilling Create the via hole.
Plating Form the conductive barrel.
Filling Fill the via with specified material.
Curing Stabilize the fill material.
Planarization Flatten excess material.
Cap plating Cover the filled via surface.
Inspection Check filling, cap quality, and surface condition.

For quality verification, a PCB cross section may be used to inspect via filling, plating, barrel condition, and cap structure when the project requires deeper validation.

What Is the Difference Between Filled and Capped Vias?

Filled vias focus on filling the hole, while capped vias add a covered surface after the via is filled.

Via Type Main Feature Typical Use
Filled via Via hole is filled. Reduce voids or support reliability needs.
Filled and capped via Filled via is covered by cap plating. Improve surface condition and solder control.
Tented via Solder mask covers the via opening. Basic protection for suitable designs.
Plugged via Via is plugged but not necessarily fully capped. Cost-sensitive via protection.
Comparison of filled via, filled and capped via, tented via, and plugged via
Common via protection options include filled, capped, tented, and plugged vias.

When Should You Choose Epoxy Filled and Capped Vias?

Epoxy filled and capped vias are useful when the via structure needs added protection, improved surface quality, or better assembly reliability.

This option may be considered for via-in-pad structures, BGA fanout areas, dense routing, boards with strict solderability needs, or applications where open via holes may create contamination or solder wicking concerns. The exact choice should be reviewed during DFM because cost and process complexity are higher than basic via tenting.

How Does IPC-4761 Type VII Define Filled and Capped Vias?

IPC-4761 Type VII is commonly referenced for filled and capped via structures, where the via is filled and then covered.

When a drawing or fabrication note calls out IPC-4761 Type VII filled and capped vias, the PCB supplier should understand the intended via protection level. Buyers should still confirm the exact fill material, plating expectation, acceptance criteria, inspection method, and whether the requirement applies to all vias or only selected vias.

Capped Via vs Via Capping: Are They the Same?

Capped via usually refers to the final via structure, while via capping refers to the process or requirement of covering a filled via.

In many engineering conversations, the terms overlap. However, fabrication notes should avoid vague wording. Instead of simply writing “cap vias,” it is better to specify whether the board needs filled and capped vias, which vias are included, whether IPC-4761 Type VII applies, and what inspection requirement is expected.

What PCB Design and Manufacturing Issues Can Capped Vias Help Prevent?

Capped vias can help reduce solder wicking, trapped residues, surface unevenness, and reliability concerns in dense PCB areas.

They are often discussed during PCB design for manufacturing review because the right via protection method depends on pad location, via size, solder mask strategy, surface finish, assembly process, and inspection needs.

For specialized boards that combine unusual material, thickness, copper, or via requirements, a special PCB manufacturing review can help confirm whether capped vias are appropriate.

How Should You Specify Capped Vias in PCB Fabrication Files?

Capped vias should be specified clearly in fabrication notes, stackup files, drill tables, and drawings so the supplier knows exactly which vias need the process.

  • State whether the requirement is filled and capped via or another via covering type.
  • Identify which via sizes or locations require capping.
  • Call out IPC-4761 Type VII only when that is the intended structure.
  • Define whether the requirement applies to via-in-pad areas, BGA areas, or all vias.
  • Confirm inspection expectations before production.

If the instruction is unclear, the supplier may quote the wrong process or ask for clarification, which can delay the project.

FAQs about Capped Via

Is a capped via the same as a filled via?

No. A filled via means the hole is filled. A capped via normally means the filled via is also covered by a cap or plating layer.

Is via capping always required for via-in-pad?

Not always, but via-in-pad designs often require filled and capped vias to prevent solder loss and surface problems during assembly.

Does IPC-4761 Type VII mean filled and capped vias?

Yes, IPC-4761 Type VII is commonly used to describe filled and capped via protection. The exact fabrication note should still be reviewed with the PCB supplier.

Are capped vias more expensive?

Yes. Capped vias add filling, curing, planarization, plating, and inspection steps, so they usually cost more than standard open or tented vias.

What should I send for a capped via quote?

Send Gerber or ODB++ files, drill files, stackup, via table, fabrication notes, IPC requirement, surface finish, quantity, lead time, and inspection expectations.

In Conclusion, a capped via can improve PCB manufacturability and assembly reliability when the board needs protected, filled, and plated via structures. To avoid quotation mistakes, specify the via type clearly, review IPC-4761 Type VII requirements carefully, and confirm the process with your PCB manufacturer before production.

EBest Circuit (Best Technology) supports PCB manufacturing, DFM review, PCB layout manufacturability review, component sourcing, PCBA assembly, and testing support. If you need help reviewing capped via requirements for a PCB or PCBA project, contact the engineering team at sales@bestpcbs.com.

You may also like