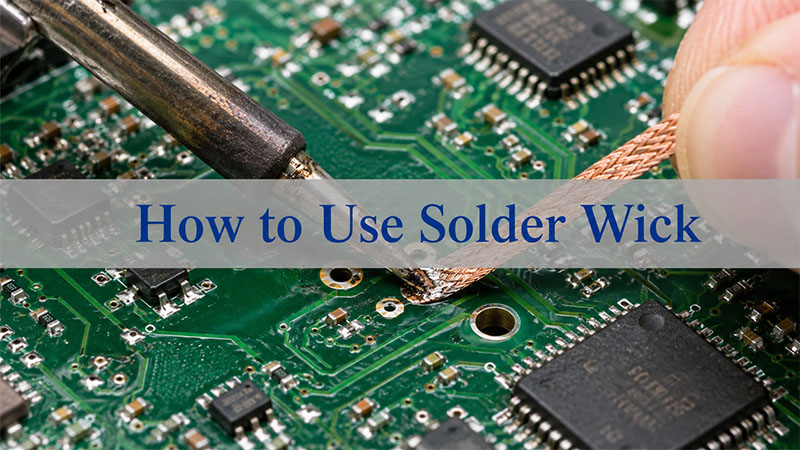
How to use solder wick is an essential skill for anyone working with PCB repair, electronics prototyping, or soldering rework. A solder wick, also known as desoldering braid, helps remove excess solder from PCB pads, component leads, through-holes, and solder bridges with better control than many mechanical tools. Its significance lies in precision: when used correctly, it can clean the soldering area, protect delicate PCB pads, and make re-soldering or component replacement much easier.
This article explains what solder wick is, how desoldering braid works, and how to use it properly for clean and safe PCB desoldering.
At EBest Circuit (Best Technology), we support customers with professional PCB fabrication, PCB assembly, component sourcing, testing, and engineering-focused rework solutions for prototypes and mass production. With 20 years of manufacturing experience and strict quality control, our team understands how small soldering details can affect the reliability of the final electronic product. For PCB or PCBA project support, feel free to contact us at sales@bestpcbs.com.
What Is Solder Wick?
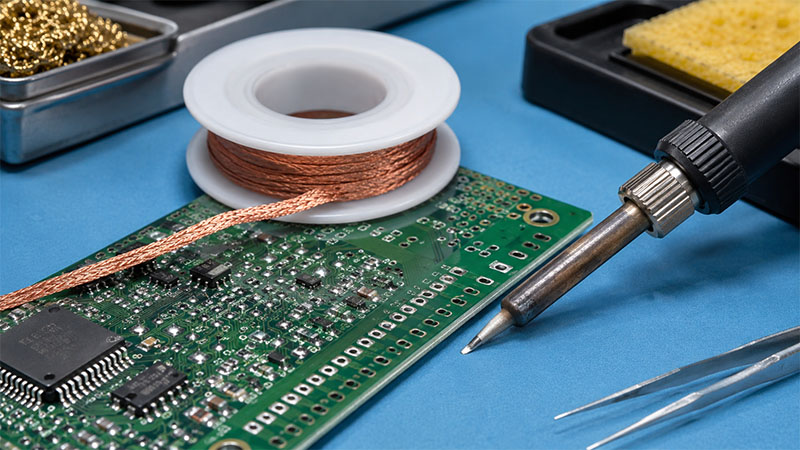
How to use solder wick is a common question for beginners, repair technicians, and electronics engineers who need to remove extra solder from PCB pads, component leads, or solder bridges. Solder wick, also called desoldering braid, is a thin braided copper strip used to absorb molten solder during PCB rework.
At first glance, it looks simple. It is just a flat copper braid rolled onto a small spool. But in real PCB repair, this small tool is very useful. When heated with a soldering iron, the copper braid pulls melted solder into its tiny woven gaps through capillary action. This helps clear old solder from pads, clean through-holes, fix excessive solder, and prepare the board for new components.
Most solder wick products are made from fine copper strands. Many versions also contain flux, which helps the solder flow more easily into the braid. Some products are rosin-based, while others are no-clean solder wick, which leaves less residue after rework.
In electronics assembly and repair, solder wick is often used for:
- Removing solder from PCB pads after component removal
- Cleaning SMT pads before placing a new chip
- Fixing solder bridges between IC pins
- Removing solder from plated through-holes
- Preparing pads for rework, inspection, or re-soldering
- Cleaning excess tin from connectors, resistors, capacitors, and small components
For PCB repair work, solder wick is one of the most basic but valuable tools. A good soldering iron, fresh flux, and the correct braid size can make desoldering cleaner, faster, and more controlled.
What Is Desoldering Braid and Is It the Same as Solder Wick?
Yes, desoldering braid and solder wick usually refer to the same product. Both describe a copper braided strip used for removing solder from a circuit board. Some engineers prefer the term “desoldering braid” because it describes the material structure. Others say “solder wick” because the braid “wicks” or draws solder away from the joint.
In daily use, these names are often interchangeable:
| Term | Meaning |
|---|---|
| Solder wick | Common name for copper braid used to absorb solder |
| Desoldering braid | More technical name for the same tool |
| Copper solder wick | Emphasizes the copper material |
| No-clean solder wick | Braid with no-clean flux |
| Wick soldering | Informal phrase, usually referring to solder removal with wick |
The key point is that solder wick is not used to add solder. It is used to remove solder. The phrase “wick soldering” can be a little confusing because it sounds like a soldering method. In most cases, users who search this phrase are looking for desoldering guidance, especially for PCB pads, IC pins, or through-hole components.
Compared with a desoldering pump, desoldering braid gives better control on small pads and surface-mount components. A pump works well for larger through-hole joints, while solder wick is better for fine-pitch areas, flat pad cleaning, and delicate rework.
For many repair benches, both tools are used together. The pump removes a large amount of solder quickly, and the braid cleans the remaining solder from the pad.
How Does Solder Wick Remove Solder?
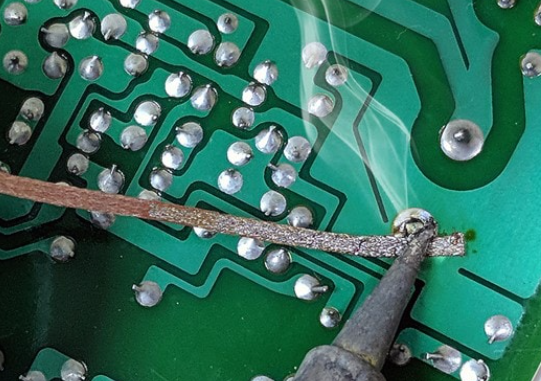
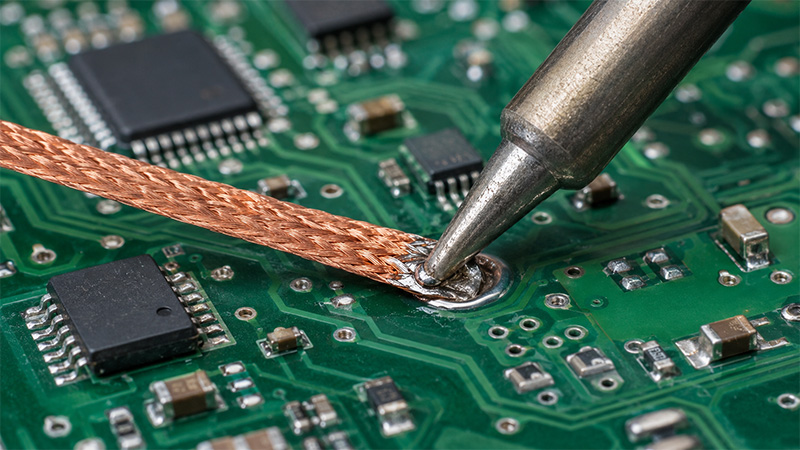
Solder wick removes solder through capillary action. When the soldering iron heats the copper braid, heat transfers through the braid into the solder joint. Once the solder melts, it flows into the tiny spaces between the woven copper strands.
This is similar to how a paper towel absorbs water, but the process depends on heat, flux activity, and clean metal surfaces. The copper braid must be hot enough, the solder must be fully molten, and the flux must help reduce oxidation.
The basic structure works like this:
- The copper braid sits on top of the solder.
- The soldering iron heats the braid.
- Heat passes from the iron to the solder joint.
- The solder melts.
- The molten solder flows into the braid.
- The used braid section turns silver because it is filled with solder.
Flux plays a very important role here. Even if the solder wick already contains flux, adding a little extra liquid flux can improve the result. This is especially helpful when removing solder from old boards, oxidized pads, lead-free solder joints, ground pads, and high-copper PCB areas.
Lead-free solder usually needs more heat than leaded solder. It also tends to be less fluid, so removing solder with wick may feel slower. With fresh flux and a suitable soldering iron tip, the process becomes smoother.
For professional PCB repair, the goal is not only to remove solder. The goal is to remove solder without lifting pads, overheating traces, or damaging the solder mask. That is why technique matters.
How to Use Solder Wick Step by Step?
Learning how to use solder wick is simple, but clean results depend on temperature, flux, timing, and braid size. Below is a practical step-by-step method that works well for most PCB repair tasks.
Step 1: Choose the correct solder wick width
Solder wick comes in different widths. Small SMT pads need narrow braid. Large pads and through-hole joints need wider braid.
| Application | Suggested Wick Width |
|---|---|
| Fine-pitch IC pins | 0.8–1.5 mm |
| Small SMT resistors and capacitors | 1.5–2.0 mm |
| General PCB pads | 2.0–2.5 mm |
| Through-hole pins and connectors | 2.5–3.5 mm |
| Large copper pads or ground areas | 3.5 mm or wider |
Using a braid that is too wide can pull heat away from the joint and may disturb nearby components. Using one that is too narrow may take too long and require repeated heating.
Step 2: Add flux to the solder joint
Even if the braid has built-in flux, apply a small amount of liquid flux to the joint. Flux helps solder melt, flow, and transfer into the copper braid. This makes the work cleaner and reduces the time your iron stays on the pad.
Step 3: Place the solder wick on the solder
Lay the braid directly over the solder you want to remove. Keep it flat and steady. Avoid dragging it across the board surface.
The correct stack is:
PCB solder joint → solder wick → soldering iron tip
The braid should touch the solder joint, and the iron should touch the braid.
Step 4: Heat the braid with the soldering iron
Place the heated iron tip on top of the solder wick. Use gentle pressure. Do not press hard. The goal is heat transfer, not force.
After one or two seconds, the solder should melt and flow into the braid. You will see the braid section turn silver as it absorbs solder.
Step 5: Lift the iron and braid together
This is one of the most important details. Once the solder has been absorbed, lift the soldering iron and the solder wick at the same time. If you remove the iron first and leave the braid on the board, the solder can cool and stick the braid to the pad. Pulling it afterward may damage the pad.
Step 6: Cut off the used section
The silver-colored section is already filled with solder and should not be reused. Cut it off with cutters and continue with a fresh copper section.
Step 7: Inspect the pad
After removing solder with wick, inspect the pad under good lighting or magnification. The pad should look flat, clean, and ready for new solder. If there is flux residue, clean it with isopropyl alcohol when required.
This basic method works for many common repair tasks, including removing excess solder, fixing bridges, and preparing pads for replacement components.
How to Desolder Using Solder Wick Without Damaging PCB Pads?
PCB pads can be delicate, especially on small SMT boards, thin FR4 boards, flexible PCBs, and older assemblies. When using solder wick, the main concern is heat exposure. The braid absorbs solder, but it also absorbs heat. If the process takes too long, the pad adhesive can soften and the copper pad may lift.
To desolder using solder wick safely, focus on heat control and clean technique.
Use enough heat, but avoid long contact time
A common mistake is using too low a temperature. When the iron is not hot enough, the user keeps the tip on the board for too long. This can cause more damage than using a slightly higher temperature for a shorter time.
For many PCB repair tasks:
- Leaded solder: around 300–350°C
- Lead-free solder: around 330–380°C
- Large copper areas: may need higher thermal capacity
The exact setting depends on the board, solder alloy, iron power, and tip size.
Use a suitable soldering iron tip
A very sharp tip may not transfer enough heat to the braid. A small chisel tip often works better because it has more contact area. Better heat transfer means shorter dwell time and cleaner solder removal.
Do not scrape the braid across the pad
Solder wick should be placed and lifted, not dragged. Dragging the braid can scratch the solder mask, disturb nearby components, or pull weak pads.
Add fresh solder when needed
This may sound unusual, but adding a small amount of fresh solder can help remove old solder. Fresh solder contains active flux and improves heat transfer. This is useful for old, dull, oxidized solder joints.
Work in short cycles
Instead of heating one pad for too long, work in short contact cycles. Add flux, heat briefly, lift, inspect, and repeat if needed.
Support the board
A stable PCB holder helps prevent slipping. This is especially useful for fine-pitch IC rework and small prototype boards.
When done correctly, desoldering braid can leave PCB pads smooth and ready for reliable soldering.
How to Use Solder Wick to Remove Solder from PCB Holes and Pads?
Removing solder from flat SMT pads is usually easier than clearing plated through-holes. Pads are open and visible, while holes can hold solder inside the barrel. Still, solder wick can be used effectively for both.
For SMT pads
After removing a surface-mount component, apply flux to the pads and place solder wick over them. Heat with the iron until the old solder flows into the braid. Use a clean section of wick for each area.
The result should be a flat pad surface. This is important for components like QFN, SOIC, SOT, capacitors, resistors, and small connectors. Flat pads help the new component sit evenly and reduce alignment problems.
For solder bridges between IC pins
Add flux across the bridged pins. Place a narrow solder wick along the bridge and touch it with the iron. The excess solder should flow into the braid. Remove the braid and inspect the pins under magnification.
For fine-pitch ICs, do not use wide wick. A narrow desoldering braid gives better control and helps avoid pulling solder from nearby good joints.
For through-hole pads
Place the solder wick on the solder side of the hole and heat it with the iron. If the solder does not fully come out, add fresh solder and flux, then try again. A desoldering pump may remove the bulk solder first, while solder wick cleans the remaining material around the hole.
For difficult holes, try these techniques:
- Add flux directly to the hole area
- Use fresh solder to improve thermal transfer
- Heat from the solder side first
- Use the correct iron tip size
- Use a desoldering pump before finishing with wick
- Avoid forcing component leads before the hole is clear
For large ground pads
Ground pads and thermal pads pull heat away quickly. Use a larger iron tip, more flux, and a suitable braid width. A preheater can also help on heavy copper boards, multilayer PCBs, and metal core PCBs.
Removing solder with wick is often easiest when the board is warm enough and the solder joint is fully active with flux.
How to Choose the Right Solder Wick Size for PCB Repair?
Choosing the correct solder wick size makes the work faster and safer. The braid should be close to the size of the solder area. It should not be much wider than the pad or pin group you are working on.
A small braid gives better control but absorbs less solder. A wide braid absorbs more solder but needs more heat and may affect nearby areas.
Here is a simple selection guide:
| Solder Wick Size | Best For | Notes |
|---|---|---|
| 0.8 mm | Very fine IC pins, small SMT pads | Good for precision work |
| 1.5 mm | SOIC, SOT, small components | Useful for daily PCB repair |
| 2.0 mm | General SMT pads and small through-holes | Balanced option |
| 2.5 mm | Medium pads and connector pins | Good for more solder volume |
| 3.0 mm+ | Large joints, ground pads, terminals | Needs stronger heat transfer |
Besides width, consider the flux type.
Rosin flux solder wick
Rosin-based wick is strong and effective. It works well for general rework, oxidized joints, and older boards. After use, cleaning may be needed depending on the product and assembly requirements.
No-clean solder wick
No-clean solder wick is designed to leave minimal residue. It is useful for production repair, electronics servicing, and boards where post-cleaning should be reduced. However, some no-clean residues may still be cleaned for high-reliability products.
Unfluxed copper braid
Some braid has little or no flux. It can work, but you usually need to add external flux. For most users, pre-fluxed solder wick is easier and more consistent.
For PCB repair, it is practical to keep two or three sizes on hand. A narrow braid for fine work, a medium braid for general pads, and a wider braid for connectors or through-hole joints will cover most needs.
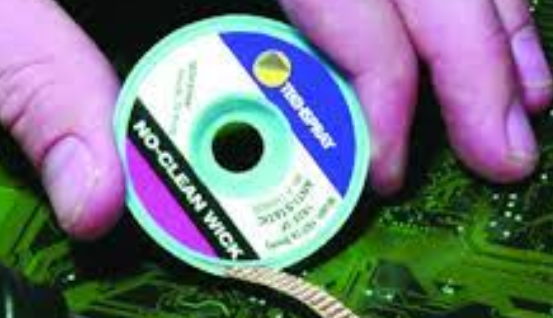
What Is No-Clean Solder Wick and When Should You Use It?
No-clean solder wick is desoldering braid that contains no-clean flux. The purpose is to remove solder while leaving less visible or less active residue on the PCB. It is commonly used in electronics repair, prototyping, production touch-up, and field maintenance.
No-clean flux is designed so that its residue can often remain on the board under normal conditions. This makes the rework process faster, especially when cleaning access is limited.
No-clean solder wick is useful when:
- You are repairing assembled PCBs with dense components
- You want to reduce cleaning time
- The board has areas that are difficult to wash
- You are working on consumer electronics
- You are doing quick SMT touch-up
- You need clean visual results after removing solder
However, “no-clean” does not always mean “never clean.” For high-reliability applications, such as medical electronics, aerospace PCBA, automotive control boards, and harsh-environment products, cleaning and inspection may still be required. Residue control depends on the product standard, board design, operating environment, and customer requirements.
When using no-clean solder wick, the process is the same:
- Place the wick on the solder.
- Heat it with the iron.
- Let solder flow into the braid.
- Lift the braid and iron together.
- Cut away the used section.
- Inspect the pad.
If the solder does not flow well, add a compatible no-clean flux. This keeps the chemistry consistent and improves solder removal.
For general PCB repair, no-clean solder wick is a convenient choice. For demanding assemblies, always follow the cleaning and inspection requirements of the project.
What Common Mistakes Should You Avoid When Removing Solder With Wick?
Solder wick is easy to use, but a few small mistakes can affect the PCB repair result. Most issues come from poor heat transfer, not enough flux, or using the wrong braid size.
Using solder wick without enough flux
Flux helps solder flow into the braid. Without enough flux, the solder may stay dull, sticky, or slow to move. Adding a small amount of flux often improves the result immediately.
Using the wrong wick width
A wide braid on a small pad can overheat nearby components. A narrow braid on a large joint may take too long. Match the braid to the solder area.
Pressing too hard with the iron
Heavy pressure is not needed. It can damage pads, flatten components, or scratch the board. Let heat and capillary action do the work.
Keeping heat on the pad too long
Long heating time increases the risk of pad lifting, solder mask discoloration, and component stress. Short, controlled heating cycles are safer.
Removing the iron before removing the braid
If the braid cools while still touching the solder, it can stick to the pad. Always lift the iron and braid together.
Reusing the solder-filled braid
Once the braid turns silver, that section is full. Cut it off and use a fresh copper section.
Using an oxidized soldering iron tip
A dirty tip transfers heat poorly. Clean and tin the tip before using solder wick.
Trying to clear a large ground pad with a tiny iron
Large copper areas need more thermal energy. Use a larger tip, proper flux, and sometimes board preheating.
Avoiding these mistakes helps keep the PCB surface clean and protects the copper pads during repair.
In summary, solder wick is a simple tool, but it gives excellent control during PCB repair. It helps remove excess solder, clean pads, fix bridges, and prepare boards for rework. The best results come from using the right braid width, enough flux, a clean soldering iron tip, and short heating time.
For beginners, the process may take a few tries. Once the technique becomes familiar, removing solder with wick becomes one of the most reliable skills for PCB maintenance, prototyping, and electronic repair. Whether you call it solder wick, desoldering braid, or copper wick, the principle is the same: heat the braid, melt the solder, let the copper absorb it, and leave the PCB pad clean for the next step. If you need reliable PCB manufacturing, PCBA assembly, or engineering support for your next project, EBest Circuit is ready to help at sales@bestpcbs.com.
FAQs About How to Use Solder Wick
1. What is solder wick used for?
Solder wick is used to remove unwanted solder from PCB pads, through-holes, component leads, and solder bridges. It is especially useful for SMT repair and pad cleaning.
2. Is solder wick the same as desoldering braid?
Yes. Solder wick and desoldering braid usually mean the same thing. Both refer to copper braid used for absorbing molten solder.
3. How do you use solder wick correctly?
Place the solder wick over the solder, press a heated soldering iron tip on top of the braid, wait for the solder to melt and flow into the wick, then lift the iron and braid together.
4. Do I need flux when using solder wick?
Yes, flux is highly recommended. Many solder wick products already contain flux, but adding extra flux often gives cleaner and faster solder removal.
5. Why is my solder wick not absorbing solder?
Common reasons include low iron temperature, poor heat transfer, insufficient flux, oxidized solder, used-up braid, or a large copper area pulling heat away.
6. Can solder wick damage PCB pads?
It can if used with too much heat, long contact time, or dragging force. With proper flux, correct temperature, and gentle handling, it is safe for most PCB repair work.
7. What size solder wick should I use?
Use narrow braid for fine-pitch IC pins and small SMT pads. Use wider braid for through-hole pins, connectors, and larger pads.
8. Is no-clean solder wick better?
No-clean solder wick is convenient because it leaves less residue. It is a good choice for many repair jobs, but high-reliability boards may still need cleaning and inspection.
9. Can I use solder wick for through-hole components?
Yes. It can remove solder from through-hole pads, but a desoldering pump may be faster for large joints. Many technicians use a pump first and solder wick for final cleanup.