The switch SPDT symbol appears in almost every schematic that routes a signal between two destinations. It looks simpleâone input arm pointing at two contactsâbut reading it correctly tells you exactly how current flows through the circuit. This guide explains what the symbol means, how to read it, the IEC vs ANSI versions, and how to draw it yourself.
What Is a SPDT Switch? (Single Pole, Double Throw Explained)
SPDT stands for Single Pole, Double Throw. In plain terms:
Single pole â one common input terminal (the “pole”).
Double throw â that input can connect to one of two output terminals.
So a SPDT switch has three terminals and acts as a changeover (or selector): it sends the common line to output A or output B, but never both at once. In British English, a SPDT used to control one light from two locations is called a two-way switch.
What Is the Symbol for a SPDT Switch?
The SPDT switch symbol is a single line (the moving contact) that pivots from one common terminal toward two separate contacts. The common terminal is the pole; the two contacts are the throws. The position of the arm shows which throw the pole is connected to.
You’ll also see it called a SPDT schematic symbol or SPDT circuit symbolâthey all refer to the same thing.
How to Read a SPDT Switch Symbol: The Pole and Two Throw Terminals
Read it in three steps:
Find the common terminal (pole). It’s the single terminal the moving arm starts fromâusually drawn as a dot or short line. This is your input.
Find the two throw terminals. These are the two contacts the arm can reach. They’re your two possible outputs.
Look at where the arm points. The arm shows the switch’s current stateâconnected to the upper throw or the lower throw.
The three terminals are commonly labeled:
COM â the common (pole)
NC â normally closed (connected to COM when the switch is at rest)
NO â normally open (connects to COM when the switch is actuated)
A SPDT is break-before-make by default: the arm leaves one throw before touching the other, so the two outputs are never shorted together.
SPDT Switch Schematic Symbol: IEC vs ANSI/IEEE Standards
The SPDT symbol is nearly universal, but two standards govern the fine details:
IEC 60617 (international / European): draws the contacts as short bars or open marks, with a clean pivoting line for the moving contact.
ANSI/IEEE 315 (North American): very similar, typically with small open circles or dots for the contact points.
In both standards the logic is identicalâone pole, two throwsâso a schematic is readable either way. The differences are cosmetic: the shape of the contact points and the angle of the actuator line.
SPDT Symbol for Different Switch Types: Toggle, Slide, Limit & Pressure
The same SPDT symbol is used no matter the physical switch, because the symbol describes the function (one pole, two throws), not the actuator. The actuator may be shown with an extra mark:
SPDT toggle switch symbol â the standard pivoting-arm symbol; the most common form.
SPDT slide switch symbol â same contacts, sometimes drawn with a small slider mark.
SPDT limit switch symbol â the arm gains a small roller/lever or actuator flag to show it’s mechanically tripped.
SPDT pressure switch symbol â the actuator is drawn as a diaphragm or pressure symbol that moves the contact.
The takeaway: find the pole and the two throws firstâthe extra marks just tell you how the switch is operated.
SPDT vs SPST vs DPDT: Switch Symbols Compared
These three are easy to tell apart once you count poles and throws:
SPST (Single Pole, Single Throw) â 1 pole, 1 throw, 2 terminals. A simple on/off switch; the symbol is one arm and one contact.
SPDT (Single Pole, Double Throw) â 1 pole, 2 throws, 3 terminals. One arm selecting between two contacts.
DPDT (Double Pole, Double Throw) â two SPDT switches operated together, 6 terminals. Drawn as two SPDT symbols joined by a dashed line showing the poles move as one.
Comparison table:
Switch Type
Poles
Throws
Terminals
Symbol Cue
SPST
1
1
2
One arm, one contact
SPDT
1
2
3
One arm, two contacts
DPDT
2
2
6
Two SPDT symbols + dashed link
SPDT Relay Symbol vs SPDT Switch Symbol
A SPDT relay uses the same contact set as a manual SPDT switchâoften called a Form C contactâbut adds a coil. The symbol shows:
A coil (rectangle or loop) that, when energized, moves the contact.
The SPDT contact set: COM, NC, and NO.
When the coil is de-energized, COM connects to NC. Energize the coil, and COM switches to NO. So the difference between the switch and relay symbols is simply the added coil and the dashed line linking it to the moving contact.
How to Draw a SPDT Switch Symbol Step by Step
You can sketch a correct SPDT symbol in four steps:
Draw the common terminal (pole) as a dot or short line on the leftâthis is the input.
Draw two throw contacts on the right, one above the otherâthese are the two outputs.
Add the moving arm from the pole, angled so it touches one of the two throws.
Label the terminals: COM on the pole, NC and NO on the two throws.
For a DPDT, draw two of these stacked and connect the poles with a dashed line. For a relay, add a coil and link it to the arm with a dashed line.
FAQs About Switch SPDT Symbol
How many terminals does a SPDT switch have? Three: one common (COM/pole) and two throws (often labeled NC and NO).
What do COM, NO, and NC mean on a SPDT symbol? COM is the common pole (input). NC (normally closed) is connected to COM at rest. NO (normally open) connects to COM when the switch is actuated.
Is a SPDT switch the same as a changeover switch? Yes. “Changeover” and “two-way switch” (British English) both describe a SPDT switch.
What’s the difference between the SPST and SPDT symbols? SPST has one arm and one contact (2 terminals, on/off). SPDT has one arm and two contacts (3 terminals, selects between two outputs).
Can a SPDT switch be used as a SPST switch? Yesâjust use the common terminal and one throw, and leave the other throw unconnected.
Is a 2-way switch the same as SPDT? Yes. “2-way switch” is the common British term for a SPDT switch, often used in staircase lighting.
Designing a electronic PCB board that uses SPDT switches, relays, or other components? EBest Circuit (Best Technology) is a one-stop PCB & PCBA contract manufacturerâsend your Gerber files and BOM to sales@bestpcbs.com for a free DFM review.
Ceramic base PCB is used when a circuit board must manage heat, electrical insulation, dimensional stability, or high-frequency performance better than a standard organic substrate. In many power, LED, RF, automotive, medical, and industrial products, the PCB is not only a carrier for components. It also becomes part of the thermal path and reliability design.
EBest Circuit (Best Technology) provides ceramic PCB fabrication, PCB manufacturing, component sourcing, PCBA assembly, DFM support, and testing for projects from prototypes to production.
What Is a Ceramic Base PCB?
Ceramic base PCB is a printed circuit board that uses a ceramic substrate as the main insulating base. Instead of glass-reinforced epoxy, it uses materials such as alumina, aluminum nitride, silicon nitride, or other ceramic substrates. Copper circuits are formed on the ceramic surface through processes such as DPC, DBC, AMB, thick film, or thin film technology.
The ceramic base supports both mechanical and electrical functions. It carries copper traces and components, provides insulation between conductive paths, and helps transfer heat away from active devices. This is why ceramic PCB is often used in high-power and high-reliability products.
A ceramic PCB board may be single-sided, double-sided, or multilayer. Simple LED modules may only require a single-sided structure. Power modules may need thick copper and strong bonding. RF circuits may require stable dielectric properties and controlled impedance.
In sourcing, buyers may use several related terms, such as ceramic PCB board, ceramic base, or even ceramics base. The key is to confirm the actual material, copper thickness, surface finish, tolerance, operating temperature, and assembly requirements before quotation.
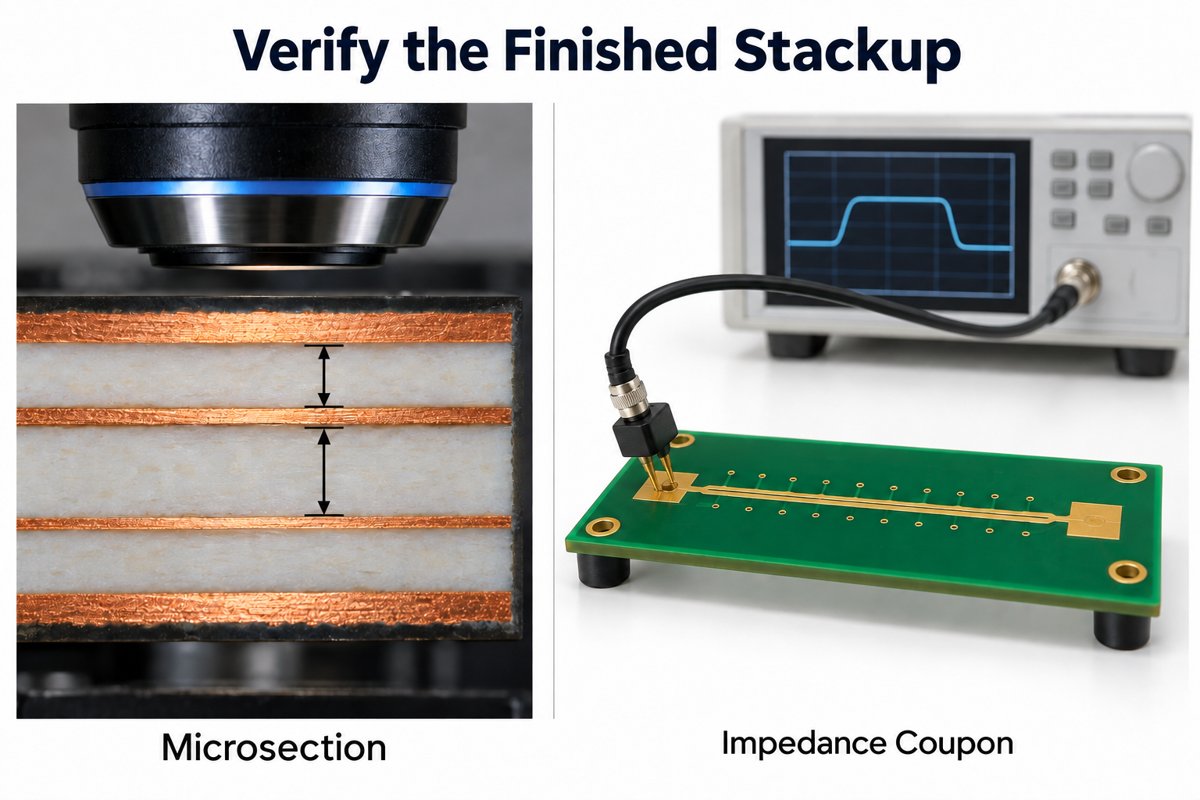
Ceramic base PCB is commonly used for high-power LEDs, MOSFETs, IGBTs, laser diodes, RF power amplifiers, sensors, and compact power modules. These devices often generate concentrated heat. A ceramic substrate helps move that heat from the component area to the external cooling structure.
How Is a Ceramic Base PCB Different from a Standard FR4 PCB?
Ceramic base PCB and an FR4 PCB can both carry components and copper circuits, but their substrate materials are different. FR4 uses glass fiber and epoxy resin. Ceramic PCB uses inorganic ceramic material. This difference affects thermal conductivity, temperature resistance, insulation, cost, and manufacturing method.
FR4 is suitable for many standard electronic products because it is economical, mature, and easy to process. It is widely used in consumer electronics, industrial control boards, communication products, and general PCBA projects.
Ceramic PCB is selected when FR4 cannot meet the thermal, electrical, or environmental requirements. It is more common in power electronics, LED modules, RF circuits, semiconductor packaging, automotive electronics, and medical devices.
Item
Ceramic Base PCB
Standard FR4 PCB
Base material
Alumina, aluminum nitride, silicon nitride, or other ceramic material
Glass fiber reinforced epoxy
Thermal conductivity
Commonly about 20â230 W/m·K, depending on material
Commonly about 0.3â0.5 W/m·K
Heat dissipation
Transfers heat through the ceramic substrate
Usually relies on thermal vias, copper planes, heat sinks, or metal core design
Temperature stability
Suitable for high-temperature environments
Suitable for general electronics
Electrical insulation
High dielectric strength
Good insulation for standard circuits
Dimensional stability
Stable under temperature change
More affected by thermal expansion and moisture
Processing cost
Higher
Lower
Typical use
Power modules, LEDs, RF circuits, sensors, automotive, medical
General electronics, control boards, digital circuits, consumer products
The main difference is not only heat dissipation. Ceramic PCB also offers stable electrical behavior, low moisture absorption, and good mechanical stability. These features are useful when the product must work in a compact structure or demanding environment.
Manufacturing is also different. FR4 can be drilled, laminated, plated, routed, and assembled through mature PCB processes. Ceramic is harder and more brittle, so it needs controlled cutting, laser processing, metallization, copper bonding, and careful handling during assembly.
Why Are Ceramic Materials Used as a PCB Base?
Ceramic materials are used as a PCB base because they combine thermal conductivity and electrical insulation. This combination is important for circuits that must move heat away from components without creating electrical leakage or short-circuit risk.
In power electronics, heat usually comes from semiconductor devices, resistors, LEDs, or power ICs. If heat remains near the component, the product may lose efficiency, reduce output stability, or shorten service life. A ceramic base helps create a direct thermal path from the component to the substrate and then to the heat sink or housing.
Ceramic materials also maintain stable performance under high temperature. They have low moisture absorption, good chemical resistance, and reliable dimensional stability. These properties make them useful in industrial, automotive, energy, medical, and aerospace electronics.
For RF and microwave circuits, ceramic PCB materials can also provide stable dielectric properties. This helps engineers control impedance, signal loss, and phase behavior. In antennas, filters, radar modules, and RF power devices, substrate stability directly affects circuit performance.
Main reasons to use ceramic materials as a PCB base include:
Better heat transfer than FR4
High electrical insulation
Stable dielectric properties
Low moisture absorption
Good dimensional stability
Suitability for compact power designs
Stable behavior under high temperature
Ceramic is not selected only because it is a premium material. It is selected when the design requires thermal, electrical, or mechanical performance that standard PCB materials cannot provide efficiently.
What Ceramic PCB Materials Are Commonly Used?
Common ceramic PCB materials include alumina, aluminum nitride, silicon nitride, and beryllium oxide. Each material has different thermal conductivity, mechanical behavior, process difficulty, and cost.
Alumina, also called AlâOâ, is the most widely used ceramic PCB material. It offers good insulation, acceptable thermal conductivity, mature manufacturing support, and a practical ceramic board price. Common grades include 96% alumina and 99.6% alumina. For many LED, sensor, and industrial applications, alumina provides a balanced solution.
Aluminum nitride, also called AlN, is used when heat dissipation is a main requirement. It has much higher thermal conductivity than alumina and has a thermal expansion coefficient closer to silicon. This makes it suitable for high-power LEDs, laser modules, semiconductor packages, and compact power modules.
Silicon nitride, or SiâNâ, is known for mechanical strength and thermal shock resistance. It is often used in automotive power modules and reliability-focused power electronics. It is useful when the design must handle temperature cycling, vibration, or mechanical stress.
Beryllium oxide, or BeO, has high thermal conductivity, but it requires strict safety control during processing. Because of handling concerns, many projects use aluminum nitride as an alternative when high thermal conductivity is required.
Material
Typical Thermal Conductivity
Main Features
Common Applications
Alumina / AlâOâ
About 20â30 W/m·K
Mature process, good insulation, controlled cost
LEDs, sensors, industrial electronics, general ceramic PCB
Aluminum Nitride / AlN
About 170â230 W/m·K
High thermal conductivity, good semiconductor compatibility
High-power LEDs, laser modules, power modules
Silicon Nitride / SiâNâ
About 60â90 W/m·K depending on grade
High mechanical strength, thermal shock resistance
Automotive power electronics, high-reliability modules
Beryllium Oxide / BeO
About 200â300 W/m·K
High thermal conductivity, special handling requirements
Specialized RF and power applications
Material selection should match the working conditions. Alumina is often suitable for cost-sensitive applications with moderate heat. Aluminum nitride is used when thermal conductivity is critical. Silicon nitride is useful when mechanical reliability is a priority.
A reliable ceramic base PCB manufacturer should not recommend material based only on performance data. It should also consider cost, manufacturability, lead time, copper structure, surface finish, and assembly method.
How Does a Ceramic Base PCB Help with Heat Dissipation?
A ceramic base PCB helps with heat dissipation by forming a shorter and more efficient thermal path between heat-generating components and the external cooling structure. Heat can move from the component pad into the copper layer, through the ceramic substrate, and then into the heat sink, metal housing, or thermal interface material.
In a standard FR4 PCB, heat transfer through the substrate is limited. Engineers often add thermal vias, large copper planes, heat sinks, or metal core structures to improve thermal performance. These methods can work well, but they may require more board space and more design control.
Ceramic substrates have higher thermal conductivity, so they can transfer heat more directly through the board. This is useful in compact power circuits where heat is concentrated in a small area.
Substrate Type
Typical Thermal Conductivity
Design Meaning
FR4
About 0.3â0.5 W/m·K
Suitable for general circuits; needs additional thermal design for higher power
Aluminum PCB dielectric layer
Often about 1â3 W/m·K
Useful for LED and power boards, but dielectric layer affects heat transfer
Alumina ceramic
About 20â30 W/m·K
Suitable for moderate to high thermal needs
Aluminum nitride ceramic
About 170â230 W/m·K
Suitable for high-power and compact thermal designs
Silicon nitride ceramic
About 60â90 W/m·K depending on grade
Suitable when heat transfer and mechanical strength are both important
Copper thickness also affects thermal behavior. Thick copper helps spread heat across the surface. Ceramic helps conduct heat through the substrate. When these two functions are combined properly, the PCB can support higher power density.
Substrate thickness should also be reviewed. A thinner ceramic substrate can reduce thermal resistance, but it must still meet insulation and mechanical strength requirements. A thicker substrate may improve handling strength, but it can increase the thermal path length.
For LED modules, ceramic PCB helps control junction temperature. This supports stable brightness, color performance, and operating life. For power semiconductors, better heat transfer helps reduce thermal stress and improves operating stability.
What Are the Main Benefits of Ceramic Base PCBs?
Ceramic base PCBs provide thermal, electrical, and mechanical advantages for applications that require more than standard PCB performance. Their main value is the ability to conduct heat while maintaining insulation.
The first benefit is thermal conductivity. Ceramic substrates transfer heat more efficiently than FR4. This helps high-power components work within a more controlled temperature range.
The second benefit is electrical insulation. Ceramic materials can provide high dielectric strength while still allowing heat to pass through the substrate. This is useful for power modules, LED arrays, high-voltage circuits, and compact electronics.
The third benefit is dimensional stability. Ceramic substrates expand less than many organic materials under temperature change. This helps maintain circuit accuracy and solder joint stability.
The fourth benefit is environmental stability. Ceramic materials have low moisture absorption and good resistance to many chemicals. This is useful in industrial, automotive, medical, and outdoor applications.
Main benefits include:
High thermal conductivity for power-dense designs
Good electrical insulation for high-voltage circuits
Stable size under temperature change
Low moisture absorption
Suitable for high-temperature environments
Good compatibility with compact modules
Stable dielectric behavior for RF designs
Ceramic base PCB is especially useful when thermal management, insulation, and reliability must be handled in the same structure. It can also reduce dependence on large external cooling designs when the product structure allows a direct thermal path.
What Applications Use Ceramic Base PCBs?
Ceramic base PCBs are used in products that require heat dissipation, insulation, compact size, stable signal behavior, or long-term reliability. They are common in LED lighting, power electronics, RF modules, automotive electronics, medical devices, aerospace systems, and sensor modules.
Application Area
Common Use
Why Ceramic Is Used
LED lighting
High-power LED, UV LED, automotive lighting
Heat dissipation and compact structure
Power electronics
Inverters, converters, MOSFET and IGBT modules
Thermal transfer and insulation
RF and microwave
Antennas, filters, radar modules, amplifiers
Stable dielectric properties
Automotive
EV power units, lighting, sensors
Thermal cycling and reliability
Medical electronics
Sensors, imaging modules, compact power circuits
Stability and process control
Aerospace and UAV
RF modules, power control, sensors
Weight, heat, and reliability considerations
EBest Circuit (Best Technology) supports ceramic PCB projects for customers in lighting, industrial control, communication, medical, automotive, and power electronics fields. For these projects, early review of material, copper thickness, thermal path, and assembly method helps improve manufacturability.
How Is a Ceramic Base PCB Manufactured?
Ceramic base PCB manufacturing depends on the substrate material and copper formation process. The main production steps include ceramic substrate preparation, cleaning, metallization, copper formation, circuit patterning, surface finishing, inspection, and profiling.
The process starts with ceramic substrate selection. The factory checks material type, thickness, flatness, surface quality, and dimensional tolerance. A clean and stable surface is important because copper adhesion depends on the substrate condition.
The next step is copper formation or metallization. Different methods are used depending on the design requirement.
DPC, or Direct Plated Copper, uses sputtering and electroplating to form copper on ceramic. It is suitable for fine lines, compact layouts, and precise circuit structures.
DBC, or Direct Bonded Copper, bonds copper foil directly to ceramic at high temperature. It is often used for power electronics because it supports thick copper and higher current capacity.
AMB, or Active Metal Brazing, uses active brazing material to bond copper and ceramic. It is used for high-reliability power modules that require strong bonding.
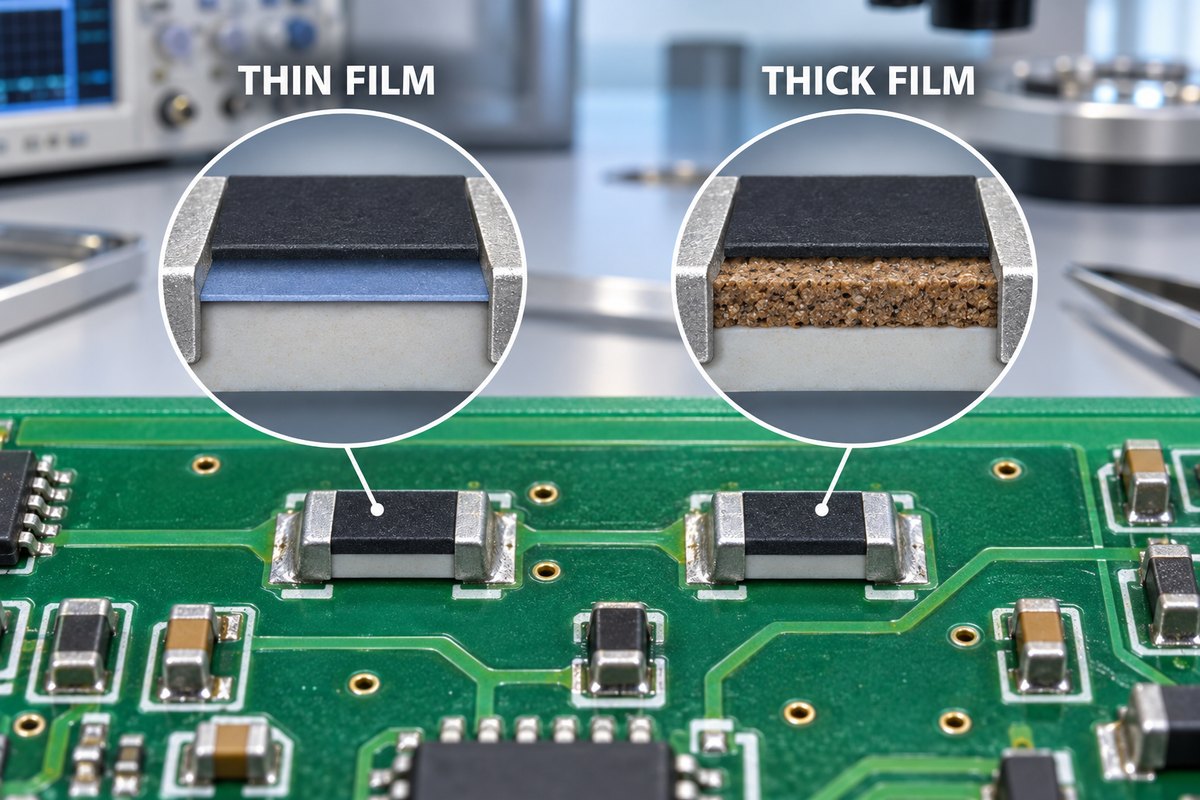
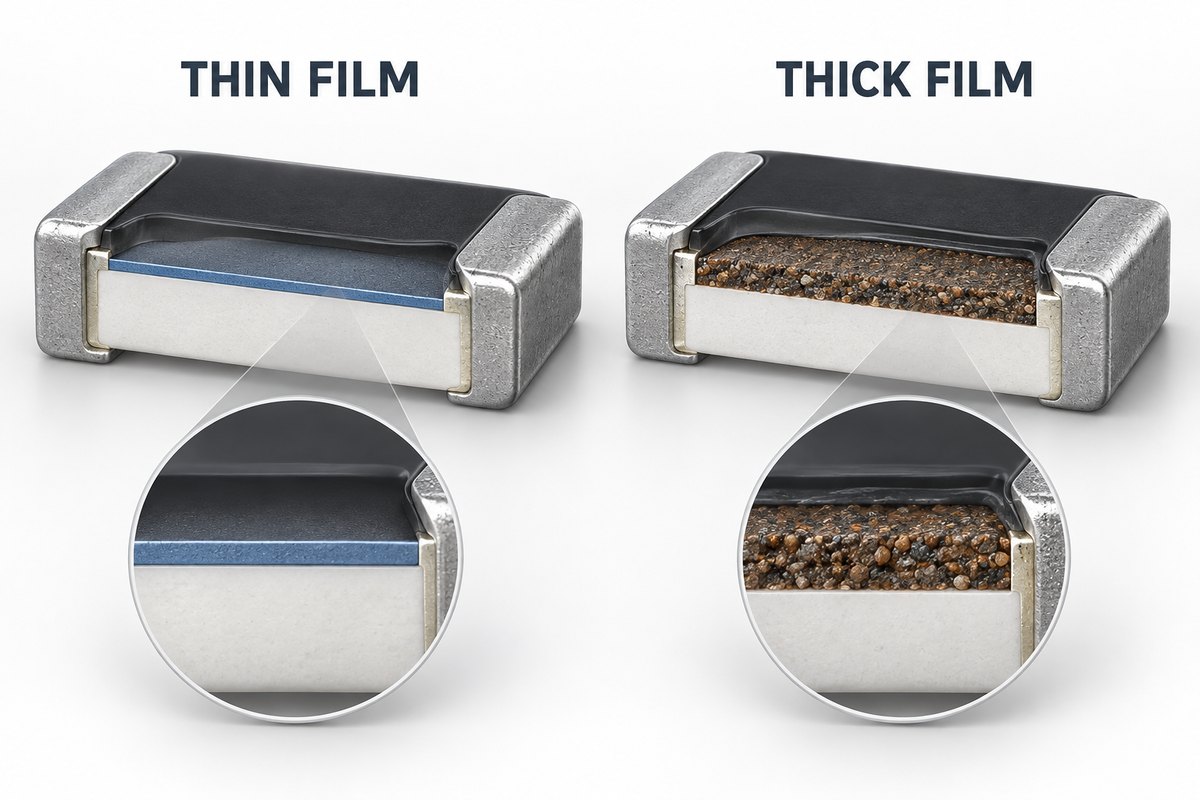
Thick film technology prints conductive paste on ceramic and fires it at high temperature. It is often used in hybrid circuits and ceramic electronic modules.
Thin film technology forms very fine and accurate circuit patterns. It is suitable for precision applications where tight feature control is required.
A typical process flow includes:
Ceramic substrate inspection
Surface cleaning and preparation
Copper bonding or metallization
Circuit imaging and etching
Plating and surface finish
Laser cutting, drilling, or profiling
Electrical testing and visual inspection
Dimensional and surface quality check
Design rules vary by process. DPC can support finer features, while DBC is better for thick copper and high-current designs. AMB is selected when bonding strength and reliability are important. The correct process should be chosen based on copper thickness, line width, current load, thermal requirement, and cost target.
What Affects Ceramic PCB Cost?
Ceramic PCB cost is affected by material type, substrate size, ceramic thickness, copper thickness, circuit complexity, surface finish, process type, tolerance, testing, quantity, and assembly requirements. When evaluating ceramic board price, the complete specification is more important than board size alone.
Material is a major factor. Alumina is usually more cost-effective and suitable for many standard ceramic PCB applications. Aluminum nitride costs more because it provides much higher thermal conductivity and requires more controlled processing. Silicon nitride may also cost more due to its mechanical properties and specialized applications.
Copper thickness affects both material usage and process difficulty. Thick copper supports higher current and better heat spreading, but it requires more process control during bonding, etching, and inspection.
Circuit complexity also affects cost. Fine lines, tight spacing, small holes, special shapes, and tight tolerances require more precise production. Surface finish can also change cost, especially when the design requires ENIG, silver, gold, or wire-bondable finishes.
Cost Factor
Effect on Price
Practical Note
Ceramic material
AlN and SiâNâ usually cost more than alumina
Select material based on actual thermal and mechanical needs
Substrate thickness
Non-standard thickness may increase cost
Use standard thickness when possible
Copper thickness
Thick copper increases material and process cost
Match copper to current and heat requirements
Process type
DPC, DBC, AMB, thick film, and thin film have different cost levels
Choose process based on performance and manufacturability
Circuit complexity
Fine features and tight tolerances increase production difficulty
Keep layout practical for the selected process
Surface finish
Special finishes add cost
Define soldering or bonding requirements clearly
Quantity
Small batches have higher unit cost
Use prototypes for validation, then optimize batch production
Testing and documentation
Extra inspection increases cost but improves control
Specify only required test items
To control ceramic PCB cost, avoid unnecessary over-specification. For example, aluminum nitride may not be required if alumina already meets the thermal target. Very thick copper may not be useful if the current load is moderate. A DFM review can help identify these issues before production.
EBest Circuit (Best Technology) can review ceramic PCB designs before manufacturing. This helps confirm material selection, copper structure, surface finish, panel use, and assembly feasibility. For ceramic PCB projects, early engineering review can improve cost control and production stability.
How Do You Choose a Reliable Ceramic Base PCB Factory?
To choose a reliable ceramic base PCB factory, evaluate its material knowledge, process capability, DFM support, inspection system, traceability, PCBA support, and communication quality. Ceramic PCB production is more specialized than standard FR4 PCB fabrication, so the supplier should understand the design purpose, not only the Gerber files.
First, check material capability. A qualified ceramic base PCB manufacturer should understand alumina, aluminum nitride, silicon nitride, copper thickness options, substrate thickness, thermal conductivity, dielectric properties, and surface finish choices. The supplier should help match the material to heat, voltage, mechanical stress, frequency, and budget.
Second, check process capability. Confirm whether the factory supports DPC, DBC, AMB, thick film, thin film, or the specific ceramic process required by your design. Also check minimum trace and spacing, copper thickness range, hole processing, outline tolerance, and available surface finishes.
Third, check engineering support. Ceramic PCB often needs DFM review before production. The factory should review copper-to-edge spacing, pad design, thermal path, substrate thickness, panelization, soldering method, and assembly handling.
Fourth, check quality control. Useful inspection items include electrical testing, visual inspection, dimensional measurement, copper thickness measurement, adhesion testing, surface finish inspection, and material traceability. For medical, automotive, industrial, or aerospace products, documentation control is also important.
EBest Circuit (Best Technology) supports ceramic PCB fabrication, PCB manufacturing, component sourcing, SMT assembly, testing, and one-stop PCBA production. This is useful when the ceramic PCB is part of a complete module and requires coordination between bare board fabrication and assembly.
Before requesting a quotation, prepare Gerber files, drill files, outline drawings, material requirements, substrate thickness, copper thickness, surface finish, quantity, operating temperature, voltage, current load, thermal target, and assembly notes. If the material has not been finalized, provide the application background so the factory can recommend a practical option.
To summarize, ceramic base PCB is suitable for designs that require better heat dissipation, electrical insulation, dimensional stability, and reliability than standard FR4 can provide. Alumina is often used for balanced cost and performance, aluminum nitride is used for high thermal conductivity, and silicon nitride is suitable for mechanically demanding applications. For ceramic base PCB fabrication, ceramic PCB board manufacturing, or PCBA project support, contact EBest Circuit (Best Technology) at sales@bestpcbs.com for quotation and engineering review.
Understanding the contract manufacturer vs OEM differences can save you time, money, and control over your own design. Here’s the twist most guides miss: you are probably the OEM. This article clears up the confusionâand helps you pick the right way to get your product builtâin minutes, not weeks.
A note on where we fit in: at EBest Circuit (Best Technology), we’re the contract manufacturerâthe partner you, as the OEM, can rely on to bring your design to life. With our own PCB and PCBA factories, we’d be glad to take your Gerber files and BOM and handle fabrication, sourcing, assembly, testing, and delivery, while you keep full ownership of your design and IP. If you have a project in mind, we’d be delighted to helpâplease feel free to reach out at sales@bestpcbs.com for a complimentary DFM review.
What Is an OEM and What Is a Contract Manufacturer?
Here’s the part most articles skip: if you have a product to bring to market, you are the OEM.
OEM (Original Equipment Manufacturer): The brand ownerâthe company that owns the product, design, and IP and sells it under its own name (Apple, Dell, or your own startup). That’s you.
Contract Manufacturer (CM): The factory you hire to build your product to your design. You send Gerber files + BOM; they fabricate, source, assemble, test, and deliver. You keep the IP.
ODM (Original Design Manufacturer): A factory that hands you a ready-made design to rebrand. You tweak the color or logo; they keep the base design.
So OEM isn’t a supplier you pickâit’s your role. The real decision is how you manufacture: hire a contract manufacturer to build your own design, or take an ODM’s ready design and rebrand it.
What Are the Key Differences Between OEM and Contract Manufacturer?
The honest answer: they aren’t competing options. As the OEM (the brand owner), you hire a contract manufacturer. They’re two sides of the same dealâyou own the product; the CM builds it.
The choice that actually matters for you is between your two manufacturing routes:
Contract manufacturer â your design, you own the IP, fully custom.
ODM â their design, you rebrandâfaster and cheaper, but you don’t own it.
Ownership drives a lotâbut your cost, MOQ, lead time, and customization also depend on tooling, component availability, test requirements, certification needs, and production volume.
Contract Manufacturing vs OEM: A Side-by-Side Comparison
Since you’re the OEM, the comparison that matters is between your two real routes to production: a contract manufacturer vs an ODM.
Factor (you’re the OEM either way)
Contract Manufacturer (build your design)
ODM (rebrand their design)
Who designs it
You
The ODM
Design / IP ownership
Yours
The ODM’s
How much you can customize
Fullâbuilt exactly to your spec
Minor (color, logo)
Your upfront cost
NRE, tooling, stencil, fixture, and setup may apply
Lowerâthe design already exists
Your MOQ
Supplier-dependent; many PCBA CMs support prototype to volume
Often tied to the ODM’s standard MOQ
Your speed to market
Fast once your design, BOM, and tests are finalized
Fastestâthe design is ready
Your control
High
Low
Best for you when
You have your own design to protect
You want a fast, low-cost launch
Pros and Cons of OEM vs Contract Manufacturer
You’re the OEM either wayâhere’s how your two routes stack up:
Contract Manufacturer (build your own design)
For you: Full design & IP control · Fully custom to your spec · Scales with you
Watch out: You need your own design · You’ll rely on a trusted, capable partner
ODM (rebrand a ready design)
For you: Fastest to market · Lower upfront cost · No design work on your side
Watch out: You don’t own the design · Hard to stand out · Others may sell the same base product
When Should You Use a Contract Manufacturer for Your Own Design?
Go the contract manufacturer routeârather than grabbing a ready-made ODM designâwhen you:
Have your own design or IP to protect
Need custom PCB & PCBA, not an off-the-shelf or rebranded board
Want flexible volumesâsamples, small batches, then scale
Need DFM feedback before committing to production
Plan to iterate and own your roadmap
(If you’d rather not own a design and just want a fast, cheap launch, an ODM is the alternative.)
When Does the OEM Model Make Sense?
Being a full OEMâdeveloping and owning your own original productâmakes sense when you:
Want long-term brand equity and differentiation
Have the R&D budget and time to develop and maintain a design
Need a proven, fully-owned product line for industries like medical, auto, or aerospace
Want to protect unique IP
In this model you still outsource the actual PCB & PCBA buildâusually to a contract manufacturer. The alternative (an ODM) is faster and cheaper, but you give up design ownership.
How to Choose the Right PCB & PCBA Manufacturing Partner
If you own your design, a strong contract manufacturer is usually your best move. Here’s a 6-point checklist for what to look for:
One-stop service â PCB fab + component sourcing + PCBA assembly + testing under one roof, so you don’t juggle vendors.
Real DFM support â A partner who reviews your design before production and flags issues.
Certifications â ISO9001, ISO13485, IATF16949, AS9100D for medical, auto, and aerospace.
Own factory + supply chain â In-house PCB & PCBA plus a deep parts network keeps your quality and lead times under control.
Sample & small-batch friendly â So you can validate before scaling.
Fast, traceable delivery â Quick turnaround with full batch traceability.
Own factories (PCB + PCBA) and 1,000+ supply-chain partnersâyour quality and lead times are easier to control.
20 years in PCBA, trusted by 10,000+ engineers and 1,800+ customers.
Digital workshop with 5-second traceability on materials, batches, and production progress.
1.5-week fast PCBA delivery.
📩 Get a quote or free DFM review: sales@bestpcbs.com
FAQs: Contract Manufacturer vs OEM Differences Explained
Is an OEM the same as a contract manufacturer? Noâand they aren’t even competing options. An OEM is the brand owner (likely you); a contract manufacturer is the factory you hire to build your design. The OEM owns the product; the CM builds it.
What’s the difference between OEM and ODM? As an OEM, you own your product and design. With an ODM, the factory owns the design and you simply rebrand it. So: OEM = your brand and your design; ODM = their design, your label.
Which is cheaper for meâbuilding my own design or using an ODM? An ODM has the lowest upfront engineering effort because the design already exists. Building your own design through a contract manufacturer may add NRE, tooling, stencil, or test-fixture costs, but you keep full IP and customization control.
Can a contract manufacturer help if my design isn’t finished? Yes. A good CM offers DFM analysis and BOM optimization to refine your design before production. EBest does this for free.
Do I lose my IP with a contract manufacturer? Normally, you keep ownership of your existing design, Gerber files, BOM, firmware, and product IP. That said, you should spell out IP protection clearly in your NDA, manufacturing agreement, tooling agreement, and engineering-change process.
What’s the typical lead time for custom PCBA? It varies, but EBest delivers PCBA in as fast as 1.5 weeks.
Still weighing contract manufacturer vs OEM for your next project? We build everything from rigid, flex, and rigid-flex to multilayer, HDI, metal-core, and high-frequency PCBsâplus full PCBA assembly. Tell us what you’re building at sales@bestpcbs.com, and we’ll help you find the right fit, no strings attached.
Are you looking for a reliableradar PCBmanufacturer for high-frequency electronic applications? Radar PCB technology is widely used in automotive systems, industrial sensing devices, aerospace equipment, and wireless communication products because of its stable signal transmission capability.
A high-quality radar PCB requires low-loss materials, controlled impedance structures, and precise multilayer manufacturing. This article explains radar PCB materials, board types, design methods, manufacturing processes, and EBest production services to help you better understand high-frequency PCB solutions.
What is a Radar Board?
A radar boardis a type of PCB designed for radar systems and high-frequency electronic devices. It is mainly used for signal transmission, sensing, communication, and data processing applications.
Compared with standard PCBs, radar boards require better electrical stability and lower signal loss. The board structure, material selection, and manufacturing accuracy directly affect signal quality.
Many radar systems operate at very high frequencies, especially mmWave applications. Because of this, the PCB must maintain stable impedance and accurate layer alignment during production.
Today, radar boards are widely used in automotive safety systems, aerospace equipment, industrial automation devices, weather monitoring systems, and smart sensing products.
What Materials are Commonly Used for Radar PCBs?
Radar PCB materials play an important role in signal transmission quality, thermal performance, and long-term reliability. High-frequency applications usually require low-loss materials with stable dielectric properties. Common radar PCB materials include:
Rogers Materials Commonly used in high-frequency and mmWave applications because of low dielectric loss and stable electrical performance.
PTFE Materials Suitable for aerospace radar PCB products requiring high signal accuracy.
Taconic Laminates Provide stable RF performance and reliable thermal stability for high-speed systems.
FR4 Hybrid Structures Used in some automotive radar PCB applications to balance performance and manufacturing cost.
Ceramic-Filled Materials Improve heat dissipation and reduce signal attenuation in high-frequency applications.
Metal-Based PCB Materials Used when enhanced thermal management and mechanical stability are required.
What are Main Types of Radar PCB Board?
Radar PCB boards can be classified according to their signal processing methods and detection functions. Different radar technologies require different PCB structures, processing capabilities, and transmission performance.
Doppler Radar PCB Based on the Doppler effect, this low-cost, stable, and durable PCB detects target velocity and motion through signal frequency shift. It is widely used in automotive collision avoidance systems, industrial speed measurement equipment, and human body sensing devices.
Monopulse (Single-Pulse) Radar PCB This high-precision PCB obtains target distance, azimuth, and elevation information through single pulse signals. It features high positioning accuracy and strong anti-interference capability, making it suitable for missile guidance, aviation monitoring, and military tracking systems.
MIMO Radar PCB Designed with multiple transmitting and receiving channels, MIMO radar PCB supports parallel signal processing and high-resolution imaging. It is commonly used in autonomous driving radar systems, aerospace remote sensing equipment, and intelligent monitoring devices.
Weather Radar PCB Specially designed for meteorological monitoring, this PCB can process long-distance and weak echo signals with stable performance and strong signal penetration capability. It is widely applied in weather stations, airport monitoring systems, and marine weather detection equipment.
Passive Radar PCB Unlike active radar systems, passive radar PCB does not contain a signal transmitting module. It analyzes surrounding reflected electromagnetic signals with low power consumption and strong concealment performance, mainly used in military detection and electromagnetic monitoring applications.
What are Common Applications of Radar PCB Board?
Radar PCB boards are widely used in modern electronic systems because they support stable high-frequency signal transmission and sensing functions. Common applications include:
Automotive Safety Systems Including adaptive cruise control and blind spot monitoring systems.
Industrial Automation Equipment Used for object detection and distance measurement applications.
Aerospace and Aviation Devices Support navigation and communication systems.
Weather Monitoring Systems Used in environmental sensing equipment.
Wireless Communication Devices Require stable high-frequency transmission capability.
Smart Traffic Systems Applied in vehicle monitoring and traffic management equipment.
Security Monitoring Equipment Used in motion tracking and remote sensing systems.
How to Design a High-Performance Radar PCB Board?
High-performance radar PCB design requires stable signal transmission, low signal loss, and strong anti-interference capability. Since radar systems usually operate at high frequencies, the PCB structure, material selection, routing layout, and thermal management all directly affect overall performance and reliability. Important design considerations include:
Choose Suitable High-Frequency Materials Standard FR4 materials may create excessive signal loss at high frequencies. Many radar systems use Rogers, PTFE, or Taconic materials because they provide lower dielectric loss and more stable electrical performance. These materials are commonly used in automotive, aerospace, and mmWave radar applications.
Design a Stable PCB Stack-Up and Impedance Structure Multilayer PCB structures help improve signal integrity and reduce interference. Dedicated ground layers and power layers are commonly added to maintain stable impedance and improve shielding performance. Controlled impedance design is especially important because unstable impedance may cause signal reflection and transmission errors.
Keep RF Routing Short and Smooth Long or complicated traces increase signal attenuation and delay. High-frequency signal traces should remain as short and direct as possible. Smooth routing with curved traces or 45-degree angles helps reduce signal reflection and improve transmission stability.
Improve Grounding and EMI Protection Continuous ground planes and shielding vias help reduce electromagnetic interference and external noise. Sensitive RF areas should remain separated from power circuits to improve overall signal quality and reduce crosstalk risks.
Optimize Thermal Management Design Radar systems may generate considerable heat during operation. Thermal vias, copper balancing structures, and heat dissipation designs help maintain stable electrical performance and improve long-term PCB reliability.
Control Manufacturing Accuracy Multilayer radar PCB boards require precise layer alignment and tight tolerance control. Small production deviations may affect signal synchronization and impedance consistency, especially in high-frequency radar applications.
Select Suitable Surface Finish ENIG surface finish is widely used in radar PCB manufacturing because it provides flat surface quality, reliable solderability, and stable conductivity for high-frequency electronic products.
Perform Signal Simulation Before Production Signal integrity simulation helps identify impedance mismatch, signal reflection, and routing issues before manufacturing. Early analysis helps improve production stability and reduces redesign risks.
What is the Manufacturing Process of Radar PCB?
Radar PCB manufacturing requires higher precision than standard PCB production because high-frequency signals are very sensitive to impedance variation, layer alignment, and signal loss. To ensure stable electrical performance, the entire production process must maintain strict material control, accurate processing, and reliable quality inspection. Typical radar PCB manufacturing steps include:
PCB Design Review and Material Preparation Before production begins, manufacturers review stack-up structure, impedance requirements, trace spacing, and manufacturing tolerance. High-frequency materials such as Rogers, PTFE, and Taconic are then prepared according to electrical performance requirements.
Inner Layer Imaging and Etching Circuit patterns are transferred onto copper layers using precision exposure equipment. Chemical etching removes unnecessary copper and forms the required high-frequency circuit layout.
AOI Inspection and Multilayer Lamination AOI inspection checks for open circuits, short circuits, and dimensional defects before lamination. Multiple PCB layers are then bonded together under controlled temperature and pressure to form stable multilayer structures.
Drilling and Copper Plating Mechanical or laser drilling creates vias and mounting holes. Copper plating forms conductive connections between PCB layers and helps maintain stable signal transmission performance.
Outer Layer Processing and Surface Finish Outer circuits are formed through imaging and etching processes. After that, solder mask and surface finish are applied. ENIG is widely used in radar PCB manufacturing because it provides flat surface quality and reliable conductivity.
Impedance Testing and Electrical Inspection Controlled impedance testing verifies whether signal traces meet electrical requirements. Electrical testing also checks for open circuits and short circuits before shipment.
Final Inspection and PCB Assembly Finished boards undergo appearance inspection, dimensional verification, and packaging checks. If assembly services are required, SMT assembly and functional testing are completed before delivery.
Why Choose EBest as Radar PCB Manufacturer?
Choosing a reliable radar PCB manufacturer helps improve product stability, reduce production risks, and shorten project lead times. EBest provides one-stop PCB manufacturing and assembly services for high-frequency radar applications with stable quality and fast delivery. Our advantages include:
More than 20 Years of PCB Manufacturing Experience EBest has focused on PCB manufacturing since 2006 and has strong experience in high-frequency PCB and multilayer PCB production.
Support for High-Frequency Materials We support Rogers, PTFE, Taconic, and other materials commonly used in radar PCB applications to maintain stable signal performance.
Strong Multilayer PCB Capability Our manufacturing process supports precise multilayer PCB production and controlled impedance structures for high-frequency applications.
Quick-Turn Prototype Services Fast PCB prototyping helps shorten development cycles. Some urgent PCB orders can be shipped within 24 hours.
One-Stop PCB Assembly Services We provide PCB fabrication, SMT assembly, and component sourcing services in one place to improve project efficiency.
Strict Quality Control AOI inspection, impedance testing, electrical testing, and shipment inspection help ensure stable product quality and reliability.
Stable Global Delivery Support Efficient production planning and logistics coordination help maintain stable lead times for prototype and production orders.
International Certifications Our factory supports IATF 16949, ISO 9001:2015, ISO 13485:2016, AS9100D, RoHS, REACH, and UL standards for industrial and automotive applications.
Flexible Production Capacity We support both small prototype orders and large-volume PCB production with stable manufacturing capability.
Technical Support for Radar PCB Projects We provide support for material selection, stack-up review, impedance structure analysis, and manufacturability evaluation to help improve production stability.
What Quality Certifications Do Our Radar PCBs Hold?
Reliable certifications help ensure stable manufacturing quality and consistent production processes for high-frequency PCB products. Our certifications include:
IATF 16949
ISO 9001:2015
ISO 13485:2016
AS9100D
RoHS Compliance
REACH Compliance
UL Certification
These certifications help ensure stable production quality for automotive, industrial, aerospace, and medical electronic applications.
What Radar PCB Services Do We Offer?
EBest provides complete PCB fabrication and assembly solutions for various radar electronic applications. Our services include:
Radar PCB prototyping
High-frequency PCB manufacturing
Multilayer PCB fabrication
PCB assembly services
SMT assembly
Component sourcing
PCB design support
Quick-turn PCB production
Mass production services
Impedance control PCB manufacturing
How Do We Ensure the Quality and Reliability of Radar PCB?
Radar PCB products require very stable electrical performance because high-frequency signals are sensitive to impedance variation, layer alignment, and signal interference. Even small production deviations may affect signal transmission quality and long-term reliability. For this reason, EBest follows strict quality management procedures throughout the entire manufacturing process. We ensure product quality and reliability through:
Strict Incoming Material Inspection All high-frequency materials are checked before production to verify dielectric properties, copper thickness, and material consistency. This helps maintain stable signal performance from the beginning of the manufacturing process.
Controlled Impedance Verification Radar PCB products require accurate impedance control for stable signal transmission. We perform impedance calculation and testing during production to ensure electrical consistency.
AOI Inspection During Production Automated optical inspection is performed after imaging and etching processes to detect open circuits, short circuits, trace defects, and dimensional deviations early.
Precise Layer Alignment Control Multilayer radar PCB boards require highly accurate layer registration. Tight alignment control helps maintain signal synchronization and stable RF performance.
100% Electrical Testing Every finished PCB undergoes electrical testing before shipment to verify continuity, isolation performance, and circuit reliability.
Surface Finish and Solderability Inspection Surface quality directly affects assembly reliability. ENIG and other surface finishes are inspected to ensure flatness, conductivity, and soldering stability.
Thermal and Reliability Evaluation For high-reliability applications, additional thermal and environmental testing may be performed to verify long-term operating stability.
Production Traceability Management Each production batch is traceable from raw materials to finished shipment, helping maintain stable quality control and production consistency.
Experienced Manufacturing and Assembly Support Our production team follows standardized manufacturing procedures and strict inspection standards throughout PCB fabrication and assembly processes.
How Do We Maintain On-Time Delivery for Radar PCB Orders?
Fast and stable delivery is important for radar PCB prototype development and volume production projects. Delays in material preparation, production scheduling, or assembly may affect the entire project timeline. EBest maintains reliable lead times through efficient manufacturing coordination and stable supply management. Our delivery advantages include:
Efficient Production Planning Production schedules are arranged according to project requirements, PCB complexity, and material availability to reduce unnecessary delays.
Stable High-Frequency Material Supply We maintain long-term cooperation with material suppliers to ensure stable availability of Rogers, PTFE, Taconic, and other high-frequency laminates.
Quick PCB Design Review Process DFM analysis and production review are completed quickly before manufacturing begins, helping reduce engineering delays and improve production efficiency.
Dedicated Prototype Production Support Separate quick-turn production arrangements help accelerate radar PCB prototype manufacturing for urgent projects.
Flexible Manufacturing Capacity Our production capability supports both small-volume prototypes and large-scale production orders with stable scheduling management.
Real-Time Production Tracking Production progress is monitored throughout fabrication and assembly stages to improve schedule visibility and delivery stability.
Optimized SMT Assembly Scheduling Assembly planning is coordinated with PCB production to reduce waiting time between fabrication and SMT processes.
Strict Shipment and Packaging Management Finished products are inspected, packaged, and prepared for shipment according to project schedules to reduce logistics delays.
Global Logistics Support We work with international shipping partners to support fast worldwide delivery for prototype and production PCB orders.
Urgent PCB Production Capability For time-sensitive projects, expedited manufacturing services are available, and some urgent PCB orders can be shipped within 24 hours.
FAQs About Radar PCB Board
Q1: What frequency ranges are commonly used in radar PCB applications?
A1:Different radar systems operate at different frequency ranges. Automotive radar commonly uses 24GHz and 77GHz, while some mmWave applications may use even higher frequencies for more accurate detection and faster signal processing.
Q2: Why are low-loss materials important for radar PCB manufacturing?
A2:High-frequency signals can easily lose energy during transmission. Low-loss materials help reduce signal attenuation and improve transmission stability, especially in long-distance or high-speed radar applications.
Q3: Can radar PCB boards support both prototype and mass production?
A3: Yes. Radar PCB products can be manufactured in small prototype quantities for testing and also scaled to volume production once the project enters the mass manufacturing stage.
Q4: What PCB thickness is commonly used for radar applications?
A4:Radar PCB thickness depends on operating frequency, stack-up structure, and mechanical requirements. Many high-frequency radar boards use controlled thickness structures to maintain stable impedance performance.
Q5: Why is impedance control important in radar PCB production?
A5:Stable impedance helps maintain signal quality and reduces signal reflection during transmission. Poor impedance control may affect radar accuracy and overall system performance.
Q6: Can radar PCB boards work in harsh environments?
A6:Yes. Many radar PCB products are designed for automotive, aerospace, and industrial applications where high temperature, vibration, and humidity resistance are required.
Q7: Does EBest support turnkey radar PCB assembly services?
A7: Yes. EBest provides one-stop services including PCB fabrication, SMT assembly, component sourcing, testing, and final product delivery.
Q8: What should be considered when designing a radar PCB antenna?
A8:Radar PCB antenna design requires stable impedance control, accurate trace dimensions, and low-loss PCB materials to maintain reliable signal transmission. Antenna layout, grounding structure, and layer stack-up also directly affect radar detection accuracy and overall RF performance.
Get Your Custom Radar PCBs Quote
Looking for a reliable supplier for radar PCB fabrication and assembly services? EBest provides custom PCB manufacturing(including RF PCB, Ceramic PCB and so on), quick prototyping, multilayer PCB production, and turnkey assembly support for automotive, industrial, aerospace, and communication applications.
Whether you need PCB prototypes or volume production, we can support your project with stable quality, fast delivery, and competitive pricing. Contact EBest today for your custom PCB quotation: sales@bestpcbs.com.
A Bluetooth Module is small, but its PCB board has a direct effect on final wireless performance. Antenna clearance, grounding, power stability, impedance control, SMT quality, and testing all affect how well the product connects in real use.
This guide is written for engineers, buyers, and product teams who want to build a reliable Bluetooth PCB board, Bluetooth module board, or Bluetooth-enabled PCBA without spending too much time on generic theory.
What Is a Bluetooth Module?
A Bluetooth Module is a compact wireless communication unit used to send data, audio, or control signals between electronic devices.
It usually includes:
Part
Function
Bluetooth chip
Handles wireless communication
Antenna or antenna pad
Sends and receives RF signals
Crystal oscillator
Supports stable timing
Matching circuit
Helps RF signal transfer
Power circuit
Provides clean voltage
Interface pins
Connects with MCU or main board
A module is easier to integrate than a bare Bluetooth chip because most RF-related parts are already built into the module.
How Does a Bluetooth Module Work?
A Bluetooth module converts device data into a short-range wireless signal and sends it through the antenna.
In a real product, the signal path usually works like this:
The MCU sends data to the Bluetooth module through UART, SPI, USB, or I2C.
The module processes the data through the Bluetooth protocol.
The RF circuit sends the signal through the antenna.
Another Bluetooth device receives and decodes the signal.
The device responds, pairs, or exchanges data.
For stable communication, the PCB must support clean power, good grounding, correct antenna placement, and controlled RF layout.
What Types of Bluetooth Modules Are Commonly Used?
Different products use different Bluetooth modules. The right choice depends on data type, power consumption, size, connection distance, and certification requirements.
Type
Common Use
Classic Bluetooth module
Audio, serial data, legacy devices
Bluetooth Low Energy module
Wearables, sensors, IoT devices
Dual-mode Bluetooth module
Products needing Classic Bluetooth and BLE
WiFi Bluetooth module
Gateways, smart home devices, connected terminals
Bluetooth audio module
Speakers, headphones, voice devices
HC-05 / HC-06 module
Arduino, MCU learning, simple serial communication
HM-10 module
BLE-based low-power projects
For commercial products, module selection should also consider supply stability, antenna type, firmware support, lifecycle status, and long-term availability.
Bluetooth Module vs Bluetooth Chip: What Is the Difference?
A Bluetooth chip is the core IC. A Bluetooth module is a more integrated wireless unit.
Item
Bluetooth Chip
Bluetooth Module
Integration level
Low
Higher
RF design work
More complex
Easier to integrate
Certification path
More work
Often simpler
PCB layout difficulty
Higher
More manageable
Best for
Custom RF design
Faster product development
A Bluetooth system on a chip may include RF, processor, memory, and protocol functions in one IC. A Bluetooth module usually places that chip with the required RF circuit, antenna, and supporting components on a small PCB.
For many product teams, the module route saves engineering time and reduces layout risk.
How Does a Bluetooth Module Connect to a Bluetooth PCB Board?
A Bluetooth PCB board turns the module into a working product circuit. This is where wireless performance meets manufacturing quality.
Key layout points include:
Keep the antenna area away from copper, metal parts, tall components, and noisy circuits.
Reserve proper antenna clearance according to the module datasheet.
Use a clean ground plane to improve signal stability.
Place decoupling capacitors close to the power pins.
Keep high-speed or noisy digital traces away from RF areas.
Control impedance when the design uses RF traces, USB, or other high-speed signals.
Review grounding, shielding, and power routing before PCB fabrication.
With customer schematics, BOM, and mechanical requirements, EBest Circuit supports PCB layout optimization, PCB fabrication, component sourcing, SMT assembly, and functional testing for Bluetooth module board projects.
What Bluetooth PCB Board Manufacturing Capabilities Support Bluetooth Module Projects?
A Bluetooth PCB board is usually small, dense, and sensitive to signal consistency. For this type of project, customers mainly care about five manufacturing points: board size, routing density, via structure, signal control, and assembly reliability.
EBest Circuit supports Bluetooth module board projects with the following focused capabilities:
1. Compact Board Build for Small Wireless Devices
Bluetooth products are often used in wearables, smart sensors, handheld terminals, medical monitors, and IoT devices. These products usually leave very limited PCB space.
Standard finished board size can reach 10 Ă 10mm.
Prototype review can support smaller boards down to 3 Ă 3mm, depending on the design structure.
Standard board thickness supports 0.4â6.0mm.
Prototype review can cover 0.15â10mm when special thickness is required.
This is useful when the Bluetooth module board must fit into a compact enclosure while still carrying the module, MCU, power circuit, connector, and antenna-related layout.
2. Fine-Line Capability for Dense Bluetooth Circuits
Bluetooth PCB boards often combine wireless modules, MCUs, sensors, connectors, shielding parts, and small passive components on one compact board. Fine routing capability helps keep the layout manufacturable.
Inner layer line width/spacing can reach 3/3mil at 1/2oz copper.
Outer layer line width/spacing can reach 3.5/4mil at 1oz copper.
Prototype review can evaluate finer routing, such as 2.5/2.5mil inner layers and 3/3mil outer layers.
This supports dense routing around Bluetooth chips, module pins, MCU areas, and compact component groups.
3. HDI and Via Support for Space-Limited Layouts
When the board becomes smaller, standard routing may not leave enough space. HDI structures and laser vias can help release routing channels and improve layout flexibility.
Standard laser via size can reach 0.10mm.
Prototype review can evaluate laser vias down to 0.070mm.
Mechanical finished holes support 0.15â6.5mm.
Standard through-hole aspect ratio supports up to 12:1.
This capability is valuable for mini Bluetooth PCB boards, multilayer wireless boards, and compact Bluetooth module board layouts.
4. Signal-Control Support for Bluetooth and High-Speed Interfaces
Some Bluetooth boards include USB, RF-sensitive traces, high-speed digital interfaces, or antenna-related layout areas. These designs require controlled material choice and impedance review.
Supported materials include normal Tg FR4, mid Tg FR4, High-Tg 170â180 materials, high-speed low-loss materials, Rogers 4003/4350B, and PTFE high-frequency materials.
This helps Bluetooth PCB board projects maintain more stable signal paths when the design includes RF-related routing, USB communication, or sensitive wireless areas.
5. Assembly-Ready Surface Finish and PCB Testing
Bluetooth PCBA often uses fine-pitch ICs, compact module pads, small passive parts, connectors, and shielding-related components. The PCB surface finish must support stable soldering and inspection.
Surface finish options include ENIG, lead-free HASL, immersion tin, immersion silver, OSP, hard gold, soft gold, ENEPIG, and gold finger.
For fine-pitch Bluetooth PCBA, ENIG is commonly used.
ENIG thickness supports 0.025â0.125ÎŒm gold and 3â8ÎŒm nickel.
PCB electrical testing can support up to 5000V DC / 3000V AC, depending on project requirements.
These capabilities help improve solderability, reduce assembly risk, and support more reliable Bluetooth module board production.
With these manufacturing capabilities, EBest Circuit can support FR4 Bluetooth PCB boards, multilayer Bluetooth boards, HDI wireless boards, controlled impedance boards, thin PCB boards, and high-frequency material Bluetooth boards from prototype to batch production.
Bluetooth Module Board Case Study: 6-Layer FR4 PCB with Blind and Buried Vias
Here is one Bluetooth module board we manufactured for a compact wireless device. The project used a 6-layer FR4 structure with Tg170 material, blind and buried vias, and a 50 Ohm impedance requirement on the front side.
The board thickness was controlled at 0.83mm ±0.1mm, helping the customer keep the product compact while still supporting multilayer routing. The design also used L1-L2 blind vias and L2-L3 buried vias, which helped release routing space around dense signal and component areas.
For the RF-related signal path, the board required 50 Ohm controlled impedance, with 0.11mm line width, 0.18mm line spacing, and L2 as the reference layer. The final PCB used white solder mask, black silkscreen, and ENIG 1u” surface finish for stable assembly and clean appearance.
This case shows EBest Circuitâs capability to support Bluetooth module boards with thin multilayer structure, HDI via design, impedance control, and production-ready surface finish.
Project Parameters
PCB Type: 6-layer FR4 Bluetooth module board
Material: FR4 Tg170, Shengyi material available
Copper Thickness: 1oz inner layers and outer layers
Board Thickness: 0.83mm ±0.1mm
Via Structure: Blind and buried vias
Blind Via: L1-L2
Buried Via: L2-L3
Impedance: 50 Ohm on front side
Impedance Line Width: 0.11mm
Impedance Line Spacing: 0.18mm
Reference Layer: L2
Solder Mask / Silkscreen: White solder mask, black silkscreen
Surface Finish: ENIG 1u”
Where Are Bluetooth Module Boards Used?
Bluetooth module boards are used wherever devices need short-range wireless connection.
Industry
Application Examples
Medical devices
Wearable monitors, portable diagnostic tools, wireless sensor units
Industrial control
Data collection terminals, wireless control panels, PLC adapters
Consumer electronics
Speakers, headphones, smart remotes, smart home devices
Handheld controllers, sensor boards, wireless control units
Instruments
Portable meters, test devices, wireless data loggers
For these products, stable Bluetooth communication depends on both module selection and PCB/PCBA manufacturing control.
Why Choose Us for Bluetooth Module Board Manufacturing?
Choose EBest Circuit when your Bluetooth product requires more than simple PCB fabrication. We support PCB layout optimization, PCB fabrication, component sourcing, SMT assembly, inspection, and functional testing for Bluetooth module board projects.
For different Bluetooth products, we can support a wide range of PCB structures, including FR4 rigid PCB, multilayer PCB, HDI PCB, flexible PCB, rigid-flex PCB, High-Tg PCB, controlled impedance PCB, and thin PCB. These board types are commonly used in compact wireless devices, smart home products, wearable electronics, industrial control terminals, medical monitoring devices, IoT gateways, automotive diagnostic tools, and battery management communication boards.
Our manufacturing support focuses on the details that directly affect Bluetooth module board performance:
Antenna area review to help keep copper, metal parts, and noisy circuits away from sensitive RF zones.
Grounding and power routing review to support cleaner power delivery and more stable wireless communication.
Controlled impedance support for boards with USB, RF traces, or high-speed signal paths.
DFM check before production to reduce layout, soldering, panelization, and assembly risks.
Component sourcing and BOM checking to help confirm module availability, package compatibility, and alternative options.
SMT assembly for compact wireless boards, including fine-pitch ICs, small passive parts, connectors, sensors, and shielding-related components.
Inspection and testing support, including AOI, X-ray, electrical testing, and functional testing according to project requirements.
Prototype, small-batch, and mass production support for different product development stages.
For Bluetooth module board projects, our role is simple: help turn your design files into a stable, manufacturable, and testable wireless PCBA.
Send your Bluetooth PCB board files or BOM to sales@bestpcbs.com for a manufacturing review and quotation.
FAQs about module bluetooth
Q1. What is a module bluetooth used for? A module bluetooth is used for wireless data transfer, audio transmission, device pairing, remote control, and IoT communication. In product manufacturing, it is usually mounted on a Bluetooth PCB board or integrated into a larger PCBA.
Q2. Is a Bluetooth module the same as a Bluetooth chip? No. A Bluetooth chip is the main IC. A Bluetooth module usually includes the chip, antenna, RF circuit, crystal, and supporting components, making it easier to integrate into a product.
Q3. What is the difference between HC-05 and HC-06 Bluetooth module? HC-05 can usually work as master or slave. HC-06 is commonly used as a slave module. Both are popular for simple serial communication and Arduino projects.
Q4. Can a Bluetooth module be used in industrial control devices? Yes. Bluetooth modules can be used in industrial data terminals, wireless panels, monitoring devices, and sensor communication boards. The PCB layout and assembly quality should support stable operation.
Q5. How do you test whether a Bluetooth module is working? Common checks include power-on test, pairing test, serial communication test, signal response test, current consumption check, and product-level functional test.
Q6. What affects the range of a Bluetooth module? The main factors include Bluetooth class, antenna layout, ground plane, power stability, enclosure material, nearby metal parts, and the actual working environment.
Planning a Bluetooth Module PCB board project? Just feel free to send your files or BOM to sales@bestpcbs.com, and our engineering team will help review the manufacturing details before production.
Are you looking for authoritative guidelines to standardize PCB solder mask production and quality inspection? IPC-SM-840 is the globally recognized industrial standard that governs the design, performance, and acceptance criteria of PCB permanent solder mask coatings.
This guide fully unpacks IPC-SM-840 core content, including the latest version, professional specifications, thickness standards, grade differences, and standard comparisons. It delivers practical, easy-to-understand technical references to help practitioners strictly follow IPC-SM-840 requirements and produce high-reliability PCB products.
What is IPC-SM-840 Standard?
IPC-SM-840 is an authoritative industry standard formulated and released by the Association Connecting Electronics Industries for circuit board solder mask production.
IPC-SM-840 exclusively targets permanent solder mask coatings applied on rigid and flexible printed circuit boards. It covers the full lifecycle of solder mask materials from incoming inspection to finished product acceptance.
This standard defines uniform testing methods, performance thresholds and defect acceptance criteria for industrial production. IPC-SM-840 eliminates inconsistent quality standards among different manufacturers and regions.
All mainstream PCB and PCBA manufacturers worldwide adopt this specification as the core inspection basis. It effectively standardizes solder mask quality and improves the overall stability of electronic circuit boards.
What is the Latest Version of IPC SM 840?
The latest official and valid version of IPC-SM-840 is Revision E, officially released in December 2010.
This updated version fully replaces the previous IPC-SM-840D issued in 2007. It supplements many new technical requirements adapted to modern high-precision PCB manufacturing processes.
A major upgrade of IPC-SM-840E is the addition of complete specification rules for flexible circuit cover layer materials. It fills the standard gap for flexible board solder mask coating quality inspection.
All old versions including Revision C and Revision D have been phased out in the industry. Current product design, production and quality inspection all take IPC-SM-840E as the only reference baseline.
Why is IPC-SM-840 Important for PCB Solder Mask?
IPC-SM-840 sets unified global standards for PCB solder mask production and quality inspection. It defines consistent performance metrics, testing rules and acceptance criteria to standardize solder mask quality across manufacturers.
This standard regulates key solder mask properties, including electrical insulation, adhesion, thermal stability and chemical resistance. It solves batch quality inconsistencies common in mass PCB production.
Following IPC-SM-840 effectively avoids typical PCB defects like copper oxidation, short circuits and coating peeling. It stabilizes circuit performance and prolongs the service life of rigid and flexible PCBs in various application environments.
IPC-SM-840 Solder Mask Specifications
IPC-SM-840E defines full, unified performance specifications for PCB permanent solder mask and flexible cover materials. It standardizes core quality criteria for mass production to guarantee stable coating reliability. Below are the detailed technical specifications for practical production and inspection use.
Item
Specification
Dielectric Strength
Minimum 500 VDC breakdown voltage per 25 ÎŒm solder mask thickness, no electric breakdown or leakage.
Passes standard anti-tracking requirements to prevent surface carbonization and short-circuit risks under high voltage and humidity.
Pencil Hardness
Minimum hardness grade F, no scratches, coating loss or substrate exposure after standard hardness testing.
Surface Adhesion
No peeling, warping or detachment after standard tape testing on copper, nickel and PCB substrate surfaces.
Surface Coverage & Resolution
Minimum 0.05 mm clearance between solder mask and pad edges; minimum 0.1 mm solder mask bridge width between adjacent pads.
Solder Heat Resistance
Withstands lead-free soldering temperatures above 260°C, no blistering, cracking, peeling or discoloration after repeated soldering cycles.
Thermal Shock Resistance
No delamination, cracking or coating separation after rapid alternating cold and hot temperature cycle tests.
Solvent & Cleaning Agent Resistance
No swelling, fading, softening or peeling after contact with common industrial solvents and cleaning agents.
Flux Resistance
No chemical corrosion or surface damage from soldering flux, allows complete flux cleaning without coating damage.
Flammability
Meets electronic assembly flame-retardant standards, inhibits rapid flame spread and reduces fire hazards.
Anti-Fungal Performance
No fungal or mildew growth on coating surfaces during long-term humid storage and operation.
What Are the Solder Mask Thickness Requirements for IPC SM 840?
IPC-SM-840 does not enforce a fixed solder mask thickness for all PCBs, and it ties thickness qualification to electrical insulation performance.
The core standard rule: minimum 500 VDC breakdown voltage for every 25 ÎŒm solder mask thickness. All coating areas must meet this insulation benchmark regardless of local thickness differences.
Even solder mask thinner than 25 ÎŒm must still pass the 500 VDC withstand voltage test to guarantee basic circuit insulation safety.
Industrial standard thickness range: 12 ÎŒm â 75 ÎŒm for general PCBs; mainstream rigid PCBs adopt 20 ÎŒm â 38 ÎŒm to balance insulation performance and soldering precision.
IPC-SM-840 Class H vs Class T: What is Difference?
IPC-SM-840E divides qualified solder mask products into two independent grade standards, namely Class T and Class H. The two grades differ greatly in application scenarios, test rigor and environmental resistance, adapting to different product reliability demands.
Comparison Dimension
IPC-SM-840 Class T
IPC-SM-840 Class H
Full Definition
Telecommunication Grade, general commercial standard for conventional electronic products
High Reliability Grade, premium standard for high-stability and harsh-environment products
Application Scenarios
Consumer electronics, communication devices, ordinary industrial control equipment, non-critical commercial instruments
Basic industrial testing standards with moderate tolerance ranges for performance indicators
Strict enhanced testing standards with narrow tolerance, covering thermal cycling, humidity and chemical resistance
Environmental Adaptability
Suitable for normal indoor, room-temperature and dry working environments
Resists extreme temperature changes, high humidity and mild chemical corrosion for complex working conditions
Product Operation Risk
Minor equipment shutdown caused by solder mask issues will not lead to major safety hazards or economic losses
Zero tolerance for performance failure, avoids equipment shutdown and safety risks in high-reliability scenarios
Production Positioning
Focuses on cost control and basic qualified performance for mass commercial production
Prioritizes long-term service stability and low failure rate for high-end industrial products
Differences Between IPC-SM-480 and IPC-6012
IPC-SM-480 and IPC-6012 are two core supporting standards in PCB manufacturing. Many people confuse their application scopes, as both involve PCB quality inspection content. In fact, the two standards have completely different core positioning and coverage, and they are often used in combination in formal PCB quality audits.
Comparison Item
IPC-SM-480
IPC-6012
Core Focus
Professional guidance for solder mask material selection, coating process and performance verification
Overall qualification verification and full-performance inspection standards for rigid printed circuit boards
Main Coverage
Solder mask raw material evaluation, coating process parameters and surface protection performance detection
Solder mask workshop production inspection and raw material incoming quality control
Finished rigid PCB overall acceptance and factory quality inspection
Solder Mask Related Rules
Complete and independent solder mask specification system
Solder mask requirements are only a small branch of full-board inspection items
Usage Scenario
Used for early-stage material selection and process confirmation before mass production
Used for final finished board delivery inspection and project quality acceptance
Where Can I Download IPC-SM-840 PDF for Free?
Most practitioners in the PCB industry need IPC-SM-840 PDF resources for daily design, production and quality inspection reference. Due to international copyright protection regulations, the official full-version IPC-SM-840E document cannot be downloaded for free through formal channels. However, there are multiple legitimate ways to obtain reference content for daily work.
Official IPC website preview: Visit the official IPC platform to view free abstracts, directory outlines and core specification introductions of IPC-SM-840, covering mainstream production inspection rules.
Professional industry technical forums: Many electronics manufacturing communities share sorted-out IPC-SM-840 interpretation articles and key specification excerpts for free learning and reference.
Industry resource sorting websites: Professional PCB technology platforms release simplified practical guides based on IPC-SM-840E, which are more suitable for on-site production operation.
Professional PCB manufacturers: Formal and qualified PCBA suppliers will sort out standardized IPC-SM-840 implementation documents, which can be obtained through business consultation.
You can directly download IPC-SM-840 PDF via the following link:
Q1: Can I use IPC-SM-840D instead of IPC-SM-840E for new orders?
A1: It is not recommended. IPC-SM-840E is the latest valid version. Old revisions lack updated rules for flexible circuits and modern low-temperature and lead-free coating materials, which cannot meet current industrial production standards.
Q2: Do all PCBs need to choose between Class H and Class T?
A2: Yes. All solder mask coated PCBs must correspond to one grade standard according to end-use scenarios. Clear grade classification ensures consistent inspection standards and product reliability.
Q3: Is solder mask thickness the only check item in IPC-SM-840?
A3: No. Thickness is only one basic inspection indicator. IPC-SM-840 also takes adhesion, insulation resistance, heat resistance and chemical resistance as core mandatory inspection items.
Q4: Does IPC-SM-840 apply to both rigid and flexible PCBs?
A4: Yes. The upgraded IPC-SM-840E adds complete specification rules for flexible circuit cover layers, covering all conventional rigid and flexible PCB products on the market.
Q5: What happens if solder mask fails IPC-SM-840 tests?
A5: Unqualified solder mask cannot pass factory inspection. Such products need rework coating or direct scrapping to avoid hidden quality risks in terminal electronic products.
Q6: Does IPC-6012 replace the use of IPC-SM-840?
A6: No. IPC-6012 is a full-board inspection standard, while IPC-SM-840 is a professional solder mask specification. The two standards complement each other and need to be used simultaneously for high-quality PCB production.
Q7: What is the biggest difference between Class H and Class T under IPC-SM-840?
A7: The core difference is reliability resistance. Class H adapts to harsh and long-term working environments with stricter test standards, while Class T only meets basic commercial product use requirements.
Conclusion
Strict compliance with IPC-SM-840 standards is the key to ensuring stable and reliable PCB solder mask quality. Our team delivers standardized PCBA manufacturing services that fully follow all specifications of IPC-SM-840, covering solder mask coating, performance testing and finished product inspection. If you have customized PCB( like FR4 PCB, metal core PCB, HDI PCB and so on) and PCBA production requirements that need to meet IPC-SM-840 industrial standards, feel free to send your project demands to sales@bestpcbs.com.
MIMO antenna is widely used in 5G CPE, LTE gateways, WiFi routers, IoT modules, UAV communication units, and industrial wireless devices. In these products, antenna performance is not only related to the antenna structure itself, but also to the PCB layout, RF trace consistency, connector reliability, controlled impedance, and PCBA assembly quality.
From a PCB and PCBA manufacturing point of view, the goal is not to redesign the antenna. The goal is to manufacture and assemble the board according to the customerâs approved RF layout, stackup, material, impedance, and assembly requirements.
Before fabrication, engineers and buyers should confirm several practical details, including RF trace width, PCB type, stackup, antenna keep-out area, controlled impedance, connector footprint, surface finish, BOM, pick-and-place file, and assembly drawing. For MIMO antenna PCB fabrication, RF PCB manufacturing, or PCBA assembly support, you can send your Gerber files, BOM, stackup, and assembly requirements to sales@bestpcbs.com for review and quotation.
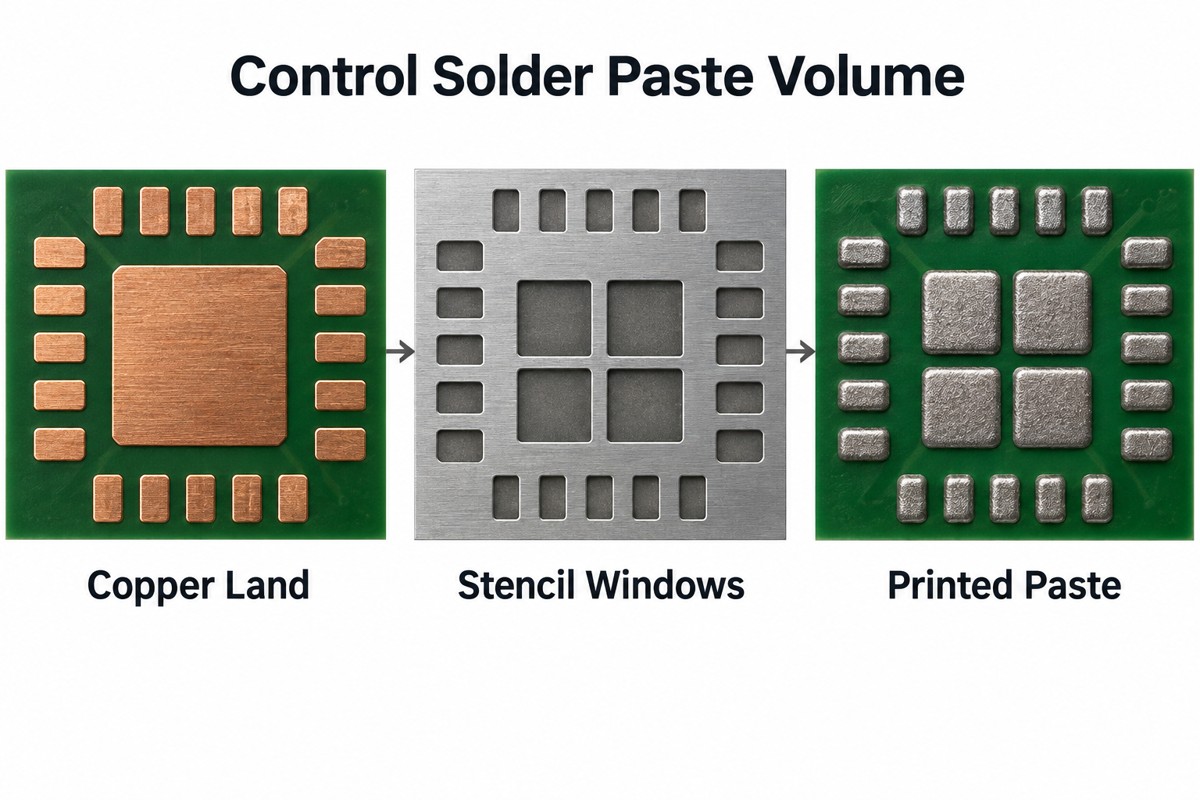
What Is a MIMO Antenna?
A MIMO antenna is an antenna system that uses multiple antenna paths to send and receive wireless signals. MIMO stands for Multiple Input, Multiple Output. It is widely used in 5G, LTE, WiFi, IoT, industrial wireless devices, routers, gateways, UAV communication units, and smart electronic products.
For engineers and buyers, the key point is not only how the antenna works in theory. In a real product, the MIMO antenna is closely connected with the PCB layout, RF feed lines, grounding area, impedance control, connectors, and PCBA assembly quality.
A typical product using a MIMO antenna may include:
RF feed lines on the PCB
Printed antenna areas or external antenna connectors
Matching component pads
Controlled impedance traces
RF connectors such as SMA, IPEX, U.FL, or similar interfaces
Wireless module or chipset area
Ground reference and shielding clearance
From a PCB and PCBA manufacturing point of view, the role of the manufacturer is not to redesign the antenna. The real task is to produce the PCB and assemble the PCBA according to the customerâs approved RF layout, stackup, impedance, and assembly requirements.
For this reason, MIMO antenna projects should be reviewed carefully before fabrication. RF trace width, PCB stackup, antenna keep-out area, connector footprint, surface finish, and assembly files should all be checked early to reduce production risk.
2×2 MIMO Antenna vs 4×4 MIMO Antenna PCB
A 2×2 MIMO antenna usually uses two RF paths, while a 4×4 MIMO antenna uses four RF paths. For PCB manufacturing, this difference affects layout density, connector quantity, impedance control, and PCBA inspection.
Item
2×2 MIMO Antenna PCB
4×4 MIMO Antenna PCB
RF paths
2
4
Layout density
Lower
Higher
PCB space pressure
Lower
Higher
RF connectors
Fewer
More
Matching components
Fewer
More
Controlled impedance
Required
More critical
PCBA inspection
Moderate
More detailed
A 4×4 board usually needs more careful RF trace routing, connector placement, antenna spacing, and assembly checking. For compact devices, layout density should be reviewed early to reduce fabrication and assembly risks.
4×4 MIMO Antenna 5G PCB Requirements
A 4×4 MIMO antenna 5G board usually has tighter PCB space and more RF paths than a basic wireless board. This makes stackup, impedance control, and connector assembly more important.
Before production, these items should be reviewed:
Production Item
What to Confirm
PCB stackup
Dielectric thickness and layer structure
RF trace width
Matches the impedance calculation
Copper thickness
Affects etching and final impedance
Connector footprint
Supports soldering and mechanical strength
Antenna area
Keep-out area is clear
Surface finish
Suitable for RF connector soldering
PCBA files
BOM, placement file, and assembly drawing are complete
An LTE MIMO antenna or 4G LTE MIMO antenna product often uses RF connectors, coaxial cables, module interfaces, or printed antenna areas. The PCB should support stable RF transmission and reliable assembly.
For LTE-related boards, the main manufacturing checks include:
RF trace width and clearance
Connector footprint accuracy
Ground reference near RF paths
Matching component pad size
Board edge accuracy if the antenna is near the outline
Surface finish for stable soldering
PCBA inspection for connectors and small RF components
For products using external LTE antennas, connector strength and cable direction should be checked before assembly. This helps reduce mechanical stress during final product installation.
MIMO WiFi Antenna PCB for Compact Devices
A MIMO WiFi antenna board is often used in WiFi 6, WiFi 7, router, gateway, smart home, and IoT products. These products usually have compact layouts, small RF components, and limited antenna space.
For compact WiFi boards, the PCB layout review should focus on:
Antenna keep-out area
RF trace continuity
Controlled impedance requirement
Ground clearance
Connector position
Component height near antenna areas
Shielding can clearance
Assembly access for inspection
Here, PCB layout support means manufacturability review and assembly review. It does not mean changing the customerâs full RF antenna design. The approved RF structure should be protected during PCB fabrication and PCBA assembly.
External MIMO Antenna Connections for PCB/PCBA
Many wireless products use an external MIMO antenna, such as a MIMO panel antenna, directional antenna, omnidirectional antenna, FPC antenna, or coaxial antenna interface. For a PCB and PCBA manufacturer, the focus is not to select the antenna type. The focus is to make sure the antenna connection on the PCB is accurate, reliable, and easy to assemble.
The connector area should be reviewed before production because it affects soldering strength, cable direction, enclosure fit, and long-term product reliability.
Antenna Interface
PCB/PCBA Focus
External MIMO antenna
RF connector footprint, solder pad strength, and cable direction
MIMO panel antenna
Connector position, enclosure clearance, and coax cable routing
MIMO directional antenna
Stable RF connector assembly and mechanical fixing
Omnidirectional MIMO antenna
Connector layout, ground area, and assembly access
FPC antenna
FPC connector soldering, cable bending direction, and fixture space
Coaxial antenna interface
U.FL, IPEX, SMA, or similar connector footprint control
For PCBA production, RF connectors need careful inspection. Poor soldering, weak pad design, unsuitable plating, or tight cable bending may affect final assembly reliability. Before production, customers should confirm the connector type, footprint, cable direction, assembly drawing, and any mechanical clearance requirement.
PCB Types for MIMO Antenna Boards
Different wireless products may require different PCB types. The right choice depends on frequency, cost target, product size, impedance requirement, assembly structure, and reliability needs.
PCB Type
Common Use
Manufacturing Focus
FR4 PCB
Basic WiFi, IoT, and cost-sensitive wireless boards
Industrial wireless modules and long-running devices
Better thermal stability
RF PCB
5G, LTE, WiFi, and RF modules
Impedance, dielectric thickness, and RF trace control
Rogers PCB
High-frequency and low-loss wireless products
Stable dielectric performance for higher-frequency applications
Hybrid Stackup PCB
RF + digital mixed circuits
Balances RF performance, cost, and structure
Rigid-Flex PCB
Space-limited wireless devices
Supports compact structure and reliable interconnection
For MIMO antenna PCB projects, PCB type selection should not be based only on price. It should match the RF path, stackup, impedance requirement, connector type, and PCBA assembly method.
Before production, these details should be confirmed:
PCB type
Material grade
Board thickness
Copper thickness
Stackup structure
Impedance requirement
Surface finish
Assembly method
Material availability
For RF-related projects, PCB type or material replacement should be handled carefully. Even when two options look similar, changes in dielectric constant, board thickness, copper type, or stackup may affect impedance result and production consistency.
MIMO Antenna PCB Layout and DFM Review
For this topic, PCB layout means layout support for manufacturability and assembly. It does not mean full antenna design or RF system redesign.
A practical DFM review should check whether the approved RF layout can be fabricated and assembled reliably.
Layout Area
DFM Review Point
Antenna keep-out area
No unexpected copper, screws, cables, or tall components
RF feed line
Short, clean, and impedance-controlled
Ground area
Stable ground reference and proper clearance
Matching component pads
Accurate pad size and easy assembly
Connector placement
Suitable for cable direction and inspection
Shielding area
Enough clearance from RF-sensitive areas
Board outline
Correct mechanical fit and antenna edge control
For faster review, customers should provide Gerber files, PCB stackup, impedance requirement, BOM, pick-and-place file, assembly drawing, and RF notes.
MIMO Antenna PCB Manufacturing and PCBA Inspection
For MIMO antenna PCB manufacturing, the most important point is repeatability. A PCB supplier should help keep the same stackup, copper geometry, impedance result, and assembly quality from prototype to batch production.
Key manufacturing controls include:
Control Item
What to Check
Stackup control
Dielectric thickness and layer structure
Controlled impedance
RF trace width, copper thickness, and tolerance
Etching accuracy
RF trace shape and spacing
Board outline
Antenna edge and mechanical fit
Surface finish
Solderability and connector reliability
Solder mask
Clearance around RF-sensitive areas
AOI inspection
Trace shape and copper defects
Electrical test
Continuity and isolation
PCBA inspection
RF connector and matching component quality
For PCBA assembly, special attention should be given to:
RF connector soldering
Small matching components
Shielding can position
Coax cable direction
Connector mechanical strength
Cleanliness around RF areas
X-ray inspection when required
EBest Circuit supports PCB fabrication, RF board material selection, controlled impedance, DFM review, component sourcing, PCBA assembly, AOI, X-ray, electrical testing, and production follow-up for wireless electronic products.
FAQs About MIMO Antenna
Q1: What is a MIMO antenna? A MIMO antenna uses multiple antenna paths to improve wireless speed, coverage, and connection stability.
Q2: What is a MIMO antenna PCB? It is a PCB that carries antenna areas, RF feed lines, matching components, connectors, grounding areas, and related wireless circuits.
Q3: What is the difference between 2×2 and 4×4 MIMO antenna PCB? A 2×2 board has two RF paths, while a 4×4 board has four. A 4×4 board usually needs more PCB space, better routing control, and more careful PCBA inspection.
Q4: What should be checked for a 4×4 MIMO antenna 5G PCB? The stackup, RF trace width, impedance requirement, antenna keep-out area, connector footprint, surface finish, and assembly files should be checked before production.
Q5: Can FR4 be used for MIMO WiFi antenna PCB? Yes. FR4 can be used for some WiFi and IoT products. For higher-frequency or lower-loss applications, RF PCB, Rogers PCB, or hybrid stackup PCB may be considered.
Q7: What PCB type is used for MIMO antenna boards? Common options include FR4 PCB, High-Tg PCB, RF PCB, Rogers PCB, Hybrid Stackup PCB, and Rigid-Flex PCB. The choice depends on frequency, stackup, impedance, cost, and assembly structure.
Q8: What should be checked for external MIMO antenna connections? RF connector footprint, solder strength, cable direction, mechanical clearance, plating quality, and PCBA inspection should be checked.
Q9: Can EBest Circuit manufacture MIMO antenna PCB and PCBA? Yes. EBest Circuit can support MIMO antenna PCB fabrication, controlled impedance, RF material selection, DFM review, component sourcing, PCBA assembly, and testing. Send your Gerber, stackup, BOM, and assembly files to sales@bestpcbs.com for a quotation.
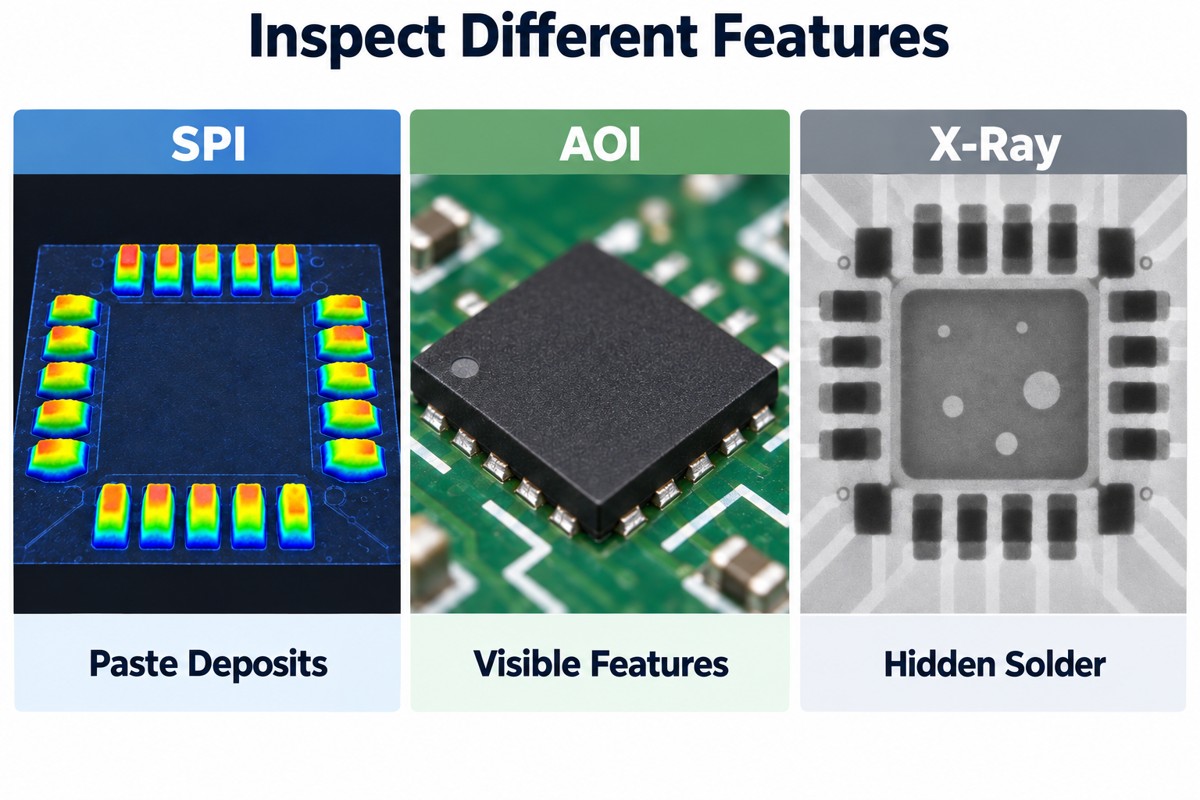
Searching for RP SMA vs SMA usually means one thing: you are trying to confirm whether an antenna, RF cable, module, or PCB connector will fit.
The difference looks small, but it can affect antenna matching, enclosure design, RF testing, and PCBA assembly. The key is simple: do not judge only by the outer thread. Check the center contact.
What Are SMA and RP-SMA Connectors?
SMA is a common RF coaxial connector used in GPS, cellular, RF test equipment, antennas, and many wireless products.
RP-SMA means Reverse Polarity SMA. It is a variation of SMA, but the center contact gender is reversed.
One important point: reverse polarity does not mean signal polarity is reversed. It only refers to the gender of the connectorâs contact pin.
Why Was RP-SMA Created for Wireless Equipment?
RP-SMA was introduced to separate professional equipment from commercial wireless equipment.
The original purpose was to make it harder for users to connect high-gain professional antennas to consumer wireless devices and exceed regulatory limits.
That is why RP-SMA is widely seen in 2.4GHz wireless equipment, such as:
Wi-Fi
Bluetooth
Zigbee
IoT gateways
Some FPV devices
It is also linked with antenna compliance rules such as FCC Section 15.203 antenna requirements.
RP SMA vs SMA: What Is the Main Difference?
The main difference is the center contact.
Connector Type
Thread Type
Center Contact
SMA(M)
Plug, inside thread
Male central pin
SMA(F)
Jack, outside thread
Female central receptacle
RP-SMA(M)
Plug, inside thread
Female central receptacle
RP-SMA(F)
Jack, outside thread
Male central pin / inner pin
So the quick rule is:
SMA uses the standard center contact arrangement. RP-SMA reverses the center contact arrangement.
The outer housing can look similar. The center pin or center receptacle tells you the real connector type.
How to Tell SMA and RP-SMA Apart Quickly?
Use this 3-step check.
1. Check the thread
Plug = inside thread
Jack = outside thread
2. Check the center contact
A visible center pin = male central pin
A center hole = female central receptacle
3. Match the pattern
SMA(M): inside thread + male central pin
SMA(F): outside thread + female central receptacle
RP-SMA(M): inside thread + center receptacle
RP-SMA(F): outside thread + inner pin
This wording is important because many buyers only look at âmaleâ or âfemaleâ in a product title. That is not enough for SMA and RP-SMA.
RP-SMA vs SMA Antenna: Which One Fits WiFi, Bluetooth, Zigbee, and FPV Devices?
RP-SMA is common in 2.4GHz wireless devices, especially Wi-Fi, Bluetooth, Zigbee, and consumer wireless equipment.
SMA is common in GPS, cellular, RF testing, industrial wireless, and many professional antenna systems.
For FPV systems, both SMA and RP-SMA may appear. Do not guess by frequency alone. Check the antenna connector and device connector.
Also, do not confuse connector type with antenna polarization.
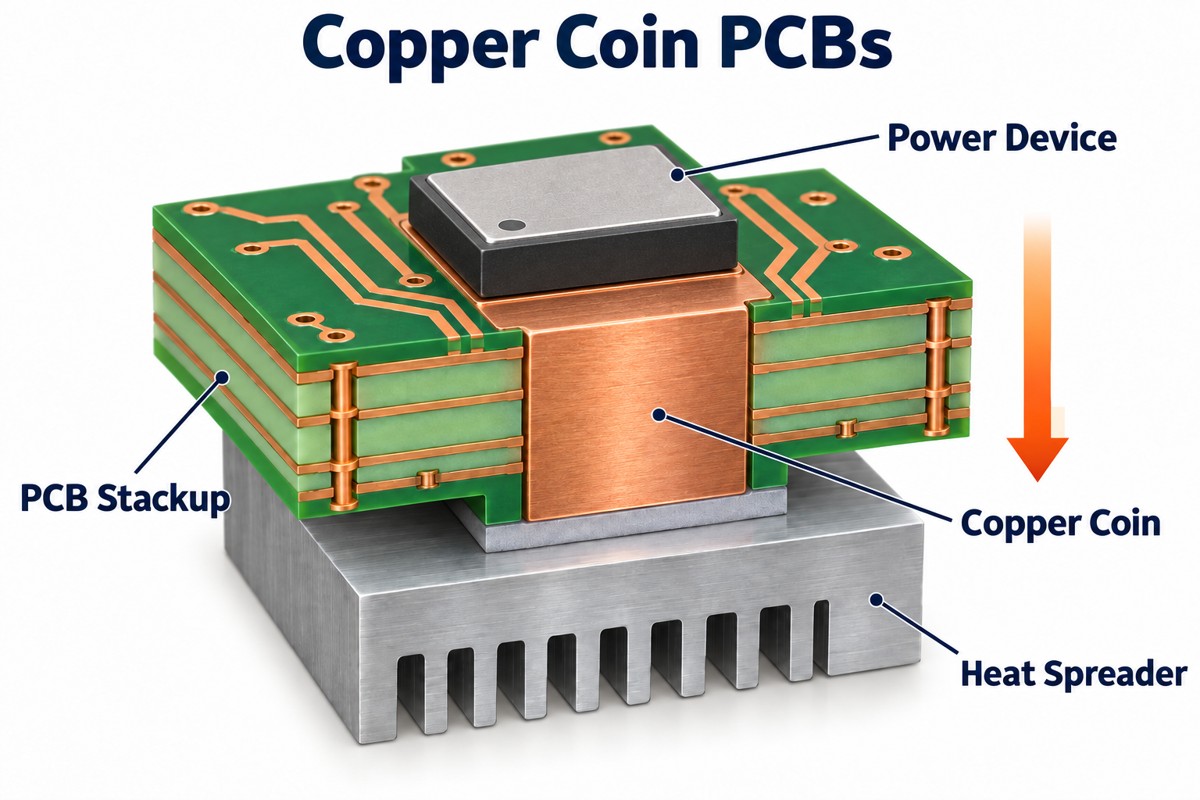
SMA / RP-SMA = connector interface
RHCP / LHCP = antenna polarization
They are different specifications.
What Happens If You Choose the Wrong SMA or RP-SMA Connector?
A wrong connector choice can create several practical issues:
The antenna cannot be attached.
The RF cable does not mate with the board connector.
The test fixture needs an unexpected adapter.
The enclosure hole does not match the connector position.
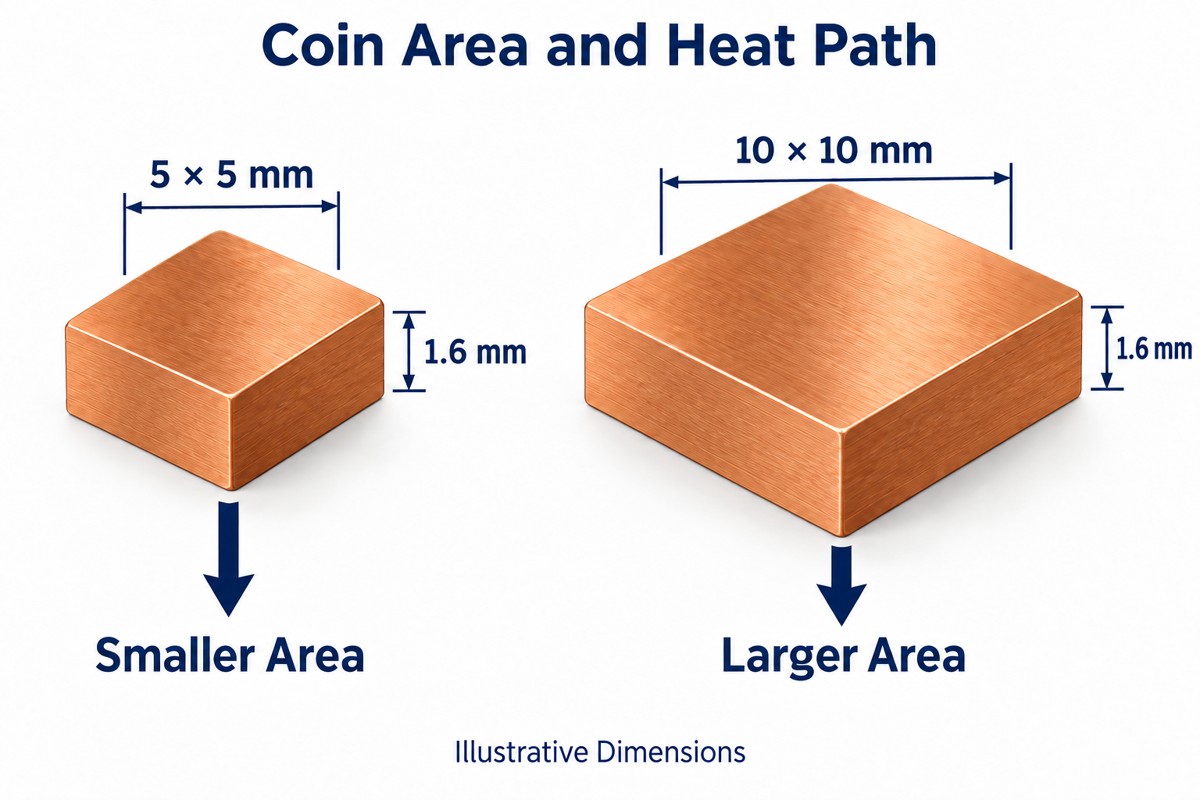
The BOM causes purchasing confusion.
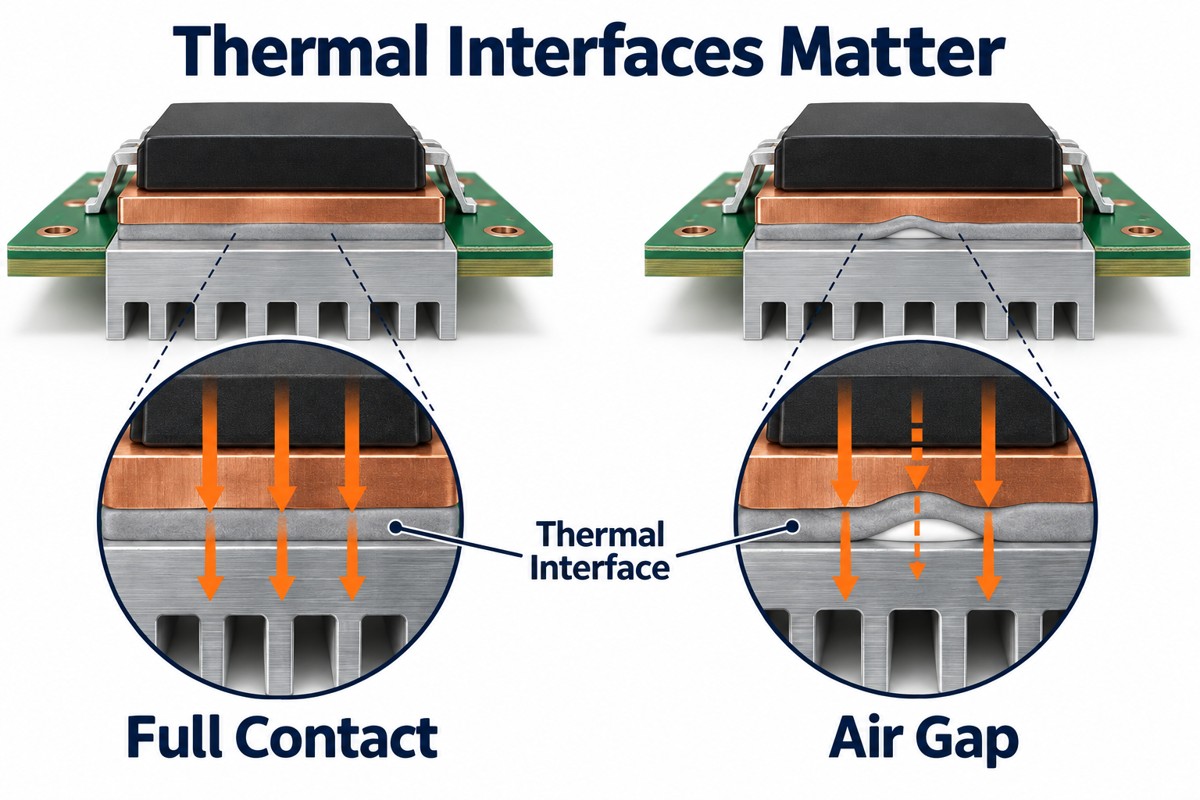
PCBA assembly may require rework.
Wireless testing gets delayed.
This is why connector details should be confirmed before PCB fabrication and PCBA assembly, not after samples arrive.
How Does SMA or RP-SMA Connector Choice Affect RF PCB and Wireless PCBA Design?
For an RF board project, SMA or RP-SMA is not just a purchasing item. It affects the board and assembly design.
Key design checks include:
50-ohm RF trace design
Connector footprint accuracy
Edge-launch or vertical mounting style
Ground pad and via placement
Antenna feed line length
Enclosure clearance
Connector solder joint strength
Cable and adapter compatibility
RF testing access
For wireless PCBA, the connector must match the antenna, cable, housing, and test plan. A small interface mistake can slow down the whole build.
This is where DFM review is useful. Before production, the PCB manufacturer should check the Gerber, BOM, connector datasheet, stackup, and RF layout together.
How to Choose the Right SMA or RP-SMA Connector for Your RF PCB Project?
Use this checklist before releasing files for production:
Confirm the wireless application: Wi-Fi, Bluetooth, Zigbee, GPS, cellular, FPV, or other RF use.
Check the antenna datasheet.
Confirm SMA or RP-SMA.
Confirm male central pin or female central receptacle.
Confirm plug inside thread or jack outside thread.
A clear BOM should not only say âSMA connector.â It should include the exact type, such as SMA(F), SMA(M), RP-SMA(F), or RP-SMA(M).
FAQs About RP SMA vs SMA
Q1. Is RP-SMA the same as SMA? No. RP-SMA is a variation of SMA, but the center contact gender is reversed.
Q2. What does reverse polarity SMA mean? It means the center contact gender is reversed. It does not mean the signal polarity is reversed.
Q3. How do I identify RP-SMA female? RP-SMA(F) is a Jack type with outside threads, but it has an inner pin.
Q4. How do I identify RP-SMA male? RP-SMA(M) has inside threads and a center receptacle.
Q5. Can SMA and RP-SMA connect directly? Usually not directly. If the center contacts do not match, you need the correct adapter.
Q6. Why is RP-SMA common on Wi-Fi equipment? It was widely used to support antenna compliance requirements and reduce casual connection of higher-gain antennas.
Q7. Is SMA common for GPS and cellular antennas? Yes. SMA connectors are generally used across GPS, cellular, RF testing, and industrial antenna systems.
Q8. Should I choose SMA or RP-SMA for my PCB? Choose based on the antenna, module, enclosure, regulatory needs, cable assembly, and test setup.
To sum up, the fastest way to understand RP SMA vs SMA is to check the center contact. SMA uses the standard center pin and receptacle arrangement. RP-SMA reverses that arrangement.
What is halogen free PCB, and why are more electronics manufacturers switching to it? As environmental regulations become stricter worldwide, halogen free PCB materialsare increasingly used in automotive electronics, communication devices, LED lighting, industrial equipment, and medical products.
Traditional PCB materials often contain bromine and chlorine flame retardants. Under high temperatures or fire conditions, these substances may release toxic gases and dense smoke. Because of this, many manufacturers now prefer halogen free PCB solutions that provide safer environmental performance and better compliance with global standards.
A halogen free PCB not only supports cleaner manufacturing, but also improves product safety, thermal reliability, and long-term sustainability. Today, these materials are widely applied in high-reliability electronic products where stable performance is important.
What is Halogen Free PCB?
What is halogen free PCB, and why are more electronic products using it today? Halogen free PCB refers to a PCB made without bromine or chlorine-based flame retardants. These materials help reduce toxic gas emissions during high-temperature conditions or fire exposure.
Traditional PCB materials often contain halogen compounds to improve flame resistance. However, when exposed to heat, these substances may release harmful smoke and corrosive gases. Because of this, many industries are shifting toward safer and more environmentally friendly PCB materials.
A halogen free PCB usually follows IEC 61249-2-21 standards. According to this specification:
Chlorine content must remain below 900 ppm
Bromine content must remain below 900 ppm
Total halogen content must stay below 1500 ppm
Today, halogen free PCB products are widely used in automotive systems, industrial equipment, LED lighting, communication devices, and medical electronics because they support cleaner manufacturing practices and improved product safety.
Why Use Halogen Free PCB?
Why use halogen free PCB instead of traditional PCB materials? More manufacturers are choosing these materials because they support environmental compliance, product safety, and long-term reliability. Main advantages include:
Reduce toxic smoke during overheating or fire exposure
Lower environmental impact during disposal and recycling
Meet RoHS and REACH environmental regulations
Improve safety for enclosed electronic products
Support sustainable manufacturing requirements
Help exported products comply with international standards
Provide stable thermal performance in demanding applications
Many industries now prefer halogen-free PCB materials because global environmental regulations continue becoming stricter every year.
What Materials Are Used in Halogen Free PCB?
What materials are commonly used in halogen free PCB manufacturing? Most halogen free PCB products use specially developed resin systems and laminates designed to replace traditional brominated flame retardants. Common halogen free PCB laminate materials include:
Halogen free FR4 epoxy resin
Phosphorus-based flame-retardant systems
Nitrogen compound resin systems
Halogen-free CEM3 materials
High Tg halogen-free laminates
Aluminum-based halogen-free materials
These materials maintain flame resistance while reducing hazardous substances. Many modern laminates also provide excellent thermal stability and reliable electrical insulation. Popular laminate manufacturers include:
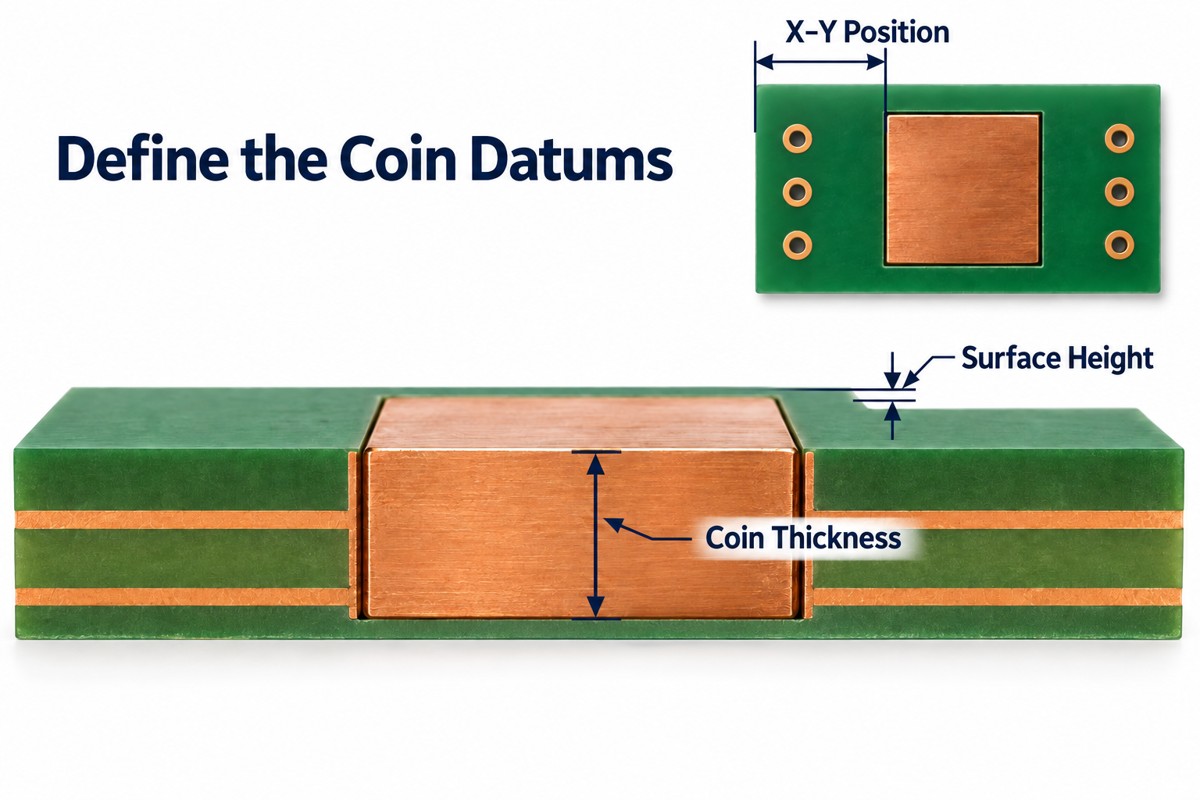
Shengyi
ITEQ
Panasonic
Isola
Rogers
High-quality halogen free PCB laminate materials are important for products exposed to high temperatures or continuous operation.
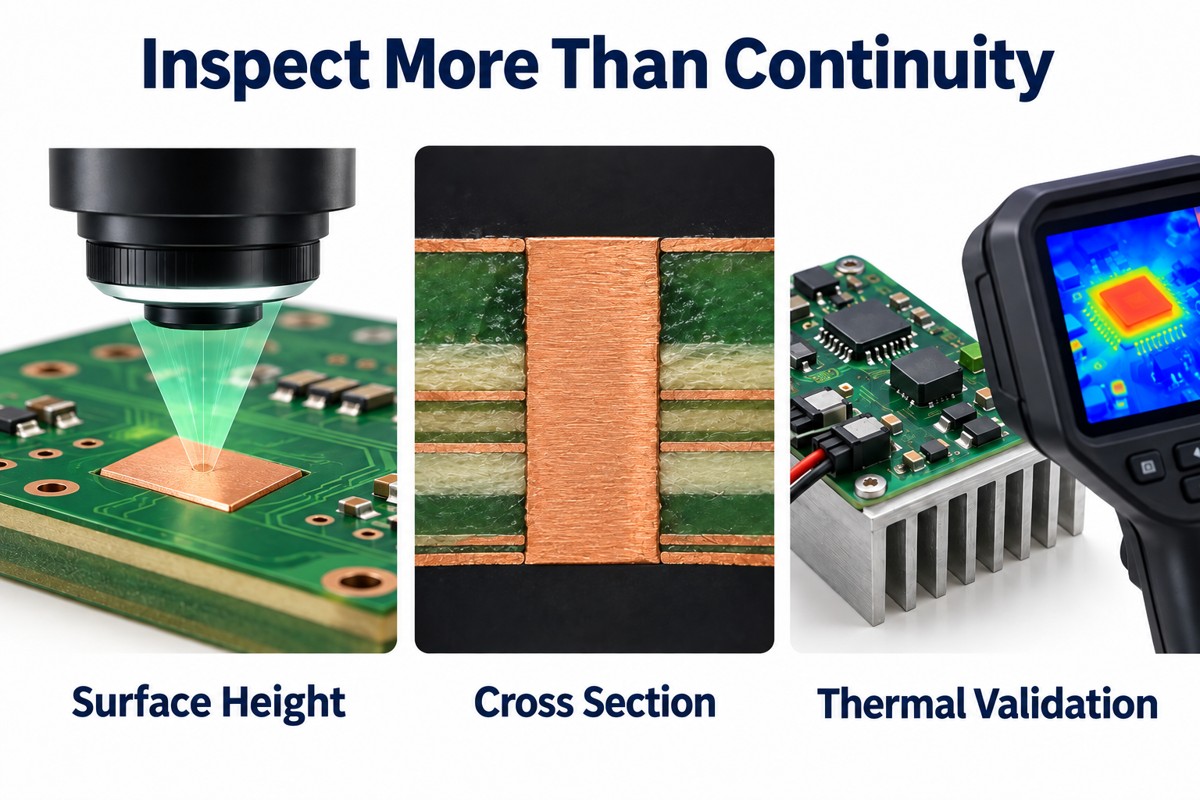
What Applications Use Halogen Free PCB?
Where is halogen free PCB commonly used today? These PCB products are now found across many industries because they combine environmental safety with stable electrical performance. Common applications include:
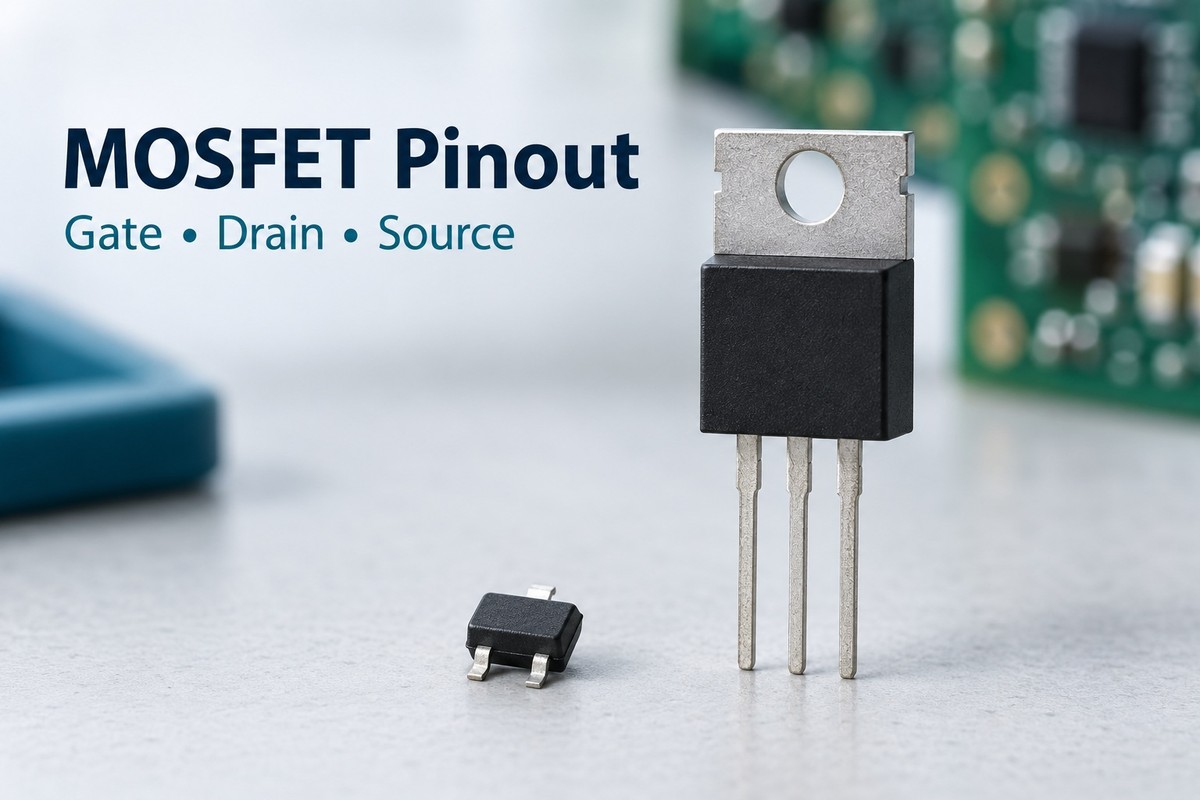
Automotive control systems
LED lighting modules
Medical electronics
Industrial automation devices
Communication equipment
Consumer electronics
Power supply systems
Renewable energy equipment
Aerospace electronics
Smart home products
Automotive and medical industries especially prefer halogen free PCB materials because these applications require high reliability, stable thermal performance, and environmental compliance.
What Are the Requirements for Halogen Free PCB?
What requirements must a halogen free PCB meet before being used in electronic products? Besides reducing harmful substances, the material must also provide stable thermal performance, reliable insulation, and environmental compliance. Main requirements for halogen free PCB include:
Bromine content must be below 900 ppm
Chlorine content must be below 900 ppm
Total halogen content must be below 1500 ppm
Must comply with IEC 61249-2-21 standards
Must support RoHS and REACH environmental regulations
Should meet UL94 V-0 flame-retardant standards
Must provide stable thermal resistance during soldering
Should maintain good electrical insulation performance
Must have low moisture absorption
Should support reliable multilayer lamination
Surface finish compatibility should remain stable
PCB materials should pass electrical and reliability testing
Manufacturers should provide material traceability and certification reports
Many modern halogen free PCB materials also use high Tg resin systems to improve heat resistance and long-term reliability in automotive, industrial, LED, and communication applications.
Halogen-Free PCB vs FR4 PCB: What is Difference?
What is the difference between halogen-free PCB and standard FR4 PCB? Both materials are widely used in electronics manufacturing, but they differ in flame-retardant systems, environmental performance, thermal stability, and application suitability.
Feature
Halogen-Free PCB
Standard FR4 PCB
Flame Retardant Type
Phosphorus or nitrogen-based system
Brominated flame retardant system
Halogen Content
Very low or none
Contains bromine/chlorine compounds
Environmental Performance
More environmentally friendly
Standard environmental performance
Toxic Smoke During Burning
Lower smoke and gas emission
Higher toxic smoke emission
RoHS & REACH Compliance
Excellent compatibility
Usually compliant but depends on material
Thermal Stability
Higher in many grades
Standard thermal stability
Tg Performance
Often high Tg materials
Normal Tg or high Tg available
Electrical Insulation
Stable insulation performance
Good standard insulation
Moisture Resistance
Better in many laminate systems
Standard moisture resistance
Reliability in High Heat
Better for high-temperature environments
Suitable for general applications
Processing Difficulty
Slightly stricter process control
Easier standard processing
Material Cost
Slightly higher
Lower
Recycling & Disposal Safety
Safer and cleaner
Moderate
Typical Applications
Automotive, medical, LED, industrial control
Consumer electronics, standard electronics
Market Trend
Growing rapidly
Traditional mainstream material
What is the Manufacturing Process for Halogen-Free PCB?
How are halogen-free PCBs manufactured? The basic process is similar to standard PCB production, but material selection, lamination control, drilling quality, and testing require closer attention because halogen-free laminates use different resin systems.
1. Material Selection The manufacturer first selects suitable halogen-free PCB laminate according to the product application, layer count, Tg value, copper thickness, thermal demand, and compliance requirements. Common options include halogen-free FR4, high Tg laminate, CEM3 material, and aluminum-based material.
2. Material Inspection Before production, the laminate, prepreg, and copper foil are checked for thickness, surface quality, certification, and halogen content report. This step helps ensure the material meets IEC 61249-2-21, RoHS, REACH, and project requirements.
3. Inner Layer Imaging For multilayer PCBs, the inner copper layers are coated with dry film and exposed according to the circuit pattern. This step defines the inner layer traces and prepares the board for etching.
4. Etching and Inner Layer Inspection Unwanted copper is removed to form the required circuit pattern. After etching, the inner layers are inspected for open circuits, short circuits, line width, spacing, and copper residue.
5. Lamination The inner layers, prepreg, and copper foil are stacked together and laminated under controlled temperature and pressure. Halogen-free materials may need adjusted lamination parameters because their resin flow and curing behavior can differ from standard FR4.
6. Drilling Mechanical or laser drilling is used to create through holes, blind vias, buried vias, or microvias. Drilling quality is important because poor hole walls can affect copper plating and long-term reliability.
7. Desmear and Hole Metallization After drilling, resin smear inside the holes is removed. Then the hole walls are chemically treated and plated with copper to build electrical connections between layers.
8. Outer Layer Imaging and Etching The outer layer circuit pattern is created through imaging, plating, and etching. This step forms the final copper traces, pads, and connection areas on the PCB surface.
9. Solder Mask Application A solder mask is applied to protect the copper surface, prevent solder bridging, and improve insulation. The solder mask must be compatible with halogen-free PCB material and assembly temperatures.
10. Surface Finish A surface finish is added to protect exposed copper pads and improve solderability. Common options include ENIG, HASL, immersion silver, immersion tin, and OSP.
11. Legend Printing Component marks, logos, polarity symbols, and part numbers are printed on the PCB surface. This helps assembly teams identify placement direction and board information clearly.
12. Electrical Testing Each PCB is tested for open circuits, short circuits, and connection accuracy. This step helps confirm that the board matches the design files before shipment.
13. Reliability and Quality Inspection The PCB may go through visual inspection, AOI, impedance testing, solderability testing, thermal stress testing, and dimensional inspection. For high-reliability applications, extra checks can be added based on project requirements.
14. Final Cleaning and Packaging After inspection, the boards are cleaned, dried, vacuum packed, and labeled. Proper packaging helps prevent oxidation, moisture absorption, and surface contamination during storage and shipping.
Why Choose EBest for Halogen Free PCB Manufacturer?
Why choose EBest for halogen free PCB manufacturing? EBest Circuit has more than 20 years of PCB manufacturing experience and provides one-stop PCB solutions for global electronics industries.
Stable halogen-free PCB material sourcing helps improve long-term product consistency
High Tg laminate support improves thermal reliability in demanding applications
One-stop PCB fabrication and assembly services help reduce supplier management costs
PCB prototype and mass production support help shorten project development cycles
Fast-turn production service helps reduce urgent project lead time pressure
Some prototype orders can be shipped within 24 hours
Monthly production capability reaching 260,000 square feet
Strict quality inspection helps reduce manufacturing defects and reliability risks
Electrical testing and reliability verification help improve product stability
Support for multilayer and complex PCB structures helps simplify difficult projects
Automotive, industrial, and medical manufacturing experience helps support high-reliability applications
Support for RoHS, REACH, UL, ISO 9001:2015, ISO 13485:2016, IATF 16949, and AS9100D requirements
Component sourcing and PCB assembly services help simplify supply chain management
Stable international delivery capability helps improve project scheduling efficiency
From PCB prototype to mass production, EBest focuses on stable quality, fast response, and reliable manufacturing support for global electronics projects.
FAQs About Halogen Free PCB
Q1: Is halogen free PCB better than standard FR4 PCB?
A1: Halogen free PCB is often preferred for products that require better environmental performance, lower toxic emissions, and higher safety standards. Compared with traditional FR4 PCB, halogen-free materials can provide cleaner burning characteristics and stronger support for RoHS and REACH compliance.
Q2: Why are more electronic products using halogen free PCB?
A2: More electronic manufacturers are switching to halogen free PCB because environmental regulations are becoming stricter worldwide. Halogen-free materials help reduce harmful smoke, toxic gas emissions, and environmental impact during overheating or fire exposure.
Q3: Can halogen free aluminum PCB be used in high-power products?
A3: Yes. Halogen free aluminum PCB is widely used in LED lighting, automotive lighting, power modules, and industrial power supplies because it combines environmental compliance with excellent heat dissipation performance.
Q4: Does halogen free PCB cost more than standard PCB?
A4: In many cases, halogen free PCB materials are slightly more expensive because of specialized resin systems and stricter manufacturing requirements. However, the improved thermal reliability, environmental performance, and global compliance advantages often make the additional cost worthwhile.
Q5: What industries commonly use halogen-free PCB materials?
A5: Halogen-free PCB materials are commonly used in automotive electronics, communication systems, medical devices, industrial automation equipment, LED lighting products, aerospace electronics, and renewable energy systems.
Q6: How can I identify a reliable halogen-free CEM3 PCB material supplier?
A6: A reliable supplier should provide certified material reports, stable laminate sourcing capability, strict quality inspection, and support for RoHS, REACH, and UL compliance standards.
Conclusion
EBest provides high-quality halogen free PCB manufacturing services for industrial, automotive, medical, communication, and LED applications. From PCB prototype to mass production, EBest supports reliable fabrication, stable material sourcing, and fast delivery services. Contact us today for your PCB project inquiry: sales@bestpcbs.com.
A 5-in-1 antenna usually combines GNSS, 4G/5G cellular, and Wi-Fi signal paths in one antenna unit. It is common in IoT gateways, vehicle trackers, industrial routers, smart transportation devices, and outdoor wireless terminals.
This guide focuses on the checks a PCB/PCBA manufacturer can realistically support before fabrication, assembly, and shipment. In many 5-in-1 antenna PCB and PCBA projects, the antenna is connected through RF interfaces such as SMA connector PCB, SMB PCB, UFL Connector PCB, BNC PCB, or MMCX PCB. If your wireless device requires RF connector assembly, controlled impedance PCB fabrication, or PCBA production review, you can send your Gerber files, BOM, and assembly requirements to sales@bestpcbs.com.
What Is a 5-in-1 Antenna?
A 5-in-1 antenna is an integrated antenna solution with five wireless signal paths. A common structure includes:
1x GNSS antenna
2x 4G/5G cellular MIMO antennas
2x Wi-Fi MIMO antennas
In a real device, the antenna connects to the PCB assembly through RF connectors, coaxial cables, wireless modules, matching circuits, ESD protection parts, and controlled impedance traces.
A PCB/PCBA manufacturer does not replace the antenna engineer. Its value is to check whether the PCB files, stackup, impedance notes, RF connector footprint, BOM, assembly drawing, and test requirements are ready for production.
Common PCB and PCBA Risks in 5-in-1 Antenna Projects
Connector datasheet, pad size, solder mask opening
RF matching issue
Wrong value or misplaced small components
BOM, placement file, first article inspection
Shielding issue
Poor soldering or incomplete grounding
Shielding can footprint, solderability, ground pads
These problems are expensive because they often appear after SMT assembly or final testing. Early manufacturing review is much cheaper than redesign, rework, or repeated debugging.
What Should Be Checked Before PCB Fabrication?
Before PCB fabrication, the main task is to confirm whether the board data can support stable RF-related production.
1. Stackup
Stackup affects impedance, trace width, return path, and signal loss. For antenna-related products, stackup should be confirmed before production.
Without clear impedance notes, the board may be treated as a normal PCB instead of an RF-controlled board.
3. RF Connector Footprint
RF connector problems are common in antenna-related PCBA projects. SMA, U.FL, IPEX, MMCX, and board-to-board RF connectors all have specific footprint requirements.
Check:
Pad size
Ground pad connection
Solder mask opening
Connector orientation
Edge clearance
Cable direction
Rework space
A small footprint error can cause soldering defects, weak contact, or unstable field performance.
RF Connector Area and Assembly Clearance
The RF connector area should be reviewed before PCB fabrication and PCBA assembly. For a 5-in-1 antenna product, connector placement and nearby PCB details can affect soldering quality, cable installation, inspection, rework access, and production consistency.
A PCB/PCBA manufacturer can help check whether the connector footprint, solder mask opening, ground pads, board edge clearance, and cable direction match the assembly requirement. If the customer provides a wireless module layout guide or antenna reference design, the manufacturer can also review whether the board files follow the key manufacturing notes.
Check before production:
RF connector footprint against the datasheet
Pad size and solder mask opening
Ground pad connection around the connector
Board edge clearance
Cable plugging direction
Space for manual inspection and rework
Coaxial cable bend radius
Shielding can footprint and solderability, if used
Keep-out notes provided by the module or antenna supplier
This review does not replace antenna tuning, OTA testing, or RF chamber testing. Its purpose is to reduce assembly risk, connector failure, soldering defects, and avoidable layout-to-production problems.
What Types of PCBs Are Used in 5-in-1 Antenna Products?
Different products need different PCB structures. The PCB type should match the RF requirement, space limit, assembly method, and working environment.
Smart LED or power products with wireless function
Helps thermal management
For many projects, the practical choice is a multilayer controlled impedance PCB. Compact products may use HDI PCB or rigid-flex PCB. Higher-frequency paths may require RF PCB or high frequency PCB.
What Should Be Checked During PCBA Assembly?
5-in-1 antenna PCBA assembly usually includes RF connectors, wireless modules, small matching components, shielding parts, and coaxial cables. These areas need tighter process control.
RF Connectors
Check connector position, solder quality, grounding, mechanical strength, and cable plugging direction. U.FL and IPEX connectors are small and can be damaged by poor soldering or repeated rework.
Wireless Modules
Check solder paste volume, stencil opening, reflow profile, placement accuracy, and inspection method. LGA, BGA, castellated, and fine-pitch wireless modules need stable SMT control.
Matching Network Components
Small capacitors and inductors near RF paths must match the BOM and placement file. Wrong values or wrong positions can change RF behavior.
Shielding Cans
Shielding only works well when grounding and soldering are reliable. Shielding can footprints, solder paste openings, and inspection standards should be confirmed before assembly.
Coaxial Cables and Wire Harnesses
Cable direction, bend radius, connector locking, strain relief, and final assembly sequence should be checked before batch production.
First Article Inspection
For the first build, inspect connector placement, module alignment, component value, polarity, solder joints, shielding position, and test results before moving to larger quantities.
What Testing Should Be Planned Before Shipment?
Testing should be defined before assembly, not after production is finished.
Test
Purpose
Bare PCB electrical test
Check opens and shorts
Impedance test
Confirm RF trace impedance on test coupon
AOI
Check solder joints, polarity, missing parts
X-ray
Inspect BGA/LGA or hidden solder joints
Functional test
Confirm power, module boot, interface communication
RF path continuity check
Find connector or soldering issues
GNSS/Wi-Fi/cellular function check
Verify product-level wireless function
Final assembly inspection
Check cable, connector, enclosure, label, and package
A PCB/PCBA factory can support production-level tests such as electrical test, impedance test, AOI, X-ray, visual inspection, and functional testing based on customer procedures.
Advanced antenna tests such as OTA, radiation pattern, antenna efficiency, and certification-level RF performance usually require customer fixtures, RF chambers, or third-party labs.
What Files Are Needed for a Faster Quote?
Complete files help the manufacturer review the project faster and quote more accurately.
Send:
Gerber or ODB++ files
Drill files
PCB stackup
Controlled impedance requirement
BOM with manufacturer part numbers
Pick-and-place file
Assembly drawing
RF connector datasheets
Wireless module datasheets
Antenna specification
Testing requirements
Cable or wire harness requirements
Order quantity
Target delivery schedule
For PCBA projects, BOM quality matters. RF connectors, wireless modules, EOL parts, and alternative components should be checked before batch production.
FAQs About 5-in-1 Antenna PCB and PCBA Manufacturing
Q1: Can a PCB/PCBA manufacturer design the 5-in-1 antenna? Usually no. A PCB/PCBA manufacturer supports layout review, DFM, impedance control, fabrication, assembly, and testing. Full antenna electromagnetic design should be handled by RF antenna specialists.
Q3: Can FR4 be used for 5-in-1 antenna products? Yes, FR4 can be used when the frequency, loss requirement, and layout structure are suitable. For higher-frequency or lower-loss paths, high frequency PCB materials may be needed.
Q4: What is the most common manufacturing issue? Common issues include unclear impedance notes, incorrect RF connector footprints, poor grounding, missing assembly clearance, wrong matching components, and poor cable routing.
Q5: What PCB type is commonly used? Many projects use multilayer controlled impedance PCB. Compact wireless products may use HDI PCB or rigid-flex PCB.
Q6: Can the factory test RF performance? The factory can support production-level tests. Advanced RF performance testing may require customer fixtures, RF chambers, or third-party RF labs.
In summary, a 5-in-1 antenna product is not difficult only because it uses several wireless functions. The real production challenge is making the PCB and PCBA stable, repeatable, and testable.
Before production, customers should confirm RF trace impedance, stackup, connector footprint, assembly clearance, shielding parts, cable routing, BOM accuracy, and test method. These checks help reduce rework, shorten debugging time, and improve batch consistency.
Best Technology supports RF PCB, high frequency PCB, controlled impedance PCB, multilayer PCB, HDI PCB, rigid-flex PCB, ceramic PCB, metal core PCB, PCB fabrication, PCBA assembly, SMT stencil, wire harness, component sourcing, DFM review, and production testing.
Send your Gerber files, BOM, antenna specification, and project requirements to sales@bestpcbs.com. Our engineering team can review your 5-in-1 antenna PCB and PCBA project before production and help you move from prototype to a more stable manufacturing build.