PCB manufacturing PCB manufacturing
Home > Blog

controlled impedance PCB

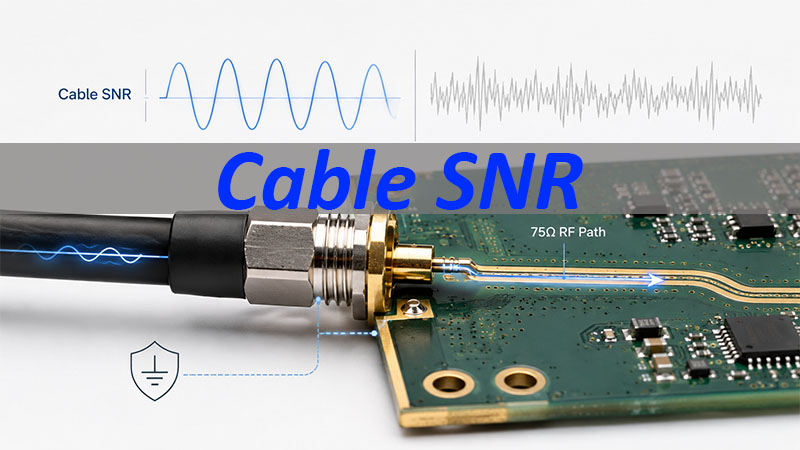
Cable SNR and 75Ω RF Input Path for PCB and PCBA
Thursday, July 2nd, 2026

When people search for cable SNR, they usually want to know whether a coaxial cable signal is clean enough. In simple terms, SNR shows how much useful signal remains above the noise. A higher SNR usually means fewer errors and more stable communication.

For PCB and PCBA customers, the practical focus is not only the SNR number. It is the product-side RF path after the signal enters the board: RF connector, connector-to-PCB transition, 75Ω controlled impedance trace, grounding, and PCBA assembly quality. This article explains cable SNR from the perspective of PCB layout and PCBA manufacturing.

Cable SNR

What Is Cable SNR?

Cable SNR means cable signal-to-noise ratio. It compares the useful signal in a coaxial cable system with unwanted noise. The value is measured in dB.

A simple way to understand it is:

Cable SNR = useful signal compared with noise

When SNR is high, the receiver can separate data from noise more easily. When SNR is low, the useful signal is too close to the noise floor. This may lead to packet loss, uncorrectable errors, unstable speed, or connection drops.

In this article, cable SNR refers to the signal quality commonly checked at the coaxial cable input of cable communication equipment. The point is not to discuss the network side in depth. The point is to understand how the product-side RF input path should be kept clean and consistent.

What Is a Good Cable SNR?

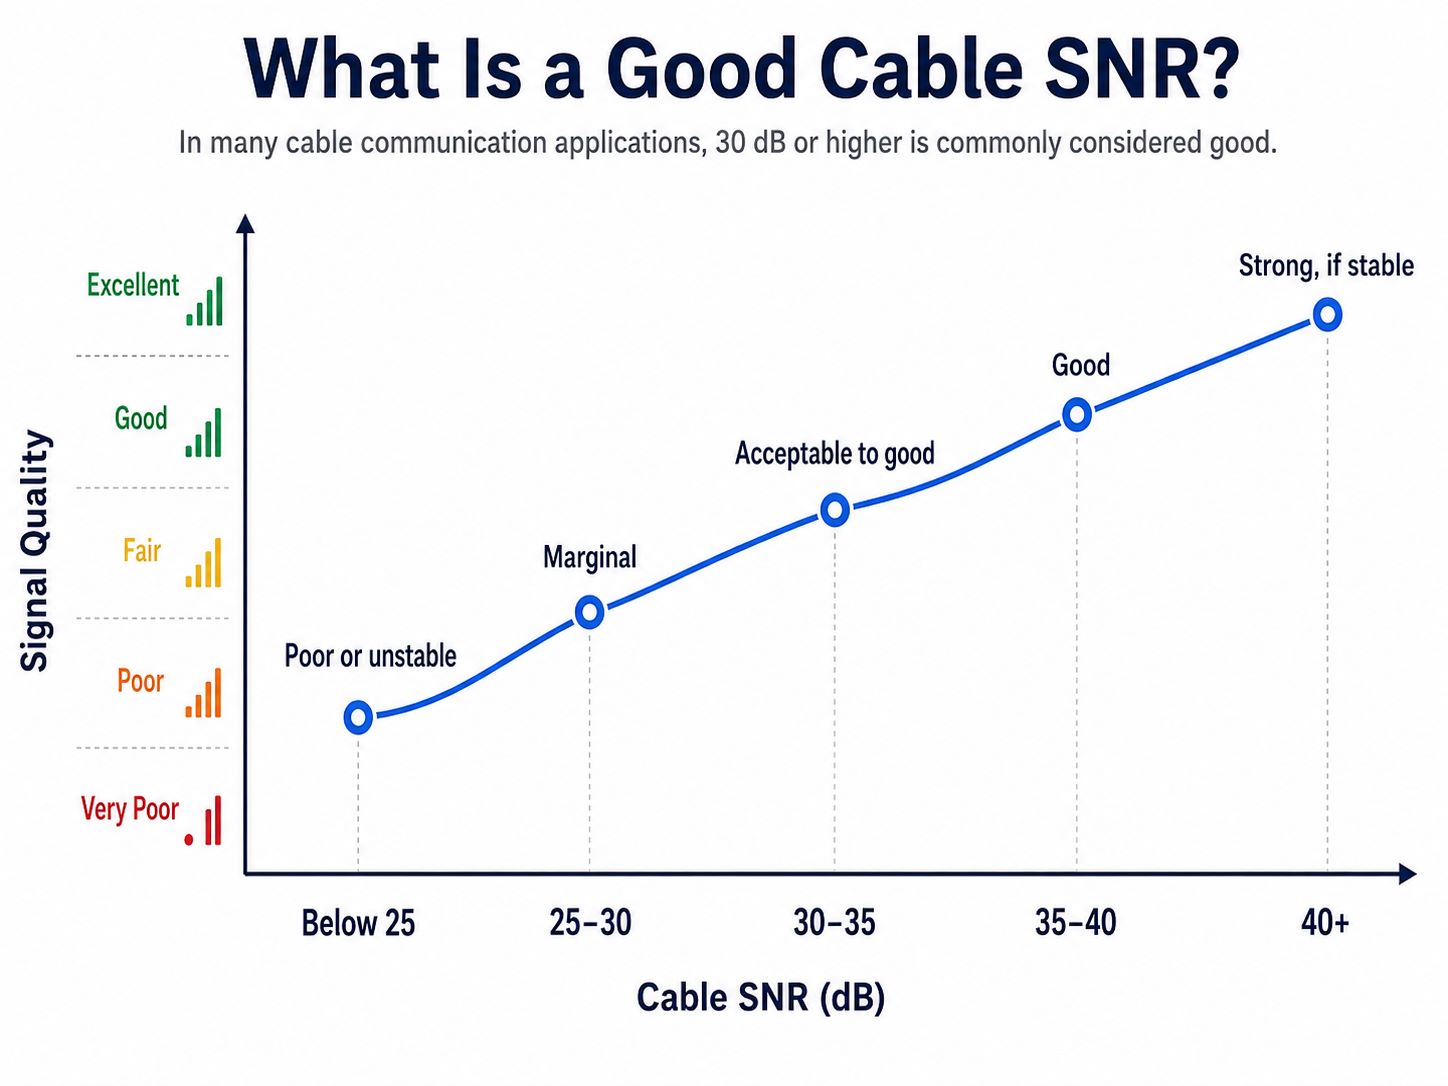
A good cable SNR is commonly 30 dB or higher in many cable communication applications. Values in the mid-to-upper 30s usually provide better margin. The final requirement should always follow the customer’s product specification, chipset guide, test requirement, or approved design file.

Cable SNRGeneral Meaning
Below 25 dBPoor or unstable
25–30 dBMarginal
30–35 dBAcceptable to good
35–40 dBGood
40 dB+Strong, if stable

For a PCB or PCBA project, one good prototype reading is not enough. The product should keep stable RF performance after PCB fabrication, connector soldering, shield-can assembly, mechanical stress, and batch production.

Cable SNR

What Do SNR, Downstream Power, and Upstream Power Mean?

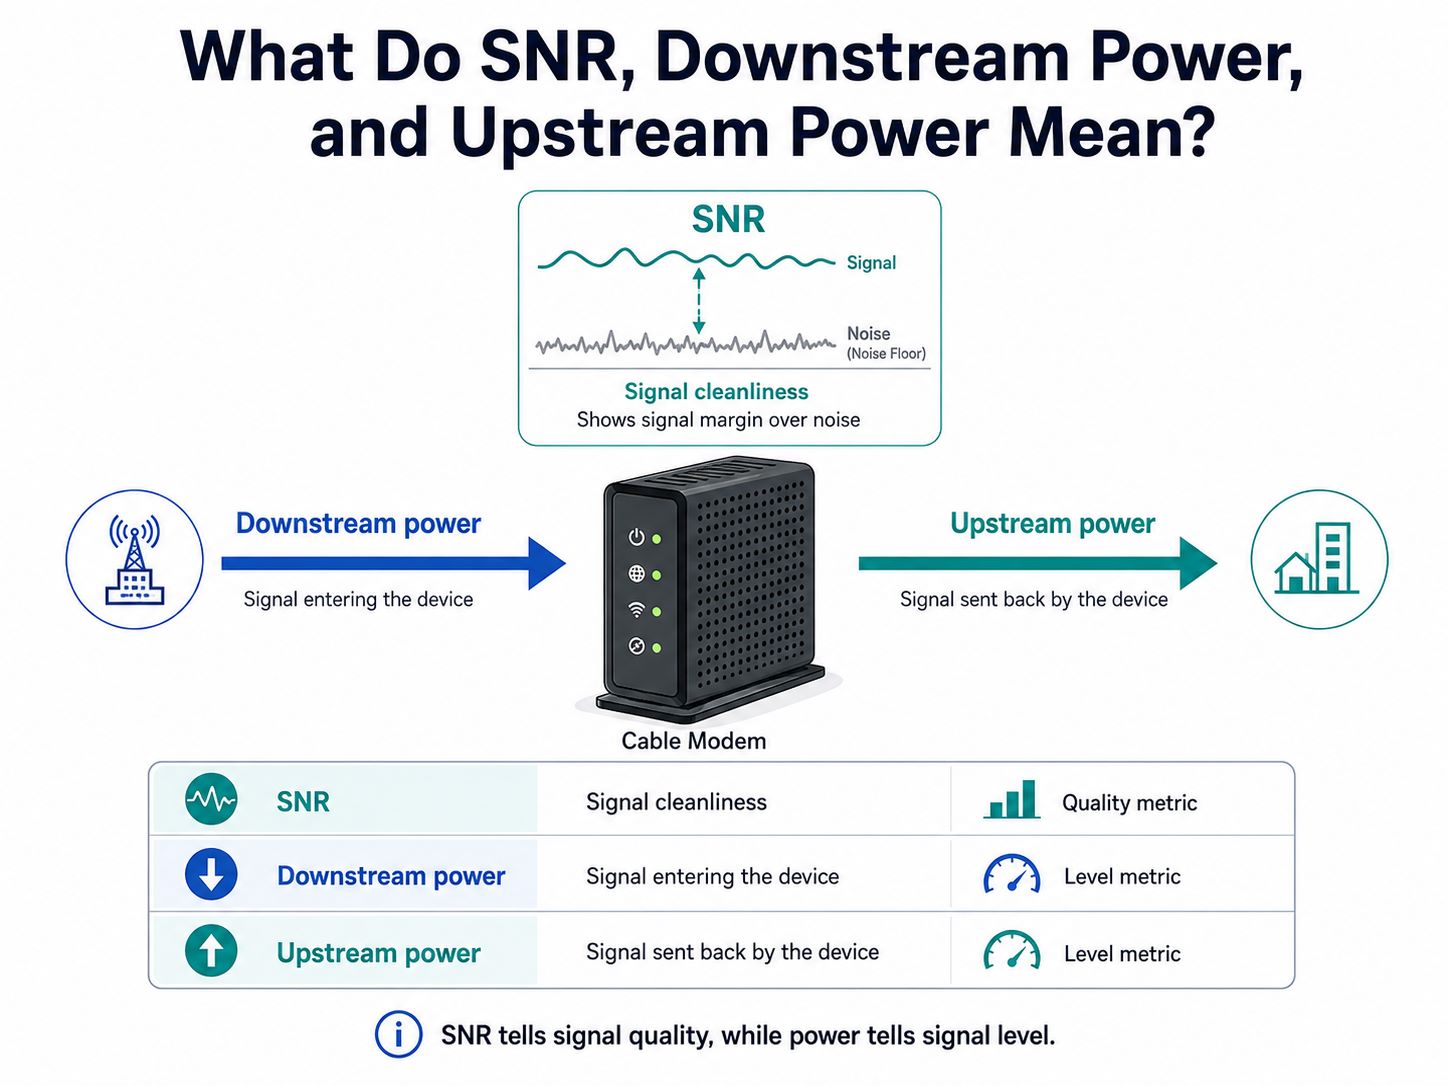
Cable signal pages often show SNR, downstream power, and upstream power together. These terms are related, but they are not the same.

ItemSimple MeaningWhy It Matters
SNRSignal cleanlinessShows signal margin over noise
Downstream powerSignal entering the deviceToo high or too low may affect reception
Upstream powerSignal sent back by the deviceHigh value may mean the device is transmitting harder

In simple terms, SNR tells signal quality, while power tells signal level.

A device may receive enough signal power but still have poor SNR if the signal path is noisy. For PCB and PCBA projects, this distinction matters because the product must preserve both signal level and signal cleanliness after the RF signal enters the board.

Cable SNR

Why Does Cable SNR Matter to PCB and PCBA Customers?

Cable SNR matters to PCB and PCBA customers because product-side implementation can weaken signal quality. Even when the incoming cable signal is acceptable, the PCB input path may still introduce loss, reflection, poor grounding, or assembly variation.

For a cable communication PCB or PCBA project, customers usually care about these questions:

  • Can the RF connector be mounted reliably?
  • Can the connector-to-PCB transition stay clean?
  • Can the 75Ω impedance path be controlled in production?
  • Can grounding reduce unnecessary noise coupling?
  • Can PCBA assembly keep connector quality consistent across batches?

These are the areas a PCB and PCBA manufacturer can support. The manufacturer does not replace RF system design. Its role is to manufacture and assemble the approved design accurately and consistently.

Why Is 75Ω Common in Cable Input Paths?

Many coaxial cable communication systems use a 75Ω environment. This is common in cable TV, CATV, video transmission, and cable input applications. It is different from many WiFi, cellular, and general RF module paths, where 50Ω is more common.

This does not mean every RF path should be 75Ω. It means the impedance should match the system it belongs to.

In cable input applications, the cable is usually not selected like a generic RF test cable. Many cable TV, CATV, and cable input systems use 75Ω coaxial cable, while many RF modules, WiFi devices, and lab instruments use 50Ω coaxial cable. The PCB input path should match the impedance environment defined by the customer’s product design. For this article, the focus is not cable selection, but how the product-side RF connector and PCB input path preserve the approved impedance.

For PCB layout, the key point is not to guess between 50Ω and 75Ω. The correct impedance should follow the customer’s chipset reference design, RF input requirement, connector datasheet, PCB stack-up, and approved layout file.

If the external cable interface is based on 75Ω, the connector-to-PCB transition and PCB input trace usually need to preserve that 75Ω path unless the customer’s design specifies otherwise.

What Is the 75Ω RF Input Path on PCB?

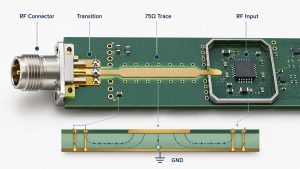
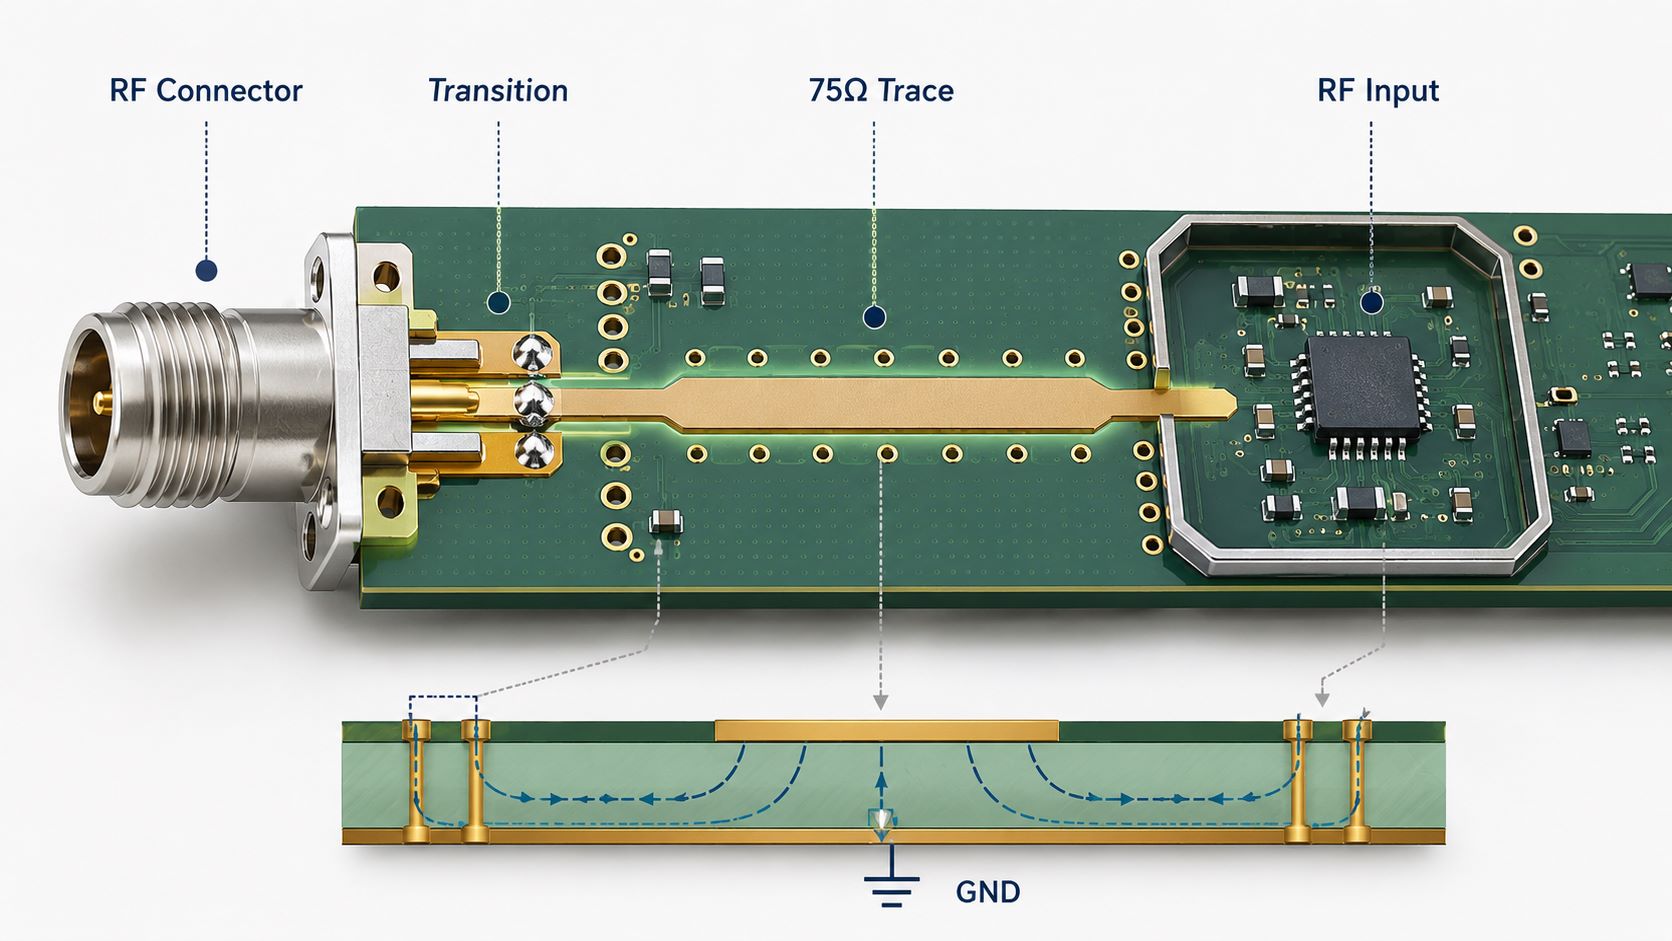
The 75Ω RF input path is the product-side signal route after the cable signal enters the board. It usually starts from the RF connector and continues toward the RF input circuit.

A simplified path looks like this:

RF connector → connector-to-PCB transition → 75Ω PCB trace → RF input circuit

Each section matters:

  • RF connector provides the physical and electrical entry point.
  • Connector-to-PCB transition affects impedance continuity.
  • 75Ω PCB trace carries the signal into the input circuit.
  • Reference ground supports the return path.
  • Grounding and shielding help reduce unwanted coupling.
  • PCBA assembly determines whether solder joints and ground contacts stay reliable.

This is the core of the article. Cable SNR is the signal-quality reading. The 75Ω PCB input path is one product-side area that can affect whether the approved hardware performs consistently.

Why Does RF Connector Layout Matter on PCB?

RF connector layout matters because the connector is the bridge between the cable signal and the PCB signal path. Poor execution can create impedance discontinuity, reflection, extra loss, or unstable grounding.

For PCB layout execution, the connector area should follow the customer’s approved files, including the connector datasheet, recommended footprint, PCB stack-up, impedance requirement, and layout guide.

Key points include:

  • Footprint accuracy
    Pad size, drill, plating, solder mask opening, and mechanical land pattern should match the approved connector drawing.
  • Connector-to-trace transition
    The path from connector pin to RF trace should be short and clean. Avoid unnecessary stubs and sudden geometry changes.
  • Ground pad placement
    Ground pads around the connector support shielding and return path continuity.
  • Ground via placement
    Ground vias near the connector shell and RF transition can help support a stable return path when placed according to layout requirements.
  • Shell grounding
    The connector body should connect reliably to ground.
  • Mechanical support
    RF connectors may face pulling, twisting, and repeated plugging. The footprint should support both electrical and mechanical reliability.

This is PCB layout execution, not complete RF design. A PCB layout team should implement the connector area based on customer-approved requirements. It should not claim RF connector launch redesign unless that service is truly provided.

How Does Controlled Impedance Protect Cable SNR?

Controlled impedance helps keep the RF input path predictable. For cable input PCB projects, this often means maintaining a 75Ω signal path from the RF connector toward the input circuit.

The correct impedance should come from the customer’s schematic, chipset reference, connector datasheet, PCB stack-up, or approved layout file.

75Ω controlled impedance depends on:

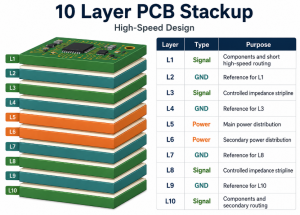
  • PCB stack-up
  • Dielectric thickness
  • Copper thickness
  • Trace width
  • Reference ground plane
  • Solder mask effect
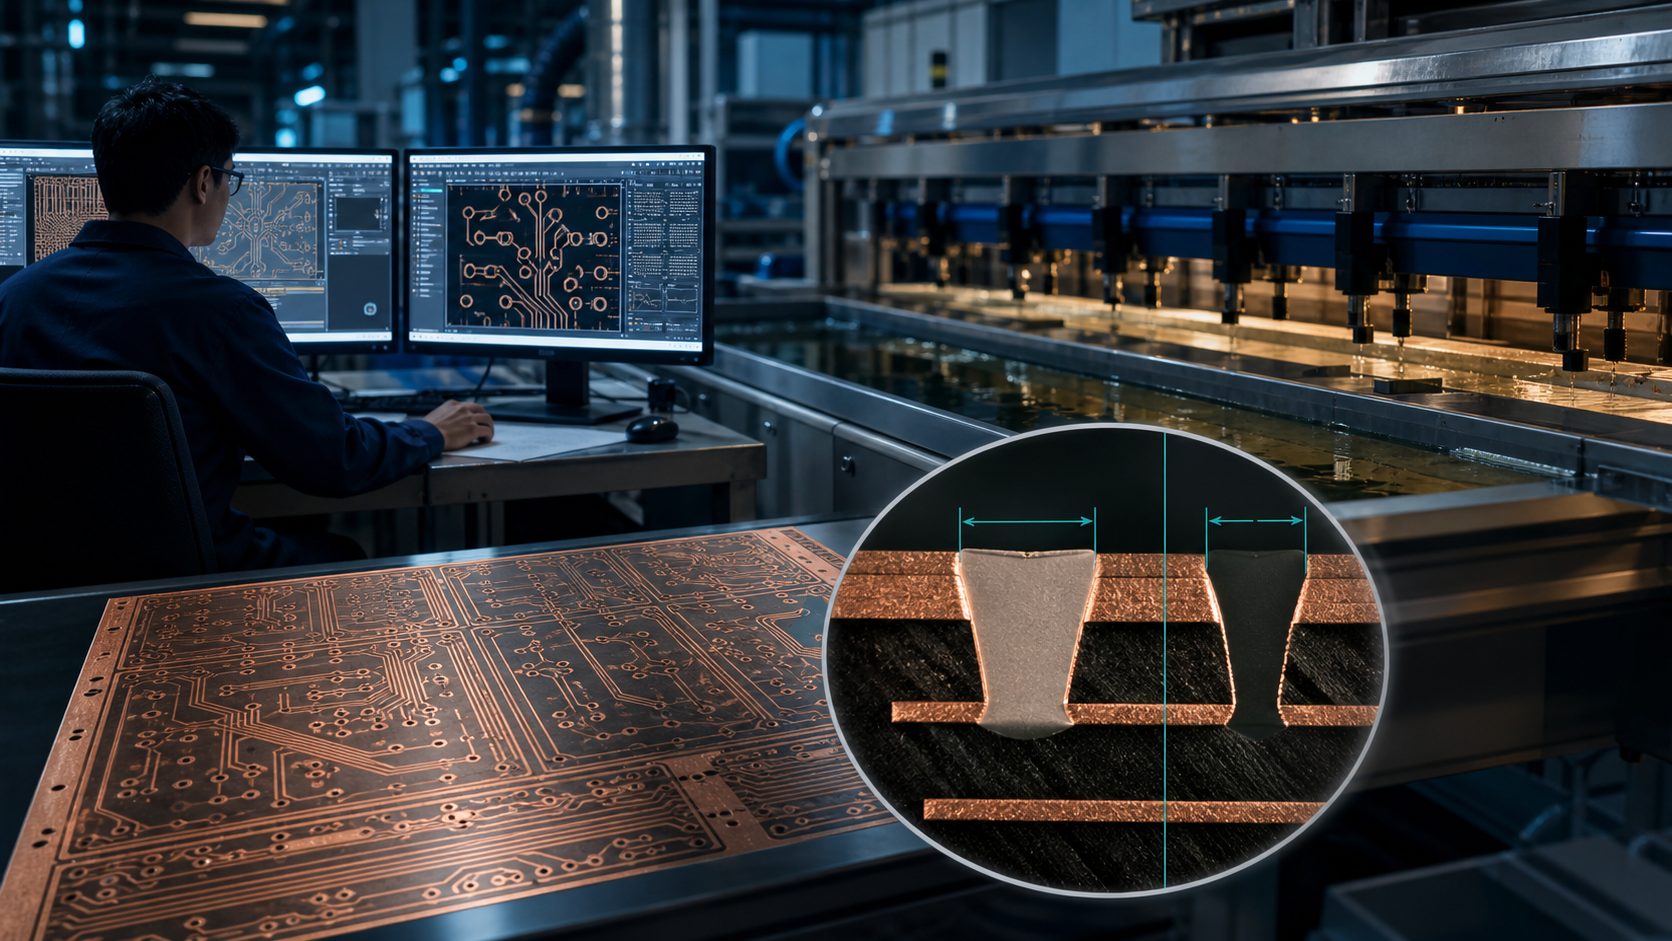
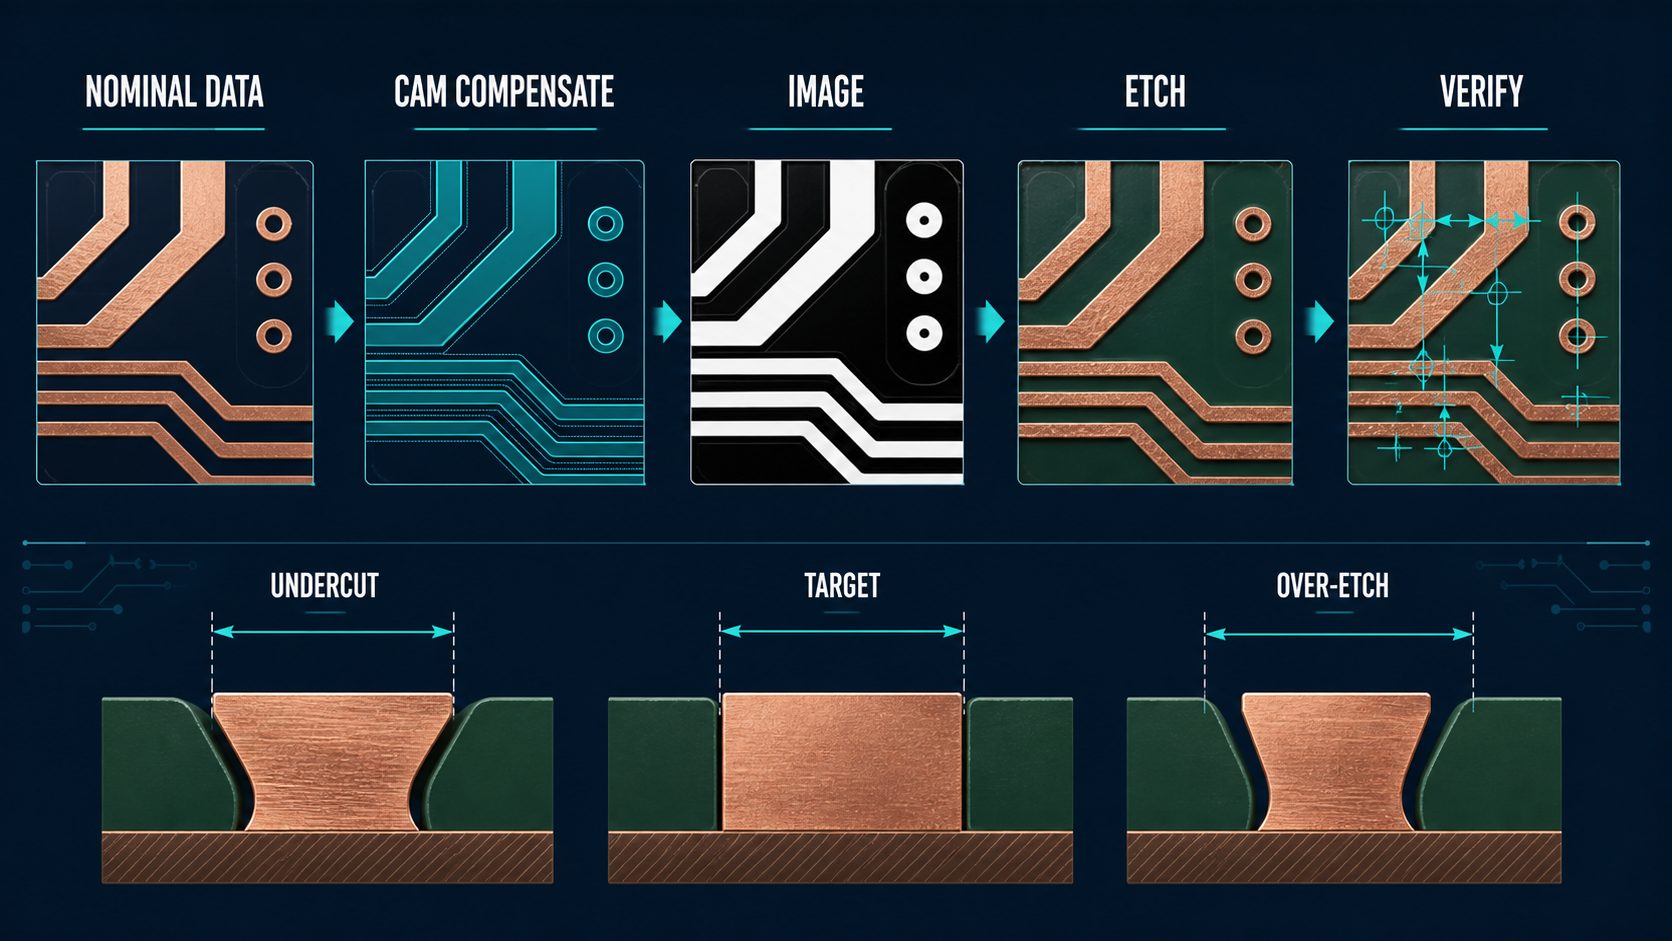
  • Etching tolerance
  • Impedance test coupon

If the stack-up changes, impedance may shift. If etching control is poor, trace width may move out of tolerance. If the reference ground is interrupted, the return path becomes less predictable.

A PCB manufacturer can support this by reviewing the stack-up, calculating impedance with actual production materials, controlling lamination and etching, and providing impedance testing when required.

For the customer, the value is simple: the 75Ω path should not only be correct in the design file. It should remain controlled in production.

How Does Grounding Affect the RF Input Path?

Grounding affects the RF input path because RF signals need a stable return path. Poor grounding can increase reflection, coupling, and noise sensitivity.

For PCB layout and PCBA production, the grounding focus should be practical:

  • Connector shell grounding
    The connector body should have a reliable ground connection.
  • Reference plane continuity
    The RF trace should not cross unnecessary ground cuts, slots, or broken reference planes.
  • Ground via stitching
    Ground vias near the RF connector and input path can help maintain a cleaner return path when used according to layout requirements.
  • Shield-can ground pads
    If the design uses a shield can, its ground pads should be placed and soldered correctly.
  • Return path control
    The RF signal and its return path should stay close and predictable.

Grounding cannot solve every cable SNR problem. If the incoming cable line is noisy, PCB grounding alone cannot fix it. But poor grounding can make a good design perform worse than expected.

How Does PCBA Assembly Affect RF Connector Reliability?

PCBA assembly quality strongly affects RF connector reliability. For RF and coaxial interfaces, soldering quality, alignment, grounding, and mechanical strength all matter.

Key assembly points include:

  • Connector alignment
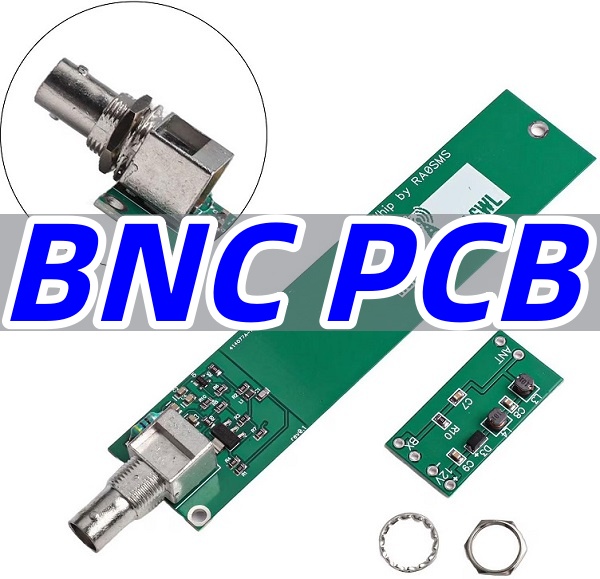
    F-type, SMA, SMB, MCX, board-edge, or custom RF connectors should be placed accurately.
  • Solder wetting
    Connector ground pads, center pins, and mechanical tabs should have proper solder wetting.
  • Ground pad soldering
    RF connector ground pads are part of the shielding and return path. Weak soldering may reduce stability.
  • Mechanical anchor strength
    Cable connectors may face pulling, twisting, and repeated plugging. Anchor points must be reliable.
  • Shield-can soldering
    Lifted edges, solder gaps, or excessive solder can affect shielding and consistency.
  • Inspection
    Visual inspection, AOI, and X-ray when needed can help identify placement shift, solder defects, hidden joints, and connector issues.
  • Functional test support
    If the customer provides test firmware, fixtures, RF test method, or acceptance criteria, the PCBA factory can support defined production testing.

For communication products, one working prototype does not guarantee mass-production stability. Customers need repeatable soldering, controlled process parameters, consistent connector handling, and traceable inspection records.

FAQs About Cable SNR

Q1: What is a good cable SNR?

A good cable SNR is commonly 30 dB or higher in many cable communication applications. Mid-to-upper 30s usually provide better stability.

Q2: Is 29 dB SNR good?

29 dB is usually marginal. It may work, but the margin is limited. If noise rises or the signal path fluctuates, errors or unstable speed may appear.

Q3: Is cable SNR the same as downstream power?

No. Cable SNR measures signal quality compared with noise. Downstream power measures the signal level entering the device.

Q4: What does upstream power mean?

Upstream power is the signal level the device sends back to the network. If it is high, the device may be working harder to transmit.

Q5: Can PCB layout affect cable SNR?

PCB layout can affect the product-side RF path through connector transition, 75Ω impedance control, grounding, and return path continuity. It cannot control the external cable network.

Q6: Can PCBA quality affect RF connector performance?

Yes. Connector soldering, ground pad quality, shield-can soldering, inspection, and functional testing can affect production consistency and RF connector reliability.

In conclusion, cable SNR shows how clean a cable signal is compared with noise. For many cable input applications, 30 dB or higher is a practical baseline.

For PCB and PCBA customers, the main concern is the 75Ω RF input path. RF connector layout, controlled impedance, grounding, and connector assembly quality can all affect whether the approved design performs consistently in production.

If you are developing a cable input PCB or RF connector PCBA project, you are welcome to send your schematic, BOM, Gerber files, stack-up, impedance requirements, connector datasheets, and assembly drawings to sales@bestpcbs.com. Best Technology will review them carefully and help evaluate a suitable PCB manufacturing and turnkey PCBA assembly approach.

You may also like

MIMO Antenna | RF PCB Layout, PCB Types, and Impedance Control
Wednesday, May 27th, 2026

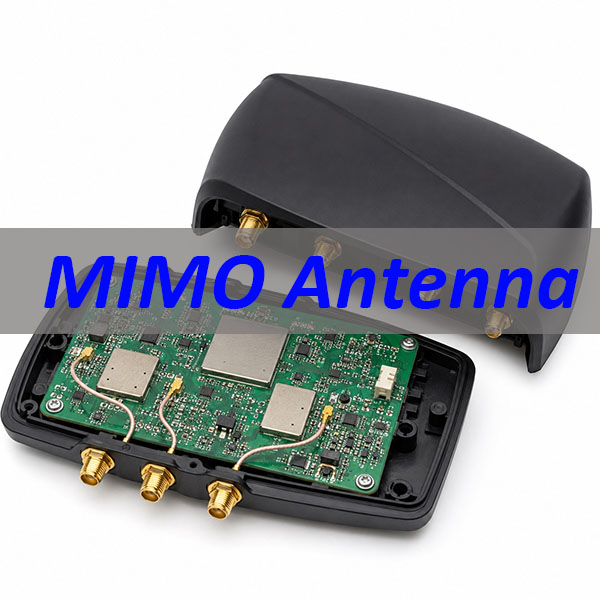
MIMO antenna is widely used in 5G CPE, LTE gateways, WiFi routers, IoT modules, UAV communication units, and industrial wireless devices. In these products, antenna performance is not only related to the antenna structure itself, but also to the PCB layout, RF trace consistency, connector reliability, controlled impedance, and PCBA assembly quality.

From a PCB and PCBA manufacturing point of view, the goal is not to redesign the antenna. The goal is to manufacture and assemble the board according to the customer’s approved RF layout, stackup, material, impedance, and assembly requirements.

Before fabrication, engineers and buyers should confirm several practical details, including RF trace width, PCB type, stackup, antenna keep-out area, controlled impedance, connector footprint, surface finish, BOM, pick-and-place file, and assembly drawing. For MIMO antenna PCB fabrication, RF PCB manufacturing, or PCBA assembly support, you can send your Gerber files, BOM, stackup, and assembly requirements to sales@bestpcbs.com for review and quotation.

MIMO antenna

What Is a MIMO Antenna?

A MIMO antenna is an antenna system that uses multiple antenna paths to send and receive wireless signals. MIMO stands for Multiple Input, Multiple Output. It is widely used in 5G, LTE, WiFi, IoT, industrial wireless devices, routers, gateways, UAV communication units, and smart electronic products.

For engineers and buyers, the key point is not only how the antenna works in theory. In a real product, the MIMO antenna is closely connected with the PCB layout, RF feed lines, grounding area, impedance control, connectors, and PCBA assembly quality.

A typical product using a MIMO antenna may include:

  • RF feed lines on the PCB
  • Printed antenna areas or external antenna connectors
  • Matching component pads
  • Controlled impedance traces
  • RF connectors such as SMA, IPEX, U.FL, or similar interfaces
  • Wireless module or chipset area
  • Ground reference and shielding clearance

From a PCB and PCBA manufacturing point of view, the role of the manufacturer is not to redesign the antenna. The real task is to produce the PCB and assemble the PCBA according to the customer’s approved RF layout, stackup, impedance, and assembly requirements.

For this reason, MIMO antenna projects should be reviewed carefully before fabrication. RF trace width, PCB stackup, antenna keep-out area, connector footprint, surface finish, and assembly files should all be checked early to reduce production risk.

2×2 MIMO Antenna vs 4×4 MIMO Antenna PCB

A 2×2 MIMO antenna usually uses two RF paths, while a 4×4 MIMO antenna uses four RF paths. For PCB manufacturing, this difference affects layout density, connector quantity, impedance control, and PCBA inspection.

Item2×2 MIMO Antenna PCB4×4 MIMO Antenna PCB
RF paths24
Layout densityLowerHigher
PCB space pressureLowerHigher
RF connectorsFewerMore
Matching componentsFewerMore
Controlled impedanceRequiredMore critical
PCBA inspectionModerateMore detailed

A 4×4 board usually needs more careful RF trace routing, connector placement, antenna spacing, and assembly checking. For compact devices, layout density should be reviewed early to reduce fabrication and assembly risks.

4×4 MIMO Antenna 5G PCB Requirements

A 4×4 MIMO antenna 5G board usually has tighter PCB space and more RF paths than a basic wireless board. This makes stackup, impedance control, and connector assembly more important.

Before production, these items should be reviewed:

Production ItemWhat to Confirm
PCB stackupDielectric thickness and layer structure
RF trace widthMatches the impedance calculation
Copper thicknessAffects etching and final impedance
Connector footprintSupports soldering and mechanical strength
Antenna areaKeep-out area is clear
Surface finishSuitable for RF connector soldering
PCBA filesBOM, placement file, and assembly drawing are complete

Most RF feed lines are designed around 50Ω controlled impedance. The final trace width should be calculated based on the confirmed stackup, material data, copper thickness, and production tolerance.

LTE MIMO Antenna and 4G LTE MIMO Antenna PCB

An LTE MIMO antenna or 4G LTE MIMO antenna product often uses RF connectors, coaxial cables, module interfaces, or printed antenna areas. The PCB should support stable RF transmission and reliable assembly.

For LTE-related boards, the main manufacturing checks include:

  • RF trace width and clearance
  • Connector footprint accuracy
  • Ground reference near RF paths
  • Matching component pad size
  • Board edge accuracy if the antenna is near the outline
  • Surface finish for stable soldering
  • PCBA inspection for connectors and small RF components

For products using external LTE antennas, connector strength and cable direction should be checked before assembly. This helps reduce mechanical stress during final product installation.

MIMO WiFi Antenna PCB for Compact Devices

A MIMO WiFi antenna board is often used in WiFi 6, WiFi 7, router, gateway, smart home, and IoT products. These products usually have compact layouts, small RF components, and limited antenna space.

For compact WiFi boards, the PCB layout review should focus on:

  • Antenna keep-out area
  • RF trace continuity
  • Controlled impedance requirement
  • Ground clearance
  • Connector position
  • Component height near antenna areas
  • Shielding can clearance
  • Assembly access for inspection

Here, PCB layout support means manufacturability review and assembly review. It does not mean changing the customer’s full RF antenna design. The approved RF structure should be protected during PCB fabrication and PCBA assembly.

External MIMO Antenna Connections for PCB/PCBA

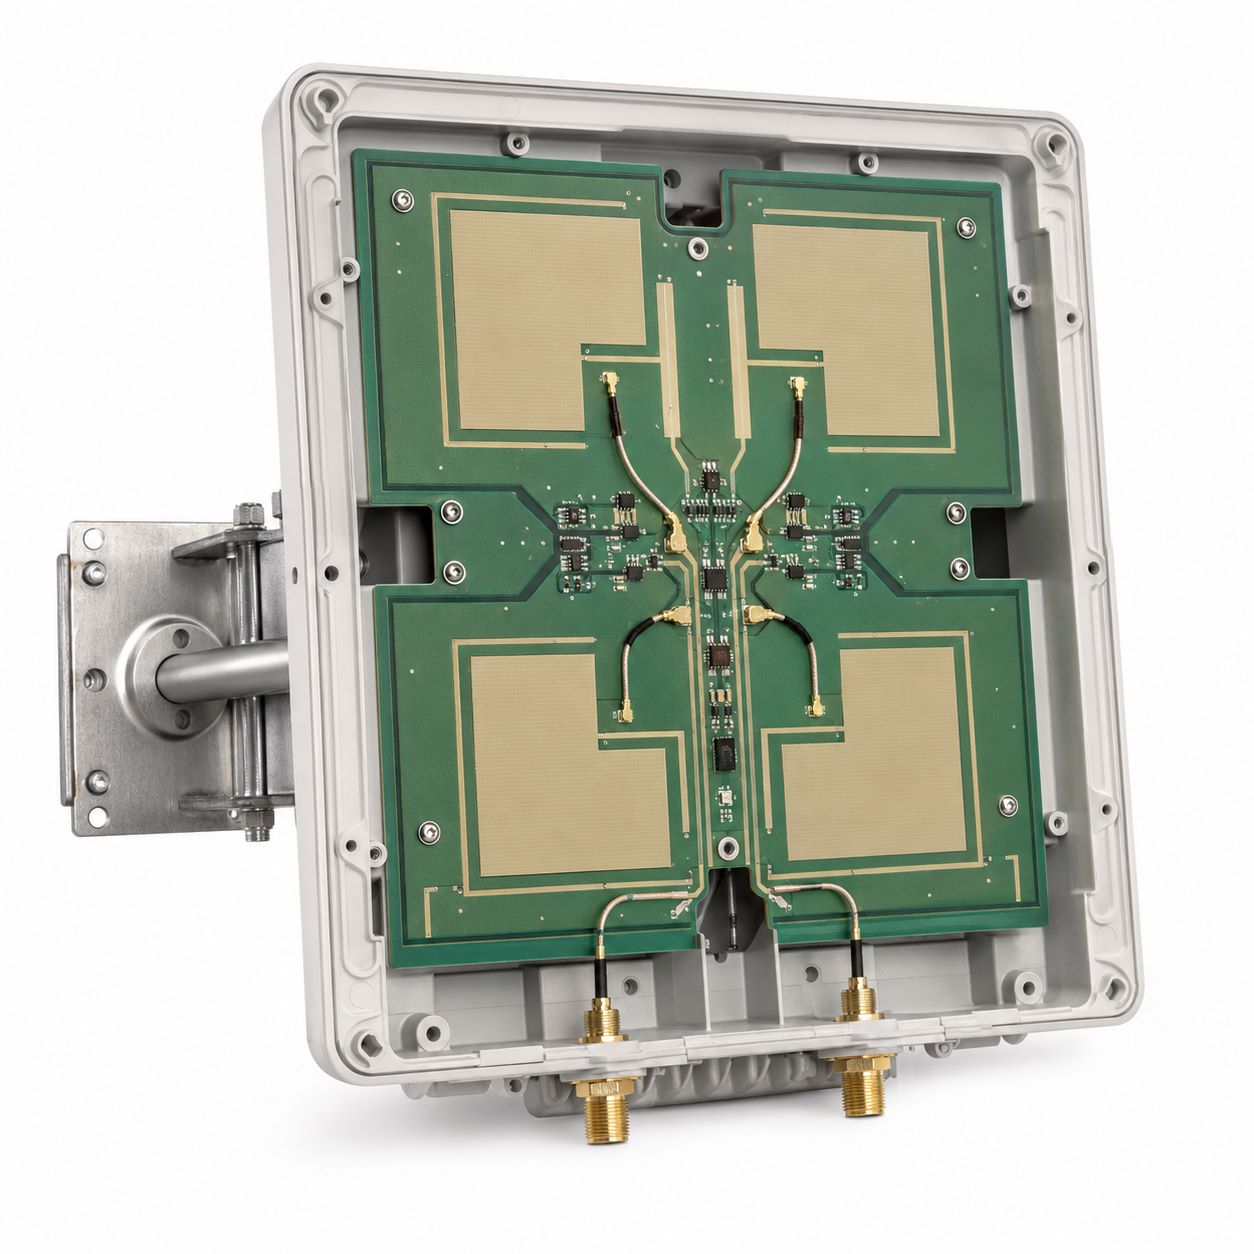
Many wireless products use an external MIMO antenna, such as a MIMO panel antenna, directional antenna, omnidirectional antenna, FPC antenna, or coaxial antenna interface. For a PCB and PCBA manufacturer, the focus is not to select the antenna type. The focus is to make sure the antenna connection on the PCB is accurate, reliable, and easy to assemble.

The connector area should be reviewed before production because it affects soldering strength, cable direction, enclosure fit, and long-term product reliability.

Antenna InterfacePCB/PCBA Focus
External MIMO antennaRF connector footprint, solder pad strength, and cable direction
MIMO panel antennaConnector position, enclosure clearance, and coax cable routing
MIMO directional antennaStable RF connector assembly and mechanical fixing
Omnidirectional MIMO antennaConnector layout, ground area, and assembly access
FPC antennaFPC connector soldering, cable bending direction, and fixture space
Coaxial antenna interfaceU.FL, IPEX, SMA, or similar connector footprint control

For PCBA production, RF connectors need careful inspection. Poor soldering, weak pad design, unsuitable plating, or tight cable bending may affect final assembly reliability. Before production, customers should confirm the connector type, footprint, cable direction, assembly drawing, and any mechanical clearance requirement.

PCB Types for MIMO Antenna Boards

Different wireless products may require different PCB types. The right choice depends on frequency, cost target, product size, impedance requirement, assembly structure, and reliability needs.

PCB TypeCommon UseManufacturing Focus
FR4 PCBBasic WiFi, IoT, and cost-sensitive wireless boardsMature process and cost-effective production
High-Tg PCBIndustrial wireless modules and long-running devicesBetter thermal stability
RF PCB5G, LTE, WiFi, and RF modulesImpedance, dielectric thickness, and RF trace control
Rogers PCBHigh-frequency and low-loss wireless productsStable dielectric performance for higher-frequency applications
Hybrid Stackup PCBRF + digital mixed circuitsBalances RF performance, cost, and structure
Rigid-Flex PCBSpace-limited wireless devicesSupports compact structure and reliable interconnection

For MIMO antenna PCB projects, PCB type selection should not be based only on price. It should match the RF path, stackup, impedance requirement, connector type, and PCBA assembly method.

Before production, these details should be confirmed:

  • PCB type
  • Material grade
  • Board thickness
  • Copper thickness
  • Stackup structure
  • Impedance requirement
  • Surface finish
  • Assembly method
  • Material availability

For RF-related projects, PCB type or material replacement should be handled carefully. Even when two options look similar, changes in dielectric constant, board thickness, copper type, or stackup may affect impedance result and production consistency.

MIMO Antenna PCB Layout and DFM Review

For this topic, PCB layout means layout support for manufacturability and assembly. It does not mean full antenna design or RF system redesign.

A practical DFM review should check whether the approved RF layout can be fabricated and assembled reliably.

Layout AreaDFM Review Point
Antenna keep-out areaNo unexpected copper, screws, cables, or tall components
RF feed lineShort, clean, and impedance-controlled
Ground areaStable ground reference and proper clearance
Matching component padsAccurate pad size and easy assembly
Connector placementSuitable for cable direction and inspection
Shielding areaEnough clearance from RF-sensitive areas
Board outlineCorrect mechanical fit and antenna edge control

For faster review, customers should provide Gerber files, PCB stackup, impedance requirement, BOM, pick-and-place file, assembly drawing, and RF notes.

MIMO Antenna PCB Manufacturing and PCBA Inspection

For MIMO antenna PCB manufacturing, the most important point is repeatability. A PCB supplier should help keep the same stackup, copper geometry, impedance result, and assembly quality from prototype to batch production.

Key manufacturing controls include:

Control ItemWhat to Check
Stackup controlDielectric thickness and layer structure
Controlled impedanceRF trace width, copper thickness, and tolerance
Etching accuracyRF trace shape and spacing
Board outlineAntenna edge and mechanical fit
Surface finishSolderability and connector reliability
Solder maskClearance around RF-sensitive areas
AOI inspectionTrace shape and copper defects
Electrical testContinuity and isolation
PCBA inspectionRF connector and matching component quality

For PCBA assembly, special attention should be given to:

  • RF connector soldering
  • Small matching components
  • Shielding can position
  • Coax cable direction
  • Connector mechanical strength
  • Cleanliness around RF areas
  • X-ray inspection when required

EBest Circuit supports PCB fabrication, RF board material selection, controlled impedance, DFM review, component sourcing, PCBA assembly, AOI, X-ray, electrical testing, and production follow-up for wireless electronic products.

FAQs About MIMO Antenna

Q1: What is a MIMO antenna?
A MIMO antenna uses multiple antenna paths to improve wireless speed, coverage, and connection stability.

Q2: What is a MIMO antenna PCB?
It is a PCB that carries antenna areas, RF feed lines, matching components, connectors, grounding areas, and related wireless circuits.

Q3: What is the difference between 2×2 and 4×4 MIMO antenna PCB?
A 2×2 board has two RF paths, while a 4×4 board has four. A 4×4 board usually needs more PCB space, better routing control, and more careful PCBA inspection.

Q4: What should be checked for a 4×4 MIMO antenna 5G PCB?
The stackup, RF trace width, impedance requirement, antenna keep-out area, connector footprint, surface finish, and assembly files should be checked before production.

Q5: Can FR4 be used for MIMO WiFi antenna PCB?
Yes. FR4 can be used for some WiFi and IoT products. For higher-frequency or lower-loss applications, RF PCB, Rogers PCB, or hybrid stackup PCB may be considered.

Q6: Does MIMO antenna PCB need controlled impedance?
Yes. RF feed lines usually require controlled impedance, commonly 50Ω, to support stable RF transmission.

Q7: What PCB type is used for MIMO antenna boards?
Common options include FR4 PCB, High-Tg PCB, RF PCB, Rogers PCB, Hybrid Stackup PCB, and Rigid-Flex PCB. The choice depends on frequency, stackup, impedance, cost, and assembly structure.

Q8: What should be checked for external MIMO antenna connections?
RF connector footprint, solder strength, cable direction, mechanical clearance, plating quality, and PCBA inspection should be checked.

Q9: Can EBest Circuit manufacture MIMO antenna PCB and PCBA?
Yes. EBest Circuit can support MIMO antenna PCB fabrication, controlled impedance, RF material selection, DFM review, component sourcing, PCBA assembly, and testing. Send your Gerber, stackup, BOM, and assembly files to sales@bestpcbs.com for a quotation.

You may also like

Impedance Control PCB
Friday, April 10th, 2026

If you’ve worked with high-frequency circuits or sensitive signals, you might have come across the term “impedance control.” Understanding and managing impedance can be the difference between a reliable design and one plagued by signal loss or interference.

Are You Facing These Challenges?

Many customers come to us after struggling with unstable signal performance, failed first builds, or mismatched stack-up assumptions.

Common Challenges

  • Signal reflection in high-speed traces
  • Differential pair mismatch
  • Unclear stack-up planning
  • Unexpected impedance deviation after fabrication
  • EMI issues caused by routing inconsistency
  • Difficulty finding a manufacturer that understands impedance requirements

Our Solution

We help review your layer structure, material selection, and trace geometry before production. With manufacturing-aware engineering support, we reduce the gap between design calculation and actual fabrication result.

Why Choose EBest Circuit for Impedance Control PCB?

Choosing the right manufacturer is important because controlled impedance is not only a calculation task. It is also a process control task. A good supplier needs to understand both design intent and manufacturing consistency.

What We Offer

  • Engineering support for stack-up review
  • Controlled impedance trace calculation support
  • Stable multilayer lamination process
  • In-process impedance monitoring
  • Support for high-speed and RF PCB projects
  • Fast prototype and production service
  • PCB and PCBA one-stop support

Our team works closely with customers during the early design stage to reduce risk before fabrication starts. That helps shorten revision cycles and improve project efficiency.

Impedance Control PCB

Impedance Control PCB Manufacturer

What is Impedance?

Impedance, in simple terms, is the opposition a circuit offers to the flow of alternating current (AC). It combines two elements: resistance, which is straightforward opposition, and reactance, which is the opposition due to capacitance and inductance. Together, they form impedance, usually measured in ohms (Ω).

In a PCB, impedance is vital because it affects how signals propagate through the traces. If the impedance isn’t controlled, it can lead to reflections, signal loss, or even total communication failure, especially in high-speed circuits.

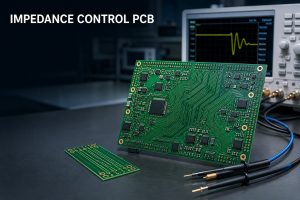
What is Impedance Control PCB?

An impedance control PCB is a printed circuit board designed so that specific traces maintain a target impedance value throughout signal transmission. The purpose is to make sure signals travel with minimal loss, reflection, or distortion.

In PCB design, impedance is influenced by resistance, capacitance, and inductance. When signal speed rises, these factors become more critical. If impedance changes unexpectedly along the routing path, the signal quality can drop quickly. This is why controlled impedance is widely used in RF circuits, high-speed digital interfaces, and precision analog systems.

Common controlled impedance types include:

  • 50Ω single-ended impedance
  • 75Ω single-ended impedance
  • 90Ω differential impedance
  • 100Ω differential impedance
  • 120Ω differential impedance

The right target depends on your interface standard, material system, stack-up, and routing method.

What is Impedance Control PCB?

Why Is Controlled Impedance Important in PCB Design?

Controlled impedance matters because signal integrity depends on consistency. In high-speed designs, the copper trace is not just a conductor. It behaves like a transmission line. If the impedance of that transmission line does not match the system requirement, part of the signal energy reflects back toward the source.

This can lead to:

  • Signal reflection
  • Timing instability
  • Crosstalk
  • EMI problems
  • Higher bit error rates
  • Reduced communication reliability

For products using DDR memory, RF modules, antennas, automotive communication, industrial control, or high-speed connectors, impedance control is often not optional. It is part of the design foundation.

What Factors Affect PCB Impedance?

PCB impedance is not determined by one variable alone. It comes from the interaction of conductor geometry, laminate properties, and layer arrangement. Even a small change in fabrication can affect the final result.

1. Trace Width

Trace width is one of the most direct factors. A wider trace usually lowers impedance, while a narrower trace increases it. This is why impedance traces cannot be adjusted casually during layout optimization.
2. Copper Thickness

Copper thickness changes the effective conductor shape and resistance. Thicker copper can reduce impedance, but it also changes etching behavior and production tolerance.

3. Dielectric Constant (Dk)

The dielectric constant of the laminate affects electric field distribution and capacitance between the trace and reference plane. FR4 materials commonly show Dk values around 3.9 to 4.5, while PTFE materials are lower and often preferred for high-frequency applications.

4. Dielectric Thickness

The spacing between the signal trace and the reference plane has a strong effect on impedance. A thicker dielectric usually increases impedance, while a thinner dielectric lowers it.

5. Loss Tangent

Low-loss materials preserve signal energy better, especially in RF and high-speed applications. While loss tangent is not the only parameter that matters, it strongly affects real-world transmission quality.

6. Trace Coupling and Crosstalk

When traces are too close, coupling can change the expected impedance and create crosstalk. This is particularly important in dense differential pair routing.

7. Layer Stack-Up

In multilayer PCBs, impedance depends heavily on stack-up design. Signal layer position, plane continuity, dielectric thickness, and via transitions must all be considered together.

When Do You Need an Impedance Control PCB?

Not every board needs controlled impedance. For low-speed, low-frequency, or simple power control products, standard PCB design may be enough. But if your design includes fast signals or strict waveform requirements, controlled impedance becomes much more important.

You should consider impedance control for:

  • RF and microwave circuits
  • High-speed digital interfaces
  • DDR memory routing
  • USB, HDMI, PCIe, LVDS, and Ethernet designs
  • Differential pair signal routing
  • Sensitive analog signal paths
  • Long trace interconnects
  • Multi-layer signal-dense boards

In these applications, controlled impedance helps maintain cleaner transmission and more predictable electrical behavior.

What Is the Typical Impedance Tolerance of PCB?

Impedance tolerance refers to the acceptable variation between the target impedance and the actual measured result. In many PCB applications, the typical tolerance is ±10%. For more demanding products, tighter tolerances such as ±5% or even ±2% may be required.

A tighter tolerance usually requires:

  • More accurate material data
  • Better etching control
  • Stable lamination process
  • Precise stack-up construction
  • Reliable impedance coupon testing

This is why the manufacturer’s process capability matters just as much as the design itself.

How Is 100Ω Differential Impedance Controlled?

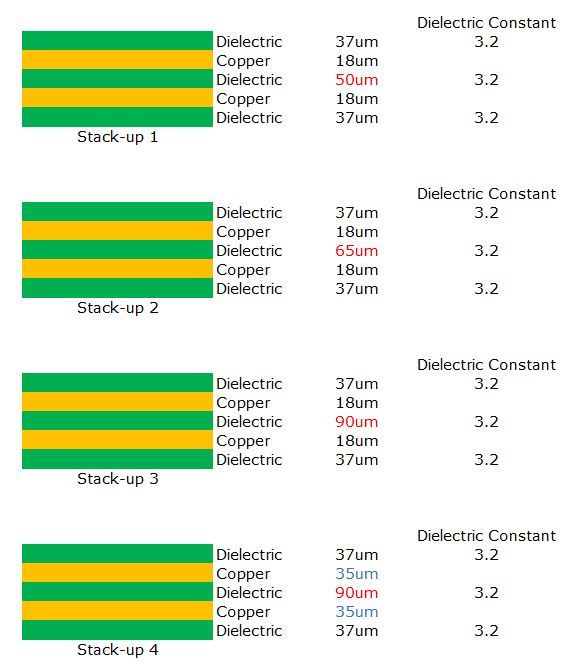
For 100Ω differential impedance, the process usually begins with stack-up definition and field-solver calculation. The dielectric thickness between layers, line width, and trace spacing must all be matched to the target value. Your original content provided example geometries for four different stack-up options, showing that trace width and spacing vary depending on the specific layer structure.
Example reference values include:

impedance control pcb stack up
  • Stack-Up 1: 70/130μm trace/space
  • Stack-Up 2: 95/140μm trace/space
  • Stack-Up 3: 125/130μm trace/space
  • Stack-Up 4: 105/150μm trace/space

During production, manufacturers normally establish process parameters after first article verification, then carry out random impedance checks during production and on finished boards.

Manufacturing Capabilities for Impedance Control PCB

At EBest Circuit (Best Technology), we support controlled impedance PCB manufacturing for a wide range of applications, from prototype builds to volume production.

Typical Capability Overview

ItemCapability
Board TypeRigid PCB, multilayer PCB, HDI PCB, RF PCB
Layer Count1–32 layers typical
Controlled Impedance TypeSingle-ended and differential
Common Target Values50Ω / 75Ω / 90Ω / 100Ω / 120Ω
Base MaterialsFR4, high-speed materials, RF laminates
Copper ThicknessStandard to heavy copper options
Impedance VerificationCoupon testing / in-process control
Application SupportRF, telecom, automotive, industrial, medical

Applications of Impedance Control PCB

Controlled impedance PCBs are widely used in products where signal integrity matters.

Typical applications include:

  • Communication equipment
  • RF modules
  • Automotive electronics
  • Medical devices
  • Industrial control systems
  • Network hardware
  • Embedded computing platforms
  • High-speed data transmission systems

As product speed and complexity continue to rise, controlled impedance is becoming a standard requirement in more electronic categories.

FAQs About Impedance Control PCB

1. What is the difference between impedance control and standard PCB design?

Standard PCB design may not define a strict trace impedance target. Impedance control PCB design requires specific trace width, spacing, material selection, and stack-up planning to achieve a defined impedance value.

2. Is FR4 suitable for impedance control PCB?

Yes. FR4 can be used for many controlled impedance applications, especially common digital designs. For higher frequencies or lower signal loss requirements, specialized materials may be a better choice.

3. What is the most common differential impedance value?

100Ω differential impedance is one of the most common targets, especially for many high-speed signal interfaces.

4. Can impedance control PCB reduce EMI?

Yes. Stable impedance routing can reduce reflections and signal discontinuities, which helps improve overall signal integrity and can support better EMI performance.

5. How is impedance tested during manufacturing?

Manufacturers commonly use impedance coupons and random process checks during production, followed by finished board verification.

6. What tolerance is usually acceptable?
A typical impedance tolerance is ±10%, while tighter requirements such as ±5% may be used in more demanding applications.

Get a Quote for Your Impedance Control PCB Project

If you are developing a high-speed or RF product, controlled impedance should be considered early in the design stage. A correct stack-up and manufacturable trace structure can save both time and revision cost later.

EBest Circuit (Best Technology) provides impedance control PCB manufacturing with engineering review, stack-up support, and reliable process control for demanding electronic applications.

Send us your Gerber files, layer stack-up, and impedance requirements, and our team will help you move your project forward with greater confidence.

You may also like

Why DK Is important to Impedance Control in RF PCB Materials?
Thursday, December 11th, 2025

In any RF PCB material used for wireless modules, radar systems, or 5G designs, few parameters influence performance as strongly as DK, or dielectric constant. When engineers talk about controlled impedance PCB structures, DK sits at the heart of every decision. It shapes signal speed, impedance behavior, and even how your RF transmission line behaves at microwave frequencies.

If your goal is stable, predictable high-frequency PCB design, understanding why DK matters will help you choose better laminates and avoid costly tuning steps.

DK Directly Determines the Impedance of RF Transmission Lines

Every RF microstrip impedance calculation depends on DK. The material’s dielectric constant feeds into the formula that sets the final impedance for 50Ω microstrip lines, 75Ω video lines, and many custom RF structures.

The relationship is simple:

  • Higher DK → lower impedance
  • Lower DK → higher impedance

This is why RF PCB stack-up design can only be accurate when the underlying DK is consistent. Even a small DK shift, such as ±0.1, can move the impedance by several ohms. At microwave frequencies, that difference influences return loss, matching accuracy, and the stability of filters or antennas.

To reduce this variation, engineers often choose Rogers RF materials such as RO3003, RO4003C, and RO4350B, which maintain tighter DK tolerance than conventional FR4.

Why DK Is important to Impedance Control in RF PCB Materials?

DK Stability Protects RF Circuits From Impedance Drift

Standard materials, such as FR4, show large DK swings at different frequencies and temperatures. But advanced high-frequency laminate materials are engineered for stability across environmental changes, humidity, and frequency ranges.

Stable DK provides stable impedance, which leads to:

  • cleaner signal flow
  • predictable matching in RF front-end circuits
  • stable phase length for microwave structures
  • consistent RF PCB routing performance

For microwave builds, especially above 2–3 GHz, DK tolerance becomes one of the clearest indicators of high-quality RF PCB material selection.

DK Controls RF Signal Propagation

Impedance is not just a number—it reflects how electromagnetic energy moves across the PCB. DK defines the relationship between the electric field in the trace and the dielectric beneath it. When DK is stable, signal propagation speed stays stable too.

This affects many RF structures:

  • microstrip antennas
  • transmission lines for mixers, LNAs, and PAs
  • VCOs and PLL circuits
  • bandpass filters and couplers
  • phased-array elements
  • radar transceiver lines

With stable DK, these structures behave closer to their modeled performance, reducing the risk of frequency drift or unexpected resonance shifts.

DK Influences Effective Permittivity (Dk_eff)

Most RF layouts use microstrip or grounded CPW traces, where only part of the electromagnetic field flows inside the substrate. The remaining field propagates through the air. The combined effect is called the effective dielectric constant (εeff) or Dk_eff.

Because Dk_eff sits between the substrate DK and air’s DK (≈1.0), any movement in the substrate DK shifts the effective value.

That creates changes in:

  • impedance
  • phase velocity
  • electrical length of the line
  • signal wavelength on the PCB
  • coupling between adjacent structures

For this reason, impedance-controlled PCBs for RF applications require laminates with tight DK tolerance across the panel and across the entire RF stack-up.

DK Influences Effective Permittivity (Dk_eff)

Tight DK Tolerance Reduces Prototyping Time

When using predictable materials, simulation models match real PCB results more closely. Designers experience fewer tuning cycles, fewer redesigns, and faster production.

Consistent DK helps:

  • improve RF yield
  • reduce tuning in power amplifier bias lines
  • support repeatable RF PCB manufacturing
  • make stack-up calculations more accurate

This is especially valuable in industries like automotive radar, satellite communication, low-noise amplifier design, and compact 5G modules.

DK Variation Increases Reflection and Mismatch Loss

Loss tangent (Df) defines dielectric loss, but DK variation introduces mismatch loss. When impedance deviates from the intended value, part of the RF signal reflects back toward the source, reducing forward transmission.

Effects include:

  • higher insertion loss
  • increased ripple in filters
  • degraded VSWR
  • phase errors in antenna arrays
  • unwanted standing waves

Stable DK helps avoid these issues by keeping impedance as close as possible to its original design target.

DK and RF PCB Stack-Up Selection

A high-performance RF PCB stack-up design always begins with DK. Engineers set copper thickness, dielectric thickness, and trace geometry around it. RF stack-ups with predictable DK behave consistently across production batches, which keeps high-volume runs stable.

Popular RF materials selected for stable DK include:

  • Rogers RO3003 (DK ≈ 3.00 ± 0.04)
  • Rogers RO4350B (DK ≈ 3.48 ± 0.05)
  • Rogers RO4003C (DK ≈ 3.38 ± 0.05)
  • Rogers RO5880 (DK ≈ 2.20 ± 0.02)
  • Taconic RF-35, TLY, and other PTFE-based laminates
DK and RF PCB Stack-Up Selection

These laminates are widely used in microwave designs because they give designers the confidence that impedance and electrical length stay predictable across builds.

Why DK Matters Even More Above 10 GHz?

As frequencies extend toward mmWave ranges, minor DK deviations introduce major impedance shifts. The higher the operating frequency, the more sensitive impedance becomes to dielectric constant variations.

For example:

  • At 1–2 GHz, DK tolerance of ±0.05 produces measurable but manageable impact.
  • At 10–24 GHz, the same DK deviation causes more dramatic impedance changes.
  • Above 28–39 GHz (5G FR2 bands), DK control becomes one of the most essential parameters in RF material selection.

This is why mmWave PCB manufacturing overwhelmingly relies on PTFE-based or ceramic-filled laminates with extremely tight DK tolerance.

EBest Circuit (Best Technology) – Your Trusted Partner for RF PCB Manufacturing

For designers working on high-frequency and microwave projects, precise DK control is only the starting point. You also need a PCB manufacturer with strong RF engineering experience, stable processes, and a deep understanding of controlled impedance PCB builds. At EBest Circuit (Best Technology), we support global RF teams through:

1. Advanced RF PCB materials – RO3003, RO4350B, RO4003C, RO5880, Taconic, and other high-frequency laminates.

2. Tight impedance tolerance – ±5% impedance control with certified test reports.

3. Professional RF stack-up design assistance – Our engineers help calculate trace widths, dielectric thicknesses, and Dk_eff models for accurate impedance.

4. Mature RF PCB fabrication capabilities – Microstrip, stripline, CPW, grounded CPW, hybrid stack-ups, cavity structures, and metal-backed RF boards.

5. Rigid quality control – ISO9001, ISO13485, AS9100D, IATF16949, and full MES traceability for all builds.

When your RF design demands precise signal behavior, stable impedance, and reliable material performance, EBest Circuit (Best Technology) provides the expertise and manufacturing strength needed to support advanced RF and microwave innovation.
You may also like