PCB manufacturing PCB manufacturing
Home > Blog

Multilayer PCB

PCB Pink Ring Defect: Causes, Inspection, and Prevention
Saturday, September 5th, 2026
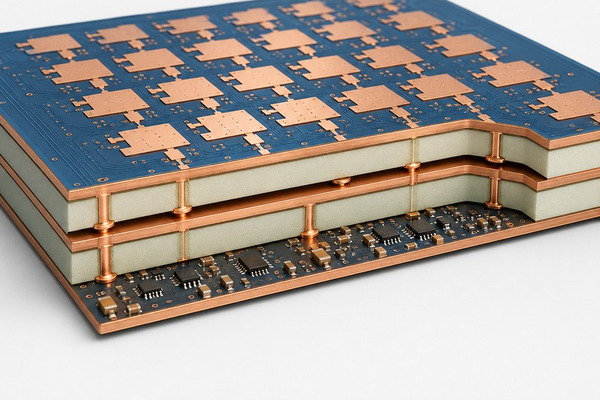
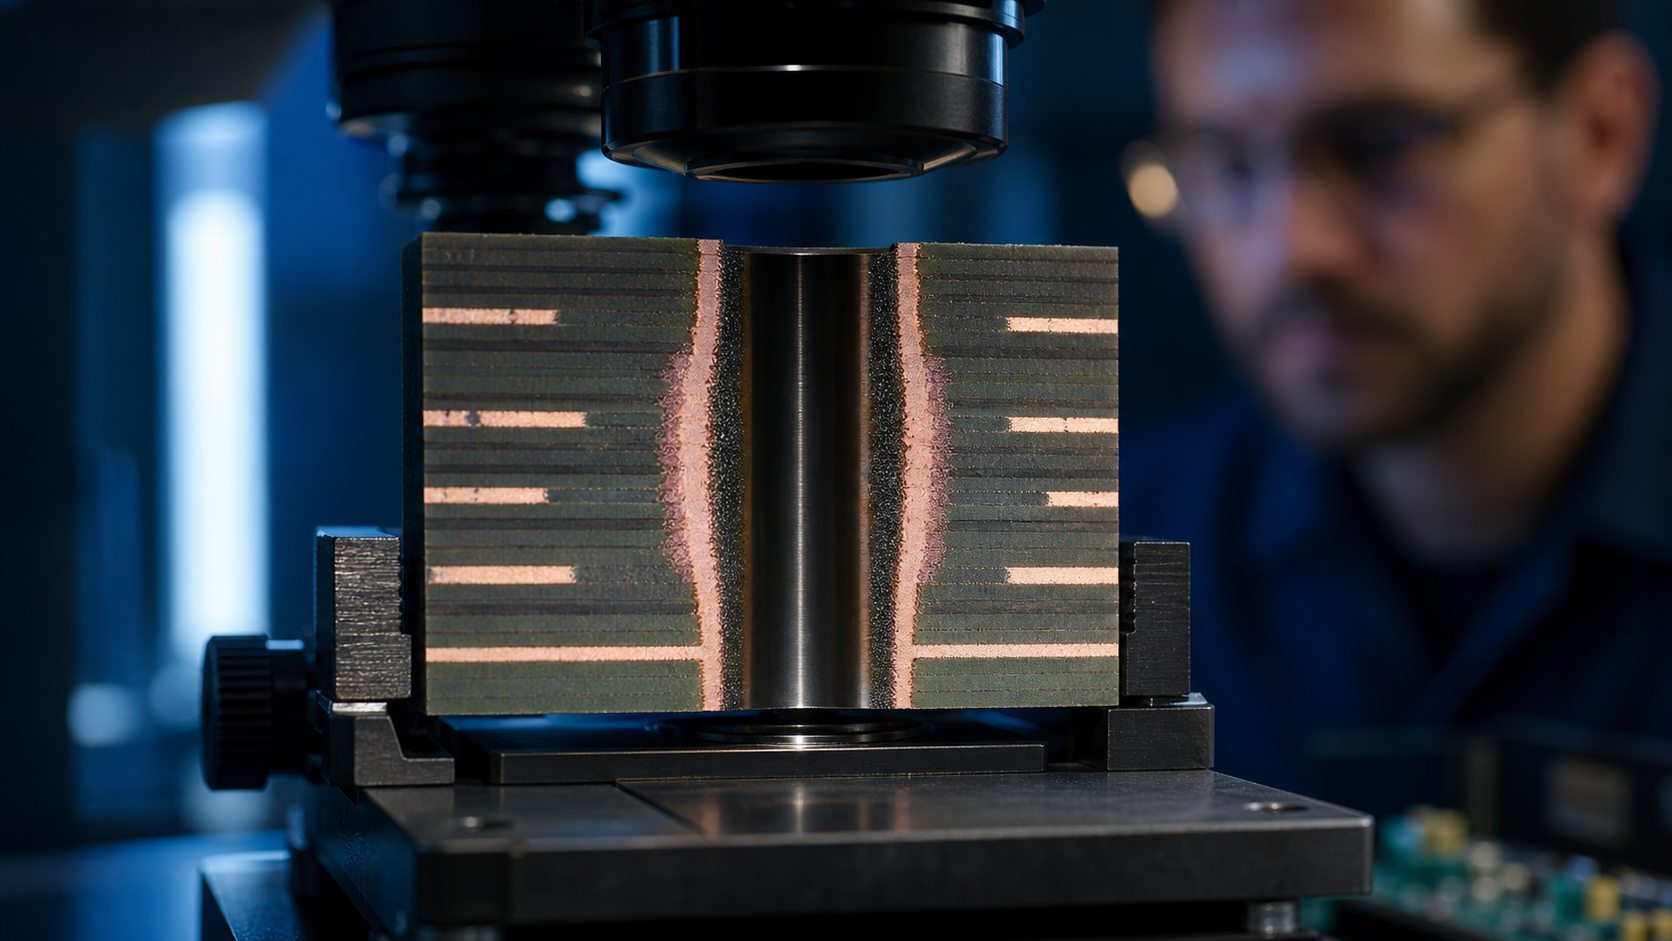
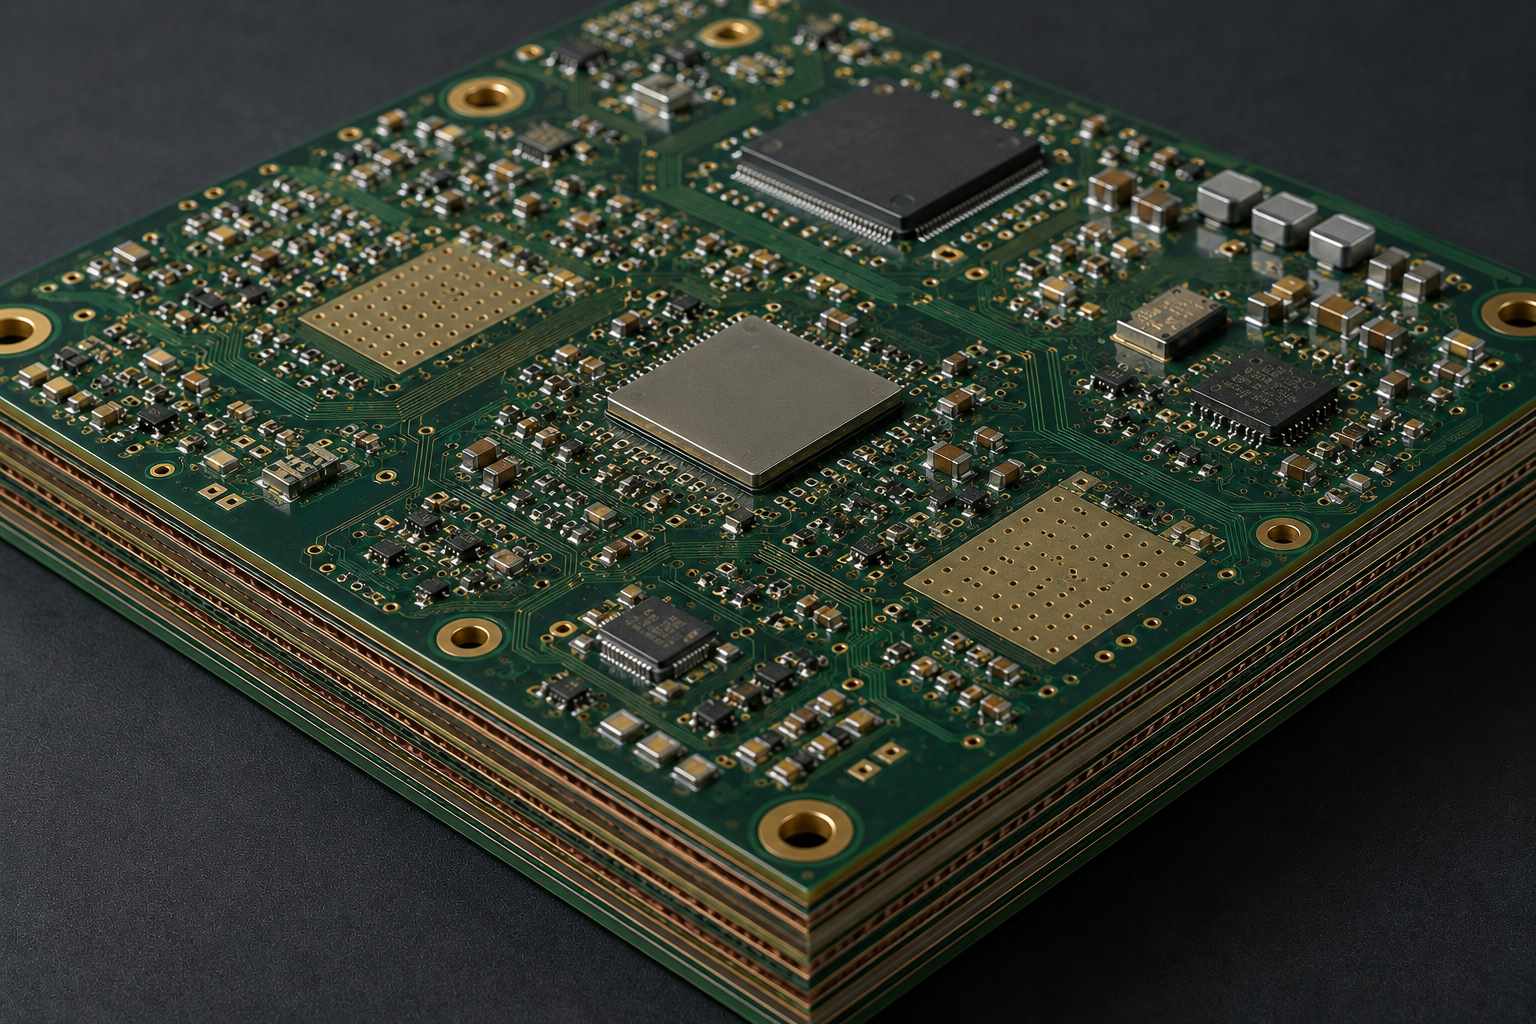
Multilayer PCB microsection showing a pink copper-colored ring around a plated through-hole
A PCB pink ring is a multilayer-interface observation around a drilled hole, not a pink solder-mask color choice.

The PCB pink ring defect is a pink or copper-colored halo around a drilled hole where the dark inner-layer bond-treatment appearance has been removed or recessed. It is normally evaluated in a multilayer PCB cross-section or after destructive inspection. The color change alone does not prove electrical failure, but it signals that engineers should examine the copper-to-resin bond interface, process history and applicable acceptance criteria.

Do not confuse this condition with annular-ring breakout, a pink solder mask, measling or a plating void. Those findings occur in different materials and require different corrective actions. A useful investigation records the ring extent, affected layers, hole types, panel locations and whether associated separation is present.

What the PCB Pink Ring Defect Actually Is

Pink ring describes the visible exposure of copper-colored inner-layer material around a hole after part of a dark oxide or oxide-alternative surface treatment is lost or attacked. The feature is associated with the treated copper/resin interface in multilayer construction. It can appear as a narrow circumferential band or as an uneven local halo.

The observation should be separated from its root cause. The ring can be influenced by bond-treatment condition, lamination, drilling, hole-wall cleaning and chemical exposure. Its presence does not identify which process created it, and an apparently uniform ring does not show whether the remaining bond is adequate.

A report should state whether the feature was found in an as-produced coupon, a production board, a thermally stressed specimen or a section prepared after field failure. That context changes how the image is interpreted.

Why the Ring Looks Pink Around a Plated Hole

The exposed underlying copper looks pink compared with the darker treated copper surface surrounding it. The contrast makes the condition visually obvious even when the actual affected distance is small. Lighting, etching and camera settings can change the apparent color, so measure geometry rather than judging severity from saturation.

The halo follows the hole because drilling and subsequent hole preparation act at that boundary. If chemistry penetrates along the treated interface or if the bond-treatment layer is locally removed, the copper color becomes visible around the circumference.

Document the ring at each affected internal layer. A single top-view photograph cannot show whether the feature is limited to one interface or repeats through the stackup.

Pink Ring vs Annular-Ring Breakout, Measling, and Solder-Mask Color

Finding Where it appears Key distinction Review focus
Pink ring Inner-layer treated-copper interface around a hole Pink/copper halo replaces darker bond-treatment appearance Bond interface and multilayer process history
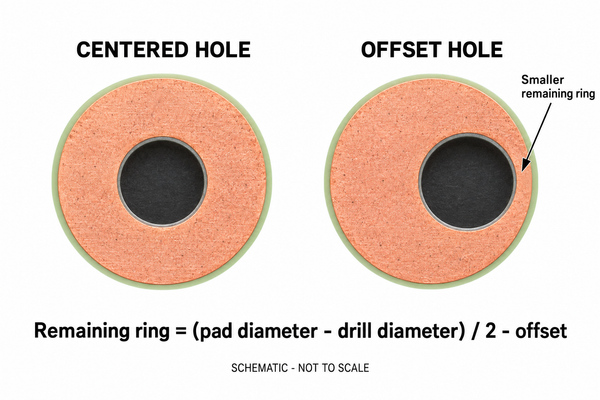
Annular-ring breakout Copper land around the drilled hole Hole position removes part of the designed land Registration, drill size and pad geometry
Measling/crazing Glass-resin laminate White or cloudy fiber-related marks Laminate stress, moisture and handling
Pink solder mask External board coating Intentional overall or patterned mask color Artwork and mask specification
Plating void Deposited copper barrel Missing/discontinuous copper rather than a surface-treatment halo Activation, deposition and plating

For white laminate marks, use the dedicated guides to PCB measling and PCB crazing. Combining these labels into “laminate damage” hides the process evidence needed for a useful response.

How Oxide and Oxide-Alternative Bond Treatments Affect the Interface

Inner-layer bond treatment prepares copper so the surrounding resin can develop a controlled interface during lamination. Traditional oxide and oxide-alternative processes use different surface chemistries and textures, but both must remain compatible with the material system and later processing.

Investigate treatment concentration, temperature, dwell, rinsing, loading, contamination and hold time before layup. Also check whether the treated panels were handled, stored or exposed outside the controlled route. A chemistry reading inside its nominal range does not prove every panel received uniform treatment.

Lamination completes the interface. Review prepreg selection, resin flow, vacuum, pressure, temperature and cure records together with the bond-treatment data. Do not change chemical settings before checking whether the feature follows a press load, panel position or material lot.

Why Drilling and Hole Preparation Can Expose the Condition

Drilling opens the multilayer interface, while desmear and conditioning expose the hole wall to mechanical and chemical action. The combination can reveal or enlarge a susceptible treated-copper boundary.

  • Review drill diameter, tool type, hit count, feed and spindle settings.
  • Check entry/backer materials, panel stack height and heat generation.
  • Inspect hole-wall roughness, smear and glass-fiber condition separately.
  • Review desmear chemistry, dwell, loading, agitation and rinse control.
  • Compare small and large holes and different panel positions.
  • Map affected layers against copper density and stackup construction.
  • Check metallization and plating for separate void or barrel concerns.

More aggressive desmear is not a universal fix. It may remove residue but can also increase attack at a vulnerable interface. Use controlled trials tied to the confirmed mechanism.

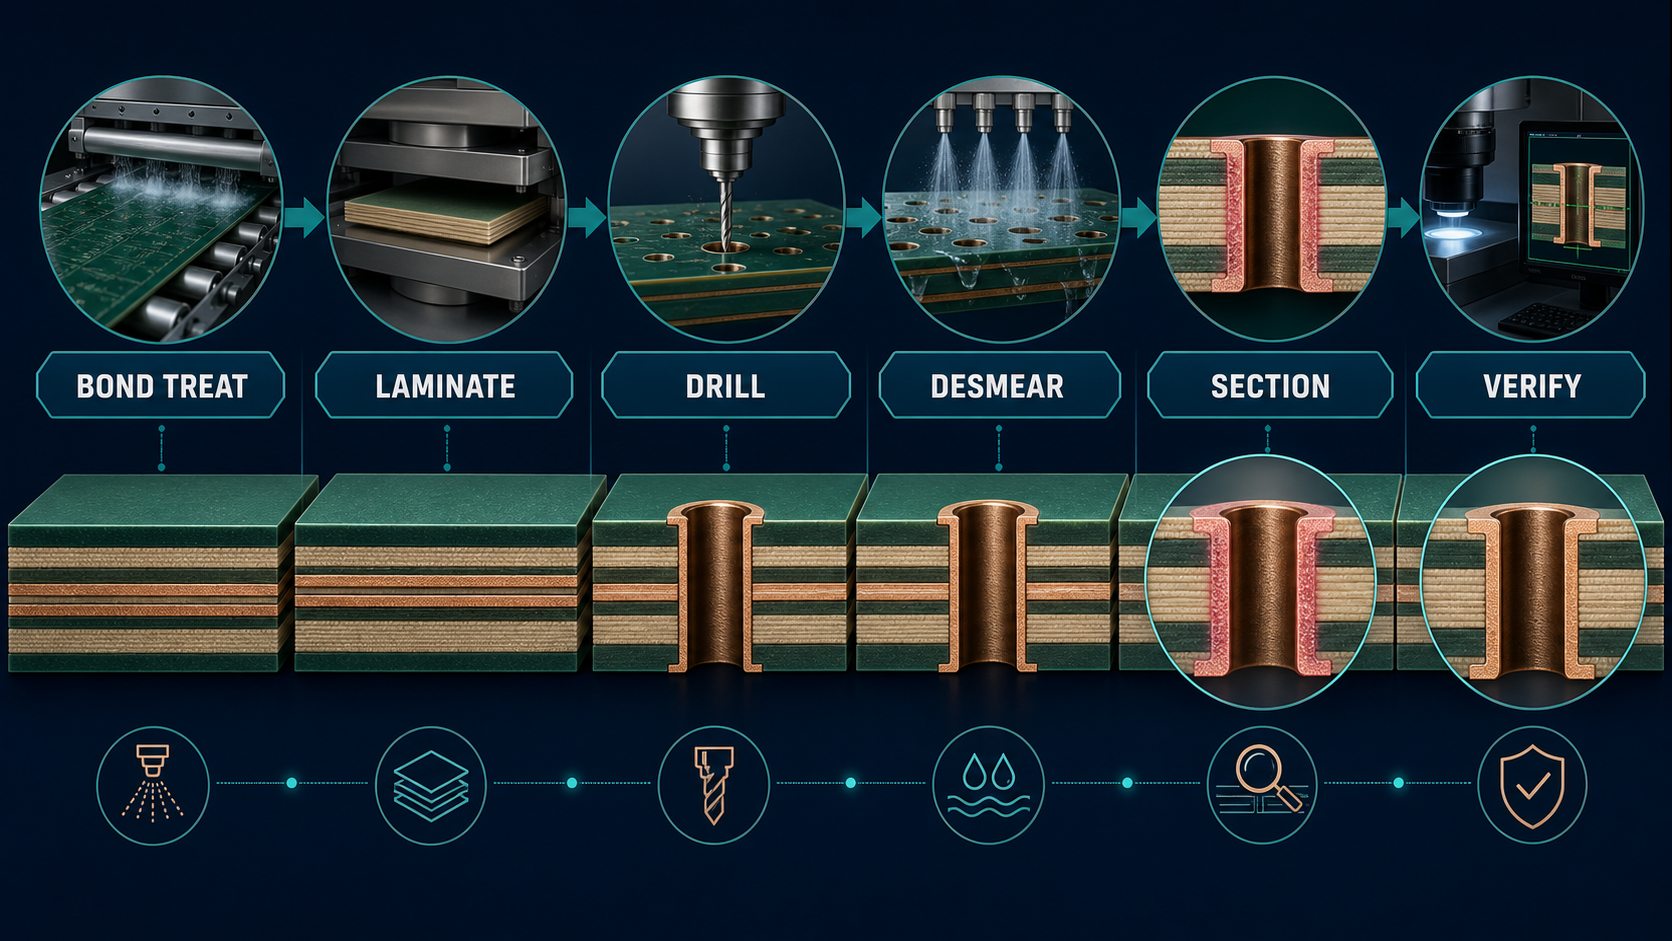
PCB pink ring prevention workflow covering bond treatment, lamination, drilling, desmear, sectioning and verification
Pink-ring prevention depends on a controlled process chain and a verified section, not one isolated setting.

What Pink Ring Does and Does Not Prove About Reliability

Pink ring proves that the interface appearance changed; it does not by itself prove delamination, an open circuit or future field failure. Reliability significance depends on the remaining bond, associated separation, ring extent, product requirement, environment and evidence from representative samples.

Look for related conditions such as inner-layer separation, resin recession, barrel cracks, plating voids or laminate damage. If none is present, the disposition may differ from a section showing a visible gap or failed interconnect. Use the governing customer and product specification rather than a threshold copied from an unrelated source.

Electrical test cannot characterize the bond interface. A board may pass continuity while a structural concern remains. Conversely, a pink appearance does not establish an electrical defect without supporting evidence.

Need an evidence-based review of a pink-ring finding?

Send the full microsection images, stackup, material callout, bond-treatment route, drill data, desmear history and lot map. EBest Circuit can identify missing evidence before a disposition or corrective rebuild.

Inspection Evidence Needed Before Lot Disposition

A defensible report connects each image to a board, lot, location and preparation condition. Include:

  • part number, revision, production lot and panel position;
  • stackup, affected layer and hole type;
  • full-hole overview plus detailed images with scale;
  • section orientation and confirmation that the cut is centered;
  • ring extent around the circumference and at each layer;
  • sample count and number of affected holes;
  • associated separation, void, crack or laminate observations;
  • thermal conditioning and sample-preparation history;
  • comparison with a known-good or unaffected location;
  • acceptance reference and named disposition authority.

The PCB microsection analysis guide provides a broader framework for preparing sections and turning images into an actionable report.

A Root-Cause Sequence for Pink Ring Findings

  1. Confirm: repeat questionable sections and rule out polishing or etching artifacts.
  2. Map: record affected layers, hole sizes, panel positions and frequency.
  3. Contain: preserve lots and unused samples while risk is evaluated.
  4. Correlate: compare treatment, layup, press, drill and desmear batches.
  5. Separate: identify any associated delamination, voids or interconnect defects.
  6. Hypothesize: rank causes that match both morphology and process pattern.
  7. Trial: change one controlled contributor where practical.
  8. Verify: rebuild and inspect representative coupons/boards using the agreed sequence.

If the feature clusters by one treated-inner-layer batch, investigate upstream. If it follows a drill tool or hole size, examine mechanical preparation. If it follows one desmear load or panel position, chemistry uniformity becomes more likely. Correlation guides the trial; it does not replace verification.

Containment While the Cause Is Still Open

Containment should prevent uncontrolled shipment and preserve the evidence needed for the permanent fix.

  • Define suspect lot boundaries and downstream locations.
  • Segregate suspect, screened, accepted and rebuilt material.
  • Maintain panel, material, treatment, press, drill and chemistry traceability.
  • Reserve unsectioned samples from affected and comparison groups.
  • Document any temporary screen and its detection limits.
  • Prevent extra thermal or chemical exposure from changing the evidence.
  • Set the responsible disposition authority and next review point.

Do not call screening a corrective action. A screen may remove visible extremes while leaving the cause unchanged.

Cause-Specific Corrective Actions and Verification

Confirmed pattern Corrective direction Verification evidence
Bond-treatment batch correlation Restore chemistry, rinsing, loading and hold-time controls Controlled treated-panel comparison and sections
Lamination/load correlation Correct material, layup, vacuum or press-cycle control Actual press chart plus mapped rebuild sections
Drill-tool/hole-size correlation Adjust tool life, parameters or stack conditions Controlled drill trial through plating and section
Desmear-load correlation Correct bath control, exposure and uniformity Chemistry records plus representative hole sections
Preparation artifact Correct mounting, polishing or etching Independent repeat sections without the false feature

Verification should reproduce the relevant construction and process route. One clean microsection from an unrepresentative coupon is weaker than a mapped sample across the corrected build.

PCB Data and Records to Send for Engineering Review

  • Gerber or ODB++, controlled fabrication drawing and revision;
  • stackup, laminate/prepreg and copper-weight callouts;
  • NC drill files and drill table;
  • acceptance class or customer-specific requirement;
  • full-resolution micrographs with sample identification;
  • lot/panel map and observed frequency;
  • bond-treatment, lamination, drilling and desmear records;
  • thermal, assembly or rework history;
  • current containment status and response deadline;
  • quantity and target delivery if a corrective build is required.

Turn the finding into a controlled PCB build plan

Include design data, material/stackup, hole information, acceptance requirement and the original inspection package so manufacturing and verification requirements can be reviewed together.

FAQ About PCB Pink Ring

Is PCB pink ring the same as a pink circuit board?

No. Pink ring is a local multilayer-interface condition around a drilled hole. A pink PCB normally refers to an intentional solder-mask color.

Does pink ring mean the annular ring is too small?

No. Annular-ring breakout concerns pad geometry and registration. Pink ring concerns the treated inner-layer copper/resin interface.

Can pink ring be seen from the board surface?

It may be suspected during destructive inspection, but a prepared cross-section is normally needed to understand affected layers and associated conditions.

Is every pink ring rejectable?

No universal disposition applies. Use the governing requirement, measured extent, associated defects, representative sampling and product risk.

Does pink ring always cause electrical failure?

No. The color change alone does not establish an open or short. It must be evaluated as part of the structural and process evidence.

Can desmear cause pink ring?

Hole-preparation chemistry can contribute, but bond treatment, lamination, drilling and material conditions must also be correlated before assigning cause.

Can microsection preparation create a misleading ring?

Yes. Polishing and etching can change contrast or produce artifacts, so questionable findings should be repeated with controlled preparation.

What should be measured?

Record affected layers, circumferential extent, radial distance, frequency and any associated gap, void or laminate damage using the agreed method.

What records are most useful?

Bond-treatment, press, material, drill and desmear traceability are especially useful when paired with a panel map and full micrographs.

How is prevention verified?

Use a controlled build with the confirmed correction, then repeat the agreed sectioning and sampling plan across representative locations.

Final Prevention Checklist

  • Define pink ring separately from breakout, measling and plating defects.
  • Control inner-layer treatment, handling and time to lamination.
  • Verify material, layup and actual press-cycle records.
  • Control drill tool life and hole-preparation chemistry.
  • Map findings by layer, hole, panel and lot.
  • Use representative microsections and an agreed acceptance basis.
  • Link the correction to confirmed cause evidence.
  • Verify a controlled rebuild before closing the action.

Request a multilayer PCB engineering and quotation review.

Send Gerber or ODB++, stackup, drill files, material callout, micrographs, process history, quantity and target delivery to sales@bestpcbs.com, or use the PCB quote form. EBest Circuit will identify missing evidence and align fabrication and inspection requirements before production.

You may also like

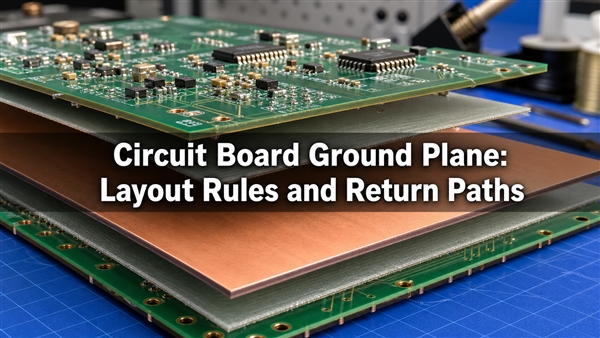
Circuit Board Ground Plane: Layout Rules and Return Paths
Wednesday, September 2nd, 2026

A circuit board ground plane is a broad copper region connected to a PCB’s ground net. It provides a voltage reference and a path for returning current. Its effectiveness depends on continuity, distance from the signal layer and the connections between layers, not simply how much copper fills the screen. A layout can pass a continuity test yet still force fast return currents through a noisy detour.

Circuit board ground plane illustrated as a continuous copper layer beneath insulated signal routing

What Is a Ground Plane?

A ground plane in PCB design is the physical copper conductor assigned to the reference net, usually named GND. In PCB terminology, a GND plane or grounding plane, sometimes written groundplane, can occupy most of an outer layer or a dedicated internal ground layer. It is not automatically connected to earth: a battery-powered circuit can have a local ground reference without an earth connection.

For the question “what is a ground plane PCB?”, the distinction is straightforward: the PCB is the complete board, while its ground plane is one part of the copper structure. Schematic ground symbols specify connectivity; the manufactured copper determines the impedance of that connection.

Ground planes are also different from chassis bonds and protective-earth conductors. Those connections address enclosure, fault-current and system-level requirements. A common net name does not make their functions interchangeable.

How Does a Ground Plane Work?

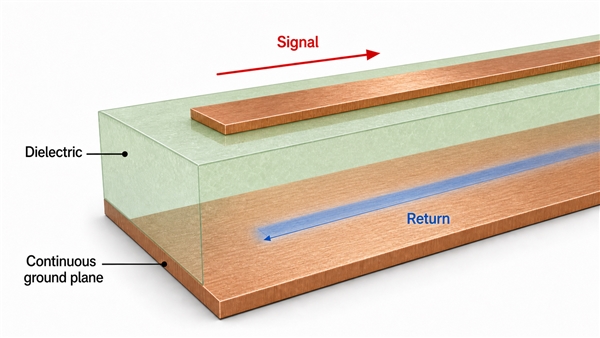
A ground plane completes the current loop between a source and its load. At low frequency, resistance strongly influences current distribution; with fast signal transitions, inductance and electromagnetic coupling become important. The high-frequency portion of the return current tends to concentrate on the nearby reference plane beneath the signal path.

The return is a distributed current, not a narrow physical track etched into the plane. A continuous reference lets that distribution follow the signal. A slot, a chain of clearance holes or a long narrow copper neck can force it elsewhere, increasing loop area and changing the local transmission-line geometry.

For example, routing a clock over an uninterrupted ground region and routing the same clock over a connector cutout are not equivalent, even if both endpoints connect to GND. Trace length alone will miss that difference. Circuit board grounding must be evaluated as a complete outgoing-and-returning path.

Conceptual signal and opposing high-frequency return directions on separate layers, not to scale

Which PCB Ground Plane Rules Matter Most?

The most useful PCB ground plane rules protect a continuous reference under critical routes and control where noisy currents travel. A large copper percentage is not a substitute for these checks.

  • Choose the stack-up before routing. Identify the reference conductor for each signal layer, including the layer after every transition.
  • Keep critical routes over continuous copper. Check slots, antipads, plane edges and narrow connections, not only obvious split lines.
  • Place by current flow. Keep switching loops and digital interfaces away from low-level analog input paths.
  • Provide local return transitions. Connect same-net ground references near signal-layer changes where the return must change planes.
  • Preserve clearances. Copper fill must not violate electrical spacing, board-edge or isolation requirements.
  • Inspect the filled result. Refill copper after layout changes and review the manufacturing output, not just the polygon boundary.

PCB ground plane design should also account for edge rate. A low clock frequency does not mean its digital edges are slow. Plane spacing, trace geometry and the device’s transition times together determine whether a seemingly short connection needs transmission-line treatment.

How Should a 2 Layer PCB Ground Plane Be Arranged?

A 2 layer PCB ground plane is usually easiest to preserve when most components and signal routing remain on one side and the other side stays predominantly ground. Every trace inserted into that ground side consumes some of the available return path.

On a 2 layer circuit board, a short crossover may be manageable, but a row of parallel bottom-side traces can divide the copper into long strips. Move components or reroute the upper layer before accepting a ground region connected only by a thin neck. Inspect the copper underneath each fast or sensitive route from source to load.

A 2 layer PCB board is not automatically unsuitable for fast signals, but it provides fewer routing options for maintaining a close, continuous reference. A thick two-layer dielectric can also make practical controlled-impedance routing more difficult. Compare the proposed geometry with a manufacturable four-layer stack before locking the board thickness.

We manufacture FR4 printed circuit boards for these constructions. Layer count, dielectric spacing and copper thickness should be considered together; adding a copper pour after routing cannot correct every return-path problem.

What Changes with a 4 Layer PCB Ground Plane?

A 4 layer PCB ground plane can provide a dedicated internal reference that routing does not repeatedly interrupt. The benefit comes from the actual layer arrangement, not the number four itself.

Illustrative stack-up Useful feature Design limitation
Signal / dielectric / GND Simple two-layer construction Ground-side routing and large dielectric spacing can constrain performance
Signal / GND / power / signal Dedicated ground and power distribution Bottom routing often references the power plane; splits and reference transitions need attention
Signal-power routing / GND / GND / signal-power routing Both outside signal layers can have adjacent ground references Power must be distributed in suitable traces or pours; current capacity still needs checking

PCB power and ground planes serve different nets. A PCB power plane can act as an AC reference in a suitable design, but return transfer to ground depends on the power-distribution network, including decoupling and plane coupling. Do not assume a signal via automatically provides that transfer.

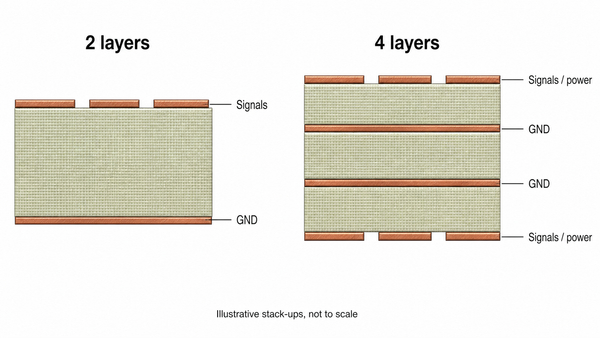
For multilayer circuit board planes, specify the copper order and actual dielectric thicknesses. Two boards with the same total thickness can have very different trace-to-reference spacing. The drawing below illustrates two possible arrangements, not a production stack-up specification.

Two-layer and four-layer examples showing signal conductors separated from continuous ground copper by dielectric

Should a PCB Ground Plane Be on the Top and Bottom?

Using a PCB ground plane top and bottom can be useful when both copper regions connect to the same ground net and support the intended return paths. Two pours connected only at a remote point do not necessarily behave as one low-impedance reference at high frequency.

Place ground connections where currents actually change layers, near appropriate connector returns and where local copper would otherwise be poorly connected. Avoid leaving disconnected copper islands. Revisit fill clearance and thermal-relief settings if the pour looks connected visually but the final geometry contains only weak connections.

More copper is not always appropriate. Antenna keepouts, isolation barriers and some sensitive high-impedance or switching nodes require deliberately controlled copper placement. Preserve those requirements instead of filling every unused area by default.

Ground Plane vs Ground Pour: What Is the Difference?

A ground pour describes a CAD-generated copper area; a ground plane describes the electrical reference structure it is intended to provide. A ground pour can form an effective plane, but its name does not guarantee continuity.

In PCB ground plane layout, evaluate the final copper rather than the rectangle used to define it. Track clearances, pad clearances and via antipads remove copper from that rectangle. A nearly full layer can still have an obstructed return path beneath one critical signal.

Solid fill generally offers more continuous conductive area than a hatched region. Hatching may be required in specific flexible constructions or for mechanical reasons, but it changes the return geometry. It should be an intentional construction choice, not a cosmetic setting applied to every design.

Where Should Ground Stitching Vias Be Placed?

PCB ground plane stitching is most useful where it connects return structures that otherwise have an inconvenient path between them. Place vias according to the signal transition, connector structure and frequency-dependent field behavior, not a universal spacing rule.

If a signal changes from a layer referenced to one GND plane to a layer referenced to another GND plane, nearby ground vias can shorten the return transition. A signal via is not itself a ground connection. If the reference changes between power and ground, a same-net ground stitching via alone does not solve the problem.

Dense packages introduce a second issue: closely spaced antipads can leave little copper between holes. Adding more ground vias without examining those openings can make the reference geometry worse. Check drill and copper clearances as well as the net connections.

Our HDI boards support compact routing structures where this interaction matters. Blind and buried via choices affect which layers can actually be connected; use the approved layer span rather than assuming every via reaches every ground plane. Our PCB via types guide explains those construction differences.

Should Signal Ground and Power Ground Be Split?

Signal ground and power ground should be arranged to prevent large or rapidly changing currents from corrupting sensitive references. They do not automatically require a physical split in the plane.

On many mixed-signal boards, sensible placement over a continuous plane keeps local return loops separated without forcing signals across a gap. AGND, DGND and power GND labels must still be interpreted using the actual IC documentation. They describe circuit functions; they are not a universal instruction to cut the board’s copper into separate regions.

A deliberate split may be necessary for a particular architecture. In that case, define how signals cross the boundary and how their returns close. True galvanic-isolation barriers are different: do not add stitching vias or casual copper bridges across them to improve signal return.

A PCB ground loop problem also needs a system view. Multiple cable and chassis connections can create unwanted current paths, while several local stitching vias between the same ground planes can be beneficial. Removing vias simply because they form a geometrical loop is not a reliable noise cure.

How Do You Create and Check Ground Copper in CAD?

Assign the copper region to the correct GND net, configure its clearances and pad connections, refill it, then inspect the exported layers. A colored polygon with the wrong net assignment is not a working ground plane.

Ground Plane PCB KiCad Workflow

For a KiCad ground plane, use a copper zone on the intended layer, set its net and review clearance, thermal and island-removal settings. Refill after editing and run the design-rule checker. Inspect isolated regions and narrow copper necks in addition to reported violations.

Ground Plane EasyEDA Workflow

The ground plane EasyEDA workflow follows the same electrical checks: choose the copper-area layer and GND net, review fill and pad-connection settings, and rebuild the copper. Command labels can differ by editor version. Confirm the final Gerber copper matches the intended return path before treating the preview as complete.

A rule checker verifies configured constraints. It does not by itself prove that a fast return current has a favorable path or that an isolated island is harmless. Net highlighting and a layer-by-layer review remain necessary.

How Can You Verify a Circuit Board Ground Plane?

Verify both connectivity and behavior. Electrical testing can find opens or shorts, while signal-integrity and EMC checks address problems that a DC continuity measurement cannot reveal.

Check What it can reveal What it does not prove
Netlist and filled-layer review Wrong nets, missing joins, copper slots and isolated regions Actual high-frequency performance
Unpowered continuity and resistance tests Open connections or unintended shorts Low inductance or correct impedance
Stack-up and impedance review Reference spacing and geometry consistency Every return transition is well designed
Waveform and noise measurements Ringing, ground-reference movement and load-related interference Regulatory EMC compliance
EMC evaluation System emissions and susceptibility under defined conditions Reliability under every operating condition

Disconnect power and discharge stored energy before continuity checks. For powered low-voltage measurements, use an appropriate short probe reference; a long ground lead can add misleading ringing. A grounded oscilloscope must not be attached casually to a floating or hazardous node. Use measurement equipment and isolation methods rated for the actual circuit.

Manufacturing review also covers copper balance, thermal connections and the clearance left between holes. These checks complement circuit validation rather than replacing it.

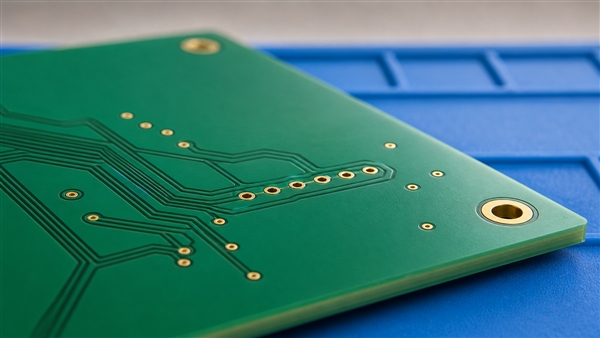
Close-up illustration of PCB ground copper, isolated signal pads and plated vias for layout review

Ground Plane Questions

1. Can a circuit board ground wire replace a plane?

A circuit board ground wire can provide a return connection in a suitable low-frequency or low-current circuit. It does not reproduce the broad, closely coupled reference of a plane for fast signals. Evaluate wire length, loop geometry and transient current, not just DC resistance.

2. Does a larger ground area always reduce noise?

No. A large area can still have narrow necks, unsuitable current sharing or poor connections between layers. Placement, continuity and the return-loop geometry matter more than copper coverage alone.

3. How is a ground plane antenna different?

A ground plane antenna intentionally uses a conductive reference as part of its radiating structure. An antenna ground plane may function as a counterpoise rather than simply as a shield. Design the ground plane for antenna operation together with the feed geometry and keepout. Flooding copper beneath every antenna is not a universal improvement.

For our RF printed circuit boards, material properties, reference spacing and copper geometry must be reviewed together. Ground copper useful beside an RF feed may still be prohibited in the antenna’s keepout region.

4. Do differential pairs need a reference plane?

Differential routing does not eliminate reference-plane considerations. Coupling between the pair, coupling to the plane, common-mode behavior and asymmetry all matter. Avoid routing the pair across an arbitrary reference gap merely because the signals are differential.

5. Can thermal reliefs be used on ground connections?

Yes, when their geometry meets electrical and assembly requirements. Thermal spokes can improve solderability, but their width and count also affect current capacity and impedance. High-current terminals and high-frequency connections may require a different attachment strategy.

Ground Plane Fabrication Support

We review manufacturability together with the specified stack-up and copper geometry. At EBest Circuit (Best Technology), our FR4 capability extends to up to 32 layers, and our HDI capability includes line/space down to 2/2 mil, subject to materials, board dimensions, stack-up and engineering review. These are capability limits, not default dimensions for every ground-plane design.

Our PCB manufacturing capabilities support construction planning, but finer traces and more layers do not guarantee a better return path. The finished board must preserve the reference geometry specified by the circuit design, and the assembled product still needs its appropriate electrical and EMC validation.

Conclusion

A useful circuit board ground plane is continuous where signals need it, connected where return currents change layers, and kept clear where isolation or antenna requirements demand it. Review the filled copper beneath critical routes, not just the GND net name. For stack-up and fabrication support, contact our team at sales@bestpcbs.com.

You may also like

Multilayer PCB Manufacturing for Reliable Stackups
Friday, July 17th, 2026
Multilayer PCB manufacturing with stackup review drilling and AOI inspection

Multilayer PCB manufacturing builds several copper and dielectric layers into one controlled circuit board, so the main risk is not only making more layers. The real risk is whether the stackup, material, registration, lamination, drilling, plating, inspection and assembly plan are controlled before production starts.

For buyers, a multilayer PCB quote should answer more than price and delivery. It should show whether the board can be fabricated, assembled, tested and repeated without late stackup changes, missing impedance details, unstable material choices or unclear inspection scope. EBest Circuit reviews multilayer PCB fabrication, PCBA, BOM, CPL and test expectations together when a project needs a practical quote path.

Is your multilayer PCB project stuck before a reliable quote?

Multilayer PCB projects often slow down when the files look complete, but the manufacturing assumptions are still open.

  • The stackup does not define layer order, dielectric targets, copper weight or impedance requirements clearly enough for fabrication.
  • The board needs 8 or more layers, but material Tg, lamination risk and thickness tolerance have not been checked early.
  • Drill size, aspect ratio, annular ring and plating expectations are reviewed after the quote, forcing another design revision.
  • Assembly files arrive separately from fabrication files, so test points, panelization, fiducials and component clearance are not checked together.
  • The first quote looks fast, but later stackup confirmation, material substitution or DFM changes delay the actual build.

EBest Circuit helps buyers turn multilayer PCB files into a controlled manufacturing plan:

  • We review Gerber or ODB++ files, drill files, stackup notes, copper, material, surface finish and board thickness before quote assumptions are locked.
  • For FR-4 and high-Tg multilayer projects, we check whether the layer count and material route match the board’s thermal, reliability and production needs.
  • We connect fabrication review with PCBA, BOM, CPL, test points and packaging when the customer needs assembled boards rather than bare PCBs only.
  • We flag DFM issues early, including tight spacing, drill risk, solder mask bridge limits, panelization, fiducials and inspection requirements.
  • We build the quote around real project files, quantities and target delivery plans, so buyers can compare suppliers with fewer hidden assumptions.

What Multilayer PCB Manufacturing Must Control

Multilayer PCB manufacturing must control the stackup, inner layers, dielectric materials, lamination, drilling, plating, surface finish and inspection as one connected process.

A 4-layer, 6-layer, 8-layer or higher-layer board can fail commercially even when each separate process step looks normal. The stackup affects impedance, copper balance, board thickness, drilling and assembly. The lamination cycle affects registration and dielectric stability. Drill and plating choices affect reliability through the plated holes. That is why a multilayer PCB quote should start with the stackup and manufacturing route, not only the finished board size.

When Multilayer PCB Projects Get Delayed Before Production

Most multilayer PCB delays happen before the factory build, when stackup, material, drill, copper or assembly requirements are still unclear.

Delay Point What Usually Causes It How to Reduce the Risk
Stackup approval Layer order, dielectric thickness or impedance target is missing Send stackup notes or ask for a manufacturable stackup review
Material choice Standard FR-4 is assumed where high-Tg or special material may be needed Share operating temperature, reliability needs and application context
Drilling and plating Small holes, high aspect ratio or tight annular rings are checked late Review drill table, finished hole size and board thickness together
Assembly readiness BOM, CPL, drawings or test requirements arrive after fabrication review Quote PCB and PCBA together when assembled boards are needed
Production repeatability Prototype files are not prepared for repeat orders or controlled revisions Define revision, quantity, forecast and inspection expectations early

How EBest Circuit Helps Control Multilayer PCB Risk

EBest Circuit supports multilayer PCB manufacturing by reviewing the board as a buildable product, not just as a set of copper layers.

For suitable projects, our engineering review can cover DFM, stackup, material, board thickness, copper weight, surface finish, drill table, panelization, solder mask, PCBA, component sourcing and test expectations. This helps buyers compare more than price. It helps them compare whether the supplier has understood the real build.

Multilayer PCB Stackup and Layer Count Planning

Stackup planning defines how signal, power, ground, core, prepreg and copper layers work together before multilayer PCB production begins.

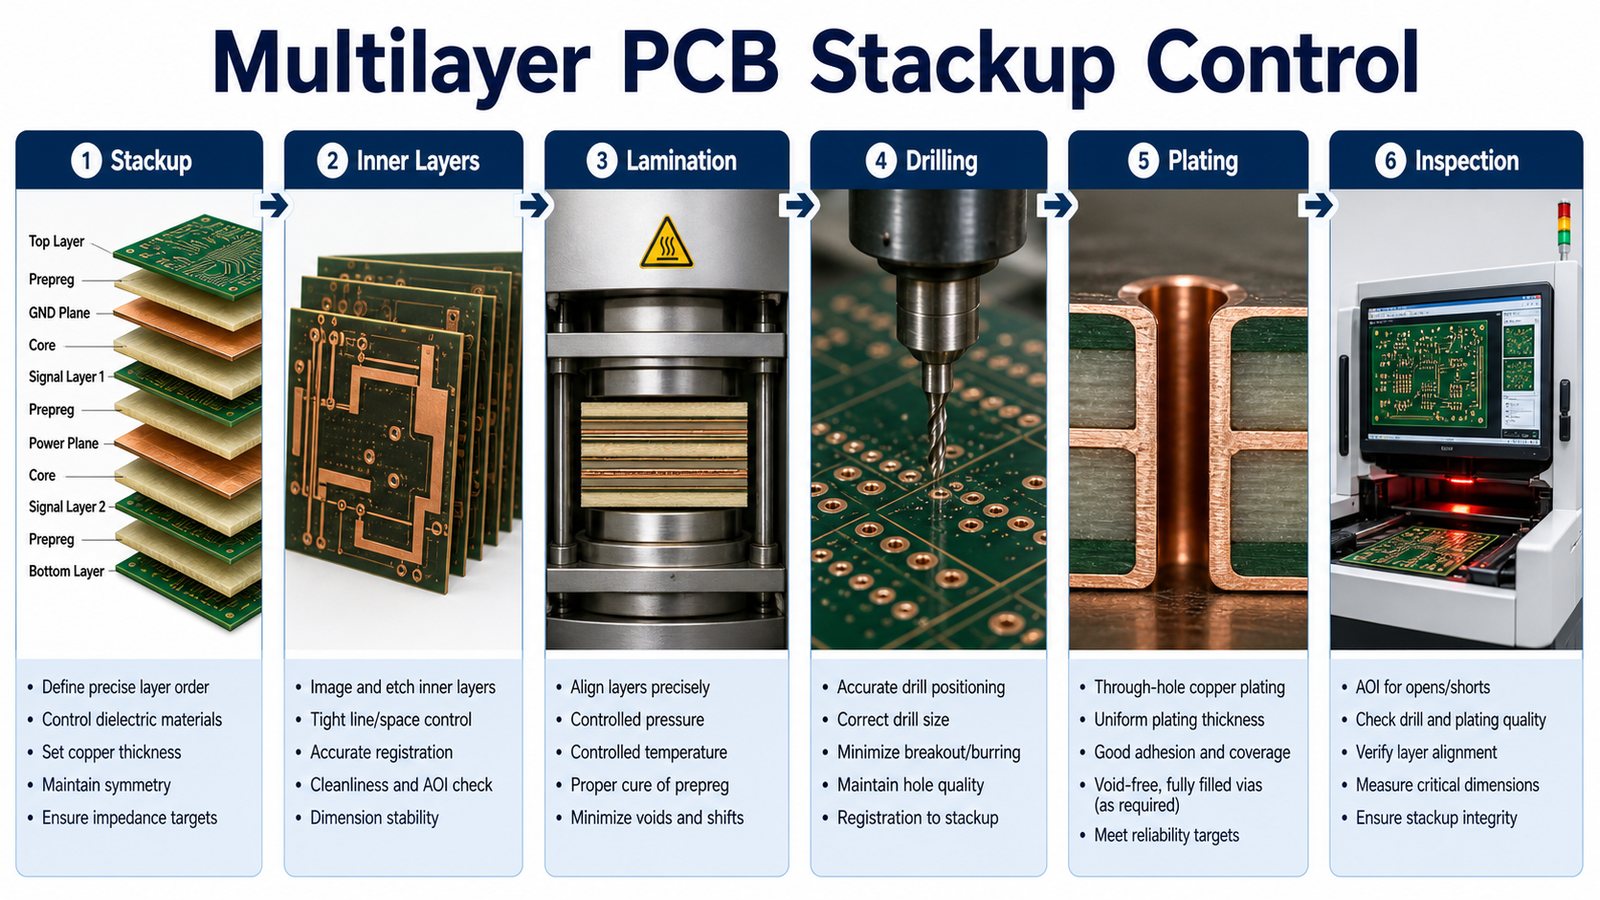
Multilayer PCB stackup control from stackup to inspection

Common multilayer PCB decisions include 4-layer, 6-layer, 8-layer, 10-layer or higher layer counts, but the right layer count depends on routing density, power integrity, signal integrity, EMI control, board thickness and assembly constraints. EBest Circuit’s process capability records show standard FR-4 and high-Tg multilayer routes for 1-10 layers, with 8 layers and above normally requiring high-Tg material. Higher layer counts, such as 10-32 layers, should be confirmed as special project requirements before a buyer treats them as standard production.

Materials, Tg, Copper and Board Thickness Decisions

Material, Tg, copper and board thickness decisions affect whether a multilayer PCB can survive fabrication, assembly and field use.

FR-4 may fit many multilayer boards, while high-Tg FR-4, RF material, heavy copper or other materials may be needed when heat, signal speed, reliability or current load demands it. The process capability table lists ordinary TG, mid TG and high TG FR-4 material families, and it also shows that surface finish and board thickness ranges are conditional. That is why the quote should not simply say “multilayer PCB.” It should say what material, copper, finish and thickness the board actually needs.

Inner Layer Imaging, Etching and Registration

Inner layer imaging and registration decide whether a multilayer PCB can keep its electrical geometry after the board is laminated.

Before lamination, inner layers must be imaged, etched, inspected and aligned. Registration errors can affect annular rings, impedance and via reliability. For dense multilayer boards, this is also where line width, spacing, copper balance and cleanliness become important. Buyers should provide the newest controlled design files and avoid mixing old drill, Gerber and stackup versions.

Lamination, Drilling and Plating Control

Lamination, drilling and plating control the physical reliability of multilayer PCBs, especially through-hole and via quality.

Lamination must align the stackup under controlled pressure and temperature. Drilling must match finished hole targets and board thickness. Plating must create reliable conductive paths through the layers. EBest Circuit’s capability records include references such as minimum finished hole size, aspect ratio, hole tolerance and copper ranges, but final feasibility must be checked against the real board thickness, layer count and drill table.

Line Width, Spacing, Hole and Surface Finish Checks

Line width, spacing, hole size and surface finish checks should happen before the buyer approves a multilayer PCB order.

For the customer’s original file, the capability table includes standard and special line/space references, finished hole references and surface finish options such as OSP, HASL, immersion gold, immersion silver and immersion tin. These values are not a reason to force every design to the limit. They are a reason to review whether the design has enough margin for reliable production.

DFM Review Before Multilayer PCB Fabrication

DFM review before multilayer PCB fabrication checks whether the design can be manufactured, assembled and inspected without avoidable revisions.

A useful DFM review should cover stackup, copper balance, drill table, via type, annular ring, spacing, solder mask bridge, surface finish, panelization, fiducials, test points and assembly clearance. For production projects, it should also check repeat-order risks such as file revision control, material availability and inspection documentation.

Assembly and Test Planning for Multilayer PCB Projects

Multilayer PCB manufacturing should be planned with assembly and testing when the buyer needs a working electronic product, not only a bare board.

PCBA planning may affect pad finish, panelization, stencil design, reflow profile, component sourcing, AOI, X-ray, ICT, functional testing and packaging. If your project needs assembled boards, send the BOM and CPL early. EBest Circuit can connect multilayer PCB fabrication with prototype PCB assembly, component sourcing and test planning so the quote reflects the full build.

Cost and Lead-Time Factors in Multilayer PCB Manufacturing

Multilayer PCB cost and lead time depend on layer count, material, board thickness, drill complexity, finish, inspection and assembly scope.

Factor Why It Matters Buyer Action
Layer count More layers usually require tighter stackup and lamination control Define the layer order and electrical requirements
Material and Tg High-Tg or special material can affect availability and price Share application temperature and reliability needs
Drill and plating Small holes, dense vias and board thickness affect feasibility Send drill files and finished hole requirements
Surface finish Finish affects assembly, shelf life and contact reliability Select finish based on assembly and operating needs
PCBA scope BOM sourcing, placement and testing can drive total cost Quote bare PCB and PCBA together when needed

RFQ Checklist for Multilayer PCB Manufacturing

A complete multilayer PCB RFQ should include fabrication files, stackup notes, assembly data and quality expectations.

  • Gerber or ODB++ files, drill files and fabrication drawing
  • Layer count, stackup, dielectric target, copper weight and board thickness
  • Material preference, Tg requirement, impedance requirement and surface finish
  • Finished hole requirements, via type, special tolerances and panelization notes
  • BOM, CPL, assembly drawing, approved alternates and test points if PCBA is needed
  • Quantity, prototype stage, forecast, packaging and target delivery plan

FAQ About Multilayer PCB Manufacturing

What is multilayer PCB manufacturing?

Multilayer PCB manufacturing is the process of building a printed circuit board with three or more conductive copper layers separated by insulating dielectric materials and connected through vias or plated holes.

What is the most important part of multilayer PCB manufacturing?

The stackup is usually the most important starting point because it affects signal layers, planes, impedance, thickness, lamination, drilling, plating and assembly decisions.

When should high-Tg material be used for multilayer PCBs?

High-Tg material should be considered when the board has higher layer count, higher thermal stress, lead-free assembly exposure or reliability requirements. EBest Circuit’s process capability table indicates that 8 layers and above normally require high-Tg material review.

Can multilayer PCB manufacturing include assembly?

Yes. If the project needs assembled boards, send BOM, CPL and assembly drawings with the PCB files so fabrication, component sourcing, placement and testing can be reviewed together.

Need help checking a multilayer PCB before production? Send your Gerber or ODB++ files, drill files, stackup, material, copper weight, surface finish, BOM, CPL, quantity, testing requirements and target delivery plan to sales@bestpcbs.com. EBest Circuit can review DFM, stackup, fabrication, PCBA and production risks before your order moves forward.

You may also like

Multilayer PCB Manufacturing Guide
Wednesday, July 15th, 2026
Multilayer PCB manufacturing stackup and lamination inspection

Multilayer PCB manufacturing builds circuit boards by stacking multiple copper layers with insulating core and prepreg materials, then laminating, drilling, plating and finishing the board so internal and external circuits connect reliably. It is used when a two-layer PCB cannot provide enough routing space, power distribution, signal integrity or compact layout.

This guide explains the multilayer PCB process, which design details affect manufacturability, and what buyers should include in an RFQ.

Multilayer PCB Manufacturing at a Glance

A multilayer PCB requires stackup control, lamination, drilling, plating, imaging, solder mask, surface finish, testing and documentation. Buyers should confirm layer count, stackup, material, copper, impedance, vias, finish and assembly needs before production.

Area What to confirm Why it matters
Stackup Layer order, cores, prepreg, copper and thickness Controls routing, impedance, power planes and manufacturability.
Lamination Material bonding, registration and thermal process Poor lamination can affect reliability and internal connections.
Vias and drilling Through vias, blind/buried vias if needed and drill tolerances Defines how layers connect and how difficult the board is to build.
Testing Electrical test, inspection and project-specific checks Verifies internal and external circuit continuity before shipment.

Is Your Multilayer PCB Project Being Delayed by Stackup or DFM Uncertainty?

Multilayer PCB buyers need early review because stackup, lamination, drilling, plating and test requirements become harder to correct after production starts.

Customer Pain Point Project Risk How bestpcbs Helps
Stackup is not defined clearly Layer order, dielectric thickness or impedance assumptions can cause redesign bestpcbs asks for stackup drawings, material notes and impedance targets during RFQ review.
Via and drilling requirements are incomplete Layer connections may become difficult or costly to manufacture bestpcbs reviews drill files, via structure, annular rings and fabrication notes before release.
Assembly planning is delayed Dense multilayer boards can have BGA, thermal or test access issues bestpcbs checks BOM, CPL, assembly drawings and testing expectations together with fabrication files.
Testing scope is assumed Internal layer problems can be hard to find without the right checks bestpcbs confirms electrical, impedance or customer-defined test requirements before production.
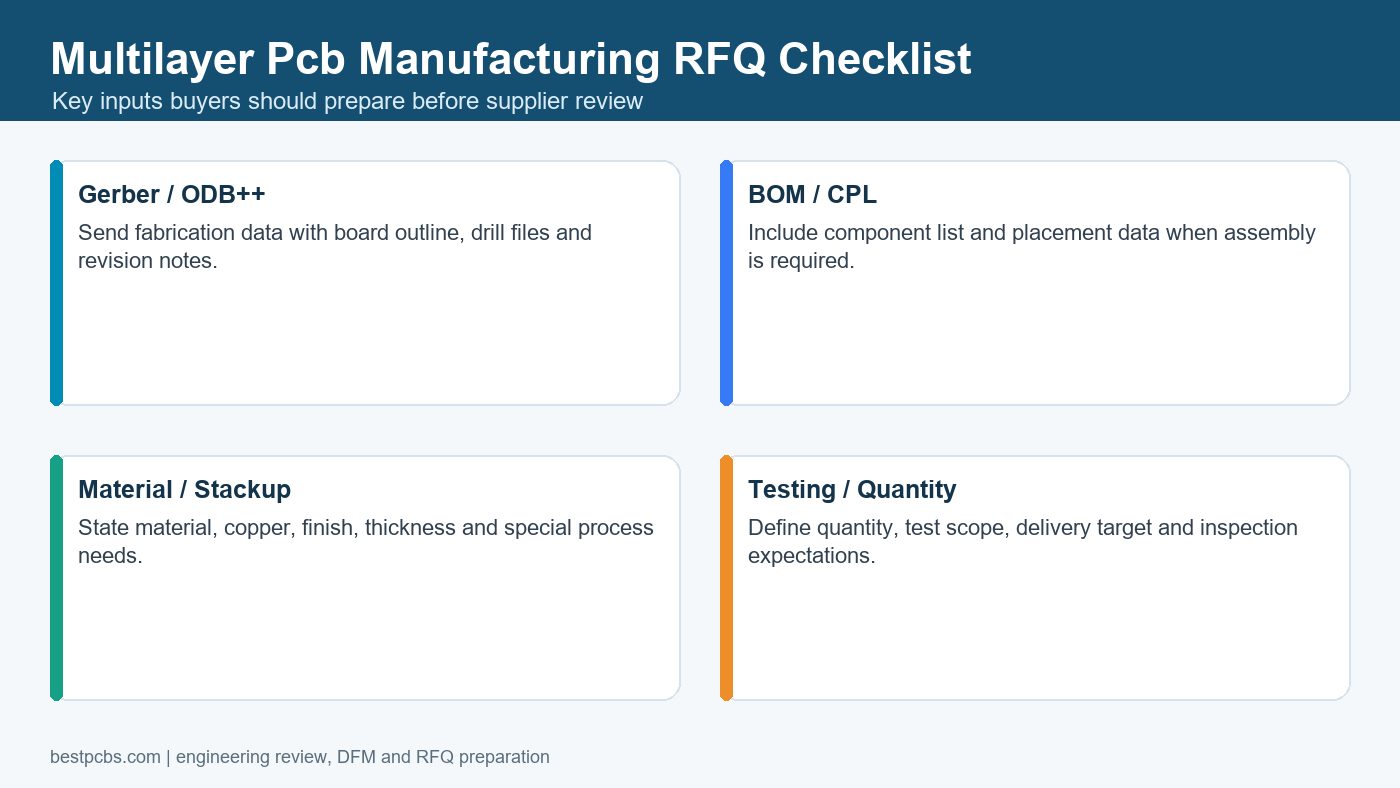
multilayer pcb manufacturing RFQ checklist for supplier review
multilayer pcb manufacturing RFQ checklist for supplier review.
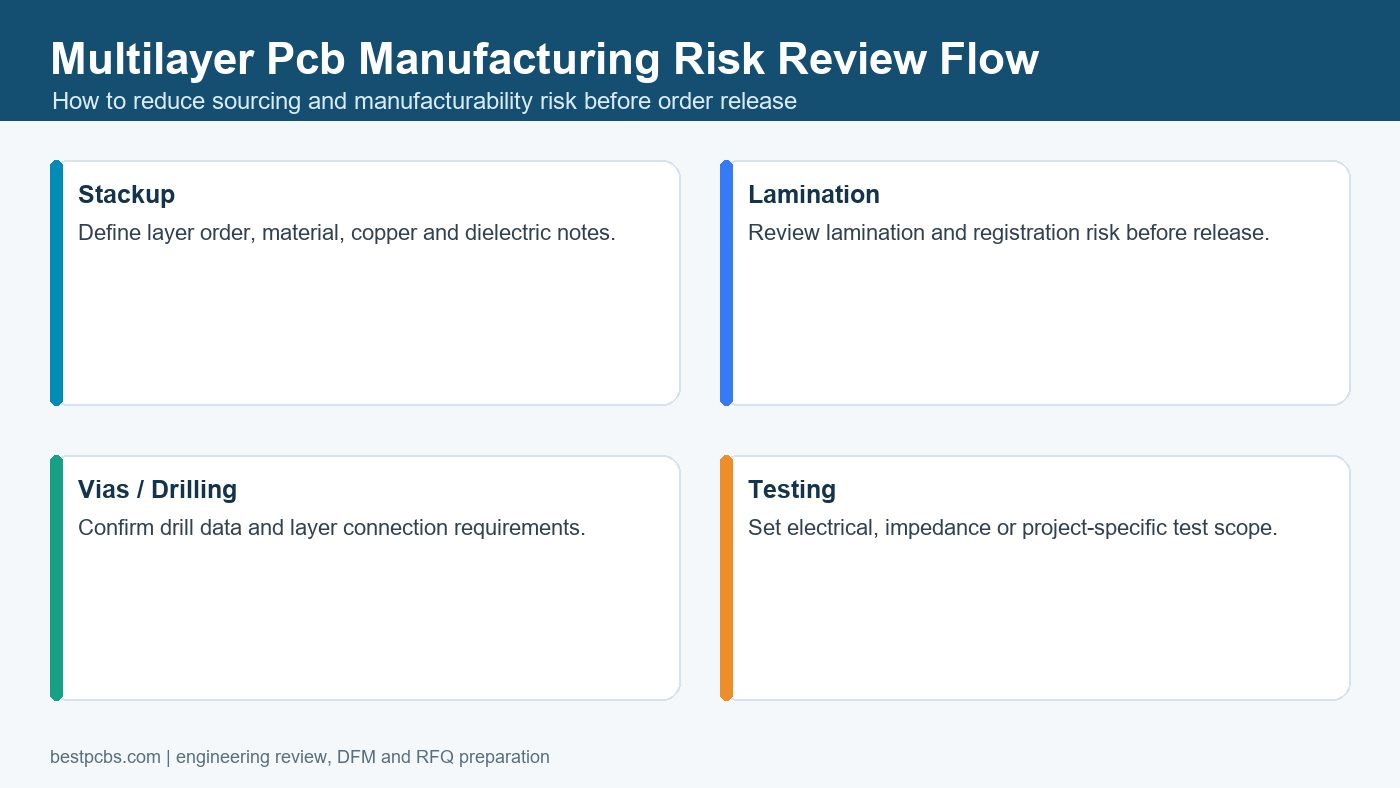
multilayer pcb manufacturing risk review flow before production
multilayer pcb manufacturing risk review flow before production.

Buyer Priorities for Multilayer PCB Manufacturing

Multilayer PCB buyers should confirm stackup, lamination needs, via structure, drilling, plating, impedance, material, copper and test scope before production. Internal layers make early review more important because hidden problems are harder to correct after lamination.

Prepare a clear stackup drawing, Gerber or ODB++ files, drill data, fabrication notes, impedance targets and assembly files when needed. A complete RFQ package helps the supplier review the real manufacturing risk instead of guessing from the layer count.

When Multilayer PCB Manufacturing Is Needed

Multilayer PCB manufacturing is needed when routing density, power planes, signal integrity, EMI control or board size requirements exceed what a single-sided or two-layer board can handle. It is common in communication equipment, industrial controls, medical electronics, embedded systems, high-speed boards and compact products.

If the design is still simple, review whether a double layer PCB manufacturing path is enough before increasing layer count.

Multilayer PCB Stackup Planning

Stackup planning should be agreed before fabrication because it affects impedance, thickness, material use, drilling and lamination risk. The supplier should not have to guess layer order from Gerber filenames.

  • Define signal, power and ground layers.
  • State total board thickness and copper requirements.
  • Identify controlled impedance lines if applicable.
  • Clarify material targets and special requirements.
  • Label layer files clearly and include a fabrication drawing.

Multilayer PCB Manufacturing Process

The multilayer process usually includes inner layer imaging and etching, layup, lamination, drilling, plating, outer layer imaging, solder mask, surface finish, routing and testing. The exact process depends on layer count, material, via structure and inspection needs.

  1. Review Gerber or ODB++ files, stackup and fabrication notes.
  2. Create and inspect inner layer circuit patterns.
  3. Lay up cores and prepreg in the required layer order.
  4. Laminate the stack under controlled heat and pressure.
  5. Drill and plate holes to connect the required layers.
  6. Create outer layer circuits, solder mask, silkscreen and finish.
  7. Profile the board, run electrical test and package the finished PCBs.

Vias, Drilling and Layer Connections

Via structure is a major cost and manufacturability factor in multilayer PCB manufacturing. Standard through vias are simpler than blind or buried vias, while HDI structures require more controlled process planning.

If the design uses advanced via structures, compare it with the HDI PCB manufacturer RFQ guide and confirm what must be project-specific before quoting.

DFM Review Before Multilayer PCB Production

DFM review should happen before production because multilayer errors can be hidden inside the stack after lamination. Review drill-to-copper clearance, annular ring, copper balance, layer registration, impedance notes, solder mask, board outline and panelization.

The PCB design and manufacturing DFM guide is useful for preparing files before supplier review.

Materials, Copper and Surface Finish

Material, copper and finish choices should match the circuit performance, assembly process and operating environment. Standard FR-4 may be suitable for many multilayer boards, while high-speed, high-frequency, high-Tg or special materials may be needed for specific designs.

Do not state a special material or layer capability as final unless it is confirmed from current project data and supplier review.

Assembly Planning for Multilayer PCBs

Assembly planning should be considered during PCB design because dense multilayer boards often include fine-pitch components, BGAs, test access limits and thermal constraints. Fabrication and assembly files should be reviewed together when PCBA is required.

For assembled boards, prepare BOM, CPL, assembly drawing, polarity notes and testing requirements. The PCBA service path helps connect fabrication and assembly review.

Testing and Quality Control

Testing should verify internal connectivity, outer layer quality, dimensions, solderability and any customer-defined acceptance criteria. Multilayer boards need careful electrical test because faults can exist inside the board structure.

Check Purpose Buyer input
Electrical test Finds opens and shorts across layers Netlist or accepted test scope
Impedance check Verifies controlled impedance where required Target values and stackup
AOI / visual inspection Checks surface pattern, mask and assembly quality Acceptance criteria and assembly files
Dimensional inspection Confirms outline, slots and mounting fit Fabrication drawing and tolerances

What Determines Multilayer PCB Cost?

Multilayer PCB cost depends on layer count, stackup complexity, material, copper, board size, via structure, impedance control, finish, testing, quantity and assembly needs. The lowest quote may be incomplete if it assumes a simpler stackup or test scope.

For cost planning, compare the project with the custom PCB cost guide and ask suppliers to quote the same stackup.

RFQ Checklist for Multilayer PCB Manufacturing

A complete RFQ should let the supplier review stackup, manufacturability and testing before committing to price and lead time. This prevents delays caused by missing layer or drill information.

  • Gerber or ODB++ files, drill files and fabrication drawing.
  • Layer count, stackup, material, copper weight, thickness and surface finish.
  • Controlled impedance, via type, special process or tolerance notes.
  • BOM, CPL, assembly drawing and polarity notes if assembly is required.
  • Quantity, prototype or production stage, target lead time and delivery destination.
  • Electrical test, impedance test, inspection and packaging requirements.

Frequently Asked Questions About Multilayer PCB Manufacturing

What is a multilayer PCB?

A multilayer PCB has more than two conductive copper layers separated by insulating materials and connected through drilled and plated vias where required.

Is multilayer PCB manufacturing more expensive than two-layer PCB manufacturing?

Usually yes, because it requires stackup planning, inner layer processing, lamination, drilling, plating and more inspection. The exact cost depends on design complexity.

What files are needed for a multilayer PCB quote?

Send Gerber or ODB++, drill files, stackup, material notes, copper, thickness, finish, quantity and testing requirements. For assembly, also send BOM, CPL and assembly drawings.

Can bestpcbs help review multilayer PCB manufacturability?

Bestpcbs can review project files for PCB manufacturing and assembly questions. Exact layer, material and special process capability should be confirmed from current project data before order release.

Final RFQ Recommendation

Before ordering multilayer PCB manufacturing, make the stackup and via structure clear enough that the supplier can quote the real board. The more layers and special requirements a board has, the more important early DFM review becomes.

For a multilayer PCB quote, send your Gerber or ODB++ files, drill data, stackup, BOM, CPL, assembly drawing, quantity, material expectations, copper weight, surface finish, impedance notes, testing requirements and target lead time to sales@bestpcbs.com. The Best Technology / bestpcbs team can review the files and confirm what needs project-specific checking before production.

You may also like

Multilayer PCB Manufacturing Quality Checklist
Wednesday, July 15th, 2026
Multilayer PCB manufacturing stackup and fabrication review

Multilayer PCB manufacturing builds a circuit board with three or more conductive copper layers bonded into one structure, so stackup, registration, drilling, plating, impedance, and inspection must be planned before production. A multilayer board can solve routing density and signal integrity problems, but it also increases the cost of unclear design data.

This guide gives engineers and buyers a practical checklist for preparing a multilayer PCB RFQ. It focuses on what to confirm before fabrication, how to compare supplier responses, and which details affect quality, cost, and production repeatability.

Multilayer PCB Manufacturing at a Glance

Multilayer PCB manufacturing combines inner-layer imaging, lamination, drilling, plating, outer-layer processing, solder mask, surface finish, routing, inspection, and electrical testing. The process is more sensitive than simple one-layer or two-layer fabrication because the internal copper layers cannot be repaired once the board is laminated.

Area What to confirm Why it matters
Stackup Layer order, dielectric thickness, copper weight, finished thickness Controls impedance, reliability, and manufacturing route.
Drilling and plating Via type, hole size, aspect ratio expectations, annular ring Affects connectivity between layers and fabrication yield.
Testing Electrical test, inspection, impedance coupon or report needs Verifies hidden-layer connectivity and buyer requirements.

When a Multilayer PCB Is the Right Choice

A multilayer PCB is useful when two layers cannot provide enough routing space, controlled impedance, power distribution, EMI control, or compact board size. It is common in industrial controls, communication devices, medical electronics, LED drivers, embedded systems, and power electronics where routing density and electrical behavior matter.

Do not choose more layers only to make layout easier. The extra layers should solve a real design problem: shorter signal paths, cleaner return paths, better power planes, compact size, or manufacturable high-density routing.

Stackup Decisions Before Layout Release

The stackup should be reviewed before layout is frozen because dielectric thickness, copper distribution, and reference planes affect impedance, warpage, and fabrication stability. A finished layout without a realistic stackup can create late changes that affect trace width, spacing, cost, and delivery time.

Send the intended layer count, copper weight, board thickness, impedance targets, reference plane arrangement, and any high-speed or power requirements. If the design is flexible, ask the manufacturer to review a manufacturable stackup before production.

DFM Checks for Multilayer Boards

DFM review for multilayer PCBs should focus on internal layer alignment, drill registration, annular ring, copper balance, lamination behavior, and solder mask details. These checks reduce the chance that a board looks correct in CAD but becomes difficult to fabricate consistently.

Important items include drill-to-copper clearance, via pad size, internal copper clearance, split-plane risk, copper thieving needs, edge-to-copper distance, slot notes, panelization, and whether fabrication drawings match the Gerber or ODB++ data. The PCB design for manufacturability checklist covers the design-side review logic in more detail.

Vias, Drills and Plating Requirements

Via and drill design can decide whether a multilayer PCB is straightforward, risky, or expensive to manufacture. Through vias, blind vias, buried vias, microvias, plated slots, and dense via fields all need different review questions.

Provide a drill table, via type definitions, finished hole requirements, plated and non-plated hole notes, and any filled or plugged via requirements. Avoid assuming that every via structure is standard. If the design uses HDI or special vias, ask for project-specific capability confirmation.

Controlled Impedance and Signal Integrity Notes

Controlled impedance should be treated as a manufacturing requirement with clear values, tolerances, reference layers, and stackup assumptions. If the manufacturer must infer the impedance target from layout alone, the quote may miss important processing and testing needs.

Send impedance values, layer references, trace geometry, dielectric expectations, and whether impedance test coupons or reports are required. Keep the language specific: “controlled impedance required on these nets” is more useful than a vague note that the board is high speed.

Material, Copper and Surface Finish Choices

Material, copper, and surface finish should match the electrical performance, assembly method, operating environment, and cost target of the board. A multilayer PCB may use standard FR-4, high-Tg material, high-frequency material, heavier copper, or other constructions depending on project requirements.
Exact bestpcbs capability limits must be checked against the latest process capability files before a quote. For content and RFQ preparation, the safe rule is to provide material target, Tg needs, copper weight, surface finish, assembly method, thermal exposure, and quantity so the manufacturer can confirm the build route.

Inspection and Testing for Multilayer PCB Quality

Testing is especially important for multilayer boards because many critical features are hidden after lamination. Electrical testing, visual inspection, dimensional checks, solder mask review, and optional impedance verification help confirm that the board matches the order requirements.

Ask which tests are included, which reports are available, and what acceptance criteria apply. If the board will be assembled, coordinate bare-board testing with PCBA requirements through the PCBA and PCB assembly service path.

Cost Drivers in Multilayer PCB Manufacturing

Multilayer PCB cost is affected by layer count, stackup, material, copper, via structure, controlled impedance, surface finish, testing, and quantity. Board size matters, but it is not the only cost driver.

Cost driver Why it matters How to reduce uncertainty
Layer count More layers add imaging, lamination, registration, and testing complexity. Explain why the layer count is needed and send stackup notes.
Via structure Blind, buried, filled, or microvia designs may need special processing. Send a clear drill table and via notes.
Impedance Controlled impedance may require stackup control and verification. Provide target values and test expectations.
Material Special laminates affect sourcing and process route. Provide acceptable alternates if possible.

RFQ Files for a Multilayer PCB Quote

A strong multilayer PCB RFQ should include fabrication data, stackup notes, drill information, material requirements, impedance details, quantity, and testing expectations. Missing stackup or drill notes can turn a quick quote into a long engineering exchange.

  • Gerber or ODB++ files
  • NC drill files and drill table
  • Layer stackup and finished board thickness
  • Material, copper, surface finish, solder mask, and silkscreen notes
  • Controlled impedance values and test report requirements if applicable
  • Quantity, revision, delivery target, packaging, and inspection needs

How to Compare Multilayer PCB Suppliers

Compare suppliers by how well they handle stackup review, DFM questions, capability confirmation, testing, and quote assumptions. A useful supplier response will flag unclear requirements instead of pretending every multilayer board is routine.

Watch for questions about dielectric thickness, impedance, drill limits, special vias, copper balance, surface finish, and assembly impact. If component sourcing or assembly is involved, include BOM and CPL files early; component sourcing support may affect the full PCBA schedule.

Frequently Asked Questions About Multilayer PCB Manufacturing

What is a multilayer PCB?

A multilayer PCB is a printed circuit board with three or more conductive copper layers bonded together with insulating dielectric material. It supports denser routing and better plane structure than a two-layer board.

Why are multilayer PCBs more expensive?

They require more process steps, stackup control, lamination, registration, drilling, plating, inspection, and testing. Special materials, impedance, or via structures can increase cost further.

What files are needed for a multilayer PCB quote?

Send Gerber or ODB++, drill files, stackup, material, copper, finish, impedance targets, quantity, revision, inspection needs, and delivery target.

Can multilayer PCBs be assembled by the same supplier?

Yes, if the supplier supports PCBA. Coordinating fabrication and assembly can reduce handoff risk when stackup, BOM, CPL, inspection, and test requirements affect each other.

Final RFQ Recommendation

Before ordering a multilayer PCB, confirm the stackup, via structure, material, impedance, and test requirements instead of treating the board like a simple Gerber upload. The more hidden layers the board has, the more valuable early engineering review becomes.

For a multilayer PCB manufacturing review or quotation, send your Gerber or ODB++ files, drill table, stackup, material target, copper weight, surface finish, quantity, impedance notes, test requirements, and target lead time to sales@bestpcbs.com. The Best Technology / bestpcbs team can review the manufacturing path and confirm what needs project-specific checking before production.

You may also like

Reliable I-Tera MT40 PCB Supplier for Multilayer Boards
Wednesday, June 3rd, 2026

An I-Tera MT40 PCB supplier supports multilayer PCB projects that require Isola I-Tera MT40 material for low-loss, high-speed, RF-related, or radar electronic applications. This article explains how I-Tera MT40 is used in radar, RF-related, and high-speed multilayer PCB projects, and how EBest Circuit (Best Technology) supports manufacturability review, PCB fabrication, PCBA assembly, testing, and production traceability.

EBest Circuit (Best Technology) supports I-Tera MT40 multilayer PCB projects based on customer-provided Gerber files, stack-up requirements, impedance tables, drawings, BOM, and assembly needs. Our support includes DFM review, PCB layout support when complete customer inputs are available, stack-up manufacturability review, controlled impedance PCB fabrication, PCBA assembly, component sourcing, testing coordination, and MES-based production traceability. If you are working on an I-Tera MT40 radar PCB, RF-related PCB, or high-speed multilayer board, you can send your files and requirements to sales@bestpcbs.com for engineering review.

I-Tera MT40 PCB Supplier

What Is I-Tera MT40 Multilayer PCB?

An I-Tera MT40 multilayer PCB is a printed circuit board made with Isola I-Tera MT40 laminate and prepreg in a multilayer structure. It is usually used when the board needs lower signal loss, better impedance stability, and more predictable performance than standard FR4.

In simple words, it is a multilayer PCB for demanding signal transmission.

It is commonly used when the project needs:

  • Low-loss signal transmission
    High-speed and RF-related signals can weaken as they travel through PCB traces. I-Tera MT40 helps reduce signal loss compared with many standard FR4 materials.
  • Stable impedance control
    Radar, RF, and high-speed boards often require controlled impedance. Material, dielectric thickness, copper thickness, trace width, and stack-up must work together.
  • High-layer-count routing
    Radar or communication boards may need many signal, ground, and power layers. 12-layer, 16-layer, or 20-layer structures are common in complex systems.
  • Reliable multilayer manufacturing
    I-Tera MT40 can be used in multilayer stack-ups where stable lamination, material consistency, and repeatable production matter.

For example, a 20-layer PCB with Isola I-Tera MT40 material used in a radar project should first be understood as:

a 20-layer low-loss multilayer PCB for radar electronics.

Depending on the real circuit and structure, it may also be described as:

  • Radar PCB if it supports radar signal or radar control functions;
  • RF-related PCB if it includes RF or microwave signal sections;
  • High-speed PCB if the main function is high-speed digital signal transmission;
  • HDI PCB only if it includes HDI features such as laser microvias, blind vias, buried vias, or sequential lamination.

The material name alone does not decide the final category. The real classification depends on the application and board structure.

EBest Circuit (Best Technology) can review I-Tera MT40 multilayer PCB projects from a manufacturability perspective, including stack-up, impedance requirements, via structure, material use, surface finish, and testing needs.

Why Use I-Tera MT40 for High-Speed Multilayer PCB?

I-Tera MT40 is used in high-speed multilayer PCB projects because signal performance becomes harder to control as speed, frequency, layer count, and routing density increase.

For radar, RF-related, and high-speed electronic systems, the PCB material can directly affect signal behavior.

Key reasons to use I-Tera MT40 include:

  • Lower dielectric loss
    Lower loss helps signals pass through the PCB with less attenuation. This is useful for radar modules, communication boards, and long high-speed signal paths.
  • Stable Dk and Df performance
    Stable dielectric properties help support more predictable impedance and signal transmission.
  • Suitable for multilayer structures
    I-Tera MT40 is available as laminate and prepreg, which makes it suitable for multilayer stack-ups.
  • Good fit for controlled impedance boards
    Many I-Tera MT40 projects require single-ended or differential impedance control. This material is often selected when impedance stability matters.
  • More practical processing than some special RF materials
    Compared with some PTFE-based materials, I-Tera MT40 can be more practical for multilayer PCB fabrication.

For customers, the value is not just “using a better material.” The real value is using the material correctly.

A successful I-Tera MT40 multilayer PCB depends on:

  • practical stack-up;
  • controlled impedance;
  • stable lamination;
  • accurate drilling;
  • reliable copper plating;
  • proper surface finish;
  • electrical testing;
  • clear production documentation.

EBest Circuit (Best Technology) can review customer-provided files before production and help reduce avoidable risks in high-layer-count PCB fabrication and assembly.

What Applications Need I-Tera MT40 Multilayer Boards?

I-Tera MT40 multilayer boards are often used in projects where signal quality, low loss, and high layer count matter. These applications usually require more manufacturing control than ordinary FR4 PCB projects.

Radar Electronics

Radar electronics is one of the strongest application areas for I-Tera MT40 multilayer PCB.

Typical radar-related uses include:

  • automotive radar modules;
  • industrial radar sensing systems;
  • radar control boards;
  • RF signal processing boards;
  • mixed RF and digital radar electronics.

Radar boards may combine RF signal paths, high-speed digital control sections, power layers, ground reference layers, and shielding structures in one multilayer PCB. This is why stack-up, impedance, material loss, and manufacturing consistency must be reviewed carefully.

A 20-layer I-Tera MT40 radar PCB is a good example. It is not just a “20-layer board.” It is a low-loss multilayer PCB where material choice, layer structure, via design, and impedance control all influence production quality.

Communication Equipment

Communication products often need dense routing, high-speed channels, and stable impedance.

Typical applications include:

  • network equipment;
  • base station electronics;
  • optical communication control boards;
  • signal processing boards;
  • high-speed communication modules.

For these boards, multilayer structures help separate signal, power, and ground layers. I-Tera MT40 helps support lower loss in high-speed paths.

RF and Microwave Modules

I-Tera MT40 can be used in RF-related PCB projects when the design requires lower loss and controlled signal behavior.

Typical applications include:

  • RF control boards;
  • microwave support boards;
  • antenna-related circuits;
  • mixed RF and digital boards;
  • high-frequency signal modules.

For RF-related boards, fabrication consistency matters. Dielectric thickness, copper profile, impedance, via design, and surface finish should all be reviewed before production.

High-Speed Digital Systems

High-speed digital systems may use I-Tera MT40 when standard FR4 cannot meet the signal loss target.

Typical applications include:

  • server boards;
  • backplanes;
  • high-speed connector boards;
  • FPGA boards;
  • processor boards;
  • SerDes signal boards.

In these projects, the board may not be called an RF PCB. It may be better classified as a high-speed low-loss multilayer PCB.

Industrial, Medical, Automotive, and Aerospace Electronics

High-reliability industries may use I-Tera MT40 when products require stable performance, better signal control, and reliable manufacturing.

Typical applications include:

  • industrial control modules;
  • medical electronic control boards;
  • automotive electronics;
  • aerospace communication boards;
  • high-reliability signal control modules.

EBest Circuit (Best Technology) supports these projects through PCB fabrication, PCBA assembly, DFM review, testing coordination, and production traceability.

What Should Be Checked Before Manufacturing I-Tera MT40 Multilayer PCB?

Before manufacturing an I-Tera MT40 multilayer PCB, the supplier should not only check whether the material is available. The key is to confirm whether the board can be manufactured reliably.

Important items include:

1. Layer Count

First confirm the layer count.

Common examples include:

  • 8-layer I-Tera MT40 PCB;
  • 12-layer I-Tera MT40 PCB;
  • 16-layer I-Tera MT40 PCB;
  • 20-layer I-Tera MT40 PCB;
  • higher-layer-count multilayer PCB.

The higher the layer count, the more important these factors become:

  • lamination control;
  • layer-to-layer registration;
  • board thickness control;
  • drilling accuracy;
  • copper plating reliability;
  • impedance consistency.

For radar and high-speed applications, a high-layer-count board should be treated as a precision multilayer project, not a routine PCB job.

2. Stack-Up Manufacturability

Stack-up affects both electrical performance and manufacturing stability.

The supplier should review:

  • core thickness;
  • prepreg thickness;
  • signal layer arrangement;
  • ground reference layers;
  • power layer arrangement;
  • copper thickness;
  • final board thickness;
  • structure symmetry;
  • dielectric spacing.

EBest Circuit (Best Technology) can review customer-provided stack-ups from a manufacturing perspective. We do not replace the customer’s product design, RF design, or circuit design work. Our role is to check whether the proposed stack-up is practical for PCB fabrication and assembly.

3. Controlled Impedance

Most I-Tera MT40 radar, RF-related, and high-speed boards need controlled impedance.

The review should include:

  • target impedance;
  • single-ended impedance;
  • differential impedance;
  • trace width;
  • trace spacing;
  • dielectric thickness;
  • copper thickness;
  • reference plane;
  • tolerance requirement.

If the impedance target is not clearly defined, the board may be difficult to control during production. Customers should provide an impedance table whenever possible.

4. Via Structure

Via structure affects manufacturing difficulty, reliability, and cost.

The supplier should confirm whether the board uses:

  • through holes;
  • blind vias;
  • buried vias;
  • laser microvias;
  • via-in-pad;
  • resin plugging;
  • copper filling;
  • stacked vias;
  • staggered vias.

This is also where the HDI question becomes clear.

A 20-layer I-Tera MT40 radar PCB is not automatically HDI.
It becomes HDI only when the customer’s design uses HDI structures such as laser microvias, blind/buried vias, or sequential lamination.

For this article, HDI is not the main topic. It is only a manufacturing structure that may appear in some I-Tera MT40 multilayer projects.

5. Drilling and Plating Quality

High-layer-count I Tera MT40 PCB requires stable drilling and plating.

Important checks include:

  • minimum drill size;
  • aspect ratio;
  • hole wall quality;
  • desmear process;
  • copper plating thickness;
  • annular ring;
  • drill-to-copper clearance;
  • reliability class.

Poor drilling or plating can cause serious reliability issues, especially in thick multilayer boards used for radar or high-speed applications.

6. Surface Finish

Surface finish should match assembly and product requirements.

Common options include:

  • ENIG;
  • ENEPIG;
  • immersion silver;
  • OSP;
  • hard gold for connector areas.

For radar and RF-related boards, surface finish should also be reviewed for signal behavior, assembly method, storage conditions, and reliability requirements.

7. Testing Requirements

Testing should be defined before production.

Common tests and inspections include:

  • electrical test;
  • impedance test;
  • AOI;
  • X-ray inspection when needed;
  • microsection analysis when required;
  • solderability test;
  • final visual inspection;
  • functional testing after PCBA when required.

EBest Circuit (Best Technology) can support testing coordination based on the customer’s board requirements and application needs.

Can I-Tera MT40 Be Used in Hybrid Stackups?

Yes. I-Tera MT40 can be used in hybrid stackups when only certain layers need low-loss performance. This can help balance signal performance, material cost, and multilayer manufacturability.

Possible hybrid structures include:

  • I-Tera MT40 for radar or RF-related signal layers
    These layers handle sensitive signal paths where low loss and impedance stability matter.
  • FR4 or High-Tg FR4 for control or power layers
    These layers may not need the same low-loss performance, so standard materials may be enough.
  • Other RF materials for special high-frequency sections
    Some projects may combine different material systems based on frequency, signal type, and customer requirements.

Hybrid stackups should be reviewed carefully before production.

Key checks include:

  • material compatibility;
  • CTE behavior;
  • lamination cycle;
  • resin flow;
  • dielectric thickness;
  • impedance control;
  • board warpage;
  • reliability requirement.

EBest Circuit (Best Technology) can review hybrid stack-up manufacturability based on customer-provided drawings, stack-up, impedance table, and production requirements.

I-Tera MT40 vs FR4, Rogers, and PTFE for Multilayer PCB

Different PCB materials are used for different design needs. I-Tera MT40 is often selected when customers need better signal performance than standard FR4, while still keeping multilayer PCB manufacturing practical.

MaterialBest ForKey Point
Standard FR4Common multilayer PCBCost-effective, but higher loss
High-Tg FR4Reliable multilayer PCBBetter thermal resistance, not always low-loss
I-Tera MT40High-speed low-loss multilayer PCBBalanced signal performance and processability
RogersRF and microwave PCBStrong RF performance, higher cost
PTFEVery high-frequency PCBGood RF behavior, more difficult processing

When Standard FR4 Is Enough

FR4 is suitable for many standard multilayer boards.

It may be enough when:

  • signal speed is not very high;
  • loss is not the main concern;
  • cost control is the priority;
  • impedance requirements are not too strict.

When High-Tg FR4 Is Better

High-Tg FR4 is suitable when thermal reliability matters more.

It is often used when:

  • assembly temperature is higher;
  • product reliability requirement is stricter;
  • the board needs better heat resistance than standard FR4.

When I-Tera MT40 Makes Sense

I-Tera MT40 makes sense when signal performance is more important.

It is often used when:

  • signal loss must be reduced;
  • impedance control is critical;
  • the board has radar or RF-related signal sections;
  • the board has high-speed digital signals;
  • the stack-up has many layers;
  • the project needs a balance between performance and manufacturability.

When Rogers or PTFE May Be Needed

Rogers or PTFE materials may still be better for some specialized RF and microwave circuits.

They may be considered when:

  • the frequency is very high;
  • RF performance is the top priority;
  • the customer has specified the material;
  • the board requires a dedicated RF material system.

The right question is not simply “which material is best?”
The better question is:

Which material fits the radar signal, frequency range, stack-up, cost target, and manufacturing requirement?

EBest Circuit (Best Technology) can review customer-specified material requirements from a manufacturing perspective and provide PCB fabrication support based on manufacturability, material availability, and production needs.

Why Choose EBest Circuit as Your I-Tera MT40 PCB Supplier?

Choosing an I-Tera MT40 PCB supplier is not only about finding a company that can quote the material. For radar, RF-related, and high-speed multilayer boards, the supplier should understand high-layer-count PCB manufacturing, stack-up control, impedance, drilling, plating, testing, and assembly requirements.

EBest Circuit (Best Technology) supports customers in these practical areas:

I-Tera MT40 Multilayer PCB Fabrication

We can support I-Tera MT40 multilayer PCB fabrication based on customer drawings, Gerber files, stack-up, impedance table, and project requirements.

Typical project types include:

  • high-speed multilayer PCB;
  • radar multilayer PCB;
  • low-loss PCB;
  • RF-related PCB;
  • controlled impedance PCB;
  • high-layer-count PCB;
  • hybrid stack-up PCB.

DFM and Stack-Up Manufacturability Review

Before production, our engineering team can review:

  • stack-up manufacturability;
  • line width and spacing;
  • drill-to-copper clearance;
  • via structure;
  • copper balance;
  • solder mask clearance;
  • controlled impedance requirements;
  • surface finish;
  • final board thickness;
  • testing requirements.

This review focuses on PCB manufacturing feasibility. It does not replace the customer’s product design, RF design, or circuit design work.

PCB Layout Support Based on Customer Inputs

EBest Circuit (Best Technology) can support PCB layout work when the customer provides the required design inputs, such as:

  • schematic;
  • netlist;
  • component placement requirements;
  • mechanical constraints;
  • impedance requirements;
  • routing rules;
  • connector position requirements;
  • keep-out areas;
  • assembly requirements.

Our role is to help prepare or adjust manufacturable PCB layout files based on the customer’s design inputs. We do not position this service as full PCB design, circuit design, RF design, or product design.

Support for Multiple PCB Types

Besides I-Tera MT40 multilayer PCB, EBest Circuit (Best Technology) can support:

This is useful for customers who have different board types within the same product platform.

PCBA Assembly and Component Sourcing

Many customers need more than bare PCB fabrication. They also need assembly and supply chain support.

EBest Circuit (Best Technology) can support:

  • PCB fabrication;
  • component sourcing;
  • SMT assembly;
  • through-hole assembly;
  • assembly process review;
  • testing coordination;
  • prototype to batch production.

Testing and MES Traceability

For high-reliability projects, testing and traceability are important.

We can support:

  • electrical testing;
  • impedance testing;
  • AOI inspection;
  • X-ray inspection when needed;
  • functional testing coordination;
  • production quality documentation;
  • MES-based production traceability.

These capabilities are valuable for radar, communication, industrial control, medical electronics, automotive electronics, aerospace, RF-related, and high-speed digital projects.

If you need an I-Tera MT40 multilayer PCB supplier for radar or high-speed applications, pls feel free to send your Gerber files, stack-up, BOM, impedance table, and requirements to sales@bestpcbs.com. Our team can review manufacturability, material requirements, assembly needs, testing requirements, and quotation details.

FAQs About I-Tera MT40 PCB Supplier

1. Is I-Tera MT40 suitable for multilayer PCB?

Yes. I-Tera MT40 is suitable for multilayer PCB designs that need low loss, controlled impedance, and stable high-speed signal performance.

2. Can I-Tera MT40 be used for radar PCB?

Yes. I-Tera MT40 can be used for radar-related multilayer PCB projects when the board requires low-loss material, controlled impedance, and stable signal transmission.

3. Can I-Tera MT40 be used for 20-layer PCB?

Yes. A 20-layer PCB using I-Tera MT40 can be manufactured as a high-speed low-loss multilayer PCB. If it is used in radar electronics, it can also be described as a 20-layer radar multilayer PCB. Final feasibility depends on stack-up, via structure, impedance requirement, board thickness, and manufacturing capability.

4. Is I-Tera MT40 PCB an RF PCB or high-speed PCB?

It depends on the application. If the board is used for RF or microwave circuits, it can be called RF PCB. If it is used for high-speed digital signals, it is better called high-speed PCB. If it is used in radar electronics, radar PCB or radar multilayer PCB may be more accurate.

5. Is a 20-layer I-Tera MT40 PCB automatically HDI?

No. A 20-layer board is a multilayer PCB. It becomes HDI only when the customer’s design includes HDI features such as laser microvias, blind vias, buried vias, stacked vias, or sequential lamination.

6. Can I-Tera MT40 be used with FR4 in hybrid stackups?

Yes. I-Tera MT40 can be used with FR4 or High-Tg FR4 in hybrid stackups when only certain layers need low-loss performance. The hybrid structure should be reviewed for material compatibility, lamination behavior, impedance control, and reliability.

7. What files are needed for an I-Tera MT40 multilayer PCB quotation?

Please provide:

  • Gerber files;
  • stack-up;
  • fabrication drawing;
  • impedance table;
  • drill file;
  • BOM if assembly is needed;
  • surface finish requirement;
  • copper thickness;
  • board thickness;
  • testing requirements;
  • application notes if available.

8. Can EBest Circuit provide PCB design for I-Tera MT40 projects?

EBest Circuit (Best Technology) does not provide full PCB design, circuit design, RF design, or product design services. We can support PCB layout work when the customer provides the required design inputs, and we can review manufacturability for PCB fabrication and assembly.

9. Can EBest Circuit support I-Tera MT40 PCB fabrication and assembly?

Yes. EBest Circuit (Best Technology) can support I-Tera MT40 multilayer PCB fabrication, DFM review, stack-up manufacturability review, controlled impedance, PCBA assembly, component sourcing, testing coordination, and production traceability.

10. How can I get engineering support for an I-Tera MT40 PCB project?

Send your Gerber files, stack-up, impedance table, BOM, drawings, and requirements to sales@bestpcbs.com. EBest Circuit (Best Technology) will review PCB manufacturability, material requirements, assembly needs, testing requirements, and quotation details.

To sum up, an I Tera MT40 PCB supplier should provide more than a material-based quotation. For radar, RF-related, and high-speed multilayer boards, the real value is manufacturing control: stack-up manufacturability review, impedance control, lamination stability, drilling quality, copper plating reliability, testing, assembly support, and production traceability.

If your project is a 12-layer, 16-layer, 20-layer, or higher-layer PCB using Isola I-Tera MT40 material, it should be treated as a high-speed low-loss multilayer PCB from the beginning. If it is used in radar electronics, the supplier should pay extra attention to impedance, signal layers, via structure, material stability, and testing requirements. If it also includes laser microvias, blind vias, buried vias, or stacked vias, it may need HDI-level manufacturing review, but HDI is only part of the structure, not the main category.

EBest Circuit (Best Technology) supports I-Tera MT40 multilayer PCB projects from manufacturability review to PCB fabrication, PCBA assembly, testing, and production support. Send your files and project requirements to sales@bestpcbs.com for a practical review before production.

You may also like

Double Sided PCBA Manufacturer with 20 Years of Production Experience
Friday, January 23rd, 2026

Double sided PCBA refers to a printed circuit board assembly where components are mounted and soldered on both sides of the PCB, enabling higher circuit density and more functional integration within a compact footprint. This article explains how double sided PCBA production works, when it should be selected, what risks commonly occur during assembly, and how an experienced manufacturer controls quality, cost, and delivery across the full production lifecycle.

Why Do Double Sided PCBA Projects So Often Run Into Trouble?

  • DFM issues are discovered after parts are ordered, forcing rework or redesign.
  • Double reflow introduces alignment and solder joint reliability risks.
  • BOM choices look acceptable on paper but fail under real supply constraints.
  • Quality varies between batches due to inconsistent process control.
  • Communication gaps slow down prototype-to-production transitions.

A double sided PCBA manufacturer with long-term production experience addresses these risks systematically rather than reactively.

  • Perform DFM review and process validation before material commitment.
  • Control double-sided reflow profiles and fixture strategy to stabilize yield.
  • Optimize BOMs with lifecycle checks and approved alternates.
  • Apply standardized inspection and quality checkpoints across all builds.
  • Use clear engineering communication workflows to reduce iteration cycles.

EBest Circuit (Best Technology) is a professional PCB and PCBA manufacturer with over 20 years of double sided PCBA production experience, serving more than 1,800 customers and 10,000 engineers worldwide. With in-house PCB fabrication, PCBA assembly, certified quality systems, and a digitalized production workshop, we help OEM teams move from prototype to volume. For technical consultation or quotations, pls feel free to contact us via sales@bestpcbs.com.

Double Sided PCBA

What Does Double Sided PCBA Involve In A Production Assembly Program?

A production-level double sided PCBA program includes more than placing parts on both sides of a board. It is a coordinated manufacturing system.
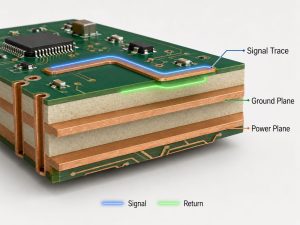
Key Elements Involved

  • Engineering Review – DFM, DFA, and process feasibility checks.
  • PCB Fabrication Alignment – Stack-up, finish, and panelization matched to assembly needs.
  • Component Preparation – Moisture control, polarity validation, and alternate sourcing.
  • Double-Sided Assembly – Controlled first-side and second-side reflow sequencing.
  • Inspection And Testing – AOI, X-Ray (when required), and functional validation.

A structured assembly program ensures that double sided PCBA remains stable and repeatable at production scale.

Double Sided PCBA

What Is The Typical Double Sided PCB Manufacturing Process From Design To Assembly?

The manufacturing process must account for thermal, mechanical, and inspection challenges unique to double sided boards.

Typical Process Flow

  • PCB fabrication with defined copper balance and solder mask design.
  • First-side SMT placement and reflow.
  • Board flipping with fixture support.
  • Second-side SMT placement and reflow.
  • AOI and selective inspection.
  • Through-hole assembly if required.
  • Final test and shipment.

Process discipline is critical to prevent cumulative defects introduced during multiple thermal cycles.

When Should Engineers Choose Double Sided PCB Design Over Single-Sided PCB?

Double sided PCB design is selected when functional density and routing flexibility outweigh the simplicity of single-sided PCB layouts.

Typical Selection Criteria

  • Circuit density exceeds single-sided routing capability.
  • Signal integrity benefits from shorter interconnect paths.
  • Board size constraints limit expansion.
  • Cost pressure makes multilayer PCB unnecessary.
  • Product requires moderate complexity with controlled assembly risk.

To wrap up, double sided PCB design often represents the best balance between functionality and manufacturing cost.

What Are Common Double-Sided PCB Applications In Modern Electronic Products?

Double-sided PCB applications span a wide range of industries where space efficiency and cost control are critical.

Common Applications

  • Industrial control modules
  • Power management boards
  • Consumer electronics
  • Automotive subassemblies
  • Communication interface boards

To summarize‌, double sided PCBA remains a workhorse solution for modern electronics across multiple sectors.

What Factors Affect Quality In China Double Sided PCBA Production?

China double sided PCBA quality depends more on process governance than on geography.

Key Quality Factors

  • DFM depth and timing
  • Component sourcing discipline
  • Reflow profile stability
  • Inspection coverage and standards
  • Production traceability

To wrap things up, choosing a China-based manufacturer with mature controls is essential for consistent quality.

What Assembly Risks Are Common In Double Sided PCBA Production?

Double sided PCBA introduces specific risks that must be managed proactively.

Common Assembly Risks

  • Component shift during second reflow
  • Tombstoning on small passives
  • Shadowing effects during AOI
  • Thermal stress on sensitive devices
  • Yield loss from inconsistent handling

To sum up, experienced manufacturers mitigate these risks through fixturing, profiling, and inspection strategy.

How Does Double Sided PCBA Compare With Multilayer PCBA In Cost Structure?

From a cost perspective, double sided PCBA often occupies a middle ground between simplicity and complexity.

Cost Structure Comparison

AspectDouble Sided PCBAMultilayer PCBA
PCB CostLowerHigher
Assembly ComplexityModerateHigh
Yield SensitivityMediumHigh
Design FlexibilityModerateVery High

In essence, double sided PCBA is often the most cost-effective solution when multilayer routing is not strictly required.

Double Sided PCBA

Overall, double sided PCBA enables compact, cost-efficient electronic manufacturing when supported by disciplined engineering and production control. This article reviewed the production scope, manufacturing process, application scenarios, quality factors, assembly risks, and cost structure considerations associated with double sided PCBA.

As a double sided PCBA manufacturer with 20 years of production experience, EBest Circuit (Best Technology) combines engineering depth, certified quality systems, digital traceability, and fast turnaround to help OEMs achieve stable, scalable results. For project evaluation or quotations, pls feel free to contact us via sales@bestpcbs.com.

FAQs

What is the difference between single sided and double sided PCB?

A single sided PCB places components on one side only, while a double sided PCB allows components on both sides, increasing circuit density and routing options.

How are double-sided PCBs assembled?

Double-sided PCBs are assembled through sequential placement and reflow, typically soldering one side first, then flipping the board and assembling the second side with controlled fixturing and thermal profiles.

You may also like

Multilayer printed circuit board, Multilayer PCB application
Tuesday, January 13th, 2026

Multilayer printed circuit board is a circuit board built from three or more conductive copper layers laminated together with insulating material. Unlike single- or double-sided boards, multilayer PCBs stack internal signal and power layers between outer layers, allowing complex circuits to fit into a much smaller footprint.

Multilayer printed circuit board, Multilayer PCB application

What is a multilayer PCB?

Multilayer printed circuit board is a circuit structure that combines three or more conductive copper layers into a single, unified board. These layers are separated by insulating materials and bonded together under heat and pressure to form a compact electrical platform.

In practical electronics, a multilayer printed circuit board allows designers to place signal layers, power planes, and ground planes in carefully controlled positions. This internal structure improves electrical stability while reducing electromagnetic interference.

As products continue to shrink while performance expectations rise, multilayer printed circuit boards have become the backbone of modern electronic systems. Smartphones, medical equipment, automotive electronics, and industrial controls all rely on this technology to meet demanding requirements.

From a manufacturing standpoint, multilayer PCB production requires precise process control. Layer alignment, dielectric thickness, copper balance, and via reliability all influence final performance. At EBest Circuit (Best Technology), multilayer printed circuit boards are produced as part of a fully integrated Turnkey EMS service, ensuring design intent and production reality stay aligned.

How to identify multi-layer PCB?

Identifying a multi-layer PCB usually starts with visual inspection, but surface clues alone are often not enough. Unlike single-layer boards, multilayer designs hide most of their complexity inside the board structure.

One common indicator is the presence of plated through holes that connect multiple layers. These vias typically appear filled or copper-lined, suggesting internal interconnections. Dense via fields are often associated with multilayer printed circuit boards, especially in high-speed or high-density designs.

Board thickness can also provide hints. Multilayer PCBs are often thicker than simple boards, even when designed for compact products. The additional dielectric layers add measurable depth.

For accurate identification, manufacturers use cross-sectional analysis or fabrication drawings. These clearly show the number of copper layers and their arrangement. It is defined, documented, and verified before production begins.

How can you tell how many layers a PCB has?

Determining the exact number of layers in a PCB requires more than observation. The most reliable method is reviewing the fabrication documentation, where the stack-up is clearly specified. This document lists each copper layer, dielectric material, and thickness in sequence.

In a production environment, cross-section testing is commonly used. A small sample of the board is cut and polished so the internal layers can be counted under magnification. This method is precise and often used for quality validation in multilayer PCB manufacturing.

Electrical testing can also provide indirect clues. The number of reference planes affects impedance behavior and signal integrity. Experienced engineers can infer layer complexity based on performance characteristics, but this approach is supplementary rather than definitive.

For customers working with Turnkey EMS providers like EBest Circuit (Best Technology), layer count transparency is standard practice. Every multilayer printed circuit board process begins with a confirmed stack-up, ensuring consistency from prototype to volume production.

Multilayer printed circuit board, Multilayer PCB application

What material is used for multilayer PCB?

The most common material used in multilayer printed circuit boards is FR-4, a glass-reinforced epoxy laminate. FR-4 offers a balance of mechanical strength, electrical stability, and cost efficiency.

For more demanding environments, alternative materials are often selected. High-Tg laminates improve thermal performance and dimensional stability. Low-loss materials support high-speed signal transmission by reducing dielectric losses.

Copper foil is used for conductive layers, with thickness selected based on current requirements and impedance design. The dielectric layers between copper planes control capacitance, signal propagation, and thermal behavior. Material selection directly influences power bus decoupling on multilayer printed circuit boards, especially in high-current designs.

How to design a multilayer PCB?

Designing a multilayer PCB begins with system requirements, not routing convenience. Engineers first define signal integrity goals, power distribution needs, and thermal constraints.

A well-designed multilayer printed circuit board separates functions across layers. Signal layers are placed adjacent to solid reference planes. Power planes are distributed to minimize voltage drop and noise.

Via strategy is another critical element. Through vias, blind vias, and buried vias each serve different purposes. High-speed signal optimization at differential vias in multilayer printed circuit boards requires careful geometry control to maintain impedance and timing balance.

Simulation plays an important role in modern design. Analytical evaluation of via plate capacitance for multilayer printed circuit boards and packages helps engineers predict parasitic effects before fabrication.

At EBest Circuit (Best Technology), design support is closely tied to manufacturing expertise. Design-for-manufacturability reviews ensure that multilayer PCB designs translate smoothly into reliable production, even for complex stack-ups.

What is the highest number of layers in a PCB?

There is no absolute limit to the number of layers in a PCB, but practical constraints define realistic boundaries. Commercial multilayer printed circuit boards commonly range from four to twenty layers. Advanced systems may use thirty or more layers when required.

In high-performance computing and aerospace applications, extremely high layer counts have been achieved. These designs demand precise control of materials, lamination cycles, and registration accuracy. Each added layer increases complexity and cost.

More layers provide routing flexibility and power integrity, but they also introduce manufacturing challenges. Balance is essential.

Experienced manufacturers guide customers toward optimal solutions rather than maximum complexity. The goal is not to use the most layers, but the right number of layers to meet performance and reliability goals.

Multilayer printed circuit board, Multilayer PCB application

What is the purpose of having multiple layers in a PCB?

The primary purpose of multiple layers in a PCB is functional separation. Different electrical roles are assigned to dedicated layers, improving performance and predictability. Signal layers carry data. Power layers distribute energy. Ground layers provide stable references.

This separation enhances signal integrity by reducing noise coupling and crosstalk. It also supports efficient power distribution, which is critical in modern electronics with fast switching devices.

Multilayer printed circuit boards also enable compact product design. By routing signals vertically through vias, designers reduce board area while maintaining functionality.

Thermal performance is another key benefit. Internal copper planes act as heat spreaders, helping manage temperature rise. When designed correctly, multilayer structures contribute directly to long-term reliability.

What are the advantages of multilayer PCBs?

Multilayer PCBs offer several compelling advantages that make them the preferred choice for advanced electronics.

  • One major benefit is improved electrical performance. Shorter signal paths and controlled impedance support high-speed operation.
  • Another advantage is mechanical stability. Laminated layers create a rigid structure that resists warping and vibration.
  • Design flexibility also increases with layer count. Engineers can route complex circuits without overcrowding, improving yield and manufacturability.
  • From a system perspective, multilayer printed circuit boards enable integration. More functionality fits into less space, reducing assembly complexity.

How do multilayer PCBs work?

Multilayer PCBs work by distributing electrical functions across stacked conductive layers. Signals travel through copper traces on designated layers, while power and ground planes provide stable electrical environments.

Vias connect these layers vertically, creating three-dimensional routing paths. This structure allows complex interconnections without excessive surface congestion.

The internal planes also act as capacitive elements. Power bus decoupling on multilayer printed circuit boards benefits from closely spaced power and ground layers.

Manufacturing precision ensures that each layer aligns correctly. Lamination bonds layers into a single unit, while drilling and plating create reliable interconnections. The result is a cohesive electrical platform designed to perform consistently.

What is the difference between single layer and multilayer PCB?

The difference between single layer and multilayer PCB lies in complexity, capability, and application scope. A single-layer board has one conductive layer and is suitable for simple circuits. It offers low cost and straightforward manufacturing.

A multilayer PCB, by contrast, supports complex routing and higher performance. Multiple layers enable better signal control, power distribution, and noise reduction.

Single-layer boards struggle with high-speed signals and dense layouts. Multilayer printed circuit boards handle these challenges with structured stack-ups and dedicated planes.

The choice depends on requirements. Simple products benefit from simplicity. Advanced systems demand multilayer solutions.

Multilayer printed circuit board, Multilayer PCB application

Common multilayer PCB application scenarios

Multilayer PCB application spans nearly every advanced electronic sector.

  • Consumer electronics rely on multilayer printed circuit boards to support compact, feature-rich devices. Smartphones and tablets are prime examples.
  • In medical electronics, multilayer designs support precision, reliability, and miniaturization. Diagnostic equipment and monitoring systems depend on stable signal integrity and controlled power distribution.
  • Automotive systems use multilayer PCBs for safety-critical functions. Engine control units, driver assistance systems, and infotainment platforms all benefit from multilayer architecture.
  • Industrial equipment also relies heavily on multilayer PCB application. Automation, robotics, and power control systems require robust designs that withstand harsh environments.

Across all these scenarios, manufacturing consistency matters. EBest Circuit (Best Technology) integrates multilayer PCB manufacturing with assembly and testing, delivering complete Turnkey EMS solutions that support diverse applications.

Conclusion:

Multilayer printed circuit boards form the foundation of modern electronics. They enable compact design, stable performance, and functional integration across industries. From material selection to stack-up design, every decision shapes reliability and efficiency.

Choosing the right partner is just as important as choosing the right layer count. If you are planning a multilayer PCB project or need full Turnkey EMS support, EBest Circuit (Best Technology) is ready to help.

For technical consultation or quotations, contact sales@bestpcbs.com

You may also like

PCB Multilayer Circuit Board: 17 multi layer boards
Tuesday, January 7th, 2025

The 17 multi layer boards is a highly integrated electronic component that alternately stacks 17 conductive layers and insulating layers and uses advanced interlayer connection technology (such as vias) to achieve electrical connection between the layers. Connections can significantly increase the wiring density and complexity of circuits. This design makes the 17 multi layer boards has broad application prospects in high-performance electronic equipment and can meet the strict requirements of these equipments for signal transmission speed, stability and functional diversity.

PCB Multilayer Circuit Board: 17 multi layer boards

What is a multi-layer circuit board?

The basic structure of a multilayer circuit board includes multiple conductive layers and insulating layers. The conductive layer usually uses copper foil or metallized holes, and the insulating layer is usually made of materials such as epoxy resin. Each layer is electrically connected through via holes, which are usually processed by drilling, laser drilling or chemical etching.

Advantages of multilayer circuit boards

  • High wiring density: Multi-layer circuit boards can achieve more complex wiring in a limited space to meet the needs of high-density electronic equipment.
  • Good electromagnetic shielding effect: The multi-layer design can effectively reduce electromagnetic interference and improve the stability and reliability of the system.
  • Low signal transmission delay: Multi-layer circuit boards reduce signal transmission delay and improve system performance by optimizing wiring and signal paths.
  • Suitable for complex systems: Multi-layer circuit boards are suitable for electronic devices that require a high degree of integration and complex functions, such as smartphones, tablets, etc.

How to make 17 multi layer boards?

The detailed steps for manufacturing a 17 multi layer boards are as follows:

  • Raw material preparation: Choose high-quality copper-clad laminates as raw materials. Commonly used copper-clad laminates include epoxy glass cloth substrates, etc.
  • Cutting: Use an automatic cutting machine to cut large-sized copper clad laminates into specific substrate sizes suitable for production needs.
  • Drilling: Use a CNC drilling machine to accurately drill holes at predetermined positions on the copper clad board.

  • Copper deposition: Copper ions in the electrolyte are deposited on the hole walls through electrochemical methods to form a uniform copper foil layer.
  • Dry film exposure and development: Use dry film for exposure and development, and use strong ultraviolet light to polymerize the dry film to form a preliminary cured circuit pattern.
  • Electroplating: In the electroplating production line, a layer of copper is plated on the exposed lines and hole walls through electrochemical reaction, and then a layer of tin is plated on the surface of the copper layer to protect the copper foil of the lines and hole walls from being eroded by the etching liquid.
  • Stripping and etching: Place the PCB in the stripping equipment, use stripping agent and cleaning methods to remove the remaining dry film, exposing the copper foil that is not protected by tin plating. Then use an etching solution to etch away the exposed copper foil, retaining the copper foil under the tin plating layer, and finally obtain the circuit pattern and metallized holes required for the design.
  • Inner layer process: Compared with single and double panels, the manufacturing of multi-layer boards has an additional inner layer process. Controlling the lamination process of the inner layers is critical to the electrical performance of controlled impedance transmission lines. The copper in the inner layer should be evenly distributed on the symmetrical layer to ensure balanced thermal stress during heating and avoid circuit board warping.
  • Laminated lamination: By combining different specifications of prepreg and copper-clad laminate (core board), all required thicknesses are achieved. The individual layers must be symmetrical and have the same layer thickness. After the lamination is completed, precise inter-layer adjustment and positioning are performed to ensure good adhesion between the inner layer and the prepreg.
  • Inspection: Circuit graphics are inspected using an automated optical inspection (AOI) system to ensure consistency of internal layers with CAD data and repair any connections or other defects found.

Through the above steps, a high-quality 17 multi layer boards can be manufactured.

When to use 17 multi layer boards?

1. High-frequency and high-speed signal processing scenarios

In communication base station equipment, such as the baseband processing unit (BBU) of a 5G base station. 5G signals have high frequency, large bandwidth, and extremely fast signal transmission speed. The 17 multi layer boards can efficiently route high-frequency, high-speed signals.

It can make the distance between the signal layer and the reference plane (ground layer) closer by reasonably arranging the positions of the signal layer, ground layer, and power layer, thereby reducing the loop inductance of the signal and reducing signal reflection and attenuation.

PCB Multilayer Circuit Board: 17 multi layer boards

And some inner shielding layers can be used to isolate signals in different frequency bands or sensitive signals from interference sources to ensure the integrity and accuracy of signal transmission.

For the communication line between the graphics processing unit (GPU) and the central processing unit (CPU) in high-speed computer systems. When performing large-scale graphics rendering or complex data operations, the data transfer rate is extremely high.

The 17 multi layer boards can provide enough wiring space to route high-speed differential signal pairs (such as PCI-Express interface signals) on different inner layers. At the same time, a complete ground plane is set up around it as a shield to reduce electromagnetic interference and ensure high speed. signal quality.

2. Complex circuit function integration

In the electronic control part of advanced medical equipment such as magnetic resonance imaging (MRI) equipment. MRI equipment contains complex radio frequency transmitting and receiving circuits, gradient magnetic field control circuits, image acquisition and processing circuits and other functional circuits. The 17 multi layer boards can distribute these circuits with different functions on different layers and connect them through vias.

In the controller of industrial robots, it needs to integrate multiple functions such as motion control, sensor signal processing, communication interfaces, and power management. The 17 multi layer boards allows the circuits of these functional modules to be reasonably distributed on each layer, making the layout of the circuit board more compact.

3. Special power and grounding requirements

In high-precision test and measurement instruments, such as spectrum analyzers. This type of instrument has extremely high requirements on the purity and stability of the power supply. The 17 multi layer boards can be equipped with multiple independent power layers, and decoupling capacitors are reasonably arranged between the power layer and the ground layer to form a low-pass filter network to effectively filter out power supply noise.

At the same time, through reasonable ground layer design, low-impedance ground paths are provided for different circuit modules to reduce the impact of ground bounce noise on measurement accuracy.

Active power filters (APF) in power electronic equipment. APF needs to process a large number of power signals and plays a key role in improving power quality. The 17 multi layer boards can provide suitable power and ground planes for different power conversion circuits and control circuits.

What are the disadvantages of 17 multi layer boards?

The disadvantages of 17 multi layer boards mainly include the following aspects:

  • 1. High cost: Due to the large number of layers and the complex manufacturing process, which requires more materials and finer processes, the cost is relatively high.
  • 2. Design is difficult: Designing a 17-layer PCB requires more factors to be considered, such as inter-layer connections, signal integrity and electromagnetic compatibility, etc. This requires higher professional skills from the designer and the design cycle may also be longer.
  • 3. Long production cycle: The production of multi-layer PCB involves multiple processes, such as lamination, drilling, copper plating, etc. These processes take time to complete, so the production cycle is relatively long.
  • 4. Difficulty in maintenance: Due to the complex internal structure, once a fault occurs, it is relatively difficult to locate and repair the problem, and sometimes even requires complete replacement.
  • 5. High requirements for design and manufacturing processes: more advanced equipment and technology are needed to ensure the quality and performance of multi-layer boards.

These shortcomings make 17 multi layer boards a reasonable trade-off between performance and cost in some applications.

How many layers can a circuit board have?

The number of layers in a circuit board can vary from single layer to multiple layers. Common layers include single layer, double layer, four layer, six layer, eight layer, ten layer, etc. High-end PCB boards can even reach 32 layers or more.

Application scenarios for different layers

  • Single-layer board: Suitable for simple circuit design, usually used in low-complexity electronic devices.
  • Double-layer boards: Suitable for medium-complexity designs that can accommodate more components and connections.
  • Four-layer board: Commonly used in designs that require better signal isolation and noise suppression, such as high-frequency circuits.

The manufacturing process of multilayer boards is very complex and requires more precise design and high-end processing technology. The more layers there are, the higher the manufacturing difficulty and cost. Therefore, when designing a circuit board, it is necessary to consider the circuit direction, number of layers, and materials to ensure the performance and reliability of the circuit board.
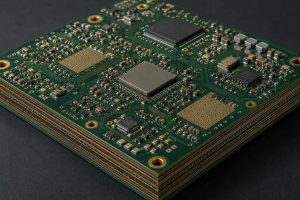
How many layers of circuit boards can we make?

With the continuous advancement of electronic technology, we are able to produce PCBs with more layers. Currently, FR4 PCBs with 20 to 32 layers can be realized. This high-level PCB structure provides engineers with greater design flexibility, allowing them to lay out various traces on different layers to meet different functional requirements.


Layers can be dedicated for power distribution, signal transmission, electromagnetic interference (EMI) shielding, and assembly of components. In order to effectively manage the number of layers, buried holes and blind holes are often designed in multi-layer PCBs to optimize circuit layout and signal transmission paths.

PCB Multilayer Circuit Board: 17 multi layer boards

For PCBs with more than 8 layers, high Tg FR4 materials are usually more popular than ordinary Tg FR4 because high Tg materials can maintain stable electrical performance and mechanical strength at higher temperatures, which is especially important for high-performance electronic devices. However, the increase in the number of layers also makes the PCB manufacturing process more complex and difficult, leading to higher costs.

In summary, we found that the 17 multi layer boards has significant advantages in signal integrity and space utilization, and can meet the needs of high-density electronic equipment, but its complex manufacturing process also brings higher costs and Production difficulty.

As a professional PCB manufacturer, BEST Technology has advanced production equipment and rich production experience, able to efficiently produce high-quality multi-layer PCB boards to meet customer needs for high-performance electronic equipment. Please feel free to contact us at sales@bestpcbs.com, we will provide a full range of services from design to production to ensure that every PCB board meets your strict standards.

You may also like