PCB manufacturing PCB manufacturing
Home > Blog

DFM Review

What Is an ODB++ File? Structure, Export, and Review Guide
Tuesday, September 1st, 2026

An ODB++ file is a PCB manufacturing data package that combines layer artwork, drill data, board geometry, net information, component details, and other production data in one structured dataset. PCB designers export it from their design software and send it to a fabricator or assembler for CAM preparation.

Its main difference from a Gerber package is context. Gerber files normally describe individual layers, while ODB++ can also preserve how layers, holes, nets, and components relate to one another. This guide explains what is inside the package, how to export and view it, when to choose it over Gerber, and what to check before sending it for PCB manufacturing.

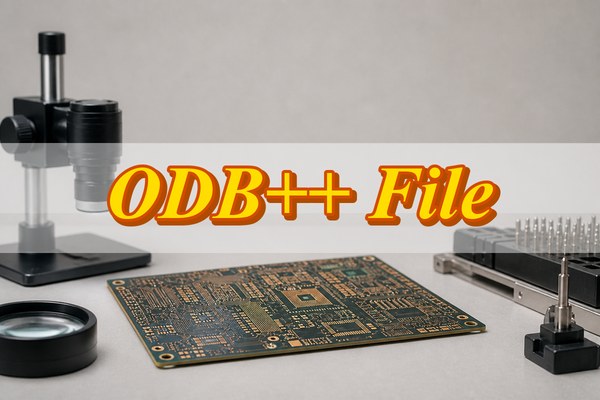
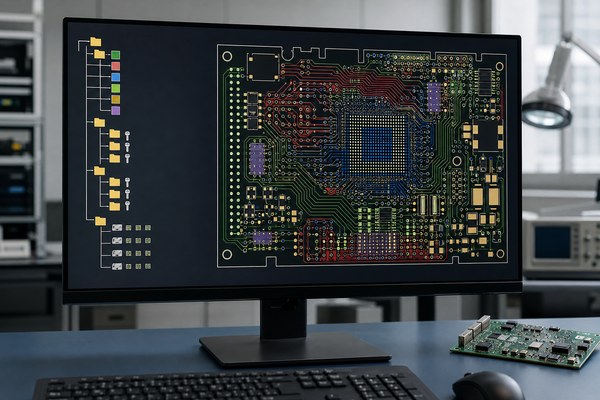
ODB++ file, PCB manufacturing data displayed on an engineering workstation

What Is an ODB++ File in PCB Manufacturing?

ODB++ is a PCB manufacturing data package that places the information for one board in a connected, machine-readable structure. The package can include copper and mask layers, board outlines, holes, routes, nets, parts, pins, and attributes. A CAM system can therefore read both the features and much of the meaning behind them.

ODB++Design is the branch of the ODB++ family used to pass PCB design data into manufacturing. Siemens maintains the format and provides specifications, sample jobs, and viewer resources through the official ODB++Design resource hub. When a PCB manufacturer imports the job, the software can identify layer types, drill relationships, connectivity, and component information without reconstructing all of that context from separate files.

The package only contains what the PCB design tool exports. If a layer, netlist, component field, or manufacturing note is missing at the source or disabled in the export settings, the ODB++ job will not add it automatically. Inspect the exported layers and compare the job with the source PCB so a missing selection does not reach CAM review.

Is an ODB++ File a Single File or a Folder Structure?

An ODB++ job is a folder structure, even when it arrives as one compressed file. Design tools commonly package the job as a .tgz, .tar, or .zip archive for easier transfer. After extraction, the archive contains a directory tree rather than one universal .odb file.

The tree separates different kinds of PCB data so that CAM software can find and connect them. Common sections include:

  • Matrix: acts like a map of the job. It identifies the layers, their order and type, and the relationship between drill spans and board layers. CAM software uses it to understand which files represent copper, solder mask, legend, drill data, and other functions.
  • Steps: contains the actual board, panel, coupon, or repeated layout. Each step can hold its profile, graphical features, holes, routes, nets, and component data.
  • Symbols: stores reusable shapes referenced by pads and other features. Reusing a symbol keeps the job organized instead of describing the same geometry repeatedly.
  • Fonts: provides character definitions used for text in the job.
  • Input and miscellaneous data: may contain source references, attributes, logs, user data, or other job-level information created by the exporter.
ODB++ file, CAM workstation showing a PCB data hierarchy and multilayer board

Altium’s CAM import and export documentation describes an ODB++ job as a directory tree of readable ASCII files. Send the original archive or the complete extracted tree. If only a few internal folders are copied, the receiving software may lose the matrix, step, or symbol references it needs to open the board correctly.

What Information Does an ODB++ File Contain?

An ODB++ file can contain most of the design data a manufacturer needs to interpret a PCB. Each data group supports a different CAM, fabrication, assembly, or inspection task:

  • Board profile and layer stack: defines the board boundary and identifies copper, solder mask, paste, legend, mechanical, and other layers. CAM uses this information to place every production layer in the correct sequence.
  • Copper and mask features: includes pads, tracks, planes, clearances, openings, and other plotted geometry. These features become the basis for imaging, solder mask, and paste preparation.
  • Drill and route data: describes hole sizes, plated or non-plated status, slots, and routed outlines. The fabricator uses it to prepare drilling and mechanical routing operations.
  • Electrical connectivity: connects features to named nets. This helps CAM engineers compare the manufactured geometry with the intended circuit and prepare electrical test data.
  • Components and packages: can include reference designators, locations, rotations, board sides, pins, and package relationships. Assembly teams can use this context when preparing placement and inspection data.
  • Attributes: adds meaning to layers, pads, holes, components, or other features. An attribute may identify a test point, via type, component pin, or special feature more clearly than geometry alone.
  • Board and panel steps: can represent a single PCB, production panel, coupon, or repeated placement. This allows the recipient to see how the job is organized rather than guessing from separate images.

The exact content varies by design tool and export settings. For example, Altium lets the user select plotted layers, archive type, ODB++ version, and netlist inclusion. A job exported without net data can still open normally, but the manufacturer cannot use it for the same connectivity comparisons as a job that includes the netlist.

How Is an ODB++ File Different from Gerber Files?

ODB++ combines PCB geometry and relationship data in one structured job, while a Gerber release is usually a set of artwork and supporting files. Both formats can support successful PCB fabrication. The better choice depends on the data your design tool can export and the format your manufacturer can process reliably.

Decision point ODB++ file Gerber package
Package model One directory tree or archive with linked job data Multiple artwork and supporting files
Layer meaning Layer type and order can be explicit in the matrix Depends on file functions, attributes, names, and supporting notes
Connectivity Can include nets and feature relationships Usually needs an IPC-D-356 or other independent netlist
Component context Can carry components, pins, packages, and placements Usually supplied through separate placement and assembly files
Review risk Wrong export options can omit expected job intelligence Missing, duplicated, or mismatched files can obscure relationships
Best choice Use when both the source CAD tool and recipient support ODB++ Use when the recipient requests Gerber or already has a tested Gerber workflow

Choose ODB++ when the manufacturer supports it and you want to send layer, net, component, drill, and attribute data together. It is especially useful for complex multilayer boards, dense layouts, and jobs that benefit from richer CAM checks.

Choose Gerber when the supplier requests it, the project uses a well-established Gerber workflow, or the handoff is limited to straightforward fabrication artwork and its supporting files. Gerber X2 can also carry useful attributes, so the comparison is not simply “smart” data versus “basic” data.

If you provide both formats, generate them from the same PCB revision and make one format the agreed manufacturing source. Two packages from different revisions create conflicting instructions rather than useful redundancy.

How Do You Create an ODB++ File from PCB Design Software?

Create an ODB++ file with the fabrication-output or manufacturing-export command in your PCB design software. Export directly from the native PCB design when possible because the source project contains the layer, net, component, and attribute relationships that a conversion from artwork may not recover.

  1. Open the finished PCB layout. Confirm that the outline, layer stack, holes, and design rules reflect the version you intend to send.
  2. Start the ODB++ export. Choose the fabrication-output or manufacturing-output command provided by the design tool.
  3. Review the settings. Select the correct board or panel, required layers, units, netlist option, archive type, and ODB++ version accepted by the recipient.
  4. Export to a new folder. Keeping the output separate from older jobs makes it easier to identify the current package.
  5. Open the result in a viewer. Check that the visible board, layers, holes, and nets match the source design.

In Altium Designer, current documentation places the command under File → Fabrication Outputs → ODB++ Files, and an Output Job can also generate it. In KiCad PCB Editor, use File → Fabrication Outputs → ODB++ Output File. In Fusion Electronics, use Export ODB++ from the Manufacturing toolbar.

Menus and available options can change between software versions. Check the current instructions for Altium ODB++ output, KiCad PCB Editor output, or Fusion Electronics export. Pay particular attention to the netlist, selected layers, units, panel or board step, archive format, and ODB++ version.

How Do You Open and View an ODB++ File?

Use an ODB++ viewer when you only need to inspect the package; use compatible CAM software when you need manufacturing analysis or process preparation. Open the complete archive or the root job folder. A suitable tool should display the board step, profile, layers, copper features, drills, nets, and any component data that the package contains.

  • Local viewing: Siemens offers an ODB++ Viewer for inspecting ODB++ models on a local system.
  • Browser viewing: the Altium 365 Viewer lists ODB++ among its supported formats and can be useful for a quick visual review.
  • CAM review: a fabricator or CAM engineer can import the job into manufacturing software to analyze layers, tools, nets, clearances, and production features.

For confidential designs, a local viewer avoids uploading the package to a third-party service. If you use an online viewer, review its current privacy, retention, access, and deletion terms first.

What Should You Check Before Sending an ODB++ File?

Before sending the package, open it in a separate viewer and compare six areas with the source PCB. The goal is to catch missing or incorrectly mapped data while the design files are still available.

  1. Board outline: confirm the outer profile, cutouts, slots, dimensions, and units. A missing or duplicated outline can change the routed board shape.
  2. Layers: compare the copper, solder mask, legend, paste, and mechanical layers with the PCB stack. Check both layer count and order.
  3. Drills and slots: review hole sizes, plated and non-plated holes, blind or buried drill pairs, backdrills, and routed slots where applicable.
  4. Nets: make sure net names and connectivity are visible if a netlist was included. Review critical planes, net ties, and intentional shorts rather than assuming they transferred correctly.
  5. Component data: when the job supports assembly, compare reference designators, board side, rotation, pin positions, and omitted or variant parts.
  6. Revision consistency: give the archive a clear part number and revision, and make sure its drawing, stackup, BOM, and placement files describe the same design version.
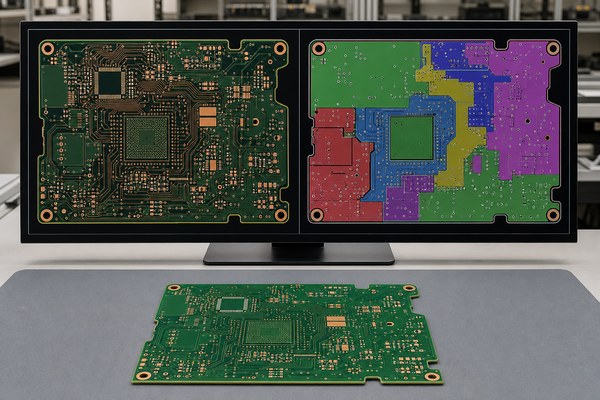
ODB++ file, comparison of source PCB design and CAM layer view

For more detail on how manufacturers use connectivity data, the PCB bare board testing guide explains how a board’s net data supports continuity and isolation testing.

What Information May Still Need a Separate Drawing or Note?

ODB++ contains extensive PCB manufacturing data, but it does not necessarily replace fabrication drawings, stackup requirements, BOMs, assembly drawings, or special process notes. These documents explain requirements that may not be included by the exporter or may need a clear written tolerance.

  • Fabrication details: material family, finished thickness, copper weight, surface finish, filled or capped vias, edge plating, and other special processes.
  • Stackup and impedance: dielectric construction, target impedance, tolerance, reference layers, coupon needs, and reporting requirements.
  • Mechanical requirements: critical dimensions and tolerances, bevels, countersinks, scoring, routing quality, and keep-out areas.
  • Panelization: array size, rails, fiducials, tooling holes, breakaway method, coupons, and any restrictions on how the manufacturer may panelize the board.
  • Assembly information: BOM, approved parts, placement data, assembly drawing, variants, polarity notes, programming, inspection, and functional test instructions.

This limitation often depends on the exporter rather than the format alone. Ansys, for example, documents cases in which an imported ODB++ directory lacks material or layer characteristics required for analysis and needs a separate control file. Ask the PCB manufacturer which supporting documents it expects instead of assuming the archive replaces every drawing and note.

Why Can an ODB++ File Fail to Import or Pass CAM Review?

Import failures usually come from incorrect packaging, missing export content, layer mapping errors, or a compatibility difference between tools. Start with the visible symptom, then check the corresponding source setting.

Problem Likely cause What to check
The viewer cannot find a job The archive has an extra wrapper folder or an incomplete directory tree Open the archive and confirm that the matrix and steps folders belong to the same job root
The board opens without layers or an outline Required layers or the board profile were not selected during export Review the layer-selection and outline settings, then export again from the native PCB
Drills or slots appear in the wrong place Units, drill pairs, plating types, or layer mapping do not match Compare tool sizes, units, plated status, and start and stop layers with the source design
Nets are missing The netlist option was disabled or the wrong board step was exported Enable net data, select the correct step, regenerate the package, and confirm that nets appear in the viewer
Stackup or materials are incomplete The exporter did not include the required attributes Check the exported data and provide a separate stackup or material note when needed
One tool opens the job but another rejects it The importer does not support the archive type, format version, or an exported feature Record both software versions and the first error; try the complete uncompressed job if archive support is uncertain

Regenerate the package after correcting the source or export settings. Manually deleting folders or editing coordinates may hide the original problem and create a package that no longer matches the PCB design.

How Should You Control Revisions and Protect ODB++ Data?

Use a clear file name that includes the PCB part number and revision. Keep the ODB++ package, fabrication drawing, stackup, BOM, placement data, and assembly drawing on the same revision. Before sending them, compare the part number and revision on every file. A mismatch can cause the manufacturer to build geometry from one version and assembly data from another.

After a design change, create a new export from the updated source project. Do not place the new drawing beside an old ODB++ package or reuse an old archive with a renamed file. If the manufacturer finds a CAM issue, update the source design where appropriate before generating the next package.

An ODB++ job can reveal copper geometry, connectivity, component positions, and other design details. Send confidential jobs through a transfer method that provides suitable access control, and avoid uploading them to an online viewer unless its data terms fit the project.

FAQs About ODB++ Files

Q1: What is the ODB++ file extension?

A1: The package has no single mandatory extension. It may be an uncompressed job directory or a .tgz, .tar, or .zip archive. Identify it by its job structure and a compatible viewer, not by a generic .odb suffix.

Q2: Is ODB++ free to view?

A2: A free official viewer is available. Siemens describes its ODB++ Viewer as a free solution. Access conditions, platform support, and resource registration can change, so check the current official download page before relying on a particular deployment.

Q3: Can you convert Gerber files to an ODB++ file?

A3: Conversion cannot recreate missing design intelligence. A CAM tool may import Gerber and drill data and export an ODB++ job, but it can only organize the information it received or inferred. It cannot reliably recover original nets, component relationships, stackup intent, or attributes that were never supplied.

Q4: Does an ODB++ file include a BOM and pick-and-place data?

A4: Do not assume it does. ODB++ can carry component and placement-related information, but exporters and assembly workflows differ. Send a matching BOM, placement file, assembly drawing, and variant instructions unless the assembler confirms that the job contains every required field.

Q5: Can a PCB manufacturer build from only an ODB++ file?

A5: Only when the package contains all required manufacturing information. Many jobs still need a fabrication drawing, stackup, material and finish notes, impedance requirements, tolerances, panel instructions, and order quantity.

Q6: Where can you find an ODB++ file example?

A6: Use the official sample. The ODB++Design resource hub provides a current sample package alongside specification resources, which is safer than treating an unknown archive as a format reference.

Q7: How do you open an ODB++ file?

A7: Open the complete archive or root job folder in a compatible viewer. Use a local ODB++ viewer for confidential data, a browser viewer for convenient visual review, or CAM software when manufacturing analysis is required.

Q8: Can Altium Designer, KiCad, and Fusion Electronics export ODB++?

A8: Current versions of all three tools provide ODB++ export options. The menu path and available settings vary by version, so confirm the selected layers, units, netlist, archive type, and ODB++ version before generating the package.

Q9: Why will an ODB++ file not open?

A9: Packaging and compatibility problems are common causes. Check for an extra wrapper folder, an incomplete job tree, an unsupported archive type, or a format version that the receiving viewer cannot import.

Q10: Should you send ODB++ and Gerber files together?

A10: Send both only when the manufacturer requests them. Generate both packages from the same PCB revision and identify which format controls manufacturing so the recipient does not have to resolve conflicting data.

How Do You Prepare a Reliable ODB++ Handoff?

ODB++ is most useful when you want to give a PCB manufacturer one structured package with geometry, layer, drill, net, and component context. Export it from the native PCB design, review the result in a separate viewer, and make sure the package opens with the correct outline, layers, holes, and connectivity.

Use the format when your manufacturer supports it and the additional data helps with CAM preparation or assembly. Keep separate drawings and notes for material, stackup, impedance, finish, tolerances, panelization, and assembly requirements that the package does not clearly contain. Above all, make sure every file belongs to the same PCB revision.

Before production, compare the ODB++ package with the source design and use a practical PCB design for manufacturability checklist to confirm the remaining build details. For a project-specific CAM and manufacturing review, send the ODB++ file and its matching documents to EBest Circuit at sales@bestpcbs.com.

You may also like

PCB Design for Manufacturability Before PCB Production
Monday, July 20th, 2026
PCB design for manufacturability DFM review before PCB production

PCB design for manufacturability means checking whether a board can be fabricated, assembled, inspected and repeated before production files are released. A useful DFM review does not only look for design-rule errors. It checks whether the stackup, trace spacing, drill sizes, annular rings, copper balance, solder mask, component clearance, panelization and test access all fit the intended PCB manufacturing and PCBA process.

For buyers, DFM is a cost and schedule control step. It helps prevent a design from moving into prototype or production with hidden fabrication risk, missing files, assembly clearance problems or quote assumptions that later change the delivery plan.

Before releasing PCB files, make sure the design is ready for the way it will actually be built.

Engineering and purchasing teams often run into avoidable delays when a design is quoted before the manufacturing package is complete.

  • The Gerber set looks complete, but drill files, stackup notes, controlled impedance or fabrication drawings are missing.
  • Trace width, spacing, via drill, annular ring or copper-to-edge clearance fit the CAD rules but not the selected supplier’s process window.
  • Assembly files arrive after the bare-board quote, so BOM/CPL errors and component clearance issues are found late.
  • Panelization, fiducials, tooling rails or test access are not considered until the build is already scheduled.
  • A prototype passes once, but the same files are not stable enough for low volume or repeat production.

EBest Circuit reviews PCB design files with fabrication, assembly and quotation readiness in one workflow.

  • We review Gerber, ODB++, NC drill, stackup, fabrication drawings, material notes, surface finish and quantity before quote confirmation.
  • For assembled boards, we check BOM, CPL, polarity notes, assembly drawings, placement risk and test expectations with the PCB manufacturing scope.
  • We help buyers identify manufacturability issues early so the quotation reflects the real build, not a simplified version of the project.
  • We support prototype, low-volume and repeat production planning when the same design must move beyond first samples.

PCB Design for Manufacturability in One Practical Answer

PCB design for manufacturability is the review process that turns a PCB layout into a buildable production package. It checks whether the board geometry, stackup, material, drill map, copper features, solder mask, silkscreen, panelization and assembly data can move through manufacturing without avoidable holds.

Why DFM Matters Before PCB Manufacturing

DFM matters because most PCB delays are cheaper to fix before files enter production. A small clearance adjustment, stackup clarification or BOM correction can prevent re-quotes, production holds, late component surprises and repeat sample builds.

If your design is moving from layout to build planning, the PCB design and manufacturing DFM workflow is a useful companion for organizing files before supplier review.

File Package Buyers Should Prepare

A DFM-ready RFQ package should include the files needed to quote, fabricate, assemble and inspect the board. For bare boards, send Gerber or ODB++, NC drill, stackup, fabrication drawing, material, copper weight, surface finish, board thickness, quantity and acceptance notes.

For PCBA, also send the BOM, CPL, assembly drawing, polarity notes, test instructions, programming needs and any packaging or labeling requirements. For fabrication scope review, see EBest Circuit’s PCB manufacturing capabilities.

Trace, Space, Hole and Annular Ring Checks

The first technical DFM check is whether copper features fit the intended process window. Review minimum trace width, trace spacing, via drill, annular ring, hole-to-copper clearance, copper-to-board-edge clearance, solder mask dams and copper balance.

DFM Area What to Check Why It Matters
Trace and spacing Minimum copper width, gap and high-density areas Prevents etching, shorting and yield risk
Drill and via Drill size, aspect ratio, annular ring and tolerance Controls plating reliability and registration risk
Board edge Copper, slots, castellations and routing clearance Prevents exposed copper and mechanical damage
Solder mask Mask bridge, expansion and exposed pads Supports solderability and assembly yield

Stackup, Copper and Material Checks

Stackup review confirms whether layer count, dielectric thickness, copper weight and material selection match the electrical and manufacturing goal. Controlled impedance, high-speed routing, thermal behavior and high-current areas all depend on stackup clarity before the quote is approved.

Solder Mask, Silkscreen and Board Outline Checks

Mask, marking and outline details should be checked because they affect assembly, inspection and mechanical fit. Review solder mask expansion, mask slivers, exposed copper, component polarity marks, silkscreen over pads, board slots, cutouts, V-cut lines and routed edges.

Assembly Clearance and PCBA DFM Checks

PCBA DFM checks make sure the board can be assembled, inspected and tested after fabrication. Review component spacing, connector overhang, tall components, fiducials, tooling rails, stencil needs, polarity, thermal relief, keep-out areas and access for AOI, X-ray or functional test.

For turnkey builds, EBest Circuit’s PCBA and SMT assembly support can align BOM/CPL review with PCB manufacturing instead of treating assembly as a separate late-stage problem.

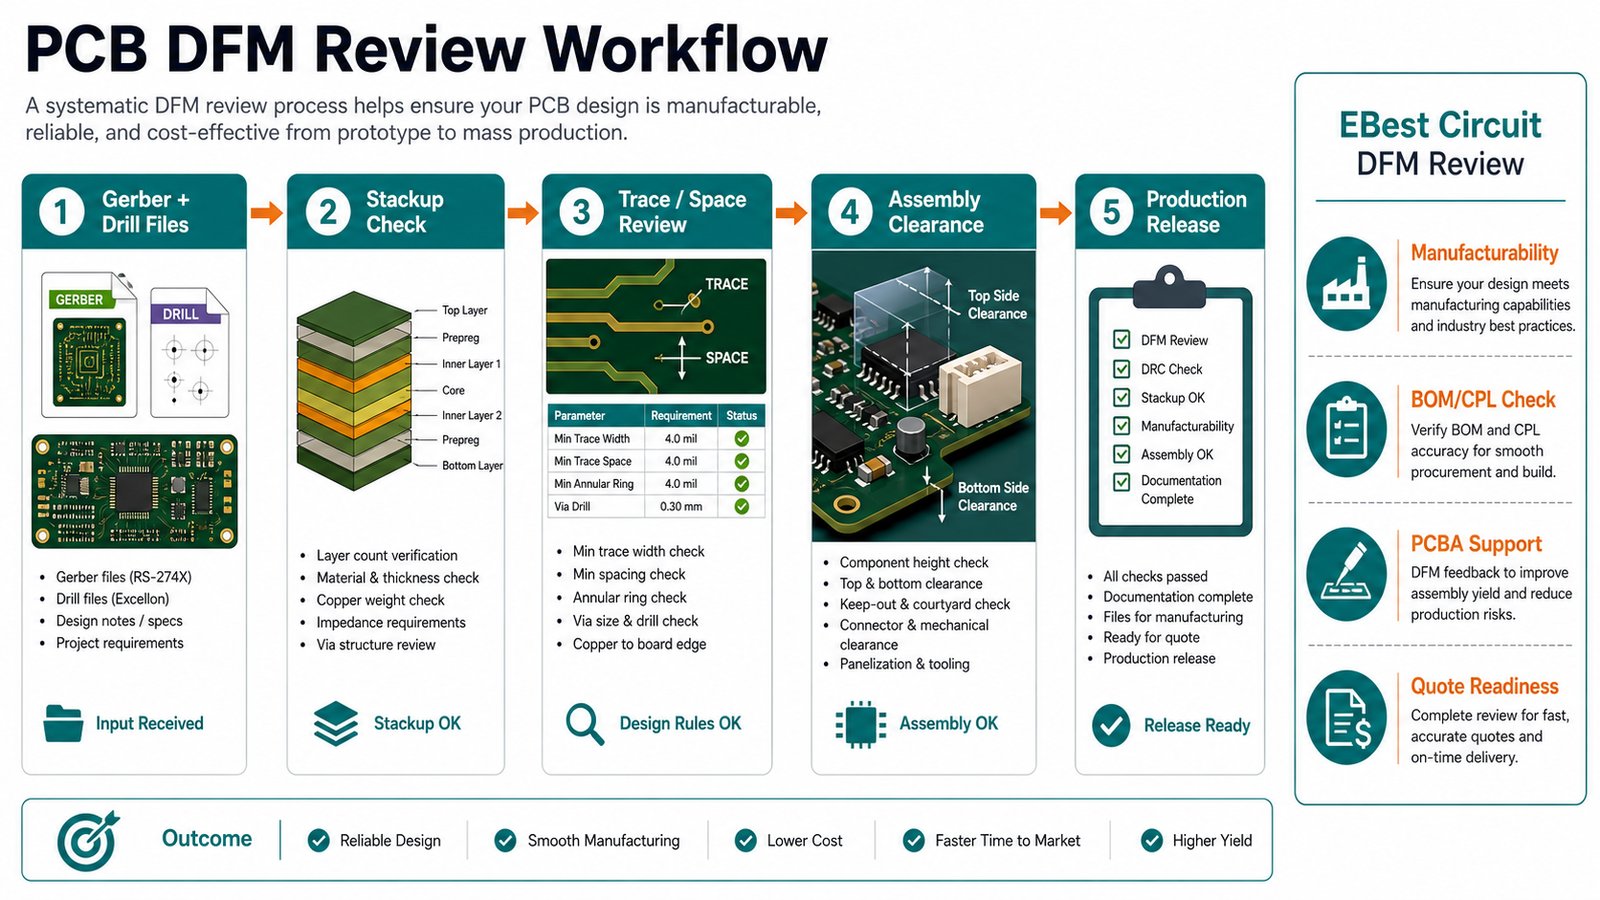
PCB DFM review workflow for Gerber drill stackup trace space assembly clearance and production release

Testing, Panelization and Production Release

DFM is not complete until the supplier knows how the board will be panelized, inspected and released. Check electrical test, impedance test when required, AOI, X-ray for hidden solder joints, functional test access, fiducials, tooling holes, rails, breakaway tabs and packaging needs.

EBest Circuit DFM Review Workflow

EBest Circuit uses DFM review to connect engineering files with manufacturing cost, lead time and quality planning. The review starts with file completeness, then moves through stackup, copper features, material, finish, assembly data, inspection needs and quotation scope.

For early builds, the prototype PCB manufacturing RFQ guide explains how to package files before first samples. For small batch planning, use the low volume PCB manufacturing guide to plan repeatability after the prototype stage.

DFM Checklist Before You Request a Quote

Use a DFM checklist before RFQ so the first supplier response is based on complete, buildable information.

  • Gerber or ODB++ files match the intended revision.
  • NC drill, stackup and fabrication drawing are included.
  • Material, board thickness, copper weight and surface finish are clear.
  • Minimum trace, spacing, via, slot and annular ring values are known.
  • Controlled impedance, high-current or thermal requirements are marked.
  • BOM, CPL and assembly notes are ready if PCBA is included.
  • Testing, packaging, labeling and target delivery needs are defined.

Common PCB DFM Mistakes

The most common DFM mistake is assuming that passing CAD rules means the board is ready for production. CAD rules may not reflect the selected supplier, material, assembly process, inspection method or quantity plan.

Mistake Production Risk Better Action
Missing stackup notes Wrong thickness, impedance or material assumption Confirm stackup before quote approval
Late BOM/CPL files Assembly risk found after board quote Send PCBA files with the RFQ
No panelization plan Assembly handling and cost changes later Ask supplier to review rails and fiducials
Only comparing price Cheap quote may exclude review, testing or repeatability Compare DFM scope and build support

PCB Design for Manufacturability FAQ

What does PCB design for manufacturability mean?
It means reviewing a PCB layout and file package against real fabrication, assembly, testing and production requirements before the board is released for manufacture.

What files are needed for a PCB DFM review?
Send Gerber or ODB++, NC drill, stackup, fabrication drawing, material notes, surface finish, quantity and test requirements. For assembly, also send BOM, CPL and assembly drawings.

Is DFM only needed for complex PCBs?
No. Simple two-layer boards can still have drill, spacing, solder mask, silkscreen, panelization or assembly issues. DFM is most useful before the first build and before repeat production.

Can EBest Circuit review PCB and PCBA files together?
Yes. EBest Circuit can review PCB fabrication files together with BOM, CPL, assembly notes and test expectations when the project includes PCBA.

Final RFQ Recommendation

Do the DFM review before the quote is treated as final. A complete review gives the buyer a clearer cost, lead time, manufacturing path and assembly risk picture before production starts.

Send your Gerber or ODB++, NC drill, stackup, fabrication drawing, BOM, CPL, quantity, material, surface finish, testing requirements and target delivery plan to sales@bestpcbs.com. EBest Circuit can review your PCB design for manufacturability and provide a practical quotation path for PCB fabrication, PCBA and production planning.

You may also like

PCB Design and Manufacturing for Build-Ready Boards
Monday, July 20th, 2026
PCB design and manufacturing from layout review to circuit board production

PCB design and manufacturing should be planned as one workflow, not two separate jobs. A board layout that looks complete in CAD can still fail manufacturing review if the stackup, copper, spacing, drill, solder mask, panelization, assembly access or test points are not checked before release.

For buyers and engineers, the safest path is simple: design the circuit, review the board for manufacturability, export complete files, then quote fabrication and assembly with the same technical assumptions. EBest Circuit helps customers connect DFM review, bare board production and optional PCBA so fewer problems move from design files into production.

Is your PCB design ready for manufacturing, or only ready for export?

Many projects reach RFQ stage with files that look finished but still hide production risk:

  • Trace spacing, drill size or annular ring is too aggressive for the selected copper weight.
  • The stackup does not match the requested material, board thickness or impedance target.
  • Silkscreen, solder mask openings or component courtyards create assembly problems.
  • Panelization, fiducials and test points are missing, so manufacturing and assembly teams must guess.
  • The supplier quotes only the bare board while BOM, CPL and testing needs are handled too late.

EBest Circuit reviews design files through a manufacturing and assembly lens.

  • We check Gerber, drill, drawing, stackup, copper, solder mask and surface finish before production release.
  • We flag manufacturability risks that can affect fabrication, SMT assembly, through-hole assembly or testing.
  • We support FR4, HDI, heavy copper, metal core, ceramic, flex and rigid-flex project discussions when files require more than standard review.
  • We can quote bare boards and PCBA together when the project needs BOM, CPL and assembly drawing review.

PCB Design and Manufacturing in One Practical Answer

PCB design defines the circuit layout, while PCB manufacturing turns that layout into a physical board; the two must be checked together through DFM review. Good design-for-manufacturing work reduces redesign, quote changes, production delay and assembly risk.

Why Design Files Fail at Manufacturing Stage

Design files usually fail because electrical layout choices were not checked against real fabrication limits. Common examples include too-small vias, narrow solder mask bridges, copper imbalance, unclear board outline, missing drill tables and incomplete fabrication notes.

A useful RFQ package tells the manufacturer not only what the circuit is, but how it should be built, finished, inspected and assembled.

DFM Review Before PCB Manufacturing

DFM review checks whether a PCB layout can be built reliably before CAM work and production begin. It should cover stackup, material, copper, minimum trace and space, hole type, annular ring, solder mask, silkscreen, outline, panelization and test access.

For related manufacturing planning, see our PCB manufacturing and assembly guide.

Stackup, Material and Copper Decisions

Stackup, laminate and copper should be locked before the buyer compares prices. FR4 material may use low Tg, mid Tg or high Tg options, while special projects may need Rogers, PTFE, ceramic, aluminum or other materials. Copper weight affects spacing, heat rise, plating, etching and cost.

For FR4 project context, see the FR4 PCB capability page.

Layout Checks That Protect Fabrication

The most important fabrication checks are trace width, spacing, drill size, annular ring, copper-to-edge clearance and solder mask bridge. These details decide whether the board can be built as standard or needs special confirmation.

Design Item Manufacturing Risk Buyer Action
Trace / spacing Etching or solder bridge risk Match rules to copper weight
Drill / pad Weak plated hole or breakout Check finished hole and annular ring
Board outline Routing, V-cut or enclosure fit issue Send mechanical drawing
Solder mask Assembly yield risk Review openings and bridges
Panelization Cost and handling changes Confirm rail, fiducial and breakaway needs

Need a DFM check before PCB manufacturing?

Send Gerber, drill, stackup, drawing, quantity and assembly notes. EBest Circuit can review the files before quote and production release.

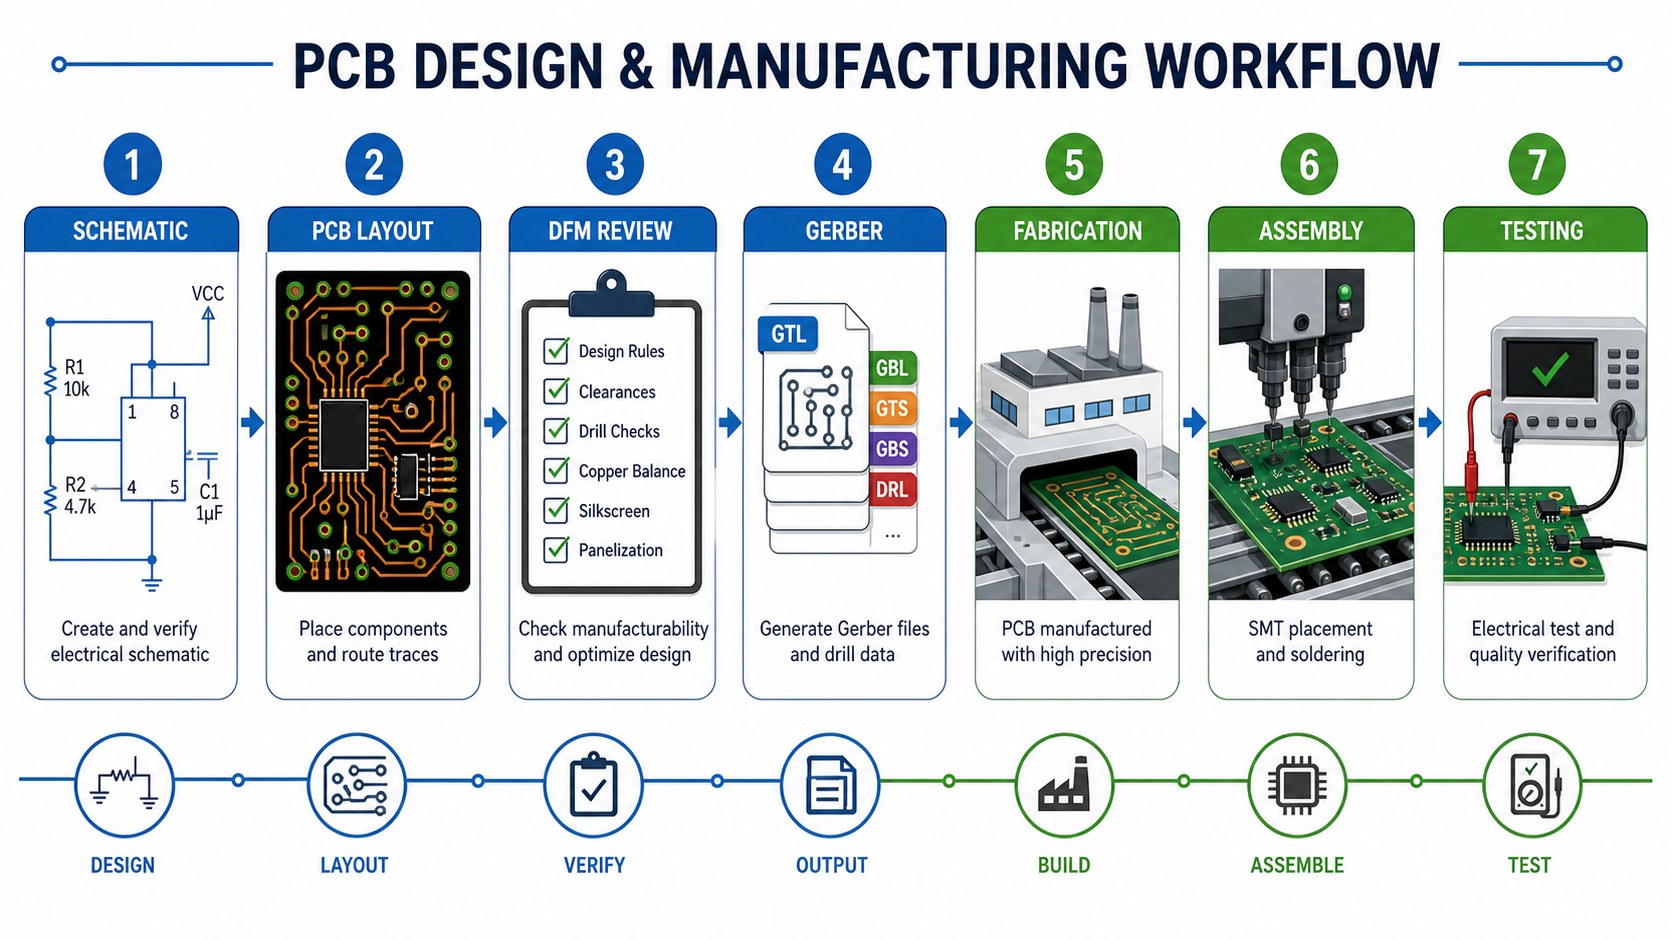
PCB design and manufacturing workflow from schematic and layout to fabrication assembly and testing
A practical PCB workflow connects schematic, layout, DFM, Gerber files, fabrication, assembly and testing.

Gerber, Drill, Drawing and BOM Package

A complete file package reduces quote changes and manufacturing questions. For bare boards, send Gerber or ODB++, NC drill, drawing, stackup, material, copper, finish, quantity and test requirements. For assembly, add BOM, CPL, assembly drawing and approved substitutions.

PCB Fabrication Process After Design Release

After release, fabrication moves through CAM review, material preparation, imaging, drilling, plating, etching, solder mask, surface finish, profiling, inspection and electrical test. The cleaner the design package is, the fewer decisions need to be corrected during CAM.

For bare board sourcing details, see our bare PCB manufacturer RFQ guide.

Assembly Planning During PCB Design

Assembly planning should start during layout, not after bare boards arrive. Component spacing, polarity marks, fiducials, test pads, panel rails and connector orientation all affect SMT and through-hole production.

If your project needs turnkey support, EBest Circuit can review fabrication data together with BOM and CPL. See our PCBA service.

Testing and Quality Checks

Testing confirms whether the design intent survived manufacturing and assembly. Bare boards may need electrical test for opens and shorts. Assemblies may need AOI, functional testing, programming, inspection reports or project-specific test fixtures.

Cost Drivers From Design to Manufacturing

Cost is shaped by design choices before the RFQ is sent. Layer count, board size, material, copper weight, surface finish, drill count, tolerance, impedance, solder mask, test method, assembly complexity and quantity all affect the final quote.

When to Move From Two Layers to Multilayer

Move to multilayer PCB when routing density, signal return, power integrity or impedance control cannot be handled safely on one or two copper layers. Staying with too few layers can create more cost through redesign and debugging than the stackup saves.

Supplier Questions Before Sending the Order

Ask questions that reveal whether the supplier can connect design review with real production.

  • Can you review DFM before formal production release?
  • Which design rules change with copper weight and surface finish?
  • Can you quote bare PCB and PCBA from the same file package?
  • What files are missing for a reliable manufacturing quote?
  • Will you flag assembly and testing risks before boards are built?

RFQ Checklist for PCB Design and Manufacturing

The RFQ should include enough information for engineering review, not only price calculation.

  • Gerber or ODB++ files
  • NC drill file and fabrication drawing
  • Stackup, material, board thickness and copper weight
  • Surface finish, solder mask and silkscreen notes
  • Quantity, target schedule and testing requirements
  • BOM, CPL and assembly drawing if PCBA is needed

FAQ About PCB Design and Manufacturing

These questions help buyers connect layout decisions with manufacturing results.

What is PCB design and manufacturing?

PCB design creates the circuit layout, and PCB manufacturing fabricates that design into a physical board through material preparation, drilling, plating, etching, solder mask, finish and test.

Why is DFM important before PCB manufacturing?

DFM review finds layout and file issues before production, reducing redesign, delay, quote changes and assembly risk.

Can EBest Circuit review my PCB design before quote?

Yes. Send Gerber, drill, drawing, stackup and project notes, and EBest Circuit can review the file package before preparing the manufacturing scope.

Can PCB design and assembly be reviewed together?

Yes. When PCBA is required, send BOM, CPL and assembly drawings with the PCB files so fabrication and assembly risks can be checked together.

Final Recommendation

Treat PCB design and manufacturing as one connected engineering path. The best time to control cost, schedule and quality is before files enter production, when DFM, material, copper, drill, finish, assembly and testing can still be aligned.

To review a PCB design and manufacturing project with EBest Circuit, send Gerber or ODB++, NC drill, fabrication drawing, stackup, material, copper, finish, quantity, target schedule and any BOM/CPL files to sales@bestpcbs.com. Our team will check manufacturability and prepare a practical quote scope.

You may also like

PCB Design and Manufacturing Guide for Buyers
Wednesday, July 15th, 2026
PCB design and manufacturing guide with layout review and factory inspection

PCB design and manufacturing is the connected process of turning an electronic circuit idea into a manufacturable printed circuit board through schematic design, PCB layout, DFM review, fabrication, assembly and testing. A design is not truly finished until the manufacturer can build it with clear files, tolerances, materials and inspection requirements.

This guide is written for engineers, founders and buyers who need to move from design intent to a real PCB order. It follows the current search intent: definitions, design basics, manufacturing process, DFM mistakes, file preparation and RFQ handoff.

PCB Design and Manufacturing at a Glance

The best PCB projects connect design decisions with manufacturing constraints before files are released. Layout choices such as trace width, spacing, stackup, drill size, component placement and test access directly affect cost, yield and lead time.
Stage Main output Manufacturing risk to control
Schematic Circuit connectivity, power tree and interfaces Missing design rules or test points.
Layout Board outline, routing, planes and footprints Clearance, assembly fit and signal integrity problems.
DFM review Manufacturing comments and corrections Unbuildable traces, holes, mask or panelization.
Fabrication Bare PCB built from Gerber or ODB++ data Wrong material, finish, thickness or drill assumptions.
Assembly Components mounted and inspected BOM, CPL, polarity and component sourcing errors.

Is Your PCB Design Ready for Manufacturing Review?

PCB design and manufacturing problems often start before fabrication, when layout, footprints, BOM and test access are not checked together.

Customer Pain Point Project Risk How bestpcbs Helps
Footprints or connector pinouts are wrong The board may need a full redesign after the first build bestpcbs encourages buyers to send complete fabrication and assembly files for DFM review before release.
Design rules do not match manufacturing constraints Spacing, drill, annular ring or copper choices may cause delays bestpcbs reviews Gerber or ODB++ files, drill data, copper and outline details during RFQ preparation.
Assembly and fabrication are reviewed separately A board may fabricate correctly but create soldering or inspection problems bestpcbs checks BOM, CPL and assembly notes together with board files when PCBA is required.

Testing access is planned too late Debug and production checks become harder after layout is fixed bestpcbs asks for test requirements and application constraints before production planning.

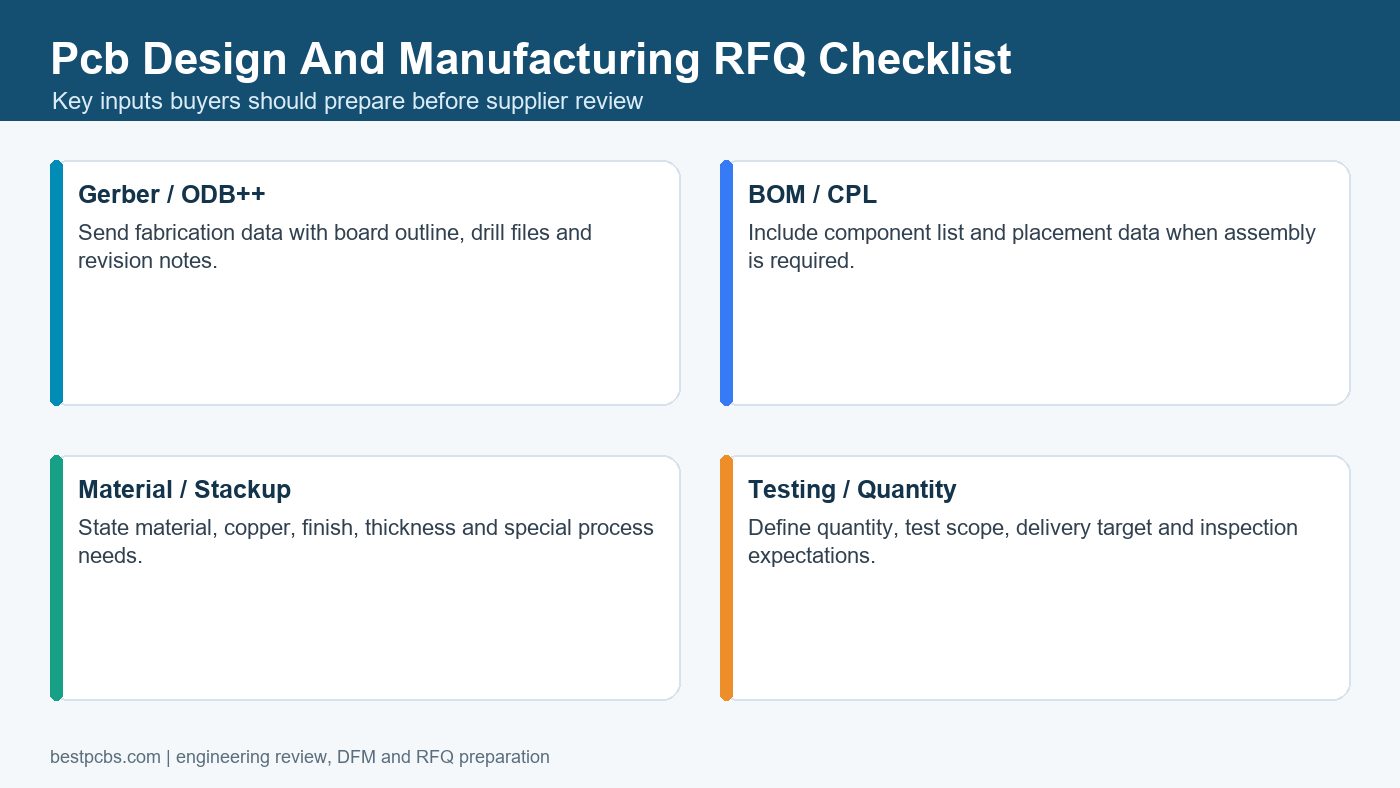
pcb design and manufacturing RFQ checklist for supplier review
pcb design and manufacturing RFQ checklist for supplier review.
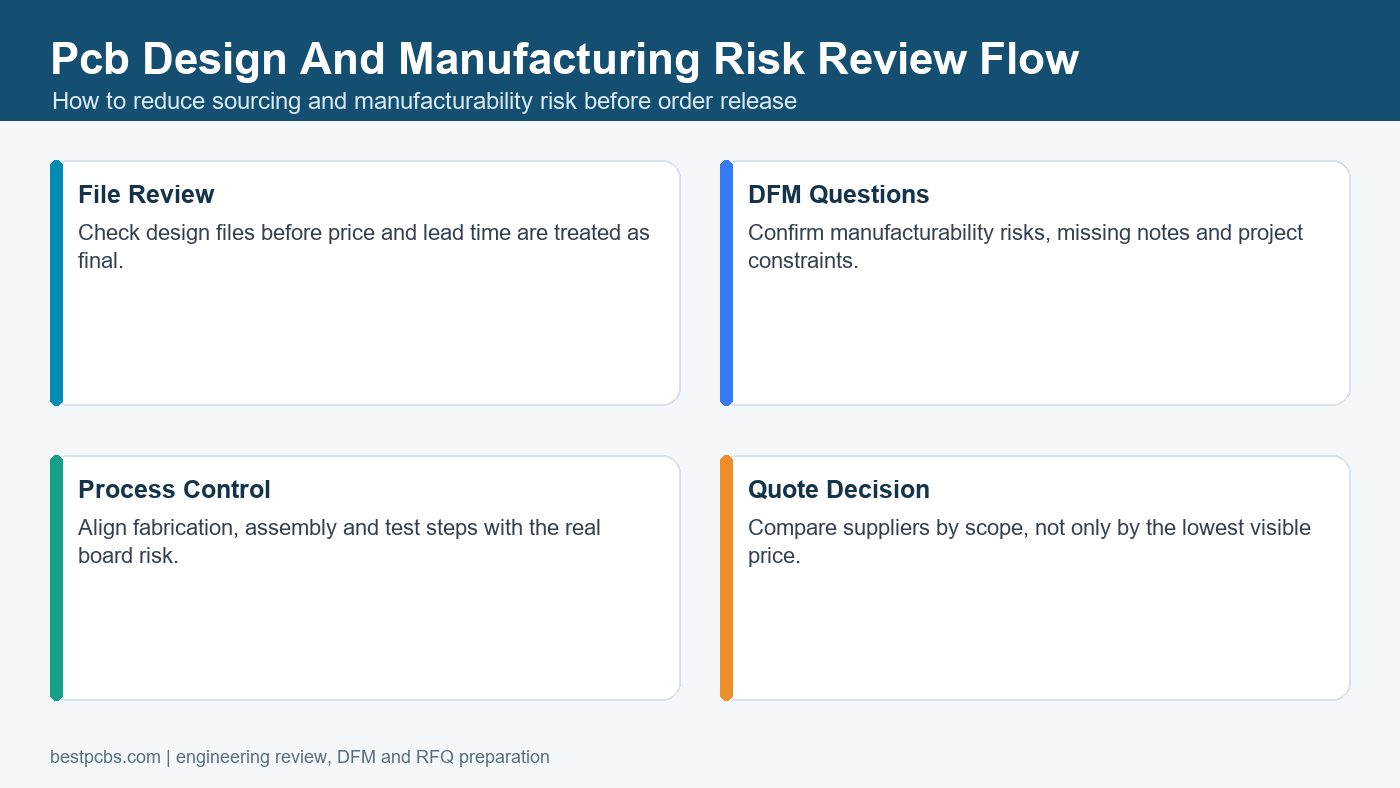
pcb design and manufacturing risk review flow before production
pcb design and manufacturing risk review flow before production.

What Is PCB Design and Manufacturing?

PCB design and manufacturing means designing the circuit board layout and then fabricating, assembling and testing the board so it can work as a physical product. Design answers what the board should do; manufacturing answers how it will be built reliably.

A complete project usually includes schematic capture, component selection, stackup planning, PCB layout, DFM review, Gerber or ODB++ export, drill files, BOM, CPL, assembly drawings, testing and revision control.

PCB Design and Manufacturing Buyer Priorities

PCB design and manufacturing should be connected before the quote stage, because layout decisions often decide fabrication cost, assembly risk and testing access. A buyer should not wait until production to discover spacing, drill, panelization or BOM conflicts.

Use supplier review to check board outline, stackup, copper, drill data, component placement, thermal constraints, assembly files and test access. This turns design handoff into a controlled manufacturing path instead of a file upload with unknown risks.

PCB Design Inputs Before Layout Starts

Good PCB manufacturing starts before layout, because the designer must know the board size, layer count, interfaces, power, current, signal speed, environment and assembly constraints. Missing inputs create redesign later.

  • Electrical requirements: voltage, current, power and critical signals.
  • Mechanical requirements: outline, mounting holes, connectors and enclosure limits.
  • Manufacturing requirements: layer count, material, copper, finish and minimum features.
  • Assembly requirements: component package, polarity, spacing and access for inspection.
  • Testing requirements: test points, programming access and acceptance criteria.

Layout Decisions That Affect Manufacturing

PCB layout decisions affect whether the board can be fabricated, assembled, inspected and repeated without avoidable defects. A clean schematic can still become a difficult board if layout ignores manufacturing.

Check trace width, spacing, drill size, annular ring, solder mask bridge, copper-to-edge clearance, impedance needs, thermal relief, fiducials, polarity marks and panelization. The PCB design for manufacturability checklist is the most relevant internal guide for this stage.

DFM Review Before PCB Fabrication

DFM review should happen before the PCB order is released because it catches manufacturing problems while they are still cheap to fix. It is the bridge between CAD output and factory reality.

DFM review can flag narrow copper, spacing conflicts, unsuitable drill sizes, missing solder mask clearance, incomplete board outline, unclear stackup and assembly access issues. For supplier selection, compare this with the PCB fabrication manufacturer guide.

PCB Manufacturing Process From Files to Boards

PCB manufacturing turns approved design files into bare boards through material preparation, imaging, etching, lamination if multilayer, drilling, plating, solder mask, silkscreen, surface finish, routing and testing. The exact route changes with board type and complexity.

Designers do not need to run every factory process, but they do need to understand which design choices affect them. Layer count, copper thickness, holes, slots, impedance and surface finish all change the manufacturing path.

PCB Assembly Data and Component Sourcing

PCB assembly requires more than bare-board files: it needs BOM, CPL, assembly drawings, component sourcing rules, polarity notes and inspection requirements. Many design-to-manufacturing delays happen at this handoff.

If you want turnkey PCBA, include PCBA and PCB assembly service requirements in the first quote. If parts need to be sourced, define approved alternates through component sourcing support before the order is committed.

Testing, Inspection and First Article Review

Testing and inspection should match the purpose of the first build: electrical continuity, assembly quality, firmware bring-up, power validation, thermal review or customer sample approval. A board that is not tested for the right question may still fail later.

For bare boards, electrical testing and visual inspection may be enough. For assembled boards, first article review, AOI, polarity checks, power-on checks or functional testing may be required.

Cost Factors in PCB Design and Manufacturing

PCB cost is driven by board size, layer count, material, copper, finish, drill density, feature limits, assembly scope, testing and urgency. Design choices made early often decide the final quote.

Cost driver Design decision behind it How to control it
Layer count Routing density, planes and signal needs Choose the simplest stackup that meets performance.
Material Temperature, signal, thermal and mechanical needs Use special material only when the requirement is real.
Fine features Trace, spacing, drill and BGA escape Review DFM before release.
Assembly BOM, package size, placement density and inspection Provide clean BOM and CPL.

Common Design-to-Manufacturing Mistakes

Common mistakes include treating layout as separate from manufacturing, exporting incomplete files, skipping DFM, delaying assembly data and changing revisions after quoting. These mistakes slow both prototypes and production.

  • Sending Gerbers without drill files or stackup notes.
  • Using footprints that do not match the real components.
  • Forgetting test points, fiducials or polarity markings.
  • Choosing a surface finish without considering assembly and storage.
  • Requesting assembly before BOM and CPL are checked.

How to Prepare an RFQ Package

A good RFQ package lets the manufacturer quote the actual board, not a guessed version of it. This reduces back-and-forth and makes competing quotes easier to compare.

  • Gerber or ODB++ files and drill files.
  • Stackup, material, copper, finish and thickness requirements.
  • Mechanical drawing for outline, slots and mounting holes.
  • BOM, CPL and assembly drawing for PCBA.
  • Testing and inspection requirements.
  • Quantity, revision, target lead time and delivery destination.

Frequently Asked Questions About PCB Design and Manufacturing

What is PCB design and manufacturing?

PCB design and manufacturing is the process of designing a circuit board layout and then fabricating, assembling and testing it as a physical printed circuit board.

Is PCB manufacturing hard?

PCB manufacturing becomes difficult when the design has tight features, unclear files, unusual materials, dense assembly or missing test requirements. Good DFM review reduces that risk.

What files are needed for PCB manufacturing?

At minimum, manufacturers usually need Gerber or ODB++ files, drill files, stackup notes, board specifications and quantity. Assembly requires BOM, CPL and assembly drawings.

Can one supplier handle PCB design review and manufacturing?

Yes, many suppliers can review manufacturability and then fabricate or assemble the board. The key is to send complete design and production files.

Final RFQ Recommendation

Before moving from PCB design to manufacturing, check whether the design files, DFM assumptions, assembly data and testing plan describe the real board you want built. That is the difference between a CAD design and a manufacturable product.

For a PCB design and manufacturing review, send Gerber or ODB++ files, drill files, stackup, material and finish requirements, board drawings, quantity, BOM, CPL, assembly drawings, test requirements and target lead time to sales@bestpcbs.com. Best Technology / bestpcbs can review the package and help plan fabrication, assembly, component sourcing, prototype validation or production release.

You may also like

Multilayer PCB Manufacturing Quality Checklist
Wednesday, July 15th, 2026
Multilayer PCB manufacturing stackup and fabrication review

Multilayer PCB manufacturing builds a circuit board with three or more conductive copper layers bonded into one structure, so stackup, registration, drilling, plating, impedance, and inspection must be planned before production. A multilayer board can solve routing density and signal integrity problems, but it also increases the cost of unclear design data.

This guide gives engineers and buyers a practical checklist for preparing a multilayer PCB RFQ. It focuses on what to confirm before fabrication, how to compare supplier responses, and which details affect quality, cost, and production repeatability.

Multilayer PCB Manufacturing at a Glance

Multilayer PCB manufacturing combines inner-layer imaging, lamination, drilling, plating, outer-layer processing, solder mask, surface finish, routing, inspection, and electrical testing. The process is more sensitive than simple one-layer or two-layer fabrication because the internal copper layers cannot be repaired once the board is laminated.

Area What to confirm Why it matters
Stackup Layer order, dielectric thickness, copper weight, finished thickness Controls impedance, reliability, and manufacturing route.
Drilling and plating Via type, hole size, aspect ratio expectations, annular ring Affects connectivity between layers and fabrication yield.
Testing Electrical test, inspection, impedance coupon or report needs Verifies hidden-layer connectivity and buyer requirements.

When a Multilayer PCB Is the Right Choice

A multilayer PCB is useful when two layers cannot provide enough routing space, controlled impedance, power distribution, EMI control, or compact board size. It is common in industrial controls, communication devices, medical electronics, LED drivers, embedded systems, and power electronics where routing density and electrical behavior matter.

Do not choose more layers only to make layout easier. The extra layers should solve a real design problem: shorter signal paths, cleaner return paths, better power planes, compact size, or manufacturable high-density routing.

Stackup Decisions Before Layout Release

The stackup should be reviewed before layout is frozen because dielectric thickness, copper distribution, and reference planes affect impedance, warpage, and fabrication stability. A finished layout without a realistic stackup can create late changes that affect trace width, spacing, cost, and delivery time.

Send the intended layer count, copper weight, board thickness, impedance targets, reference plane arrangement, and any high-speed or power requirements. If the design is flexible, ask the manufacturer to review a manufacturable stackup before production.

DFM Checks for Multilayer Boards

DFM review for multilayer PCBs should focus on internal layer alignment, drill registration, annular ring, copper balance, lamination behavior, and solder mask details. These checks reduce the chance that a board looks correct in CAD but becomes difficult to fabricate consistently.

Important items include drill-to-copper clearance, via pad size, internal copper clearance, split-plane risk, copper thieving needs, edge-to-copper distance, slot notes, panelization, and whether fabrication drawings match the Gerber or ODB++ data. The PCB design for manufacturability checklist covers the design-side review logic in more detail.

Vias, Drills and Plating Requirements

Via and drill design can decide whether a multilayer PCB is straightforward, risky, or expensive to manufacture. Through vias, blind vias, buried vias, microvias, plated slots, and dense via fields all need different review questions.

Provide a drill table, via type definitions, finished hole requirements, plated and non-plated hole notes, and any filled or plugged via requirements. Avoid assuming that every via structure is standard. If the design uses HDI or special vias, ask for project-specific capability confirmation.

Controlled Impedance and Signal Integrity Notes

Controlled impedance should be treated as a manufacturing requirement with clear values, tolerances, reference layers, and stackup assumptions. If the manufacturer must infer the impedance target from layout alone, the quote may miss important processing and testing needs.

Send impedance values, layer references, trace geometry, dielectric expectations, and whether impedance test coupons or reports are required. Keep the language specific: “controlled impedance required on these nets” is more useful than a vague note that the board is high speed.

Material, Copper and Surface Finish Choices

Material, copper, and surface finish should match the electrical performance, assembly method, operating environment, and cost target of the board. A multilayer PCB may use standard FR-4, high-Tg material, high-frequency material, heavier copper, or other constructions depending on project requirements.

Exact bestpcbs capability limits must be checked against the latest process capability files before a quote. For content and RFQ preparation, the safe rule is to provide material target, Tg needs, copper weight, surface finish, assembly method, thermal exposure, and quantity so the manufacturer can confirm the build route.

Inspection and Testing for Multilayer PCB Quality

Testing is especially important for multilayer boards because many critical features are hidden after lamination. Electrical testing, visual inspection, dimensional checks, solder mask review, and optional impedance verification help confirm that the board matches the order requirements.

Ask which tests are included, which reports are available, and what acceptance criteria apply. If the board will be assembled, coordinate bare-board testing with PCBA requirements through the PCBA and PCB assembly service path.

Cost Drivers in Multilayer PCB Manufacturing

Multilayer PCB cost is affected by layer count, stackup, material, copper, via structure, controlled impedance, surface finish, testing, and quantity. Board size matters, but it is not the only cost driver.

Cost driver Why it matters How to reduce uncertainty
Layer count More layers add imaging, lamination, registration, and testing complexity. Explain why the layer count is needed and send stackup notes.
Via structure Blind, buried, filled, or microvia designs may need special processing. Send a clear drill table and via notes.
Impedance Controlled impedance may require stackup control and verification. Provide target values and test expectations.
Material Special laminates affect sourcing and process route. Provide acceptable alternates if possible.

RFQ Files for a Multilayer PCB Quote

A strong multilayer PCB RFQ should include fabrication data, stackup notes, drill information, material requirements, impedance details, quantity, and testing expectations. Missing stackup or drill notes can turn a quick quote into a long engineering exchange.

  • Gerber or ODB++ files
  • NC drill files and drill table
  • Layer stackup and finished board thickness
  • Material, copper, surface finish, solder mask, and silkscreen notes
  • Controlled impedance values and test report requirements if applicable
  • Quantity, revision, delivery target, packaging, and inspection needs

How to Compare Multilayer PCB Suppliers

Compare suppliers by how well they handle stackup review, DFM questions, capability confirmation, testing, and quote assumptions. A useful supplier response will flag unclear requirements instead of pretending every multilayer board is routine.

Watch for questions about dielectric thickness, impedance, drill limits, special vias, copper balance, surface finish, and assembly impact. If component sourcing or assembly is involved, include BOM and CPL files early; component sourcing support may affect the full PCBA schedule.

Frequently Asked Questions About Multilayer PCB Manufacturing

What is a multilayer PCB?

A multilayer PCB is a printed circuit board with three or more conductive copper layers bonded together with insulating dielectric material. It supports denser routing and better plane structure than a two-layer board.

Why are multilayer PCBs more expensive?

They require more process steps, stackup control, lamination, registration, drilling, plating, inspection, and testing. Special materials, impedance, or via structures can increase cost further.

What files are needed for a multilayer PCB quote?

Send Gerber or ODB++, drill files, stackup, material, copper, finish, impedance targets, quantity, revision, inspection needs, and delivery target.

Can multilayer PCBs be assembled by the same supplier?

Yes, if the supplier supports PCBA. Coordinating fabrication and assembly can reduce handoff risk when stackup, BOM, CPL, inspection, and test requirements affect each other.

Final RFQ Recommendation

Before ordering a multilayer PCB, confirm the stackup, via structure, material, impedance, and test requirements instead of treating the board like a simple Gerber upload. The more hidden layers the board has, the more valuable early engineering review becomes.

For a multilayer PCB manufacturing review or quotation, send your Gerber or ODB++ files, drill table, stackup, material target, copper weight, surface finish, quantity, impedance notes, test requirements, and target lead time to sales@bestpcbs.com. The Best Technology / bestpcbs team can review the manufacturing path and confirm what needs project-specific checking before production.

You may also like

PCB Design for Manufacturability Checklist Before Fabrication
Wednesday, July 15th, 2026

PCB design for manufacturability means checking a PCB layout against real fabrication and assembly constraints before the files are released for build. A useful DFM review catches file gaps, layout risks, material questions, assembly conflicts, and test problems early, when they are still easy to fix.

Use DFM before sending Gerber or ODB++ files for quotation, not after the first production problem appears. The goal is simple: help the board move from CAD data to PCB fabrication and PCBA with fewer engineering questions, fewer price changes, and fewer avoidable delays.

PCB design for manufacturability checklist with PCB layout Gerber review and inspection tools
PCB DFM works best when layout, stackup, drill, solder mask, assembly, and test details are reviewed before the files are released to manufacturing.

What PCB Design for Manufacturability Means

PCB design for manufacturability is the practice of designing a circuit board so it can be fabricated, assembled, inspected, and tested reliably by the chosen manufacturing process.

DFM is not only a software report. It is a practical engineering check between design intent and factory reality. The same schematic can be routed in a way that is easy to build or in a way that creates tight spacing, unclear drill data, soldering problems, poor test access, or repeated questions during quotation.

For buyers, DFM is a risk-control step. It helps decide whether the current file package is ready for a quote, prototype, pilot run, or production release. If the project also includes assembly, read DFM together with the PCB manufacturing and assembly guide so bare-board and PCBA risks are reviewed together.

When to Run a DFM Review

Run a DFM review before quotation, before prototype release, before production release, and whenever the board changes material, layer count, package density, or assembly method.

The best time is after layout is mature enough to export manufacturing data, but before purchase orders, panel plans, component commitments, or production schedules become fixed. At that point, the team can still adjust traces, vias, mask openings, component spacing, test pads, or drawings without turning every change into schedule pressure.

Project stage DFM focus Why it matters
Early prototype File completeness, obvious layout errors, package fit Prevents first-build rework and missing-file delays
Pilot build Repeatability, assembly access, test coverage Finds issues before the design is treated as stable
Production Yield risk, sourcing consistency, inspection method Reduces hidden cost and schedule surprises

Gerber, ODB++, Drill and Drawing Checks

The first DFM gate is file completeness, because unclear manufacturing data creates quote delays before anyone can evaluate the real board.

  • Confirm that all copper, solder mask, paste, silkscreen, outline, drill, and mechanical layers are exported.
  • Check whether the Gerber or ODB++ package matches the fabrication drawing and revision name.
  • Verify NC drill files, plated and non-plated holes, slots, cutouts, countersinks, and controlled-depth notes.
  • Remove old notes from previous revisions so the supplier does not quote against conflicting requirements.
  • Include a clear drawing when board outline, tolerances, impedance, panelization, or special processes matter.

If the same supplier will build and assemble the board, include BOM and CPL data early instead of sending bare-board files first and assembly files later.

Board Outline, Stackup and Material Checks

Board outline, stackup, thickness, material, copper, and impedance notes should be checked before release because they affect both manufacturability and quotation accuracy.

A design that looks correct in CAD may still create manufacturing questions if the outline is not closed, slots are not clearly defined, the stackup is missing, or the material is stated too loosely. For FR4, high Tg, RF, HDI, metal core, ceramic, flex, or rigid-flex work, the selected material route should be confirmed with the manufacturer instead of assumed from a generic rule.

For material-family context, BestPCBs product pages such as FR4 printed circuit boards and HDI PCB can be useful internal references, but exact limits should still be confirmed against the live project files.

Trace, Spacing, Via and Annular Ring Checks

Trace, spacing, via, drill, and annular ring rules should be checked against the intended process route, not copied from a generic internet table.

The safe rule is to design with margin. Very tight features may be possible on one process route and poor value on another. Before release, check whether the smallest trace, smallest gap, via type, drill-to-copper clearance, via-to-pad relationship, and board-edge clearance are appropriate for the supplier and the build quantity.

Item to check What can go wrong DFM action
Fine traces and spacing Yield loss, etching variation, re-quote Confirm rules before layout release
Small drills and vias Fabrication route changes or reliability questions Check drill table and annular ring margin
Vias near pads Solder wicking or assembly defects Review via-in-pad, tenting, filling, or spacing plan
Copper near board edge Routing damage or exposed copper Keep edge clearance consistent with the fabrication route

Copper, Solder Mask, Silkscreen and Surface Finish Checks

Copper weight, solder mask clearance, silkscreen placement, and surface finish should be checked together because they affect fabrication quality and assembly reliability.

DFM review should catch mask slivers, exposed copper, legend on pads, unclear polarity marks, and surface finish choices that do not match the assembly or storage requirement. The right finish depends on solderability, shelf life, pad design, component type, and project use, so it should be specified clearly in the RFQ instead of left as an assumption.

If cost is part of the decision, use the custom PCB cost guide together with the DFM checklist. Cost changes often come from the same details that make a design harder to build.

PCB Assembly DFM Checks

Assembly DFM checks whether the board can be populated, soldered, inspected, repaired, and tested without avoidable process risk.

For PCBA, bare-board manufacturability is only half of the review. Component footprint accuracy, part rotation, polarity marks, spacing around connectors, thermal relief, paste openings, BGA escape routing, tall-part clearance, and panel handling all matter. A board can pass fabrication review and still create assembly trouble.

  • Match BOM manufacturer part numbers to footprints and package data.
  • Check CPL or pick-and-place coordinates, rotation, side, and reference designators.
  • Make polarity, pin 1, connector direction, and LED orientation visible and unambiguous.
  • Review component spacing for soldering, inspection, rework, and enclosure fit.
  • Confirm whether special parts require hand soldering, selective soldering, fixtures, or extra inspection.

When the build includes assembly, the PCBA and PCB assembly service page is the natural service reference.

Test Point, Inspection and Quality Planning

DFM should include test and inspection planning because boards that cannot be inspected or tested efficiently carry higher production risk.

Ask how the board will be checked after fabrication and after assembly. Bare boards may need electrical testing. Assembled boards may need AOI, X-ray for hidden joints, functional test, fixture access, programming, or visual inspection. Test points should be accessible, labeled where needed, and compatible with the intended fixture or manual test method.

For capability context, the PCB test equipment page can support discussions about inspection and test expectations.

Cost and Lead-Time Risks Found by DFM

DFM often reduces cost and lead-time risk by finding manufacturability issues before they force a re-quote, redesign, material change, or assembly hold.

DFM issue Likely business impact How to reduce it
Missing drill or drawing data Quote delay Send complete manufacturing files first
Tight process features Higher cost or different route Confirm limits before final routing
BOM or CPL mismatch Assembly hold Review BOM, CPL, polarity, and footprint data together
Unclear testing need Late cost addition State electrical, AOI, X-ray, functional, or fixture needs early

DFM Checklist Before Releasing Files

A practical PCB DFM checklist should cover fabrication data, mechanical intent, assembly data, test requirements, and quotation scope before files are sent.

  • Gerber or ODB++ package includes every required layer and matches the revision.
  • NC drill, slots, plated/non-plated holes, cutouts, and board outline are clear.
  • Stackup, thickness, material, copper, impedance, finish, mask, and legend requirements are stated.
  • Smallest trace, spacing, drill, annular ring, and edge clearance are reasonable for the intended process route.
  • BOM, CPL, assembly drawing, polarity notes, approved substitutes, and special handling notes are complete.
  • Test requirements, inspection expectations, delivery target, quantity, and packaging needs are stated.

What to Send for a PCB DFM Review

For a useful PCB DFM review, send the same package you expect the manufacturer to quote and build, not only a screenshot or incomplete Gerber export.

For bare PCB fabrication, send Gerber or ODB++, NC drill, fabrication drawing, stackup, material preference, copper, finish, tolerance notes, quantity, and target delivery. For assembly, add BOM, CPL, assembly drawing, polarity notes, component alternatives, programming needs, and test plan.

If component sourcing is included, make sourcing expectations explicit. The component sourcing service page is a useful reference when the DFM review also needs BOM availability and substitute approval.

How to Work With a PCB Manufacturer on DFM Feedback

DFM feedback is most useful when the buyer and manufacturer agree which issues are mandatory fixes, which are recommendations, and which are acceptable project risks.

Do not treat every DFM comment as criticism of the design. Some comments protect yield, some clarify quotation scope, and some prevent assembly mistakes. Ask for the reason behind each major issue, then update the CAD source, exported files, fabrication drawing, BOM, or CPL so the approved change is visible in the next release package.

If your project is an early engineering build, the prototype PCB assembly page gives more context for prototype and small-batch review.

Common PCB DFM Mistakes

Common PCB DFM mistakes include incomplete files, unclear drawings, tight layout features without process confirmation, poor assembly markings, and missing test access.

Mistake Why it matters Better practice
Only Gerbers are sent for PCBA Assembly scope cannot be reviewed Send BOM, CPL, assembly drawing, and test notes
Old notes stay on drawings Supplier may quote the wrong requirement Clean revision notes before release
Polarity is unclear Assembly error risk increases Mark pin 1, diode, LED, capacitor, and connector orientation clearly
No test strategy is stated Late inspection or fixture cost may appear Define electrical, AOI, X-ray, or functional test needs early

Frequently Asked Questions About PCB Design for Manufacturability

What is PCB design for manufacturability?

PCB design for manufacturability is the process of checking a board layout, files, materials, assembly data, and test requirements against the way the board will actually be fabricated and assembled.

Is DFM only needed for complex PCBs?

No. Complex HDI, RF, flex, rigid-flex, or dense PCBA projects need deeper DFM, but even simple boards benefit from checking files, drill data, outline, polarity, and test requirements before quotation.

Can DFM reduce PCB cost?

DFM can reduce avoidable cost by finding problems that would otherwise cause re-quotes, fabrication questions, assembly holds, rework, or special process changes. It does not guarantee the lowest price; it helps make the quote more realistic.

What is the difference between DFM and DFA?

DFM focuses on whether the PCB can be manufactured reliably. DFA, or design for assembly, focuses on whether components can be mounted, soldered, inspected, and tested efficiently. PCBA projects need both.

Final Recommendation Before PCB Release

Before releasing a PCB for build, run one final DFM pass on the manufacturing files, assembly files, test requirements, and quotation assumptions.

If you want BestPCBs to review your design before fabrication or assembly, send Gerber or ODB++ files, NC drill files, stackup, fabrication drawing, BOM, CPL, quantity, material, surface finish, testing requirements, and target lead time through the contact page or email sales@bestpcbs.com. The clearer the file package is, the faster the team can confirm manufacturability, assembly scope, sourcing risks, and quotation details.

You may also like