PCB manufacturing PCB manufacturing
Home > Blog

Alumina Board for Electronics: Properties, Uses, and Buying Guide

June 1st, 2026

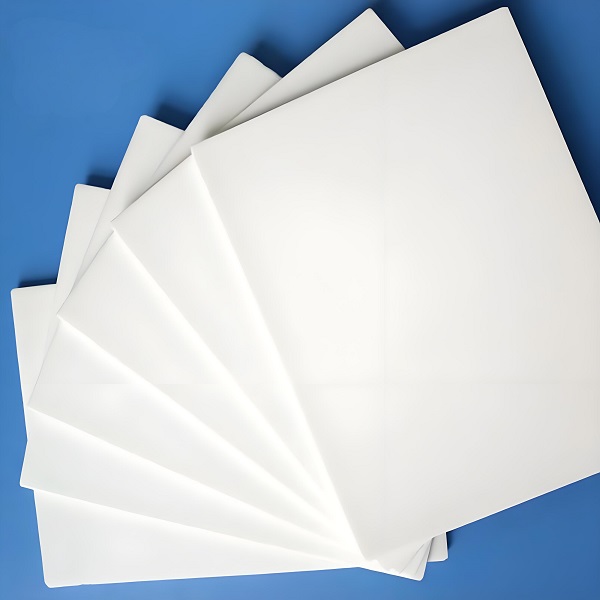
Alumina board is a ceramic substrate made from aluminum oxide, widely used when a circuit or structural part needs electrical insulation, heat transfer, dimensional stability, and long service life.

In electronics manufacturing, it is often selected for ceramic PCBs, power modules, LED substrates, RF circuits, sensors, heaters, and industrial control boards. Compared with FR4, alumina offers much higher thermal conductivity and better high-temperature stability, while staying more cost-friendly than aluminum nitride in many projects.

What Is an Alumina Board?

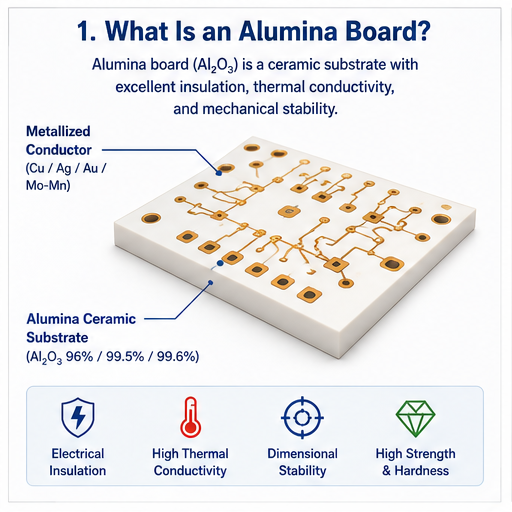
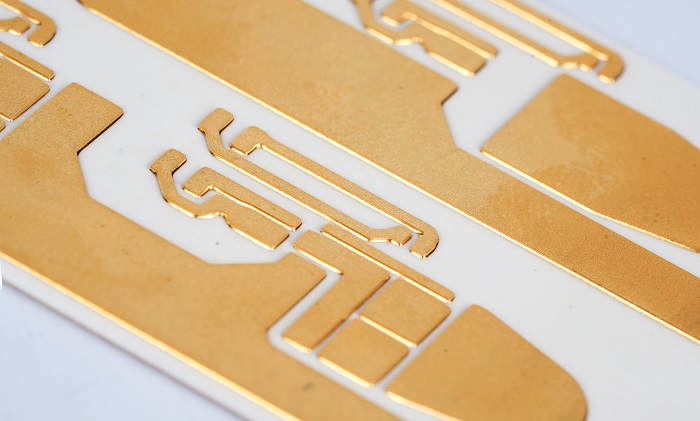
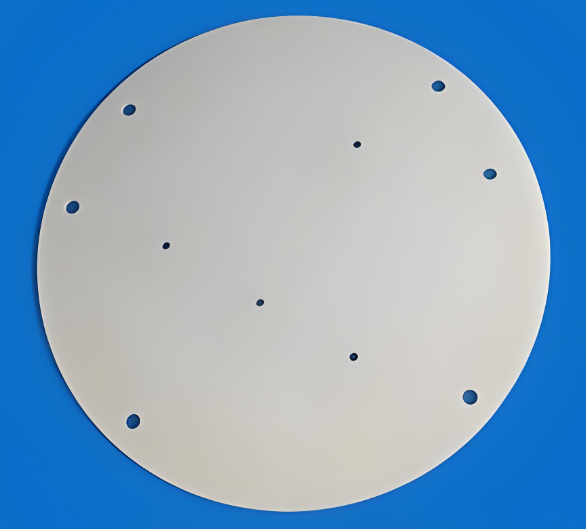
An alumina board is a flat ceramic plate made mainly from aluminum oxide, also written as Al₂O₃. In electronic manufacturing, it can serve as an insulating base, a thermal carrier, or a circuit substrate after metallization. When copper, silver, gold, or tungsten conductors are applied to its surface, the board becomes part of a ceramic PCB or hybrid circuit.

Alumina Board for Electronics: Properties, Uses, and Buying Guide

The most common grades used in electronics are 96% alumina and high-purity alumina such as 99.5% or 99.6%. 96% alumina is widely used because it balances cost, strength, insulation, and thermal performance. Higher-purity alumina is preferred when a project needs tighter electrical stability, finer thin-film circuits, or better surface quality. Microwaves101 notes that 96% alumina is a workhorse material in microwave integrated circuits, while 99.5% alumina is often used in thin-film networks.

In simple terms, alumina board is chosen when standard organic PCB materials cannot provide enough heat resistance, insulation, or mechanical stability for the working environment.

Why Does Alumina Board Matter in Electronic Manufacturing?

Modern electronics are getting smaller, hotter, and more power-dense. That creates a clear material challenge. A substrate must carry the circuit, isolate voltage, transfer heat, resist aging, and keep dimensions stable during thermal cycling.

FR4 is suitable for many standard electronic products, but its thermal conductivity is low. Cadence lists typical FR4 thermal conductivity at about 0.3–0.5 W/mK, while alumina is commonly around 20–30 W/mK and aluminum nitride can reach much higher ranges. This gap explains why engineers consider alumina when heat flow is part of the circuit design, not only a mechanical detail.

For buyers, alumina also matters because it offers a practical middle ground. It gives better heat dissipation than FR4 and many metal-core boards, while keeping cost lower than AlN in many mass-production projects. For OEM and ODM products, that balance can improve reliability without forcing the project into an unnecessarily expensive substrate.

How Does an Alumina Board Work in a Circuit?

An alumina board works by combining three functions in one substrate: insulation, heat conduction, and mechanical support.

Electrical insulation: Alumina is a ceramic insulator. It helps separate conductive paths even in high-voltage or compact circuit layouts. This is useful in power electronics, ignition systems, heating controls, sensors, and high-reliability modules.

Thermal conduction: Heat generated by chips, resistors, LEDs, or power devices can move through the alumina substrate more efficiently than through FR4. This reduces hot-spot accumulation and supports stable component operation.

Mechanical stability: Alumina has high hardness and good dimensional stability. Du-Co lists 96% dense alumina as having strong electrical, wear-resistant, high-temperature, and mechanical properties, with a safe operating temperature listed at 1550°C for the ceramic material itself.

In a ceramic PCB, conductive patterns are formed on alumina by thick-film printing, thin-film deposition, DPC, DBC, or other metallization methods. The best process depends on current load, line width, thermal path, cost target, and assembly method.

Common Types of Alumina Board for Engineering Projects

Alumina boards are usually classified by purity, surface finish, metallization method, and final use.

TypeCommon UseMain AdvantageTypical Consideration
96% alumina boardCeramic PCB, LED substrate, heater board, power controlGood cost-performance balanceSurface roughness and tolerance must match the circuit process
99.5% / 99.6% alumina boardThin-film circuit, RF module, precision sensorBetter purity and electrical stabilityHigher material and processing cost
Thick-film alumina boardHybrid circuit, resistor network, sensor moduleMature and cost-efficientConductor thickness and current capacity need review
Thin-film alumina boardRF, microwave, precision circuitFine traces and stable signal behaviorRequires cleaner process control
Metallized alumina boardBrazing, soldering, power module, package baseSupports strong conductor bondingMetallization stack must match assembly conditions
Plain alumina ceramic boardInsulation plate, fixture, spacer, heat-resistant carrierSimple structure and stable insulationMachining tolerance and edge quality are key

For most industrial and commercial electronic products, 96% alumina is the starting point. Higher-purity grades are selected after the design team confirms frequency, surface finish, leakage current, dielectric loss, or long-term environmental requirements.

Alumina Board Materials and Key Technical Properties

The key material properties of alumina board include thermal conductivity, dielectric strength, dielectric constant, volume resistivity, coefficient of thermal expansion, hardness, and flexural strength.

Alumina Board for Electronics: Properties, Uses, and Buying Guide

Typical values vary by purity, forming method, sintering recipe, grain structure, surface finish, and supplier specification. A property chart from Superior Technical Ceramics shows thermal conductivity values rising across different alumina grades, with listed room-temperature values from 19 W/mK to 35 W/mK for several alumina and high-purity alumina materials. The same chart lists dielectric constants around 9.0–9.9 at 1 MHz for many grades.

PropertyTypical Engineering MeaningWhy It Matters
Thermal conductivityHeat transfer capabilityHelps move heat away from power devices or LEDs
Dielectric strengthInsulation resistance under voltage stressSupports compact high-voltage layouts
Dielectric constantSignal propagation behaviorImportant for RF, microwave, and impedance-sensitive designs
CTEExpansion under temperature changeAffects solder joints, copper bonding, and package stress
Surface roughnessTopography of the ceramic surfaceImpacts thin-film circuits, printing accuracy, and bonding
Flexural strengthResistance to bending stressImportant during machining, assembly, and field vibration
Volume resistivityBulk insulation propertySupports leakage control in high-voltage applications

For procurement, the safest approach is to request the actual material datasheet from the manufacturer instead of using one universal value. Alumina grades with the same purity can still behave differently in production.

Alumina Board vs FR4, Aluminum PCB, AlN, and Si3N4

Alumina board is often compared with FR4, aluminum PCB, aluminum nitride, and silicon nitride. Each material has its own best-fit area.

MaterialThermal PerformanceElectrical InsulationMechanical BehaviorCost LevelBest-Fit Applications
FR4LowGood for standard circuitsEasy to processLowConsumer electronics, control boards, general PCB
Aluminum PCB / MCPCBMedium, depends on dielectric layerInsulation layer is the limiting pointGood for flat LED boardsMediumLED lighting, power boards, thermal spreader designs
Alumina boardHigh compared with FR4ExcellentHard and stableMediumCeramic PCB, power module, RF, sensors, heaters
Aluminum nitrideVery highExcellentMore demanding processHighHigh-power laser, advanced power module, high-heat device
Silicon nitrideGoodGoodStrong fracture toughnessHighAutomotive power modules, vibration-prone systems

MADPCB lists 96% alumina at about 24 W/mK and 99.6% alumina at about 29 W/mK, while AlN is listed much higher and SiN is noted for stronger shock resistance and structural reliability.

Alumina Board for Electronics: Properties, Uses, and Buying Guide

The practical conclusion is straightforward: choose alumina when your project needs better thermal and electrical performance than FR4 or standard MCPCB, while keeping cost more controlled than AlN.

How to Choose the Right Alumina Board for Your Design?

Choosing the right alumina board starts with the application environment, not the material name. Engineers should define heat load, voltage stress, line width, assembly process, size tolerance, and field conditions before selecting the grade.

For LED and lighting modules, 96% alumina is often enough when the design needs good heat dissipation, high reflectivity, and stable insulation. It is useful for high-brightness LEDs, UV modules, and compact lighting products.

For RF and microwave circuits, surface flatness, dielectric constant, dielectric loss, conductor geometry, and metallization method become more important. High-purity alumina is often selected for finer circuit control.

For power electronics, current capacity, copper thickness, thermal resistance, solder joint reliability, and ceramic cracking risk should be reviewed together. The substrate must support both electrical load and heat flow.

For sensors and medical electronics, cleanliness, dimensional control, insulation stability, and process traceability are important. The material must support stable performance over the product lifecycle.

A good selection rule is to avoid choosing alumina only because it sounds “high-end.” Use it when the operating condition creates a real need for ceramic insulation, heat conduction, high-temperature stability, or precise circuit behavior.

Alumina Board Manufacturing Process and Metallization Options

The manufacturing route depends on whether the alumina board is a plain ceramic sheet, a metallized substrate, or a finished ceramic PCB.

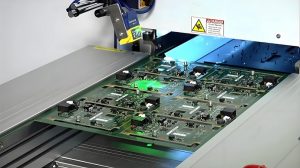
A typical alumina board process includes powder preparation, forming, drying, binder removal, sintering, lapping or polishing, laser cutting or CNC machining, cleaning, metallization, patterning, plating, inspection, and packaging. For ceramic PCB production, additional steps may include conductor printing, copper deposition, etching, firing, surface finish, solder mask where applicable, and assembly.

Common metallization methods include:

ProcessHow It WorksSuitable Use
Thick filmConductive paste is screen-printed and firedHybrid circuits, sensors, resistor networks, cost-sensitive ceramic PCB
Thin filmMetal layers are deposited and patternedRF, microwave, precision circuits, fine-line designs
DPCCopper is deposited directly on ceramic and patternedFine circuits, LEDs, sensors, compact ceramic PCB
DBCCopper foil is bonded to ceramic at high temperaturePower modules and high-current designs
AMBActive metal brazing bonds metal to ceramicHigh-reliability power modules and demanding thermal cycles

Thick-film technology is widely used because it is mature and cost-effective. MADPCB describes thick-film processing as adding conductor layers such as copper or silver onto a ceramic substrate through screen printing, with a typical conductor thickness range of 7–20 μm.

For custom alumina boards, the manufacturer should confirm the metallization stack, adhesion strength, solderability, plating thickness, edge quality, and cleaning standard before batch production.

Testing Methods and Quality Standards for Alumina Boards

Quality control for alumina board production should cover raw material, ceramic forming, surface treatment, metallization, circuit pattern, electrical performance, and final packaging.

Alumina Board for Electronics: Properties, Uses, and Buying Guide

Common inspection items include:

Test ItemPurposeTypical Production Value
Visual inspectionChecks cracks, chips, stains, pinholes, edge damagePrevents visible defects from entering assembly
Dimension measurementConfirms length, width, thickness, hole size, flatnessSupports assembly fit and fixture compatibility
Surface roughness testConfirms finish for printing, plating, or bondingImproves metallization consistency
AOIChecks pattern accuracy and surface defectsUseful for finished ceramic PCB
Continuity and isolation testVerifies circuit open/short conditionsEssential before assembly
Adhesion testChecks metal-to-ceramic bond strengthImportant for soldering and thermal cycling
Thermal shock testEvaluates reliability under temperature changeUseful for automotive, LED, and power modules
Solderability testConfirms assembly readinessReduces SMT or solder joint issues
X-ray inspectionChecks voids and hidden assembly defectsUseful after PCBA assembly

For standards, alumina board projects may involve ISO 9001 quality management, RoHS and REACH material compliance, UL requirements where applicable, and IPC-related workmanship expectations for assembled electronics. For PCBA, IPC-A-610 is commonly used as an assembly acceptance reference. For bare ceramic substrates, supplier-specific drawings, agreed inspection criteria, and material datasheets are especially important because ceramic boards differ from standard FR4 PCB production.

Common Failure Modes and Factory-Level Prevention

Alumina boards are reliable when the design and manufacturing process are matched correctly. Most issues come from mismatch between material behavior, copper design, assembly temperature, and mechanical handling.

Failure ModeCommon CausePrevention Method
Ceramic crackingSharp internal corners, improper panel handling, high assembly stressAdd radius design, improve fixtures, control loading pressure
Metallization peelingWeak bonding, contaminated surface, wrong firing profileImprove cleaning, verify paste or copper process, test adhesion
Edge chippingAggressive cutting, poor packaging, thin fragile geometryUse laser cutting or optimized machining, add protective packing
Solder joint fatigueCTE mismatch between ceramic, copper, and componentsReview pad size, solder alloy, thermal cycle conditions
Hot spotsPoor thermal path, insufficient copper area, weak interface materialSimulate heat flow and improve copper layout or mounting method
Electrical leakageSurface contamination, poor cleaning, insufficient spacingStrengthen cleaning process and confirm creepage/clearance
Warpage or flatness issueSintering variation, thin large panel, unsuitable toleranceDefine flatness early and use proper ceramic forming control

From a factory perspective, early DFM review is valuable. The manufacturer should check hole-to-edge spacing, board thickness, trace width, copper coverage, metallization type, panel format, firing conditions, and assembly temperature before production starts.

Alumina Board Applications and Project Examples

Alumina board is used across many industries where heat, insulation, and stability are part of the product design.

Alumina Board for Electronics: Properties, Uses, and Buying Guide

Power electronics: Alumina substrates support switching devices, rectifiers, power resistors, and driver modules. They help manage heat while keeping electrical insulation stable.

LED lighting: High-power LED modules use alumina boards for heat transfer and light reflection. Applications include industrial lighting, UV curing, automotive lamps, and compact optical modules.

RF and microwave circuits: Alumina is used in antennas, filters, hybrid circuits, microwave modules, and sensor front ends. Its stable dielectric behavior supports more predictable circuit performance than many general-purpose materials.

Medical electronics: Alumina boards can be used in sensor modules, diagnostic devices, heating elements, and compact control circuits that need insulation and dimensional stability.

Industrial control: Ceramic boards appear in motor drives, power conversion, automation sensors, high-temperature monitoring, and harsh-environment control systems.

Automotive electronics: Alumina is used in ignition modules, LED headlight circuits, sensor packaging, and power control designs. For vibration-heavy or high-shock areas, engineers may compare alumina with silicon nitride during material selection.

Practical case example: In a high-power LED module, replacing FR4 with alumina can reduce thermal bottlenecks between the LED chip and heat sink. The final result depends on copper design, solder layer, thermal interface material, and mechanical mounting, so the substrate upgrade should be reviewed as part of the whole thermal path.

Cost Factors, Procurement Advice, and Supplier Selection

The cost of alumina board depends on more than the ceramic material itself. Purity, thickness, tolerance, surface finish, board size, hole design, metallization, copper thickness, surface finish, testing level, and order quantity all affect the final price.

Cost FactorWhy It Changes Price
Alumina purityHigher purity usually needs tighter material control
Thickness and sizeThin, large, or unusual shapes increase handling difficulty
ToleranceTight tolerance may require lapping, polishing, or precision machining
Surface roughnessThin-film and bonding applications need better surface control
Metallization methodDPC, DBC, AMB, thick film, and thin film have different process costs
Hole and slot designCeramic machining is more demanding than FR4 drilling
Copper thicknessHigher current designs need stronger metallization planning
Testing requirementsThermal shock, adhesion, AOI, and traceability add process value
QuantityBatch production improves unit cost after setup is absorbed

For procurement teams, the best supplier is one that can discuss both ceramic processing and electronic manufacturing. A pure ceramic shop may understand material forming, while a PCB/PCBA manufacturer can better support circuit layout, solderability, DFM, testing, and assembly.

A reliable China-based source factory should provide clear drawings review, material confirmation, tolerance advice, sample validation, batch consistency, global shipping support, and documentation. For US and European buyers, RoHS, REACH, traceability, packaging protection, and consistent communication are often as important as unit price. For Southeast Asian buyers, lead time, batch flexibility, and cost control usually carry more weight.

Pre-Order Checklist for Custom Alumina Board Projects

Before placing an alumina board order, prepare a complete technical package. This reduces engineering back-and-forth and keeps sampling closer to the final production target.

Use this checklist:

ItemWhat to Confirm
ApplicationLED, RF, power, sensor, heater, insulation, or ceramic PCB
Material grade96%, 99.5%, 99.6%, or another specified alumina grade
Board sizeLength, width, thickness, tolerance, and flatness
Surface finishAs-fired, lapped, polished, or customized roughness
MetallizationThick film, thin film, DPC, DBC, AMB, or plain ceramic
Conductor materialCopper, silver, gold, tungsten, molybdenum-manganese, or other stack
Circuit filesGerber, DXF, CAD drawing, stack-up, and BOM if assembly is needed
Electrical needsVoltage, current, insulation, impedance, frequency, creepage distance
Thermal needsPower loss, heat sink method, operating temperature, thermal cycling
Assembly methodSMT, wire bonding, soldering, brazing, screw mounting, or adhesive bonding
Test requirementsAOI, e-test, adhesion, thermal shock, X-ray, functional test
ComplianceRoHS, REACH, UL-related needs, ISO documentation, customer-specific standard
PackagingAnti-chip protection, vacuum packing, tray packing, label, traceability

The earlier these details are shared, the faster the engineering team can recommend the right process and avoid unnecessary prototype iterations.

FAQs About Alumina Board

What is alumina board used for?
Alumina board is used as an insulating, heat-conductive, and mechanically stable ceramic base. In electronics, it is common in ceramic PCBs, LED modules, power circuits, RF boards, sensors, heaters, and high-temperature control systems. It is also used as an insulating plate, spacer, fixture, or heat-resistant structural part in industrial equipment.

Is alumina board the same as ceramic PCB?
An alumina board is the ceramic substrate material. A ceramic PCB is a finished circuit board built on a ceramic substrate, often with copper, silver, gold, or other conductive patterns. So, an alumina board can become part of a ceramic PCB after metallization, patterning, surface finishing, and electrical testing.

Why choose alumina board instead of FR4?
Engineers choose alumina board when the circuit needs better thermal conductivity, stronger insulation, higher temperature stability, or more stable dimensions than FR4 can provide. FR4 remains practical for standard electronics, while alumina fits high-power, high-temperature, compact, or reliability-sensitive designs where heat and insulation are major design factors.

Is alumina board better than aluminum PCB?
Alumina board offers ceramic insulation and strong thermal stability, while aluminum PCB relies on a metal base plus a dielectric insulation layer. For many LED and power applications, both can work. Alumina becomes attractive when the design needs ceramic insulation, high operating stability, compact spacing, or better resistance to harsh environments.

What is the common thickness of alumina board?
Common alumina board thicknesses include 0.25 mm, 0.38 mm, 0.5 mm, 0.635 mm, 1.0 mm, and 1.5 mm, although availability depends on the supplier and process. Thin boards support compact thermal paths, while thicker boards improve stiffness and handling strength. The final choice should match assembly stress and thermal needs.

Can alumina board be used for high-frequency circuits?
Yes. Alumina board is widely used in RF, microwave, hybrid, and sensor circuits. Its dielectric constant and low loss behavior can support stable circuit performance when the layout is designed correctly. For high-frequency designs, engineers should confirm dielectric constant, loss tangent, thickness tolerance, surface roughness, and metallization accuracy before production.

What is the difference between 96% and 99.6% alumina board?
96% alumina is widely used because it offers a strong balance of cost, insulation, thermal conductivity, and manufacturability. 99.6% alumina has higher purity and is often selected for finer circuits, better surface quality, or more demanding electrical stability. The better choice depends on circuit accuracy, budget, and operating environment.

Can alumina board crack during production or assembly?
Alumina is hard and stable, but ceramic materials require proper handling. Cracking risk increases with sharp corners, thin large panels, high mounting pressure, poor machining design, or severe thermal shock. A good manufacturer can reduce this risk through DFM review, radius design, controlled cutting, suitable packaging, and fixture optimization.

What surface finish can be used on alumina ceramic PCB?
Surface finish depends on the metallization system. Ceramic PCBs may use ENIG, silver, gold, nickel, or other finishes depending on soldering, wire bonding, brazing, or corrosion requirements. For thick-film and thin-film circuits, conductor material and firing process also affect finish selection. The assembly method should be confirmed first.

How much does custom alumina board cost?
Cost depends on purity, size, thickness, tolerance, surface roughness, hole design, metallization method, copper thickness, testing, and quantity. A simple plain alumina plate costs less than a precision metallized ceramic PCB. For accurate pricing, provide drawings, Gerber files, material grade, tolerance, and test requirements at the quotation stage.

What files are needed for alumina board manufacturing?
For plain alumina boards, a mechanical drawing with size, thickness, tolerance, holes, slots, and surface requirements is usually enough. For ceramic PCB production, provide Gerber files, stack-up, material grade, copper thickness, surface finish, BOM, pick-and-place file, and assembly drawing if PCBA service is required.

How do I choose a reliable alumina board supplier?
Choose a supplier that can review design feasibility, confirm ceramic grade, control tolerance, provide metallization options, perform inspection, and support sample-to-batch production. For electronic products, a PCB and PCBA manufacturer with ceramic substrate experience is valuable because it can review both material behavior and assembly reliability.

Conclusion:

Alumina board is a practical ceramic substrate for electronic products that need heat transfer, electrical insulation, and long-term stability. It is especially useful in ceramic PCBs, LED modules, power electronics, RF circuits, sensors, industrial controls, and high-temperature applications.

For engineering selection, 96% alumina is often the best starting point because it provides a strong balance of performance and cost. Higher-purity alumina should be considered for RF, thin-film, precision, or demanding electrical applications. For procurement, the most important step is to send complete technical files and ask the manufacturer to review material grade, tolerance, metallization, testing, and assembly compatibility before mass production.

If you need custom alumina boards, ceramic PCB fabrication, PCB assembly, OEM manufacturing, ODM production, sample development, or batch production support, our engineering team can help review your design, optimize the manufacturing process, and provide a practical quotation. Please contact us at sales@bestpcbs.com.

You may also like

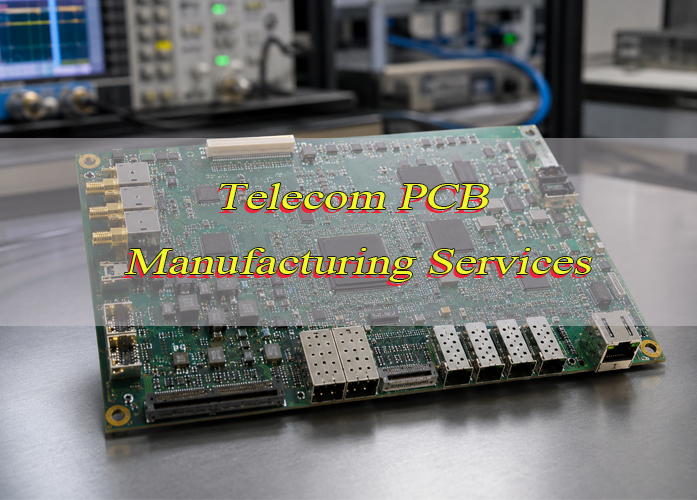
Telecom PCB Manufacturing Services for High-Speed Communication Equipment

June 1st, 2026

Are you looking for telecom pcb manufacturing services that deliver reliable quality and on-time delivery for high-speed communication projects? Many procurement teams face delays, unstable product performance, or unclear supplier capabilities when sourcing communication PCBs.

EBest provides complete telecom pcb manufacturing services, covering prototypes, batch production, component sourcing, assembly, and urgent orders. With a wide PCB portfolio and proven manufacturing experience, EBest helps buyers simplify sourcing, reduce project risk, and keep delivery schedules under control.

telecom pcb manufacturing services

What Are Telecom PCB Manufacturing Services and What Do They Include?

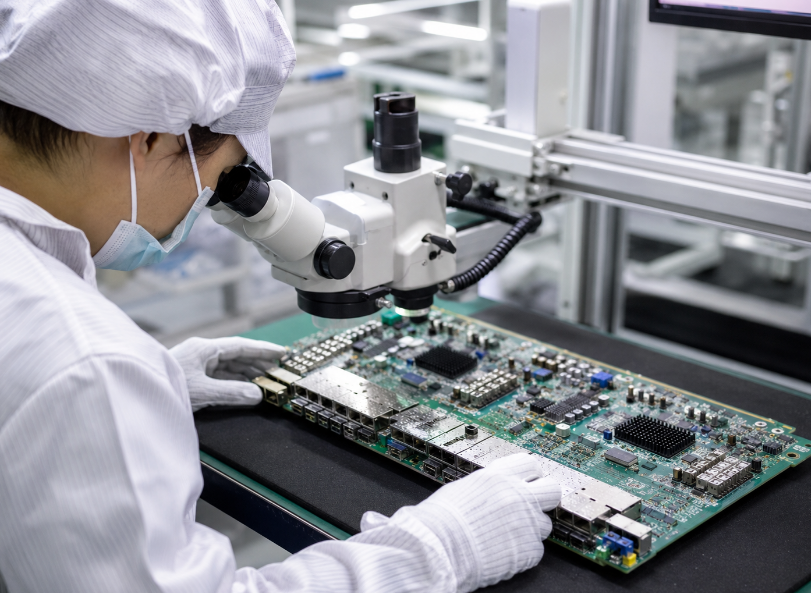
Telecom PCB manufacturing services encompass the full production process for printed circuit boards used in communication equipment. This typically includes PCB design review, material selection, prototyping, mass production, component sourcing, PCB assembly, inspection, testing, packaging, and delivery.

These services are not just about producing boards. They ensure that each PCB meets the required performance, reliability, and delivery standards. A competent supplier verifies board structure, material choice, copper thickness, surface finish, and manufacturing tolerances before production begins to prevent potential issues later.

A trusted telecom circuit board manufacturing partner also accommodates different project stages. Whether a project requires fast prototypes for validation or stable batch production for long-term supply, EBest supports the entire workflow, helping projects move smoothly from initial testing to full-scale production with minimal risk and clear communication.

Where Are Telecom PCBs Used in High-Speed Communication Equipment?

Telecom PCBs are used in communication devices that handle signal transmission, data processing, power control, and network connection. They help equipment maintain stable performance in high-speed and long-term operation.

5G Base Stations
Used in RF units, control boards, and signal processing modules to support stable wireless transmission.

Routers and Network Switches
Used for data routing, network control, and high-speed signal transmission.

Optical Communication Equipment
Used in optical modules, fiber optic devices, and transmission systems to support low-loss communication.

Wireless Communication Devices
Used in gateways, repeaters, terminals, and wireless modules for signal receiving and transmitting.

Network Servers and Data Systems
Used in servers, storage equipment, and data communication systems that require stable high-speed performance.

Antenna and RF Modules
Used in RF systems where impedance control, material stability, and low signal loss are important.

Industrial Communication Equipment
Used in industrial gateways, controllers, and remote monitoring devices for reliable network communication.

telecom PCB assembly application

Why Do Telecom PCBs Require High Reliability and Signal Stability?

Telecom PCBs are essential for high-speed communication systems where even small signal interruptions can affect overall performance. Boards must maintain consistent electrical characteristics to ensure fast, accurate data transmission.

Precise impedance control, consistent layer alignment, and uniform material properties are critical. Variations in copper thickness, surface finish, or board structure can lead to signal degradation, crosstalk, or electromagnetic interference, impacting device performance.

These PCBs often operate continuously under demanding conditions including high temperatures and electrical load. Reliability ensures the board performs consistently over time without failure.

High reliability and signal stability allow communication equipment such as base stations, routers, optical modules, and RF devices to function efficiently, deliver accurate data, and maintain network integrity across all operating conditions.

What Technical Requirements Should Be Confirmed Before Telecom PCB Production?

Before starting production, key technical requirements should be clearly defined to ensure signal performance, reliability, and accurate assembly for telecom PCBs. For telecom pcb manufacturing services, these details help confirm whether the board can meet high-speed communication requirements before production begins.

Technical RequirementTypical Values
PCB Layer Count2, 4, 6, 8, 10, 12 layers
Base MaterialFR4 Tg 130°C, FR4 Tg 170°C, Rogers 4350B, PTFE
Board Thickness0.4 mm, 0.6 mm, 0.8 mm, 1.0 mm, 1.6 mm
Copper Thickness1 oz/ft² 35 μm, 2 oz/ft² 70 μm, 3 oz/ft² 105 μm
Impedance Control50 Ω ±5%, 75 Ω ±5%, 100 Ω differential ±10%
Line Width / SpacingMinimum 3 mil / 3 mil, 4 mil / 4 mil, 5 mil / 5 mil
Hole Size / Via0.2 mm to 1.0 mm, through-hole, blind via, buried via, microvia
Surface FinishHASL, ENIG, OSP, immersion silver, immersion tin
Solder Mask15 to 20 μm thickness, green, blue, or black
Silkscreen0.1 mm line width, white or black ink
Assembly MethodSMT, through-hole, mixed technology
Testing RequirementsFlying probe, ICT, AOI, impedance test, functional test
Production QuantityPrototype: 1 to 10 pcs, small batch: 10 to 500 pcs, mass production: over 500 pcs
Delivery Lead TimePrototype: 1 to 3 weeks, small batch: 2 to 4 weeks, mass production: 4 to 8 weeks

What Standards Should Telecom PCB Manufacturing Services Follow?

Telecom PCB manufacturing requires adherence to recognized quality, safety, and environmental standards to ensure reliable performance and long-term stability.

ISO 9001:2015
Focuses on overall quality management, ensuring consistent production processes and documentation control.

IPC Standards
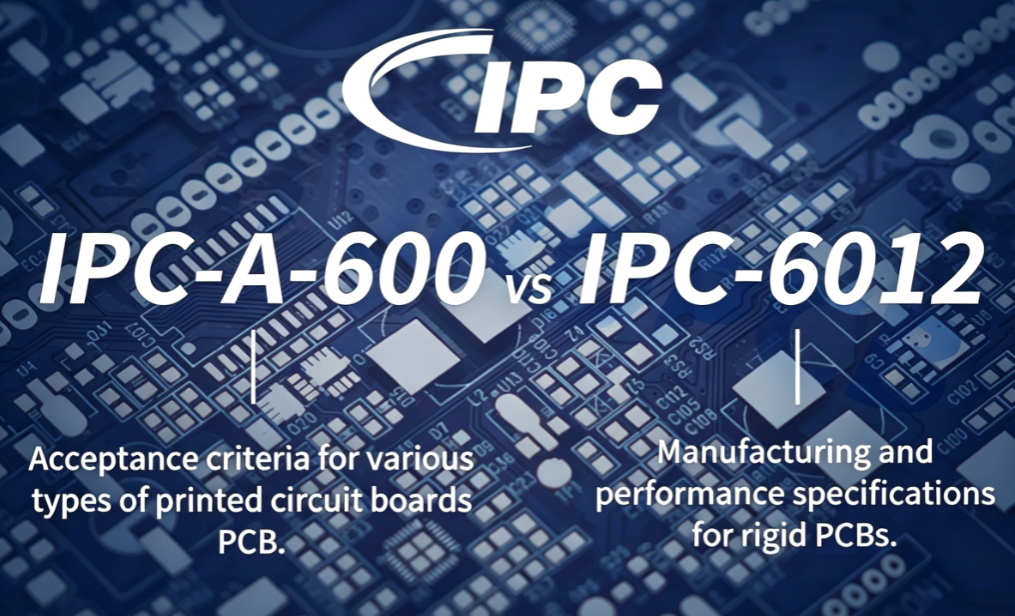
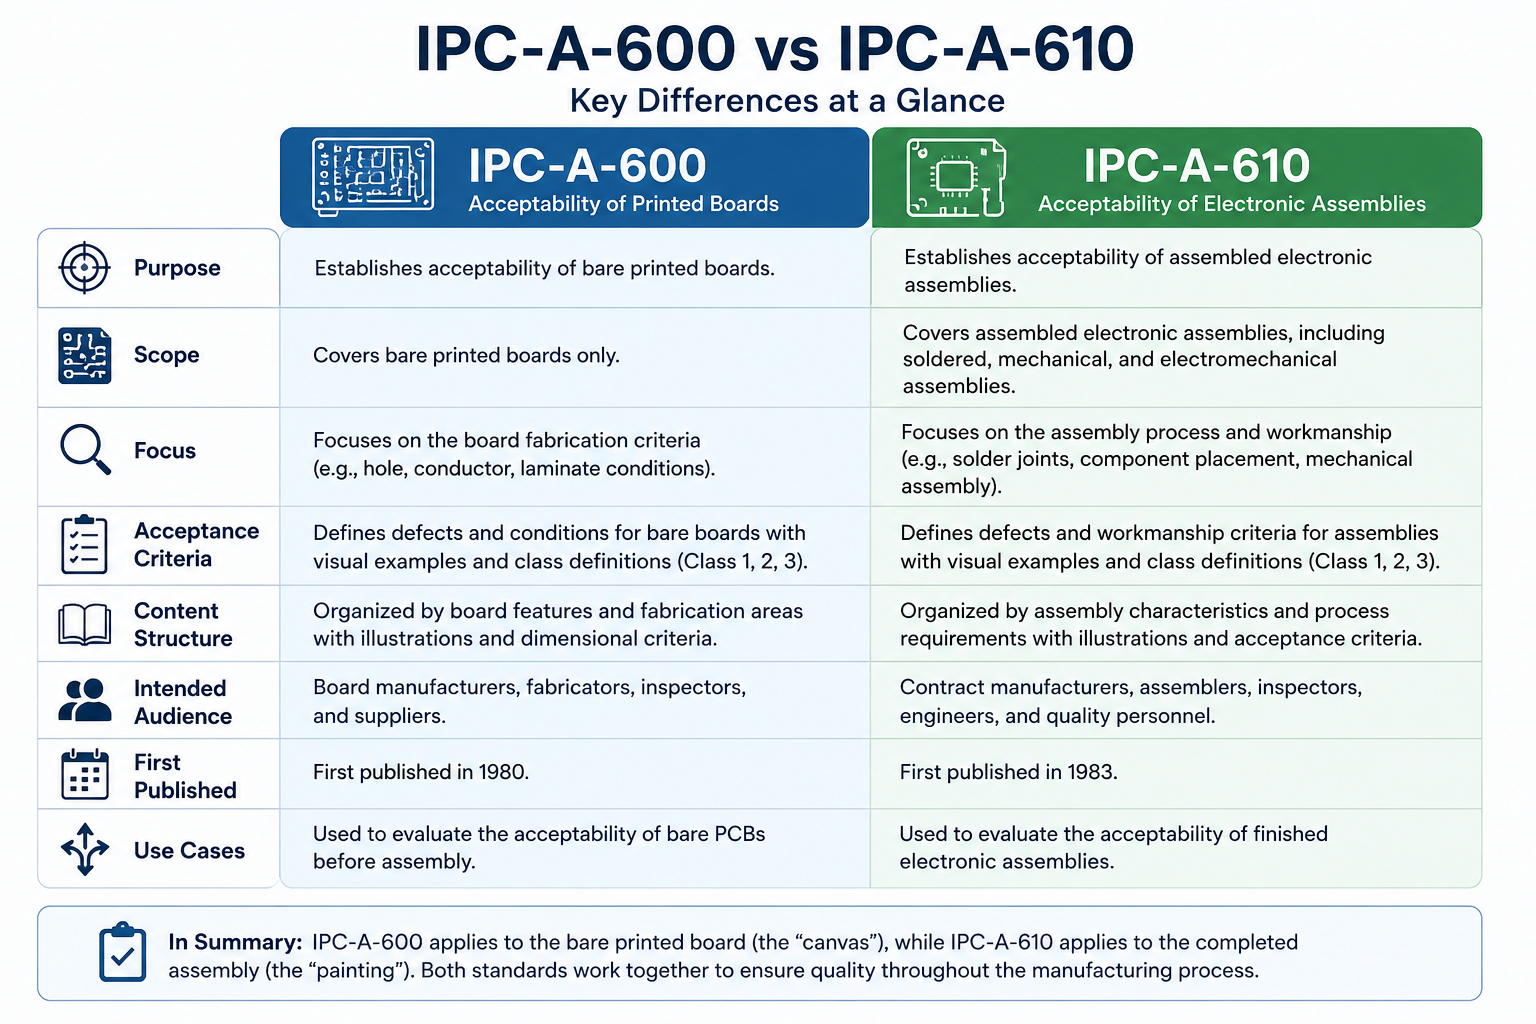
Standards such as IPC-A-600, IPC-6012, and IPC-A-610 define PCB acceptability, performance requirements, and assembly quality, ensuring consistent manufacturing results.

UL Certification
Verifies product safety and material reliability, supporting compliance with international safety regulations.

RoHS Compliance
Limits the use of hazardous substances in PCBs, ensuring environmentally safe production for global markets.

REACH Compliance
Controls the use of chemical substances, promoting environmentally responsible PCB manufacturing.

IATF 16949
A standard primarily used for automotive-related PCBs. It ensures rigorous process control, traceability, and defect prevention.

ISO 13485
Applies to medical device-related PCBs. It emphasizes consistent production quality, risk management, and regulatory compliance.

AS9100D
Used in aerospace and defense PCB production. It focuses on process reliability, risk management, and quality control for high-performance applications.

What Challenges Are Common in Telecom PCB Manufacturing?

Telecom PCB manufacturing is more demanding than standard PCB production because communication equipment must handle fast signals, long operating hours, and stable data transmission. Even small process variations can affect signal quality, assembly reliability, or final product performance.

Signal Loss
High-speed signals can weaken during transmission if the material, stack-up, or trace design is not properly controlled. Low-loss materials and stable production processes help reduce this risk.

Impedance Control
Telecom PCBs often require controlled impedance, such as 50 Ω single-ended or 100 Ω differential impedance. If impedance values are not stable, signal reflection and transmission errors may occur.

Multilayer Alignment
Many telecom PCBs use multilayer structures to support complex routing and compact product design. Accurate layer alignment is important for stable connections, reliable vias, and consistent electrical performance.

High-Density Routing
Communication boards often include fine traces, small spacing, and dense component areas. This requires precise manufacturing capability to avoid short circuits, open circuits, and yield loss.

Thermal Management
Telecom equipment may work continuously under high load. Good heat control helps prevent material deformation, component stress, and long-term reliability issues.

Assembly Reliability
Fine-pitch components, BGAs, connectors, and RF modules require accurate placement and stable soldering. Poor assembly control can lead to weak solder joints, hidden defects, or unstable operation.

Testing Consistency
Telecom PCBs often require electrical testing, impedance testing, AOI, X-ray inspection, or functional testing. Consistent testing helps confirm board quality before shipment and reduces project risk.

How Does the Telecom PCB Manufacturing Process Work?

Telecom PCB production requires a controlled process because these boards are often used in high-speed, high-frequency, and long-term operating communication equipment. Each step must support stable signal transmission, accurate layer structure, reliable assembly, and consistent product quality.

Step 1: Production File Review
Production starts with checking Gerber files, drill files, stack-up, impedance requirements, material specifications, copper thickness, and surface finish. This step confirms whether the design is suitable for telecom PCB manufacturing before materials are prepared.

Step 2: Material Preparation
The required laminate, copper foil, prepreg, and core materials are prepared according to the project specifications. For telecom PCBs, material stability is important because it affects signal loss, impedance control, heat resistance, and long-term reliability.

Step 3: Inner Layer Imaging and Etching
For multilayer telecom PCBs, the inner circuit layers are first transferred onto copper-clad laminates. After imaging and etching, the inner layer circuits are inspected to ensure correct trace width, spacing, and pattern accuracy.

Step 4: Layer Lamination
The inner layers, prepreg, and copper foil are stacked and pressed together under controlled temperature and pressure. Accurate lamination helps maintain board thickness, layer alignment, and electrical stability.

Step 5: Drilling and Via Formation
Mechanical drilling or laser drilling is used to create through holes, blind vias, buried vias, or microvias. These vias build electrical connections between different layers and are especially important for dense telecom PCB designs.

Step 6: Copper Plating
After drilling, copper is deposited inside the holes and on the board surface. Good plating quality ensures reliable layer-to-layer connection, stable current flow, and long-term board durability.

Step 7: Outer Layer Circuit Formation
The outer layer circuit pattern is created through imaging, plating, and etching. For telecom PCBs, line width, spacing, and copper uniformity must be carefully controlled to support signal stability and production consistency.

Step 8: Solder Mask Application
Solder mask is applied to protect copper traces, prevent oxidation, and reduce the risk of solder bridging during assembly. Accurate solder mask openings are important for fine-pitch components and high-density communication boards.

Step 9: Surface Finish Treatment
Surface finishes such as ENIG, HASL, OSP, immersion silver, or immersion tin are applied to protect exposed copper and improve solderability. The right finish depends on assembly requirements, storage time, and product reliability needs.

Step 10: Electrical Test and Impedance Test
Telecom PCBs are tested for open circuits, short circuits, and electrical continuity. If controlled impedance is required, impedance testing is also performed to verify whether the board meets the target values.

Step 11: PCB Assembly if Required
When the project includes assembly, the process continues with component sourcing, solder paste printing, SMT placement, reflow soldering, through-hole assembly, AOI inspection, X-ray inspection, and functional testing.

Step 12: Final Inspection and Packaging
Before delivery, the finished boards are checked for appearance, dimensions, markings, cleanliness, and packaging requirements. Proper packaging helps protect telecom PCBs from moisture, contamination, and handling damage during shipment.

What Telecom PCB Manufacturing Services Does EBest Offer?

EBest provides one-stop telecom pcb manufacturing services for communication equipment projects, covering PCB fabrication, assembly support, component sourcing, testing, and delivery coordination. These services help simplify project management from prototype to mass production.

PCB Design Support
EBest can support file review, DFM checking, stack-up discussion, and production feasibility confirmation before manufacturing begins.

PCB Prototype Production
Prototype service helps verify board structure, material selection, assembly fit, and basic performance before moving to larger production quantities.

Mass PCB Production
EBest supports stable batch production for telecom PCB orders that require consistent quality, repeatable processes, and long-term supply support.

Component Sourcing
For assembly projects, EBest can help source components according to the BOM, reducing coordination work and improving project efficiency.

PCB Assembly
EBest provides PCB assembly services, including SMT assembly, through-hole assembly, mixed assembly, inspection, and testing support.

High-Speed and RF PCB Manufacturing
EBest supports PCB projects that require high-speed materials, RF performance, impedance control, multilayer structures, and stable signal transmission.

HDI and Multilayer PCB Production
For compact communication equipment, EBest can support HDI and multilayer PCB production with fine routing, small vias, and dense circuit structures.

Testing and Inspection Support
Testing support can include electrical testing, AOI, X-ray inspection, impedance testing, functional testing, and other project-specific quality checks.

Expedited PCB Service
For urgent projects, EBest can support expedited production when files, materials, and production conditions are confirmed.

One-Stop Project Coordination
EBest helps coordinate PCB production, assembly, testing, packaging, and delivery through one supplier, reducing communication gaps and improving project control.

How Does EBest Control Quality in Telecom PCB Manufacturing?

EBest controls quality from the first review stage, not only at final inspection. For telecom pcb manufacturing services, our team checks Gerber files, stack up, impedance requirements, material selection, copper thickness, surface finish, and assembly details before production starts. This helps reduce hidden risks before the order enters manufacturing.

During production, EBest manages each key process carefully, including drilling, plating, lamination, imaging, solder mask, surface finish, routing, and assembly. For telecom PCBs, stable process control is essential because small variations may affect signal transmission, impedance consistency, and long term reliability.

Quality inspection is carried out through multiple steps according to project needs. Common checks include electrical testing, AOI inspection, impedance testing, visual inspection, dimensional inspection, X-ray inspection for assembled boards, and functional testing. These checks help confirm that each board meets the required specifications before shipment.

EBest also follows strict quality and compliance requirements for demanding PCB projects. With controlled production, inspection records, material traceability, and reliable testing support, EBest helps customers receive telecom PCBs with stable quality, lower rework risk, and stronger confidence for future repeat orders.

Telecom PCB Manufacturing

How Does EBest Ensure On-Time Delivery for Telecom PCB Orders?

EBest improves delivery reliability by confirming project details clearly before production starts. Gerber files, BOM, materials, copper thickness, surface finish, assembly needs, testing requirements, quantity, and target delivery date are reviewed in advance. Clear confirmation helps prevent delays caused by missing or unclear information.

Our integrated service also helps shorten the project cycle. EBest can coordinate PCB fabrication, component sourcing, PCB assembly, testing, packaging, and delivery in one workflow. This reduces communication gaps and keeps the project schedule easier to manage.

Production planning is arranged according to order urgency, material availability, process complexity, and testing requirements. Whether the project is a prototype, small batch, or repeat order, EBest works to keep each step moving smoothly while maintaining stable production quality.

For urgent telecom PCB projects, EBest can provide expedited service when files, materials, and production conditions are confirmed. Some urgent boards can be shipped within 24 hours, helping customers respond faster to sample approval, project deadlines, or unexpected production needs.

Why Choose EBest for Telecom PCB Manufacturing Services?

Choosing EBest for telecom pcb manufacturing services means working with a PCB manufacturing partner that helps reduce project risk, improve quality stability, and keep telecom PCB orders on schedule. For communication equipment projects, customers need reliable production, certified quality systems, strong process capability, and responsive project support.

Certified Quality Systems
EBest supports ISO 9001:2015, IATF 16949, ISO 13485:2016, AS9100D, UL, RoHS, and REACH. These certifications help customers reduce supplier evaluation risk and build confidence in long-term cooperation.

Strong Process Capability
Telecom PCBs may require multilayer structures, impedance control, high-speed signals, RF performance, HDI design, fine lines, and small vias. EBest supports these requirements for both standard and complex communication PCB projects.

One-Stop Service Support
EBest provides PCB design support, prototyping, mass production, component sourcing, PCB assembly, testing, packaging, and delivery coordination. This helps reduce communication errors and saves time compared with managing multiple suppliers.

Reliable Delivery Control
EBest supports standard production and expedited service for urgent orders. When files, materials, and production conditions are ready, urgent telecom PCB orders can move quickly to support tight project schedules.

Stable Quality from Sample to Batch Production
EBest focuses on material confirmation, process control, electrical testing, AOI inspection, impedance testing, X-ray inspection, and functional testing. This helps maintain consistent quality from prototypes to mass production.

Wide PCB Capability
EBest supports FR4 PCB, high Tg PCB, RF PCB, high-speed PCB, HDI PCB, multilayer PCB, metal core PCB, ceramic PCB, flexible PCB, rigid-flex PCB, heavy copper PCB, extra thin PCB, and impedance control PCB for different telecom applications.

Practical Cost Control
EBest helps customers choose suitable materials, processes, surface finishes, and testing methods based on actual project needs. This avoids unnecessary over-specification while keeping the required quality and reliability.

Responsive Communication
EBest provides clear feedback on manufacturability, material options, assembly needs, testing requirements, and delivery feasibility. This helps customers make faster decisions and move orders forward with greater confidence.

telecom PCB

FAQs About Telecom PCB Manufacturing Services

Q1: What information is needed for a telecom PCB quotation?
A1: Please provide Gerber files, BOM, PCB specifications, material requirements, quantity, surface finish, testing needs, and expected delivery time. If assembly is required, placement files and component details should also be included.

Q2: Can telecom PCB production support both prototypes and mass production?
A2: Yes. A reliable telecom PCB supplier should support prototype validation, small batch production, and stable mass production. This helps projects move smoothly from sample testing to long-term supply.

Q3: What makes telecom PCBs different from standard PCBs?
A3: Telecom PCBs usually require better signal stability, impedance control, multilayer alignment, material stability, and testing accuracy. These requirements help support high-speed communication and long-term equipment operation.

Q4: What PCB types are commonly used in telecom equipment?
A4: Common options include multilayer PCB, high-speed PCB, RF PCB, HDI PCB, impedance control PCB, high Tg PCB, rigid-flex PCB, and metal core PCB. The right choice depends on signal speed, frequency, heat load, and product structure.

Q5: Does EBest provide PCB assembly for telecom projects?
A5: Yes. EBest supports PCB fabrication, component sourcing, SMT assembly, through-hole assembly, mixed assembly, inspection, testing, and delivery coordination. This helps simplify the full project process.

Q6: How does EBest help reduce telecom PCB project risk?
A6: EBest reviews files, materials, stack-up, impedance, assembly needs, and testing requirements before production. This helps identify risks early, reduce rework, and improve production stability.

Q7: Can EBest support urgent telecom PCB orders?
A7: Yes. EBest supports expedited production when files, materials, and production conditions are confirmed. This helps urgent prototypes or time-sensitive telecom PCB orders move forward faster.

How Can You Start Your Telecom PCB Project with EBest?

Starting your telecom PCB project with EBest is easy. Send your Gerber files, BOM, quantity, material requirements, surface finish, testing needs, assembly requirements, and target delivery time to sales@bestpcbs.com.

For reliable telecom pcb manufacturing services, EBest will review your project details, confirm production feasibility, and provide a clear quotation. Whether you need prototypes, batch production, PCB assembly, or urgent delivery, our team can help you move your telecom PCB project forward with reliable quality and professional support.

You may also like

104 Capacitor: Meaning, Value, Uses, Selection, and Buying Guide

May 30th, 2026

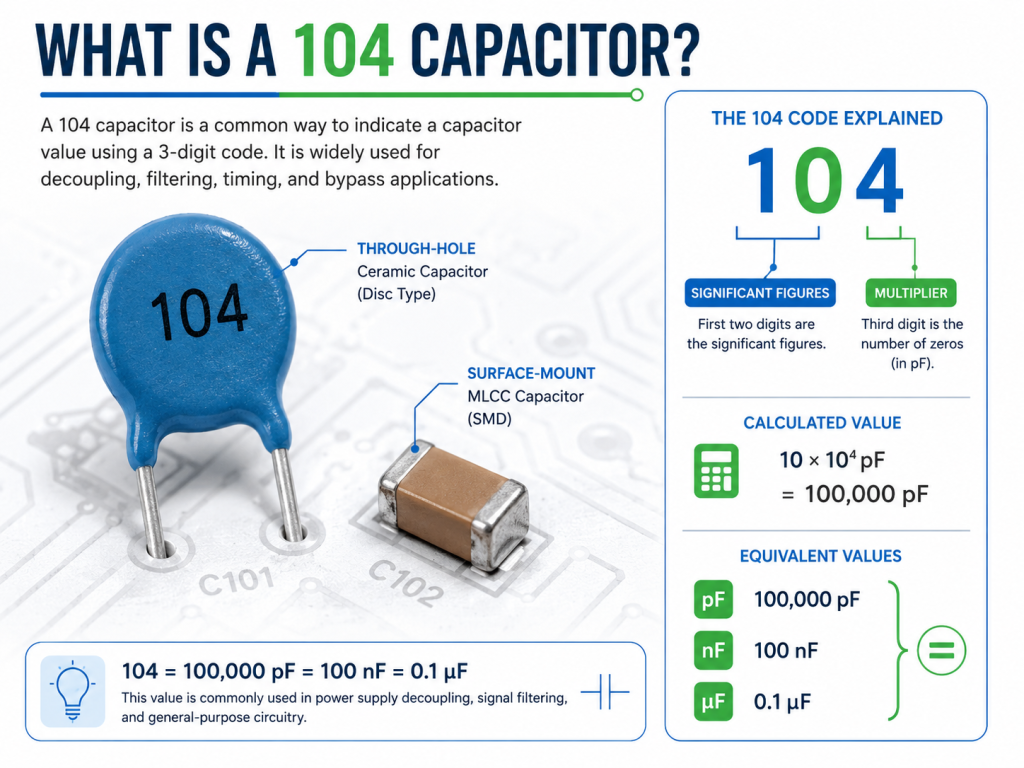
A 104 capacitor is one of the most common capacitors used in electronic circuits. The code “104” means the capacitor has a capacitance value of 100,000 pF, which equals 100 nF or 0.1 µF. You can find it in power supply filtering, IC decoupling, signal bypassing, timing circuits, sensor modules, LED drivers, automotive electronics, communication devices, and industrial control boards.

Although the value looks simple, choosing the right part is not only about capacitance. Engineers also need to check voltage rating, dielectric material, tolerance, package size, temperature stability, leakage current, ESR, safety approval, and long-term supply reliability. For buyers, the same marking may appear on ceramic, film, dipped, or safety capacitors, so the complete part number and datasheet matter more than the printed code alone.

104 Capacitor: Meaning, Value, Uses, Selection, and Buying Guide

What Is a 104 Capacitor?

A 104 capacitor is a capacitor marked with the three-digit code “104.” This code follows a simple capacitor marking rule. The first two digits are significant numbers, and the third digit shows how many zeros should be added in picofarads.

For a 104 capacitor:

CodeCalculationValue
10410 × 104 pF100,000 pF
104100,000 pF100 nF
104100 nF0.1 µF

This makes the 104 capacitor a standard 0.1 µF capacitor. It is widely used because 0.1 µF is a practical value for filtering high-frequency noise near integrated circuits, stabilizing power rails, and improving circuit reliability.

In many PCB assemblies, engineers place one 104 capacitor close to each power pin of an IC. This helps reduce voltage fluctuation caused by fast switching current.

Why Is the 104 Capacitor Important in Electronics?

The 104 capacitor is important because it provides a compact and cost-effective way to control noise, store small amounts of charge, and stabilize circuit behavior. In digital circuits, ICs switch quickly and create current spikes. A 104 capacitor placed near the IC can supply instant local current and reduce power rail disturbance.

In analog circuits, it can help smooth small voltage changes, filter unwanted frequency components, and improve signal clarity. In mixed-signal boards, it often works together with larger capacitors to build a wider filtering network.

A typical power line may use:

Capacitor ValueCommon Role
10 µF or 22 µFBulk energy storage
1 µFMid-frequency filtering
0.1 µF / 104High-frequency decoupling
10 nF or 1 nFVery high-frequency noise control

The 104 capacitor is small, inexpensive, and available in many packages, which makes it a default choice in both prototype and mass production designs.

How Does a 104 Capacitor Work?

A capacitor stores electrical energy between two conductive plates separated by an insulating material called dielectric. When voltage is applied, electric charge accumulates on the plates. When the circuit needs a short burst of current, the capacitor can release that stored energy quickly.

In a 104 capacitor, the capacitance value is 0.1 µF, which is suitable for fast charge and discharge behavior. This is why it is frequently used for bypass and decoupling functions.

In a PCB circuit, the working behavior depends on several factors:

FactorEffect on Performance
CapacitanceDefines charge storage capacity
Voltage ratingDefines safe operating voltage range
DielectricAffects stability, loss, and aging
ESRInfluences filtering and heat behavior
ESLAffects high-frequency performance
PlacementDetermines real decoupling efficiency

For high-speed circuits, the PCB layout can be as important as the capacitor itself. A 104 capacitor placed far from the IC may lose much of its filtering effect because the trace inductance becomes too high.

What Are the Main Types of 104 Capacitors?

The marking “104” only tells the capacitance value. It does not identify the capacitor type. Different 104 capacitors may have very different materials, structures, voltage ratings, and applications.

TypeCommon UseKey Feature
Ceramic 104 capacitorIC decoupling, bypass, general circuitsSmall size, low cost, fast response
MLCC 104 capacitorSMT PCB assembly, compact electronicsSuitable for automated assembly
Film 104 capacitorAudio, timing, AC circuits, industrial boardsGood stability and low loss
Safety-rated 104 capacitorAC input filtering, EMI suppressionRequires X or Y safety certification
Dipped ceramic 104 capacitorThrough-hole boards, repair, older designsEasy manual soldering
High-voltage 104 capacitorPower supplies, lighting, industrial controlHigher voltage endurance

For modern SMT PCB assembly, the most common option is the MLCC 104 capacitor, usually in 0402, 0603, 0805, or 1206 package sizes.

What Materials Are Used in a 104 Capacitor?

A 104 capacitor may use ceramic, plastic film, or other dielectric materials. The dielectric material determines capacitance stability, temperature behavior, voltage response, and long-term reliability.

DielectricCommon CharacteristicsTypical Use
X7RStable from -55°C to +125°C, general-purposeIndustrial and automotive circuits
X5RStable from -55°C to +85°C, compact MLCCConsumer and compact devices
Y5VHigh capacitance in small size, wider variationLow-cost non-critical circuits
C0G / NP0Very stable, low lossPrecision timing and RF circuits
Polyester filmGood insulation and stable behaviorGeneral film capacitor use
Polypropylene filmLow loss, good AC performancePower, snubber, and EMI circuits

For decoupling near ICs, X7R and X5R are common. For precision frequency or timing circuits, C0G/NP0 is better, although 0.1 µF C0G capacitors are usually larger and more expensive.

What Do 104K, 104M, and 104J Mean?

Many capacitors include a letter after the capacitance code. This letter usually indicates capacitance tolerance.

MarkingCapacitanceTolerance
104J0.1 µF±5%
104K0.1 µF±10%
104M0.1 µF±20%
104Z0.1 µF+80% / -20%

A 104K capacitor means a 0.1 µF capacitor with ±10% tolerance. A 104M capacitor means the same nominal value with ±20% tolerance.

For decoupling circuits, ±10% or ±20% is often acceptable. For timing, filtering, and frequency-sensitive circuits, tighter tolerance may be required. Buyers should avoid selecting only by “104” because tolerance and dielectric can change the actual circuit performance.

Where Is a 104 Capacitor Used?

The 104 capacitor is used across many electronic products because it fits several basic circuit functions.

ApplicationHow the 104 Capacitor Helps
IC decouplingStabilizes voltage near power pins
Power rail bypassReduces high-frequency noise
Signal couplingBlocks DC while passing AC signal
RC timing circuitWorks with a resistor to set delay or timing
Sensor moduleReduces noise around signal and supply lines
LED driverHelps improve power stability
Motor control boardSuppresses switching noise
Communication deviceSupports cleaner power for RF and logic circuits
Automotive electronicsHelps stabilize control modules
Industrial controllerImproves noise immunity in harsh environments

On a PCB, 104 capacitors are often placed near microcontrollers, logic ICs, op-amps, voltage regulators, connectors, and communication chips.

How to Choose the Right 104 Capacitor?

Choosing the right 104 capacitor requires more than confirming the capacitance value. The complete selection should match the electrical, mechanical, thermal, and production requirements of the project.

ParameterWhat to Check
Capacitance100 nF / 0.1 µF
Voltage ratingHigher than actual working voltage with margin
DielectricX7R, X5R, C0G, film, or safety-rated type
Tolerance±5%, ±10%, ±20%, or project-specific
Package size0402, 0603, 0805, 1206, radial, axial, etc.
Temperature rangeMatch operating environment
DC bias behaviorImportant for MLCC capacitance stability
Safety approvalRequired for AC mains EMI applications
Mounting typeSMT or through-hole
Supply statusCheck lifecycle, stock, and alternatives

For a 5V or 12V DC circuit, engineers often select 16V, 25V, or 50V capacitors depending on reliability requirements. For automotive or industrial use, higher voltage margin and better temperature stability are usually preferred.

104 Ceramic Capacitor vs 104 Film Capacitor

A 104 ceramic capacitor and a 104 film capacitor may have the same capacitance value, but they behave differently in real circuits.

Item104 Ceramic Capacitor104 Film Capacitor
SizeSmallerLarger
CostUsually lowerUsually higher
SMT availabilityVery commonLess common than MLCC
StabilityDepends on dielectricGenerally good
High-frequency responseGood for decouplingGood for selected AC applications
Voltage optionsWide rangeWide range
Typical usePCB decoupling, bypassAudio, timing, AC, EMI, industrial circuits

For compact digital boards, ceramic MLCC is usually the first choice. For AC signal circuits, audio paths, timing stability, and some power applications, film capacitors may be preferred.

What Should Engineers Notice During PCB Design?

A 104 capacitor works best when the PCB layout supports its function. Poor placement can reduce filtering performance even when the component value is correct.

For IC decoupling, place the capacitor as close as possible to the power and ground pins. Keep traces short and wide. Use direct vias to the power and ground planes when possible. Avoid routing the capacitor through long thin traces.

Design PointRecommended Practice
PlacementClose to IC power pin
Ground connectionShort path to ground plane
Trace lengthAs short as practical
Via useUse nearby vias for power and ground
Loop areaKeep current loop small
Multiple ICsUse local decoupling for each IC
High-speed circuitsCombine 104 with smaller capacitors if needed

In dense PCB layouts, engineers sometimes place 0402 or 0201 MLCCs directly under or beside IC packages to reduce parasitic inductance.

What Common Problems Can Happen with a 104 Capacitor?

Although the 104 capacitor is simple, several problems can appear during design, sourcing, assembly, or field operation.

ProblemPossible CausePractical Solution
Poor filtering effectCapacitor placed too far from ICImprove layout and reduce loop area
Lower actual capacitanceMLCC DC bias effectUse higher voltage rating or larger package
CrackingBoard bending or thermal stressImprove PCB handling and use soft termination if needed
Wrong value assembledSimilar appearance of MLCCsUse BOM control and incoming inspection
Leakage or shortOvervoltage, damage, contaminationCheck voltage margin and quality control
Noise remains highInsufficient capacitor networkAdd bulk and high-frequency capacitors
Failure in AC inputNon-safety capacitor usedUse certified X/Y safety capacitor

For mass production, capacitor issues are often linked to incorrect substitution, poor storage control, soldering stress, or insufficient verification during BOM replacement.

How Is a 104 Capacitor Tested?

Testing depends on capacitor type and application. For normal PCB assembly, manufacturers may check capacitance, appearance, solderability, polarity if applicable, and placement accuracy. Since most 104 ceramic capacitors are non-polarized and visually similar, BOM control and reel label verification are important.

Test MethodPurpose
Capacitance measurementConfirms actual capacitance value
LCR meter testMeasures capacitance, ESR, and loss factor
Visual inspectionChecks cracks, damage, and marking
AOI inspectionConfirms placement and solder joint quality
X-ray inspectionChecks hidden solder issues if needed
ICT testVerifies assembled circuit connectivity
Functional testConfirms circuit-level performance
Reliability testChecks temperature, humidity, or vibration endurance

For high-reliability products, capacitor selection should be verified under real operating voltage and temperature, not only at room temperature.

What Affects 104 Capacitor Cost?

The price of a 104 capacitor depends on more than capacitance. Two capacitors with the same “104” marking may have very different costs because of material, voltage rating, size, tolerance, certification, and brand.

Cost FactorImpact
Dielectric materialC0G and specialty dielectrics cost more
Voltage ratingHigher voltage often increases cost
Package sizeLarger MLCCs may cost more
ToleranceTight tolerance increases price
Safety certificationX/Y capacitors cost more than general types
BrandAuthorized brands may have price differences
QuantityBulk purchasing improves unit cost
Supply conditionShortage or EOL status can raise cost
Testing requirementExtra inspection increases total cost

For OEM and ODM projects, the best approach is not always choosing the cheapest capacitor. A stable part with reliable supply and suitable electrical margin can reduce rework, field failure, and production delays.

How to Buy 104 Capacitors for Production?

For production purchasing, buyers should confirm the full part specification instead of searching only for “104 capacitor.” The BOM should include capacitance, tolerance, voltage, dielectric, package size, manufacturer part number, and approved alternatives.

ItemWhat to Confirm
Capacitance0.1 µF / 100 nF
ToleranceJ, K, M, or specified tolerance
Voltage16V, 25V, 50V, 100V, or higher
DielectricX7R, X5R, C0G, film, safety type
Package0402, 0603, 0805, 1206, radial, etc.
BrandOriginal manufacturer and traceable source
DatasheetConfirm parameters before approval
CertificationRoHS, REACH, AEC-Q200, UL, or safety approval if required
PackagingTape and reel, bulk, ammo pack, or tray
AlternativesApproved second source for stable supply

For PCBA factories, component substitution should be reviewed by engineering before production. A replacement with the same capacitance but different dielectric or voltage rating may cause performance changes.

How to Identify a 104 Capacitor Correctly?

Through-hole capacitors may show “104” directly on the body. SMT MLCCs usually have no printed marking because the package is too small. In that case, the value must be identified through reel labels, BOM records, supplier documents, and measurement.

MethodSuitable For
Printed codeDipped ceramic, film, larger capacitors
Reel labelSMT MLCC production parts
BOM and MPNEngineering and procurement control
LCR meterValue confirmation
Datasheet checkFull parameter verification
Supplier traceabilityQuality and authenticity control

For buyers, visual checking alone is not enough. A 104 capacitor in 0603 X7R 50V may look almost identical to another 0603 capacitor with a different value. Controlled labeling and traceable sourcing are essential.

What Quality Standards Matter for 104 Capacitors?

The required standards depend on the product application. For consumer electronics, RoHS and REACH compliance may be sufficient. For automotive electronics, AEC-Q200-qualified capacitors are commonly preferred. For AC mains EMI suppression, X or Y safety certification is mandatory.

RequirementTypical Application
RoHSGeneral electronic products
REACHExport and environmental compliance
AEC-Q200Automotive electronic components
UL / ENEC / VDESafety capacitors for AC circuits
ISO-controlled sourcingProduction quality management
Lot traceabilityIndustrial, medical, automotive, aerospace projects

For regulated or high-reliability industries, capacitor traceability should cover supplier source, batch number, incoming inspection, production lot, and shipment record.

FAQs About 104 Capacitor

What is the value of a 104 capacitor?

A 104 capacitor has a value of 100,000 pF, which equals 100 nF or 0.1 µF. The first two digits “10” are the significant numbers, and the third digit “4” means four zeros are added in picofarads.

Is a 104 capacitor the same as 0.1 µF?

Yes. A 104 capacitor is the same as 0.1 µF. It can also be written as 100 nF or 100,000 pF. These are different unit expressions for the same capacitance value.

What is a 104 ceramic capacitor used for?

A 104 ceramic capacitor is commonly used for IC decoupling, power supply bypassing, signal filtering, and noise reduction. It is often placed close to IC power pins to stabilize voltage during fast switching.

What does 104K mean on a capacitor?

104K means the capacitor value is 0.1 µF with a tolerance of ±10%. The “104” indicates capacitance, while the “K” indicates tolerance. Other common tolerance letters include J for ±5% and M for ±20%.

Can I replace a 104 capacitor with another 0.1 µF capacitor?

Usually yes, but the replacement should match voltage rating, dielectric material, tolerance, package size, temperature range, and safety approval if used in AC circuits. Matching capacitance alone is not always enough.

Does a 104 capacitor have polarity?

Most 104 ceramic and film capacitors are non-polarized, so they can be installed in either direction. However, engineers should still check the datasheet because capacitor type and application may vary.

What voltage rating should I choose for a 104 capacitor?

The voltage rating should be higher than the actual working voltage with a suitable margin. For common low-voltage DC circuits, 16V, 25V, or 50V capacitors are often used. Industrial and automotive circuits may require higher ratings.

Is a 104 capacitor good for power supply filtering?

Yes. A 104 capacitor is widely used for high-frequency filtering and decoupling. It often works together with larger capacitors such as 1 µF, 10 µF, or 22 µF to cover a wider noise frequency range.

Why does an MLCC 104 capacitor lose capacitance under DC voltage?

Class II ceramic capacitors such as X5R and X7R can lose effective capacitance under DC bias. The amount depends on voltage rating, package size, dielectric, and applied voltage. Engineers should check datasheet curves for critical designs.

Can a 104 capacitor be used in AC mains circuits?

Only safety-certified capacitors should be used across or from AC mains lines. A general 104 capacitor should not replace an X or Y safety capacitor. For EMI suppression, always choose certified safety-rated components.

What package size is common for SMT 104 capacitors?

Common SMT packages include 0402, 0603, 0805, and 1206. Smaller packages save space, while larger packages may provide better capacitance stability under DC bias and higher voltage ratings.

How can I test a 104 capacitor?

You can test it with an LCR meter or capacitance meter. For production, suppliers and PCBA factories may also use incoming inspection, AOI, ICT, and functional testing to verify assembly quality and circuit performance.

Why are 104 capacitors placed near ICs?

They are placed near ICs to supply short bursts of current and reduce high-frequency voltage noise. Short placement distance lowers parasitic inductance and improves decoupling performance.

What is the difference between 103 and 104 capacitors?

A 103 capacitor is 10,000 pF, or 10 nF. A 104 capacitor is 100,000 pF, or 100 nF. The third digit controls the number of zeros added in picofarads.

How should buyers source 104 capacitors for mass production?

Buyers should source by full manufacturer part number, not only by “104.” The approved specification should include capacitance, voltage, tolerance, dielectric, package, compliance, lifecycle status, and traceable supply source.

Conclusion

A 104 capacitor is a 0.1 µF / 100 nF capacitor used in a wide range of electronic circuits. It is especially valuable for IC decoupling, noise suppression, power rail bypassing, signal filtering, and compact PCB assembly. For engineering teams, the main selection points are voltage rating, dielectric material, tolerance, package size, temperature stability, and real circuit placement. For buyers, the key is to source by full specification and verified part number, not by the “104” marking alone.

For stable production, select approved brands, confirm datasheets, prepare alternative part numbers, and maintain traceable sourcing records. This helps reduce quality risk, avoid production delays, and support long-term product reliability.

If you are looking for reliable OEM manufacturing, ODM production, sample development, mass production, or custom engineering solutions, welcome to contact our engineering team for technical support and quotation service.

You may also like

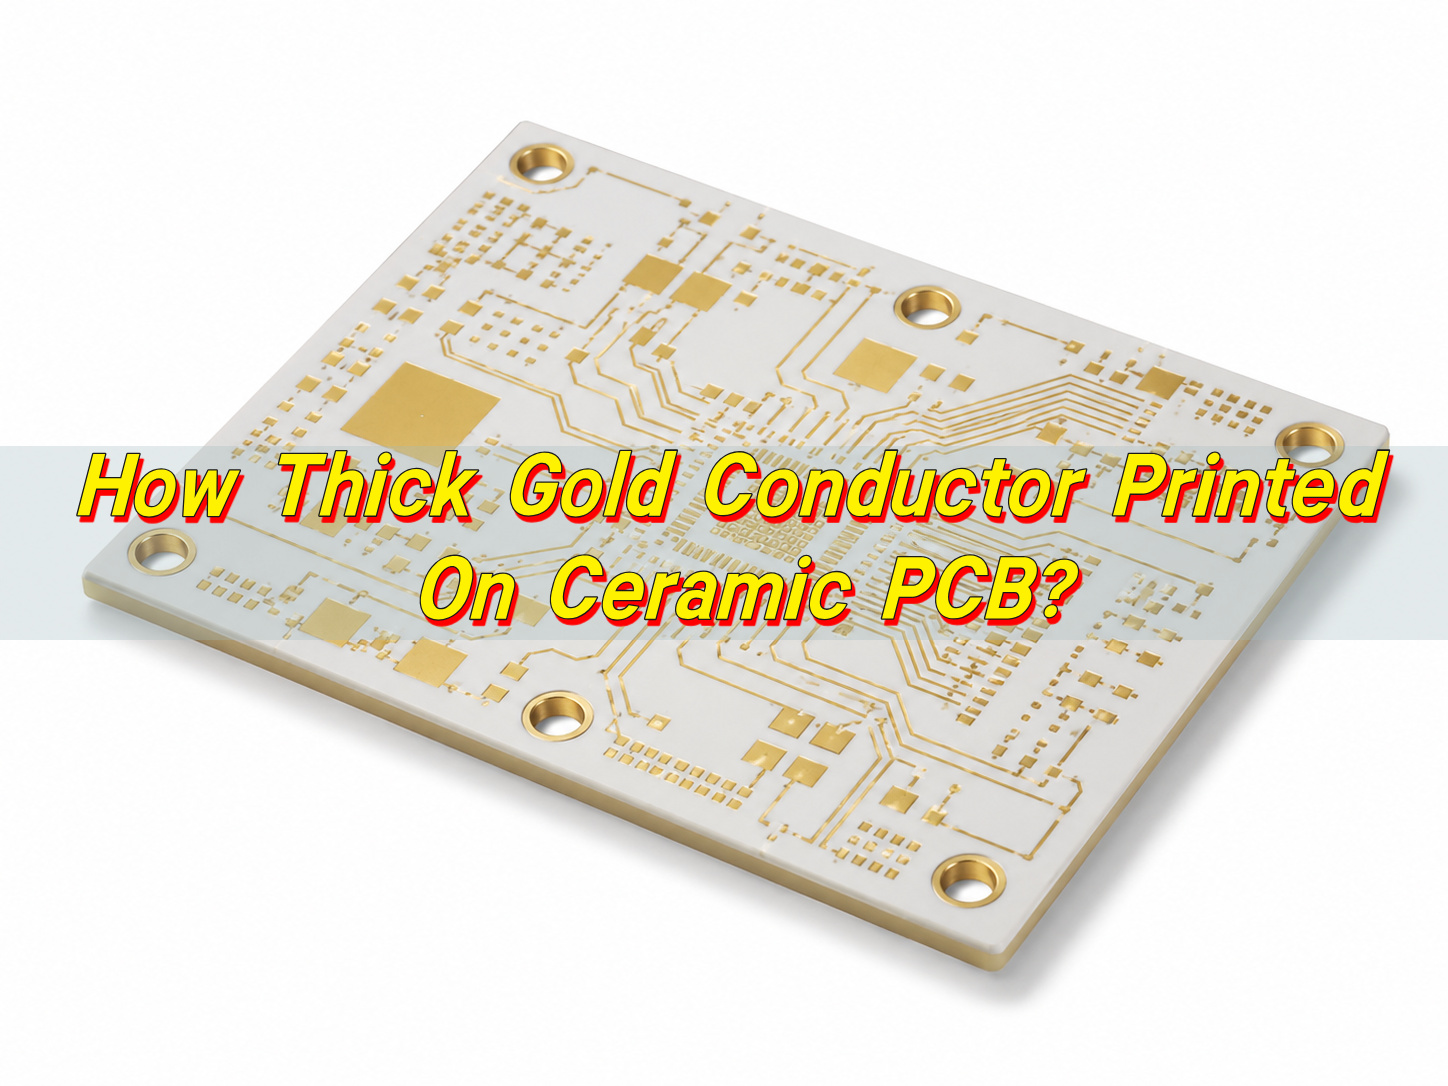
How Thick Gold Conductor Printed On Ceramic PCB?

May 29th, 2026

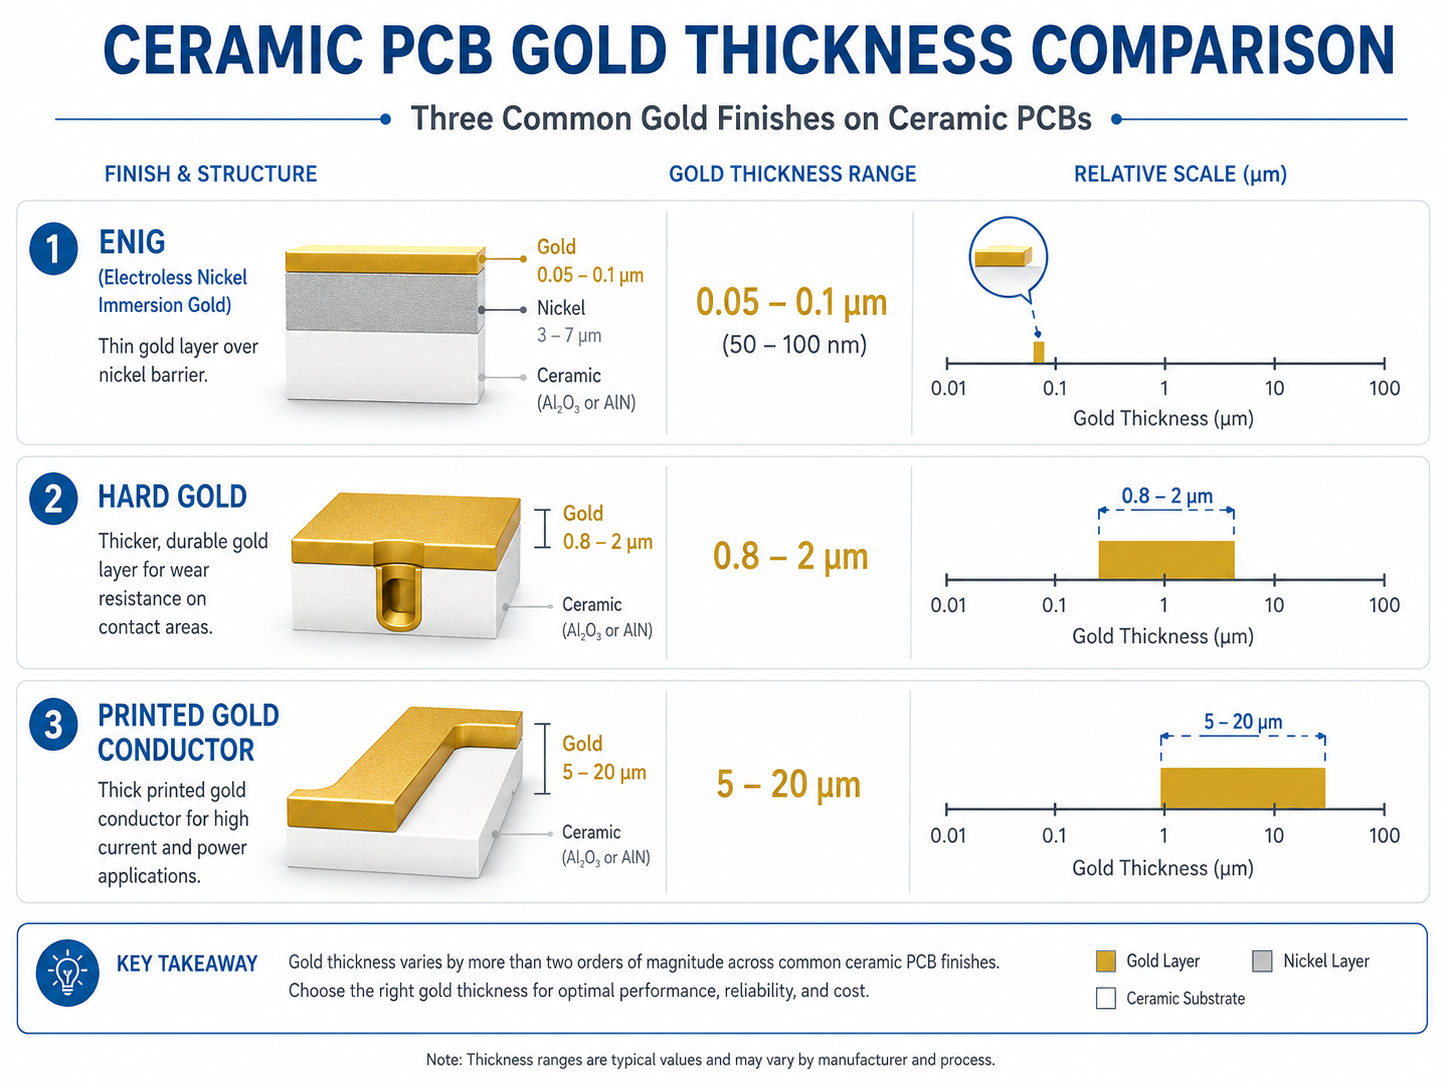
How thick gold conductor printed on ceramic PCB depends on the manufacturing method, conductor paste, firing profile, circuit function, and required reliability level. In thick-film ceramic PCB production, printed gold conductors are commonly around 5–20 μm after firing. Many commercial gold conductor pastes are designed around 6–12 μm fired thickness for one print pass. If the design uses gold plating instead of printed gold, the thickness is usually much thinner. ENIG gold is often around 0.05–0.1 μm, while hard gold for contact areas is commonly around 0.8–2 μm.

How Thick Gold Conductor Printed On Ceramic PCB?

EBest Circuit (Best Technology) supports ceramic PCB fabrication, DFM review, material selection, PCBA assembly, and testing. For ceramic PCB designs with gold conductors or gold-plated surfaces, the gold specification should be reviewed before production to avoid unclear drawings, unnecessary cost, or unsuitable surface performance.

What Is a Gold Conductor on a Ceramic PCB?

A gold conductor on a ceramic PCB is a conductive metal layer formed on a ceramic substrate such as alumina, aluminum nitride, or other technical ceramic materials. It may be used as a circuit trace, bonding pad, electrode, sensor pattern, RF path, or contact area. Unlike standard FR4 circuit boards, ceramic PCBs are often used in high-temperature, high-frequency, high-power, or high-reliability applications, so the conductor material must match stricter performance requirements.

In thick-film ceramic PCB manufacturing, the gold conductor is usually made from screen-printable gold paste. The paste is printed onto the ceramic surface, dried, and fired at high temperature. During firing, organic materials burn away, and the metal particles form a stable conductive film on the ceramic substrate. The final fired thickness is usually measured in micrometers.

Gold conductors are often used in:

  • Ceramic hybrid circuits
  • RF and microwave modules
  • Medical electronic assemblies
  • Aerospace and defense electronics
  • High-temperature sensors
  • Precision instruments
  • Wire-bonded ceramic packages
  • Contact or electrode structures

For these applications, the gold conductor must be specified clearly. A drawing should define whether the gold is printed, plated, bondable, solderable, or used only as a contact surface.

Why Is Gold Used on Ceramic PCBs?

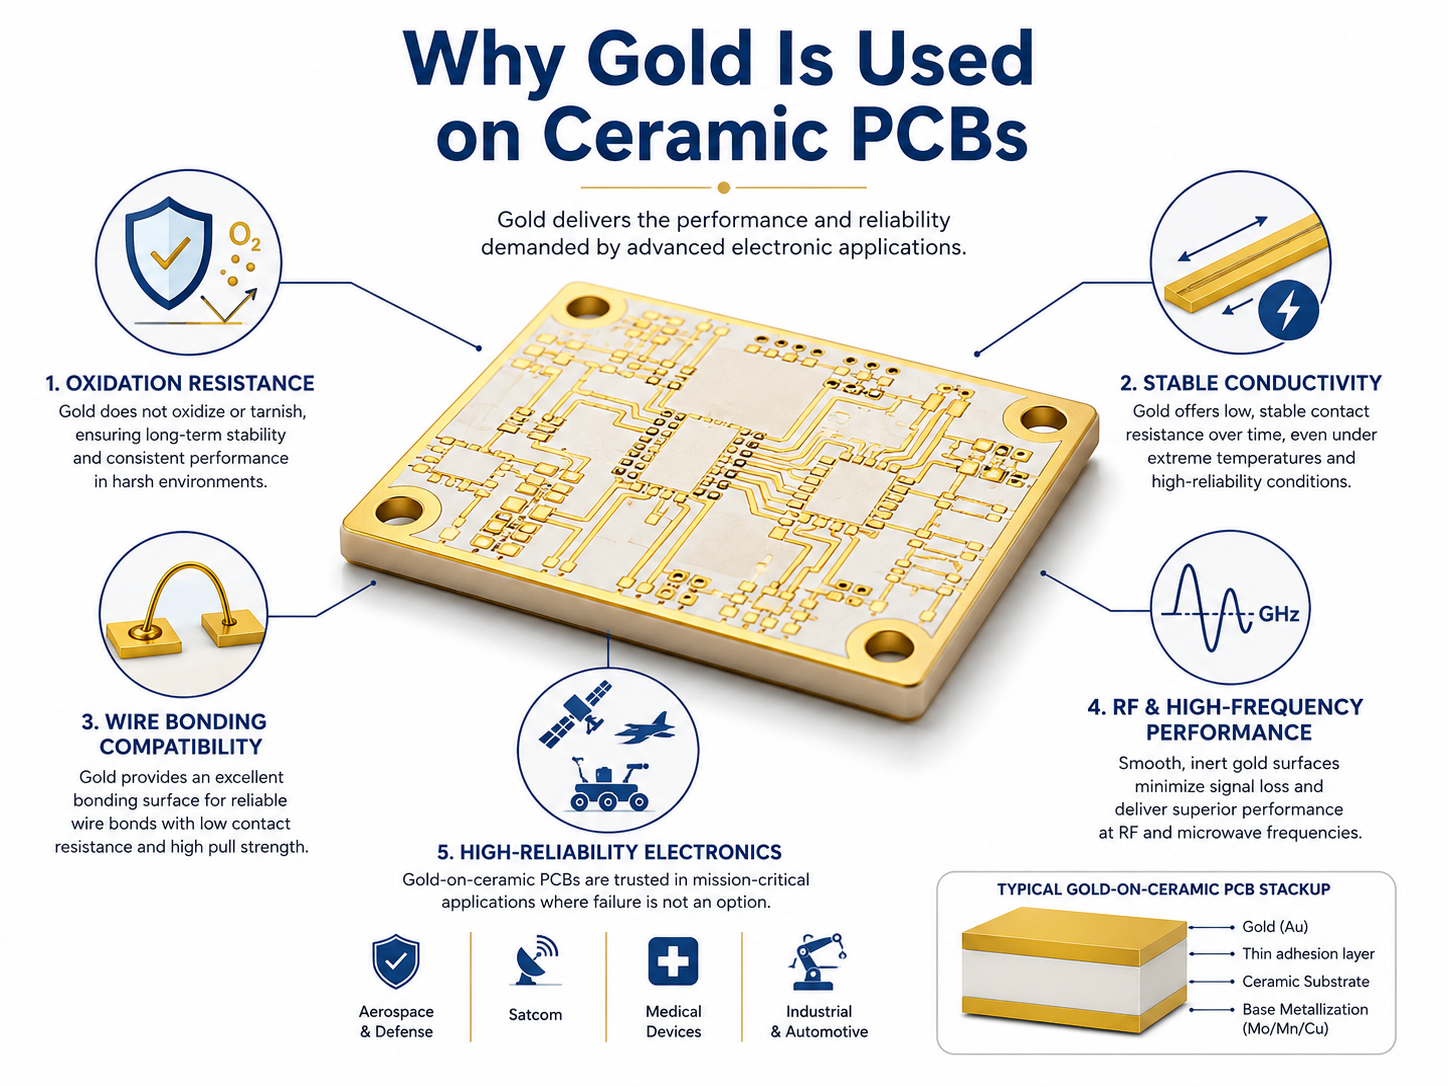
Gold is used on ceramic PCBs because it offers stable electrical performance, excellent oxidation resistance, and reliable surface behavior. Ceramic substrates are often selected for demanding environments, so the metal system must support thermal stability, clean contact surfaces, and long service life.

Gold does not oxidize easily under normal operating conditions. This helps maintain stable contact resistance and reliable bonding performance. For wire bonding, sensor electrodes, RF circuits, and precision contact areas, this surface stability is valuable. It also supports storage stability before assembly, especially for projects with strict quality control requirements.

How Thick Gold Conductor Printed On Ceramic PCB?

Gold is also compatible with many high-reliability ceramic circuit applications. When the right gold paste or plating structure is selected, it can support fine traces, bond pads, contact surfaces, and low-current signal paths. In hybrid microelectronics, gold is commonly used because the circuit may include bare dies, fine wires, precision resistors, and compact ceramic layouts.

However, gold is expensive, so it should be used where it provides clear technical value. For high-current power substrates, copper-based ceramic technologies may be more suitable. For general solder pads, ENIG or other finishes may be enough. For wire bonding or stable contact areas, gold becomes more important.

Gold is commonly chosen for ceramic PCBs because it provides:

  • Stable contact resistance for signal and interface areas
  • Excellent oxidation resistance during storage and operation
  • Good bondability when the correct material system is used
  • Reliable performance in high-temperature or high-reliability products
  • Consistent surface quality for sensors, RF circuits, and precision electronics

In ceramic PCB projects, EBest Circuit reviews the gold area, circuit function, ceramic material, assembly method, and testing requirements before recommending a process. This helps control cost while keeping the required performance.

Is Gold Printed or Plated on Ceramic PCB?

Gold can be either printed or plated on a ceramic PCB. The right process depends on the circuit structure and the function of the gold layer.

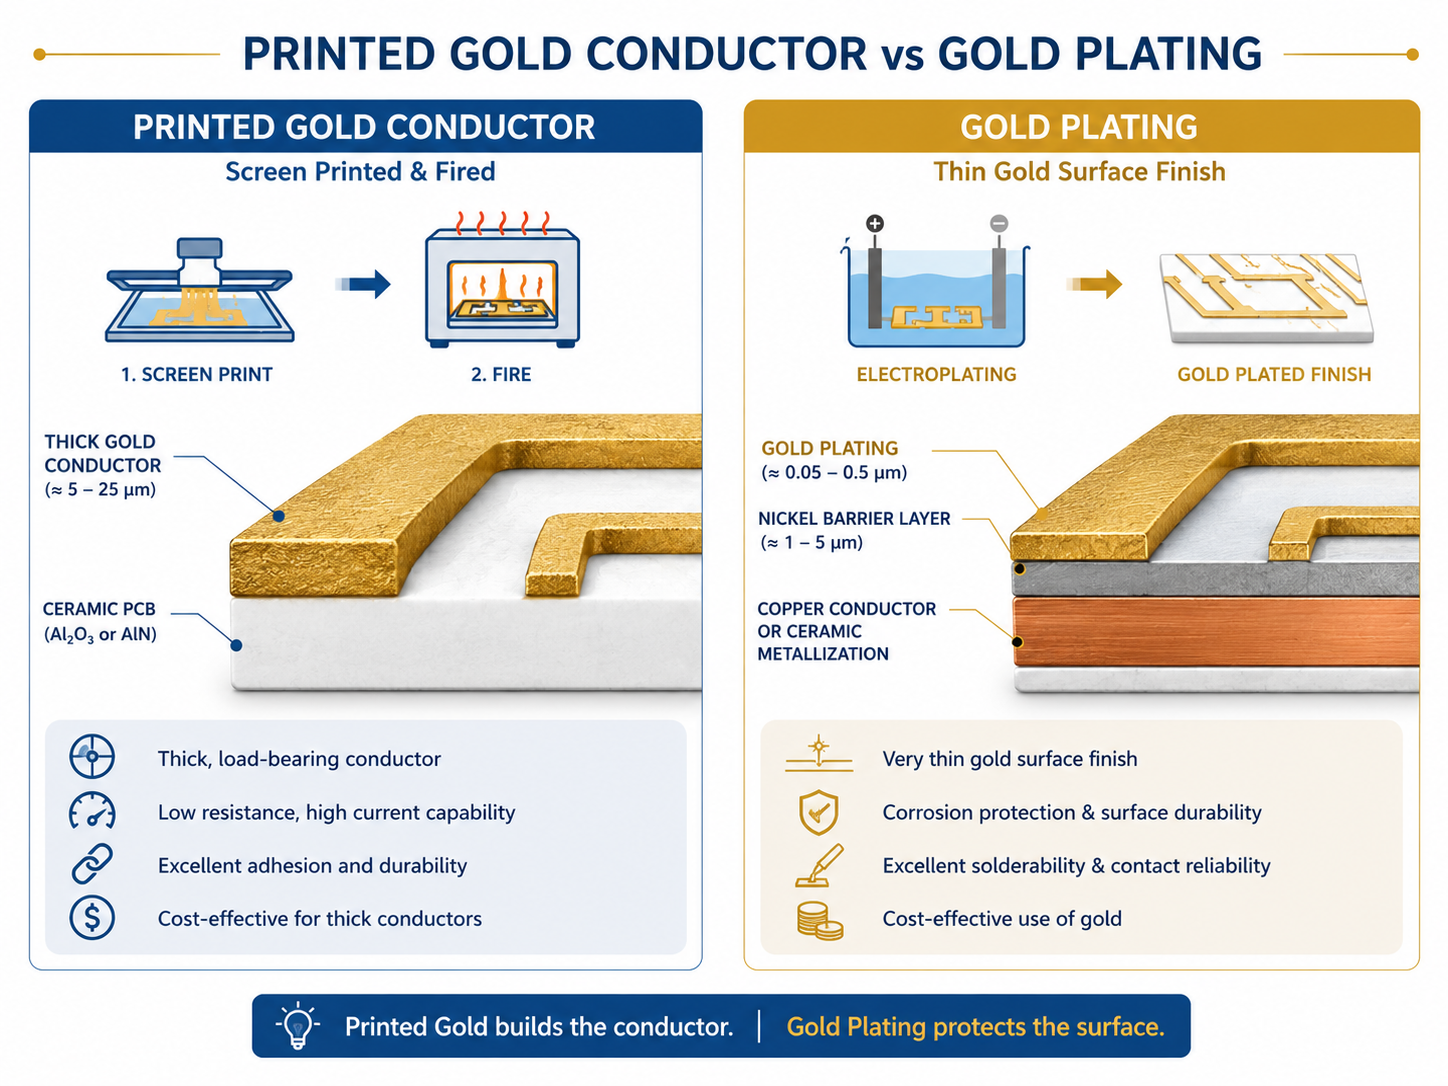
Printed gold is common in thick-film ceramic PCB production. A gold conductor paste is screen printed onto the ceramic substrate, dried, and fired. After firing, the gold film becomes part of the circuit. It can be used as a conductor trace, bonding pad, electrode, or contact area. Printed gold is usually much thicker than ENIG gold plating.

Plated gold is deposited onto an existing metal surface. It may be applied over nickel, copper, or another metallization layer. In many cases, plated gold is used as a surface finish rather than the main conductor. ENIG, soft gold, and hard gold are common examples.

The difference affects both design and quotation. If a drawing only says “gold,” the manufacturer may not know whether the requirement means printed gold conductor, ENIG, soft gold, hard gold, or bondable gold. These options have different thickness ranges, costs, and reliability characteristics.

How Thick Gold Conductor Printed On Ceramic PCB?

A clear specification should include:

  • Gold process: printed gold, ENIG, soft gold, hard gold, or selective gold
  • Required thickness range
  • Application area on the board
  • Bonding or soldering requirement
  • Inspection method
  • Applicable standard if required

For example, “printed gold conductor, fired thickness 8–12 μm” is very different from “ENIG finish, gold thickness 0.05–0.1 μm.” Both may appear gold-colored, but their function is not the same.

What Is the Difference Between Printed Gold and Gold Plating?

Printed gold and gold plating both use gold, but they are not interchangeable. Printed gold is usually a functional conductor formed by thick-film printing and firing. Gold plating is a deposited finish applied over another metal layer.

Printed gold is selected when gold itself must form the circuit path, bonding pad, sensor electrode, or ceramic conductor pattern. Gold plating is selected when the circuit already has another conductor layer and the surface needs protection, solderability, bondability, or wear resistance.

ItemPrinted Gold ConductorGold Plating
ProcessScreen printing, drying, firingChemical or electrochemical deposition
Common ThicknessUsually 5–20 μm fired thicknessENIG about 0.05–0.1 μm; hard gold often 0.8–2 μm
Main RoleCircuit conductor, bonding pad, electrode, RF pathSurface finish, contact layer, solderable or bondable surface
Base MaterialPrinted directly on ceramicDeposited over nickel, copper, or another metal layer
Surface CharacterMay look matte or slightly texturedUsually smoother and more uniform
Cost DriverGold paste area, fired thickness, print countPlated area, thickness, masking, plating process
Typical UseThick-film ceramic circuits, hybrid modules, sensorsENIG pads, edge contacts, bond pads, selective gold areas

The cost difference can be significant. Printed gold uses precious-metal paste across the printed pattern. Large printed areas or repeated print passes can increase cost quickly. Hard gold plating also adds cost when used over large areas. ENIG uses a very thin gold layer, so it is usually more cost-efficient for solderable surfaces.

From a design point of view, printed gold should be used when its electrical or bonding function is necessary. Gold plating should be used when the surface needs protection, contact durability, or assembly compatibility. Selecting the right option early helps avoid redesign and quotation uncertainty.

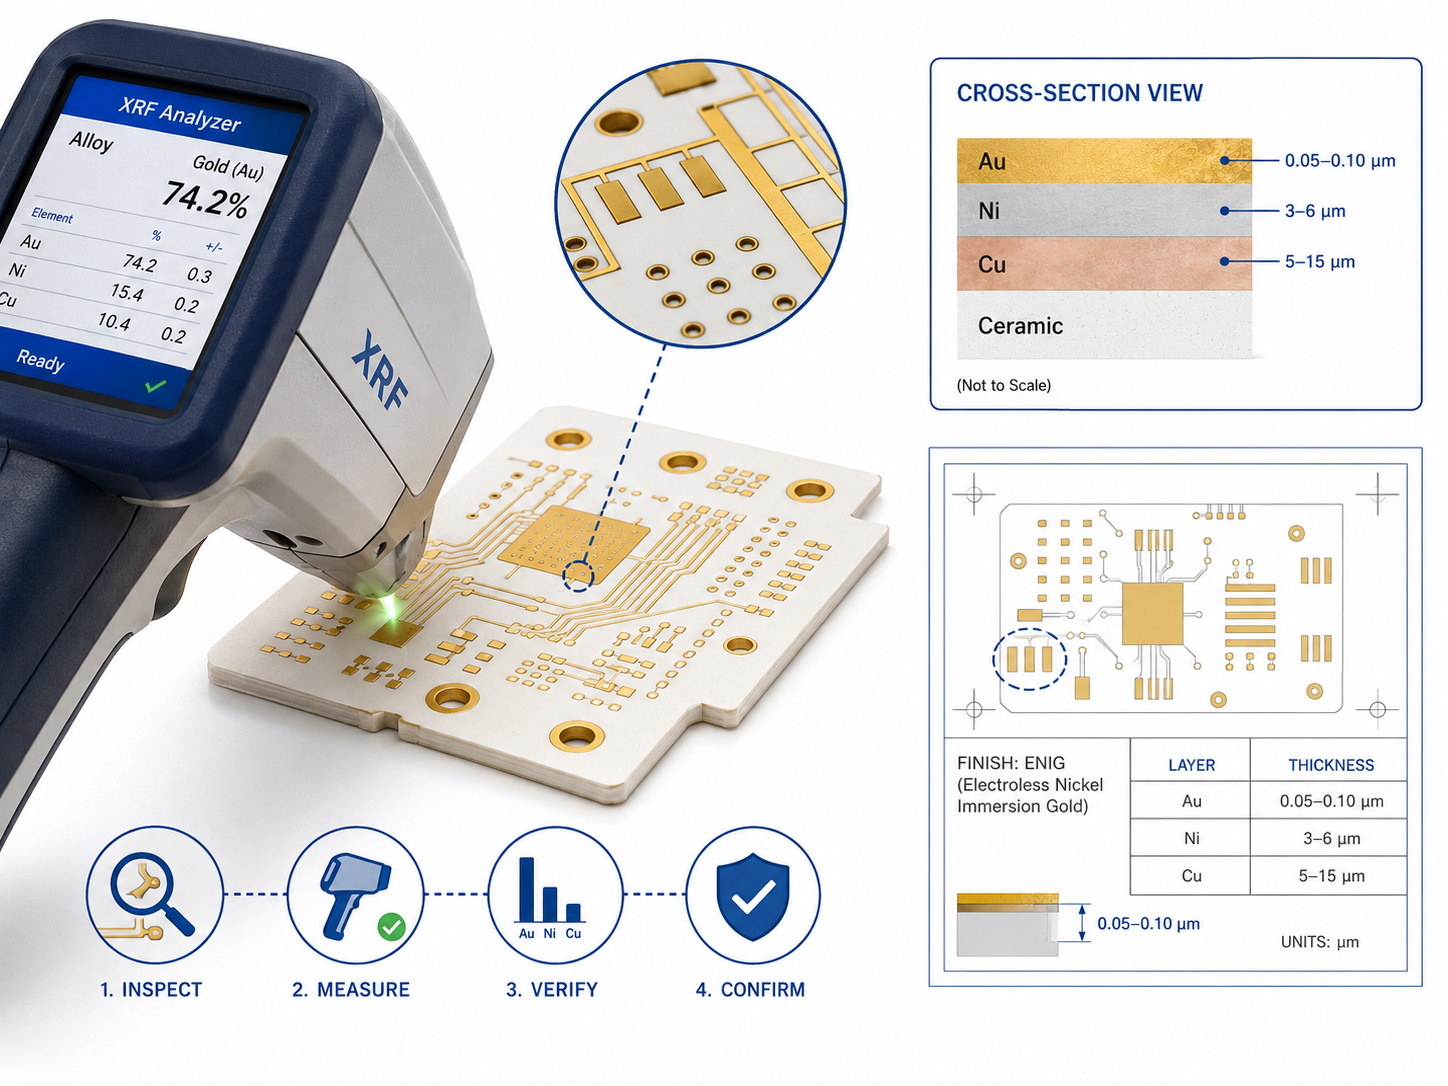
How to Identify Gold on Circuit Boards?

Gold on circuit boards can be identified by documentation, visual inspection, and measurement. Visual appearance alone is not enough because several finishes can look similar. A yellow or shiny surface may be ENIG, hard gold, soft gold, printed gold paste, or another metal finish.

The first step is checking the fabrication drawing. A proper PCB drawing should state the surface finish or conductor material. It should also define thickness, application area, and process requirement. If the drawing says ENIG, the gold layer is a thin surface finish over nickel. If it says printed gold conductor, the gold layer is part of the ceramic circuit pattern.

Visual inspection can provide clues. Printed gold on ceramic may appear slightly matte or textured due to the fired paste structure. Plated gold is often smoother and more reflective. Edge connector hard gold usually appears uniform and is applied only to contact fingers. Bonding pads should look clean and consistent, especially when used for wire bonding.

How Thick Gold Conductor Printed On Ceramic PCB?

Reliable identification usually requires measurement or documentation. Common methods include:

  • Drawing review to confirm the specified finish or conductor process
  • Material certificate review to confirm paste type or plating requirement
  • XRF measurement to check metal thickness without cutting the board
  • Cross-section analysis to observe layer structure and thickness
  • Bondability or solderability testing when the gold area is used in assembly

XRF is widely used for plated gold thickness measurement. Cross-section inspection is useful when the structure is complex or when the gold layer is part of a fired ceramic metallization system. For critical ceramic PCBs, especially in medical, aerospace, RF, and sensor applications, the gold area should be verified according to the function it performs.

How Much Gold Is in a Ceramic Printed Circuit Board?

The amount of gold in a ceramic printed circuit board depends on gold-covered area, gold thickness, and material composition. A board with large printed gold traces contains more gold than a board with only small ENIG-finished pads. Printed gold conductors are often several micrometers thick, while ENIG gold is only a very thin surface layer.

A simple theoretical estimate can be made with this formula:

Gold mass = gold-covered area × gold thickness × gold density

The density of gold is about 19.32 g/cm³. If a ceramic PCB has 1 cm² of pure gold at 10 μm thickness, the theoretical gold mass is about 19.3 mg. If the same area has 0.05 μm ENIG gold, the theoretical gold mass is only about 0.097 mg.

Gold Area and ThicknessApproximate Pure Gold Mass
1 cm² at 0.05 μm ENIG gold0.097 mg
1 cm² at 1 μm hard gold1.93 mg
1 cm² at 10 μm printed gold19.3 mg
4 cm² at 8 μm printed gold61.8 mg
10 cm² at 10 μm printed gold193 mg

These numbers are useful for comparison, but real gold content may vary. Printed gold paste is not always equal to pure dense gold foil. Fired films may include glass, bonding additives, alloying elements, and microscopic porosity. The actual recoverable gold content depends on the specific paste system and fired structure.

For PCB buyers, gold content mainly affects cost. Gold paste and gold plating are expensive compared with many other conductor systems. Large gold areas, thick layers, and unnecessary gold coverage can increase the quotation. A practical design uses gold only where it supports the required function.

EBest Circuit can review ceramic PCB drawings and help customers check whether the gold area, thickness, and finish are suitable for the product. This is especially helpful for prototypes moving toward production, where early design choices affect yield, cost, and inspection requirements.

What Is Ceramic PCB Gold Plating Thickness?

Ceramic PCB gold plating thickness depends on the type of finish. ENIG, hard gold, soft gold, and printed gold all have different thickness ranges and functions.

ENIG is one of the most common gold-related finishes. It consists of electroless nickel with a thin immersion gold layer on top. The gold layer protects the nickel surface and supports solderability. ENIG gold is very thin, commonly around 0.05–0.1 μm, while the nickel layer is much thicker, often around 3–6 μm.

Hard gold is thicker because it is designed for repeated contact and wear resistance. It is often used on edge fingers, spring contacts, test points, and contact pads. Typical hard gold thickness is around 0.8–2 μm, depending on the specification and reliability class.

Soft gold is used when the surface must support wire bonding or special contact performance. Its required thickness depends on the bonding method, wire material, and package design. It should be defined clearly in the drawing.

How Thick Gold Conductor Printed On Ceramic PCB?

Printed gold conductor is not usually called plating. It is a fired thick-film conductor. Its thickness is commonly around 5–20 μm after firing, depending on paste type, screen design, and print process.

Gold TypeTypical ThicknessMain Use
ENIG GoldAbout 0.05–0.1 μmSolder pads, surface protection, storage stability
Hard GoldAbout 0.8–2 μmEdge contacts, test contacts, repeated mating areas
Soft GoldProject-specificWire bonding and special contact surfaces
Printed Gold ConductorAbout 5–20 μmCeramic traces, electrodes, bonding pads, thick-film circuits

Gold thickness should match the function. ENIG does not need to be thick because it protects nickel and supports solderability. Hard gold needs more thickness because it resists mechanical wear. Printed gold is thicker because it may carry the circuit function itself.

A clear drawing note helps the manufacturer quote and produce the board accurately. Instead of writing only “gold plated,” the drawing should define the process, thickness, application area, and performance requirement.

How Does Gold Thickness Affect Conductivity?

Gold thickness affects conductivity because a thicker conductor usually provides a larger cross-sectional area for current flow. When the conductor is thicker, electrical resistance is generally lower. This is especially relevant for printed gold traces on ceramic substrates.

For printed gold conductors, sheet resistance is often used to describe electrical performance. A thicker and denser fired gold layer usually has lower sheet resistance. However, the final resistance also depends on paste composition, firing profile, trace width, trace length, and film density. Two gold conductors with the same thickness may perform differently if they use different paste systems.

Gold thickness can influence several design factors:

  • Trace resistance: Thicker printed conductors usually reduce resistance.
  • Current capacity: More conductor cross-section can support better current handling when the layout also manages heat properly.
  • Contact durability: Hard gold thickness improves resistance to repeated mechanical contact.
  • Wire bonding quality: Bondable gold must have the correct surface condition, not only sufficient thickness.
  • Soldering behavior: Excessive gold in solder joints can affect joint quality, so the finish must match the soldering process.
  • Cost: Thicker gold and larger gold areas increase material cost.

For low-current signal circuits, a standard printed gold thickness may be enough. For high-current circuits, simply increasing gold thickness may not be the best solution. Wider traces, copper-based ceramic substrates, DBC, DPC, AMB, or other metallization structures may provide better electrical and thermal performance.

For RF ceramic PCBs, thickness also affects signal behavior, surface stability, and impedance consistency. The design should consider conductor geometry, ceramic dielectric properties, surface roughness, and manufacturing tolerance together. Gold thickness is only one part of the total RF performance.

The best approach is to define gold thickness based on the actual function. A bonding pad, contact finger, solder pad, RF trace, and sensor electrode may all require different gold specifications.

Is It Worth Extracting Gold from Circuit Boards?

Extracting gold from circuit boards is usually practical only for certified electronic waste recyclers or precious-metal recovery companies. Ceramic printed circuit boards with printed gold conductors may contain more gold than standard ENIG-finished boards, but the recoverable value depends on board quantity, gold area, gold thickness, paste composition, and processing cost.

For small quantities, gold recovery is rarely economical. A ceramic board may contain visible gold, but visible gold does not always mean high recoverable value. ENIG gold is extremely thin, so the actual gold amount on many boards is small. Printed gold conductors may contain more gold, but professional refining is still required to recover it safely and efficiently.

From a manufacturing perspective, the better strategy is to control gold usage during design. Gold should be placed where it improves electrical performance, bondability, contact stability, or reliability. Oversized gold areas increase cost without adding value.

In summary, printed gold conductors on ceramic PCBs are commonly around 5–20 μm after firing, while ENIG gold plating is usually around 0.05–0.1 μm. Hard gold is thicker, often around 0.8–2 μm, because it is used for wear-resistant contact areas. The right thickness depends on the circuit function, assembly method, reliability requirement, and cost target.

EBest Circuit (Best Technology) provides ceramic PCB fabrication, DFM review, material selection, PCBA assembly, and testing support for demanding electronic applications. For ceramic PCB projects involving gold conductors, ceramic PCB gold plating thickness, bonding pads, RF circuits, or high-reliability assemblies, contact sales@bestpcbs.com for engineering support and quotation.

You may also like

High Quality Rapid Prototyping PCB Assembly and Mass Production with Fast Turnaround

May 29th, 2026

Are you looking for rapid prototyping PCB assembly to accelerate product development while keeping costs and risks under control? Many companies use prototype assembly services to verify designs, test functionality, and prepare products for market launch before moving into larger production runs.

Rapid prototyping PCB assembly provides a faster and more flexible way to turn design files into working hardware. By validating a product before volume manufacturing, businesses can reduce delays, improve product quality, and transition to mass production with greater confidence.

Rapid Prototyping PCB Assembly, https://www.bestpcbs.com/blog/2026/05/rapid-prototyping-pcb-assembly/

What is Rapid Prototyping PCB Assembly?

Rapid prototyping PCB assembly is a manufacturing service designed to produce a small quantity of fully assembled PCBs within a short lead time. It allows businesses to transform design files into functional products for testing, evaluation, and validation before moving to larger production volumes.

Compared with traditional manufacturing, prototype assembly focuses on speed, flexibility, and quick feedback. It helps identify potential issues early, reducing the likelihood of costly changes during mass production.

A typical rapid prototype assembly service may include:

  • PCB fabrication and manufacturing
  • Electronic component sourcing
  • SMT and through-hole assembly
  • Inspection and testing procedures
  • Final assembly and shipment

The goal is to shorten development cycles, improve product readiness, and reduce manufacturing risks before full-scale production begins.

Why Choose Rapid Prototype PCB Assembly Before Mass Production?

Before investing in large production quantities, it is important to confirm that a design performs as expected. Prototype assembly provides an efficient way to evaluate functionality, manufacturability, and overall product readiness. Choosing prototype assembly before mass production offers several advantages:

  • Faster Product Validation – Verify performance and functionality using actual assembled hardware.
  • Lower Financial Risk – Avoid expensive production mistakes and unnecessary inventory costs.
  • Greater Design Flexibility – Implement design updates quickly without disrupting large manufacturing runs.
  • Better Production Planning – Identify sourcing, assembly, or manufacturing challenges before scaling production.
  • Improved Product Reliability – Resolve potential issues early and improve overall product quality.

When Should You Choose Rapid Prototype PCB Assembly?

Prototype assembly is not only for new designs. It is useful whenever a project requires testing, validation, demonstration, or small-volume production. Common situations include:

  • New Product Development – Validate new concepts before committing to larger production orders.
  • Functional Verification – Confirm that assembled PCBs operate according to design requirements.
  • Pilot Production Runs – Evaluate manufacturing readiness using a limited production quantity.
  • Product Demonstrations – Prepare working units for presentations, exhibitions, or market evaluations.
  • Design Improvement Cycles – Test revisions and enhancements before finalizing the design.
  • Low-Volume Market Launches – Support initial product releases while demand is being evaluated.

Rapid Prototyping PCB Assembly vs Mass Production: What is Difference?

Choosing between prototype assembly and mass production depends on your project’s stage, objectives, and timeline. While both services involve assembling PCBs, they differ significantly in production volume, lead time, flexibility, and overall manufacturing strategy.

Comparison ItemRapid Prototype PCB AssemblyMass Production PCB Assembly
Primary PurposeDesign validation and testingCommercial product manufacturing
Production Volume1–100 pcs (typically)Hundreds to millions of units
Lead Time24 hours to several daysSeveral weeks or months
Setup TimeMinimalLonger production preparation
Design ChangesEasy to implementDifficult and costly
Manufacturing FlexibilityVery highLimited
Initial InvestmentLowerHigher
Unit CostHigherLower
Risk LevelLower production riskHigher if design is unverified
Inventory CommitmentSmall quantityLarge inventory requirement
Component PurchasingSmall-volume sourcingBulk purchasing for lower costs
Time-to-MarketFasterSlower initial launch
Quality FocusDesign validation and functionalityProcess stability and consistency
Production EfficiencyLowerHigher
Supply Chain PlanningFlexible and adaptiveLong-term planning required
Testing PriorityProduct verificationProcess control and yield optimization
Production ScalingEasy transition to larger volumesAlready optimized for volume output
Suitable ProjectsNew products, pilot runs, design verificationMature products with stable demand
Cash Flow ImpactLower upfront investmentHigher upfront investment
Best Choice WhenProduct performance still needs validationProduct design has been fully approved
Rapid Prototyping PCB Assembly vs Mass Production, https://www.bestpcbs.com/blog/2026/05/rapid-prototyping-pcb-assembly/

How Does Rapid PCB Assembly Reduce Time-to-Market?

In today’s competitive market, launching a product earlier can create significant advantages. Faster development cycles allow businesses to receive feedback sooner, respond to market demand more quickly, and generate revenue earlier. Rapid PCB assembly helps shorten project timelines through several important benefits:

  • Shorter Development Cycles – Receive assembled PCBs quickly for testing and evaluation.
  • Faster Design Improvements – Identify issues early and implement updates without lengthy delays.
  • Reduced Waiting Time – Minimize the gap between design completion and hardware availability.
  • Earlier Production Planning – Begin sourcing and manufacturing preparation sooner.
  • Improved Project Scheduling – Keep development milestones on track and reduce unexpected delays.
  • Quicker Product Launches – Bring products to market faster and gain a competitive advantage.

Reducing time-to-market is not only about manufacturing speed. It is about improving efficiency throughout the entire product development process while maintaining quality and reliability.

What Factors Affect Rapid Prototyping PCB Assembly Lead Time?

Fast turnaround is one of the main reasons companies choose prototype assembly services. However, the total lead time is influenced by several factors throughout the manufacturing process, from material preparation to final delivery.

PCB Fabrication Requirements

  • The PCB itself is often the first factor affecting delivery schedules. Standard PCBs can usually be manufactured quickly, while multilayer boards, high-frequency materials, metal-core PCBs, or special surface finishes may require additional production steps and processing time.

Component Availability

  • Component sourcing can have a significant impact on project timelines. If critical components are out of stock or have long procurement cycles, delivery schedules may be extended. Working with a supplier that has a stable supply chain can help reduce these risks.

Assembly Complexity

  • The number of components, package types, and assembly technologies all influence production time. Boards containing BGAs, fine-pitch devices, or mixed SMT and through-hole components generally require more setup, assembly, and inspection processes.

Testing and Inspection Requirements

  • Quality inspections such as AOI, X-ray inspection, and functional testing help ensure product reliability. Although these procedures require additional processing time, they significantly reduce the risk of defects during later development stages.

Order Quantity

  • Prototype projects typically involve smaller quantities and can often be completed quickly. As order volumes increase, assembly, inspection, and packaging requirements also increase.

Shipping Arrangements

  • Even after production is completed, logistics still affect the final delivery schedule. Choosing express shipping can help reduce overall turnaround time for urgent projects.
Rapid Prototyping PCB Assembly, https://www.bestpcbs.com/blog/2026/05/rapid-prototyping-pcb-assembly/

How Can We Ensure High Quality in Rapid Prototyping PCB Assembly?

A prototype is more than just a sample board. It is the foundation for future product development and volume production. For this reason, maintaining high quality throughout the assembly process is essential. At EBest, quality control begins before production starts and continues until the finished boards are ready for shipment.

Incoming Material Inspection

  • Every project starts with verifying the quality of incoming materials. Components and bare PCBs are inspected to ensure they meet production requirements before assembly begins.

Automated Optical Inspection (AOI)

  • AOI equipment is used to inspect component placement, polarity, solder joints, and other assembly details. This process helps identify potential defects early and improves overall assembly consistency.

X-Ray Inspection for Advanced Packages

  • For BGA components and hidden solder joints, X-ray inspection provides an additional level of verification. This helps ensure proper solder connections that cannot be checked through visual inspection alone.

Controlled Manufacturing Processes

  • Stable solder paste printing, accurate component placement, and controlled reflow profiles all contribute to consistent assembly quality. Process control helps reduce variation between boards.

Functional Testing

  • When required, assembled PCBs can undergo functional testing to confirm that they perform according to design expectations before shipment.

Final Quality Verification

  • Before delivery, finished assemblies undergo final inspection to verify workmanship, assembly accuracy, and overall product condition.

How Do We Ensure On-Time Delivery for Rapid Prototyping PCBA Orders?

For many projects, speed is just as important as quality. Delays in prototype delivery can affect testing schedules, product launches, and future production planning.

To support fast turnaround requirements, EBest focuses on efficient coordination across every stage of the manufacturing process.

Fast PCB Manufacturing Capability

  • With in-house PCB production resources and expedited manufacturing services, urgent PCB orders can often be processed much faster than traditional production schedules.

Stable Component Supply Chain

  • A strong global sourcing network helps improve component availability and reduce procurement-related delays. This is especially important when projects require multiple component types from different suppliers.

High-Speed SMT Production Lines

  • Modern assembly equipment enables efficient processing of both prototype and production orders. High placement capacity helps shorten manufacturing cycles and improve delivery performance.

Flexible Production Scheduling

  • Production resources can be adjusted according to project priorities, helping urgent orders move through manufacturing more efficiently.

Integrated Project Management

  • Coordinating PCB fabrication, component sourcing, assembly, testing, and shipping through one supplier helps eliminate communication delays and improves overall workflow efficiency.

Efficient Logistics Support

  • Reliable shipping partners and flexible transportation options help ensure products reach their destination on schedule.

Why Choose EBest for Rapid Prototyping PCB Assembly and Volume Production?

Selecting the right manufacturing partner can simplify product development, improve delivery performance, and reduce overall project risks. Beyond manufacturing capability, a reliable supplier should also provide flexibility, responsiveness, and long-term production support.

With more than 19 years of experience, EBest provides one-stop PCB and PCBA solutions for prototype and volume production projects worldwide.

One-Stop Manufacturing Services

  • PCB fabrication, component sourcing, assembly, testing, and box build services can all be managed through a single supplier. This reduces communication complexity and shortens project timelines.

Fast Turnaround Support

  • Urgent projects often require quick action. Our manufacturing capabilities allow prototype orders to move through production efficiently while maintaining quality standards.

Strong Component Sourcing Capability

  • A stable supply chain helps improve material availability and supports smoother project execution, especially for projects with demanding schedules.

Advanced Assembly Capability

  • We support SMT, through-hole assembly, mixed-technology assemblies, BGA packages, flex PCBs, ceramic PCBs, and many other specialized manufacturing requirements.

Prototype to Production Support

  • Projects can move seamlessly from prototype validation to full-scale manufacturing without changing suppliers, helping maintain consistency throughout the product lifecycle.

Certified Quality Systems

  • Our manufacturing processes are supported by internationally recognized certifications, including ISO 9001, IATF 16949, ISO 13485, AS9100D, RoHS, REACH, and UL.

Global Manufacturing Experience

  • Years of experience serving international markets allow us to support a wide range of industries and project requirements.
Rapid Prototyping PCB Assembly, https://www.bestpcbs.com/blog/2026/05/rapid-prototyping-pcb-assembly/

FAQs About Rapid Prototyping PCB Assembly Services

Q1: How fast can rapid prototyping PCB assembly be completed?

A1: The turnaround time depends on PCB complexity, component availability, assembly requirements, and testing needs. Standard prototype projects can often be completed within a few days, while urgent orders may be expedited to support tight development schedules. Working with a supplier that offers PCB fabrication, component sourcing, and assembly under one roof can further reduce lead times.

Q2: What files are required to get a PCB assembly quotation?

A2: To receive an accurate quotation, it is recommended to provide Gerber files, BOM lists, assembly drawings, and Pick & Place files if available. Complete project documentation helps eliminate unnecessary back-and-forth communication, improves quotation accuracy, and speeds up project evaluation.

Q3: Can you source electronic components for my project?

A3: Yes. We provide complete component sourcing services as part of our one-stop PCB assembly solution. A stable supply chain helps improve component availability, reduce procurement risks, and shorten overall project timelines. This allows projects to move into production more efficiently.

Q4: Can prototype PCB assembly be scaled to mass production later?

A4: Absolutely. Many products begin with prototype validation and later transition into volume production. Using the same manufacturing partner helps maintain consistent quality standards, sourcing channels, and production processes, making the transition smoother and more cost-effective.

Q5: What types of PCBs do you support for assembly?

A5: We support a wide range of PCB technologies, including FR4 PCBs, multilayer PCBs, metal core PCBs, ceramic PCBs, flex PCBs, rigid-flex PCBs, and high-frequency PCBs. This enables us to support projects across industrial, medical, automotive, communication, and consumer electronics applications.

Q6: How do you ensure the quality of prototype PCB assembly?

A6: Quality control is implemented throughout the manufacturing process. This includes incoming material inspection, AOI inspection, X-ray inspection for complex packages, process monitoring, functional testing, and final inspection before shipment. These procedures help improve reliability and reduce the risk of assembly defects.

Q7: Do you provide worldwide shipping services?

A7: Yes. We regularly ship PCB assembly orders to customers around the world. Multiple logistics options are available to support different delivery schedules and budget requirements, helping ensure products arrive safely and on time.

Get a Fast Quote for Your PCB Assembly Project

Whether you need prototype PCB assembly or volume production, EBest provides reliable, high-quality manufacturing services with fast turnaround. From PCB fabrication and component sourcing to assembly and testing, we help simplify the entire production process.

Simply send us your Gerber files, BOM list, and project requirements for a fast quotation. Contact EBest today to reduce lead times, improve product quality, and bring your products to market faster. Email: sales@bestpcbs.com.

You may also like

Solder Paste Stencil Printing Process & Design Guide

May 29th, 2026

Are you choosing a solder paste stencil and wondering which specifications matter most for SMT assembly? A solder paste stencil controls solder paste deposition on PCB pads, helping improve printing accuracy, solder joint consistency, and overall assembly quality.

This guide explains stencil materials, thickness options, design guidelines, printing methods, cleaning procedures, and service life. Whether for prototypes or volume production, understanding these fundamentals can help achieve more reliable SMT results.

Solder Paste Stencil, https://www.bestpcbs.com/blog/2026/05/solder-paste-stencil/

What is Solder Paste Stencil?

A solder paste stencil is a thin metal sheet with precisely cut openings that match the pad layout on a PCB. During SMT assembly, solder paste is printed through these openings onto specific locations before component placement.

Most stencils are manufactured from stainless steel using laser-cut technology. The openings determine how much solder paste is deposited on each pad, making stencil accuracy critical to assembly quality.

The stencil acts as a template between the PCB and the printing process. Without controlled solder deposition, issues such as solder bridging, insufficient solder, or poor solder joints may occur during reflow.

Because of its ability to deliver consistent solder volume and repeatable printing results, the stencil has become a standard tool in modern SMT manufacturing.

What is a Stencil Used for Solder Pasting?

The main purpose of a stencil is to transfer a controlled amount of solder paste onto PCB pads before component placement. Each aperture is designed according to the size and shape of the corresponding pad.

A stencil helps ensure that every solder joint receives a similar volume of paste. This consistency is important for achieving stable reflow results and reducing assembly defects.

During printing, a squeegee pushes solder paste across the stencil surface. The paste fills the apertures and is transferred onto the PCB when the stencil separates from the board.

Compared with manual dispensing, stencil printing offers higher efficiency, better repeatability, and more uniform solder paste deposition, making it suitable for both prototypes and volume production.

What Materials Are Used for Solder Paste Stencils?

The most common materials used for solder paste stencils are stainless steel, electroformed nickel, and nano-coated stainless steel. Among them, stainless steel is the most widely used because it offers a good balance of durability, printing performance, and cost.

Stainless steel stencils are suitable for most SMT assembly applications and can withstand thousands of printing cycles. They are commonly used in both prototype and mass production.

For fine-pitch components and high-density PCB designs, electroformed nickel stencils provide smoother aperture walls and better solder paste release performance.

Some manufacturers also use nano-coated stencils, which reduce solder paste adhesion and improve cleaning efficiency during continuous production.

MaterialMain AdvantageTypical Use
Stainless SteelDurable and economicalGeneral SMT assembly
Electroformed NickelBetter paste releaseFine-pitch devices
Nano-Coated StencilCleaner printingHigh-volume production

What is the Thickness of Solder Paste Stencil?

The standard solder paste stencil thickness is typically 0.08 mm, 0.10 mm, 0.12 mm, 0.15 mm, and 0.20 mm. For most SMT assemblies, 0.10 mm and 0.12 mm are the most commonly used options.

Thinner stencils are generally selected for fine-pitch components and high-density PCB layouts because they provide better control of solder paste volume and help reduce bridging.

Thicker stencils are often used for connectors, power devices, and components that require a larger amount of solder during assembly.

Stencil ThicknessTypical Applications
0.08 mm0201, 0402, fine-pitch ICs
0.10 mmMixed SMT assemblies
0.12 mmStandard SMT production
0.15 mmLarge components and connectors
0.20 mmHigh solder volume requirements
Solder Paste Stencil, https://www.bestpcbs.com/blog/2026/05/solder-paste-stencil/

Solder Paste Stencil Design Guidelines

Proper stencil design directly affects solder paste transfer, solder joint quality, and SMT production yield. A well-designed stencil helps achieve consistent printing results while reducing common assembly defects.

  • Match stencil thickness to component size. Fine-pitch ICs and miniature components usually require thinner stencils, while connectors and power devices often need thicker stencils to provide sufficient solder volume.
  • Optimize aperture size instead of copying pad dimensions exactly. In many cases, reducing the aperture slightly improves solder paste release and lowers the risk of solder bridging.
  • Maintain a proper area ratio. The stencil area ratio affects how easily solder paste releases from the aperture. An area ratio greater than 0.66 is generally recommended for stable printing performance.
  • Use window-pane openings for large thermal pads. Dividing a large aperture into multiple smaller openings helps distribute solder more evenly and reduces voiding during reflow.
  • Modify apertures for fine-pitch components. BGAs, QFNs, and fine-pitch ICs may require reduced or specially shaped apertures to improve printing accuracy and minimize solder defects.
  • Consider spacing between adjacent pads. Components with tight pad spacing are more prone to solder bridging, so aperture design should be adjusted accordingly.
  • Ensure smooth aperture walls. Laser-cut and polished apertures improve solder paste release and help maintain consistent print quality over long production runs.
  • Review manufacturing tolerances before fabrication. Verify aperture dimensions, pad alignment, and solder volume requirements to ensure the stencil can be manufactured accurately.

What Equipment Is Used for Solder Paste Stencil Printing?

Accurate solder paste printing requires several pieces of equipment working together. Each tool contributes to alignment accuracy, solder paste control, and process consistency.

  • Stencil Printer – Aligns the PCB and stencil before printing. Automatic printers provide higher throughput and better consistency than manual systems.
  • Squeegee Blade – Pushes solder paste across the stencil surface and fills the apertures. Blade pressure, speed, and angle directly affect print quality.
  • PCB Support System – Uses support fixtures or vacuum platforms to keep the PCB flat during printing and prevent movement.
  • Vision Alignment System – Uses cameras to align stencil apertures with PCB pads before printing begins.
  • Solder Paste Inspection (SPI) System – Measures solder paste volume, height, and coverage to identify printing defects before component placement.
  • Stencil Cleaning System – Removes residual solder paste from stencil surfaces and apertures, helping maintain stable printing performance.

How to Make a Solder Paste Stencil?

A solder paste stencil is usually manufactured from PCB Gerber files and serves as the foundation of the SMT printing process. A well-made stencil helps ensure accurate solder paste deposition, while a poorly designed stencil can lead to solder bridging, insufficient solder, or inconsistent printing results.

  • Prepare the solder paste layer data. The stencil manufacturer uses the PCB solder paste layer to generate aperture openings. Before production, verify pad sizes, component spacing, and special package requirements.
  • Optimize aperture openings. Apertures are often adjusted rather than copied directly from PCB pads. Small reductions can improve solder paste release and help prevent excess solder deposition.
  • Choose the correct stencil thickness. Thickness should match component density and solder volume requirements. Fine-pitch assemblies generally require thinner stencils, while connectors and power devices may require thicker stencils.
  • Laser cut the stencil. Laser cutting is the most widely used manufacturing method because it offers excellent dimensional accuracy and consistent aperture quality.
  • Electropolish the apertures. Polishing smooths the aperture walls and improves solder paste release, especially for fine-pitch components.
  • Perform final inspection. Aperture dimensions, stencil flatness, and overall quality should be verified before the stencil enters production.

How to Frame a Solder Paste Stencil?

Framing ensures that the stencil remains flat and properly tensioned during printing. Proper installation is important because even a small alignment error can affect solder paste deposition accuracy.

  • Select the appropriate frame type. Framed stencils are commonly used for continuous production, while frameless stencils are often preferred for prototypes and small-volume orders.
  • Inspect the stencil before installation. Check for scratches, bending, contamination, or other damage that may affect print quality.
  • Mount the stencil evenly. Uniform tension across the stencil surface helps prevent distortion during printing.
  • Verify alignment references. Fiducials and positioning marks should remain visible and accurately positioned after framing.
  • Run a trial print. Testing before production helps identify alignment issues and confirms that solder paste deposits are forming correctly.

How to Apply Solder Paste with Stencil?

Stencil printing is the most common method used in SMT manufacturing because it provides fast, accurate, and repeatable solder paste deposition. Consistent printing is essential for achieving reliable solder joints during reflow.

  • Secure the PCB firmly. The board should be supported properly to prevent movement during printing.
  • Align the stencil accurately. Apertures must match PCB pads precisely to ensure solder paste is deposited in the correct locations.
  • Apply the correct amount of solder paste. Too little paste can cause weak joints, while excessive paste increases the risk of bridging.
  • Use proper squeegee settings. Squeegee pressure, speed, and angle should remain consistent throughout production.
  • Separate the stencil smoothly. Careful separation helps maintain clean solder paste deposits and prevents smearing.
  • Inspect the printed result. Check solder paste height, shape, and coverage before component placement.
Solder Paste Stencil, https://www.bestpcbs.com/blog/2026/05/solder-paste-stencil/

How to Clean Solder Paste Stencil?

Cleaning is an important part of stencil maintenance. Residual solder paste left inside apertures can affect paste release and eventually lead to printing defects.

  • Clean the stencil regularly during production. Frequent cleaning helps prevent aperture blockage and maintains stable print quality.
  • Use compatible cleaning solutions. Cleaning chemicals should remove solder paste effectively without damaging the stencil surface.
  • Pay special attention to fine-pitch apertures. Small openings are more likely to trap solder paste and require thorough cleaning.
  • Inspect the stencil during maintenance. Cleaning provides an opportunity to identify scratches, wear, or damaged apertures.
  • Store the stencil correctly after cleaning. Proper storage helps prevent contamination and mechanical damage.

What is Solder Paste Stencil Life?

A high-quality solder paste stencil can typically be used for thousands to tens of thousands of printing cycles under normal production conditions. The actual lifespan depends on stencil material, printing frequency, and maintenance practices.

Regular cleaning helps maintain solder paste release performance and extends stencil life. Residual solder paste inside apertures can affect printing accuracy and lead to inconsistent solder deposition.

Proper storage is also important. Stencils should be protected from bending, scratches, and contamination to maintain printing precision.

A stencil should be replaced when aperture wear, deformation, or poor paste release begins affecting print quality. A well-maintained stencil helps ensure consistent solder paste deposition and reliable SMT production results.

How to Apply Solder Paste without Stencil?

Although stencil printing is preferred for most SMT assemblies, manual solder paste application can be useful for prototypes, repairs, and very small production runs.

  • Use a dispensing syringe. This is the most common alternative method and allows solder paste to be placed directly onto individual pads.
  • Choose a suitable dispensing tip. Smaller tips provide better control when working with miniature components.
  • Apply solder paste carefully. Excessive paste may cause solder bridging, while insufficient paste can affect solder joint strength.
  • Inspect the paste deposits before assembly. Checking placement accuracy helps reduce defects during reflow.
  • Reserve this method for low-volume work. Manual application is flexible but generally cannot match the consistency and efficiency of stencil printing.

For prototype projects, manual application can be effective, but for production quantities a stencil remains the most reliable solution.

Solder Paste Stencil, https://www.bestpcbs.com/blog/2026/05/solder-paste-stencil/

FAQs About Solder Paste Stencils

Q1: What is the HS Code for Solder Paste Stencils?

A1: The HS code varies by country and customs regulations. Solder paste stencils are commonly classified as industrial metal templates or SMT manufacturing tools. Always confirm the exact code with your customs broker before shipment.

Q2: What is the Difference Between Framed and Frameless Stencils?

A2: Framed stencils include a fixed aluminum frame, while frameless stencils require a reusable mounting system. Framed stencils are preferred for production runs, while frameless stencils are more economical for prototypes and small batches.

Q3: Do I Need a Stencil for Solder Paste?

A3: No, but a stencil is the most accurate and efficient way to apply solder paste. Manual application is suitable for prototypes and repairs, while stencil printing provides better consistency and higher production efficiency.

Q4: Which Stencil Thickness Is Best for Fine-Pitch Components?

A4: A thickness of 0.08 mm to 0.10 mm is commonly used for fine-pitch components. Thinner stencils provide better control of solder volume and help reduce solder bridging.

Q5: When Should a Solder Paste Stencil Be Replaced?

A6: A stencil should be replaced when wear, damage, or poor paste release affects print quality. Replacing worn stencils helps maintain consistent solder deposition and SMT yield

Conclusion

A well-designed solder paste stencil helps ensure accurate solder paste deposition, reliable solder joints, and stable SMT assembly results. Choosing the right stencil specifications and maintaining proper printing practices can significantly improve production quality and efficiency.

If you are looking for a reliable SMT assembly partner, EBest PCB provides one-stop SMT services, including SMT stencil fabrication, component sourcing, SMT assembly, THT assembly, testing, and final product assembly. Whether you need prototypes or volume production, our team is ready to support your project with fast turnaround and dependable quality. Contact sales@bestpcbs.com today for a quotation.
You may also like

PCB Epoxy Resin Explained: Types, Applications and Removal Methods

May 29th, 2026

What is PCB epoxy, and why is it used in so many electronic products? From FR-4 substrates and protective coatings to encapsulation compounds and adhesives, PCB epoxy plays a critical role in improving electrical insulation, mechanical stability, and environmental resistance.

Because different epoxy materials are designed for different applications, understanding their properties and performance is essential. In this guide, you’ll learn about the main types of PCB epoxy, their performance characteristics, common applications, and factors that affect long-term PCB reliability.

PCB Epoxy, https://www.bestpcbs.com/blog/2026/05/pcb-epoxy/

What is Epoxy in PCB?

Epoxy is a thermosetting polymer widely used throughout PCB manufacturing and assembly processes. Once cured, it forms a durable material that provides electrical insulation, mechanical support, and environmental protection.

The most common example is FR-4, where epoxy resin is combined with fiberglass cloth to create a rigid substrate capable of supporting copper circuitry while maintaining excellent insulation properties.

In addition to PCB substrates, epoxy is also used as an adhesive, coating, encapsulation compound, and staking material. These applications help protect assemblies from moisture, vibration, dust, and chemicals.

Because of its excellent insulation, adhesion, and durability, epoxy remains one of the most important materials used in modern PCB manufacturing.

Why Use Epoxy on PCB?

Uppercase PCB needs stable structural protection and electrical insulation support in production and service. PCB epoxy is the most mainstream auxiliary material to meet these demands. It can solve common problems such as circuit short circuit, structural looseness and environmental corrosion in PCB operation, and improve the overall stability of circuit boards. Here are reasons why use epoxy on PCB:

  • Excellent insulation performance: Cured PCB epoxy forms a dense insulating layer on PCB surfaces and gaps. It effectively isolates circuits and prevents short circuit faults caused by circuit contact. It also avoids current leakage and ensures safe operation of electronic circuits.
  • Strong structural bonding effect: This material can bond copper foil, glass fiber substrates and electronic components firmly. It fixes loose parts of the PCB and enhances the overall structural firmness. It is widely used in pcb epoxy staking and internal lamination processes.
  • Effective environmental protection: Cured epoxy layer resists moisture, dust, acid and alkali corrosion. It isolates external humid and corrosive air from the PCB internal circuit. It greatly extends the service life of finished circuit boards.
  • Good shock and wear resistance: The cured epoxy colloid has certain toughness and hardness. It can buffer external vibration and impact force, and reduce component wear and falling off. It protects PCB circuits in complex working conditions.

What Kind of Epoxy for PCB Board?

Different epoxy products are used in PCB manufacturing and assembly depending on the application. Some are designed for structural bonding, while others focus on protection, insulation, thermal management, or component reinforcement. Selecting the appropriate epoxy helps improve reliability and manufacturing consistency.

Epoxy Adhesives

Epoxy adhesives are commonly used to bond components, heat sinks, connectors, and mechanical parts to a PCB. They provide strong adhesion, excellent durability, and good resistance to temperature and vibration.

Epoxy Encapsulation Compounds

PCB encapsulation epoxy completely surrounds electronic assemblies to protect them from moisture, dust, chemicals, and mechanical damage. This type of epoxy is widely used in industrial, automotive, and outdoor electronic products.

Potting Epoxy

Potting compounds fill cavities or enclosures around electronic assemblies. Compared with thin coatings, potting provides a higher level of environmental protection and mechanical support.

Epoxy Coatings

Epoxy PCB coating materials create a protective barrier on the PCB surface. They help prevent corrosion, contamination, and moisture-related failures while improving long-term reliability.

Staking Epoxy

PCB epoxy staking is used to secure large or vibration-sensitive components such as transformers, inductors, connectors, and capacitors. It helps prevent movement and reduces stress on solder joints.

Thermally Conductive Epoxy

This type of epoxy contains thermally conductive fillers that improve heat transfer. It is commonly used in LED modules, power electronics, and high-power assemblies where temperature management is important.

Conductive Epoxy

Conductive epoxy contains metallic particles that allow electrical conductivity after curing. It is sometimes used as an alternative to solder for specialized interconnection applications.

PCB epoxy type, https://www.bestpcbs.com/blog/2026/05/pcb-epoxy/

What Performance Parameters Do PCB Epoxy Have?

The performance parameters of PCB epoxy resin are listed below. These indicators directly determine the insulation capability, heat resistance, structural stability and overall service life of finished circuit boards, so they are essential references for material evaluation.

ParameterTypical Value / Range
Glass Transition Temperature (Tg)120°C – 250°C
Thermal Conductivity0.2 – 8.0 W/m·K
Dielectric Constant (Dk @ 1GHz)3.0 – 5.0
Dissipation Factor (Df @ 1GHz)0.002 – 0.030
Volume Resistivity10¹³ – 10¹⁶ Ω·cm
Surface Resistivity10¹² – 10¹⁵ Ω
Dielectric Strength15 – 35 kV/mm
Moisture Absorption0.05% – 1.00%
CTE (X-Y Direction)10 – 25 ppm/°C
CTE (Z Direction)40 – 250 ppm/°C
Tensile Strength40 – 100 MPa
Flexural Strength80 – 180 MPa
Compressive Strength100 – 250 MPa
Adhesion Strength10 – 35 MPa
HardnessShore D 75 – 95
Viscosity500 – 100,000 cP
Cure Temperature25°C – 180°C
Cure Time5 Minutes – 24 Hours
Operating Temperature-55°C to +200°C
Thermal Decomposition Temperature (Td)280°C – 400°C
UL Flammability RatingUL94 V-0 / V-1 / V-2
Cure Shrinkage0.1% – 2.0%
Water ResistanceExcellent
Chemical ResistanceGood to Excellent

What Are the Common Applications of Epoxy in PCB Manufacturing?

Epoxy materials are used throughout PCB fabrication and assembly.

FR-4 Laminate Production

  • Forms the base PCB structure
  • Bonds fiberglass layers together
  • Provides electrical insulation

PCB Encapsulation

  • Protects circuits from moisture
  • Improves environmental resistance
  • Extends service life

PCB Epoxy Staking

  • Secures heavy components
  • Improves vibration resistance
  • Reduces mechanical stress

Epoxy PCB Coating

  • Protects traces and solder joints
  • Prevents corrosion
  • Improves durability

Thermal Management

  • Transfers heat from components
  • Improves temperature control
  • Supports power electronics

Epoxy Ink PCB Screen Printing

  • Creates legends and markings
  • Improves identification
  • Supports manufacturing processes
PCB epoxy application, https://www.bestpcbs.com/blog/2026/05/pcb-epoxy/

How Does Epoxy Affect PCB Performance and Reliability?

Epoxy is more than just a protective material. It directly influences electrical performance, thermal stability, mechanical durability, and environmental resistance. Choosing the right epoxy can significantly improve the reliability and lifespan of a PCB assembly.

Improves Electrical Insulation

Epoxy creates an insulating barrier between conductive traces and components. High insulation resistance helps prevent electrical leakage, short circuits, and signal interference, especially in humid or contaminated environments.

Enhances Mechanical Stability

PCB assemblies are often exposed to vibration, impact, and thermal expansion. Epoxy helps secure components, distribute mechanical stress, and reduce the risk of cracked solder joints or component movement during operation.

Increases Resistance to Moisture and Chemicals

Moisture is one of the most common causes of PCB failure. Epoxy coatings and encapsulation materials help prevent water ingress, corrosion, oxidation, and chemical contamination, improving long-term reliability in harsh environments.

Supports Thermal Reliability

Temperature fluctuations cause materials to expand and contract at different rates. Properly selected epoxy materials help reduce thermal stress, minimize delamination risks, and improve stability during repeated heating and cooling cycles.

Protects Against Environmental Damage

Dust, salt spray, industrial pollutants, and other contaminants can gradually degrade electronic assemblies. Epoxy provides an additional protective layer that helps maintain performance in challenging operating conditions.

Extends Service Life

By improving insulation, strengthening mechanical support, enhancing environmental protection, and reducing thermal stress, epoxy contributes directly to longer product life and lower failure rates throughout the operating lifecycle.

How to Remove Epoxy Coating from PCB?

Removing epoxy from a PCB can be challenging because epoxy is designed to create a strong and durable bond. The removal method depends on the epoxy type, coating thickness, and whether the PCB needs to remain functional after the process. Careful removal helps minimize damage to copper traces, solder joints, and electronic components.

Identify the Type of Epoxy

Before starting, determine whether the material is a conformal coating, staking adhesive, encapsulation compound, or potting resin. Thin epoxy coatings are generally easier to remove than fully encapsulated assemblies.

Use Controlled Heat for Softening

Many epoxy materials become softer when exposed to moderate heat. A hot air station or heat gun can help loosen the material and make mechanical removal easier. Excessive temperatures should be avoided because they may damage nearby components or PCB substrates.

Remove Small Areas Mechanically

For localized epoxy deposits, precision knives, scrapers, or micro-grinding tools can be used to gradually remove the material. This method is commonly used when removing PCB epoxy staking around connectors, transformers, or large capacitors.

Apply Chemical Removers When Necessary

Specialized epoxy-removal solvents may help break down certain formulations. However, compatibility should always be verified because some chemicals can affect solder masks, plastics, or component markings.

Remove Encapsulation in Stages

For PCB encapsulation epoxy, complete removal is usually performed gradually. Combining heat, mechanical tools, and chemical softeners often produces better results than relying on a single method.

Clean and Inspect the PCB

After removal, clean the surface thoroughly to eliminate residue. Inspect traces, pads, vias, and nearby components for damage before performing repairs, testing, or reassembly.

Know When Replacement Is More Practical

In some cases, fully cured potting compounds are extremely difficult to remove without damaging the assembly. For heavily encapsulated products, replacing the module may be more practical than attempting complete epoxy removal.

PCB Epoxy Removal, https://www.bestpcbs.com/blog/2026/05/pcb-epoxy/

FAQs About PCB Epoxy

Q1: Does epoxy stick to PCB?

A1: Yes. Epoxy bonds well to FR-4 substrates, copper surfaces, solder masks, and many electronic components. Proper cleaning before application improves adhesion and durability.

Q2: Will PCB potting epoxy help with heat sink performance?

A2: Standard potting compounds mainly provide insulation and protection. Thermally conductive potting materials containing ceramic fillers can improve heat transfer and support heat dissipation.

Q3: How Does Epoxy Dispensing PCB Work?

A3: Epoxy dispensing involves applying controlled amounts of resin to specific PCB locations using manual or automated equipment. After curing, the material provides protection, bonding, or structural reinforcement.

Q4: What is the role of filler in epoxy in PCB adhesives?

A4: Fillers improve thermal conductivity, mechanical strength, dimensional stability, and moisture resistance. Common fillers include silica, alumina, and ceramic particles.

Conclusion

The performance of a PCB depends not only on circuit design but also on material selection and manufacturing quality. Choosing the right PCB epoxy helps improve electrical insulation, thermal stability, and environmental protection, ultimately contributing to a more reliable and longer-lasting product.

EBest specializes in PCB fabrication and PCB assembly services, supporting FR4 PCB, Metal Core PCB, HDI PCB, RF PCB, Ceramic PCB. If you need a quick quotation for prototypes or volume production, simply send your Gerber files, BOM list, or project requirements to sales@bestpcbs.com, and our team will provide manufacturing recommendations and pricing based on your project needs.

You may also like

Best Radar PCB Manufacturer in China | Custom Design, Prototyping & Assembly Services

May 28th, 2026

Are you looking for a reliable radar PCB manufacturer for high-frequency electronic applications? Radar PCB technology is widely used in automotive systems, industrial sensing devices, aerospace equipment, and wireless communication products because of its stable signal transmission capability.

A high-quality radar PCB requires low-loss materials, controlled impedance structures, and precise multilayer manufacturing. This article explains radar PCB materials, board types, design methods, manufacturing processes, and EBest production services to help you better understand high-frequency PCB solutions.

Radar PCB, https://www.bestpcbs.com/blog/2026/05/radar-pcb/

What is a Radar Board?

A radar board is a type of PCB designed for radar systems and high-frequency electronic devices. It is mainly used for signal transmission, sensing, communication, and data processing applications.

Compared with standard PCBs, radar boards require better electrical stability and lower signal loss. The board structure, material selection, and manufacturing accuracy directly affect signal quality.

Many radar systems operate at very high frequencies, especially mmWave applications. Because of this, the PCB must maintain stable impedance and accurate layer alignment during production.

Today, radar boards are widely used in automotive safety systems, aerospace equipment, industrial automation devices, weather monitoring systems, and smart sensing products.

What Materials are Commonly Used for Radar PCBs?

Radar PCB materials play an important role in signal transmission quality, thermal performance, and long-term reliability. High-frequency applications usually require low-loss materials with stable dielectric properties. Common radar PCB materials include:

  • Rogers Materials
    Commonly used in high-frequency and mmWave applications because of low dielectric loss and stable electrical performance.
  • PTFE Materials
    Suitable for aerospace radar PCB products requiring high signal accuracy.
  • Taconic Laminates
    Provide stable RF performance and reliable thermal stability for high-speed systems.
  • FR4 Hybrid Structures
    Used in some automotive radar PCB applications to balance performance and manufacturing cost.
  • Ceramic-Filled Materials
    Improve heat dissipation and reduce signal attenuation in high-frequency applications.
  • Metal-Based PCB Materials
    Used when enhanced thermal management and mechanical stability are required.

What are Main Types of Radar PCB Board?

Radar PCB boards can be classified according to their signal processing methods and detection functions. Different radar technologies require different PCB structures, processing capabilities, and transmission performance.

  • Doppler Radar PCB
    Based on the Doppler effect, this low-cost, stable, and durable PCB detects target velocity and motion through signal frequency shift. It is widely used in automotive collision avoidance systems, industrial speed measurement equipment, and human body sensing devices.
  • Monopulse (Single-Pulse) Radar PCB
    This high-precision PCB obtains target distance, azimuth, and elevation information through single pulse signals. It features high positioning accuracy and strong anti-interference capability, making it suitable for missile guidance, aviation monitoring, and military tracking systems.
  • MIMO Radar PCB
    Designed with multiple transmitting and receiving channels, MIMO radar PCB supports parallel signal processing and high-resolution imaging. It is commonly used in autonomous driving radar systems, aerospace remote sensing equipment, and intelligent monitoring devices.
  • Weather Radar PCB
    Specially designed for meteorological monitoring, this PCB can process long-distance and weak echo signals with stable performance and strong signal penetration capability. It is widely applied in weather stations, airport monitoring systems, and marine weather detection equipment.
  • Passive Radar PCB
    Unlike active radar systems, passive radar PCB does not contain a signal transmitting module. It analyzes surrounding reflected electromagnetic signals with low power consumption and strong concealment performance, mainly used in military detection and electromagnetic monitoring applications.
radar PCB types, https://www.bestpcbs.com/blog/2026/05/radar-pcb/

What are Common Applications of Radar PCB Board?

Radar PCB boards are widely used in modern electronic systems because they support stable high-frequency signal transmission and sensing functions. Common applications include:

  • Automotive Safety Systems
    Including adaptive cruise control and blind spot monitoring systems.
  • Industrial Automation Equipment
    Used for object detection and distance measurement applications.
  • Aerospace and Aviation Devices
    Support navigation and communication systems.
  • Weather Monitoring Systems
    Used in environmental sensing equipment.
  • Wireless Communication Devices
    Require stable high-frequency transmission capability.
  • Smart Traffic Systems
    Applied in vehicle monitoring and traffic management equipment.
  • Security Monitoring Equipment
    Used in motion tracking and remote sensing systems.
Radar PCB Application, https://www.bestpcbs.com/blog/2026/05/radar-pcb/

How to Design a High-Performance Radar PCB Board?

High-performance radar PCB design requires stable signal transmission, low signal loss, and strong anti-interference capability. Since radar systems usually operate at high frequencies, the PCB structure, material selection, routing layout, and thermal management all directly affect overall performance and reliability. Important design considerations include:

  • Choose Suitable High-Frequency Materials
    Standard FR4 materials may create excessive signal loss at high frequencies. Many radar systems use Rogers, PTFE, or Taconic materials because they provide lower dielectric loss and more stable electrical performance. These materials are commonly used in automotive, aerospace, and mmWave radar applications.
  • Design a Stable PCB Stack-Up and Impedance Structure
    Multilayer PCB structures help improve signal integrity and reduce interference. Dedicated ground layers and power layers are commonly added to maintain stable impedance and improve shielding performance. Controlled impedance design is especially important because unstable impedance may cause signal reflection and transmission errors.
  • Keep RF Routing Short and Smooth
    Long or complicated traces increase signal attenuation and delay. High-frequency signal traces should remain as short and direct as possible. Smooth routing with curved traces or 45-degree angles helps reduce signal reflection and improve transmission stability.
  • Improve Grounding and EMI Protection
    Continuous ground planes and shielding vias help reduce electromagnetic interference and external noise. Sensitive RF areas should remain separated from power circuits to improve overall signal quality and reduce crosstalk risks.
  • Optimize Thermal Management Design
    Radar systems may generate considerable heat during operation. Thermal vias, copper balancing structures, and heat dissipation designs help maintain stable electrical performance and improve long-term PCB reliability.
  • Control Manufacturing Accuracy
    Multilayer radar PCB boards require precise layer alignment and tight tolerance control. Small production deviations may affect signal synchronization and impedance consistency, especially in high-frequency radar applications.
  • Select Suitable Surface Finish
    ENIG surface finish is widely used in radar PCB manufacturing because it provides flat surface quality, reliable solderability, and stable conductivity for high-frequency electronic products.
  • Perform Signal Simulation Before Production
    Signal integrity simulation helps identify impedance mismatch, signal reflection, and routing issues before manufacturing. Early analysis helps improve production stability and reduces redesign risks.

What is the Manufacturing Process of Radar PCB?

Radar PCB manufacturing requires higher precision than standard PCB production because high-frequency signals are very sensitive to impedance variation, layer alignment, and signal loss. To ensure stable electrical performance, the entire production process must maintain strict material control, accurate processing, and reliable quality inspection. Typical radar PCB manufacturing steps include:

  • PCB Design Review and Material Preparation
    Before production begins, manufacturers review stack-up structure, impedance requirements, trace spacing, and manufacturing tolerance. High-frequency materials such as Rogers, PTFE, and Taconic are then prepared according to electrical performance requirements.
  • Inner Layer Imaging and Etching
    Circuit patterns are transferred onto copper layers using precision exposure equipment. Chemical etching removes unnecessary copper and forms the required high-frequency circuit layout.
  • AOI Inspection and Multilayer Lamination
    AOI inspection checks for open circuits, short circuits, and dimensional defects before lamination. Multiple PCB layers are then bonded together under controlled temperature and pressure to form stable multilayer structures.
  • Drilling and Copper Plating
    Mechanical or laser drilling creates vias and mounting holes. Copper plating forms conductive connections between PCB layers and helps maintain stable signal transmission performance.
  • Outer Layer Processing and Surface Finish
    Outer circuits are formed through imaging and etching processes. After that, solder mask and surface finish are applied. ENIG is widely used in radar PCB manufacturing because it provides flat surface quality and reliable conductivity.
  • Impedance Testing and Electrical Inspection
    Controlled impedance testing verifies whether signal traces meet electrical requirements. Electrical testing also checks for open circuits and short circuits before shipment.
  • Final Inspection and PCB Assembly
    Finished boards undergo appearance inspection, dimensional verification, and packaging checks. If assembly services are required, SMT assembly and functional testing are completed before delivery.

Why Choose EBest as Radar PCB Manufacturer?

Choosing a reliable radar PCB manufacturer helps improve product stability, reduce production risks, and shorten project lead times. EBest provides one-stop PCB manufacturing and assembly services for high-frequency radar applications with stable quality and fast delivery. Our advantages include:

  • More than 20 Years of PCB Manufacturing Experience
    EBest has focused on PCB manufacturing since 2006 and has strong experience in high-frequency PCB and multilayer PCB production.
  • Support for High-Frequency Materials
    We support Rogers, PTFE, Taconic, and other materials commonly used in radar PCB applications to maintain stable signal performance.
  • Strong Multilayer PCB Capability
    Our manufacturing process supports precise multilayer PCB production and controlled impedance structures for high-frequency applications.
  • Quick-Turn Prototype Services
    Fast PCB prototyping helps shorten development cycles. Some urgent PCB orders can be shipped within 24 hours.
  • One-Stop PCB Assembly Services
    We provide PCB fabrication, SMT assembly, and component sourcing services in one place to improve project efficiency.
  • Strict Quality Control
    AOI inspection, impedance testing, electrical testing, and shipment inspection help ensure stable product quality and reliability.
  • Stable Global Delivery Support
    Efficient production planning and logistics coordination help maintain stable lead times for prototype and production orders.
  • International Certifications
    Our factory supports IATF 16949, ISO 9001:2015, ISO 13485:2016, AS9100D, RoHS, REACH, and UL standards for industrial and automotive applications.
  • Flexible Production Capacity
    We support both small prototype orders and large-volume PCB production with stable manufacturing capability.
  • Technical Support for Radar PCB Projects
    We provide support for material selection, stack-up review, impedance structure analysis, and manufacturability evaluation to help improve production stability.

What Quality Certifications Do Our Radar PCBs Hold?

Reliable certifications help ensure stable manufacturing quality and consistent production processes for high-frequency PCB products. Our certifications include:

  • IATF 16949
  • ISO 9001:2015
  • ISO 13485:2016
  • AS9100D
  • RoHS Compliance
  • REACH Compliance
  • UL Certification

These certifications help ensure stable production quality for automotive, industrial, aerospace, and medical electronic applications.

What Radar PCB Services Do We Offer?

EBest provides complete PCB fabrication and assembly solutions for various radar electronic applications. Our services include:

  • Radar PCB prototyping
  • High-frequency PCB manufacturing
  • Multilayer PCB fabrication
  • PCB assembly services
  • SMT assembly
  • Component sourcing
  • PCB design support
  • Quick-turn PCB production
  • Mass production services
  • Impedance control PCB manufacturing

How Do We Ensure the Quality and Reliability of Radar PCB?

Radar PCB products require very stable electrical performance because high-frequency signals are sensitive to impedance variation, layer alignment, and signal interference. Even small production deviations may affect signal transmission quality and long-term reliability. For this reason, EBest follows strict quality management procedures throughout the entire manufacturing process. We ensure product quality and reliability through:

  • Strict Incoming Material Inspection
    All high-frequency materials are checked before production to verify dielectric properties, copper thickness, and material consistency. This helps maintain stable signal performance from the beginning of the manufacturing process.
  • Controlled Impedance Verification
    Radar PCB products require accurate impedance control for stable signal transmission. We perform impedance calculation and testing during production to ensure electrical consistency.
  • AOI Inspection During Production
    Automated optical inspection is performed after imaging and etching processes to detect open circuits, short circuits, trace defects, and dimensional deviations early.
  • Precise Layer Alignment Control
    Multilayer radar PCB boards require highly accurate layer registration. Tight alignment control helps maintain signal synchronization and stable RF performance.
  • 100% Electrical Testing
    Every finished PCB undergoes electrical testing before shipment to verify continuity, isolation performance, and circuit reliability.
  • Surface Finish and Solderability Inspection
    Surface quality directly affects assembly reliability. ENIG and other surface finishes are inspected to ensure flatness, conductivity, and soldering stability.
  • Thermal and Reliability Evaluation
    For high-reliability applications, additional thermal and environmental testing may be performed to verify long-term operating stability.
  • Production Traceability Management
    Each production batch is traceable from raw materials to finished shipment, helping maintain stable quality control and production consistency.
  • Experienced Manufacturing and Assembly Support
    Our production team follows standardized manufacturing procedures and strict inspection standards throughout PCB fabrication and assembly processes.
radar PCB board, https://www.bestpcbs.com/blog/2026/05/radar-pcb/

How Do We Maintain On-Time Delivery for Radar PCB Orders?

Fast and stable delivery is important for radar PCB prototype development and volume production projects. Delays in material preparation, production scheduling, or assembly may affect the entire project timeline. EBest maintains reliable lead times through efficient manufacturing coordination and stable supply management. Our delivery advantages include:

  • Efficient Production Planning
    Production schedules are arranged according to project requirements, PCB complexity, and material availability to reduce unnecessary delays.
  • Stable High-Frequency Material Supply
    We maintain long-term cooperation with material suppliers to ensure stable availability of Rogers, PTFE, Taconic, and other high-frequency laminates.
  • Quick PCB Design Review Process
    DFM analysis and production review are completed quickly before manufacturing begins, helping reduce engineering delays and improve production efficiency.
  • Dedicated Prototype Production Support
    Separate quick-turn production arrangements help accelerate radar PCB prototype manufacturing for urgent projects.
  • Flexible Manufacturing Capacity
    Our production capability supports both small-volume prototypes and large-scale production orders with stable scheduling management.
  • Real-Time Production Tracking
    Production progress is monitored throughout fabrication and assembly stages to improve schedule visibility and delivery stability.
  • Optimized SMT Assembly Scheduling
    Assembly planning is coordinated with PCB production to reduce waiting time between fabrication and SMT processes.
  • Strict Shipment and Packaging Management
    Finished products are inspected, packaged, and prepared for shipment according to project schedules to reduce logistics delays.
  • Global Logistics Support
    We work with international shipping partners to support fast worldwide delivery for prototype and production PCB orders.
  • Urgent PCB Production Capability
    For time-sensitive projects, expedited manufacturing services are available, and some urgent PCB orders can be shipped within 24 hours.

FAQs About Radar PCB Board

Q1: What frequency ranges are commonly used in radar PCB applications?

A1: Different radar systems operate at different frequency ranges. Automotive radar commonly uses 24GHz and 77GHz, while some mmWave applications may use even higher frequencies for more accurate detection and faster signal processing.

Q2: Why are low-loss materials important for radar PCB manufacturing?

A2: High-frequency signals can easily lose energy during transmission. Low-loss materials help reduce signal attenuation and improve transmission stability, especially in long-distance or high-speed radar applications.

Q3: Can radar PCB boards support both prototype and mass production?

A3: Yes. Radar PCB products can be manufactured in small prototype quantities for testing and also scaled to volume production once the project enters the mass manufacturing stage.

Q4: What PCB thickness is commonly used for radar applications?

A4: Radar PCB thickness depends on operating frequency, stack-up structure, and mechanical requirements. Many high-frequency radar boards use controlled thickness structures to maintain stable impedance performance.

Q5: Why is impedance control important in radar PCB production?

A5: Stable impedance helps maintain signal quality and reduces signal reflection during transmission. Poor impedance control may affect radar accuracy and overall system performance.

Q6: Can radar PCB boards work in harsh environments?

A6: Yes. Many radar PCB products are designed for automotive, aerospace, and industrial applications where high temperature, vibration, and humidity resistance are required.

Q7: Does EBest support turnkey radar PCB assembly services?

A7: Yes. EBest provides one-stop services including PCB fabrication, SMT assembly, component sourcing, testing, and final product delivery.

Q8: What should be considered when designing a radar PCB antenna?

A8: Radar PCB antenna design requires stable impedance control, accurate trace dimensions, and low-loss PCB materials to maintain reliable signal transmission. Antenna layout, grounding structure, and layer stack-up also directly affect radar detection accuracy and overall RF performance.

Get Your Custom Radar PCBs Quote

Looking for a reliable supplier for radar PCB fabrication and assembly services? EBest provides custom PCB manufacturing(including RF PCB, Ceramic PCB and so on), quick prototyping, multilayer PCB production, and turnkey assembly support for automotive, industrial, aerospace, and communication applications.

Whether you need PCB prototypes or volume production, we can support your project with stable quality, fast delivery, and competitive pricing. Contact EBest today for your custom PCB quotation: sales@bestpcbs.com.

You may also like

IPC-SM-840 Standard Explained for PCB Solder Mask

May 27th, 2026

Are you looking for authoritative guidelines to standardize PCB solder mask production and quality inspection? IPC-SM-840 is the globally recognized industrial standard that governs the design, performance, and acceptance criteria of PCB permanent solder mask coatings.

This guide fully unpacks IPC-SM-840 core content, including the latest version, professional specifications, thickness standards, grade differences, and standard comparisons. It delivers practical, easy-to-understand technical references to help practitioners strictly follow IPC-SM-840 requirements and produce high-reliability PCB products.

IPC-SM-840, https://www.bestpcbs.com/blog/2026/05/ipc-sm-840/

What is IPC-SM-840 Standard?

IPC-SM-840 is an authoritative industry standard formulated and released by the Association Connecting Electronics Industries for circuit board solder mask production.

IPC-SM-840 exclusively targets permanent solder mask coatings applied on rigid and flexible printed circuit boards. It covers the full lifecycle of solder mask materials from incoming inspection to finished product acceptance.

This standard defines uniform testing methods, performance thresholds and defect acceptance criteria for industrial production. IPC-SM-840 eliminates inconsistent quality standards among different manufacturers and regions.

All mainstream PCB and PCBA manufacturers worldwide adopt this specification as the core inspection basis. It effectively standardizes solder mask quality and improves the overall stability of electronic circuit boards.

IPC-SM-840, https://www.bestpcbs.com/blog/2026/05/ipc-sm-840/

What is the Latest Version of IPC SM 840?

The latest official and valid version of IPC-SM-840 is Revision E, officially released in December 2010.

This updated version fully replaces the previous IPC-SM-840D issued in 2007. It supplements many new technical requirements adapted to modern high-precision PCB manufacturing processes.

A major upgrade of IPC-SM-840E is the addition of complete specification rules for flexible circuit cover layer materials. It fills the standard gap for flexible board solder mask coating quality inspection.

All old versions including Revision C and Revision D have been phased out in the industry. Current product design, production and quality inspection all take IPC-SM-840E as the only reference baseline.

Why is IPC-SM-840 Important for PCB Solder Mask?

IPC-SM-840 sets unified global standards for PCB solder mask production and quality inspection. It defines consistent performance metrics, testing rules and acceptance criteria to standardize solder mask quality across manufacturers.

This standard regulates key solder mask properties, including electrical insulation, adhesion, thermal stability and chemical resistance. It solves batch quality inconsistencies common in mass PCB production.

Following IPC-SM-840 effectively avoids typical PCB defects like copper oxidation, short circuits and coating peeling. It stabilizes circuit performance and prolongs the service life of rigid and flexible PCBs in various application environments.

IPC-SM-840 Solder Mask Specifications

IPC-SM-840E defines full, unified performance specifications for PCB permanent solder mask and flexible cover materials. It standardizes core quality criteria for mass production to guarantee stable coating reliability. Below are the detailed technical specifications for practical production and inspection use.

ItemSpecification
Dielectric StrengthMinimum 500 VDC breakdown voltage per 25 μm solder mask thickness, no electric breakdown or leakage.
Surface Insulation ResistanceMaintains insulation resistance above 10⁸ Ω at 85°C and 85% relative humidity with no conductive leakage.
Comparative Tracking Index (CTI)Passes standard anti-tracking requirements to prevent surface carbonization and short-circuit risks under high voltage and humidity.
Pencil HardnessMinimum hardness grade F, no scratches, coating loss or substrate exposure after standard hardness testing.
Surface AdhesionNo peeling, warping or detachment after standard tape testing on copper, nickel and PCB substrate surfaces.
Surface Coverage & ResolutionMinimum 0.05 mm clearance between solder mask and pad edges; minimum 0.1 mm solder mask bridge width between adjacent pads.
Solder Heat ResistanceWithstands lead-free soldering temperatures above 260°C, no blistering, cracking, peeling or discoloration after repeated soldering cycles.
Thermal Shock ResistanceNo delamination, cracking or coating separation after rapid alternating cold and hot temperature cycle tests.
Solvent & Cleaning Agent ResistanceNo swelling, fading, softening or peeling after contact with common industrial solvents and cleaning agents.
Flux ResistanceNo chemical corrosion or surface damage from soldering flux, allows complete flux cleaning without coating damage.
FlammabilityMeets electronic assembly flame-retardant standards, inhibits rapid flame spread and reduces fire hazards.
Anti-Fungal PerformanceNo fungal or mildew growth on coating surfaces during long-term humid storage and operation.
IPC-SM-480, https://www.bestpcbs.com/blog/2026/05/ipc-sm-840/

What Are the Solder Mask Thickness Requirements for IPC SM 840?

IPC-SM-840 does not enforce a fixed solder mask thickness for all PCBs, and it ties thickness qualification to electrical insulation performance.

The core standard rule: minimum 500 VDC breakdown voltage for every 25 μm solder mask thickness. All coating areas must meet this insulation benchmark regardless of local thickness differences.

Even solder mask thinner than 25 μm must still pass the 500 VDC withstand voltage test to guarantee basic circuit insulation safety.

Industrial standard thickness range: 12 μm – 75 μm for general PCBs; mainstream rigid PCBs adopt 20 μm – 38 μm to balance insulation performance and soldering precision.

IPC-SM-840 Class H vs Class T: What is Difference?

IPC-SM-840E divides qualified solder mask products into two independent grade standards, namely Class T and Class H. The two grades differ greatly in application scenarios, test rigor and environmental resistance, adapting to different product reliability demands.

Comparison DimensionIPC-SM-840 Class TIPC-SM-840 Class H
Full DefinitionTelecommunication Grade, general commercial standard for conventional electronic productsHigh Reliability Grade, premium standard for high-stability and harsh-environment products
Application ScenariosConsumer electronics, communication devices, ordinary industrial control equipment, non-critical commercial instrumentsAutomotive electronics, outdoor monitoring equipment, industrial precision devices, long-term uninterrupted operation equipment
Testing RigorBasic industrial testing standards with moderate tolerance ranges for performance indicatorsStrict enhanced testing standards with narrow tolerance, covering thermal cycling, humidity and chemical resistance
Environmental AdaptabilitySuitable for normal indoor, room-temperature and dry working environmentsResists extreme temperature changes, high humidity and mild chemical corrosion for complex working conditions
Product Operation RiskMinor equipment shutdown caused by solder mask issues will not lead to major safety hazards or economic lossesZero tolerance for performance failure, avoids equipment shutdown and safety risks in high-reliability scenarios
Production PositioningFocuses on cost control and basic qualified performance for mass commercial productionPrioritizes long-term service stability and low failure rate for high-end industrial products

Differences Between IPC-SM-480 and IPC-6012

IPC-SM-480 and IPC-6012 are two core supporting standards in PCB manufacturing. Many people confuse their application scopes, as both involve PCB quality inspection content. In fact, the two standards have completely different core positioning and coverage, and they are often used in combination in formal PCB quality audits.

Comparison ItemIPC-SM-480IPC-6012
Core FocusProfessional guidance for solder mask material selection, coating process and performance verificationOverall qualification verification and full-performance inspection standards for rigid printed circuit boards
Main CoverageSolder mask raw material evaluation, coating process parameters and surface protection performance detectionFull-board structure, copper layer quality, hole metallization, surface finish and overall board reliability
Application ScopeSolder mask workshop production inspection and raw material incoming quality controlFinished rigid PCB overall acceptance and factory quality inspection
Solder Mask Related RulesComplete and independent solder mask specification systemSolder mask requirements are only a small branch of full-board inspection items
Usage ScenarioUsed for early-stage material selection and process confirmation before mass productionUsed for final finished board delivery inspection and project quality acceptance
IPC-SM-480 vs IPC-6012, https://www.bestpcbs.com/blog/2026/05/ipc-sm-840/

Where Can I Download IPC-SM-840 PDF for Free?

Most practitioners in the PCB industry need IPC-SM-840 PDF resources for daily design, production and quality inspection reference. Due to international copyright protection regulations, the official full-version IPC-SM-840E document cannot be downloaded for free through formal channels. However, there are multiple legitimate ways to obtain reference content for daily work.

  1. Official IPC website preview: Visit the official IPC platform to view free abstracts, directory outlines and core specification introductions of IPC-SM-840, covering mainstream production inspection rules.
  2. Professional industry technical forums: Many electronics manufacturing communities share sorted-out IPC-SM-840 interpretation articles and key specification excerpts for free learning and reference.
  3. Industry resource sorting websites: Professional PCB technology platforms release simplified practical guides based on IPC-SM-840E, which are more suitable for on-site production operation.
  4. Professional PCB manufacturers: Formal and qualified PCBA suppliers will sort out standardized IPC-SM-840 implementation documents, which can be obtained through business consultation.
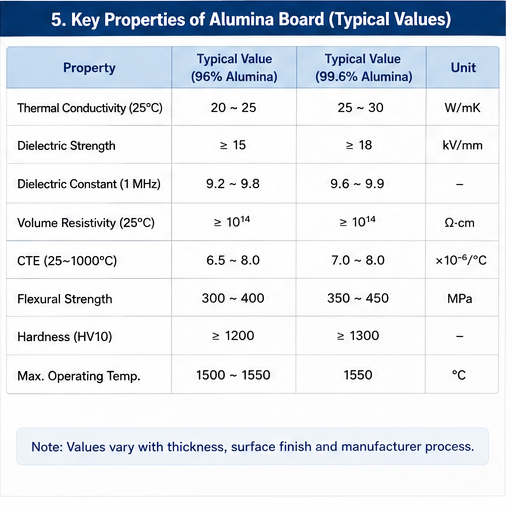
You can directly download IPC-SM-840 PDF via the following link:

FAQs About IPC-SM-840 Standard

Q1: Can I use IPC-SM-840D instead of IPC-SM-840E for new orders?

A1: It is not recommended. IPC-SM-840E is the latest valid version. Old revisions lack updated rules for flexible circuits and modern low-temperature and lead-free coating materials, which cannot meet current industrial production standards.

Q2: Do all PCBs need to choose between Class H and Class T?

A2: Yes. All solder mask coated PCBs must correspond to one grade standard according to end-use scenarios. Clear grade classification ensures consistent inspection standards and product reliability.

Q3: Is solder mask thickness the only check item in IPC-SM-840?

A3: No. Thickness is only one basic inspection indicator. IPC-SM-840 also takes adhesion, insulation resistance, heat resistance and chemical resistance as core mandatory inspection items.

Q4: Does IPC-SM-840 apply to both rigid and flexible PCBs?

A4: Yes. The upgraded IPC-SM-840E adds complete specification rules for flexible circuit cover layers, covering all conventional rigid and flexible PCB products on the market.

Q5: What happens if solder mask fails IPC-SM-840 tests?

A5: Unqualified solder mask cannot pass factory inspection. Such products need rework coating or direct scrapping to avoid hidden quality risks in terminal electronic products.

Q6: Does IPC-6012 replace the use of IPC-SM-840?

A6: No. IPC-6012 is a full-board inspection standard, while IPC-SM-840 is a professional solder mask specification. The two standards complement each other and need to be used simultaneously for high-quality PCB production.
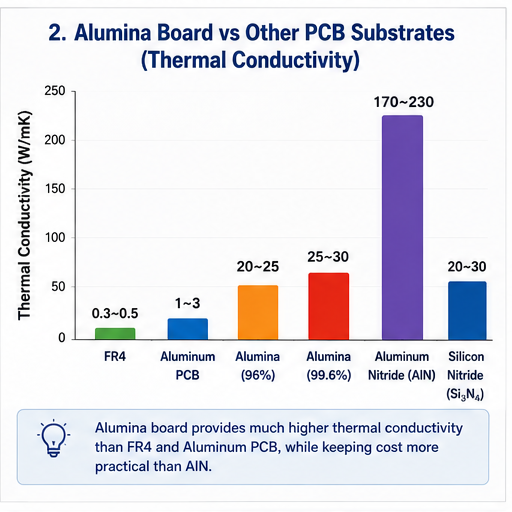
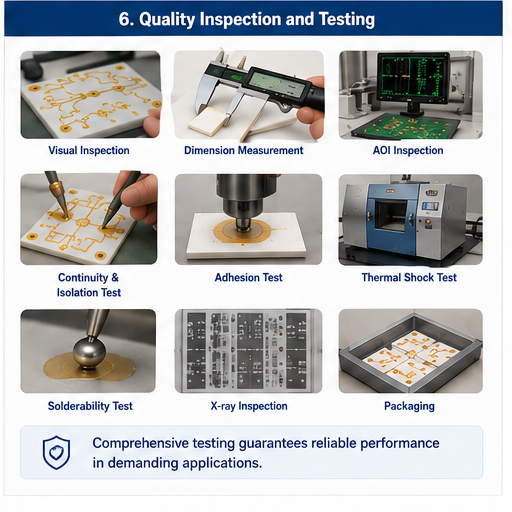
Q7: What is the biggest difference between Class H and Class T under IPC-SM-840?

A7: The core difference is reliability resistance. Class H adapts to harsh and long-term working environments with stricter test standards, while Class T only meets basic commercial product use requirements.

Conclusion

Strict compliance with IPC-SM-840 standards is the key to ensuring stable and reliable PCB solder mask quality. Our team delivers standardized PCBA manufacturing services that fully follow all specifications of IPC-SM-840, covering solder mask coating, performance testing and finished product inspection. If you have customized PCB( like FR4 PCB, metal core PCB, HDI PCB and so on) and PCBA production requirements that need to meet IPC-SM-840 industrial standards, feel free to send your project demands to sales@bestpcbs.com.
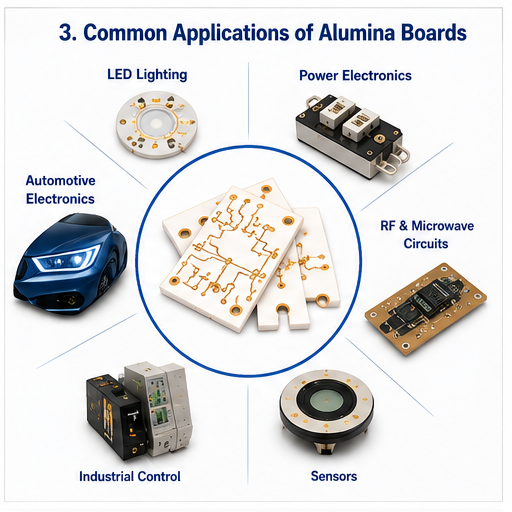
You may also like

Halogen Free PCB Manufacturer in China | RoHS Compliant PCB Solutions

May 27th, 2026

What is halogen free PCB, and why are more electronics manufacturers switching to it? As environmental regulations become stricter worldwide, halogen free PCB materials are increasingly used in automotive electronics, communication devices, LED lighting, industrial equipment, and medical products.

Traditional PCB materials often contain bromine and chlorine flame retardants. Under high temperatures or fire conditions, these substances may release toxic gases and dense smoke. Because of this, many manufacturers now prefer halogen free PCB solutions that provide safer environmental performance and better compliance with global standards.

A halogen free PCB not only supports cleaner manufacturing, but also improves product safety, thermal reliability, and long-term sustainability. Today, these materials are widely applied in high-reliability electronic products where stable performance is important.

Halogen Free PCB, https://www.bestpcbs.com/blog/2026/05/halogen-free-pcb/

What is Halogen Free PCB?

What is halogen free PCB, and why are more electronic products using it today? Halogen free PCB refers to a PCB made without bromine or chlorine-based flame retardants. These materials help reduce toxic gas emissions during high-temperature conditions or fire exposure.

Traditional PCB materials often contain halogen compounds to improve flame resistance. However, when exposed to heat, these substances may release harmful smoke and corrosive gases. Because of this, many industries are shifting toward safer and more environmentally friendly PCB materials.

A halogen free PCB usually follows IEC 61249-2-21 standards. According to this specification:

  • Chlorine content must remain below 900 ppm
  • Bromine content must remain below 900 ppm
  • Total halogen content must stay below 1500 ppm

Today, halogen free PCB products are widely used in automotive systems, industrial equipment, LED lighting, communication devices, and medical electronics because they support cleaner manufacturing practices and improved product safety.

Why Use Halogen Free PCB?

Why use halogen free PCB instead of traditional PCB materials? More manufacturers are choosing these materials because they support environmental compliance, product safety, and long-term reliability. Main advantages include:

  • Reduce toxic smoke during overheating or fire exposure
  • Lower environmental impact during disposal and recycling
  • Meet RoHS and REACH environmental regulations
  • Improve safety for enclosed electronic products
  • Support sustainable manufacturing requirements
  • Help exported products comply with international standards
  • Provide stable thermal performance in demanding applications

Many industries now prefer halogen-free PCB materials because global environmental regulations continue becoming stricter every year.

What Materials Are Used in Halogen Free PCB?

What materials are commonly used in halogen free PCB manufacturing? Most halogen free PCB products use specially developed resin systems and laminates designed to replace traditional brominated flame retardants. Common halogen free PCB laminate materials include:

  • Halogen free FR4 epoxy resin
  • Phosphorus-based flame-retardant systems
  • Nitrogen compound resin systems
  • Halogen-free CEM3 materials
  • High Tg halogen-free laminates
  • Aluminum-based halogen-free materials

These materials maintain flame resistance while reducing hazardous substances. Many modern laminates also provide excellent thermal stability and reliable electrical insulation. Popular laminate manufacturers include:
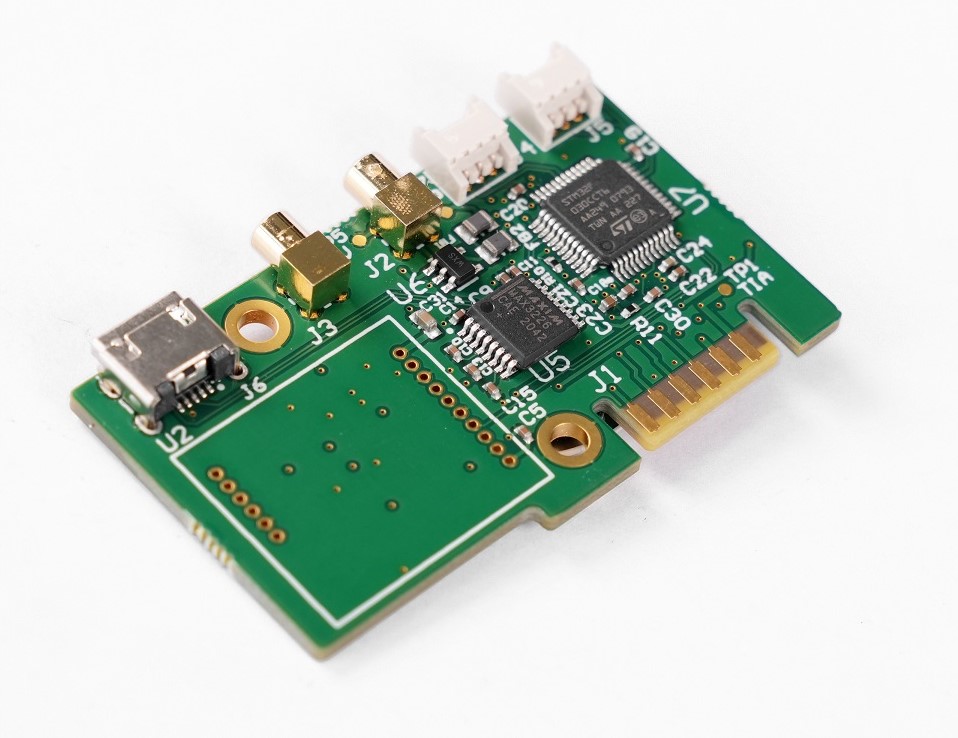
  • Shengyi
  • ITEQ
  • Panasonic
  • Isola
  • Rogers

High-quality halogen free PCB laminate materials are important for products exposed to high temperatures or continuous operation.
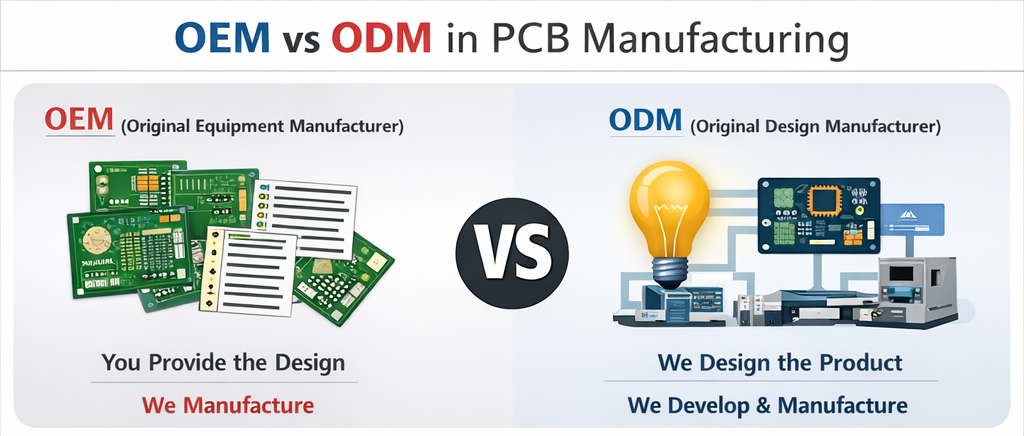
What Applications Use Halogen Free PCB?

Where is halogen free PCB commonly used today? These PCB products are now found across many industries because they combine environmental safety with stable electrical performance. Common applications include:

  • Automotive control systems
  • LED lighting modules
  • Medical electronics
  • Industrial automation devices
  • Communication equipment
  • Consumer electronics
  • Power supply systems
  • Renewable energy equipment
  • Aerospace electronics
  • Smart home products

Automotive and medical industries especially prefer halogen free PCB materials because these applications require high reliability, stable thermal performance, and environmental compliance.

What Are the Requirements for Halogen Free PCB?

What requirements must a halogen free PCB meet before being used in electronic products? Besides reducing harmful substances, the material must also provide stable thermal performance, reliable insulation, and environmental compliance. Main requirements for halogen free PCB include:

  • Bromine content must be below 900 ppm
  • Chlorine content must be below 900 ppm
  • Total halogen content must be below 1500 ppm
  • Must comply with IEC 61249-2-21 standards
  • Must support RoHS and REACH environmental regulations
  • Should meet UL94 V-0 flame-retardant standards
  • Must provide stable thermal resistance during soldering
  • Should maintain good electrical insulation performance
  • Must have low moisture absorption
  • Should support reliable multilayer lamination
  • Surface finish compatibility should remain stable
  • PCB materials should pass electrical and reliability testing
  • Manufacturers should provide material traceability and certification reports

Many modern halogen free PCB materials also use high Tg resin systems to improve heat resistance and long-term reliability in automotive, industrial, LED, and communication applications.

Halogen-Free PCB vs FR4 PCB: What is Difference?

What is the difference between halogen-free PCB and standard FR4 PCB? Both materials are widely used in electronics manufacturing, but they differ in flame-retardant systems, environmental performance, thermal stability, and application suitability.

FeatureHalogen-Free PCBStandard FR4 PCB
Flame Retardant TypePhosphorus or nitrogen-based systemBrominated flame retardant system
Halogen ContentVery low or noneContains bromine/chlorine compounds
Environmental PerformanceMore environmentally friendlyStandard environmental performance
Toxic Smoke During BurningLower smoke and gas emissionHigher toxic smoke emission
RoHS & REACH ComplianceExcellent compatibilityUsually compliant but depends on material
Thermal StabilityHigher in many gradesStandard thermal stability
Tg PerformanceOften high Tg materialsNormal Tg or high Tg available
Electrical InsulationStable insulation performanceGood standard insulation
Moisture ResistanceBetter in many laminate systemsStandard moisture resistance
Reliability in High HeatBetter for high-temperature environmentsSuitable for general applications
Processing DifficultySlightly stricter process controlEasier standard processing
Material CostSlightly higherLower
Recycling & Disposal SafetySafer and cleanerModerate
Typical ApplicationsAutomotive, medical, LED, industrial controlConsumer electronics, standard electronics
Market TrendGrowing rapidlyTraditional mainstream material
Halogen-Free PCB vs FR4 PCB, https://www.bestpcbs.com/blog/2026/05/halogen-free-pcb/

What is the Manufacturing Process for Halogen-Free PCB?

How are halogen-free PCBs manufactured? The basic process is similar to standard PCB production, but material selection, lamination control, drilling quality, and testing require closer attention because halogen-free laminates use different resin systems.

1. Material Selection
The manufacturer first selects suitable halogen-free PCB laminate according to the product application, layer count, Tg value, copper thickness, thermal demand, and compliance requirements. Common options include halogen-free FR4, high Tg laminate, CEM3 material, and aluminum-based material.

2. Material Inspection
Before production, the laminate, prepreg, and copper foil are checked for thickness, surface quality, certification, and halogen content report. This step helps ensure the material meets IEC 61249-2-21, RoHS, REACH, and project requirements.

3. Inner Layer Imaging
For multilayer PCBs, the inner copper layers are coated with dry film and exposed according to the circuit pattern. This step defines the inner layer traces and prepares the board for etching.

4. Etching and Inner Layer Inspection
Unwanted copper is removed to form the required circuit pattern. After etching, the inner layers are inspected for open circuits, short circuits, line width, spacing, and copper residue.

5. Lamination
The inner layers, prepreg, and copper foil are stacked together and laminated under controlled temperature and pressure. Halogen-free materials may need adjusted lamination parameters because their resin flow and curing behavior can differ from standard FR4.

6. Drilling
Mechanical or laser drilling is used to create through holes, blind vias, buried vias, or microvias. Drilling quality is important because poor hole walls can affect copper plating and long-term reliability.

7. Desmear and Hole Metallization
After drilling, resin smear inside the holes is removed. Then the hole walls are chemically treated and plated with copper to build electrical connections between layers.

8. Outer Layer Imaging and Etching
The outer layer circuit pattern is created through imaging, plating, and etching. This step forms the final copper traces, pads, and connection areas on the PCB surface.

9. Solder Mask Application
A solder mask is applied to protect the copper surface, prevent solder bridging, and improve insulation. The solder mask must be compatible with halogen-free PCB material and assembly temperatures.

10. Surface Finish
A surface finish is added to protect exposed copper pads and improve solderability. Common options include ENIG, HASL, immersion silver, immersion tin, and OSP.

11. Legend Printing
Component marks, logos, polarity symbols, and part numbers are printed on the PCB surface. This helps assembly teams identify placement direction and board information clearly.

12. Electrical Testing
Each PCB is tested for open circuits, short circuits, and connection accuracy. This step helps confirm that the board matches the design files before shipment.

13. Reliability and Quality Inspection
The PCB may go through visual inspection, AOI, impedance testing, solderability testing, thermal stress testing, and dimensional inspection. For high-reliability applications, extra checks can be added based on project requirements.

14. Final Cleaning and Packaging
After inspection, the boards are cleaned, dried, vacuum packed, and labeled. Proper packaging helps prevent oxidation, moisture absorption, and surface contamination during storage and shipping.

Halogen-Free PCB, https://www.bestpcbs.com/blog/2026/05/halogen-free-pcb/

Why Choose EBest for Halogen Free PCB Manufacturer?

Why choose EBest for halogen free PCB manufacturing? EBest Circuit has more than 20 years of PCB manufacturing experience and provides one-stop PCB solutions for global electronics industries.

EBest supports FR4 PCB, metal core PCB, ceramic PCB, RF PCB, high Tg PCB, HDI PCB, heavy copper PCB, and impedance control PCB manufacturing. Choosing EBest can bring the following advantages to your PCB projects:

  • Stable halogen-free PCB material sourcing helps improve long-term product consistency
  • High Tg laminate support improves thermal reliability in demanding applications
  • One-stop PCB fabrication and assembly services help reduce supplier management costs
  • PCB prototype and mass production support help shorten project development cycles
  • Fast-turn production service helps reduce urgent project lead time pressure
  • Some prototype orders can be shipped within 24 hours
  • Monthly production capability reaching 260,000 square feet
  • Strict quality inspection helps reduce manufacturing defects and reliability risks
  • Electrical testing and reliability verification help improve product stability
  • Support for multilayer and complex PCB structures helps simplify difficult projects
  • Automotive, industrial, and medical manufacturing experience helps support high-reliability applications
  • Support for RoHS, REACH, UL, ISO 9001:2015, ISO 13485:2016, IATF 16949, and AS9100D requirements
  • Component sourcing and PCB assembly services help simplify supply chain management
  • Stable international delivery capability helps improve project scheduling efficiency

From PCB prototype to mass production, EBest focuses on stable quality, fast response, and reliable manufacturing support for global electronics projects.

Halogen Free PCB, https://www.bestpcbs.com/blog/2026/05/halogen-free-pcb/

FAQs About Halogen Free PCB

Q1: Is halogen free PCB better than standard FR4 PCB?

A1: Halogen free PCB is often preferred for products that require better environmental performance, lower toxic emissions, and higher safety standards. Compared with traditional FR4 PCB, halogen-free materials can provide cleaner burning characteristics and stronger support for RoHS and REACH compliance.

Q2: Why are more electronic products using halogen free PCB?

A2: More electronic manufacturers are switching to halogen free PCB because environmental regulations are becoming stricter worldwide. Halogen-free materials help reduce harmful smoke, toxic gas emissions, and environmental impact during overheating or fire exposure.

Q3: Can halogen free aluminum PCB be used in high-power products?

A3: Yes. Halogen free aluminum PCB is widely used in LED lighting, automotive lighting, power modules, and industrial power supplies because it combines environmental compliance with excellent heat dissipation performance.

Q4: Does halogen free PCB cost more than standard PCB?

A4: In many cases, halogen free PCB materials are slightly more expensive because of specialized resin systems and stricter manufacturing requirements. However, the improved thermal reliability, environmental performance, and global compliance advantages often make the additional cost worthwhile.

Q5: What industries commonly use halogen-free PCB materials?

A5: Halogen-free PCB materials are commonly used in automotive electronics, communication systems, medical devices, industrial automation equipment, LED lighting products, aerospace electronics, and renewable energy systems.

Q6: How can I identify a reliable halogen-free CEM3 PCB material supplier?

A6: A reliable supplier should provide certified material reports, stable laminate sourcing capability, strict quality inspection, and support for RoHS, REACH, and UL compliance standards.

Conclusion

EBest provides high-quality halogen free PCB manufacturing services for industrial, automotive, medical, communication, and LED applications. From PCB prototype to mass production, EBest supports reliable fabrication, stable material sourcing, and fast delivery services. Contact us today for your PCB project inquiry: sales@bestpcbs.com.

You may also like