A servo driver board turns an AI robot controller’s motion commands into stable, synchronized actuator movement. A reliable custom design must match the servo interface, simultaneous current demand, control timing, connector system, PCB layout and test strategy; a simple bank of headers is not enough.
The scope covers PWM and serial-bus servo interfaces for robot hardware. Industrial AC servo drives require a separate motor-specific power-stage and control design.
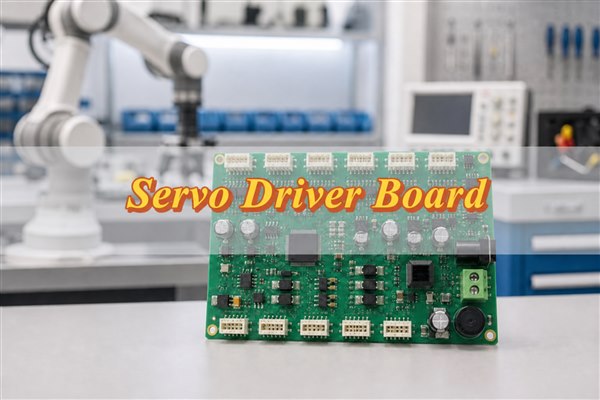
What Is a Servo Driver Board in AI Robot Hardware?
A servo driver board connects the robot processor, power source and servo actuators. Its exact role depends on the actuator and command architecture.
Its core functions are to distribute power, route or generate control signals, monitor required feedback and provide the necessary protection and connectors.
This interface must control timing, supply stability, contact reliability and logic integrity. The robot processor cannot correct these board-level failures after they occur.
How Does a Servo Driver Board Control Robot Motion?
The board converts a position, velocity or torque request into the electrical command format expected by each actuator. For a PWM servo, command timing encodes the requested position. For an addressed serial servo, a data packet identifies the actuator and target. Closed-loop industrial drives add current and feedback processing, so they require a different power and control architecture.
Evaluate the complete path under coordinated load; a single unloaded servo will not expose bus timing errors, voltage sag or corrupted feedback.
- Deterministic updates: Schedule channel updates so simultaneous joints do not receive stale or irregular commands.
- Safe startup: Hold outputs in a defined state until power rails, firmware and communication are ready.
- Fault containment: Prevent one shorted cable or failed actuator from disabling unrelated control electronics when required by the system safety analysis.
- Feedback integrity: Keep encoder, current, temperature and status paths away from noisy power switching loops.
How Do You Choose a Servo Driver Board for a Multi-Axis AI Robot?
Choose the board architecture from the actuator interface, peak simultaneous load and required motion coordination. Channel count by itself is not enough. Two boards with the same number of outputs can behave very differently when several joints accelerate together, when cables are long, or when the robot must recover safely after a fault.
Document these seven inputs before selecting the circuit architecture or connector count:
- Actuator compatibility: Record every servo part number, supply range, command protocol, logic level and pinout. Confirm the interface from the actuator datasheet and, where possible, a known-good signal capture; a connector match alone does not prove electrical compatibility.
- Axis count and update timing: Define the installed channels, axes that move together, required update period and worst-case bus latency. A board with enough outputs can still produce visible jitter if commands are delayed or updated unevenly.
- Simultaneous power demand: Base the input rail, branch distribution and connector current rating on the real acceleration, reversal and holding profile. Normal running current can hide the short peaks that cause brownouts, resets or overheated contacts.
- Feedback and diagnostics: Specify whether the controller needs position, current, temperature, status or fault data from each actuator. Confirm the required bandwidth and response to missing or invalid feedback before choosing a one-way PWM or bidirectional bus architecture.
- Cable and connector limits: Control the mating part, pin sequence, wire gauge, cable length, retention method and mating-cycle requirement. These details affect voltage drop, signal integrity, serviceability and resistance to intermittent contact.
- Startup and fault behavior: Define the output state during power-up, reset, undervoltage, overcurrent, watchdog timeout and communication loss. Decide whether one failed actuator or cable must remain isolated from the controller and other axes.
- Mechanical and test integration: Check board outline, mounting, enclosure airflow, connector access, programming method and test-point access. Verify measurement and service access in the installed robot, because bench access may hide enclosure constraints.
Why Do Multiple Servos Jitter or Reset the Robot Controller?
Multi-servo jitter and controller resets usually begin with supply droop, shared return impedance, irregular command timing or EMI coupling. Diagnose these causes at the board while reproducing the loaded motion, not by replacing firmware or adding capacitors at random.
- Reproduce the event: Run the exact joint combination, acceleration and mechanical load that causes the fault.
- Measure at the load: Capture minimum rail voltage and transient duration at local connectors or test points with adequate bandwidth.
- Correlate timing: Capture supply voltage, reset, command signal and fault output on the same time base.
- Separate causes: Repeat with one actuator at a time, reduced acceleration and an alternate cable route to distinguish load current from coupling.
- Verify the repair: Re-run the worst-case motion across the intended input-voltage and temperature conditions.
Also inspect shared connector pins, thin ground traces and long harness returns; transient current through these impedances can shift the local logic reference and trigger a reset.
How Should Power Integrity Be Designed for a Multi-Servo Driver Board?
Size and verify every element from the power source to the servo connector and return path under simultaneous motion. Use the real motion profile rather than channel count alone.
- Model simultaneous current: Add the servos that can operate together, controller current and design margin; use stall current only for a credible operating or fault state.
- Budget voltage drop: Calculate each source, protection, connector, copper, via, cable and return segment with Vdrop = I × R, then measure at the loaded connector.
- Bulk energy: Place appropriately rated bulk capacitance where the servo rail enters and where a branch experiences a fast load step.
- Local decoupling: Use the values specified by each controller, transceiver and power-device manufacturer, with short connections to the relevant supply and return pins.
- Low-impedance distribution: Use copper geometry, layer transitions and connector contacts that match the calculated current and allowable temperature rise.
- Rail separation: Keep noisy actuator current from flowing through the logic regulator’s sensitive supply and return path.
- Protection coordination: Select reverse-polarity, surge, overcurrent and branch protection for the available source energy and credible harness faults.
- Copper and stackup: Select FR4 copper weight and distribution from current, temperature rise, voltage drop and routing density; confirm spacing, vias, escape routing and manufacturability.
How Do PCB Layout, EMI and Thermal Design Affect Servo Board Reliability?
Coordinate switching-loop geometry, return paths, noise control and heat flow during PCB layout. One filter cannot correct poor routing after the layout is complete.
- Shrink critical loops: Keep the source, switching device, load path, decoupling capacitor and return loop compact.
- Preserve return paths: Avoid routing that cuts the reference plane beneath clocks, buses and sensitive measurements.
- Partition by function: Separate power switching, logic, analog sensing and external interfaces while providing deliberate connection points between their returns.
- Control coupling: Increase separation from noisy nodes, reduce long parallel runs and protect high-impedance signals.
- Build a thermal path: Connect exposed pads to continuous copper and an appropriate thermal-via pattern, then measure the assembled board under the worst credible motion profile.
- Record thermal conditions: Log input voltage, active channels, mechanical load, airflow, enclosure state, ambient temperature and soak time with every temperature result.
Compare component and board hot spots with the applicable device limits, derating policy and robot duty cycle.
How Does a Custom Servo Driver Board Prototype Validate Robot Performance?
Validate the prototype under representative multi-axis load; one unloaded servo is not sufficient release evidence. Use six verification gates:
- Design for observation: Add safe access to input, servo and logic rails, ground, reset, communication, command outputs and current measurement.
- Verify static safety: Check shorts, polarity and rail resistance, then perform the first power-up with a current-limited supply before connecting actuators.
- Validate one channel: Confirm signal format, connector pinout, direction, range and fault behavior with one known actuator.
- Increase concurrency: Add channels according to the real robot motion profile while logging minimum rail voltage, current and timing.
- Apply mechanical load: Test acceleration, reversal, holding and collision-recovery states that change actuator current.
- Record release evidence: Save waveforms, temperatures, firmware version, board revision, actuator list and pass limits.
What Must Be Controlled During Servo Driver Board PCB Assembly?
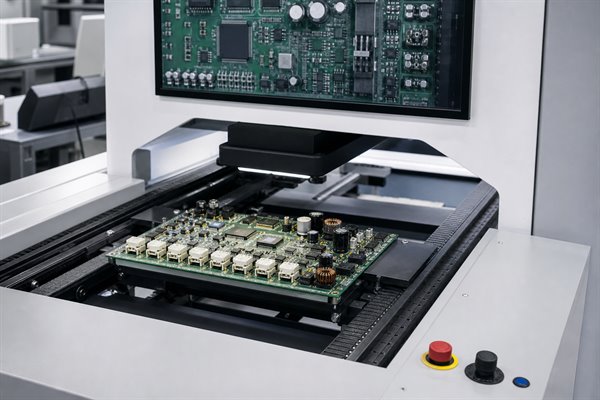
Assembly control must protect component identity, polarity, solder quality, connector alignment and thermal-pad integrity. Servo boards often combine fine-pitch logic, large capacitors, power packages and mechanically loaded connectors, so one uniform inspection method is insufficient.
- BOM control: Lock manufacturer part numbers, approved alternates, package, ratings and do-not-substitute items.
- Moisture handling: Follow the component and packaging requirements for moisture-sensitive devices before reflow.
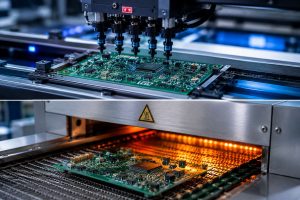
- Paste and reflow control: Match stencil apertures and the validated thermal profile to the component mix and exposed pads.
- Polarity inspection: Verify diodes, electrolytic capacitors, IC orientation and connector pin-one features against controlled drawings.
- Joint inspection: Use AOI for visible placement and solder features, then add X-ray where hidden joints or thermal pads create a real risk.
- Connector mechanics: Check coplanarity, retention, insertion clearance and any hand-soldered or press-fit operation before functional test.
- Revision control: Release matching fabrication, BOM, centroid and assembly files under one revision identifier.
- Programming control: Define the image, checksum, security state, connector, fixture and pass record before assembly release.
Which Functional Tests Should Validate an AI Robot Servo Control Board?
Functional testing should verify power, every channel, communication, protection and loaded motion behavior against written limits. A power-on LED is only an initial observation; it does not prove channel timing, voltage margin or fault recovery.
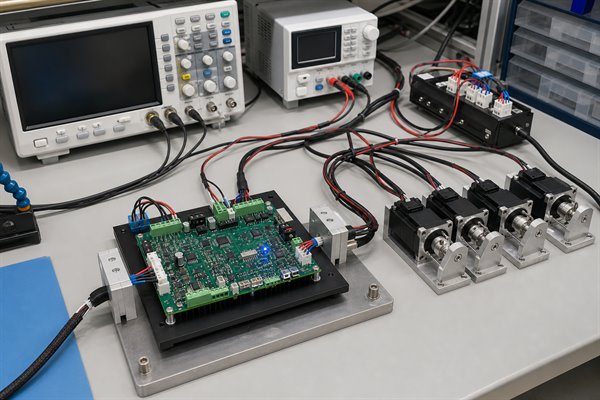
| Test | Method |
| Input and rails | Measure startup, steady state and worst-case transient at defined test points |
| All output channels | Exercise each connector with a known load or validated simulator |
| Communication | Test valid frames, timeout, missing device and bus recovery |
| Protection | Apply controlled undervoltage, overload or disconnected-load conditions where safe |
| Loaded motion | Run representative concurrent trajectories and mechanical loads |
| Programming and identity | Read firmware, configuration, serial-number or revision identifiers |
Set limits from actuator data, the control budget, safety analysis and system requirements. Use a protected fixture or simulator for unsafe fault tests and document its coverage limits.
How Do You Move a Servo Driver Board from Prototype to Production?
Release the design only after the board definition, approved parts, assembly controls and measurable acceptance limits are ready for repeat production. Confirm all eight requirements:
- Close prototype findings: Assign every electrical, thermal, communication and mechanical failure a root cause, corrective action and passing retest. Update the schematic, layout, BOM and firmware together so the released files match the tested board.
- Complete PCB DFM: Review the approved stackup, copper distribution, minimum geometry, drill and via structure, board outline, connector clearances, panelization and fabrication notes against the chosen manufacturer’s documented capabilities.
- Complete assembly and test DFM: Confirm package footprints, polarity marks, stencil requirements, fiducials, tool clearance, programming access and test-point size and spacing. The fixture must reach every required rail, interface and output without stressing connectors.
- Qualify the production BOM: Lock manufacturer part numbers for controllers, power devices, capacitors and connectors. Evaluate an alternate for electrical rating, pinout, package, thermal behavior, startup behavior and firmware compatibility before approval.
- Freeze production inputs: Issue matching Gerber or ODB++, drill, stackup, fabrication notes, BOM, centroid, assembly drawings, firmware image, programming instructions and functional-test specification under one revision.
- Build a production-intent pilot: Use the planned PCB construction, approved components, stencil, reflow process, programming method and test fixture. Temporary prototype wiring, hand-selected parts or laboratory-only setup must not hide transfer risks.
- Review pilot results: Classify fabrication, placement, soldering, programming and functional-test failures. Record rework and retest results, then verify rail voltage, timing, temperature and loaded multi-axis behavior against written limits before increasing quantity.
- Control post-release changes: Link every component, PCB, process, firmware or fixture change to an approval record and an affected-test plan. Repeat only the tests justified by the impact analysis, but never accept generic replacement equivalence without verification.
Why Choose EBest for Custom Servo Driver Board Manufacturing?
Reduce engineering handoffs, identify production risks earlier and keep the approved board and BOM aligned from prototype through repeat builds. These EBest Circuit services address those needs:
- Resolve board-level risks before ordering volume: PCB design support can review power distribution, stackup, routing, connector placement and test access against the servo interface and motion-load requirements.
- Validate the design with lower commitment: PCB prototyping and assembly services enable verification builds before the design moves to mass production.
- Reduce uncontrolled BOM changes: Component sourcing and PCB assembly can work from the same approved manufacturer part numbers and flag alternatives that require engineering confirmation.
- Match the PCB construction to the electrical load: EBest’s product scope includes FR4, multilayer, heavy-copper, high-Tg and impedance-controlled PCBs for project-specific stackup review.
- Simplify prototype-to-production transfer: PCB design, prototype, sourcing, assembly and mass-production services can use one controlled set of fabrication, BOM, programming and test files.
- Support supplier qualification: Use a defined PCB assembly manufacturer selection process to confirm sourcing responsibility, inspection, testing, traceability and change control. EBest lists IATF 16949, ISO 9001:2015, ISO 13485:2016, AS9100D, REACH, RoHS and UL credentials; confirm the certification and product-level documentation required for the specific robot program during quotation.
FAQs About Servo Driver Boards
Q1: What files should I send for a custom servo driver board quotation?
A1: Send the complete fabrication and assembly package. Include Gerber or ODB++, drill files, BOM, centroid data, assembly drawings, quantity, stackup, servo models, protocol, voltage, simultaneous-motion requirement, firmware method and functional test limits.
Q2: Can EBest assemble a customer-designed servo control PCB?
A2: Yes, EBest can fabricate and assemble a customer-designed board. The files still need engineering review for manufacturability, component availability and test readiness before release.
Q3: Can firmware be programmed during PCB assembly?
A3: Programming can be included with controlled inputs. Provide the firmware image, programming interface, security instructions and verification method, including the checksum or version readback that proves the correct image was loaded.
Q4: Does EBest provide a free DFM review before quotation?
A4: Yes, EBest offers a free DFM review for the submitted PCB and assembly package. The review can identify manufacturability issues involving stackup, copper geometry, drill and via choices, component footprints, assembly clearances and test access before production.
Q5: Which PCB constructions can be reviewed for a servo driver board?
A5: The appropriate construction depends on current, thermal, signal and mechanical requirements. EBest’s product scope includes FR4, multilayer, heavy-copper, high-Tg and impedance-controlled PCBs for project-specific review.
Q6: Can EBest support both bare PCB fabrication and complete PCB assembly?
A6: Yes, the service scope includes PCB fabrication, component sourcing and PCB assembly. Define whether the quotation requires bare boards, assembled boards, programming, functional testing or a combination of these services.
Q7: Which quality or compliance credentials should buyers confirm?
A7: Match the required certification or compliance document to the product and end-use program. EBest lists IATF 16949, ISO 9001:2015, ISO 13485:2016, AS9100D, REACH, RoHS and UL credentials; request the applicable current documentation during supplier qualification.
Q8: When is conformal coating appropriate for a robot servo board?
A8: Use conformal coating only when the environmental risk justifies it. Specify keep-out areas, connectors, test points and rework requirements; coating cannot compensate for inadequate spacing or enclosure design.
Q9: What information helps EBest provide a useful DFM review?
A9: Submit the manufacturing files together with the application’s electrical limits. Include Gerber or ODB++, stackup, BOM, centroid data, assembly drawings, servo models, voltage, simultaneous-load profile, connector constraints and required tests.
Q10: What records can accompany a servo driver board shipment?
A10: Define shipment records in the purchase specification. Request the inspection, programming, functional-test and traceability records needed for receiving acceptance before the order is released.
Conclusion
Ready to reduce manufacturing risk before ordering your servo driver board? Send your Gerber or ODB++, BOM, quantity, stackup, servo interface, simultaneous-load profile, assembly, programming and test requirements to sales@bestpcbs.com. Ask EBest for a free DFM review and quotation for your AI robot hardware project.