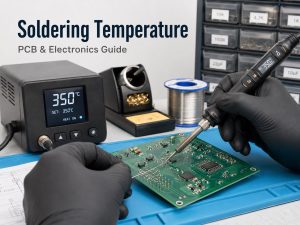
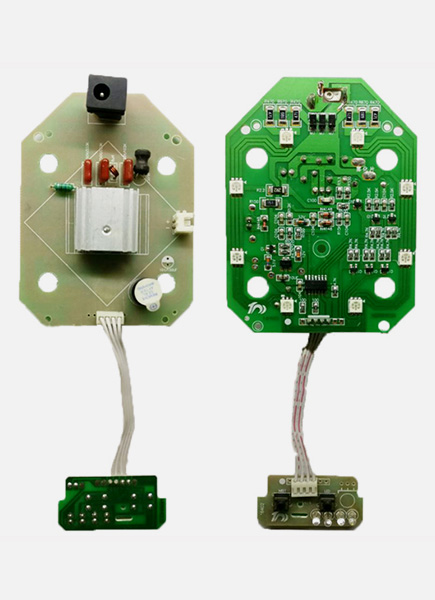
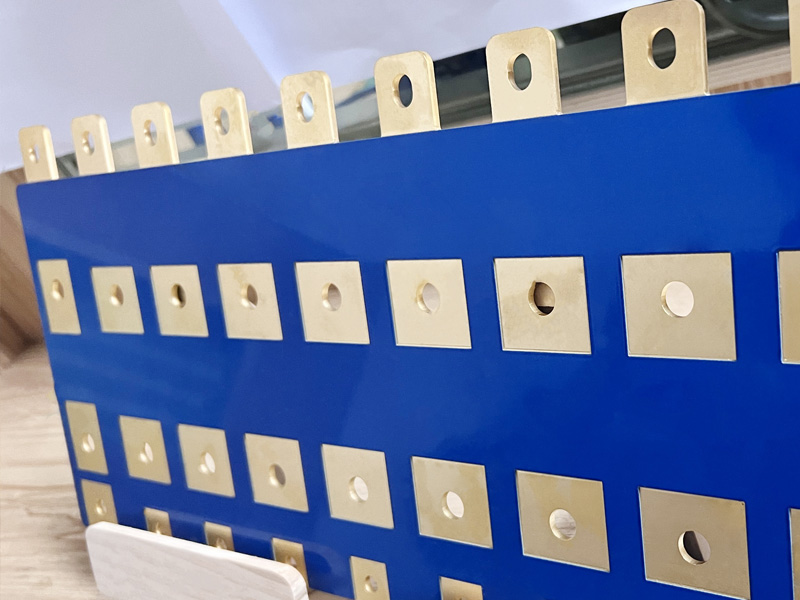
An ultrasonic PCB cleaner can remove flux residue, oils and particles from areas that brushes cannot easily reach. Safe use depends on the complete assembly, however. The wrong chemistry, excessive exposure or trapped liquid can damage components even when the bare board material survives the bath.
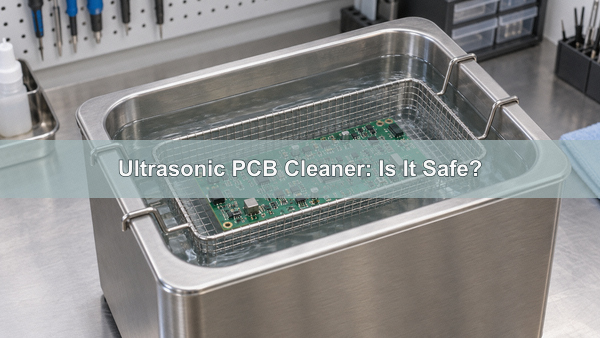
Before cleaning, identify every component and material that will enter the tank. Then validate the liquid, ultrasonic settings, cycle length, rinse and drying method on representative assemblies. There is no single frequency, temperature or cleaning time that is suitable for every PCB.
What Is an Ultrasonic PCB Cleaner?
An ultrasonic PCB cleaner is a tank-based system that transmits high-frequency mechanical energy through a liquid. The liquid carries the cleaning chemistry to exposed board surfaces, under suitable components and around dense solder joints. The equipment normally includes a stainless steel tank, transducers, a generator, a basket and controls for time; some systems also provide heating, power adjustment or frequency sweep.
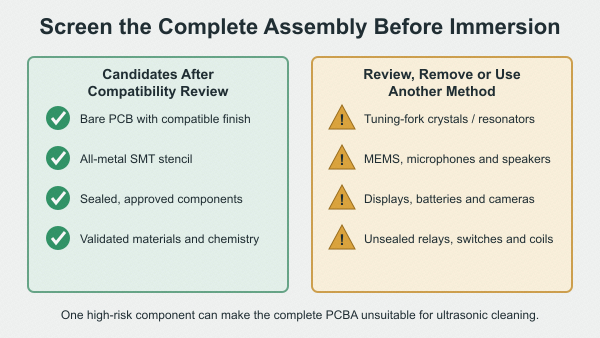
An ultrasonic bath for PCB cleaning is not automatically safe for every assembled board. A bare panel, an all-metal SMT stencil and a populated PCBA present very different material and liquid-trapping risks. The process specification must identify which of those objects is being cleaned.
How Does Ultrasonic PCB Cleaning Work?
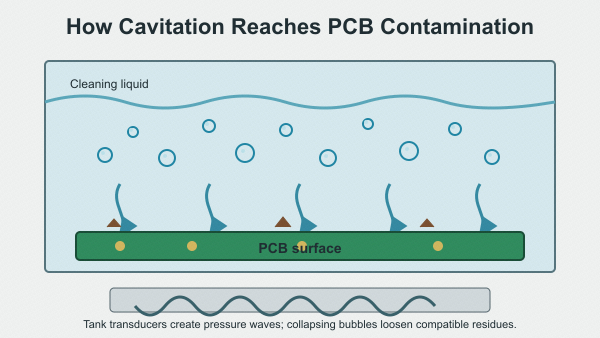
Ultrasonic PCB cleaning relies on cavitation. Alternating pressure waves create microscopic bubbles in the liquid. When those bubbles collapse near a surface, they produce local fluid movement that helps lift contamination from pads, component gaps and irregular features.
Cavitation improves access, but it also applies mechanical energy. Cleaning effectiveness and component stress change with frequency, acoustic power, tank loading, temperature, chemistry and time. A visibly active bath does not prove that the process is safe or that ionic residues have reached an acceptable level.
When Should You Use an Ultrasonic PCB Cleaner?
Ultrasonic cleaning is most useful when compatible contamination remains in spaces that controlled spray or manual brushing cannot reach. Examples can include removable flux residues, machining particles and process oils on a board or metal stencil. The chemistry must be capable of dissolving or displacing the actual soil; ultrasound alone cannot make an incompatible liquid effective.
The process is a poor choice when the assembly contains components that can be damaged by vibration or admit liquid, when the contamination is already beneath a sealed component, or when drying cannot remove liquid from cavities. It also cannot rebuild corroded copper, repair cracked solder joints or restore an electrically damaged part.
Which PCBs Should Not Be Cleaned Ultrasonically?
Do not approve an assembly only because most of its parts appear robust. One sensitive component can make the entire ultrasonic cycle unsuitable. Review the component manufacturer's cleaning restrictions and the actual mounted condition.
| Component or feature | Main concern | Required decision |
|---|---|---|
| Low-frequency crystals and resonators | Acoustic energy can affect delicate internal structures | Follow the exact component specification or remove the part before cleaning |
| MEMS sensors, microphones and speakers | Vibration, pressure and liquid entry can damage functional elements | Treat as high risk unless the manufacturer explicitly permits the process |
| Displays, batteries and camera modules | Liquid ingress, trapped chemistry or seal damage | Remove or exclude the assembly from immersion |
| Unsealed relays, switches, trimmers and connectors | Cleaner can enter cavities and remain after surface drying | Use a non-immersion method or prove complete rinse and drying |
| Transformers, coils and porous housings | Wicking and long-term residue retention | Validate with destructive samples or avoid the bath |
| Labels, adhesives and conformal coatings | Swelling, delamination or loss of identification | Run a material-compatibility test before production |
An ultrasonic cleaner for motherboard repair therefore needs a component-by-component review; “motherboard safe” is not a meaningful universal setting. The same caution applies to densely populated industrial and medical assemblies.
How Do You Choose an Ultrasonic PCB Cleaner?
The best ultrasonic cleaner for electronics is the system that can hold the actual workpiece without placing it on the tank floor, deliver a controllable and repeatable process, and support the approved chemistry. Tank dimensions should allow liquid circulation around the basket and should not force boards to overlap.
- Basket and fixture: support boards without scraping surfaces or shadowing contaminated areas.
- Tank size: fit the largest board or panel with clearance for circulation.
- Power control: allow a conservative starting point and repeatable settings.
- Frequency sweep: a sweeping ultrasonic cleaner can reduce fixed standing-wave patterns, but it does not remove the need for validation.
- Temperature control: prevent uncontrolled heating and keep chemistry within its approved range.
- Drainage and filtration: make bath maintenance and contamination control practical.
A PCB ultrasonic cleaning machine should be evaluated by process capability, safety certification, service support and tank uniformity, not only by ultrasonic PCB cleaner price. An inexpensive ultrasonic PCB cleaner machine that cannot control power or temperature can make a validated process difficult to reproduce.
What Cleaning Solution Is Safe for PCBs?
The ultrasonic PCB cleaning solution must match the contaminant and every exposed material. Check compatibility with the solder mask, legend, surface finish, component bodies, adhesives, seals and plastics. A solution that removes one flux system may leave another residue or attack markings.
Water-based electronic cleaners are commonly paired with a deionized-water rinse when the assembly and residues are compatible. A commercial ultrasonic PCB cleaner liquid or ultrasonic PCB cleaner fluid still requires concentration, temperature, bath-life and rinse controls from its technical data. “Electronics cleaner” on a label is not enough evidence for a production process.
Do not put isopropyl alcohol, acetone or another flammable solvent into a standard ultrasonic tank. Cavitation and heat can increase vapor and ignition hazards. Flammable chemistry requires equipment, ventilation and operating controls specifically approved for that service. A homemade or DIY ultrasonic PCB cleaning solution should not be introduced into production without material, safety and residue validation.
How Should You Prepare a PCB for Ultrasonic Cleaning?
Disconnect all power and remove batteries before the board approaches the tank. Record the board revision and cleaning reason, identify the flux or contamination if possible, and review the cleaning restrictions for crystals, sensors, switches, displays, relays and other enclosed parts.
- Remove parts that are not approved for immersion.
- Protect contacts or areas that must not be exposed to the selected chemistry.
- Check that the cleaning liquid is fresh and at the approved concentration.
- Degas a newly prepared bath according to the equipment and chemistry instructions.
- Place the board in a compatible basket with spacing between assemblies.
- Prepare a representative sample and a documented starting condition before processing a production lot.
How Do You Clean a PCB with an Ultrasonic Cleaner?
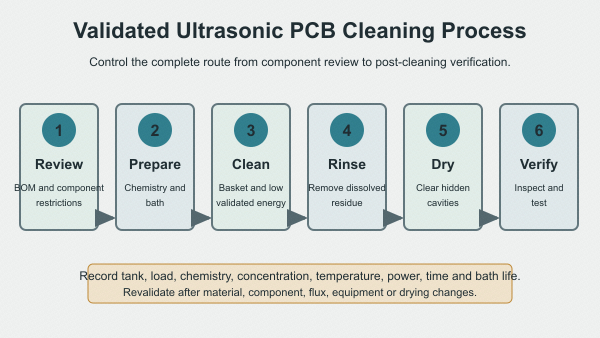
Cleaning a PCB with an ultrasonic cleaner should follow a controlled sequence rather than an operator's visual guess.
- Confirm that the unpowered assembly and all mounted components are approved for immersion and ultrasonics.
- Prepare and degas the validated cleaning solution.
- Support the PCB in the basket; do not rest it directly on the tank floor.
- Start with the lowest validated energy, temperature and exposure that can remove the target residue.
- Observe the bath and fixture without placing hands in an operating tank.
- Transfer the board to the specified rinse before loosened residue can dry again.
- Dry the assembly completely, then inspect and test it before power is applied.
How Long Should a PCB Stay in an Ultrasonic Cleaner?
Use the shortest cycle that consistently meets the cleanliness requirement without affecting components or materials. A time copied from another board is only a trial input, not a released process. Board density, contamination, chemistry, bath loading, temperature and acoustic energy all change the result.
Develop the window with representative samples. Increase one controlled variable at a time, inspect for residue and material changes, and perform the required electrical or functional tests. Once approved, document the tank, basket, liquid concentration, temperature range, power setting, cycle time, load size and bath-change criteria.
How Should You Rinse and Dry a PCB After Ultrasonic Cleaning?
Rinsing removes dissolved soil and cleaning chemistry. Use the rinse quality specified for the process, commonly controlled deionized water for compatible water-based systems. One stagnant rinse can redeposit contamination, so production processes may require staged or monitored rinsing.
Drying must remove liquid from beneath components, connector cavities, through-holes and porous parts, not just from visible surfaces. Use compatible forced air, controlled heat, vacuum or time as defined by the assembly. Do not power a board because its top surface looks dry. Verify the allowed temperature for components, labels, adhesives and the FR4 PCB construction.
Ultrasonic PCB Cleaning vs Manual Cleaning
| Decision factor | Ultrasonic cleaning | Manual or controlled local cleaning |
|---|---|---|
| Access under parts | Can reach exposed gaps through the liquid | Limited by brush, swab and spray access |
| Mechanical risk | Acoustic energy affects the complete immersed assembly | Local force can damage leads or spread residue |
| Liquid exposure | Full immersion can fill cavities | Can be limited to a selected area |
| Repeatability | Good when equipment, chemistry, load and time are controlled | More operator-dependent unless the method is tightly defined |
| Best use | Compatible assemblies with hard-to-reach removable contamination | Sensitive assemblies, spot cleaning and low-volume rework |
Use the general PCB cleaning guide when the task involves dust, localized flux, battery corrosion or contacts that do not justify immersion. The method should follow the contaminant and assembly risk, not the availability of a machine.
How Do You Validate an Ultrasonic PCB Cleaning Process?
Validation must show both cleanliness and absence of damage. Visual inspection can find remaining residue, staining, lifted labels and trapped liquid, but it cannot establish every electrical or ionic condition.
| Check | What it can confirm | Important limit |
|---|---|---|
| Magnified visual inspection | Visible residue, corrosion, coating damage and displaced parts | Cannot quantify invisible ionic contamination |
| Electrical and functional test | Defined circuit behavior after cleaning and drying | Does not prove long-term electrochemical reliability by itself |
| ROSE or ionic contamination test | Process cleanliness against an agreed method and limit | Result depends on extraction method and specification |
| Ion chromatography or SIR | Specific ions or electrochemical reliability under defined conditions | Requires an agreed test plan and is not replaced by visual inspection |
| Cross-section or destructive audit | Evidence from hidden or liquid-trapping areas | Uses sampled assemblies and must have a defined sampling plan |
Revalidate when the PCB revision, component source, flux, cleaning chemistry, tank loading or drying method changes. Process control is more reliable than assuming that a board which passed once will always tolerate the same bath.
How Do We Control PCB Cleanliness and Assembly Quality?
At EBest Circuit (Best Technology), we review the cleaning requirement together with the BOM, assembly materials, flux system and acceptance criteria. Our PCB assembly process includes cleaning and drying where the approved build requires them, followed by inspection and customer-defined testing.
We use 3D SPI, AOI and X-ray inspection at appropriate production stages, and we can perform functional testing when the procedure, interfaces and limits are defined. These methods inspect assembly quality; they do not automatically replace a specified ionic-cleanliness test. If your project requires a particular cleaning chemistry, ROSE limit, ion chromatography or SIR evidence, include the method and acceptance criteria in the manufacturing package.
Ultrasonic PCB Cleaner FAQs
Can ultrasonic cleaning damage PCB components?
Yes. Damage can result from acoustic stress, incompatible chemistry, liquid ingress, excessive heat or incomplete drying. Approve the complete assembly, not only the laminate.
Can you use isopropyl alcohol in an ultrasonic cleaner?
Not in a standard unit. Isopropyl alcohol is flammable, and ordinary ultrasonic tanks are not designed to control its vapor and ignition risk. Use only equipment and procedures specifically approved for the solvent.
Can an ultrasonic cleaner remove PCB corrosion?
It may remove loose corrosion products and contamination when the chemistry is compatible. It cannot restore copper, plating or components that corrosion has already consumed or damaged.
Can you put a motherboard in an ultrasonic cleaner?
Only after every mounted component, connector, label and material has been reviewed and the complete process has been validated. A generic ultrasonic cleaner for motherboard use is not safe merely because the board fits in the tank.
Conclusion
A safe ultrasonic PCB cleaner process begins with component compatibility and ends with complete rinsing, drying and verification. Select the tank and chemistry for the actual assembly, avoid unapproved flammable liquids, and establish the shortest effective cycle with representative samples.
For a new PCBA project, send the BOM, board files, flux or cleanliness requirement, sensitive-component restrictions, expected quantity and test criteria to sales@bestpcbs.com. We can review how the cleaning and inspection requirements fit our manufacturing process and quotation.