





A desoldering gun combines a heated hollow nozzle with vacuum suction, allowing an operator to melt and remove solder from a plated through-hole joint in one controlled action. It is faster and more repeatable than switching between a soldering iron and a manual pump, but the result still depends on nozzle fit, heat transfer, suction timing, board support, and maintenance.
This desoldering gun guide explains how to select the right tool, set a sensible starting temperature, remove components without lifting pads, and inspect the PCB before installing a replacement. The focus is practical PCB rework rather than brand rankings.
What Is a Desoldering Gun and How Does It Work?
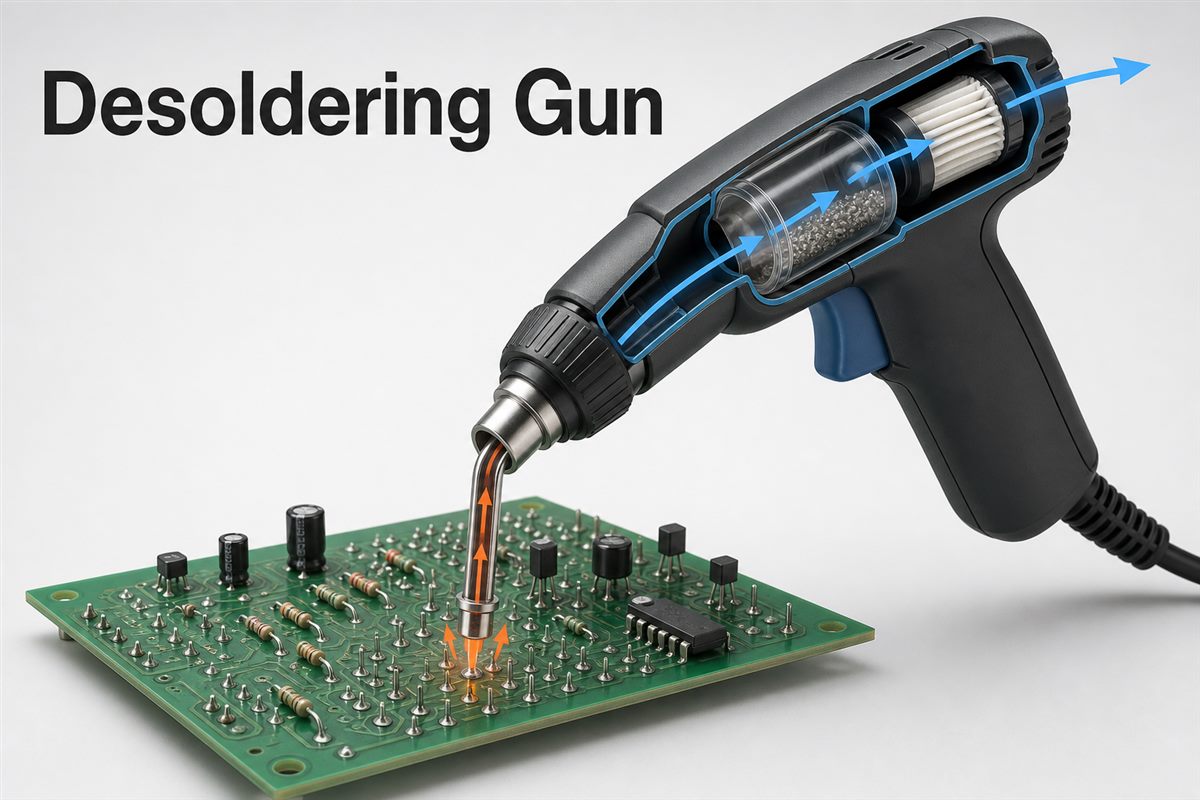
A desoldering gun heats the solder joint through a metal nozzle and then pulls the molten solder through the nozzle into a collection chamber. In an electric vacuum desoldering gun, the heater and suction path are integrated into the handpiece, so the nozzle can remain centered over the component lead while the pump is triggered.
The nozzle must transfer enough heat to melt solder throughout the plated barrel, not only on the surface pad. Once the solder is fully liquid, vacuum flow carries it through the nozzle. A filter traps solder and flux residue before they reach the pump. If the solder has not melted completely, stronger suction will not solve the problem; it may instead cool the joint and prolong heating.
This method is best suited to leaded parts such as connectors, relays, electrolytic capacitors, transformers, switches, and pin headers. Readers unfamiliar with these joints can first review how through-hole technology differs from SMT.
Desoldering Tool Types: Manual Pump, Electric Vacuum, and Hot Air
The best desoldering method depends on the component package, repair volume, and risk of thermal damage. A vacuum desoldering gun is usually the most efficient choice for repeated through-hole rework, while a manual pump is economical for occasional joints and hot air is generally better for surface-mount packages.
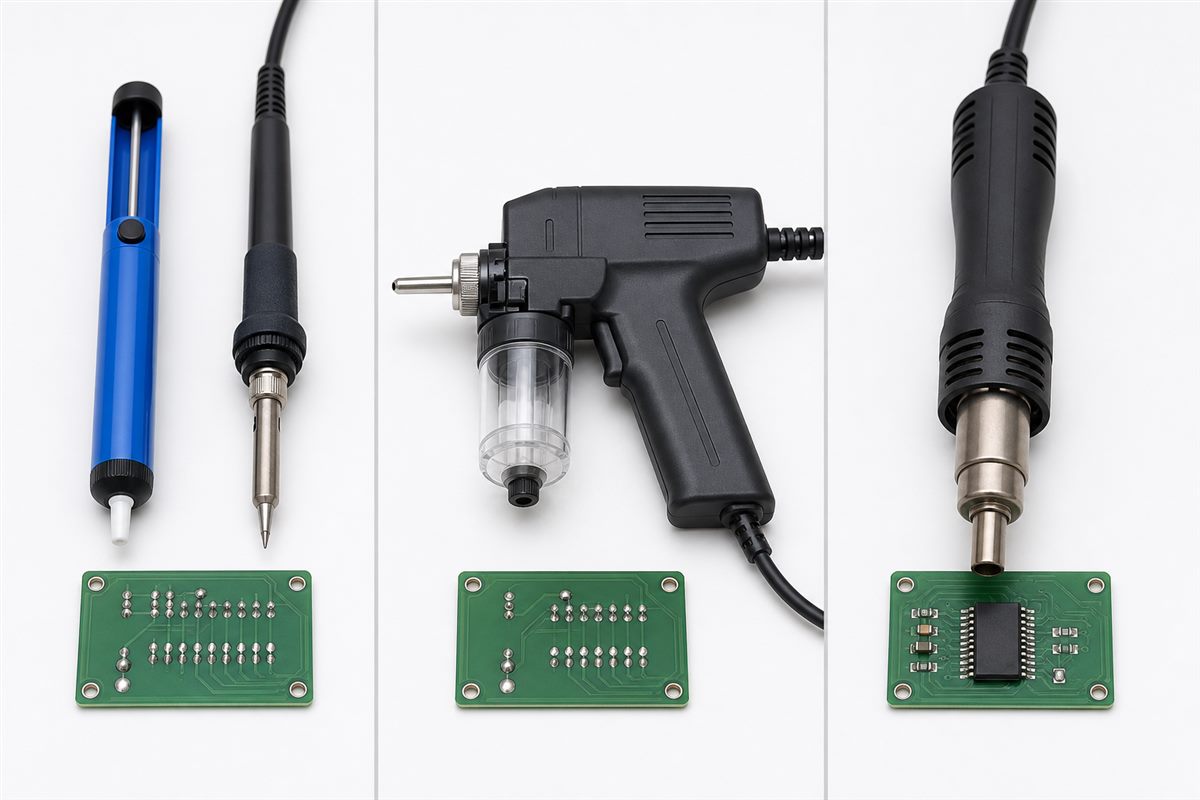
| Tool type | Best use | Main advantage | Main limitation |
| Manual solder sucker plus iron | Occasional single-sided or simple through-hole repair | Low cost and easy portability | Heat and suction occur as separate actions, which can leave solder in the barrel |
| Electric vacuum desoldering gun | Repeated through-hole PCB rework | Integrated heating and suction with better control around the lead | Requires nozzle, chamber, filter, and pump maintenance |
| Desoldering station | Production repair benches and high-mass multilayer boards | Stable power, adjustable control, and serviceable vacuum system | Higher cost and more bench space |
| Hot-air rework tool | SOIC, QFP, QFN, and other surface-mount packages | Heats multiple SMD leads or pads together | Can disturb nearby parts and is not the first choice for clearing deep plated holes |
How to Choose the Best Desoldering Gun for PCB Rework
Choose a tool by matching its thermal recovery, nozzle range, vacuum path, ESD features, and serviceability to the boards you actually repair. The phrase “best desoldering gun” is incomplete without considering multilayer copper mass, lead diameter, joint accessibility, and daily workload.
- Thermal recovery: The nozzle should restore heat quickly after contacting a ground plane or large connector pin. Rated wattage alone does not describe recovery at the joint.
- Nozzle selection: The opening should fit over the lead while the nozzle rim contacts the solder pad. A nozzle that is too small restricts solder flow; one that is too large may heat adjacent features.
- Vacuum consistency: Look for a short, serviceable suction path and accessible filters. A high peak-vacuum claim is less useful if flow collapses as the chamber fills.
- Temperature control: Variable control is useful when moving between tin-lead joints, lead-free assemblies, fragile legacy boards, and high-thermal-mass PCBs.
- ESD-safe construction: For sensitive assemblies, confirm tip-to-ground characteristics in the tool manufacturer’s current documentation.
- Consumables: Check the availability of nozzles, filters, collection chambers, seals, and cleaning tools before buying.
- Ergonomics: A balanced handpiece and convenient trigger reduce sideways force on pads during repetitive work.
For example, HAKKO publishes multiple nozzle diameters for its FR-301 portable desoldering tool and specifies a serviceable collection and filter system. Those figures are useful for understanding the selection criteria, but they are model-specific and should not be treated as universal requirements.
What Desoldering Gun Temperature Should You Use?
Use the lowest temperature that fully melts the joint within a short, controlled contact time. There is no single correct desoldering gun temperature: alloy, copper area, layer count, component lead mass, tip condition, preheating, and nozzle contact all change the amount of heat required.
| Board condition | Practical starting approach | What to watch |
| Standard tin-lead through-hole joint | Start near 315-350°C and confirm complete melting before suction | Do not keep increasing dwell time if the nozzle has poor contact |
| Lead-free joint or moderate ground connection | Start around 350-380°C, using fresh flux and good nozzle contact | Watch for solder-mask discoloration and pad movement |
| Large connector or heavy multilayer ground plane | Use a higher-power tool or controlled board preheat before raising temperature further | Excessive top-side heat can damage the pad while solder remains solid deeper in the barrel |
| Old, thin, or heat-sensitive PCB | Use the lowest effective setting, short cycles, and cooling pauses | Aged adhesive systems and repaired pads may lift more easily |
These are starting bands, not fixed process specifications. The official PACE SX-100 manual recommends 316°C as a starting point for many applications and advises selecting a temperature that produces complete melting in roughly two to five seconds, with more time sometimes needed on heavy multilayer boards. Other tools have different control ranges; the HAKKO FR-301, for example, is specified for 350-500°C. Follow the current manual for the exact tool and reduce exposure through good contact, correct nozzle size, and preheat rather than relying on temperature alone.
How to Use a Desoldering Gun Without Damaging PCB Pads
Successful desoldering is a sequence: stabilize the board, refresh the joint, melt the full solder volume, trigger suction while maintaining contact, then remove the nozzle vertically. Side loading, premature suction, and repeated long heating cycles are the main operator-controlled risks.
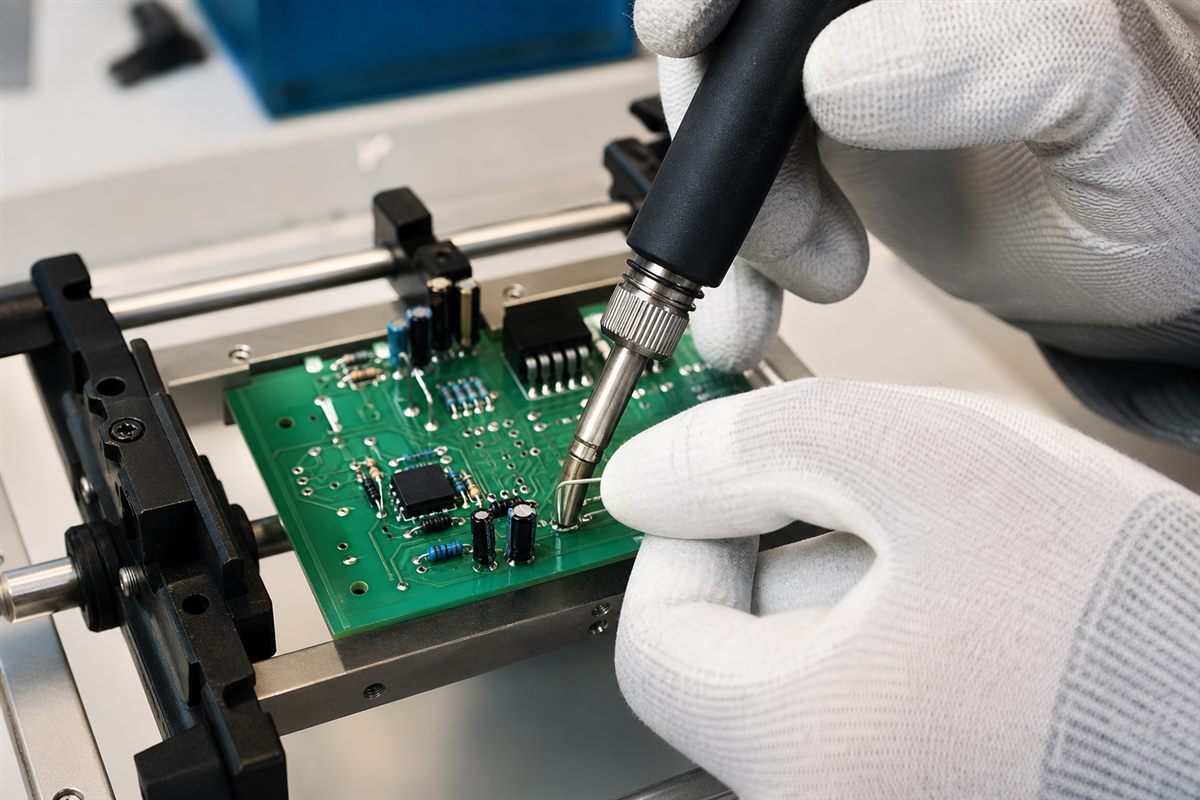
- Power down and discharge the assembly. Remove batteries and stored energy, follow ESD controls, and use local fume extraction.
- Support the PCB. A fixture prevents flexing and keeps the component side accessible without forcing the board.
- Inspect the joint. Note ground-plane connections, previous repairs, conformal coating, bent leads, and nearby heat-sensitive parts.
- Add flux and a small amount of compatible fresh solder when needed. This can improve wetting and heat transfer on oxidized joints. Consistent incoming board solderability also matters; BestPCBs describes one practical PCB solderability test.
- Seat the nozzle over the lead. Keep the tool close to perpendicular and ensure the nozzle rim contacts the solder without grinding against the pad.
- Wait for complete melting. Gently move the lead only if it can be done without levering the plated barrel.
- Trigger suction while the solder is liquid. Maintain nozzle position briefly so solder clears the hole, then release and lift vertically.
- Let the area cool before repeating. If the hole does not clear, diagnose nozzle fit, oxidation, thermal mass, or vacuum restriction instead of immediately adding a long second heat cycle.
Why a Desoldering Gun Fails to Remove Solder
Most incomplete extraction comes from insufficient heat transfer, a poor nozzle-to-lead fit, blocked suction, oxidized solder, or hidden thermal mass. Finding the cause is safer than compensating with maximum temperature.
| Symptom | Likely cause | Corrective action |
| Solder melts on the pad but remains in the hole | Barrel or inner-plane solder is not fully molten | Improve nozzle contact, add flux, select a better-fitting nozzle, or use controlled preheat |
| Weak suction or slow solder movement | Clogged nozzle, full chamber, saturated filter, leaking seal, or weak pump | Clean the hot nozzle with the correct tool, empty the chamber, replace the filter, and inspect seals |
| Lead stays bonded on one side | Bent lead, residual solder, or mechanically locked component | Inspect both PCB sides and straighten the lead only after solder is removed |
| Pad begins to move or discolor | Excessive dwell, sideways force, repeated cycles, or unsuitable temperature | Stop, cool the board, reassess the method, and do not pull the component |
| Nozzle wets poorly and transfers heat slowly | Oxidation or contaminated nozzle surface | Clean and tin the working surface as directed by the tool manufacturer |
How to Maintain Vacuum Suction, Nozzles, and Filters
A vacuum desoldering gun needs routine cleaning because every extracted joint sends solidifying solder and flux residue through a narrow heated path. Maintenance should follow the manufacturer’s procedure, especially when handling a hot nozzle or opening a collection chamber.
- Empty the solder collection chamber before debris restricts airflow.
- Inspect ceramic or paper filters and replace them when loaded, discolored, or damaged.
- Clean the nozzle bore with the correct-size cleaning pin while following the manual’s hot-tool precautions.
- Clean the heater path with the specified tool after safely removing the nozzle.
- Check O-rings, valves, hoses, and chamber seals when suction is unstable.
- Keep the nozzle in its holder during pauses and avoid placing a hot tool on the bench.
- Do not force an oversized drill or improvised wire through the nozzle, as this can damage the bore or heater.
HAKKO’s official desoldering-tool maintenance guidance emphasizes cleaning both the nozzle and the heater core, monitoring filters, and emptying collected solder. A maintenance log is useful on shared rework benches because poor performance often develops gradually and can otherwise be mistaken for a temperature problem.
How to Inspect a PCB After Desoldering
Inspect the joint before fitting a replacement component. A hole that looks open from one side may still contain a solder film, a separated barrel, or a damaged annular ring that affects electrical and mechanical reliability.
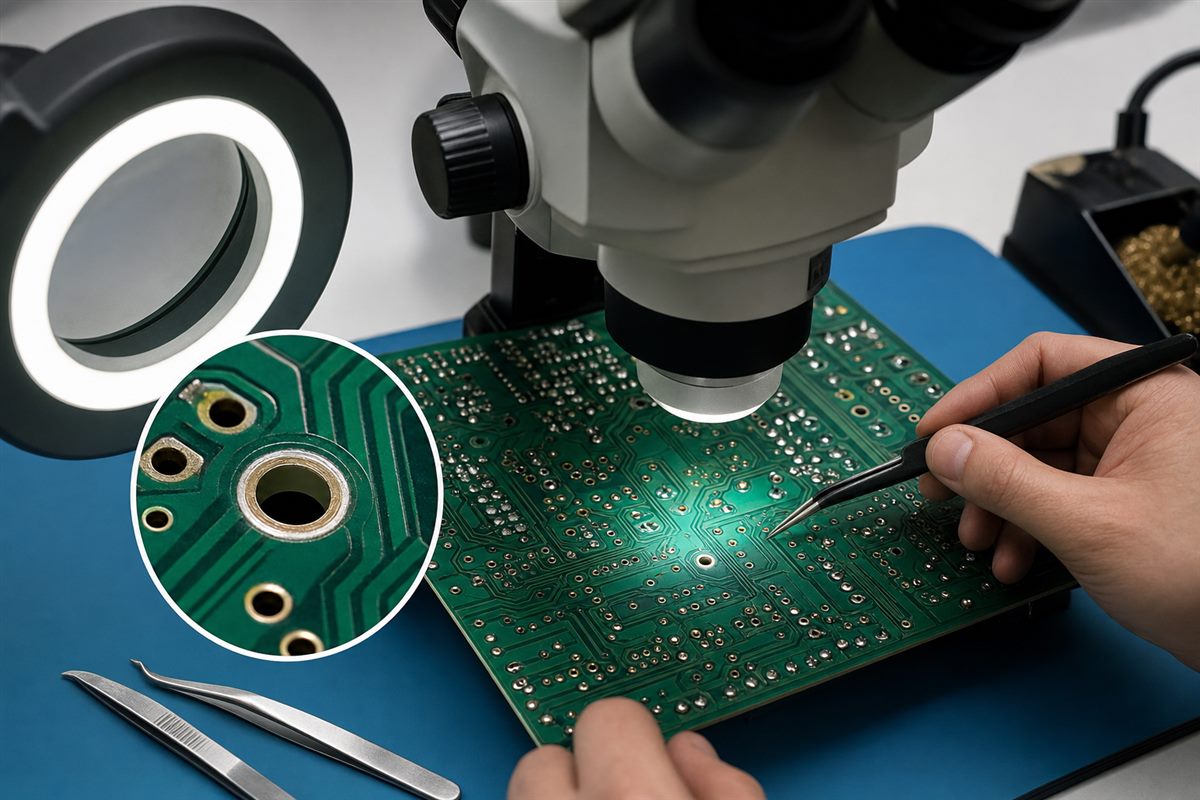
- Check both sides for lifted pads, broken traces, solder-mask damage, scorching, or delamination.
- Confirm the plated barrel is continuous and the hole is clear without enlarging it mechanically.
- Verify continuity to connected nets and isolation from adjacent pads when the circuit allows.
- Remove flux residue using a compatible cleaning method. This guide to cleaning flux from a PCB explains why chemistry and board construction matter.
- Inspect nearby components for heat movement, cracked joints, or disturbed conformal coating.
- Confirm the replacement lead fits without force before resoldering.
When Should You Use a Rework Station or Professional PCBA Service?
Move beyond a handheld electric desoldering gun when the board has large power planes, fine-pitch SMD packages, heat-sensitive laminates, expensive components, conformal coating, or a repeatable production-repair requirement. These jobs may need underside preheating, controlled hot air, bottom-side access, microscopes, thermocouples, component-specific profiles, or documented inspection.
Professional support is also sensible when the PCB is safety-critical, multilayer interconnect damage is suspected, or the assembly must return to a defined quality standard. Rework is only one stage of the complete PCB assembly process; component traceability, cleaning, inspection, and functional verification can matter as much as removing the original part.
Frequently Asked Questions About Desoldering Guns
Is a desoldering gun better than a solder sucker?
A powered desoldering gun is usually faster and more consistent for repeated through-hole work because heating and suction occur at the same point. A manual solder sucker remains useful for occasional repairs, low budgets, and field kits, but it requires a separate iron and more coordination.
Can a desoldering gun remove surface-mount components?
It can remove solder from individual accessible leads, but it is not the preferred tool for most multi-lead SMD packages. Hot air, heated tweezers, or specialized rework equipment can heat multiple pads more evenly. Choose the method by package style and nearby component risk.
Why should fresh solder be added before desoldering?
A small amount of compatible fresh solder and flux can break through oxidation, improve wetting, and increase the contact area between the nozzle and joint. The goal is better heat transfer, not adding unnecessary solder. Confirm alloy compatibility and cleaning requirements first.
How do I choose a desoldering gun nozzle size?
Select an opening slightly larger than the component lead while keeping the nozzle rim on the solder pad. It must allow molten solder to pass without scraping the pad or heating adjacent features. Use the tool manufacturer’s nozzle chart because dimensions and heater interfaces differ.
How often should a vacuum desoldering gun be cleaned?
Clean it according to use and suction performance rather than waiting for complete blockage. Empty the chamber as debris accumulates, inspect filters frequently, and clean the nozzle and heater path using the specified tools. High-flux or high-volume work requires shorter maintenance intervals.
Build a Repeatable PCB Rework Process
A desoldering gun is effective when the nozzle fits, solder is fully molten, vacuum flow is unobstructed, and the board is supported and inspected. Record the successful settings and consumables for recurring assemblies, but treat temperature as one part of a controlled process rather than the only adjustment.
Use this desoldering gun reference as a pre-rework checklist: identify the joint, choose the tool and nozzle, start with the lowest effective heat, extract without sideways force, clean the tool, and inspect the plated hole. If you’re sourcing reliable PCB/PCBA manufacturing, including OEM, ODM, prototyping, mass production, or custom engineering solutions, reach out to our engineering team for technical support and a quote at sales@bestpcbs.com.







