PCB manufacturing PCB manufacturing
Home > Blog

Circuit Board Adhesive: Types, Uses, and Selection Guide for PCB Assembly

May 13th, 2026

Circuit board adhesive helps keep PCB assemblies stable, clean, and reliable. Engineers use it to hold components, support wires, bond flexible circuits, and protect selected areas.

At first, adhesive may look like a small detail. However, it can affect the life of the whole assembly. A wire may need support. A connector may need extra strength. A flexible circuit may need a safe bonding layer. In each case, the right adhesive helps the board work better.

Also, not every adhesive suits electronics. A circuit board may face heat, vibration, moisture, and electrical stress. Therefore, the adhesive must match the board material, components, process, and final product use.

This guide explains the main types of circuit board adhesive. It also shows where each type works best and how to choose the right option for PCB assembly.

circuit board adhesive

What Is Circuit Board Adhesive?

Circuit board adhesive is a bonding or protective material for printed circuit boards and PCB assemblies. It helps fix components, support wires, bond flexible circuits, protect solder joints, and mount boards inside housings.

In simple words, it is not common glue. Instead, it is a material made for electronic products. It must work safely with solder mask, copper, solder joints, plastic parts, and electronic components.

For example, some adhesives insulate. Others conduct electricity. Some help move heat. Meanwhile, some absorb vibration or add physical support.

As a result, the best adhesive depends on the job. A printed circuit board adhesive for wire support may not suit thermal transfer. In the same way, a conductive adhesive may not suit insulation.

A good adhesive for circuit boards should offer:

  • Strong bonding to PCB surfaces
  • Good insulation, unless conductivity is needed
  • Safe curing temperature
  • Good heat and moisture resistance
  • Stable performance over time
  • Clean and controlled application
  • Compatibility with solder mask and components

Because PCB assemblies are sensitive, random household glue is not a good choice. Instead, engineers should use an electronic-grade adhesive that fits the working conditions.

Why Do Engineers Use Adhesive on Printed Circuit Boards?

Engineers use adhesive on printed circuit boards to improve strength, process control, and long-term reliability. Solder creates the electrical joint. However, some parts still need extra physical support.

For example, a large capacitor can move during transport. A connector can face repeated plugging force. A wire can pull against a solder pad. Therefore, adhesive helps reduce stress and keeps these parts steady.

Also, adhesive can help during production. In some SMT or wave soldering processes, adhesive holds parts before soldering. This helps the assembly line keep parts in the right position.

In addition, circuit board adhesive can protect selected areas. It can cover soldered wires, support connectors, or reinforce vibration-sensitive parts. Because of this, many industrial, automotive, LED, and power products use adhesives in PCBA production.

Common uses include:

  • Fixing tall or heavy components
  • Supporting soldered wires
  • Reducing vibration stress
  • Bonding flexible circuits
  • Mounting small PCB modules
  • Protecting selected connections
  • Improving production handling
  • Supporting thermal or electrical functions

In short, adhesive is not just an extra material. It can be part of the design and assembly plan.

What Are the Main Types of Circuit Board Adhesive?

The main types of circuit board adhesive include epoxy, silicone, acrylic, polyurethane, conductive adhesive, thermal adhesive, UV adhesive, and adhesive tape. Each type has a different use.

Epoxy Adhesive

Epoxy adhesive gives strong bonding. It also offers good chemical resistance. Therefore, engineers often choose it for potting, sealing, component fixing, and strong support.

However, some epoxy materials become hard after curing. Because of that, engineers should check stress and heat expansion before using epoxy near delicate parts.

Silicone Adhesive

Silicone adhesive stays flexible after curing. It also handles heat and vibration well. As a result, silicone adhesive glue for circuit boards often appears around capacitors, coils, connectors, and wires.

Also, silicone works well in power supplies, LED drivers, and industrial boards. It gives support without making the area too rigid.

Acrylic Adhesive

Acrylic adhesive cures fast and bonds well to many surfaces. Therefore, it often appears in tapes, insulation films, and fast assembly steps.

In addition, acrylic adhesive can help improve production speed. It also gives clean handling in many medium-stress applications.

Polyurethane Adhesive

Polyurethane adhesive offers flexibility and good environmental resistance. It can help with sealing, potting, and local protection.

Because it stays softer than many rigid adhesives, it can reduce stress from movement or vibration.

Conductive Adhesive

Circuit board conductive adhesive can bond materials and carry current. It usually contains silver, copper, nickel, or carbon fillers.

Engineers use it for grounding, shielding, die attach, low-temperature bonding, and special connections. However, it does not replace solder in every design. Instead, it works best when the product has a clear need for it.

Thermal Adhesive

Thermal adhesive helps move heat from a component to a heat sink, metal case, or heat spreader. Therefore, it often appears in LED modules, power electronics, and high-heat products.

Before choosing it, engineers should check thermal conductivity, bond strength, working temperature, and curing method.

UV-Curable Adhesive

UV-curable adhesive cures under ultraviolet light. This gives manufacturers fast process control.

For example, a factory may use UV adhesive when quick curing helps production speed. However, UV light must reach the adhesive area. So, component shadowing and board layout matter.

Circuit Board Adhesive Tape

Circuit board adhesive tape gives clean bonding and controlled thickness. It can support mounting, insulation, FPC bonding, thermal transfer, and shielding.

Since tape does not need liquid dispensing, it can make assembly easier. Also, it helps keep the same thickness from board to board.

How Do Circuit Board Protection Adhesives Protect PCB Assemblies?

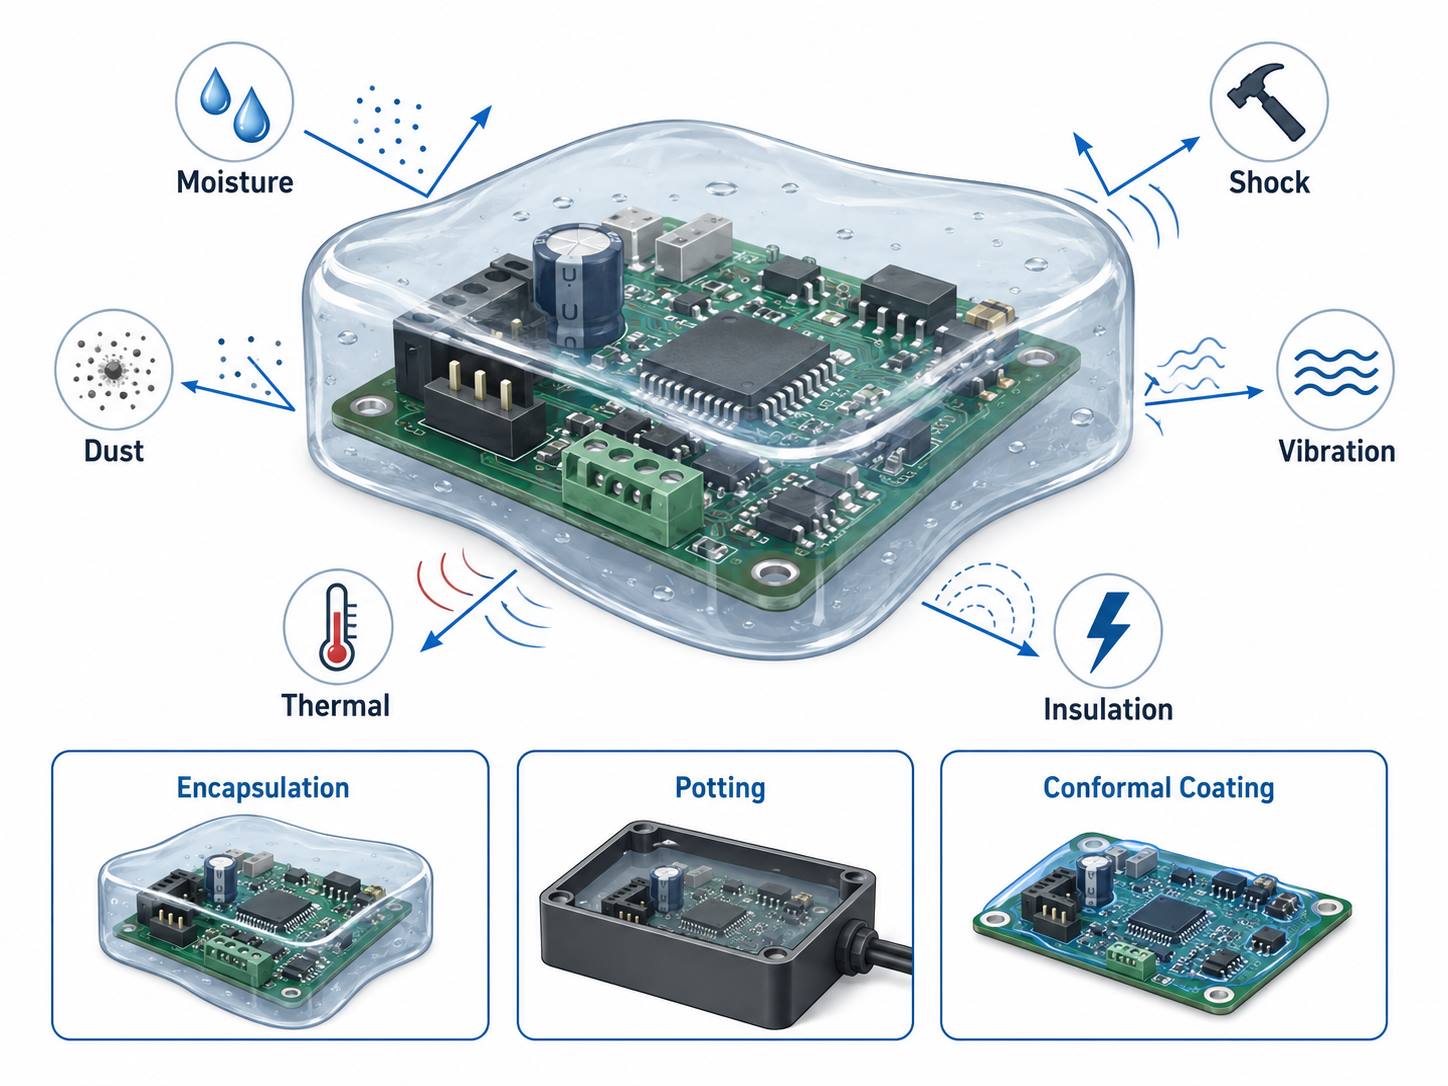
Circuit board protection adhesives protect PCB assemblies by supporting weak points and covering selected areas. They help the board handle vibration, dust, moisture, and movement.

For example, a soldered wire may pass electrical testing. However, it may still move during use. If the wire keeps pulling on the solder joint, the joint can suffer stress. Therefore, adhesive for circuit board connections can add strain relief.

Similarly, large parts may need more support. Coils, capacitors, relays, transformers, and connectors can move during shipping or operation. A neat adhesive bead can hold them in place.

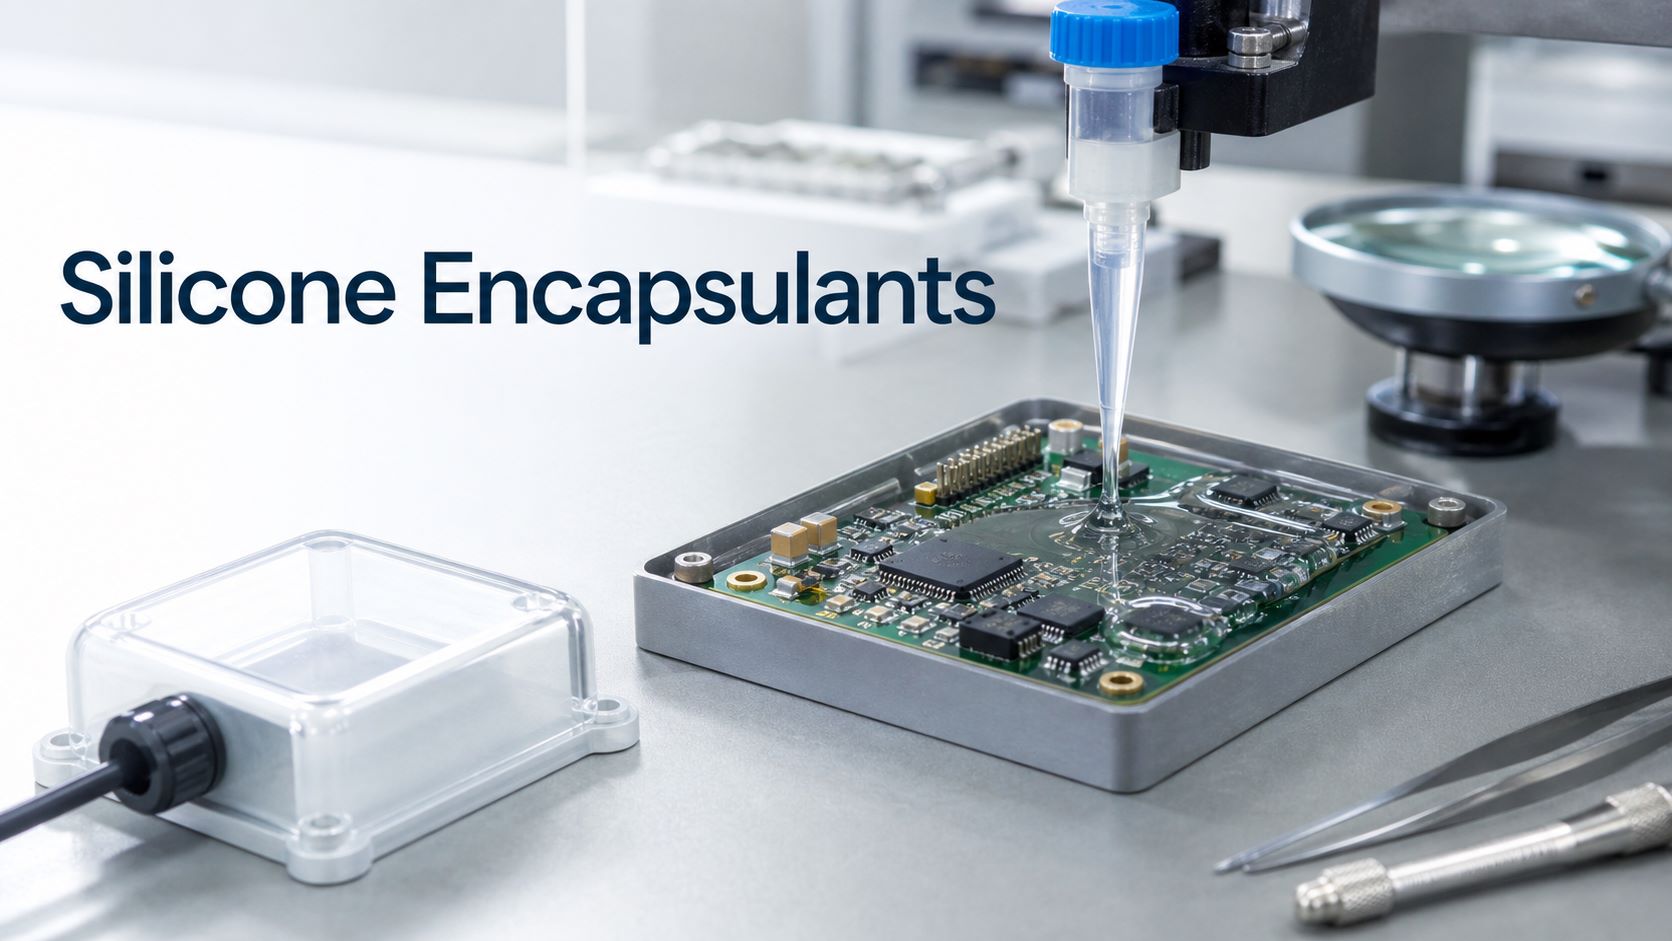
Also, protection adhesive can work with other protective materials. Conformal coating covers the board with a thin film. Potting compound fills a larger area. Meanwhile, adhesive gives local bonding or support.

Protection adhesives often work well around:

  • Soldered wires
  • Connectors
  • Tall capacitors
  • Inductors and coils
  • Transformers
  • Vibration-sensitive parts
  • Local exposed connections

The goal is simple. The adhesive should support the part without blocking testing, repair, or heat flow.

When Should You Use Circuit Board Adhesive Tape?

You should use circuit board adhesive tape when you need clean handling, controlled thickness, and fast assembly. Tape works well for mounting, insulation, bonding, shielding, thermal layers, and flexible circuit attachment.

Unlike liquid adhesive, tape already has a set thickness. Therefore, it gives better repeatability. Also, many tapes use pressure-sensitive adhesive, so they do not need extra curing time.

Circuit board adhesive tape can help with:

  • FPC bonding
  • PCB module mounting
  • Insulation film attachment
  • Thermal pad placement
  • LED strip support
  • Battery protection board mounting
  • EMI shielding attachment
  • Temporary assembly positioning

For flexible electronics, tape is often very useful. Flexible circuit board adhesive tape can bond FPC to stiffeners, housings, displays, sensors, or compact modules.

However, tape still needs careful selection. Engineers should check adhesion strength, thickness, temperature rating, dielectric strength, aging behavior, and surface compatibility.

In short, tape may look simple. However, it still affects reliability and assembly quality.

What Is Circuit Board Conductive Adhesive?

Circuit board conductive adhesive bonds materials while allowing current to pass through. It contains conductive particles inside a resin system.

Electrically conductive adhesive for circuit boards can help when soldering brings too much heat. It can also help when a substrate does not suit normal soldering. For example, some flexible circuits, ceramic substrates, sensors, or sensitive parts may need a lower-temperature process.

There are two common types.

Isotropic conductive adhesive conducts electricity in all directions. Engineers use it when the full adhesive area needs conductivity.

Anisotropic conductive adhesive conducts mainly through the thickness direction. This helps in fine-pitch connections because it reduces side-to-side current paths.

Conductive adhesive can support:

  • Grounding points
  • EMI shielding connections
  • Die attach
  • Low-temperature bonding
  • Flexible electronics
  • Selected repair work
  • Special material bonding

However, engineers should compare its resistance, strength, and aging behavior with the design needs. In standard PCB assembly, solder is still the main joining method. Even so, conductive adhesive works very well in the right application.

Is Flexible Circuit Board Adhesive Different from Rigid PCB Adhesive?

Yes. Flexible circuit board adhesive must handle bending, thin materials, and movement. Rigid PCB adhesive usually focuses more on component fixing, local protection, or mounting support.

Flexible circuits often use polyimide, copper foil, coverlay, adhesive layers, and stiffeners. Since the circuit can bend, the adhesive must hold well without creating hard stress points.

If the adhesive is too rigid, it may shorten the flex life. Therefore, engineers often choose flexible adhesive systems for FPC designs.

The right material should match:

  • Bend radius
  • Flex cycle requirement
  • Substrate type
  • Working temperature
  • Stiffener position
  • Housing design
  • Assembly method

In some products, black flexible circuit board adhesive helps with appearance or light blocking. In other products, amber, clear, or white adhesive may work better.

So, color is not the main point. Performance under bending is more important.

How Is Circuit Board Component Adhesive Used in PCB Assembly?

Circuit board component adhesive helps hold, reinforce, or protect parts during and after PCB assembly. It works well for heavy, tall, or vibration-sensitive components.

During production, SMT adhesive can hold components before soldering. This helps in wave soldering or double-sided assembly.

After assembly, teams may add adhesive around larger parts. This gives extra support during transport and use.

Component adhesive often supports:

  • Large capacitors
  • Inductors
  • Coils
  • Relays
  • Transformers
  • Connectors
  • Soldered wires
  • Tall plastic parts
  • Power components

White adhesive for circuit board components often appears around these parts. However, the color does not tell you the material type. It may be silicone, epoxy, polyurethane, or another adhesive.

Also, application control matters. Too much adhesive can cover test points, block repair, trap heat, or make the board messy. Therefore, the assembly team should control bead size, position, curing time, and inspection rules.

A clean adhesive process makes the board easier to test. It also helps the final product look more professional.

How Do You Choose the Right Adhesive for Circuit Boards?

To choose the right adhesive for circuit boards, start with the function. Ask what the adhesive must do. Should it bond, insulate, conduct, transfer heat, absorb vibration, or protect one area?

Once you know the function, the choice becomes easier.

  • First, check the working environment. Will the board face heat, moisture, vibration, chemicals, or outdoor use? These conditions help narrow the options.
  • Next, review the electrical needs. Most PCB adhesives need strong insulation. However, conductive adhesive must create a controlled current path. Therefore, engineers should check dielectric strength, resistance, and conductivity.
  • Then, match the curing process. Some adhesives cure at room temperature. Others need heat, UV light, or two-part mixing. If the board has heat-sensitive parts, a high-temperature cure may not fit.
  • Also, think about repair. Some adhesives stay flexible and easier to remove. Others become hard and strong. If future repair may happen, the team should consider circuit board adhesive remover options.
  • Finally, check production needs. Manual dispensing may work for prototypes. However, automated dispensing gives better control in mass production. Tape may also help when thickness control matters.

Why Should Adhesive Selection Start During PCB Design?

Adhesive selection should start during PCB design because it affects layout, spacing, testing, heat flow, and assembly steps.

When engineers plan early, they can reserve adhesive areas. They can also keep test points open and avoid sensitive contacts. In addition, they can protect heat paths and make future repair easier.

Early planning also helps the PCBA factory. The team can define where to apply adhesive, how much to use, how to cure it, and how to inspect it.

For better adhesive use, engineers should:

  • Reserve enough space for adhesive
  • Keep adhesive away from test points
  • Avoid covering labels or QR codes
  • Protect heat dissipation paths
  • Keep repair access in mind
  • Define the dispensing amount
  • Confirm solder mask compatibility
  • Review the material datasheet

Because of these steps, adhesive becomes part of the design plan. It no longer acts as a last-minute fix.

Overall, circuit board adhesive helps PCB assemblies become stronger, cleaner, and more reliable. It can secure components, support soldered wires, bond flexible circuits, move heat, provide conductivity, or protect selected areas.

Different materials solve different problems. Epoxy gives strength. Silicone adds flexibility. Conductive adhesive creates current paths. Thermal adhesive helps move heat. Adhesive tape gives clean and controlled bonding.

Therefore, engineers should choose adhesive based on function, environment, electrical behavior, curing method, and production needs. With the right choice, this small material can support a better electronic product.

If you are working on a PCB or PCBA project and need support with material selection, assembly process review, or adhesive application planning, our engineering team can help review your requirements. You can send your project details or Gerber files to sales@bestpcbs.com for a practical manufacturing suggestion.

FAQs About Circuit Board Adhesive

1. Can I use normal glue on a circuit board?

No. Normal household glue is not a good choice for a circuit board. PCB assemblies need materials with proper insulation, heat resistance, chemical stability, and component compatibility. Electronic-grade adhesive gives a safer result.

2. Is circuit board adhesive the same as conformal coating?

No. Circuit board adhesive fixes, bonds, reinforces, or protects selected areas. Conformal coating creates a thin protective film over the PCB surface. However, many products use both because they solve different problems.

3. What adhesive works best for circuit board components?

Silicone, epoxy, SMT adhesive, and polyurethane can work for circuit board components. The best choice depends on component size, vibration level, working temperature, curing process, and repair needs.

4. Can I put adhesive over soldered wires on a circuit board?

Yes. You can apply adhesive over soldered wires for strain relief. However, inspect the solder joint first. Then apply a compatible adhesive that supports the wire without covering test points or nearby parts.

You may also like

Transistor Pinout Guide for PCB Layout and PCBA Assembly

May 13th, 2026

A transistor pinout shows how the pins of a transistor are arranged in its physical package. For a BJT transistor, these pins are usually Emitter, Base, and Collector. For PCB layout and PCBA assembly, this small detail is very important. It affects the schematic, footprint, SMT placement, BOM review, and final circuit performance.

At first glance, a transistor looks simple. It may only have three pins. However, the same transistor family can come in several packages, such as TO-92, SOT-23, TO-220, SOT-223, or DFN. In addition, different manufacturers may use different pin arrangements for similar-looking parts.

Therefore, engineers should confirm the transistor pinout before PCB layout starts. They should also check it again before SMT assembly. This helps reduce footprint errors, wrong part orientation, and avoidable production issues.

This guide explains transistor pinout from a PCB and PCBA point of view. It is written for engineers, hardware teams, purchasing teams, and product companies that need reliable PCB manufacturing and assembly.

transistor pinout

What Is a Transistor Pinout?

A transistor pinout is the physical order of the transistor pins. It tells you which lead or pad connects to each internal function of the device.

For a BJT transistor, the three main pins are:

Pin NameShort NameMain Function
EmitterEWorks as one side of the main current path
BaseBControls the transistor switching or amplification
CollectorCConnects to the load or output side in many circuits

For PCB design, the transistor pinout must match three things:

  • The schematic symbol
  • The PCB footprint
  • The actual component package

If these three parts match, the circuit has a much better chance of working correctly after assembly. However, if one part is wrong, the finished PCB may fail during testing.

For example, a TO-92 transistor may look the same as another TO-92 transistor. Even so, the pin order may be different. One part may use E-B-C order, while another may use C-B-E order. Because of this, engineers should not rely only on the package shape.

Instead, the safest method is to check the official datasheet. Then, compare the datasheet pinout with the PCB library footprint.

Why Does Transistor Pinout Matter in PCB Layout and PCBA Assembly?

Transistor pinout matters because it affects how the real part connects to the circuit. In a PCB file, the footprint may look correct. During SMT assembly, the component may also be placed neatly. However, the circuit can still fail if the footprint pin mapping is wrong.

In PCB layout, transistor pinout affects routing, pad numbering, copper layout, and test point planning. In PCBA assembly, it affects pick-and-place rotation, AOI inspection, and functional testing.

For instance, an SOT-23 transistor has a very small body and three pads. The package looks simple. Yet the electrical pin order is not always the same for every part. As a result, one wrong footprint can cause many assembled boards to fail.

A correct transistor pinout helps avoid:

  • Wrong PCB footprint selection
  • Incorrect schematic-to-layout mapping
  • SMT orientation errors
  • NPN and PNP part mix-ups
  • Wrong alternative transistor selection
  • Failed functional testing after assembly
  • Extra rework during pilot production

Therefore, pinout checking should be part of the normal DFM review process. It is a small step, but it helps protect the full PCB production flow.

For EBest Circuit projects, this type of check connects directly with PCB fabrication, SMT assembly, BOM review, DFM support, and turnkey PCBA production.

What Do Emitter, Base, and Collector Mean in a BJT Transistor Pinout?

In a BJT transistor pinout, the three pins are Emitter, Base, and Collector. Each pin has a different role in the circuit.

BJT PinShort NameWhat It DoesPCB Design Note
EmitterEConnects to one side of the current pathMust match the expected current direction
BaseBControls the transistorUsually needs a proper resistor
CollectorCOften connects to the load sideRouting should follow the circuit design

The Base is the control pin. A small signal at the Base can control a larger current between the Collector and Emitter. Because of this, BJT transistors are widely used for switching and amplification.

However, the physical pin order can be different from what beginners expect. A schematic symbol may show the Base in the middle. Still, the actual transistor package may not place the Base on the middle lead.

For that reason, engineers should always check the package drawing. They should also confirm the view direction. Some datasheets show the front view, while others show the bottom view. This detail is easy to miss during library creation.

In short, knowing Emitter, Base, and Collector is only the first step. The more important step is making sure these pins are mapped correctly to the PCB pads.

How to Determine Transistor Pinout Before PCB Design?

The best way to determine transistor pinout before PCB design is to check the official datasheet. Then, compare the datasheet with the schematic symbol, PCB footprint, and BOM part number.

A simple engineering workflow is shown below:

StepWhat to CheckWhy It Matters
1Full part numberSimilar part names may have different packages
2Manufacturer datasheetIt gives the most reliable pinout data
3Package drawingPin order depends on the viewing direction
4Schematic symbolPin names must match the real transistor
5PCB footprintPad numbers must connect to the correct pins
6BOM alternativesSubstitute parts may use different pinouts
7SMT orientationPlacement data must match the package direction

This process is useful for both through-hole and SMD transistors. However, it becomes even more important for SMT assembly. Small packages leave little room for visual correction after placement.

Also, engineers should check the complete ordering code. A short part name may not be enough. For example, one transistor family may include TO-92, SOT-23, and metal-can versions. Although the electrical function may be similar, the package pinout can be different.

Before releasing Gerber files, the design team should review the pinout together with the footprint. In addition, the assembly team should check the pick-and-place file before SMT production.

This habit saves time. More importantly, it helps the project move smoothly from prototype to batch production.

NPN Transistor Pinout vs PNP Transistor Pinout: What Should Engineers Check?

NPN and PNP transistors both use Emitter, Base, and Collector pins. However, their current direction and circuit polarity are different. Therefore, engineers must check both the transistor type and the physical pinout.

ItemNPN TransistorPNP Transistor
Symbol arrowPoints outwardPoints inward
Common useLow-side switchingHigh-side switching
Control styleTurns on with positive base driveTurns on with negative base drive
PCB check pointCollector load path and base resistorEmitter supply path and polarity
Assembly concernMay look similar to PNP partsRequires clear BOM control

In PCB projects, an NPN transistor and a PNP transistor may use the same package shape. For example, both can be supplied in SOT-23 or TO-92 packages. As a result, the assembly line may not easily tell the difference by shape alone.

Because of this, BOM accuracy is very important. The approved manufacturer part number should be clear. The reference designator should also match the correct transistor type.

In addition, substitute parts should be reviewed carefully. A replacement transistor must match the package, pinout, polarity, voltage rating, current rating, and power rating.

For PCBA assembly, clear documentation is helpful. Assembly drawings, centroid data, and BOM files should all point to the same part direction. This makes SMT production more stable and easier to inspect.

How Do SMD Transistor Pinouts Affect SMT Placement?

SMD transistor pinouts affect SMT placement because the part is mounted by pad position and rotation angle. If the footprint is wrong, the SMT machine can still place the part correctly from a mechanical view. However, the circuit connection may still be wrong.

SOT-23 is one of the most common SMD transistor packages. It is small, easy to place, and widely used in compact PCB designs. Even so, SOT-23 pinouts are not universal. Different devices may use different pin mapping in the same package outline.

SMD PackageCommon UseSMT Placement Note
SOT-23Small-signal switchingCheck Pin 1 and footprint mapping
SOT-223Medium-power applicationsReview copper area and heat path
SOT-89Power and regulator-style circuitsCheck pad size and thermal design
DFN / QFN-style packagesCompact circuit designsConfirm hidden pad and stencil design

During SMT assembly, the pick-and-place machine follows the centroid file. It places the part according to X-Y position and rotation. However, it does not know whether the electrical pinout is right.

Therefore, engineers should check several files before production:

  • Datasheet package drawing
  • CAD footprint pad numbering
  • Pick-and-place rotation
  • Assembly drawing
  • BOM manufacturer part number
  • AOI inspection reference
  • Approved vendor list

In addition, SMD transistors often have small top markings. These markings can be different between suppliers. For this reason, the production team should not rely only on the code printed on the package.

A good DFM review can catch many of these risks before PCB fabrication and SMT assembly begin.

What Is the 2N2222 Transistor Pinout and 2N2222A Pinout?

The 2N2222 transistor pinout depends on the exact package and manufacturer. The 2N2222 and 2N2222A are common NPN BJT transistors. They are often used for switching and amplification. However, their physical pinout should still be checked before PCB layout.

The 2N2222 family is available in several forms. Some versions use metal-can packages. Others use plastic through-hole packages or SMD packages. Because of this, one footprint cannot cover every version.

Part NumberTypeCommon PackagePCB Design Note
2N2222NPN BJTTO-18, TO-92, SMD variantsConfirm the package-specific pinout
2N2222ANPN BJTTO-18, TO-92, SMD variantsCheck supplier datasheet
PN2222ANPN BJTTO-92Common plastic-package version
MMBT2222ANPN BJTSOT-23Common SMT version

For PCB projects, 2N2222 is a useful example of why full part control matters. A schematic may simply list “2N2222.” Later, purchasing may source a different package version. If the PCB footprint was made for another package, the assembly may face problems.

A better practice is to define the exact manufacturer part number in the BOM. Also, the package name and footprint name should be clear. If alternatives are allowed, each alternative should be checked before approval.

This is especially important when moving from prototype to mass production. During early samples, engineers may use a through-hole part. Later, they may switch to an SMT version for volume assembly. In that case, the PCB footprint and pinout must be reviewed again.

What Are Common Transistor Pinout Examples for PCB Projects?

Common transistor examples help engineers compare package types and layout notes. However, the final design should always follow the original datasheet.

Part NumberTypeCommon PackageTypical UsePCB / PCBA Note
2N2222 / 2N2222ANPN BJTTO-18, TO-92, SOT-23 variantsSwitching and amplificationConfirm package version
2N3904NPN BJTTO-92, SOT-23 variantsLow-current switchingCommon signal transistor
2N3906PNP BJTTO-92, SOT-23 variantsComplementary switchingCheck polarity and pin mapping
BC547NPN BJTTO-92General amplificationPin order may differ from 2N series
BC557PNP BJTTO-92Low-power switchingOften paired with BC547-style circuits
S8050NPN BJTTO-92, SMD variantsLow-power switchingConfirm supplier pinout
S8550PNP BJTTO-92, SMD variantsComplementary transistorOften used with S8050
BD139NPN BJTTO-126Medium-power circuitsThermal layout should be reviewed
BD140PNP BJTTO-126Complementary power stageCheck heat path and package
TIP120NPN DarlingtonTO-220Higher-current switchingReview thermal design
MMBT3904NPN BJTSOT-23SMT signal switchingOrientation is critical
MMBT3906PNP BJTSOT-23SMT signal switchingCheck approved alternatives
MRF9120RF power transistorRF power packageRF power circuitsFollow datasheet and RF layout rules

This table is useful during early component selection. Still, it should not replace datasheet checking. Similar transistor names can have different package versions. Also, the same electrical type may be sold by several manufacturers.

For production PCB projects, it is better to build an approved component list. This list should include the part number, package, footprint, supplier, and substitute options. As a result, the design team and purchasing team can work with the same information.

In addition, PCB and PCBA teams should review transistor pinout before manufacturing. This review is useful for both prototype builds and batch orders.

What Transistor Pinout Mistakes Can Cause PCB Assembly Defects?

Transistor pinout mistakes can lead to PCB assembly defects, even when PCB fabrication and SMT placement are well controlled. Most of these issues come from wrong library data, unclear BOM information, or unverified substitute parts.

MistakePossible ResultPrevention Method
Wrong footprint selectedPads connect to the wrong pinsCompare footprint with datasheet
Generic symbol usedSymbol pins do not match the packageUse verified library mapping
Substitute part has a different pinoutCircuit may not work as plannedCheck AVL and approved alternatives
SMD orientation is wrongPart is placed at the wrong angleReview centroid file and assembly drawing
TO-92 pin order is assumedThrough-hole pins connect incorrectlyConfirm package view and lead order
NPN and PNP are mixedCircuit function changesStrengthen BOM review
Thermal design is ignoredPower device runs too hotReview copper area and heat path
RF transistor layout is treated as standardRF performance may become unstableFollow datasheet layout guidance

Fortunately, most of these problems can be found before production. The key is to review the design early.

Before PCB fabrication, engineers should check the schematic, footprint, package drawing, and BOM. Before SMT assembly, the production team should check placement direction, part marking, and assembly files. After assembly, AOI and functional testing can confirm the result.

For turnkey PCBA projects, this process is even more important. A small transistor error can affect the whole batch. Therefore, early review helps improve delivery speed and production quality.

EBest Circuit supports customers with PCB fabrication, SMT assembly, component sourcing, BOM review, DFM pre-check, testing, and turnkey electronics manufacturing. For transistor-based circuits, our engineering team can help check package selection, footprint consistency, assembly orientation, and production feasibility before batch manufacturing.

All in all, a transistor pinout may look like a small detail. However, it plays a large role in PCB layout and PCBA assembly. When the pinout is correct, the schematic, footprint, BOM, and SMT data can work together smoothly.

Before releasing a PCB design, engineers should check the official datasheet, package drawing, pin numbering, footprint mapping, and approved alternatives. In addition, they should review SMD orientation and substitute parts before assembly.

This is especially useful for SOT-23 transistors, 2N2222 variants, NPN and PNP substitutions, and production projects with BOM changes.

With careful pinout verification, electronic product teams can reduce assembly risk and move from prototype to mass production with more assurance. EBest Circuit helps customers with PCB manufacturing, SMT assembly, component sourcing, DFM review, BOM optimization, and testing, supporting a smoother path from design files to reliable assembled boards. If any questions, pls feel free to contact us at sales@bestpcbs.com.

FAQs About Transistor Pinout

1. What is a transistor pinout?

A transistor pinout shows the physical order of a transistor’s pins. For a BJT transistor, these pins are usually Emitter, Base, and Collector. In PCB layout and PCBA assembly, the pinout must match the schematic symbol, PCB footprint, and actual component package.

2. How do I determine the correct transistor pinout?

The safest way is to check the official manufacturer datasheet. Engineers should confirm the full part number, package type, pin numbering, and viewing direction. Then, they should compare this information with the schematic symbol and PCB footprint before releasing the design.

3. Are all transistors with the same package pinout the same?

No. Transistors with the same package, such as TO-92 or SOT-23, may have different pin arrangements. For example, one TO-92 transistor may use E-B-C order, while another may use C-B-E. Therefore, package shape alone is not enough for PCB design.

4. Why is transistor pinout important for PCBA assembly?

Transistor pinout affects SMT placement, solder pad mapping, BOM verification, and functional testing. If the pinout does not match the PCB footprint, the component may be assembled correctly in appearance but fail electrically. That is why pinout verification should be included in DFM review before PCB fabrication and assembly.

You may also like

Printed Circuit Board Labels: PCB Marking, QR Codes & Traceability Guide

May 13th, 2026

Printed circuit board labels are identification marks used on PCBs or PCB assemblies to show key information such as part numbers, revision codes, serial numbers, QR codes, barcodes, batch numbers, and inspection data. This article explains how PCB labels support board identification, traceability, quality control, and smarter production management in modern electronics manufacturing.

EBest Circuit (Best Technology) is an experienced PCB and PCBA manufacturer supporting customers with PCB fabrication, component sourcing, PCBA assembly, DFM review, testing, and traceability-focused production support. For projects that require printed circuit board labels, QR codes, serial numbers, batch tracking, or custom PCB identification, our engineering team can help review the labeling method, placement, material, and manufacturing process before production. If you are planning a PCB or PCBA project and want practical advice on labeling and traceability, pls feel free to contact us at sales@bestpcbs.com.

printed circuit board labels

What Are Printed Circuit Board Labels?

Printed circuit board labels help manufacturers identify, track, and manage PCBs during fabrication, assembly, testing, shipping, and after-sales support. A label can show a part number, revision code, batch number, serial number, QR code, barcode, or inspection mark.

In simple words, a PCB label works like an identity card for a circuit board. It tells engineers what the board is, where it came from, and which production record belongs to it.

A label may appear as silkscreen text, laser marking, a QR code, a barcode, or a high-temperature adhesive label. Each method serves a different purpose. For example, silkscreen works well for fixed text, while QR codes work better for traceability data.

Therefore, PCB labels do more than make a board look organized. They also help production teams control quality, reduce mix-ups, and find records faster.

Why Are Printed Circuit Board Labels Important?

PCB production involves many steps. Engineers need to check materials, boards, components, assembly data, inspection results, and shipment details. Without clear labels, teams may spend more time finding the right information.

That is why labels matter. They help link each board to a specific order, production batch, test result, or customer project. As a result, the whole manufacturing flow becomes easier to manage.

For example, two PCBs may look almost the same but belong to different revisions. A small revision code can help operators avoid using the wrong version. In addition, a QR code can connect the board to digital records in a manufacturing system.

For medical, automotive, industrial, communication, and aerospace electronics, this level of control becomes even more valuable. These products often need clear records and stable quality tracking.

What Information Should a PCB Label Include?

A PCB label should show the information that helps production, inspection, and future support. However, the label should not carry too much data. A crowded label becomes hard to read and hard to scan.

Common label information includes:

Label InformationMain Purpose
Part numberIdentifies the PCB or PCBA model
Revision codeShows the design version
Batch numberLinks the board to one production lot
Serial numberGives each board a unique identity
Date codeShows the production or assembly date
QR codeConnects the board to digital records
BarcodeSupports fast scanning in production
Inspection markShows quality control status
Customer codeMatches the board with customer records

For simple prototype boards, part number and revision code may be enough. However, production PCB assemblies often need serial numbers, QR codes, and batch tracking.

Also, the label format should stay consistent from batch to batch. Consistency helps engineers, quality teams, and customers read the data in the same way.

How Do Printed Circuit Board Labels Support Traceability?

Traceability means that a team can track a board through its full production history. Labels make this possible by giving each PCB a clear identity.

During PCB fabrication, the label may connect to material batch, panel number, surface finish, and production date. During PCBA assembly, the same board may also connect to solder paste batch, SMT line, component lots, AOI results, X-ray inspection, and final test data.

Therefore, if a quality issue appears later, engineers can scan the code and review the board’s history. This helps them find the source of the issue faster.

In addition, traceability supports inventory control. Warehouses can scan barcodes or QR codes when boards move through kitting, assembly, testing, packing, and shipping.

For customers, this creates more confidence. They receive boards with clear identity and better production records.

How Are Printed Circuit Board Labels Printed or Marked?

Manufacturers can print or mark PCB labels in several ways. The best method depends on the label content, board size, process temperature, and traceability needs.

  • Silkscreen marking is common in PCB fabrication. It shows component reference designators, polarity marks, logos, part numbers, and simple text. Because silkscreen works best for fixed information, it suits data that does not change from board to board.
  • Laser marking works well for QR codes, serial numbers, date codes, and permanent marks. The laser marks the board surface directly. As a result, the code will not peel off like an adhesive label.
  • Adhesive labels offer flexibility. Manufacturers can print barcodes, QR codes, serial numbers, and customer-specific data on them. However, the label material must suit heat, cleaning, and handling conditions.
  • Thermal transfer printing also supports variable data. Many factories use this method to print high-temperature PCB labels with clear barcodes and QR codes.

In many cases, manufacturers combine several methods. For example, a PCB may use silkscreen for fixed text and laser marking for a unique QR code.

Printed Circuit Board Labels vs Silkscreen Marking: What Is the Difference?

Silkscreen marking and PCB labels are related, but they do not mean the same thing.

Silkscreen refers to printed text and symbols on the PCB surface. It usually appears during the PCB fabrication process. Engineers use it for component names, polarity marks, connector labels, logos, and assembly guidance.

PCB labels cover a wider range. They may include silkscreen, laser marking, QR codes, barcodes, serial numbers, or adhesive labels. So, silkscreen can be part of PCB labeling, but it is not the only method.

ItemSilkscreen MarkingPCB Label
Main purposeAssembly guidanceIdentification and traceability
Common contentRef designators, polarity, logosSerial number, batch code, QR code
Variable dataLimitedStrong support
Process stagePCB fabricationFabrication, assembly, testing, or shipping
Best useVisual guidanceTracking and production control

In practice, both methods often work together. Silkscreen helps operators assemble the board. Meanwhile, labels help teams track the board through production and quality control.

Can Custom Printed Circuit Board Labels Include QR Codes?

Yes. Custom printed circuit board labels can include QR codes, barcodes, serial numbers, batch codes, and customer part numbers.

QR codes work especially well for modern PCB traceability. A small QR code can connect a board to a large amount of digital data. For example, it can link to production date, inspection results, component lots, test reports, firmware version, or shipment records.

This is useful because a PCB surface has limited space. Instead of printing long text on the board, a QR code can store or connect to the needed data.

However, engineers need to plan the QR code carefully. The code must have enough size, contrast, and open space around it. Otherwise, scanners may read it poorly.

Also, the code should stay visible after assembly. Components, heatsinks, connectors, batteries, cables, and enclosures may cover some areas. Therefore, label position matters as much as label content.

What Materials Are Used for PCB Labels?

PCB labels need stronger materials than ordinary paper labels. Electronics production may involve heat, soldering, cleaning, handling, and long-term operation.

  • Polyimide labels are popular for high-temperature PCB processes. They can handle heat better than many standard label materials. Because of this, manufacturers often use them for barcode and serial number labels.
  • Polyester labels suit many general electronics products. They offer clean print quality and stable appearance. However, engineers should check the exact temperature rating before use.
  • Laser marking does not add a separate label material. Instead, the laser creates a mark directly on the board surface. This method offers strong durability and a clean appearance.
  • Silkscreen ink works well for fixed markings. It can show board names, reference designators, polarity marks, and simple identification text.
  • Thermal transfer labels can produce clear QR codes and barcodes. They work well when paired with the right ribbon and label substrate.

The right material depends on the process. Therefore, engineers should consider temperature, cleaning chemicals, surface finish, and product environment before choosing the label type.

Where Should Labels Be Placed on a PCB?

Label placement affects readability and manufacturing efficiency. A good label should be easy to see, easy to scan, and safe from process problems.

In most cases, the label should sit on a flat area with enough open space. It should also avoid pads, vias, test points, mounting holes, and copper-exposed areas.

In addition, engineers should keep labels away from high-heat components when they use adhesive materials. Power devices, LED modules, transformers, and heatsinks may create heat that affects label life.

Visibility also matters. A label may look good in the PCB design file, but a connector or shield can cover it after assembly. Therefore, the team should review the final assembled structure.

For QR codes and barcodes, scanning angle and distance also matter. A code that looks clear to the eye may still fail in production scanning if it is too small or poorly placed.

That is why DFM review is helpful. A PCB manufacturer can check label position before fabrication and suggest better options.

How Do PCB Labels Improve Quality Control?

PCB labels help quality teams identify boards quickly and record inspection results accurately. This reduces confusion during production.

For example, operators can scan a barcode before SMT assembly. Then, the system can connect the board to solder paste batch, component lot, machine setup, and reflow profile.

After assembly, quality teams can scan the same code during AOI, X-ray inspection, ICT, functional testing, and final inspection. As a result, each board receives a clear quality record.

This process also helps when a board needs review. Engineers can check the serial number and see what happened during production. They can review test data, repair notes, or inspection images.

For customers, this creates a more transparent process. They can manage product versions, warranty records, and field feedback more easily.

In short, PCB labels turn a physical board into a traceable product. That makes quality control faster and more organized.

Which Industries Need Reliable PCB Labeling?

Many electronics industries use PCB labels. However, some sectors need stronger identification and traceability than others.

  • Medical electronics need clear tracking because device quality and documentation matter greatly. Labels help link each PCB assembly to production and inspection records.
  • Automotive electronics also rely on traceability. Control modules, sensors, lighting boards, and power electronics often need batch control and long-term records.
  • Industrial automation products may stay in service for many years. Clear labels help maintenance teams identify versions and replace parts correctly.
  • Communication equipment often includes different board revisions and test configurations. Labels help engineers manage these details.
  • Aerospace and UAV electronics usually need stable process control and detailed records. Labels support this need from prototype to production.

Even consumer electronics can benefit from labels. They help with inventory, warranty, repair, and shipment management.

Therefore, reliable labeling supports both high-end products and everyday electronics manufacturing.

How to Choose the Right Printed Circuit Board Labels

The best label choice depends on what the board needs to show and how the product will be used.

  • First, define the purpose. Do you need simple identification, batch tracking, serial number control, QR code scanning, or full traceability? This decision shapes the label method.
  • Next, check the process. If the board must pass through reflow soldering, choose a high-temperature label or laser marking. If the label only appears after final testing, an adhesive label may work well.
  • Then, review the environment. A PCB used in industrial power equipment may need a more durable label than a low-power consumer board.
  • Also, think about scanning. If the production line uses barcode or QR code scanners, the label must have the right size, contrast, and placement.

Here is a simple guide:

RequirementRecommended Method
Fixed text or logoSilkscreen
Unique serial numberLaser marking or printed label
QR code traceabilityLaser marking or high-resolution label
High-temperature processPolyimide label or laser marking
Long-term durabilityLaser marking
Low-cost board IDSilkscreen
Production scanningBarcode or QR code label

The best option is not always the most complex one. It is the method that stays readable and fits the manufacturing flow.

Why Choose an Experienced PCB Manufacturer for Printed Circuit Board Labels?

PCB labeling may seem like a small detail. However, it affects PCB design, fabrication, assembly, testing, packing, and traceability.

An experienced PCB manufacturer can review the label area during DFM checking. The team can confirm whether the label size, position, and marking method fit the board layout.

For example, if a QR code is too small, the manufacturer can suggest a larger size. If a label sits too close to a component, the engineer can move it before production. In addition, if the board needs high-temperature resistance, the supplier can suggest a better material.

For PCBA projects, timing also matters. Some labels should appear before SMT assembly. Others should appear after testing. The right sequence helps the factory track boards without slowing production.

EBest Circuit supports PCB fabrication, PCBA assembly, component sourcing, DFM review, testing, and production-quality support. For projects that need QR codes, serial numbers, custom labels, or traceability control, early communication helps build a smoother production process.

In a nutshell, printed circuit board labels help manufacturers identify boards, control revisions, track batches, manage QR codes, and improve traceability. They also support smoother production, faster inspection, and better after-sales support.

For simple PCBs, silkscreen may provide enough identification. For advanced PCB assemblies, serial numbers, QR codes, barcodes, and durable labels can create stronger process control.

Therefore, engineers should plan PCB labeling early. They should consider label content, material, marking method, placement, scanning needs, and long-term readability.

When the label strategy fits the product and process, every board becomes easier to track, inspect, ship, and support. If you are planning a PCB or PCBA project that requires custom labels, QR codes, serial numbers, or traceability support, feel free to contact EBest Circuit at sales@bestpcbs.com for practical manufacturing advice.

FAQs About Printed Circuit Board Labels

1. What is a printed circuit board label?
A printed circuit board label is an identification mark on a PCB or PCBA. It may show a part number, revision code, batch number, serial number, barcode, or QR code.

2. Are PCB labels the same as silkscreen?
No. Silkscreen is one marking method. PCB labels can also include laser marking, adhesive labels, QR codes, barcodes, and serial numbers.

3. Can a PCB label include a QR code?
Yes. A QR code can connect the board to production records, inspection results, component lots, test data, and shipment information.

4. What label material is best for PCB assembly?
Polyimide labels and laser marking work well for high-temperature processes. However, the best choice depends on temperature, cleaning method, and product use.

5. Where should a PCB label go?
A PCB label should sit in a flat, visible, and scannable area. It should avoid pads, vias, test points, holes, high-heat areas, and covered zones.

6. Do all PCBs need labels?
Most production PCBs need some form of identification. Simple boards may only need silkscreen text. Complex PCB assemblies may need QR codes and serial numbers.

7. Can custom PCB labels support mass production?
Yes. Custom labels can support batch tracking, unique serial numbers, QR codes, customer part numbers, warehouse scanning, and quality control.

8. Is laser marking better than adhesive labeling?
Laser marking offers strong durability and a clean surface. Adhesive labels offer more flexibility for printed data. The better choice depends on the board design and process.

You may also like

Single Pole Double Throw Relay: Diagram, Wiring, Symbol, and Working Principle

May 12th, 2026

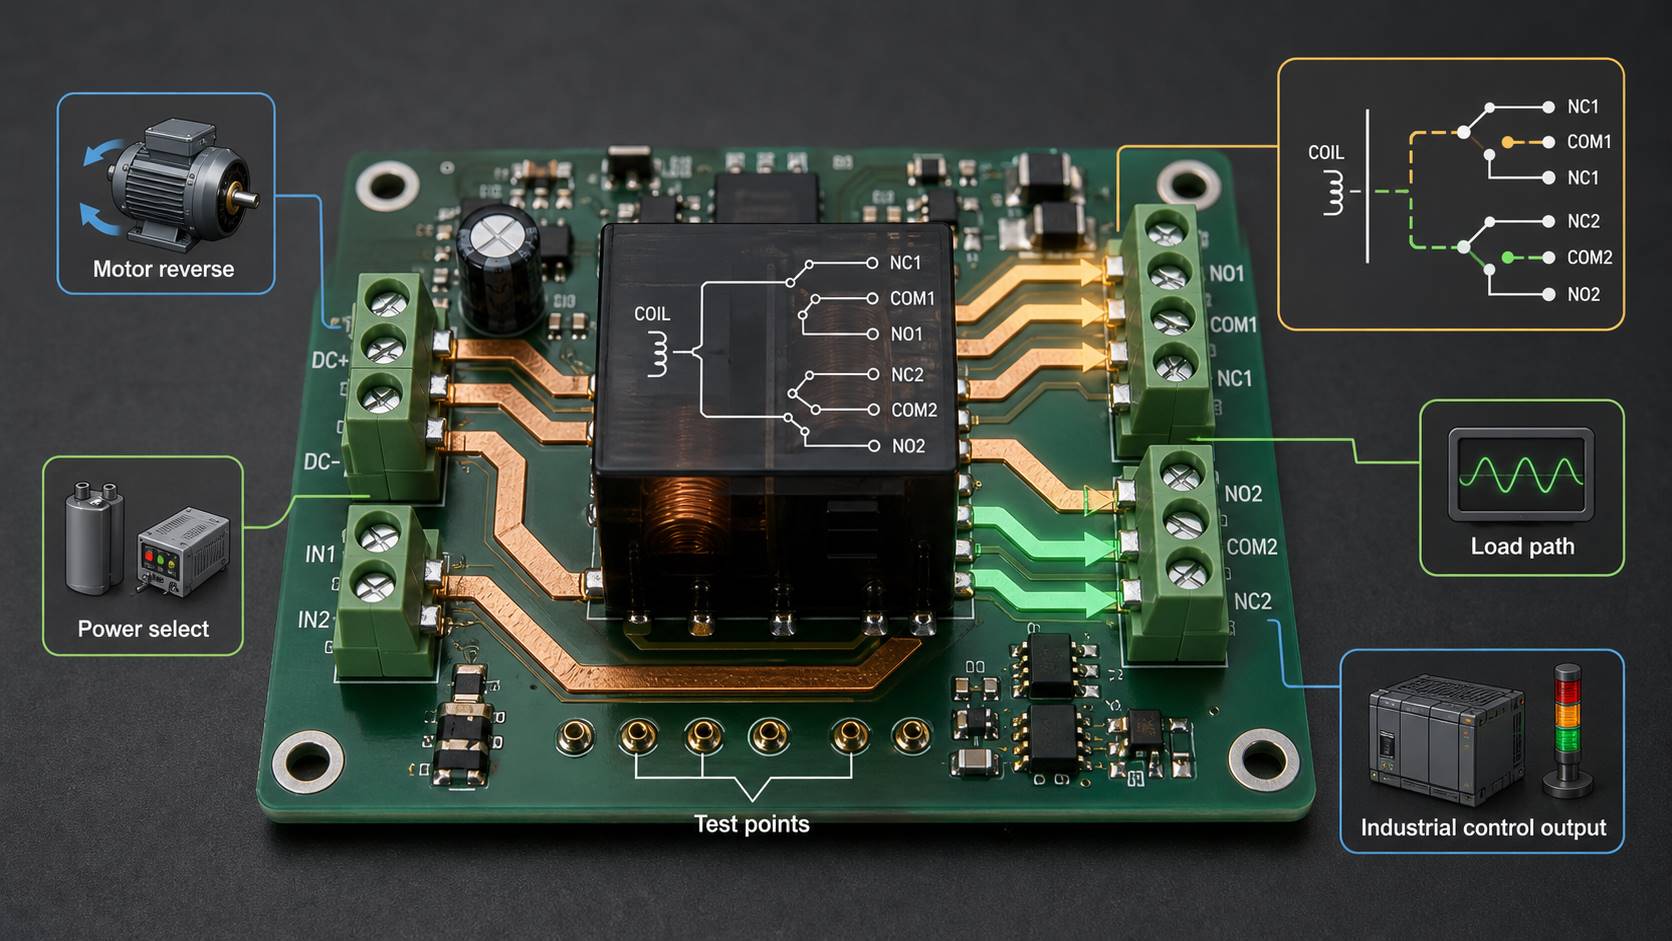
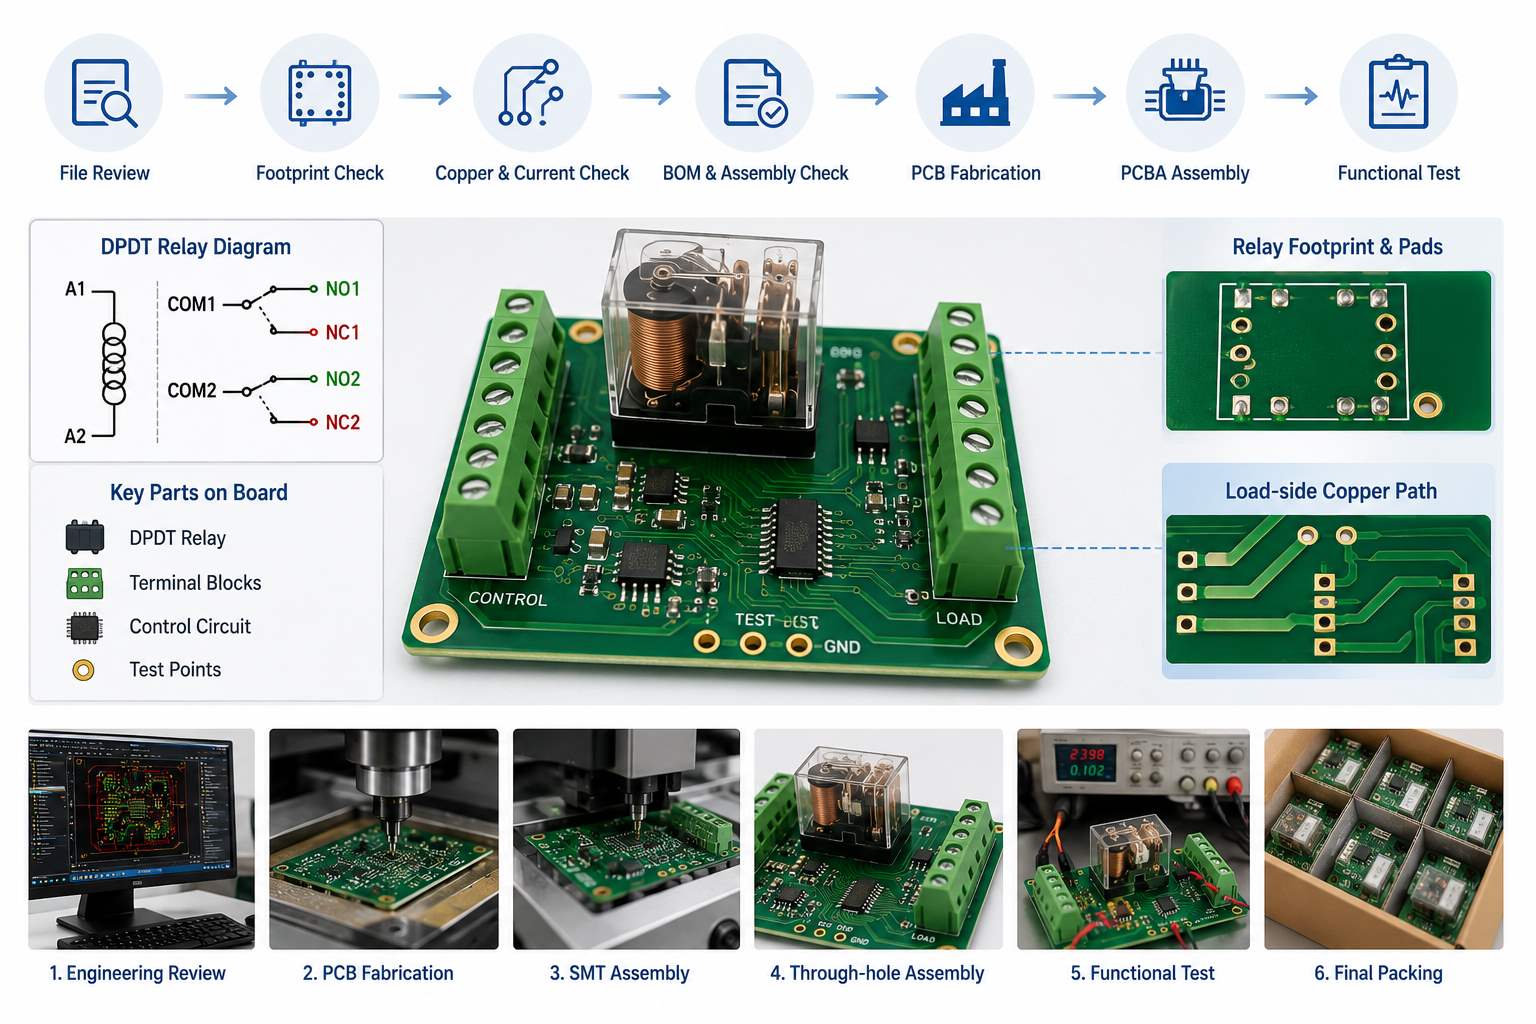
Single pole double throw relay is one of the most common relay types used to switch one circuit between two different output paths. In simple terms, it allows one input contact to connect with either of two output contacts, depending on whether the relay coil is energized or not.

You may also see it called an SPDT relay, changeover relay, or Form C relay. These names point to the same basic contact arrangement: one common terminal, one normally closed terminal, and one normally open terminal. This relay is widely used in control circuits, automotive electronics, power switching, signal routing, industrial automation, battery backup systems, alarm circuits, and PCB assemblies. For engineers, technicians, and electronics buyers, understanding how it works makes relay selection, wiring, troubleshooting, and PCB layout much easier.

In this guide, we will explain what an SPDT relay does, how it works, how to read its diagram and symbol, how to wire it, and how to choose the right relay for PCB or PCBA designs.

Single Pole Double Throw Relay

What Is a Single Pole Double Throw Relay?

A single pole double throw relay is an electromechanical or solid-state switching device that controls one circuit and switches it between two possible outputs.

The term can be broken down like this:

TermMeaning
Single PoleThe relay controls one common circuit path
Double ThrowThe common contact can connect to either of two output contacts
RelayAn electrically controlled switch

In a standard SPDT relay, there are three main contact terminals:

TerminalFull NameFunction
COMCommonThe moving contact or shared input/output terminal
NCNormally ClosedConnected to COM when the relay is not energized
NONormally OpenConnected to COM when the relay is energized

The relay also has two coil terminals in an electromechanical version. When voltage is applied to the coil, the internal armature moves and changes the contact connection from NC to NO.

So, in its resting state, COM connects to NC. Once the coil is powered, COM disconnects from NC and connects to NO.

This simple changeover action is why SPDT relays are so useful in electronic control circuits.

Single Pole Double Throw Relay

What Does a Single Pole Double Throw Relay Do?

A single pole double throw relay allows a circuit to choose between two paths.

For example, it can switch:

  • A motor between forward and off control logic
  • A signal between two output lines
  • A device between main power and backup power
  • A lamp between two control states
  • A PCB circuit between normal operation and fault indication

The main value of an SPDT relay is not just turning something on or off. Its real advantage is changeover switching.

A simple ON/OFF relay only opens or closes one path. An SPDT relay gives you two possible states:

Relay StateCOM Connects ToTypical Meaning
Coil OffNCDefault or standby path
Coil OnNOActive or switched path

This makes it helpful when the circuit needs a default connection before the control signal is applied.

For example, in a backup power system, the NC contact may connect to the main power line. When the control circuit detects a fault or change, the relay can switch COM to NO and route the circuit to an alternate power source.

How Does a Single Pole Double Throw Relay Work?

A standard electromechanical SPDT relay works through magnetic force.

Inside the relay, there is a coil, a movable armature, a spring mechanism, and three switching contacts: COM, NO, and NC.

When the coil has no voltage, the spring holds the armature in its default position. In this state, COM is connected to NC.

When voltage is applied to the coil, current flows through the winding and creates a magnetic field. This magnetic field pulls the armature toward the coil. As the armature moves, it breaks the COM-to-NC connection and makes the COM-to-NO connection.

When the coil voltage is removed, the magnetic field disappears. Then the spring returns the armature to its resting position, and COM connects back to NC.

Here is the basic operation:

Coil ConditionInternal ActionContact State
Coil not energizedSpring holds armature in default positionCOM connects to NC
Coil energizedMagnetic field pulls armatureCOM connects to NO
Coil de-energized againSpring resets armatureCOM returns to NC

This action is fast, repeatable, and electrically isolated. The control side and the load side are separated, which allows a low-power circuit to control a higher-power circuit safely when the relay is properly rated.

Single Pole Double Throw Relay Diagram

A basic single pole double throw relay diagram usually shows the coil on one side and the switching contacts on the other side.

A typical SPDT relay has five pins:

Pin GroupDescription
2 coil pinsUsed to energize the relay
1 COM pinCommon switching terminal
1 NC pinNormally closed contact
1 NO pinNormally open contact

A simple contact diagram looks like this:

          NC
           |
           |
COM -------o
            \
             o
             |
             NO

In the relay’s normal state, COM touches NC. When the coil is energized, the internal contact moves and connects COM to NO.

A complete diagram may show the coil as a rectangle or loop symbol beside the contact structure:

Coil Side                  Contact Side

+ ----[ Coil ]---- -        NC
                            |
                            |
                   COM -----o
                             \
                              o
                              |
                              NO

This diagram helps users understand two important points:

First, the coil side controls the relay action. Second, the contact side switches the load or signal path.

The coil circuit and contact circuit are not the same electrical path in an electromechanical relay. This isolation is one reason relays are widely used in PCBs that must separate logic control from power switching.

Single Pole Double Throw Relay Wiring Diagram

A single pole double throw relay wiring diagram depends on what you want the relay to do. However, the basic wiring method is always built around COM, NO, NC, and the coil pins.

Here is a simple low-voltage switching example:

Control Side:

+12V Control Supply ---- Switch/Transistor ---- Relay Coil ---- GND


Load Side:

Power Supply + ---- COM

NC ---- Load A ---- GND

NO ---- Load B ---- GND

In this example:

  • When the relay coil is off, power flows from COM to NC and turns on Load A.
  • When the relay coil is on, COM switches to NO and turns on Load B.
  • Load A turns off when Load B turns on.

This is the classic changeover function.

For a circuit where a load should only turn on when the relay is energized, use COM and NO:

Power Supply + ---- COM
NO ---- Load ---- GND

For a circuit where a load should stay on by default and turn off when the relay is energized, use COM and NC:

Power Supply + ---- COM
NC ---- Load ---- GND

This is useful for safety loops, alarm circuits, and default-on control paths.

Before wiring, always confirm the relay’s pinout from the datasheet or case marking. Pin arrangements can vary between manufacturers, even when the relay has the same voltage and contact form.

Single Pole Double Throw Relay Schematic and Symbol

In a schematic, an SPDT relay symbol usually includes two parts: the coil and the changeover contact.

The coil is drawn as a rectangle or winding symbol. The contact section shows COM switching between NC and NO.

A simplified schematic symbol looks like this:

        Relay Coil
A1 ----[      ]---- A2


        NC
        |
COM ----o
         \
          o---- NO

The slanted line represents the movable contact. In the normal position, it touches NC. When the coil is energized, it moves toward NO.

You may also see labels such as:

  • A1 / A2 for coil terminals
  • COM / C for common
  • NO for normally open
  • NC for normally closed
  • Form C for SPDT contact form

In relay datasheets, the schematic may also include polarity marks if the relay has an internal diode, LED, or surge suppression component. This detail matters because a relay with an internal diode must be connected with the correct coil polarity.

For PCB design, the schematic symbol should match the physical footprint. A mismatch between schematic pins and PCB pads is a common source of relay assembly errors.

Single Pole Double Throw Relay Pinout: COM, NO, and NC

The most important part of an SPDT relay pinout is identifying the COM, NO, and NC terminals correctly.

Here is what each terminal means in practical use:

TerminalState When Coil Is OffState When Coil Is OnCommon Use
COMConnected to NCConnected to NOMain input or output path
NCConnected to COMDisconnected from COMDefault-on circuit
NODisconnected from COMConnected to COMActive-on circuit

In many small PCB relays, the five pins are arranged in a compact rectangular pattern. Automotive relays often use numbered terminals. Common automotive relay numbering may include:

Terminal NumberTypical Meaning
85Coil
86Coil
30COM
87NO
87aNC

This numbering is common, but it should not replace datasheet verification. Some relays may use different layouts, especially signal relays, telecom relays, power relays, and latching relays.

A quick continuity test with a multimeter can also help identify terminals:

  • Find the two coil pins by measuring coil resistance.
  • Find the pair that has continuity without coil power. That pair is COM and NC.
  • Energize the coil with the rated voltage.
  • The terminal that now connects to COM is NO.

This method is useful during troubleshooting, but for production design, the datasheet remains the correct source.

Single Pole Double Throw Relay Circuit Example

A common SPDT relay circuit uses a microcontroller or transistor to control a load. Since most microcontroller pins cannot drive a relay coil directly, a transistor driver is usually added.

A basic control circuit includes:

  • Microcontroller output pin
  • Base or gate resistor
  • NPN transistor or MOSFET
  • Relay coil
  • Flyback diode
  • External load circuit

Example structure:

Microcontroller Pin ---- Resistor ---- Transistor Base/Gate

Relay Coil + ---- +V
Relay Coil - ---- Transistor ---- GND

Flyback Diode Across Relay Coil

The relay contacts then switch the load:

Power Source ---- COM

NO ---- Load ---- GND
NC ---- Optional Default Load ---- GND

When the microcontroller output turns on the transistor, current flows through the coil. The relay energizes and COM switches from NC to NO.

The flyback diode is important in DC relay circuits. When the coil is turned off, the magnetic field collapses and creates a voltage spike. The diode gives this energy a safe discharge path and helps protect the transistor, microcontroller, and nearby PCB traces.

For AC loads or high-current switching, additional protection may be needed, such as an RC snubber, MOV, TVS diode, contact arc suppression, or proper creepage and clearance spacing.

12V Single Pole Double Throw Relay and Other Common Coil Voltages

A 12V single pole double throw relay is one of the most common types, especially in automotive electronics, low-voltage control boards, battery systems, lighting controls, and industrial modules.

However, SPDT relays are available in many coil voltage options.

Coil VoltageCommon Application
3VPortable electronics, battery-powered modules
5VMicrocontroller boards, Arduino-style projects, digital control PCBs
9VSmall control circuits
12VAutomotive, industrial control, LED lighting, battery systems
24VPLC systems, industrial automation, control cabinets
120V ACAppliance control, HVAC, mains-powered equipment
230V ACIndustrial and regional mains-control circuits

Coil voltage is not the same as contact rating. A relay may have a 12V coil but switch a much higher load voltage through its contacts, as long as the load remains within the relay’s rated contact voltage and current.

For example, a 12V relay may be rated to switch 250VAC at a specific current. Still, the exact rating depends on the contact material, relay structure, safety approval, load type, and switching frequency.

When selecting a relay, check these points:

  • Coil voltage
  • Coil current
  • Contact voltage rating
  • Contact current rating
  • AC or DC load type
  • Resistive or inductive load
  • Contact arrangement
  • Mechanical life
  • Electrical life
  • PCB footprint
  • Operating temperature
  • Safety approvals

For PCB or PCBA projects, relay height, pin pitch, soldering method, and insulation distance should also be reviewed early in the design.

Single Pole Double Throw Solid State Relay vs Electromechanical Relay

A single pole double throw solid state relay performs changeover switching without moving mechanical contacts. Instead, it uses semiconductor devices such as MOSFETs, optocouplers, triacs, or photovoltaic drivers.

The main difference is the switching mechanism.

FeatureElectromechanical SPDT RelaySPDT Solid State Relay
Switching MethodMoving metal contactsSemiconductor switching
IsolationCoil-to-contact isolationOptical or electronic isolation
SpeedModerateFast
Contact WearYes, over timeNo mechanical contact wear
Audible ClickYesNo
Leakage CurrentUsually near zero when openMay have small leakage
Contact ResistanceLow metal contact resistanceDepends on semiconductor device
Load TypeAC/DC depending on relayMust match SSR output type
CostOften lowerOften higher

Electromechanical relays remain popular because they provide true contact isolation, low off-state leakage, and clear contact behavior. They are also easy to understand, test, and replace.

Solid state relays are often chosen when the application needs silent operation, long switching life, high-speed switching, or resistance to vibration.

For PCB design, the choice depends on load type, switching speed, heat generation, leakage current, expected lifetime, and available board space. In many industrial and automotive designs, mechanical SPDT relays are still a practical and economical choice.

Single Pole Double Throw Relay vs SPST, DPST, and DPDT Relay

Relay names can look confusing at first, but the logic becomes simple once you understand poles and throws.

  • Pole means the number of independent circuits being controlled.
  • Throw means the number of output positions each pole can connect to.

Here is a practical comparison:

Relay TypeFull NameContact FunctionBest Used For
SPSTSingle Pole Single ThrowOne circuit, one output pathSimple ON/OFF control
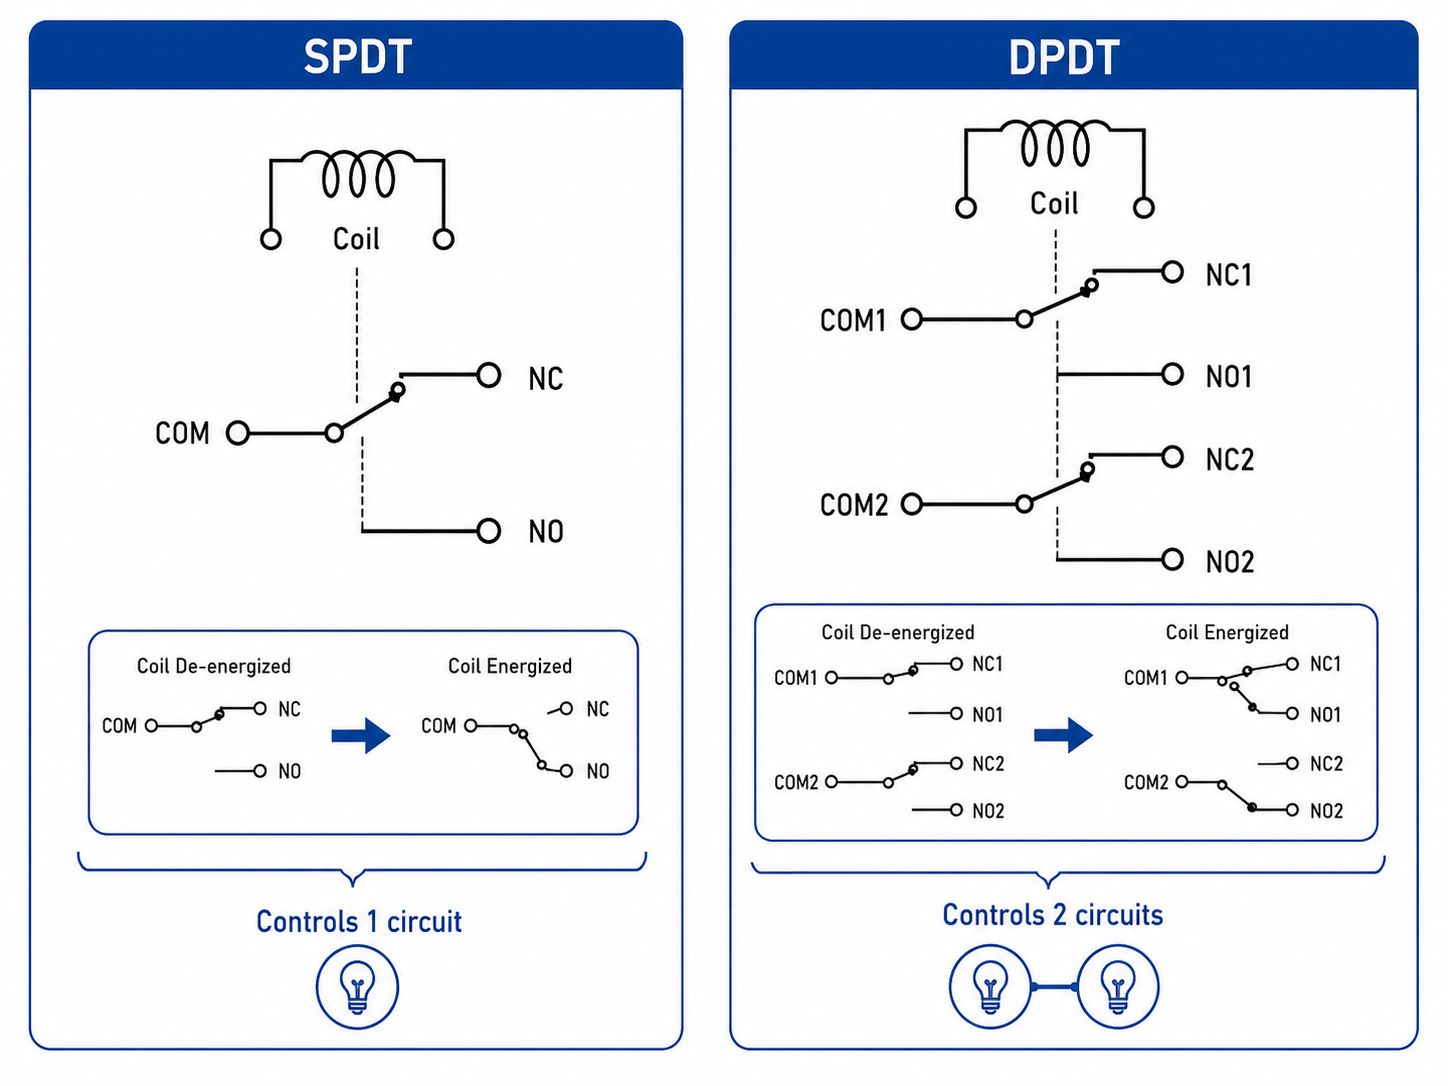
SPDTSingle Pole Double ThrowOne circuit, two output pathsChangeover switching
DPSTDouble Pole Single ThrowTwo circuits switched ON/OFF togetherSwitching two lines at the same time
DPDTDouble Pole Double ThrowTwo circuits, each with two output pathsPolarity reversal, dual changeover control

An SPST relay is like a basic switch. It opens or closes one circuit.

An SPDT relay can switch one common line between two outputs.

A DPST relay works like two SPST relays operated together.

A DPDT relay works like two SPDT relays operated together.

This is why a double pole single throw relay should not be confused with an SPDT relay. DPST controls two separate circuits but only provides one throw for each circuit. SPDT controls one circuit but gives it two throw positions.

For an information-focused article, it is useful to include DPST and DPDT in a comparison section, but the main topic should stay centered on SPDT relay operation.

Where Is a Single Pole Double Throw Relay Used?

SPDT relays are used anywhere a circuit needs to switch between two states or two paths.

Common applications include:

ApplicationHow the Relay Is Used
Automotive electronicsSwitching lights, horns, fans, pumps, or accessories
Battery backup systemsChanging between main power and backup power
Industrial controlRouting control signals or switching loads
Alarm systemsDefault closed safety loops or triggered outputs
HVAC controlFan, compressor, or mode switching
Test equipmentSignal path selection
Audio circuitsChannel switching or mute control
Lighting controlSwitching between modes or power paths
PCB control boardsLogic-controlled load switching

In automotive circuits, a 12V SPDT relay is especially common because vehicle electrical systems are usually based around 12V control power.

In industrial electronics, 24V relays are common because many control cabinets and PLC systems use 24VDC control voltage.

In PCB assemblies, smaller signal relays may be used for low-current switching, while power relays are chosen for higher load current.

How to Choose a Single Pole Double Throw Relay for PCB or PCBA Design?

Choosing the right relay is not only about matching the coil voltage. For a reliable PCB or PCBA design, the relay must match the electrical, mechanical, thermal, and manufacturing requirements of the project.

Start with the coil voltage.
The coil voltage should match the control circuit. For example, a 5V relay can work well with logic-level boards when the driver circuit provides enough coil current. A 12V relay is common in automotive or battery-powered systems. A 24V relay is common in industrial automation.

Check the contact rating carefully.
The contact rating must support the load voltage and current. Also, pay attention to whether the load is resistive, inductive, capacitive, or motor-based. Inductive loads can create arcs and voltage spikes, so they usually need more protection.

Review the relay footprint.
For PCB mounting, the pad size, pin pitch, hole diameter, body outline, and keep-out area must match the selected relay. A good footprint reduces soldering defects and assembly variation.

Plan creepage and clearance.
When a relay switches high voltage, the PCB layout must provide enough distance between low-voltage control circuits and high-voltage load circuits. This matters for safety, reliability, and compliance.

Add coil protection.
For DC coils, a flyback diode is often used. In faster release circuits, a TVS diode or Zener clamp may be better because a standard diode can slow relay release time.

Consider contact protection.
For motor loads, solenoids, transformers, and other inductive loads, add suitable suppression. Options include RC snubbers, MOVs, TVS diodes, or load-side protection circuits.

Think about production testing.
For PCBA manufacturing, test points can be added near the coil driver and relay contacts. This helps with ICT, functional testing, and troubleshooting.

Confirm operating environment.
Temperature, humidity, vibration, dust, and switching frequency all affect relay performance. Automotive, medical, industrial, and outdoor lighting products may need stricter validation.

For EBest Circuit, relay-related PCB and PCBA projects usually require attention to footprint accuracy, soldering quality, BOM verification, test coverage, and DFM review. A relay is a familiar component, but its layout and load path can strongly affect long-term reliability.

Common Design Mistakes With Single Pole Double Throw Relay Circuits

Even though SPDT relays are simple components, mistakes can still happen during schematic design, PCB layout, wiring, or assembly.

Here are several common issues to avoid.

MistakeResultBetter Practice
Confusing NO and NCLoad works in the opposite stateVerify the contact diagram before wiring
Ignoring coil currentMicrocontroller pin may be damagedUse a transistor or MOSFET driver
No flyback diode on DC coilVoltage spike may damage control circuitAdd diode, TVS, or clamp circuit
Wrong PCB footprintAssembly failure or misconnectionMatch datasheet pinout to footprint
Underrated contact currentContact overheating or early failureSelect rating with proper margin
Poor spacing for high voltageSafety and reliability riskFollow creepage and clearance rules
No suppression for inductive loadContact arcing and EMIUse snubber, MOV, or diode protection
Routing high current through thin tracesHeat rise or voltage dropCalculate trace width and copper weight

For production boards, the relay should also be reviewed during DFM and DFT. This is especially important when the relay switches high current, high voltage, or safety-related circuits.

Single Pole Double Throw Relay

In closing, a single pole double throw relay is a practical changeover switching device that connects one common terminal to either a normally closed or normally open terminal. This makes it more flexible than a simple ON/OFF relay and useful in many control, power, signal, automotive, and PCB applications.

For a strong understanding, focus on five key points: COM, NO, NC, coil operation, and contact rating. Once these are clear, relay diagrams, wiring diagrams, symbols, and circuit examples become much easier to read.

For PCB and PCBA projects, relay selection should also include coil voltage, load rating, footprint accuracy, protection circuits, creepage and clearance, soldering process, and functional testing. A relay may look like a small component, but it often controls critical circuit behavior. Careful design and manufacturing review can make the final product safer, cleaner, and more reliable.

FAQs About Single Pole Double Throw Relay

What Is the Difference Between SPDT and Single Pole Double Throw Relay?

SPDT and single pole double throw relay mean the same thing. SPDT is simply the abbreviation. “Single pole” means one common circuit is controlled. “Double throw” means that common contact can switch between two output contacts.

What Are COM, NO, and NC on an SPDT Relay?

COM is the common contact. NO means normally open, and NC means normally closed. When the relay is not energized, COM connects to NC. When the relay is energized, COM connects to NO.

Is a Single Pole Double Throw Relay Normally Open or Normally Closed?

An SPDT relay has both normally open and normally closed contacts. That is why it can support two circuit states. You can use COM and NO for active-on switching, or COM and NC for default-on switching.

What Is a 12V Single Pole Double Throw Relay Used For?

A 12V SPDT relay is often used in automotive electronics, battery control systems, LED lighting, low-voltage control boards, alarm circuits, and small industrial modules. It uses a 12V coil to switch the relay contacts.

Can a Single Pole Double Throw Relay Switch AC and DC Loads?

Yes, many SPDT relays can switch AC or DC loads, but the rating is different for each type. DC switching is often harder on contacts because arcs do not self-extinguish as easily as AC arcs. Always check the relay datasheet.

Is a Single Pole Double Throw Relay the Same as a Changeover Relay?

Yes. A changeover relay is another common name for an SPDT relay. The term describes how the common contact changes over from NC to NO when the relay coil is energized.

What Is the Difference Between SPDT and DPDT Relay?

An SPDT relay controls one circuit and switches it between two outputs. A DPDT relay controls two circuits, and each circuit can switch between two outputs. A DPDT relay is similar to two SPDT relays operated together.

Do I Need a Diode for a Single Pole Double Throw Relay?

For a DC relay coil, a flyback diode or another suppression component is strongly recommended. It helps absorb the voltage spike generated when the coil turns off and protects the driver circuit.

You may also like

Ceramic PCB Manufacturer USA Serving | Alumina & AlN Boards

May 12th, 2026

What is a ceramic PCB manufacturer serving USA?

For many buyers, the phrase ceramic pcb manufacturer usa does not only mean “a factory physically located in the USA.” It often means a capable ceramic PCB supplier that can serve U.S. projects with dependable engineering support, export experience, and quality systems suitable for demanding applications.

Ceramic PCB Manufacturer USA Serving | Alumina & AlN Boards

Ceramic PCBs are different from standard FR4 boards because the base material is a ceramic substrate, such as alumina or aluminum nitride. These materials offer excellent thermal conductivity, electrical insulation, dimensional stability, and high-temperature endurance. That is why ceramic PCB technology is widely used in power electronics, LED modules, medical devices, aerospace electronics, RF modules, automotive electronics, sensors, and other products where heat, reliability, and compact design matter.

When a U.S. customer searches for a ceramic PCB partner, the real question is usually simple: can this supplier manufacture the correct ceramic substrate, control the process, support the design review, and deliver boards that perform as expected?

EBest Circuit(Best Technology), serves U.S. customers with ceramic PCB fabrication and assembly support for prototype, low-volume, medium-volume, and production requirements. The company provides custom ceramic PCB manufacturing, turnkey PCB and PCBA services, and multiple ceramic processes, including DPC, DBC, AMB, thick film, LTCC, and HTCC. Its ceramic PCB capabilities include alumina, aluminum nitride, ZTA, silicon nitride, several conductor options, multiple surface finishes, and certified quality systems including ISO 9001, ISO 13485, IATF 16949, AS9100D, RoHS, REACH, and UL recognition.

What materials do ceramic PCB manufacturers for USA offer?

Ceramic PCB manufacturers serving USA customers usually offer several substrate materials. The most common ceramic PCB materials are alumina and aluminum nitride, but advanced projects may also require silicon nitride, zirconia-toughened alumina, LTCC materials, or HTCC materials.

Alumina ceramic PCB is one of the most widely used choices because it provides a balanced mix of insulation, thermal performance, mechanical durability, and cost control. It is commonly used in LED lighting, power modules, sensors, hybrid circuits, and industrial electronics. Alumina is available in different purity levels, such as 92% and 96%, and some manufacturers can support special variants such as black alumina.

Aluminum nitride, often written as AlN, is selected when thermal performance is a main priority. Compared with alumina, AlN has much higher thermal conductivity and a thermal expansion behavior that works well with certain semiconductor and power device packages. This makes it a strong choice for high-power LED modules, laser diodes, power conversion modules, RF power devices, aerospace electronics, medical imaging electronics, and other compact systems that generate concentrated heat.

Some advanced projects also use silicon nitride, ZTA, LTCC, or HTCC. Silicon nitride offers high strength, high toughness, good thermal conductivity, and excellent thermal shock resistance. ZTA combines alumina with zirconia to improve toughness and mechanical reliability. LTCC and HTCC are often used for multilayer ceramic circuits, high-frequency modules, sensors, and compact electronic packages.

Ceramic PCB MaterialMain StrengthTypical Use CasesCommon Reason to Choose It
Alumina PCBGood insulation, stable performance, cost-effective ceramic baseLED modules, sensors, power circuits, industrial electronicsBalanced ceramic performance and practical cost
Aluminum Nitride PCBHigh thermal conductivity and good CTE behaviorPower electronics, RF power modules, laser modules, medical electronicsBetter heat dissipation in compact designs
Silicon Nitride PCBHigh mechanical strength and thermal shock resistanceAutomotive power modules, harsh environments, high-reliability electronicsStronger mechanical reliability
ZTA PCBImproved toughness compared with standard aluminaIndustrial and power applicationsBetter crack resistance and durability
LTCCMultilayer ceramic structure, good for compact circuitsRF modules, sensors, microwave devices, integrated packagesCompact multilayer ceramic integration
HTCCHigh-temperature ceramic circuit capabilityAerospace, defense-related commercial electronics, harsh applicationsHigh-temperature endurance and stable insulation

For most U.S. projects, the best starting point is to match the material to the real design challenge. If the main issue is controlled heat transfer at a reasonable cost, alumina may be suitable. If the design has a very hot component, tight thermal limits, or high power density, aluminum nitride may be the better direction. If the board needs extra toughness, silicon nitride or ZTA may deserve attention. If the product requires ceramic multilayer routing, LTCC or HTCC may be a stronger path than a simple single-sided or double-sided ceramic board.

EBest Circuit supports several ceramic PCB materials and process types, which gives U.S. customers more flexibility during design evaluation. Instead of forcing one standard material into every project, the engineering team can review thermal requirements, copper thickness, operating temperature, board size, assembly needs, and budget targets.

Can China ceramic PCB suppliers meet USA aerospace/medical standards?

China ceramic PCB suppliers can meet the expectations of USA aerospace and medical customers when they have the right manufacturing capability, quality certifications, process controls, and documentation discipline. The key is not the country alone. The key is whether the supplier can build to controlled requirements, maintain traceability, support audits, and provide reliable production records.

For advanced ceramic PCB projects, U.S. customers should evaluate the supplier’s quality system, engineering response, material control, inspection process, and shipment reliability before placing important orders.

Aerospace and medical electronics often require more than basic PCB fabrication. These markets value documented processes, controlled materials, repeatable production, inspection evidence, and clear communication. Aerospace customers may look for AS9100D alignment, first article inspection support, lot traceability, controlled process records, and stable supplier management. Medical customers may look for ISO 13485, process documentation, component traceability for assembly projects, clean handling practices, and long-term quality consistency.

EBest Circuit’s positioning is especially relevant here because the company supports ceramic PCB fabrication and ceramic PCB assembly under a quality framework that includes ISO 9001, ISO 13485, IATF 16949, AS9100D, RoHS, REACH, and UL. For U.S. medical, aerospace, automotive, and industrial customers, these certifications help show that the supplier has invested in quality management and controlled production practices.

For ceramic PCB projects going into regulated or high-reliability products, the manufacturer should provide practical support in several areas:

  • Material selection records, substrate specifications, and copper or conductor details.
  • Engineering review for manufacturability, tolerances, hole sizes, surface finish, and thermal design.
  • Inspection methods such as visual inspection, dimensional checks, electrical testing, and process-specific validation.
  • Production traceability by order, lot, material batch, and process route.
  • Clear export packaging, shipping documentation, and communication for USA delivery.

The best approach is to treat the supplier qualification step as part of the design process. U.S. customers can request the manufacturer’s certifications, capability table, sample reports, material options, and previous industry experience. They can also start with a prototype order, review the board quality, check communication speed, and then move toward repeat orders or volume production.

Ceramic PCB Manufacturer USA Serving | Alumina & AlN Boards

What certifications should a USA-serving ceramic PCB manufacturer have?

A USA-serving ceramic PCB manufacturer should have certifications that match the application risk level and target industry. For general industrial electronics, ISO 9001 is usually the baseline. For medical device electronics, ISO 13485 is highly valuable because it focuses on quality management for medical device-related manufacturing. For automotive electronics, IATF 16949 is an important signal of process control and automotive supply chain discipline. For aerospace electronics, AS9100D is especially relevant because it aligns with aerospace quality management expectations. RoHS and REACH are also important for material compliance, especially when products are sold into global markets.

Certification or Compliance ItemWhy It Matters for USA CustomersTypical Application Relevance
ISO 9001Shows a structured quality management systemGeneral PCB and PCBA manufacturing
ISO 13485Supports medical device quality expectationsMedical electronics, monitoring devices, diagnostic equipment
IATF 16949Supports automotive process disciplineAutomotive electronics, EV systems, lighting, control modules
AS9100DSupports aerospace quality management expectationsAerospace electronics, UAV electronics, avionics-related commercial projects
ULSupports recognized material or product safety-related requirementsProducts requiring UL-recognized manufacturing inputs
RoHSRestricts hazardous substances in electronicsGlobal electronics, consumer, industrial, medical, automotive
REACHSupports chemical compliance for global marketsElectronics exported to compliance-sensitive regions

A ceramic PCB manufacturer serving USA customers should also understand that certifications are not only marketing badges. They should influence how the supplier handles document control, incoming inspection, production routing, staff training, nonconforming material, corrective actions, equipment maintenance, and final inspection. This matters because ceramic PCB production can involve special processes such as metallization, firing, plating, laser drilling, DPC, DBC, AMB, or thick film printing. Each process needs stable control to produce boards with repeatable performance.

For U.S. buyers, the most efficient qualification method is to map the certification to the product use. A medical sensor PCB may need ISO 13485 support and strong traceability. An aerospace power module substrate may need AS9100D alignment, material control, and detailed inspection records. An automotive LED ceramic board may benefit from IATF 16949 discipline and thermal reliability evaluation. A general industrial ceramic PCB may be well served by ISO 9001, RoHS, REACH, and clear production documentation.

EBest Circuit (Best Technology)’s certification portfolio supports a wide range of ceramic PCB applications for U.S. customers. Our quality system coverage is helpful for customers who want one supplier for ceramic PCB fabrication, ceramic PCB assembly, and turnkey electronics manufacturing support.

How fast can a ceramic PCB supplier deliver orders to the USA?

Delivery time for ceramic PCB orders shipped to the USA depends on the material, process, board complexity, quantity, surface finish, inspection requirements, and assembly scope. A simple alumina ceramic PCB may move faster than a complex aluminum nitride, DBC, AMB, LTCC, or HTCC project. A bare ceramic board can usually be completed faster than a full turnkey PCBA order that includes component sourcing, assembly, inspection, and functional testing.

For ceramic PCB USA projects, buyers should think about lead time in two parts. The first part is production lead time, which includes engineering review, material preparation, substrate processing, metallization, plating, surface finishing, inspection, and packaging. The second part is shipping time, which includes export documentation, courier pickup, customs clearance, and delivery to the customer’s U.S. location.

A typical ceramic PCB project may follow this delivery flow: design file review, quotation confirmation, DFM feedback, purchase order, production preparation, manufacturing, inspection, packing, export shipment, and arrival in the USA. For urgent prototype orders, early DFM review is very important because a small design issue can slow down production if it is discovered after the order begins.

Lead time is also affected by material choice. Alumina is usually easier to source and process, so it is often faster. Aluminum nitride requires more careful handling and may need a longer production window depending on the structure. DBC and AMB boards with thicker copper often require more process control. LTCC and HTCC projects can require additional engineering discussion because they involve multilayer ceramic construction and firing behavior.

U.S. customers can improve delivery speed by preparing complete production data from the beginning. A good RFQ package should include Gerber files, drill files, stack-up or material requirement, copper thickness, board thickness, surface finish, solder mask and silkscreen requirements, tolerance notes, quantity, test requirements, and assembly files if PCBA is needed. For turnkey assembly, the BOM should include manufacturer part numbers, acceptable alternates, reference designators, and any approved sourcing rules.

EBest Circuit (Best Technology) supports rapid response for ceramic PCB manufacturing and turnkey PCB assembly projects. For USA customers, the company can review custom ceramic PCB designs, provide DFM suggestions, manufacture the boards, support assembly if required, and arrange international delivery.

Do ceramic PCB manufacturers serving USA provide DFM support?

A strong ceramic PCB manufacturer serving USA customers should provide DFM support before production. DFM, or design for manufacturability, is especially important for ceramic boards because ceramic substrates behave differently from FR4 laminates. The material is hard, dimensionally stable, thermally efficient, and electrically insulating, but it also needs suitable design rules for holes, edge clearance, copper geometry, metallization, solder mask, and final handling. A design that works well on FR4 may need adjustments when moved to alumina, AlN, or another ceramic substrate.

DFM support helps align the customer’s design intent with the supplier’s manufacturing process. This step can review whether the selected ceramic material matches the thermal requirement, whether the copper thickness is suitable, whether the hole sizes are manufacturable, whether the board outline tolerance is realistic, and whether the surface finish supports the assembly method. For high-power designs, DFM may also include discussion of thermal paths, component placement, copper coverage, solder joint reliability, and attachment method.

The value of DFM is high because ceramic PCB projects often involve expensive components or high-reliability applications. When the design is reviewed early, the supplier can identify small adjustments that improve production yield and long-term performance. This can save time during prototyping and make volume production easier. It also helps U.S. customers communicate with their internal engineering, purchasing, and quality teams because the project risks are explained in practical manufacturing language.

Ceramic PCB Manufacturer USA Serving | Alumina & AlN Boards

A useful ceramic PCB DFM review may cover:

  • Ceramic material selection, including alumina, aluminum nitride, silicon nitride, ZTA, LTCC, or HTCC.
  • Board thickness, copper thickness, conductor type, and surface finish.
  • Minimum line width, spacing, hole size, hole tolerance, and board outline tolerance.
  • Solder mask, silkscreen, metallized holes, edge clearance, and panelization method.
  • Thermal design, including heat flow, hot spot control, and copper distribution.
  • Assembly considerations, including component footprint, soldering method, and inspection access.

EBest Circuit (Best Technology) provides engineering support for custom ceramic PCB projects, including DFM pre-review and process recommendations. This is useful for U.S. customers who want to avoid repeated prototype revisions. The team can review whether the design should use DPC, DBC, AMB, thick film, LTCC, or HTCC, depending on the required thermal performance, copper structure, current capacity, board geometry, and end-use environment.

What’s the MOQ for custom ceramic PCB orders from USA clients?

The MOQ for custom ceramic PCB orders from USA clients depends on the material, process, size, tooling requirement, and production method. Many ceramic PCB manufacturers can support prototypes and small batches, but the price per piece is usually higher at low quantity because setup time, engineering review, tooling, process preparation, and inspection are spread across fewer boards.

For U.S. customers, the better question is not only “what is the MOQ?” but also “what quantity makes sense for my stage?” A new product may start with a small prototype batch for electrical and thermal validation. After the design is confirmed, the buyer may order a pilot run to check assembly, reliability, packaging, and field testing. Once the project is stable, the order can move into regular production.

MOQ can also vary by ceramic process. Simple alumina boards may allow more flexible prototype quantities. Aluminum nitride boards may have a different cost structure because the material is more expensive. DBC and AMB boards can involve thicker copper and special bonding processes, so setup and panel utilization become important. LTCC and HTCC designs may require more engineering preparation, especially for multilayer ceramic structures.

Order StageTypical Buyer GoalRecommended Quantity ThinkingSupplier Support Needed
PrototypeValidate thermal, electrical, and mechanical designSmall quantity for testing and design confirmationDFM review, material advice, quick feedback
Pilot RunCheck assembly, yield, inspection, and field performanceMedium quantity based on test planProcess control, PCBA support, inspection reports
ProductionSupport stable customer demandLarger batches for better unit costRepeatability, traceability, scheduled delivery
Engineering SampleCompare materials or processesMultiple small lots may be usefulSide-by-side technical guidance

EBest Circuit (Best Technology) supports low, medium, and larger quantity ceramic PCB manufacturing, which is useful for USA clients at different project stages. A startup developing a power module may need only a small number of samples first. A medical device company may need prototype boards, then a documented pilot run. An industrial equipment manufacturer may need recurring batches with stable quality and delivery.

For custom ceramic PCB orders, U.S. customers should share the estimated annual usage when requesting a quote, even if the first order is small. This helps the supplier recommend a practical production path. For example, the manufacturer may quote prototype pricing and also provide a production price range for later batches. This gives the buyer better visibility for cost planning. It also helps engineering and purchasing teams decide whether the selected material and process fit the long-term product target.

How to ensure quality control for ceramic PCBs shipped to the USA?

Quality control for ceramic PCBs shipped to the USA begins before production, not after the boards are finished. The first step is to define the technical requirements clearly. This includes substrate material, thickness, copper or conductor structure, surface finish, solder mask, hole sizes, tolerances, inspection criteria, testing needs, packaging requirements, and documentation expectations. When these points are confirmed before manufacturing, the supplier can control the process more effectively and the customer can inspect the delivered boards with a clear standard.

Ceramic PCB quality is built through process discipline. The manufacturer should control incoming ceramic substrates, conductor materials, metallization process, plating thickness, surface finish, dimensional accuracy, hole quality, solder mask quality, and final appearance. For high-reliability projects, the quality team may also check bond strength, insulation performance, thermal behavior, solderability, and electrical continuity.

For U.S. customers, quality control also includes documentation. A supplier serving the USA market should be comfortable providing inspection records, certificates of conformity, material-related information, production lot references, and packing records when required. For medical, aerospace, automotive, and industrial projects, traceability is often as important as the physical board quality.

A practical quality control plan for ceramic PCB USA shipments should include the following steps:

  • Confirm drawings, Gerber data, stack-up, tolerances, and special requirements before production.
  • Review material selection and ceramic process type during DFM.
  • Check critical dimensions, hole quality, copper features, and board outline during manufacturing.
  • Apply electrical testing or functional inspection based on project needs.
  • Inspect surface finish, solder mask, silkscreen, and appearance before packing.
  • Use protective packaging suitable for ceramic substrates and international shipping.
  • Keep order records, lot information, and inspection results for traceability.

Packaging deserves special attention because ceramic boards are hard and stable, but they should still be protected from edge damage, contamination, moisture exposure, and mechanical shock during international transit. A good supplier uses proper separation, vacuum packing or moisture-protective methods when needed, rigid outer cartons, and clear labels. For assembled ceramic PCBs, ESD protection and component-level packaging become even more important.

EBest Circuit (Best Technology) supports quality control through certified management systems, ceramic manufacturing capability, inspection procedures, and turnkey service support. For USA customers, this means one supplier can help manage bare ceramic PCB fabrication, component sourcing, assembly, and testing when the project requires PCBA delivery.

What industries do USA-serving ceramic PCB manufacturers support most?

USA-serving ceramic PCB manufacturers support industries where heat management, electrical insulation, compact packaging, and long-term reliability are important. Ceramic PCB technology is especially valuable when FR4 or conventional metal core PCB cannot provide enough thermal performance or dimensional stability.

Power electronics is one of the strongest application areas. Ceramic substrates can support high-power components, improve heat transfer, and help maintain electrical insulation. This makes them useful in power supplies, converters, inverters, motor control modules, semiconductor packages, and high-current electronic systems.

LED and laser electronics also use ceramic PCB technology extensively. High-power LED modules generate concentrated heat, and ceramic substrates can help move that heat away from the junction area. This supports better optical stability and longer product life. Ceramic PCBs are used in industrial lighting, automotive lighting, medical lighting, UV LED modules, laser diode modules, and other optoelectronic products.

Medical electronics can benefit from ceramic PCBs because they offer stable insulation, precision, and strong thermal behavior. Applications may include imaging systems, monitoring equipment, sensor modules, diagnostic devices, power control boards, and compact electronic modules. For this market, the supplier’s ISO 13485 capability, traceability, and documentation support are important. EBest Circuit (Best Technology)’s ceramic PCB and PCBA capabilities are a strong fit for medical device teams that need both manufacturing support and controlled quality processes.

Aerospace and UAV electronics also value ceramic PCBs because these systems often require stable performance under thermal stress, vibration, compact design constraints, and long service expectations. Ceramic substrates can support RF modules, power electronics, sensor packages, control modules, and high-reliability electronic assemblies.

Automotive and EV electronics are another major field. Ceramic PCBs are used in power modules, LED headlights, battery systems, charging equipment, sensors, and control electronics. The automotive market values thermal cycling reliability, process repeatability, and traceable production. A supplier with IATF 16949 capability and ceramic process knowledge can support automotive-related engineering teams more effectively.

Industrial automation, telecommunications, RF, microwave electronics, and new energy equipment also rely on ceramic PCB solutions. In these markets, ceramic boards can help manage high frequency, heat, insulation, and compact layout requirements. The exact material depends on the design. Alumina is often practical for many industrial and sensor products. Aluminum nitride is preferred when heat density is higher. LTCC can support compact RF and multilayer ceramic modules. DBC and AMB can support power electronics requiring thick copper and strong thermal behavior.

Ceramic PCB Manufacturer USA Serving | Alumina & AlN Boards

In brief, a qualified ceramic PCB manufacturer USA serving partner should provide more than ceramic substrates. The right supplier should help U.S. customers choose materials, review DFM, control quality, support documentation, manage delivery, and scale from prototype to production. EBest Circuit (Best Technology) provides ceramic PCB manufacturing, ceramic PCB assembly, and turnkey electronics manufacturing support for U.S. customers working in medical, aerospace, automotive, industrial, RF, power electronics, LED, and new energy applications. For ceramic PCB fabrication or assembly inquiries, contact sales@bestpcbs.com.

You may also like

Difference Between Inverter and Converter: Inverter vs Converter Explained

May 12th, 2026

The difference between inverter and converter is a common question in power electronics. People often search for it when they compare solar systems, RV power setups, UPS units, EV systems, battery storage, chargers, and industrial power products.

At first, the two words sound similar. Both devices handle electrical power. Also, both are used in modern electronic systems. However, they do not do the same job.

An inverter usually converts DC power into AC power. A converter is a broader device. It can change power from one form to another. For example, it may convert AC to DC, DC to DC, AC to AC, or DC to AC.

In simple terms, an inverter has a more specific role. A converter covers a wider group of power circuits.

This difference is useful to know. It affects product design, PCB layout, heat control, component choice, and PCBA testing. Therefore, engineers, buyers, and product teams should understand the basics before they choose or build a power device.

What Is the Difference Between Inverter and Converter?

The main difference between an inverter and a converter is the type of power change they perform.

An inverter converts DC power into AC power. DC means direct current. In DC power, the current flows in one direction. Batteries, solar panels, and many energy storage systems provide DC power.

AC means alternating current. In AC power, the current changes direction again and again. Homes, factories, grid systems, and many machines use AC power.

A converter changes electrical power from one form to another. It may change voltage level, current type, frequency, or waveform. Because of this, converter is a wider term.

Simple Explanation

Here is the easiest way to remember it:

An inverter usually changes DC to AC. A converter can change power in several ways.

For example, a solar panel produces DC power. However, most home appliances need AC power. Therefore, a solar system needs an inverter to run those appliances.

By comparison, a phone charger works in another way. It takes AC power from a wall outlet. Then, it converts that power into low-voltage DC power for the phone battery. So, the charger is a converter.

In short, the two devices are related. However, they are not the same in everyday use.

Inverter vs Converter: Quick Comparison Table

A table can make the difference easier to understand.

ItemInverterConverter
Basic FunctionConverts DC power to AC powerChanges power from one form to another
Common Power DirectionDC to ACAC to DC, DC to DC, AC to AC, or DC to AC
Typical InputBattery, solar panel, or DC busAC mains, battery, DC source, or another power stage
Typical OutputAC voltageAC or DC voltage
Common ApplicationsSolar inverter, UPS, RV inverter, EV inverter, motor driveCharger, adapter, power supply, DC-DC module, voltage converter
Key ComponentsMOSFET, IGBT, gate driver, transformer, capacitor, filterDiode, rectifier, regulator, transformer, inductor, capacitor, IC
PCB Design FocusHeat, high current, EMI, switching loopsVoltage stability, ripple control, isolation, efficiency
Common User Question“How do I turn battery power into AC power?”“How do I change voltage or current type?”

In short, an inverter has a clear DC-to-AC function. A converter, however, can describe many kinds of power conversion circuits.

What Is an Inverter?

An inverter is an electrical device that converts DC power into AC power.

This is important because many power sources provide DC power. Batteries, solar panels, fuel cells, and DC bus systems are common examples. However, many appliances and machines need AC power. Therefore, an inverter connects a DC source to an AC load.

Common Inverter Applications

Inverters are used in many products, such as:

  • Solar inverters
  • RV inverters
  • UPS inverters
  • EV traction inverters
  • Motor drive inverters
  • Battery energy storage inverters
  • Industrial frequency inverters
  • Portable power station inverters

For example, a battery energy storage system stores DC power. When the user needs AC output, the inverter changes that stored energy into usable AC power.

Main Inverter Components

Inside an inverter, power components switch very fast. These parts may include MOSFETs or IGBTs. The right choice depends on voltage, current, power level, and switching speed.

A control circuit sends signals to the switching parts. Then, filters help shape the output. As a result, the final AC output becomes suitable for the connected load.

From a PCB point of view, this fast switching needs careful design. The board must carry current safely. Also, it must move heat away from key components. In addition, it must reduce noise from high-speed switching.

What Is a Converter?

A converter is a power device that changes electrical power from one form to another.

The word “converter” is broad. In consumer products, it often means an adapter or charger. In power electronics, it may mean an AC-DC converter, DC-DC converter, AC-AC converter, or DC-AC converter.

Common Converter Types

Converter TypeFunctionExample
AC-DC ConverterConverts AC to DCPhone charger, power adapter, LED driver
DC-DC ConverterConverts one DC voltage to anotherBattery electronics, automotive modules
AC-AC ConverterChanges AC voltage or frequencyVoltage regulator, frequency control system
DC-AC ConverterConverts DC to ACInverter, solar inverter, UPS inverter

Because the term is broad, an inverter can technically be one type of converter. However, people usually use the two words differently.

In daily use, “inverter” often means DC-to-AC conversion. Meanwhile, “converter” often means AC-to-DC or DC-to-DC conversion.

Why Converters Matter

Converters are used almost everywhere in electronics. For instance, laptops, medical devices, communication systems, LED lighting, industrial controllers, and automotive modules all need power conversion.

A converter board may look small. Still, it can be complex. It needs stable output, low ripple, good feedback routing, and proper heat flow. Therefore, both circuit design and PCB layout matter.

How Does an Inverter Work?

An inverter works by switching DC power very quickly. Through this switching process, it creates an AC output waveform.

Most modern inverters use PWM, or pulse width modulation. PWM controls the width of electrical pulses. As a result, the circuit can shape the output waveform more accurately.

Basic Working Steps

A simple inverter process includes five steps:

  • DC input enters the circuit
    The input may come from a battery, solar panel, DC bus, or energy storage system.
  • Switching parts create pulses
    MOSFETs or IGBTs turn on and off at high speed.
  • The control circuit manages timing
    A driver and controller set the switching pattern, output frequency, and protection logic.
  • Filters improve the waveform
    Inductors, capacitors, and sometimes transformers reduce noise.
  • AC output powers the load
    Finally, the inverter supplies AC power to appliances, motors, or other equipment.

Why PCB Layout Is Important

Inverter circuits often handle high current. They also switch very fast. Therefore, the PCB layout must be clean and compact.

For example, long switching loops can increase noise. Poor heat paths can raise component temperature. In addition, weak grounding can affect waveform quality.

Because of this, inverter PCB design should consider current path, thermal relief, EMI control, creepage, clearance, and component placement from the beginning.

How Does a Converter Work?

A converter works by changing voltage level, current type, or power form. The exact method depends on the converter type.

Some converters use rectification. Others use switching, regulation, filtering, or transformers. In many power products, several methods work together.

AC-DC Converter

An AC-DC converter takes AC input and turns it into DC output.

First, a rectifier changes AC into pulsating DC. Then, capacitors and regulators smooth and control the output. As a result, the circuit provides a more stable DC voltage.

This type of converter is common in chargers, adapters, LED drivers, and power supplies.

DC-DC Converter

A DC-DC converter changes one DC voltage into another DC voltage. It may step voltage down. It may also step voltage up. In some designs, it can also provide isolation.

Common DC-DC converter types include:

  • Buck converter
  • Boost converter
  • Buck-boost converter
  • Flyback converter
  • Forward converter
  • LLC resonant converter

For example, an EV may use a DC-DC converter. It can reduce high battery voltage to a lower voltage for control electronics.

Converter PCB Design Needs

Converter PCB design often focuses on stable output. Therefore, engineers must check feedback routing, ripple control, grounding, magnetic component placement, and heat flow.

Even a small layout issue can affect output quality. So, early PCB review is helpful before production.

Power Inverter vs Power Converter: What Is the Difference?

A power inverter converts DC power into AC power. A power converter changes power form, voltage level, or current type.

The difference becomes clearer in real systems.

For example, a battery system may use both devices. The battery stores DC power. If the product needs AC output, it needs a power inverter. However, if the product needs a lower DC voltage for control circuits, it may need a DC-DC power converter.

Power Flow Matters

Instead of looking only at the product name, engineers should check the power flow.

Ask these questions:

  • What is the input voltage?
  • Is the input AC or DC?
  • What output voltage is needed?
  • Is the output AC or DC?
  • How much current is required?
  • Does the circuit need isolation?
  • How much heat will it produce?
  • What safety standards apply?

Once these points are clear, the right design choice becomes much easier.

RV Inverter vs Converter: What Is the Difference?

In RV power systems, an inverter and a converter usually do opposite jobs.

An RV inverter converts battery DC power into AC power. This allows users to run AC appliances when shore power is not available. For example, it may power a TV, laptop charger, coffee maker, or microwave, depending on its rating.

An RV converter usually converts AC shore power into DC power. It can charge the RV battery. It can also supply 12V DC loads. These loads may include lights, fans, control panels, and small DC devices.

Easy RV Explanation

The simple rule is:

An RV inverter helps the battery power AC devices. An RV converter helps AC power charge the battery and support DC loads.

Some RV systems use inverter-chargers. These units combine both functions. Therefore, they can convert DC to AC and also convert AC to DC for battery charging.

This is why many users feel confused. The product name may include inverter, converter, charger, or inverter-charger. However, the real difference depends on the power direction.

Converter vs Inverter vs Rectifier vs Transformer

Converter, inverter, rectifier, and transformer are related terms. However, they do different jobs.

TermBasic MeaningCommon Function
ConverterBroad power conversion deviceChanges voltage, current type, or power form
InverterDC-to-AC deviceConverts battery or DC bus power into AC
RectifierAC-to-DC circuitConverts AC into DC
TransformerMagnetic energy transfer deviceSteps AC voltage up or down and may provide isolation

Rectifier

A rectifier converts AC into DC. It is often used inside an AC-DC converter. After rectification, the circuit usually needs filtering and regulation.

Transformer

A transformer transfers energy through magnetic coupling. It can step AC voltage up or down. Also, it can provide isolation between circuits.

However, a transformer does not convert AC into DC by itself.

Converter

A converter may contain rectifiers, transformers, regulators, switching parts, control ICs, and filters. Therefore, it is the broadest term in this group.

A practical way to remember the difference is:

  • Rectifier: AC to DC
  • Inverter: DC to AC
  • Transformer: AC voltage change and isolation
  • Converter: broader power conversion system

Where Are Inverters and Converters Used?

Inverters and converters are used in many industries. Any product that needs charging, voltage matching, motor control, or stable power may use one or both.

Solar Energy Systems

Solar panels generate DC power. Therefore, solar systems use inverters to convert DC into AC for homes, businesses, or grid connection.

In addition, DC-DC converters may help with battery charging or power optimization.

Battery Energy Storage

Battery systems store DC power. However, many loads need AC power. As a result, energy storage systems often use both inverters and converters.

Electric Vehicles

EVs use traction inverters to drive motors. Also, they use DC-DC converters to power low-voltage electronics from the high-voltage battery pack.

UPS Systems

A UPS may include rectification, battery charging, DC storage, and inversion. Therefore, both converter and inverter functions may appear in one system.

Industrial Motor Control

Motor drives use inverter stages to control speed and torque. These systems require stable switching, strong heat control, and good EMI performance.

Medical and Communication Equipment

Medical devices need stable and low-noise power. Communication systems also need efficient DC-DC conversion. In both cases, reliability is very important.

How Do Inverter and Converter Differences Affect PCB and PCBA Design?

The function of an inverter or converter directly affects PCB design. It also affects material choice, copper thickness, component placement, heat control, and testing.

Inverter PCB Design Focus

For inverter PCB design, engineers often check:

  • High-current paths
  • Switching loops
  • MOSFET or IGBT placement
  • Gate driver routing
  • DC bus capacitor layout
  • EMI control
  • Creepage and clearance
  • Heat dissipation
  • Output filtering
  • Protection circuits

Because inverters switch high current at high speed, layout quality is very important. For example, poor routing can increase noise. Also, weak heat paths can shorten product life.

Converter PCB Design Focus

For converter PCB design, engineers usually focus on:

  • Voltage regulation
  • Feedback loop routing
  • Ripple reduction
  • Transformer or inductor placement
  • Isolation spacing
  • Grounding strategy
  • Component derating
  • Thermal vias
  • Output filtering
  • Efficiency

Although converter boards may be compact, they still need careful design. A noisy feedback trace can affect stability. Poor grounding can also reduce output quality. Therefore, layout review is useful before mass production.

PCBA Manufacturing Considerations

Both inverter and converter PCBAs need controlled manufacturing. For example, solder quality, component polarity, insulation spacing, copper thickness, and test coverage all matter.

In high-power products, the PCB is more than a base for parts. It is also part of the electrical and thermal system.

What Should Engineers Check Before Manufacturing Inverter or Converter PCBAs?

Before manufacturing an inverter or converter PCBA, engineers should review the full design. This includes electrical, thermal, mechanical, and process details.

Electrical Ratings

First, confirm the input voltage, output voltage, current, power level, surge condition, and load range. These ratings affect trace width, component choice, insulation spacing, and test method.

Copper Thickness and Current Path

High-current boards may need wider traces, heavy copper, copper pours, bus bar structures, or special thermal paths. Therefore, current path review should happen early.

PCB Material

Many control boards use FR4. However, high-power applications may need high-Tg FR4, heavy copper PCB, metal core PCB, or ceramic PCB.

The right choice depends on voltage, current, temperature, and product life requirements.

Creepage and Clearance

Power circuits need safe spacing between high-voltage areas. This is especially important for isolated designs, primary and secondary sides, and user-accessible products.

Thermal Management

MOSFETs, IGBTs, diodes, transformers, inductors, and resistors may generate heat. Therefore, the design may need thermal vias, copper planes, heat sinks, or enclosure contact areas.

EMI Control

Fast switching can create electromagnetic noise. To reduce EMI, engineers should use short loops, proper grounding, filtering, shielding, and careful component placement.

BOM and Component Supply

Power semiconductors, capacitors, magnetic parts, and control ICs should be checked for availability. In addition, approved alternatives can help reduce supply risk.

Assembly and Testing

Power boards may need AOI, X-ray, ICT, functional testing, burn-in testing, hipot testing, load testing, and thermal testing. As a result, the test plan should be confirmed before production.

For inverter PCBAs and converter PCBAs, EBest Circuit can support PCB fabrication, PCBA assembly, DFM review, BOM sourcing, component procurement, functional testing, and production-quality control. Our team supports power electronics projects for industrial control, energy systems, automotive electronics, medical devices, communication equipment, and other high-reliability applications.

In conclusion, the difference between inverter and converter becomes clear when you look at the power direction. An inverter usually converts DC to AC. A converter is a broader device. It can change electrical power in many ways, such as AC to DC, DC to DC, AC to AC, or DC to AC.

In practical systems, both may appear together. For example, solar energy systems, RV power systems, EVs, UPS units, industrial drives, and battery storage products may use both inverter and converter circuits. For engineers, this difference affects much more than product naming. It influences circuit design, PCB layout, material selection, heat control, component sourcing, assembly process, and testing strategy.

If your project involves inverter PCBAs, converter PCBAs, power supply boards, high-current control boards, or power electronics manufacturing, EBest Circuit can support the process from DFM review and PCB fabrication to BOM sourcing, SMT assembly, functional testing, and production delivery. For technical support or project evaluation, pls feel free to contact us via sales@bestpcbs.com.

FAQs About the Difference Between Inverter and Converter

What Is the Main Difference Between an Inverter and a Converter?

The main difference is the power direction. An inverter usually converts DC power into AC power. A converter changes electrical power from one form to another, such as AC to DC, DC to DC, AC to AC, or DC to AC.

Is an Inverter a Type of Converter?

Yes. Technically, an inverter can be seen as a type of converter because it changes DC power into AC power. However, in common use, “inverter” usually means DC-to-AC conversion, while “converter” often means AC-to-DC or DC-to-DC conversion.

What Is the Difference Between a Power Inverter and a Power Converter?

A power inverter converts DC input into AC output. A power converter may change voltage level, current type, or power form. For example, chargers, adapters, power supplies, and DC-DC modules are power converters.

What Is the Difference Between an RV Inverter and Converter?

An RV inverter uses battery DC power to supply AC appliances. An RV converter takes AC shore power and changes it into DC power for battery charging and 12V DC loads.

What Is the Difference Between Converter and Inverter and Rectifier?

A converter is a broad power conversion device. An inverter converts DC to AC. A rectifier converts AC to DC. In many power systems, rectifiers and inverters can both be parts of a larger converter system.

What Is the Difference Between Inverter and Frequency Converter?

An inverter converts DC power into AC power. A frequency converter changes the frequency of AC power, often for motor control. Many frequency converters include both rectifier and inverter stages inside the system.

Do Inverters and Converters Use the Same PCB Components?

They may share some parts. For example, both may use MOSFETs, capacitors, inductors, transformers, diodes, sensors, and control ICs. However, their PCB layout, heat design, feedback routing, and test needs may be different.

Can One Device Work as Both an Inverter and a Converter?

Yes. Some systems combine both functions. For example, an inverter-charger can convert DC battery power into AC output. It can also convert AC input into DC power for battery charging.

You may also like

Best 4K Modulator 4K: PCB, PCBA and Box Build Manufacturing Guide

May 12th, 2026

The keyword best 4K modulator 4K is often used by buyers who need a 4K HDMI, RF, QAM, ATSC, or SDI modulator. Many users want to compare finished products. However, OEM brands and electronics companies often care about something deeper. A stable 4K modulator depends on the circuit board inside. It also depends on PCBA quality, connector strength, power stability, testing, and box build assembly. Therefore, the real value is not only in the product name. It is also in how the product is built.

This guide explains 4K modulator products from a manufacturing view. It shows how PCB layout support, PCB fabrication, PCBA assembly, component sourcing, testing, and box build can affect product quality. At EBest Circuit, we do not sell finished 4K modulator products. Instead, we support companies that develop this type of equipment. Our services include PCB fabrication, PCB layout support, PCBA assembly, component sourcing, testing support, and box build assembly.

 best 4k modulator 4k

What Makes the Best 4K Modulator 4K Reliable from a PCB and PCBA Perspective?

A reliable 4K modulator must handle video signals, RF output, power circuits, and long working hours. Therefore, the PCB and PCBA must be made with care.

A good 4K modulator is not only about features. It also needs stable production. If the board is not built well, the final product may have signal loss, unstable output, or a shorter service life.

Key PCB and PCBA points include:

  • Controlled impedance PCB fabrication
  • Accurate SMT component placement
  • Strong HDMI, SDI, BNC, and RF connector soldering
  • Stable power circuit assembly
  • Good grounding support
  • Proper heat transfer for main ICs
  • Clear test points
  • Functional testing based on customer needs

For example, weak connector soldering may cause signal dropouts. Also, poor power assembly may cause random restarts. In addition, poor heat transfer may reduce product life.

As a result, OEM customers need more than a low-cost assembly supplier. They need a PCB and PCBA partner that understands high-speed and RF-related electronics.

How Does a Best HDMI 4K Modulator Work Inside the Circuit Board?

A best HDMI 4K modulator usually receives video through an HDMI input. Then, the circuit processes the signal. After that, it sends the signal out through RF, coaxial cable, QAM, ATSC, or another output format.

Although each product is different, many 4K HDMI modulators use similar circuit sections.

Circuit SectionMain Function
HDMI Input SectionReceives 4K video and audio signals
Video Processing SectionHandles video conversion or encoding
Clock SectionKeeps signal timing stable
RF Output SectionSends the signal through RF or coaxial output
Power SectionSupplies stable voltage to the board
Control SectionSupports buttons, display, firmware, or web control
Connector SectionIncludes HDMI, SDI, RF, Ethernet, USB, and power ports

From the outside, a 4K modulator box may look simple. However, the PCBA inside can be complex. It may include digital signals, RF signals, power circuits, and many connectors.

For this reason, clear production files are important. These files often include Gerber data, BOM, pick-and-place files, assembly drawings, impedance notes, test steps, and firmware loading needs.

In addition, if the product needs an enclosure, the customer should also provide box build drawings. Label files, cable routing notes, and packing details are also helpful.

What PCB Layout Requirements Matter in a Best 4K RF Modulator?

PCB layout is important in a best 4K RF modulator. However, this does not mean the PCB manufacturer must design the full RF product. In most OEM projects, the customer provides the circuit design.

After that, the manufacturer can support PCB layout review, DFM checks, PCB fabrication, and PCBA assembly.

For a 4K RF modulator, the PCB layout should help signals move cleanly across the board. It should also reduce noise, signal loss, and assembly risk.

Key layout points may include:

  • Controlled impedance routing
  • Short RF signal paths
  • Solid ground plane support
  • Clear spacing between RF, digital, and power areas
  • Correct HDMI, SDI, BNC, and RF connector footprints
  • Good via placement near RF paths
  • Enough space for heat-sensitive parts
  • Suitable test points for production checks
  • DFM-friendly pad sizes and solder mask openings

For example, HDMI differential pairs may need impedance control. Meanwhile, RF output traces need a stable reference plane. Also, connector areas should match the final enclosure.

Before PCB production, DFM review can help find possible issues. For instance, it can check pad size, spacing, solder mask clearance, via design, board edge clearance, and panelization.

As a result, customers can fix many problems before SMT assembly starts. This saves time. It also helps improve production quality.

Best 4K RF Modulator for Smart TV Distribution: What PCBA Features Support Stable Output?

Many users search for the best 4K RF modulator for smart TV distribution because they need to send video to many TVs. This is common in hotels, schools, hospitals, churches, gyms, malls, and meeting rooms.

In these systems, stable output matters more than fancy features. The device should provide clear video, stable audio, and reliable channel output.

A 4K RF modulator for TV distribution usually needs strong PCBA quality in several areas.

Key PCBA features include:

  • Stable RF output section assembly
  • Reliable HDMI or SDI connector soldering
  • Clean power circuit assembly
  • Accurate clock component placement
  • Good grounding and shielding support
  • Proper heat transfer around video processing ICs
  • Functional testing before shipment
  • Serial number tracking for production control

In addition, connector durability is very important. HDMI ports, RF connectors, BNC connectors, F-type connectors, Ethernet ports, and power jacks are used often. Therefore, solder quality and mechanical alignment should be checked carefully.

For OEM brands, one good prototype is not enough. Instead, they need repeatable production. Every unit should follow the same assembly and test standard.

Because of this, EBest Circuit supports prototypes, small-batch PCBA, and volume production. We can help with PCB fabrication, component sourcing, SMT assembly, DIP assembly, inspection, testing support, and box build assembly.

Best 4K RF Modulator Multichannel QAM ATSC Blade: What Makes the PCB Assembly More Complex?

The keyword best 4K RF modulator multichannel QAM ATSC blade points to a more professional product type. These products are often used in headend systems, hotel TV systems, hospital TV distribution, campus systems, and commercial AV networks.

Compared with a simple single-channel modulator, a multichannel QAM or ATSC blade is more complex. It may process several channels at the same time. Therefore, the PCBA must support more RF paths, more connectors, and more testing.

AreaManufacturing Focus
Multiple RF ChannelsBetter connector and RF path consistency
Dense ComponentsAccurate SMT placement and reflow control
Fine-Pitch ICsClean solder paste printing and inspection
Power SectionsStable assembly for several voltage rails
Thermal AreasCorrect thermal pad or heat sink assembly
Edge ConnectorsGood mechanical fit for system installation
TestingChannel-by-channel checks if required

In addition, these products may use BGA, QFN, fine-pitch ICs, high-speed memory, RF parts, and many connectors. Because of this, inspection becomes more important.

AOI can check part placement and visible solder joints. Also, X-ray inspection can help check hidden solder joints under BGA or QFN packages. Meanwhile, functional testing can confirm power-on status, firmware loading, communication, and output behavior.

For customers developing QAM, ATSC, blade-type, or rack-mounted 4K modulator products, EBest Circuit can support the full manufacturing flow. This includes PCB fabrication, PCBA assembly, inspection, testing support, and box build assembly.

How Are HDMI, SDI and RF Interfaces Supported in 4K Modulator PCBA Assembly?

HDMI, SDI, and RF interfaces are important parts of many 4K modulator PCBAs. They connect the device to media players, cameras, encoders, displays, coaxial networks, and AV systems.

From a manufacturing view, these interfaces need both electrical quality and mechanical strength.

HDMI interface assembly

HDMI ports carry high-speed video and audio signals. Therefore, the connector must be placed correctly. It also needs strong soldering.

In addition, nearby ESD protection parts, common mode chokes, capacitors, and related parts must match the customer’s BOM and assembly files. A small solder issue near the HDMI port may cause no signal or unstable display.

SDI interface assembly

SDI interfaces are common in broadcast, camera, and professional AV systems. They often use BNC connectors. Because these connectors face repeated cable use, solder strength and position accuracy matter.

Also, when HDMI and SDI exist on the same PCBA, the board may need more careful inspection. Final testing can help confirm that each input or output works as expected.

RF interface assembly

RF connectors, F-type connectors, coaxial connectors, and shield covers also need careful assembly. Good soldering, proper grounding, and correct shield installation can support stable output.

EBest Circuit follows customer assembly drawings, BOM files, connector specifications, and test instructions. In addition, we can help review DFM issues, such as wrong connector footprints, poor pad size, or difficult inspection access.

What Thermal and EMI Considerations Matter in 4K Modulator Box Build Assembly?

A 4K modulator box may run for long hours. It may also be installed inside an AV rack, control room, cabinet, or wall-mounted system. As a result, box build assembly must handle thermal and EMI-related details with care.

It is important to explain this clearly. EBest Circuit does not claim to provide full thermal design or EMI certification design for a finished 4K modulator product. However, we can support the customer’s approved drawings, materials, and assembly process.

Thermal-related assembly

Thermal parts must be installed correctly. For example, if a thermal pad is placed in the wrong position, heat transfer may be reduced. Also, if a heat sink is loose, the main IC may not cool properly.

Thermal-related box build steps may include:

  • Heat sink installation
  • Thermal pad placement
  • Fan or vent assembly if required
  • Screw torque control
  • Cable routing to avoid blocking airflow
  • Final visual inspection

EMI-related assembly

EMI-related parts also need careful handling. These parts may include shield covers, conductive gaskets, metal enclosures, grounding points, and internal cables.

During box build assembly, the manufacturer may need to check:

  • Shield cover position
  • Conductive gasket placement
  • Enclosure grounding contact
  • Connector alignment with the rear panel
  • Internal cable routing
  • Screw and bracket installation

In addition, box build may include label placement, LED light pipe assembly, button alignment, firmware loading, serial number tracking, final testing, and packaging.

Therefore, an integrated manufacturing partner can save time for OEM customers. It also helps keep the full build process more consistent.

Can PCB and PCBA Manufacturers Support 4K HDMI to RF Modulator OEM Projects?

Yes. A qualified PCB and PCBA manufacturer can support 4K HDMI to RF modulator OEM projects when the customer provides clear design files and production needs.

A turnkey manufacturing flow may include several steps.

1. Engineering file review

First, the manufacturer reviews Gerber files, BOM, pick-and-place files, assembly drawings, PCB stack-up, impedance notes, and panelization.

2. DFM review

Next, DFM review checks whether the board is easy and safe to manufacture. It may cover pad size, spacing, solder mask, via design, component supply, connector fit, and assembly risk.

3. PCB fabrication

After the review, PCB fabrication begins. A 4K modulator PCB may require multilayer construction, controlled impedance, ENIG surface finish, and stable process control.

4. Component sourcing

Then, components are sourced according to the BOM. These may include ICs, connectors, passives, crystals, inductors, RF-related parts, power parts, and mechanical items.

5. SMT and DIP assembly

Next, SMT assembly places small parts, ICs, QFN, BGA, and passives. In addition, DIP or manual soldering may be used for large connectors, transformers, inductors, or mechanical parts.

6. Inspection and test support

After assembly, AOI, X-ray, visual inspection, and first article inspection help check quality. Also, if the customer provides firmware and test steps, programming and functional testing can be supported.

7. Box build assembly

Finally, box build assembly may include enclosure assembly, cable connection, shield cover installation, thermal pad placement, label attachment, final inspection, and packaging.

As a result, customers can manage the full manufacturing process more easily. They can also reduce supplier communication time.

Why Choose EBest Circuit for 4K Modulator PCB, PCBA and Box Build Assembly?

EBest Circuit supports electronics companies that need PCB fabrication, PCBA assembly, component sourcing, testing support, and box build manufacturing.

For 4K modulator-related products, our value is not selling a finished branded modulator. Instead, we help customers build their own products with stable manufacturing quality.

Our support can include:

  • PCB layout optimization feedback
  • DFM review before production
  • Multilayer PCB fabrication
  • Controlled impedance PCB manufacturing
  • FR4, high-Tg FR4, metal core PCB, ceramic PCB, and RF-related laminate support
  • SMT assembly and through-hole assembly
  • Fine-pitch IC and connector assembly
  • Component sourcing and BOM optimization
  • AOI, X-ray, electrical test, and functional test support
  • Firmware programming based on customer instructions
  • Box build assembly
  • Prototype, small-batch, and mass production support

For 4K HDMI modulators, RF modulators, QAM/ATSC boards, SDI interface boards, commercial AV electronics, and smart TV distribution devices, stable manufacturing is very important. Therefore, each production step should be checked carefully.

With EBest Circuit, customers can receive support from PCB fabrication to PCBA assembly and box build. In addition, our team can help review production files, reduce assembly risk, source components, inspect quality, and support final product delivery.

Do you need PCB, PCBA, or box build support for your 4K modulator project? Pls feel free to send your Gerber files, BOM, or assembly requirements to sales@bestpcbs.com, and EBest Circuit will help you move from prototype to production with reliable manufacturing support.

FAQs About Best 4K Modulator 4K

1. What is a best 4K modulator 4K used for?

A best 4K modulator 4K is used to convert 4K video signals into formats that can be sent through RF, coaxial cable, QAM, ATSC, or other video distribution systems. It is often used in hotels, churches, schools, hospitals, commercial AV systems, and smart TV distribution projects.

For OEM brands, the product quality depends not only on the video function. It also depends on the PCB, PCBA assembly, connector quality, power stability, and final testing.

2. Can EBest Circuit manufacture PCB and PCBA for 4K modulators?

Yes. EBest Circuit can support 4K modulator-related projects with PCB fabrication, PCB layout support, PCBA assembly, component sourcing, testing support, and box build assembly.

We do not sell finished 4K modulator products. Instead, we help electronics companies manufacture the PCB, PCBA, and box build parts of their own products.

3. What files are needed for a 4K modulator PCBA project?

For a 4K modulator PCBA project, customers usually need to provide Gerber files, BOM, pick-and-place files, assembly drawings, PCB stack-up requirements, and test instructions.

If box build assembly is needed, enclosure drawings, cable routing notes, label files, firmware loading instructions, and packaging requirements are also helpful. As a result, the manufacturing process can move faster and more smoothly.

4. Why is PCBA quality important for a 4K HDMI to RF modulator?

PCBA quality affects signal stability, connector strength, power reliability, heat transfer, and product life. For example, poor HDMI or RF connector soldering may cause signal loss. Also, unstable power assembly may cause random restarts.

Therefore, a reliable 4K HDMI to RF modulator needs careful PCB fabrication, accurate SMT assembly, proper inspection, and functional testing before shipment.

You may also like

How to Use Solder Wick? What Is Solder Wick and Desoldering Braid

May 11th, 2026

How to use solder wick is an essential skill for anyone working with PCB repair, electronics prototyping, or soldering rework. A solder wick, also known as desoldering braid, helps remove excess solder from PCB pads, component leads, through-holes, and solder bridges with better control than many mechanical tools. Its significance lies in precision: when used correctly, it can clean the soldering area, protect delicate PCB pads, and make re-soldering or component replacement much easier.

This article explains what solder wick is, how desoldering braid works, and how to use it properly for clean and safe PCB desoldering.

At EBest Circuit (Best Technology), we support customers with professional PCB fabrication, PCB assembly, component sourcing, testing, and engineering-focused rework solutions for prototypes and mass production. With 20 years of manufacturing experience and strict quality control, our team understands how small soldering details can affect the reliability of the final electronic product. For PCB or PCBA project support, feel free to contact us at sales@bestpcbs.com.

how to use solder wick

What Is Solder Wick?

How to use solder wick is a common question for beginners, repair technicians, and electronics engineers who need to remove extra solder from PCB pads, component leads, or solder bridges. Solder wick, also called desoldering braid, is a thin braided copper strip used to absorb molten solder during PCB rework.

At first glance, it looks simple. It is just a flat copper braid rolled onto a small spool. But in real PCB repair, this small tool is very useful. When heated with a soldering iron, the copper braid pulls melted solder into its tiny woven gaps through capillary action. This helps clear old solder from pads, clean through-holes, fix excessive solder, and prepare the board for new components.

Most solder wick products are made from fine copper strands. Many versions also contain flux, which helps the solder flow more easily into the braid. Some products are rosin-based, while others are no-clean solder wick, which leaves less residue after rework.

In electronics assembly and repair, solder wick is often used for:

  • Removing solder from PCB pads after component removal
  • Cleaning SMT pads before placing a new chip
  • Fixing solder bridges between IC pins
  • Removing solder from plated through-holes
  • Preparing pads for rework, inspection, or re-soldering
  • Cleaning excess tin from connectors, resistors, capacitors, and small components

For PCB repair work, solder wick is one of the most basic but valuable tools. A good soldering iron, fresh flux, and the correct braid size can make desoldering cleaner, faster, and more controlled.

What Is Desoldering Braid and Is It the Same as Solder Wick?

Yes, desoldering braid and solder wick usually refer to the same product. Both describe a copper braided strip used for removing solder from a circuit board. Some engineers prefer the term “desoldering braid” because it describes the material structure. Others say “solder wick” because the braid “wicks” or draws solder away from the joint.

In daily use, these names are often interchangeable:

TermMeaning
Solder wickCommon name for copper braid used to absorb solder
Desoldering braidMore technical name for the same tool
Copper solder wickEmphasizes the copper material
No-clean solder wickBraid with no-clean flux
Wick solderingInformal phrase, usually referring to solder removal with wick

The key point is that solder wick is not used to add solder. It is used to remove solder. The phrase “wick soldering” can be a little confusing because it sounds like a soldering method. In most cases, users who search this phrase are looking for desoldering guidance, especially for PCB pads, IC pins, or through-hole components.

Compared with a desoldering pump, desoldering braid gives better control on small pads and surface-mount components. A pump works well for larger through-hole joints, while solder wick is better for fine-pitch areas, flat pad cleaning, and delicate rework.

For many repair benches, both tools are used together. The pump removes a large amount of solder quickly, and the braid cleans the remaining solder from the pad.

How Does Solder Wick Remove Solder?

Solder wick removes solder through capillary action. When the soldering iron heats the copper braid, heat transfers through the braid into the solder joint. Once the solder melts, it flows into the tiny spaces between the woven copper strands.

This is similar to how a paper towel absorbs water, but the process depends on heat, flux activity, and clean metal surfaces. The copper braid must be hot enough, the solder must be fully molten, and the flux must help reduce oxidation.

The basic structure works like this:

  • The copper braid sits on top of the solder.
  • The soldering iron heats the braid.
  • Heat passes from the iron to the solder joint.
  • The solder melts.
  • The molten solder flows into the braid.
  • The used braid section turns silver because it is filled with solder.

Flux plays a very important role here. Even if the solder wick already contains flux, adding a little extra liquid flux can improve the result. This is especially helpful when removing solder from old boards, oxidized pads, lead-free solder joints, ground pads, and high-copper PCB areas.

Lead-free solder usually needs more heat than leaded solder. It also tends to be less fluid, so removing solder with wick may feel slower. With fresh flux and a suitable soldering iron tip, the process becomes smoother.

For professional PCB repair, the goal is not only to remove solder. The goal is to remove solder without lifting pads, overheating traces, or damaging the solder mask. That is why technique matters.

How to Use Solder Wick Step by Step?

Learning how to use solder wick is simple, but clean results depend on temperature, flux, timing, and braid size. Below is a practical step-by-step method that works well for most PCB repair tasks.

Step 1: Choose the correct solder wick width

Solder wick comes in different widths. Small SMT pads need narrow braid. Large pads and through-hole joints need wider braid.

ApplicationSuggested Wick Width
Fine-pitch IC pins0.8–1.5 mm
Small SMT resistors and capacitors1.5–2.0 mm
General PCB pads2.0–2.5 mm
Through-hole pins and connectors2.5–3.5 mm
Large copper pads or ground areas3.5 mm or wider

Using a braid that is too wide can pull heat away from the joint and may disturb nearby components. Using one that is too narrow may take too long and require repeated heating.

Step 2: Add flux to the solder joint

Even if the braid has built-in flux, apply a small amount of liquid flux to the joint. Flux helps solder melt, flow, and transfer into the copper braid. This makes the work cleaner and reduces the time your iron stays on the pad.

Step 3: Place the solder wick on the solder

Lay the braid directly over the solder you want to remove. Keep it flat and steady. Avoid dragging it across the board surface.

The correct stack is:

PCB solder joint → solder wick → soldering iron tip

The braid should touch the solder joint, and the iron should touch the braid.

Step 4: Heat the braid with the soldering iron

Place the heated iron tip on top of the solder wick. Use gentle pressure. Do not press hard. The goal is heat transfer, not force.

After one or two seconds, the solder should melt and flow into the braid. You will see the braid section turn silver as it absorbs solder.

Step 5: Lift the iron and braid together

This is one of the most important details. Once the solder has been absorbed, lift the soldering iron and the solder wick at the same time. If you remove the iron first and leave the braid on the board, the solder can cool and stick the braid to the pad. Pulling it afterward may damage the pad.

Step 6: Cut off the used section

The silver-colored section is already filled with solder and should not be reused. Cut it off with cutters and continue with a fresh copper section.

Step 7: Inspect the pad

After removing solder with wick, inspect the pad under good lighting or magnification. The pad should look flat, clean, and ready for new solder. If there is flux residue, clean it with isopropyl alcohol when required.

This basic method works for many common repair tasks, including removing excess solder, fixing bridges, and preparing pads for replacement components.

How to Desolder Using Solder Wick Without Damaging PCB Pads?

PCB pads can be delicate, especially on small SMT boards, thin FR4 boards, flexible PCBs, and older assemblies. When using solder wick, the main concern is heat exposure. The braid absorbs solder, but it also absorbs heat. If the process takes too long, the pad adhesive can soften and the copper pad may lift.

To desolder using solder wick safely, focus on heat control and clean technique.

Use enough heat, but avoid long contact time

A common mistake is using too low a temperature. When the iron is not hot enough, the user keeps the tip on the board for too long. This can cause more damage than using a slightly higher temperature for a shorter time.

For many PCB repair tasks:

  • Leaded solder: around 300–350°C
  • Lead-free solder: around 330–380°C
  • Large copper areas: may need higher thermal capacity

The exact setting depends on the board, solder alloy, iron power, and tip size.

Use a suitable soldering iron tip

A very sharp tip may not transfer enough heat to the braid. A small chisel tip often works better because it has more contact area. Better heat transfer means shorter dwell time and cleaner solder removal.

Do not scrape the braid across the pad

Solder wick should be placed and lifted, not dragged. Dragging the braid can scratch the solder mask, disturb nearby components, or pull weak pads.

Add fresh solder when needed

This may sound unusual, but adding a small amount of fresh solder can help remove old solder. Fresh solder contains active flux and improves heat transfer. This is useful for old, dull, oxidized solder joints.

Work in short cycles

Instead of heating one pad for too long, work in short contact cycles. Add flux, heat briefly, lift, inspect, and repeat if needed.

Support the board

A stable PCB holder helps prevent slipping. This is especially useful for fine-pitch IC rework and small prototype boards.

When done correctly, desoldering braid can leave PCB pads smooth and ready for reliable soldering.

How to Use Solder Wick to Remove Solder from PCB Holes and Pads?

Removing solder from flat SMT pads is usually easier than clearing plated through-holes. Pads are open and visible, while holes can hold solder inside the barrel. Still, solder wick can be used effectively for both.

For SMT pads

After removing a surface-mount component, apply flux to the pads and place solder wick over them. Heat with the iron until the old solder flows into the braid. Use a clean section of wick for each area.

The result should be a flat pad surface. This is important for components like QFN, SOIC, SOT, capacitors, resistors, and small connectors. Flat pads help the new component sit evenly and reduce alignment problems.

For solder bridges between IC pins

Add flux across the bridged pins. Place a narrow solder wick along the bridge and touch it with the iron. The excess solder should flow into the braid. Remove the braid and inspect the pins under magnification.

For fine-pitch ICs, do not use wide wick. A narrow desoldering braid gives better control and helps avoid pulling solder from nearby good joints.

For through-hole pads

Place the solder wick on the solder side of the hole and heat it with the iron. If the solder does not fully come out, add fresh solder and flux, then try again. A desoldering pump may remove the bulk solder first, while solder wick cleans the remaining material around the hole.

For difficult holes, try these techniques:

  • Add flux directly to the hole area
  • Use fresh solder to improve thermal transfer
  • Heat from the solder side first
  • Use the correct iron tip size
  • Use a desoldering pump before finishing with wick
  • Avoid forcing component leads before the hole is clear

For large ground pads

Ground pads and thermal pads pull heat away quickly. Use a larger iron tip, more flux, and a suitable braid width. A preheater can also help on heavy copper boards, multilayer PCBs, and metal core PCBs.

Removing solder with wick is often easiest when the board is warm enough and the solder joint is fully active with flux.

How to Choose the Right Solder Wick Size for PCB Repair?

Choosing the correct solder wick size makes the work faster and safer. The braid should be close to the size of the solder area. It should not be much wider than the pad or pin group you are working on.

A small braid gives better control but absorbs less solder. A wide braid absorbs more solder but needs more heat and may affect nearby areas.

Here is a simple selection guide:

Solder Wick SizeBest ForNotes
0.8 mmVery fine IC pins, small SMT padsGood for precision work
1.5 mmSOIC, SOT, small componentsUseful for daily PCB repair
2.0 mmGeneral SMT pads and small through-holesBalanced option
2.5 mmMedium pads and connector pinsGood for more solder volume
3.0 mm+Large joints, ground pads, terminalsNeeds stronger heat transfer

Besides width, consider the flux type.

Rosin flux solder wick

Rosin-based wick is strong and effective. It works well for general rework, oxidized joints, and older boards. After use, cleaning may be needed depending on the product and assembly requirements.

No-clean solder wick

No-clean solder wick is designed to leave minimal residue. It is useful for production repair, electronics servicing, and boards where post-cleaning should be reduced. However, some no-clean residues may still be cleaned for high-reliability products.

Unfluxed copper braid

Some braid has little or no flux. It can work, but you usually need to add external flux. For most users, pre-fluxed solder wick is easier and more consistent.

For PCB repair, it is practical to keep two or three sizes on hand. A narrow braid for fine work, a medium braid for general pads, and a wider braid for connectors or through-hole joints will cover most needs.

What Is No-Clean Solder Wick and When Should You Use It?

No-clean solder wick is desoldering braid that contains no-clean flux. The purpose is to remove solder while leaving less visible or less active residue on the PCB. It is commonly used in electronics repair, prototyping, production touch-up, and field maintenance.

No-clean flux is designed so that its residue can often remain on the board under normal conditions. This makes the rework process faster, especially when cleaning access is limited.

No-clean solder wick is useful when:

  • You are repairing assembled PCBs with dense components
  • You want to reduce cleaning time
  • The board has areas that are difficult to wash
  • You are working on consumer electronics
  • You are doing quick SMT touch-up
  • You need clean visual results after removing solder

However, “no-clean” does not always mean “never clean.” For high-reliability applications, such as medical electronics, aerospace PCBA, automotive control boards, and harsh-environment products, cleaning and inspection may still be required. Residue control depends on the product standard, board design, operating environment, and customer requirements.

When using no-clean solder wick, the process is the same:

  • Place the wick on the solder.
  • Heat it with the iron.
  • Let solder flow into the braid.
  • Lift the braid and iron together.
  • Cut away the used section.
  • Inspect the pad.

If the solder does not flow well, add a compatible no-clean flux. This keeps the chemistry consistent and improves solder removal.

For general PCB repair, no-clean solder wick is a convenient choice. For demanding assemblies, always follow the cleaning and inspection requirements of the project.

What Common Mistakes Should You Avoid When Removing Solder With Wick?

Solder wick is easy to use, but a few small mistakes can affect the PCB repair result. Most issues come from poor heat transfer, not enough flux, or using the wrong braid size.

Using solder wick without enough flux

Flux helps solder flow into the braid. Without enough flux, the solder may stay dull, sticky, or slow to move. Adding a small amount of flux often improves the result immediately.

Using the wrong wick width

A wide braid on a small pad can overheat nearby components. A narrow braid on a large joint may take too long. Match the braid to the solder area.

Pressing too hard with the iron

Heavy pressure is not needed. It can damage pads, flatten components, or scratch the board. Let heat and capillary action do the work.

Keeping heat on the pad too long

Long heating time increases the risk of pad lifting, solder mask discoloration, and component stress. Short, controlled heating cycles are safer.

Removing the iron before removing the braid

If the braid cools while still touching the solder, it can stick to the pad. Always lift the iron and braid together.

Reusing the solder-filled braid

Once the braid turns silver, that section is full. Cut it off and use a fresh copper section.

Using an oxidized soldering iron tip

A dirty tip transfers heat poorly. Clean and tin the tip before using solder wick.

Trying to clear a large ground pad with a tiny iron

Large copper areas need more thermal energy. Use a larger tip, proper flux, and sometimes board preheating.

Avoiding these mistakes helps keep the PCB surface clean and protects the copper pads during repair.

In summary, solder wick is a simple tool, but it gives excellent control during PCB repair. It helps remove excess solder, clean pads, fix bridges, and prepare boards for rework. The best results come from using the right braid width, enough flux, a clean soldering iron tip, and short heating time.

For beginners, the process may take a few tries. Once the technique becomes familiar, removing solder with wick becomes one of the most reliable skills for PCB maintenance, prototyping, and electronic repair. Whether you call it solder wick, desoldering braid, or copper wick, the principle is the same: heat the braid, melt the solder, let the copper absorb it, and leave the PCB pad clean for the next step. If you need reliable PCB manufacturing, PCBA assembly, or engineering support for your next project, EBest Circuit is ready to help at sales@bestpcbs.com.

FAQs About How to Use Solder Wick

1. What is solder wick used for?
Solder wick is used to remove unwanted solder from PCB pads, through-holes, component leads, and solder bridges. It is especially useful for SMT repair and pad cleaning.

2. Is solder wick the same as desoldering braid?
Yes. Solder wick and desoldering braid usually mean the same thing. Both refer to copper braid used for absorbing molten solder.

3. How do you use solder wick correctly?
Place the solder wick over the solder, press a heated soldering iron tip on top of the braid, wait for the solder to melt and flow into the wick, then lift the iron and braid together.

4. Do I need flux when using solder wick?
Yes, flux is highly recommended. Many solder wick products already contain flux, but adding extra flux often gives cleaner and faster solder removal.

5. Why is my solder wick not absorbing solder?
Common reasons include low iron temperature, poor heat transfer, insufficient flux, oxidized solder, used-up braid, or a large copper area pulling heat away.

6. Can solder wick damage PCB pads?
It can if used with too much heat, long contact time, or dragging force. With proper flux, correct temperature, and gentle handling, it is safe for most PCB repair work.

7. What size solder wick should I use?
Use narrow braid for fine-pitch IC pins and small SMT pads. Use wider braid for through-hole pins, connectors, and larger pads.

8. Is no-clean solder wick better?
No-clean solder wick is convenient because it leaves less residue. It is a good choice for many repair jobs, but high-reliability boards may still need cleaning and inspection.

9. Can I use solder wick for through-hole components?
Yes. It can remove solder from through-hole pads, but a desoldering pump may be faster for large joints. Many technicians use a pump first and solder wick for final cleanup.

You may also like

HDMI RF Modulator Box PCBA Guide: RF PCB Design, Assembly & Testing

May 11th, 2026

An HDMI RF modulator box looks simple from the outside. A user connects an HDMI source. Then the box sends the signal through a coaxial cable to a TV. However, the inside of the box is not simple. It needs a stable PCB, clean HDMI routing, strong RF output, and reliable PCBA assembly. It also needs good testing before shipment. For OEM brands, AV product companies, security system suppliers, and electronics manufacturers, this product is more than a converter. It is a mixed-signal electronic device. It combines HDMI, RF, power control, firmware, connectors, and enclosure assembly.

This guide explains the product from a PCB and PCBA manufacturing view. It also shows what buyers should check before prototype or mass production.

What Is an HDMI RF Modulator Box in PCB and PCBA Manufacturing?

An HDMI RF modulator box converts an HDMI signal into an RF signal. After that, the RF signal travels through a coaxial cable. A TV or RF distribution system can then receive the signal.

People often use this box with media players, cameras, DVRs, laptops, set-top boxes, and signage players. However, manufacturers need to look deeper. The real performance comes from the circuit board inside.

A typical PCBA may include:

  • HDMI input circuit
  • HDMI receiver chip
  • Video processing IC
  • RF modulator chipset
  • Clock circuit
  • Power management circuit
  • Coaxial RF output connector
  • MCU or control processor
  • Buttons or display
  • Shielding parts
  • Test points

Each part has a clear job. The HDMI section receives the video signal. The processing section prepares the data. The RF section changes the signal into an RF channel. Then the coaxial output sends it to the cable.

Therefore, this type of product needs careful PCB design. It also needs accurate assembly and complete testing.

How Does an HDMI to RF Modulator Box Work at the Circuit Level?

An HDMI to RF modulator box follows a clear signal path.

  • First, the HDMI input receives video and audio data. HDMI uses high-speed signals. So the PCB must keep these traces short and balanced.
  • Next, the video processing circuit handles the signal. This area may include processors, memory, clocks, and firmware-controlled chips. It needs clean power and stable timing.
  • Then, the RF modulator circuit changes the signal into an RF channel. This part needs strong layout control. For example, trace width, ground design, filters, and connector placement can affect RF quality.
  • Finally, the coaxial output sends the signal to the cable. Many TV coaxial systems use 75-ohm impedance. So the PCB should keep the RF path stable.

Good circuit design is important. However, production quality also matters. Wrong parts, weak solder joints, or poor connector alignment can still cause problems. For this reason, the PCBA process must be controlled well.

What PCB Design Issues Affect an RF Modulator with HDMI Box?

An RF modulator with HDMI box has both digital and RF circuits. This makes PCB design more sensitive.

  • First, HDMI traces need controlled impedance. The PCB stack-up affects this result. Copper thickness, dielectric thickness, trace width, and trace spacing all matter.
  • Second, the RF section needs a strong ground path. A clean ground helps reduce noise. It also helps the RF output stay stable.
  • Third, the PCB must control EMI. HDMI and RF circuits can both create noise. Therefore, engineers should plan filtering, shielding, and grounding early.
  • Fourth, the board needs clean power. Different chips may need different voltage rails. In addition, RF circuits often need low-noise power. A stable power design helps the box work better.
  • Finally, heat control matters. Many boxes are small. As a result, heat can build up inside the enclosure. Engineers can improve this with copper areas, thermal vias, and better component spacing.

A good PCBA manufacturer can review these points before production. This step helps reduce design changes later.

Why Does Signal Integrity Matter in an HDMI RF Modulator Box PCBA?

Signal integrity affects the real user experience. If the signal is poor, users may see image flicker, black screens, weak audio, or unstable channels.

In the HDMI section, engineers must control trace length, impedance, and spacing. They should also add proper ESD protection. These details help the box work with different HDMI sources.

In the RF section, the signal path should stay short and smooth. The layout should also keep a solid ground reference. Even small layout changes can affect output level and channel quality.

Clock circuits also need care. HDMI processing and RF modulation both need accurate timing. Therefore, oscillator placement and power filtering are important.

Assembly quality also affects signal performance. The manufacturer should control solder paste printing, component placement, reflow profile, and connector soldering.

However, visual inspection is not enough. The test team should also check HDMI input, RF output, audio, video, and channel settings. As a result, the final PCBA can perform better in real use.

What PCB Materials Are Used for a 4K HDMI RF Modulator Box?

A 4K HDMI RF modulator box handles more data than a basic model. It may also create more heat. Therefore, material choice matters.

Many designs use high-quality FR4. This material works well for many commercial HDMI and RF products. It also helps control cost.

However, some designs need better RF performance. In that case, engineers may choose low-loss RF materials. These materials reduce signal loss and offer better stability at higher frequencies.

Some products may also use a hybrid stack-up. For example, the main digital area may use FR4. The RF area may use a higher-grade RF laminate. This method can balance cost and performance.

When choosing PCB material, engineers should check:

  • HDMI signal speed
  • RF output frequency
  • Modulation standard
  • Board layer count
  • Impedance control
  • Heat control
  • Product size
  • Target cost
  • Production volume
  • Reliability needs

In addition, surface finish matters. ENIG, OSP, and other finishes suit different projects. The best option depends on soldering needs, shelf life, connector design, and budget.

Before production, the customer should discuss the material with the PCB manufacturer. This helps confirm that the board can support both performance and stable production.

How Does an HDMI RF Modulator Coax Converter Box Handle RF Output?

An HDMI RF modulator coax converter box sends the final signal through a coaxial cable. This output section affects signal quality directly.

The RF output path usually includes the modulator circuit, filters, matching parts, and coaxial connector. These parts work together to control the final output.

Most TV coaxial systems use 75-ohm impedance. Therefore, the RF path should support this target where needed. The trace should also stay short and well grounded.

The connector also matters. Many products use F-type connectors. The connector must fit both the PCB and the enclosure. If it does not align well, it may stress the solder joints.

During box-build assembly, the manufacturer should check connector position, shell fit, screw holes, labels, and grounding. These checks help the final box feel solid and work well.

Useful production tests include:

  • HDMI input test
  • RF output test
  • Channel setting test
  • Video display test
  • Audio output test
  • Connector inspection
  • Coax output stability test
  • Sample aging test

As a result, the finished product can work better in homes, hotels, schools, security systems, and AV networks.

What Is the Difference Between HDMI to ATSC RF Modulator Box and HDMI to QAM RF Modulator Box?

An HDMI to ATSC RF modulator box and an HDMI to QAM RF modulator box both convert HDMI into RF. However, they serve different systems.

ATSC often supports digital TV broadcasting in North America. An HDMI to ATSC RF modulator box can create an ATSC-compatible RF channel. TVs that support ATSC can receive that channel.

QAM often appears in cable TV systems. An HDMI to QAM RF modulator box suits hotels, apartments, hospitals, campuses, and other multi-TV systems.

From a PCBA view, both products share similar sections. They need HDMI input, signal processing, RF modulation, power control, firmware, and coaxial output.

However, the chipset may differ. The firmware may also differ. In addition, the test method and output standard may change.

Before production, the customer should confirm:

  • Target market
  • TV standard
  • Output channel plan
  • Chipset solution
  • Firmware process
  • RF output level
  • Test method
  • Certification needs

Also, the BOM must stay clear and accurate. A wrong oscillator, filter, or RF part can affect performance. Therefore, careful BOM control helps keep each batch consistent.

How Are 4 Channel and 8 Channel HDMI to RF Modulator Box PCBAs Manufactured?

A 4 channel or 8 channel HDMI to RF modulator box is more complex than a single-channel model. It handles several HDMI inputs in one system.

Because of this, the PCB layout becomes denser. The power design also becomes more important. In addition, the enclosure must manage more heat.

For multi-channel products, engineers may use more PCB layers. A simple board may use 4 layers. However, a dense design may need 6 layers or more. More layers help with routing, grounding, and power distribution.

The BOM also needs strong control. Multi-channel boards use more HDMI connectors, processors, RF parts, clocks, filters, and passive parts. Therefore, the sourcing team must check part quality and delivery time.

During SMT assembly, accuracy is very important. Fine-pitch ICs, HDMI connectors, and small RF parts need stable process control.

Testing must also cover every channel. A board may power on, but one channel may fail. Therefore, the test plan should check each HDMI input and each RF output.

In addition, the box-build process should support heat control. The manufacturer may need thermal pads, vents, or metal housing contact.

For commercial AV products, this level of control brings better field performance. It also helps reduce installation issues.

How to Choose a PCBA Manufacturer for HDMI RF Modulator Box Production?

Choosing a PCBA manufacturer for this product takes more than price comparison. The project needs PCB knowledge, RF experience, sourcing ability, assembly control, and test support.

A good manufacturer should review the design before production. The review should cover PCB stack-up, impedance, RF layout, connector position, thermal design, and test points.

In addition, the manufacturer should support both PCB fabrication and PCBA assembly. This can reduce communication gaps. It also helps solve problems faster.

For this type of project, a suitable PCBA partner should support:

  • DFM review
  • PCB stack-up review
  • Controlled impedance PCB fabrication
  • RF PCB manufacturing
  • Component sourcing
  • BOM optimization
  • SMT assembly
  • Through-hole assembly
  • HDMI connector assembly
  • RF connector assembly
  • AOI inspection
  • X-ray inspection when needed
  • Functional testing
  • RF output test support
  • Firmware loading
  • Box-build assembly
  • Final inspection and packing

EBest Circuit supports PCB fabrication, PCBA assembly, component sourcing, testing, and box-build assembly. The engineering team can also review Gerber files, BOM, assembly drawings, and test needs before production.

For RF and mixed-signal products, early review brings clear value. It helps improve manufacturability. It also helps reduce sourcing risk. Most importantly, it supports a smoother move from prototype to mass production.

To sum up, an HDMI RF modulator box depends on the PCB and PCBA inside. The outer shell matters, but the circuit board decides the real performance.

The design must handle HDMI signals, RF output, power stability, EMI control, heat, firmware, connectors, and enclosure fit. Therefore, OEMs should involve the PCBA manufacturer early.

With proper DFM review, controlled PCB fabrication, reliable sourcing, accurate assembly, and complete testing, the product can move from prototype to mass production more smoothly.

EBest Circuit supports PCB fabrication, PCBA assembly, component sourcing, RF-related assembly, testing, and box-build manufacturing for HDMI RF modulator box PCBA projects. For project review or quotation, please send Gerber files, BOM, and technical requirements to sales@bestpcbs.com.

FAQs About HDMI RF Modulator Box PCBA

What does an HDMI RF modulator box do?
It converts HDMI video and audio into an RF signal. Then the signal travels through coaxial cable to a TV or distribution system.

Is an HDMI RF modulator box only for home users?
No. Many OEM brands and AV product companies use this type of product for hotels, schools, security systems, and commercial TV networks.

Why does PCB design matter in this product?
PCB design affects HDMI quality, RF output, EMI control, heat control, and reliability. Therefore, layout quality has a direct effect on performance.

Can a 4K HDMI RF modulator box use FR4 PCB material?
Yes. Many designs can use FR4 when the stack-up and layout are well controlled. However, some RF designs may need low-loss materials.

What files are needed for PCBA quotation?
You can send Gerber files, BOM, pick-and-place file, schematic, assembly drawing, test plan, enclosure drawing, and order quantity.

Does this product need RF testing?
Yes. RF testing helps confirm output level, channel stability, and signal quality. Functional testing should also check HDMI input, video, audio, and settings.

Are 4 channel and 8 channel models harder to build?
Yes. They need better routing, stronger power design, more heat control, and full channel testing.

Can one manufacturer handle PCB, PCBA, and box-build assembly?
Yes. A one-stop manufacturer can support PCB fabrication, sourcing, SMT assembly, testing, enclosure assembly, labeling, and packing.

You may also like

What is Silkscreen on PCB? Clear Marking for Better Assembly

May 8th, 2026

What Is Silkscreen on PCB?

Silkscreen on PCB is the printed layer of text, symbols, logos, reference designators, polarity marks, test points, warning signs, and revision information placed on the surface of a printed circuit board. It does not conduct electricity. Its main job is to help people read, assemble, test, repair, and trace the board more easily.

On most circuit boards, the silkscreen is the white text you see on top of a green solder mask. However, it can also be black, yellow, gray, or another color depending on the PCB surface color and manufacturing process.

What Is Silkscreen on PCB?

What Is the Main Purpose of PCB Silkscreen?

The main purpose of PCB silkscreen is to make the board easier to identify, assemble, inspect, test, and maintain. It gives visible information to people working with the board during production and after the product enters the field.

A good silkscreen design usually includes component names, polarity marks, Pin 1 indicators, connector labels, test point numbers, warning text, board revision, and company logo. These small details can make a large difference during real production.

Common uses include:

  • Identifying resistors, capacitors, ICs, diodes, connectors, and switches
  • Showing polarity for LEDs, diodes, electrolytic capacitors, and batteries
  • Marking Pin 1 on ICs, headers, flat cables, and connectors
  • Labeling test points for ICT, flying probe, or functional testing
  • Adding board name, part number, revision, date code, or QR code
  • Warning users about high voltage, hot surfaces, ESD-sensitive zones, or orientation requirements
  • Supporting repair and field maintenance

What Information Should Be Included on a PCB Silkscreen?

A useful PCB silkscreen should include only the information that helps assembly, testing, inspection, traceability, and maintenance. The goal is not to print everything possible. The goal is to print the right information in the right place.

For simple boards, it is common to include every reference designator, such as R1, C1, U1, D1, and J1. For high-density boards, space may be limited, so designers should prioritize information that prevents mistakes.

The most important silkscreen items usually include:

Silkscreen ItemExample
Reference designatorR12, C8, U3, J1
Polarity mark+, -, cathode line
Pin 1 markDot, triangle, “1”
Connector labelUSB, VIN, OUT, CANH
Test point labelTP1, GND, 3V3, RESET
Board revisionREV A, V1.2
Manufacturing codeDate code, lot number
QR code or serial numberProduct ID, batch ID
Warning markHIGH VOLTAGE, HOT
Logo or brand nameEBest, customer logo

For many products, the highest-priority marks are polarity, Pin 1, connector direction, test points, and board revision. These markings are closely tied to assembly accuracy and maintenance efficiency.

What Is the Difference Between Silkscreen and Solder Mask?

Silkscreen and solder mask are different PCB layers. Solder mask is a protective coating that covers copper and helps control soldering. Silkscreen is a printed marking layer used for text, symbols, logos, and identification.

The solder mask is usually the colored background, such as green, black, blue, red, or white. The silkscreen is the printed legend on top of that surface.

Silkscreen vs Solder Mask

For high-reliability electronics, such as medical devices, industrial controls, aerospace modules, automotive boards, and communication equipment, both layers should be reviewed carefully during DFM checking.

What Are the Standard PCB Silkscreen Design Rules?

Standard PCB silkscreen design rules focus on readability, manufacturability, and clearance. The markings should be large enough to read, thick enough to print, and far enough from pads, exposed copper, and component bodies.

A common mistake is designing silkscreen text that looks clear in CAD software but becomes too small after fabrication. Another common issue is placing text too close to solder pads. During CAM processing, the PCB factory may clip or remove part of the silkscreen to avoid pad contamination.

The following table gives practical reference values for standard PCB projects.

Design ItemRecommended ValueBetter Practice
Text height≥1.0 mm / 40 mil1.27 mm / 50 mil
Stroke width≥0.15 mm / 6 mil0.18–0.20 mm / 7–8 mil
Clearance to solder pad≥0.15 mm / 6 mil≥0.20 mm / 8 mil
Clearance to exposed copper≥0.15 mm / 6 mil≥0.20 mm / 8 mil
Hollow text height≥1.5 mm / 60 mil≥2.0 mm / 80 mil
Hollow text stroke≥0.20 mm / 8 mil≥0.25 mm / 10 mil
QR code sizeDepends on data amountConfirm with manufacturer
Bottom textMirrored in layoutVerify in Gerber viewer

These values are practical for many standard FR4 boards. However, each PCB manufacturer may have different process capability. Fine-pitch HDI boards, ceramic PCBs, metal core PCBs, and high-frequency boards may need a separate review.

What Is the Minimum Text Size for Silkscreen on PCB?

For a reliable and readable PCB silkscreen, a text height of at least 1.0 mm and a stroke width of at least 0.15 mm are commonly recommended. If the board has enough space, larger text is better for manual inspection, testing, and repair.

Here is a useful conversion table for PCB silkscreen design:

Metric SizeApprox. Imperial SizeCommon Use
0.15 mm5.9 milMinimum practical stroke width
0.18 mm7.1 milMore stable stroke width
0.20 mm7.9 milBetter for normal production
0.80 mm31.5 milSmall text, limited readability
1.00 mm39.4 milStandard readable text height
1.27 mm50.0 milBetter manual readability
1.50 mm59.1 milGood for labels and warnings
2.00 mm78.7 milGood for connectors or safety text

Can Silkscreen Be Printed Over Pads, Vias, or Copper?

Silkscreen should not be printed over solder pads, exposed copper, gold fingers, test pads, or solderable via areas. If the marking overlaps these areas, the factory may remove it during CAM processing. In some cases, poor placement can also affect appearance or assembly readability.

Silkscreen ink is usually non-conductive, but that does not mean it should be placed anywhere. Pads and exposed copper need clean surfaces for soldering, testing, or electrical contact. When silk markings are too close to these areas, the result may be missing text, cut letters, or unclear symbols.

Designers should pay extra attention to these areas:

  • SMT pads
  • Through-hole pads
  • Test points
  • Exposed copper zones
  • Gold fingers
  • Castellated holes
  • Thermal pads
  • High-current terminals
  • RF launch areas
  • Fine-pitch IC footprints

What Are Common PCB Silkscreen Mistakes?

Common PCB silkscreen mistakes include using text that is too small, placing marks under components, printing over pads, forgetting polarity marks, using unclear symbols, and failing to check bottom-side mirroring.

The most common PCB silkscreen mistake including:

What Are Common PCB Silkscreen Mistakes?

What Colors Are Common for PCB Silkscreen?

White is the most common PCB silkscreen color because it gives strong contrast on green, red, blue, and black solder masks. Black silkscreen is common on white solder mask or light-colored boards. Yellow, gray, and other colors may be available depending on the manufacturer.

Color is not only an appearance choice. It affects readability. For example, white text on a green solder mask is easy to read, black text on a white solder mask also gives good contrast. Gray text on a black board may look stylish, but it may be less readable during repair or inspection.

Common color combinations include:

Solder Mask ColorCommon Silkscreen ColorReadability
GreenWhiteExcellent
BlueWhiteExcellent
RedWhiteGood
BlackWhiteGood
WhiteBlackExcellent
YellowBlackGood
Matte blackWhite or light grayGood
Transparent / no maskDepends on copper finishRequires review

If the PCB will go through conformal coating, potting, cleaning, or harsh field use, confirm whether the marking remains visible after the final process. The best silkscreen design considers the full product lifecycle, not only the bare board.

How Can a PCB Manufacturer Improve Silkscreen Quality?

A reliable PCB manufacturer improves silkscreen quality through DFM review, proper printing process selection, CAM checking, readable text control, and clear communication before production. The best result comes from both good design and disciplined manufacturing.

Silkscreen quality depends on several factors:

  • Ink type
  • Printing method
  • Solder mask surface
  • Character size
  • Stroke width
  • Board material
  • Surface finish
  • Curing process
  • CAM clearance rules
  • Operator and equipment control

For standard PCBs, traditional silkscreen printing is often sufficient. For dense layouts, QR codes, small text, or high-end appearance, direct legend printing, inkjet printing, or laser marking may be a better option.

EBest Circuit supports PCB fabrication, PCBA assembly, component sourcing, testing, and engineering review for prototype and production projects. For silkscreen-related issues, our team can help check text size, polarity marks, Pin 1 indicators, reference designators, QR code areas, and manufacturing readability before production starts.
How Do You Design Better Silkscreen for High-Density PCBs?

For high-density PCBs, silkscreen should be selective, not crowded. When there is not enough room, keep only the markings that prevent assembly mistakes and support testing. Other information can be moved to the assembly drawing or digital documentation.

A better priority order is:

  • Pin 1 marks for ICs and connectors
  • Polarity marks for LEDs, diodes, capacitors, and battery connectors
  • Test point labels for production and repair
  • Connector function labels
  • Board revision and traceability marks
  • Selected reference designators for important components
  • Logo and non-essential graphics

For very small boards, use simple but clear symbols. A small dot for Pin 1, a cathode bar for diode orientation, or a “+” mark for positive polarity can be more valuable than long text.

pcb silkscreen design rules

How Should You Work With a Manufacturer on PCB Silkscreen?

To get a clean silkscreen result, provide complete manufacturing files and ask the PCB manufacturer to review the marking layer before fabrication. This is especially important for dense boards, double-sided assembly, QR code marking, medical electronics, industrial products, and high-reliability applications.

Send these files when possible:

  • Gerber files
  • Drill file
  • PCB stackup
  • Assembly drawing
  • BOM
  • Pick-and-place file
  • Special marking requirements
  • QR code or serial number rule
  • Preferred silkscreen color
  • Any customer logo file
  • Required board revision format

Before production, confirm these points:

  • Is the text size manufacturable?
  • Is the stroke width stable?
  • Is the silkscreen clear from pads and exposed copper?
  • Are Pin 1 and polarity marks visible after assembly?
  • Will the QR code scan after printing?
  • Is the board revision correct?
  • Is bottom-side text mirrored correctly?
  • Will coating, cleaning, or final assembly hide any marks?

For customers who need PCB fabrication and assembly together, EBest Circuit can review silkscreen together with component placement, BOM, test access, and assembly process. This helps prevent small marking issues from becoming production delays.

FAQs About Silkscreen on PCB

1. Is silkscreen on PCB necessary?
Yes, it is highly useful. A PCB can work electrically without silkscreen, but clear markings make assembly, testing, inspection, repair, and traceability much easier. For production boards, it is strongly recommended.

2. Does PCB silkscreen affect circuit performance?
In normal designs, it does not affect electrical performance because the ink is non-conductive. Still, it should be kept away from solder pads, exposed copper, RF-sensitive areas, high-voltage clearances, and test contact areas.

3. What is the best font size for PCB silkscreen?
A practical choice is at least 1.0 mm text height with 0.15 mm stroke width. If the board has enough space, 1.27 mm text height and 0.18–0.20 mm stroke width offer better readability.

4. Can I print a logo on PCB silkscreen?
Yes. Logos are commonly printed on PCB silkscreen. The logo should meet minimum line width and spacing rules. It should also avoid pads, exposed copper, QR codes, and important technical markings.

5. Can silkscreen include QR codes or serial numbers?
Yes. QR codes, serial numbers, lot codes, and product IDs can be added to support traceability. For small or high-density codes, laser marking or high-resolution printing may be more reliable than standard silkscreen.

6. Why did some silkscreen text disappear after PCB production?
The most common reason is that the text overlapped pads, vias, exposed copper, or restricted areas. During CAM processing, the factory may remove part of the marking to protect solderability and manufacturing quality.

7. What is the difference between PCB silkscreen and PCB legend?
They usually refer to the same idea. “Silkscreen” often describes the printed marking process, while “legend” refers to the text and symbols shown on the PCB surface.

8. Which silkscreen color is best for PCB?
White is the most common choice because it works well on green, blue, red, and black solder masks. Black is better for white solder mask. The best color is the one that gives strong contrast and stable readability.

Conclusion

Silkscreen on PCB may look like a small detail, but it has a practical role in the full product lifecycle. It helps assemblers place components correctly, helps testers find signals quickly, helps repair teams locate parts, and helps manufacturers support traceability.

EBest Circuit provides PCB fabrication, PCBA assembly, component sourcing, DFM review, and testing support for prototype and mass production projects. If your PCB needs clear silkscreen, reliable assembly, and traceable production, send your Gerber and BOM files to our team for review.
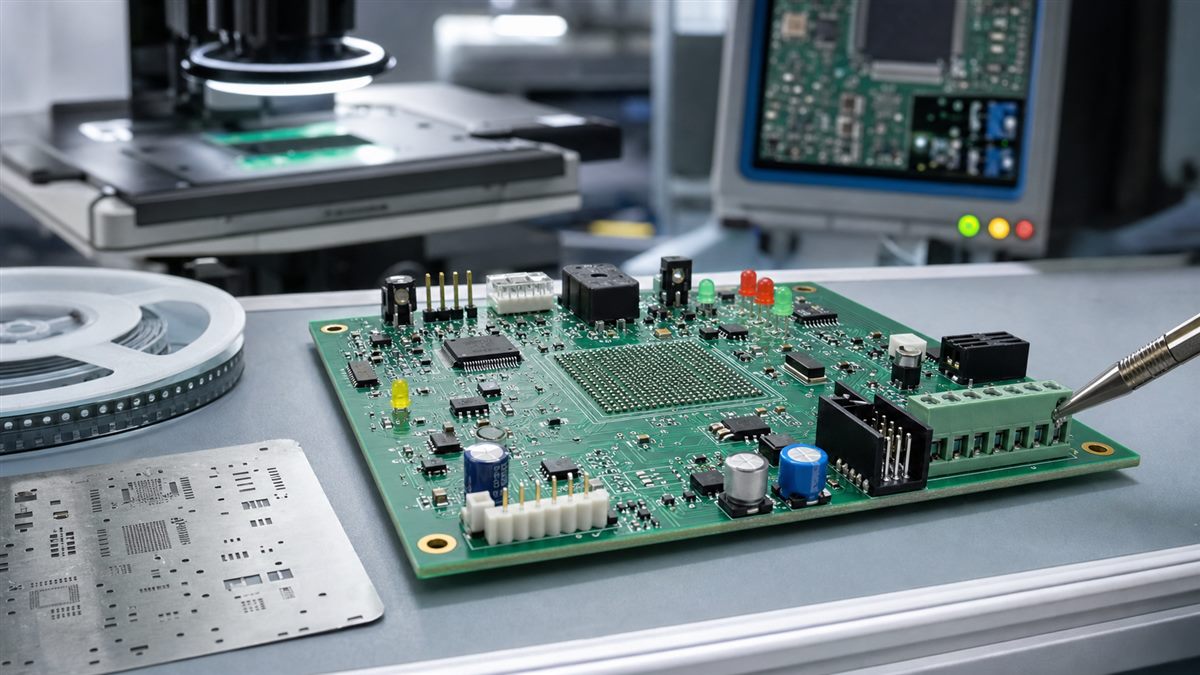
Contact EBest Circuit: sales@bestpcbs.com

You may also like