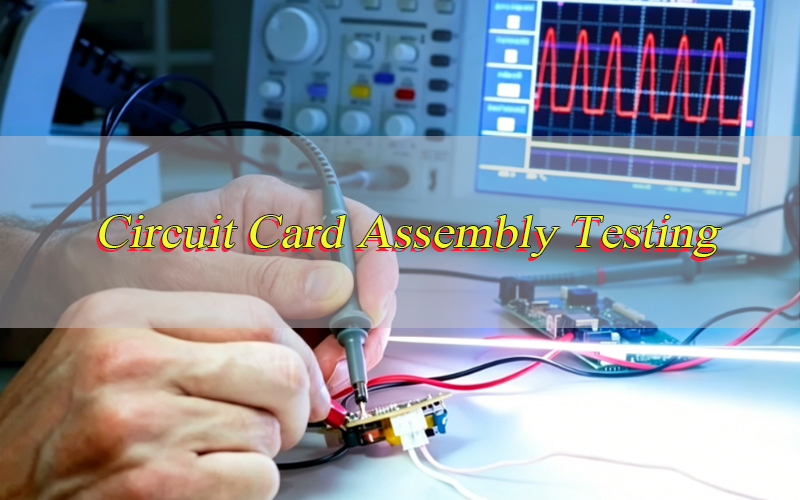
If your manufacturing line relies on consistent, reliable circuit card assemblies, how do you ensure each unit meets the standards your operations demand? How do you leverage circuit card assembly testing to choose the right approach and avoid costly rework, delays, and product failures?
Circuit card assembly testing is essential for consistent production, and navigating its many methods, equipment and requirements can be overwhelming. This guide helps you choose the right testing methods for your manufacturing needs, detect defects early, and maintain high-quality output.
What Is Circuit Card Assembly Testing and How Does It Work?
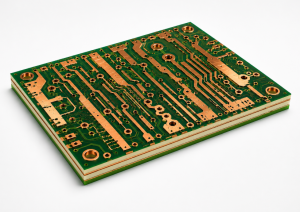
Circuit card assembly testing is a straightforward process designed to confirm that assembled circuit boards work as they should. It ensures each board meets the design requirements set for it and is free of any defects that could affect its performance or how long it lasts. Without this testing, even small issues can lead to bigger problems down the line, from product failures to wasted time and money.
At its core, this testing checks two key things: the physical condition of the assembly and its electrical functionality. It verifies that every component, from resistors and capacitors to solder joints and connections, is in the right place and working properly. This dual check helps catch both obvious surface issues and hidden problems that might not be visible to the naked eye.
The process itself is simple: controlled inputs are applied to the circuit card, and the outputs are measured and compared to predefined standards. Depending on the needs of the production run, testing methods can vary; some are automated for fast, high-volume testing, while others are more flexible for small batches or prototypes. The end goal is always the same: to catch issues early and ensure consistent, reliable quality.
Why Is Circuit Card Assembly Testing Critical for Product Quality and Reliability?
Circuit card assembly testing is critical for product quality and reliability. It safeguards electronic product performance and longevity, catches defects early to avoid faulty units, reduce rework costs and delays, ensures design compliance, and enhances long-term reliability while protecting brand trust.
- Prevents Defective Products from Reaching Customers Unchecked defects in circuit card assemblies can lead to product failures, customer complaints, and reputational damage. Testing ensures only fully functional units leave the manufacturing line, protecting brand trust and reducing returns.
- Reduces Rework and Production Costs Catching defects early in the manufacturing process is far less expensive than fixing them after assembly or after delivery. Testing eliminates the need for costly rework, scrap, and replacement parts, improving overall production efficiency.
- Ensures Compliance with Design Specifications Circuit card assemblies must meet strict design requirements to work with other system components. Testing verifies that each assembly aligns with electrical, mechanical, and performance standards, preventing compatibility issues.
- Enhances Long-Term Reliability Defects like poor solder joints or component misalignment may not cause immediate failure but can lead to premature breakdowns in the field. Testing identifies these hidden issues, ensuring assemblies perform consistently over their intended lifespan.
- Minimizes Production Delays Unplanned rework or product recalls due to untested defects can halt production lines and delay deliveries. Consistent testing streamlines the manufacturing process, keeping operations on schedule and meeting customer deadlines.
What Are the Main Types of Circuit Card Assembly Testing Methods Available?
Choosing the right circuit card assembly testing method depends on factors like production volume, assembly complexity, and testing goals. Each method has unique strengths, designed to address specific testing needs from fast, automated checks for high-volume runs to flexible, fixtureless options for prototypes and complex assemblies. Below is a breakdown of the most common methods, their key features, and ideal use cases.
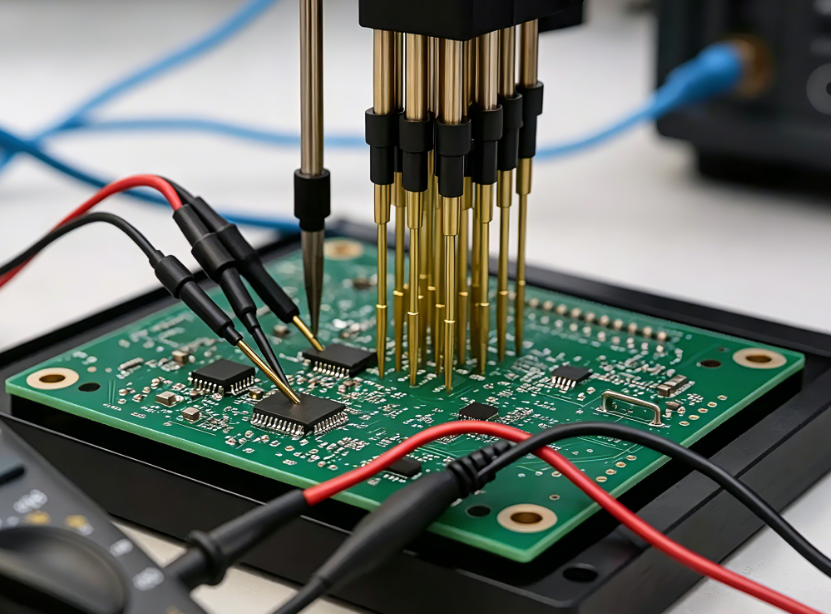
- In-Circuit Testing (ICT) A popular method for high-volume production, ICT uses a bed-of-nails fixture to test individual components and connections on the circuit card assembly. It checks for component values, solder shorts, open circuits, and incorrect part placements. This method delivers fast, accurate results for mass-produced units.
- Flying Probe Testing A flexible, fixtureless method ideal for low-volume production, prototypes, or complex assemblies. Flying probe testers use movable probes to access test points, eliminating the need for custom fixtures. This approach works well for quick turnaround and design iterations.
- Functional Testing Verifies that the entire circuit card assembly operates as intended in real-world conditions. It applies inputs similar to those the assembly will encounter in use and measures outputs to ensure performance meets design standards. This type of testing is critical for validating end-to-end functionality.
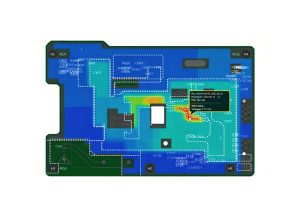
- Automated Optical Inspection (AOI) Uses high-resolution cameras and image analysis to check the physical appearance of the circuit card assembly. It detects surface defects like missing components, misaligned parts, solder bridging, and poor solder joints. AOI is often used as a first-pass test in production.
- X-Ray Inspection Used for hidden defects that are invisible to the naked eye or AOI. Examples include internal solder joints in ball grid arrays (BGAs) or quad flat packages (QFPs). X-ray testing penetrates the assembly to check for voids, cold solder joints, and component misalignment.
How Do Flying Probe Testing and In-Circuit Testing Differ in Circuit Card Assembly Testing?
| Feature | Flying Probe Testing | In-Circuit Testing |
| Fixture Requirement | No custom fixture needed; uses movable probes to access test points | Requires a custom bed-of-nails fixture tailored to the specific circuit card assembly |
| Production Volume Suitability | Ideal for low-volume production, prototypes, and design iterations | Optimized for high-volume production, where fixture costs are offset by fast testing speeds |
| Testing Speed | Slower than ICT, as probes move to each test point individually | Fast, with simultaneous testing of multiple points via the bed-of-nails fixture |
| Complexity Handling | Excels with complex assemblies, fine-pitch components, and tight test point spacing | May struggle with very complex assemblies or limited test point access |
| Cost | Lower upfront costs (no fixture), but higher per-unit testing costs for high volumes | Higher upfront costs (fixture design and fabrication), but lower per-unit costs for high volumes |
| Turnaround Time | Fast setup with no fixture, ideal for quick prototyping and small batches | Longer setup time due to fixture design and installation, better for consistent high-volume runs |
What Common Defects Can Circuit Card Assembly Testing Detect?
Circuit card assembly testing plays a vital role in identifying a range of common defects that can arise during manufacturing, from visible surface issues to hidden flaws that may cause premature failure. These defects, which can stem from soldering mishaps, component placement errors, or material issues, can compromise the assembly’s functionality if left undetected. Below is a detailed breakdown of the most frequent defects and how testing methods uncover them.
- Open Circuits: Breaks in the circuit path that prevent electrical current from flowing. These are often caused by poor solder joints, broken traces, or component lead issues. Continuity tests in ICT, flying probe testing, or functional testing can detect them.
- Solder Shorts: Unintended electrical connections between two or more circuit points. These are typically caused by excess solder or solder bridging. AOI and X-ray testing are effective for identifying surface and hidden solder shorts.
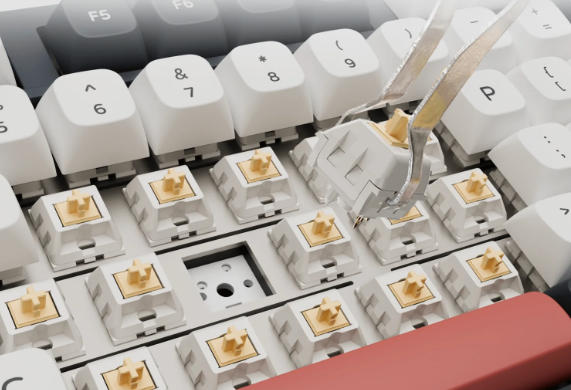
- Missing Components: Components that are not placed on the circuit card assembly during manufacturing. AOI and visual inspection (manual or automated) quickly detect missing resistors, capacitors, integrated circuits, and other parts.
- Misplaced Components: Components placed in the wrong location or orientation, which can render the assembly nonfunctional. AOI and ICT verify component placement against design specifications.
- Incorrect Component Values: Components with values that do not match the design. An example is a 1k resistor instead of a 10k resistor. ICT and functional testing measure component values to ensure accuracy.
- Cold Solder Joints: Solder joints that do not form a proper bond with the component lead and circuit pad. These can lead to intermittent connections or complete failure. X-ray testing and functional testing can detect these hidden defects.
- Component Damage: Physical damage to components such as cracked chips or bent leads. It also includes damage from electrostatic discharge (ESD) during manufacturing. AOI and visual inspection identify visible damage, while functional testing uncovers performance issues from hidden damage.
When Should You Perform Circuit Card Assembly Testing in the Manufacturing Process?
Circuit card assembly testing must be timed strategically throughout the manufacturing process to maximize effectiveness and minimize costs. The right testing timing ensures defects are caught early, rework is reduced, and final products meet quality standards. Below is a breakdown of key stages to perform testing, aligned with production workflows to keep operations efficient and reliable.
- After Component Placement and Soldering: The first critical testing point is immediately after components are placed and soldered. This step catches surface-level defects like missing components, misplacement, and solder shorts early. It prevents additional assembly steps from increasing rework costs.
- After Rework or Repair: Any time a circuit card assembly is reworked or repaired, testing is essential. It ensures the repair was successful and no new defects were introduced. This prevents faulty repaired units from moving forward in production.
- Before Final Assembly: Testing before the circuit card assembly is integrated into the final product ensures it functions correctly with other system components. This step avoids costly disassembly if the assembly is defective.
- Before Shipping: A final test before shipping confirms that the circuit card assembly meets all performance and quality standards. This is the last line of defense against defective products reaching customers.
- During Prototype Development: Testing during prototype development helps validate the design. It identifies potential issues and allows for adjustments before mass production. This reduces the risk of costly design changes later in the process.
What Equipment Is Needed for Effective Circuit Card Assembly Testing?
Effective circuit card assembly testing relies on the right tools and equipment, tailored to your testing methods and production needs. The right equipment ensures accurate, efficient defect detection, whether for high-volume automated testing or flexible low-volume checks. Below is a breakdown of essential equipment and its role in reliable testing processes.
- In-Circuit Test Fixtures: Custom bed-of-nails fixtures designed to match the test points of the specific circuit card assembly. These fixtures connect the assembly to the ICT machine for fast, automated testing.
- Flying Probe Testers: Automated machines with movable probes that access test points without a custom fixture. They include high-precision motors and sensors to ensure accurate probe placement.
- AOI Machines: High-resolution cameras, lighting systems, and image analysis software to detect physical defects. Advanced models include 3D capabilities for better detection of solder joint issues.
- X-Ray Inspection Systems: X-ray sources and detectors to visualize internal components and solder joints. These systems are essential for testing BGAs, QFPs, and other components with hidden connections.
- Functional Test Benches: Custom setups that simulate real-world operating conditions for the circuit card assembly. They include signal generators, power supplies, and measurement tools to verify performance.
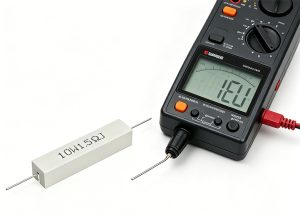
- Continuity Testers: Handheld or automated tools to check for open circuits and short circuits. These are useful for quick spot checks and manual testing of small batches.
How to Choose the Right Circuit Card Assembly Testing Service for Your Project?
Selecting the right service for circuit card assembly testing is key to ensuring accurate results, timely turnaround, and alignment with your project goals. With varying service capabilities and expertise, it’s critical to focus on factors that match your assembly type and production needs. Below are key considerations to guide your service selection process.
- Verify Experience with Your Assembly Type: Look for services with a track record of testing similar circuit card assemblies. This includes experience with the same complexity, component types, and industry applications. It ensures they understand the unique challenges of your project.
- Check Equipment Capabilities: Ensure the service has the right equipment for your testing needs. This could be ICT for high volume, flying probe testing for prototypes, or X-ray testing for complex components. Outdated equipment may miss defects or slow down testing.
- Review Quality Control Processes: Ask about the service’s quality control measures. This includes test protocols, defect reporting, and rework procedures. A reliable service will have clear processes to ensure accurate, consistent results.
- Evaluate Turnaround Time: Match the service’s turnaround time to your production schedule. For high-volume production, choose a service with fast automated testing. For prototypes, prioritize flexibility and quick setup.
- Compare Pricing Structures: Understand how the service prices its testing. This includes upfront costs, per-unit fees, and any additional charges for rework or rush orders. Choose a service that fits your budget without compromising quality.
- Check Compliance with Industry Standards: Ensure the service follows relevant industry standards for circuit card assembly testing. This guarantees the results are reliable and meet regulatory requirements.
What Are the Cost Factors of Circuit Card Assembly Testing?
Understanding the cost factors of circuit card assembly testing helps you budget effectively and optimize spending without compromising quality. Costs vary based on equipment, volume, complexity, and other key variables. Below is a breakdown of the main factors that influence testing costs and how they impact your production budget.
- Equipment Costs: Purchasing or leasing testing equipment such as ICT machines or flying probe testers is a significant upfront expense. For small to mid-sized operations, outsourcing testing may be more cost-effective than buying equipment.
- Fixture Costs: Custom bed-of-nails fixtures for ICT can be expensive, especially for complex circuit card assemblies. Fixture costs are a one-time expense but can add up for multiple assembly designs.
- Labor Costs: Manual testing or operating automated equipment requires trained personnel, adding to labor expenses. Automated testing reduces labor costs for high-volume production but requires initial training.
- Testing Volume: Per-unit testing costs decrease with higher volumes. Fixed costs such as equipment and fixtures are spread across more units. Low-volume testing often has higher per-unit costs due to setup time and equipment idle time.
- Complexity of the Assembly: More complex circuit card assemblies require more advanced testing methods. Examples include those with fine-pitch components, BGAs, or multiple layers. These assemblies increase testing costs.
- Rework and Retesting Costs: Defects found during testing require rework and retesting, adding to overall costs. Early defect detection reduces these expenses by minimizing rework.
Why Do Some Circuit Card Assemblies Fail Even After Testing?
Even with thorough circuit card assembly testing, some assemblies may still fail in the field; often due to hidden issues or oversights in the testing process. Identifying these root causes helps improve testing protocols and reduce future failures. Below are the most common reasons assemblies fail after testing and how to address them.
- Intermittent Defects: Some defects only appear under specific conditions. These include temperature changes, vibration, or varying voltage that are not simulated during testing. These intermittent issues can go undetected until the assembly is in use.
- Inadequate Testing Coverage: Testing may not cover all possible failure points. This is especially true if the test protocol is incomplete or does not align with the assembly’s design requirements. It leaves hidden defects unaddressed.
- Component Degradation: Components may degrade during storage or transportation after testing, leading to failure. This is common with sensitive components like capacitors or integrated circuits that are susceptible to environmental factors.
- Human Error: Mistakes during testing can lead to faulty units being approved. Examples include incorrect test settings, misalignment of probes, or misinterpretation of results. Proper training and quality control reduce this risk.
- Design Flaws: Testing verifies that the assembly meets design specifications, but it cannot fix inherent design flaws. If the design is flawed, the assembly may fail even if it passes all tests.
- Post-Testing Damage: The circuit card assembly may be damaged during handling, packaging, or shipping after testing. This leads to failure. Proper handling and packaging protocols are essential to prevent this.
How Can You Optimize Circuit Card Assembly Testing for High-Volume Production?
Optimizing circuit card assembly testing for high-volume production balances speed, accuracy, and cost-efficiency; this is critical for meeting large-scale production demands. The right strategies streamline testing workflows, reduce bottlenecks, and maintain consistent quality. Below are actionable steps to optimize testing for high-volume manufacturing.
- Use Automated Testing Methods: ICT and automated functional testing are designed for high-volume production. They reduce testing time and improve consistency. These methods eliminate human error and handle large batches efficiently.
- Integrate Testing into the Production Line: Embed testing stations directly into the manufacturing line. This catches defects early and avoids bottlenecks. It streamlines the process and reduces the time between assembly and testing.
- Optimize Test Protocols: Review and refine test protocols to focus on critical failure points. This reduces testing time without compromising quality. Remove redundant tests that do not add value.
- Implement Predictive Maintenance for Testing Equipment: Regular maintenance of testing equipment ensures it operates at peak efficiency. It reduces downtime and prevents false test results. Predictive maintenance identifies potential equipment issues before they cause delays.
- Train Personnel on Automated Systems: Ensure staff are trained to operate and maintain automated testing equipment. This reduces errors and maximizes productivity. Well-trained personnel can also troubleshoot issues quickly.
- Use Data Analytics to Identify Trends: Collect and analyze testing data to identify recurring defects, bottlenecks, or equipment issues. This allows for proactive adjustments to the manufacturing or testing process, reducing failures and improving efficiency.
What Industry Standards Should Circuit Card Assembly Testing Comply With?
Circuit card assembly testing must comply with industry standards to ensure reliability, safety, and compatibility, especially for regulated sectors. These standards set criteria for testing protocols, defect acceptability, and equipment use. Below is a breakdown of key standards and their role in ensuring high-quality testing results.
- IPC-A-610: The industry standard for acceptability of electronic assemblies, including circuit card assemblies. It provides criteria for evaluating solder joints, component placement, and overall assembly quality.
- IPC-7095: Focuses on the design and assembly of ball grid array (BGA) components. It includes testing requirements for BGAs and other area array packages.
- ISO 9001: A quality management system standard that includes requirements for testing and quality control in manufacturing. Compliance ensures consistent testing processes and reliable results.
- IEC 61169: Covers the testing of electronic components and assemblies. It includes methods for verifying electrical performance and reliability.
- MIL-STD-810: A military standard that outlines environmental testing requirements for circuit card assemblies used in harsh conditions. Examples include temperature, vibration, and humidity. Compliance is critical for aerospace and defense applications.
- UL 94: A safety standard for flammability of plastic materials used in circuit card assemblies. Testing ensures the assembly meets fire safety requirements for consumer and industrial products.
FAQs About Circuit Card Assembly Testing
Q1: Can circuit card assembly testing be skipped for low-volume production?
A1: No, circuit card assembly testing should not be skipped for low-volume production. Even small batches can contain defects that lead to product failure, customer complaints, or costly rework. Flying probe testing is a cost-effective option for low-volume runs, providing flexibility without the need for custom fixtures.
Q2: How long does circuit card assembly testing take for high-volume production?
A2: The time required for circuit card assembly testing depends on the method and assembly complexity. ICT can test a single assembly in seconds, making it ideal for high-volume production. For complex assemblies with multiple test points, testing may take a few minutes per unit, but automated systems can handle hundreds or thousands of units per hour.
Q3: Is X-ray testing necessary for all circuit card assemblies?
A3: X-ray testing is not necessary for all circuit card assemblies. It is most critical for assemblies with hidden components such as BGAs or QFPs where solder joints cannot be inspected visually or with AOI. Simple assemblies with through-hole components may not require X-ray testing.
Q4: Can circuit card assembly testing detect electrostatic discharge (ESD) damage?
A4: Yes, circuit card assembly testing can detect ESD damage. Functional testing will uncover performance issues caused by ESD, while AOI may identify visible damage to components. Some testing methods also include ESD simulation to verify the assembly’s resistance to electrostatic discharge.
Q5: How often should testing equipment be calibrated for circuit card assembly testing?
A5: Testing equipment should be calibrated regularly to ensure accurate results. The frequency depends on the equipment type and manufacturer recommendations, but most equipment requires calibration every 6 to 12 months. High-volume production may require more frequent calibration to maintain consistency.