

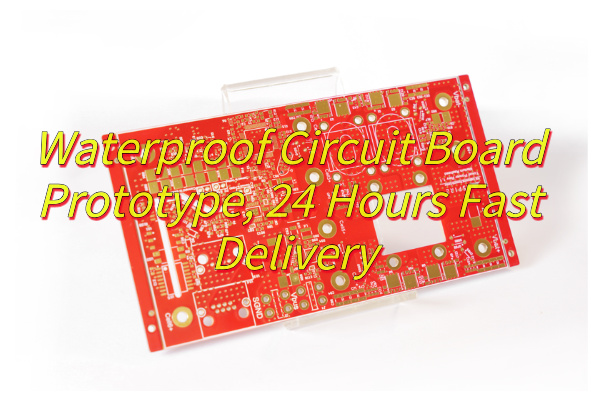
Struggling with waterproof circuit board failures in harsh environments? This guide covers prototyping essentials from material selection to cost-performance optimization for reliable waterproof PCBs.
- Waiting for samples for a long time? – 24-hour lightning delivery, 5 times faster than peers
- Waterproof does not meet the standard? – Triple protection process, 72-hour salt spray test zero failure
- Small batch cost is high? – Shared engineering fee model, free mold opening fee within 5 pieces
- Mass production conversion is difficult? – Use the same equipment and process for mass production, yield deviation <0.5%
EBest Circuit (Best Technology) provide
- Ultra-fast sample service – 24-hour ultra-fast delivery process, tracking the whole process from document confirmation to finished product shipment
- Full process support – Nano-level three-proof paint spraying process, passed IP68 waterproof test
- Intelligent detection system – Automatic optical inspection (AOI) + manual re-inspection double insurance, first sample pass rate 99.2%
- Full process support – Free DFM analysis + engineering confirmation to ensure the design is successful at the first time
Let every waterproof circuit board withstand the test of extreme environments! Contact us now: sales@bestpcbs.com.
What Is Waterproof Circuit Board?
A waterproof circuit board is a printed circuit board engineered to resist water, moisture, and other liquids, preventing damage such as electrical shorts, corrosion, or component failure. Often essential in environments like outdoor electronics, marine systems, or medical devices, it ensures electronics operate reliably despite exposure to wet conditions.
Achieving this involves protective methods, for example, applying conformal coatings—thin protective films made from materials like silicone or acrylic—that cover components to repel water. Alternatively, potting compounds encapsulate the entire board in a solid barrier, while design features such as sealed enclosures or gaskets enhance resistance. These approaches help maintain functionality in demanding applications, from automotive sensors to industrial controls.
How to Waterproof Circuit Board?
Here’s how to waterproof circuit boards:
Apply Conformal Coating
- Use a silicone, polyurethane, or parylene coating to create a thin, protective layer. These materials resist moisture, chemicals, and temperature extremes.
- Ensure even coverage on components, solder joints, and exposed traces. Mask connectors or ports before coating to prevent adhesion issues.
Use Encapsulation Resins
- For harsh environments, fully encapsulate the PCB in epoxy or polyurethane resin. This provides mechanical protection and prevents water ingress.
- Prioritize low-viscosity resins to avoid air bubbles, which can weaken the seal.
Design with Waterproof Enclosures
- House the PCB in a sealed enclosure made of aluminum, stainless steel, or high-temperature plastic (e.g., PPS or PEEK).
- Use gaskets (e.g., silicone or fluorosilicone) and compression fittings to maintain IP67/IP68 ratings.
Seal Connectors and Ports
- Use potting compounds (e.g., epoxy or RTV silicone) around cable entries to prevent water wicking.
- Install waterproof connectors with O-rings or heat-shrink tubing for external interfaces.
Optimize Component Selection
- Choose components with IP67+ ratings (e.g., sealed switches, LEDs with diffused lenses).
- Avoid electrolytic capacitors or exposed metal contacts in humid environments.
Implement Ventilation Solutions
- Add hydrophobic membranes (e.g., Gore-Tex) to enclosures to equalize pressure while blocking moisture.
- Position vents away from direct spray or immersion zones.
Test for Reliability
- Conduct IP water immersion tests (e.g., 30 minutes at 1m depth) and thermal cycling (-40°C to 85°C) to validate sealing.
- Use dye penetration tests to identify microscopic leaks in coatings or enclosures.
What Are the Best Practices for Applying Waterproof Paint to Circuit Boards?
- Clean the Board Thoroughly: Use isopropyl alcohol (99% purity) and a soft-bristle brush to scrub away flux residues, dust, and oils. Wipe with lint-free cloths and allow full evaporation (15–30 minutes) before proceeding.
- Apply Conformal Coating Precisely: Select silicone for flexibility or polyurethane for chemical resistance. Use a spray gun (for large boards) or dipping tank (for small batches). Apply two thin layers (25–50 microns each), avoiding puddles. Cure at 60–80°C for 1 hour if using heat-activated coatings.
- Encapsulate High-Risk Components: For boards exposed to submersion, fill enclosures with epoxy resin. Use a vacuum chamber to eliminate bubbles during curing. Leave 2–3mm gaps near walls to allow thermal expansion.
- Seal Enclosures with Custom Gaskets: Mold silicone gaskets to fit irregular edges. Use O-rings for cylindrical joints. Coat gaskets lightly with silicone grease to prevent sticking while maintaining seal integrity.
- Choose IP68-Rated Connectors: Replace standard connectors with models featuring double seals and overmolded cables. Test connections by submerging in 1m-deep water for 24 hours.
- Elevate Components Strategically: Raise capacitors and microcontrollers by 0.5–1mm using adhesive spacers. This prevents water pooling near solder joints during condensation.
- Validate with Rigorous Testing: Inspect coatings quarterly using a 10x loupe. Reapply paint to worn areas with a fine-tipped brush. Replace gaskets annually if operating in saltwater environments.
How to Prevent Water Damage to Sensitive Components on Waterproof PCBs?
- Apply Brush-On Silicone Coating to Critical Zones: Manually coat ICs, connectors, and exposed traces with silicone conformal paint. Reapply every 12 months in humid environments to maintain barrier integrity.
- Use Capillary Underfill for BGA/QFN Chips: Inject epoxy underfill between BGA solder balls to block water paths. Cure at 120°C for 90 seconds to lock components and reduce thermal fatigue.
- Elevate Sensors with 1mm Adhesive Standoffs: Mount moisture-sensitive parts (e.g., MEMs) on 1mm-thick polyimide spacers. Prevents condensation pooling near solder joints during temperature shifts.
- Seal Edge Connectors with Polyurethane Gaskets: Fit 0.5mm-thick polyurethane seals around card-edge connectors. Pair with gold-plated contacts to resist saltwater corrosion in marine applications.
- Treat RF Components with Fluoropolymer Spray: Apply hydrophobic fluoropolymer coating to antennas and sensors. Maintains signal quality while repelling water droplets in rainy conditions.
- Design 3° Drainage Angle in Enclosures: Tilt PCBs slightly inside waterproof cases to direct water toward vents. Avoids pooling near low-profile components like capacitors.
- Test with 95% RH Accelerated Aging: Run prototypes at 60°C/95% RH for 1000 hours while monitoring failures. Identify delamination points or corroded traces before mass production.
How to Improve the Water Resistance of Waterproof PCBs in High-Temperature Environments?
Here are practical strategies to enhance the water resistance of waterproof PCBs in high-temperature environments:
Select High-Temperature-Resistant Conformal Coatings
- Use silicone or polyurethane-based coatings instead of acrylics, as they withstand temperatures up to 200°C without cracking or delamination.
- Apply coatings in a two-layer system: a primer for adhesion and a topcoat for abrasion resistance.
Optimize PCB Substrate Material
- Choose ceramic or high-Tg FR-4 substrates (Tg ≥ 170°C) to minimize thermal expansion, which can cause solder joint fatigue or coating cracks.
- Avoid halogen-free laminates, as they may soften at elevated temperatures.
Reinforce Enclosure Sealing
- Use fluorosilicone or perfluoroelastomer (FFKM) O-rings for gaskets, as they retain elasticity above 150°C.
- Apply thread-locking adhesives with high-temperature resistance (e.g., loctite 272) to fasteners in pressurized enclosures.
Improve Solder Joint Integrity
- Use SnAgCu (SAC) lead-free solder with a melting point above 217°C to prevent reflow during thermal cycling.
- Implement a nitrogen atmosphere during soldering to reduce voids, which can expand under heat and compromise waterproofing.
Design Ventilation with Membranes
- Install Gore-Tex or ePTFE hydrophobic membranes in enclosures to equalize pressure while blocking moisture.
- Position vents away from heat sources to prevent membrane degradation (typically rated for ≤120°C).

Why Do Waterproof Circuit Board Prototypes?
Reasons why waterproof circuit board prototypes:
Validate Design Effectiveness
- Prototypes confirm whether conformal coatings, gaskets, or encapsulation methods actually block moisture. Testing reveals weaknesses like uneven coating coverage or seal gaps before mass production.
Reduce Long-Term Costs
- Fixing waterproofing flaws during prototyping saves rework expenses later. For example, identifying a faulty O-ring design early prevents costly recalls or warranty claims post-launch.
Ensure Regulatory Compliance
- Prototypes undergo IP67/IP68 immersion tests or MIL-STD-810G environmental trials to meet industry standards. Certification delays are avoided by addressing failures at the prototype stage.
Optimize Performance Balance
- Testing ensures waterproofing measures (e.g., thick coatings) don’t impair thermal dissipation or signal integrity. Prototypes reveal if heat sinks need redesign or RF shielding adjustments.
Accelerate Time-to-Market
- Early-stage validation streamlines development. For instance, confirming a nano-coating’s cure time prevents production bottlenecks later when scaling.
What Are the Most Common Causes of Failure in Waterproof Circuit Board Prototypes?
Here are the most common causes of failure in waterproof circuit board prototypes, along with actionable solutions:
Inadequate Conformal Coating Application
- Issue: Inconsistent coating thickness or missed areas (e.g., under components, near stitching vias) leave gaps for moisture ingress.
- Solution: Use selective spray coating or automated dispensing for even coverage. Inspect with UV light after curing.
Poor Enclosure Seal Design
- Issue: Gaskets compressed unevenly, or enclosure walls flex under pressure, creating leaks.
- Solution: Design interlocking enclosure features and use finite element analysis (FEA) to simulate seal performance.
Connector Water Wicking
- Issue: Unsealed cable entries allow water to travel along wires (wicking) into the enclosure.
- Solution: Use potting compounds (e.g., epoxy) around connectors and opt for hermetic feedthroughs for critical signals.
Thermal Expansion Mismatch
- Issue: Dissimilar materials (e.g., PCB laminate vs. metal enclosure) expand at different rates, breaking seals or coatings.
- Solution: Select enclosures with CTE (coefficient of thermal expansion) matching the PCB substrate (e.g., aluminum for FR-4).
Insufficient Ventilation Membrane Protection
- Issue: Hydrophobic membranes clog with dust or ice, causing pressure buildup and enclosure deformation.
- Solution: Add a porous filter (e.g., PTFE) over membranes and test under mud/sand exposure.
Component Selection Errors
- Issue: Non-sealed switches or exposed solder joints corrode in humid environments.
- Solution: Use IP67+ rated components and coat all exposed metal surfaces, including test points.
Inadequate Accelerated Life Testing
- Issue: Prototypes pass initial immersion tests but fail after thermal cycling or prolonged humidity exposure.
- Solution: Conduct 1,000-hour damp heat tests (85°C/85% RH) and 100+ thermal shock cycles (-40°C to 125°C).
How to Balance Cost and Performance of Waterproofing Electronic Circuit Boards Prototype?
Here are practical strategies to balance cost and performance when waterproofing electronic circuit board prototypes:
Prioritize Critical Areas for Coating
- Apply conformal coating (e.g., silicone or polyurethane) only to vulnerable zones like solder joints, exposed traces, and low-profile components.
- Mask non-critical areas (e.g., tall capacitors, connectors) to reduce material waste and labor time.
Use Hybrid Enclosure Solutions
- Combine a low-cost plastic enclosure with localized epoxy potting around sensitive components (e.g., microcontrollers, power circuits).
- For non-critical sections, rely on silicone gaskets instead of full encapsulation to cut material costs by 30–50%.
Leverage Off-the-Shelf Waterproof Components
- Use pre-sealed switches, LEDs, and connectors with IP67 ratings instead of custom-sealed parts.
- Replace through-hole components with surface-mount devices (SMDs) to minimize holes in the enclosure.
Optimize Conformal Coating Thickness
- Apply coatings at 50–70µm thickness—enough for moisture resistance without excess material use.
- Use UV-curable coatings for faster curing (5–10 seconds vs. 2+ hours for air-dry), reducing labor costs.
Design for Manufacturability (DFM)
- Standardize enclosure fasteners (e.g., M2 screws) to reduce tooling costs.
- Avoid sharp corners in PCB layouts to prevent coating pooling and uneven curing.
Conclusion
This guide explored waterproof PCB prototyping from fundamentals to advanced solutions, covering material selection, coating techniques, component protection, and cost-performance optimization. With our 24-hour rapid prototyping service, you gain access to reliable waterproofing tested in demanding conditions. For prototypes that withstand moisture, humidity and extreme environments without compromising budgets, request your quote today. Our engineering team ensures your design performs when it matters most. Welcome to contact us now: sales@bestpcbs.com.