IC board, the fundamental platform that mounts and connects integrated circuits, is the unsung hero behind every reliable electronic system. This article explores the intricacies of IC board design, components, troubleshooting, and manufacturing, providing a comprehensive guide for engineers and product developers to achieve unwavering system reliability.
Have you ever struggled with electronic failures, signal interference, or costly production rework? Let’s pinpoint five key challenges you might face:
- Signal integrity issues like crosstalk and EMI causing erratic system behavior.
- Thermal management failures leading to premature IC board components degradation.
- Physical and electrical defects from unreliable manufacturing or assembly.
- Difficulty in prototyping and testing IC circuit board designs efficiently.
- High costs and delays from redesigns and IC board repair after failures.
Addressing these pain points requires a systematic approach and partnership with a capable manufacturer. The following solutions form the foundation for building robust electronic systems:
- Implementing advanced design rules and simulation for layout optimization.
- Integrating strategic thermal management into the IC board design from the start.
- Adhering to stringent, certified manufacturing and quality control processes.
- Utilizing reliable prototyping services and comprehensive IC test board strategies.
- Engaging in early design collaboration with manufacturing experts (DFM).
At EBest Circuit (Best Technology), we specialize in transforming these solutions into reality. As a professional PCB and assembly manufacturer with extensive expertise in IC PCB board fabrication, we pride ourselves on delivering high-reliability, high-performance boards. Our commitment to quality and advanced capabilities ensures your integrated circuit systems are built on a foundation of excellence. For inquiries, pls feel free to contact us at sales@bestpcbs.com.
What Is an IC Board?
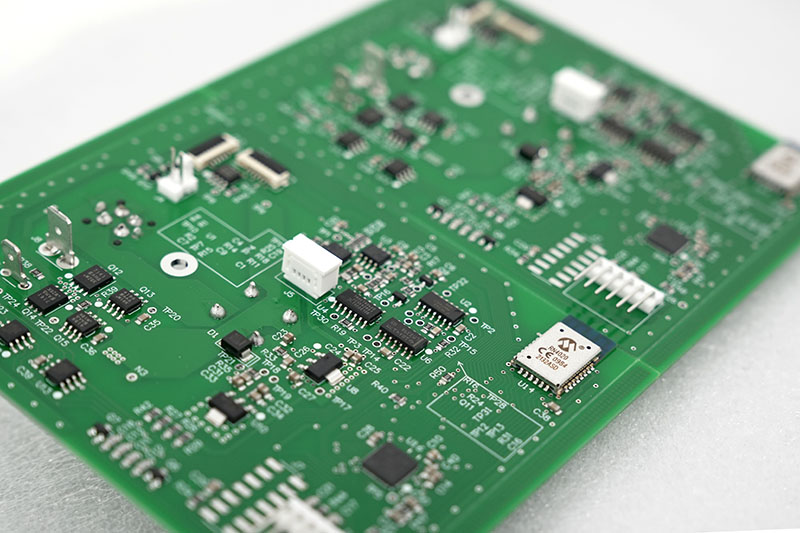
An IC board, most commonly a Printed Circuit Board (PCB), is the physical platform that mechanically supports and electrically connects the various components of an electronic system using conductive tracks and pads. Its primary role is to provide a stable, organized, and reliable environment for ICs (Integrated Circuits) and other parts to function as intended. Think of it as the nervous system and skeleton of any electronic device, from a simple breadboard prototype to the sophisticated logIC board in your smartphone.
Core Functions and Types:
- Mechanical Foundation: Provides a solid base to mount chips, resistors, capacitors, and connectors.
- Electrical Interconnect: Creates the wiring (traces) that allows signals and power to travel between components.
- Thermal Management: Often includes design features (like thermal vias or planes) to dissipate heat from powerful ICs.
- Protection & Support: Offers physical protection and organizes the IC board components into a compact form factor.
The term “IC board” can refer to several specific types, depending on context:
| Board Type | Description | Common Use Case |
|---|---|---|
| IC PCB Board | The standard, fabricated board with etched copper traces. | Virtually all commercial electronics. |
| IC Breakout Board | A small PCB that adapts a difficult-to-solder IC (like a QFN) to a easier DIP or header format. | Prototyping and development. |
| IC Test Board | A custom board designed specifically to validate the functionality of a particular IC. | Production validation and QA. |
| Breadboard | A reusable solderless platform for temporary prototyping and experimenting with circuit designs. | Education and initial concept verification. |
In summary, an IC board is the critical substrate that bridges the abstract world of circuit schematics with the physical world of functional hardware, making it essential for reliable electronic systems.
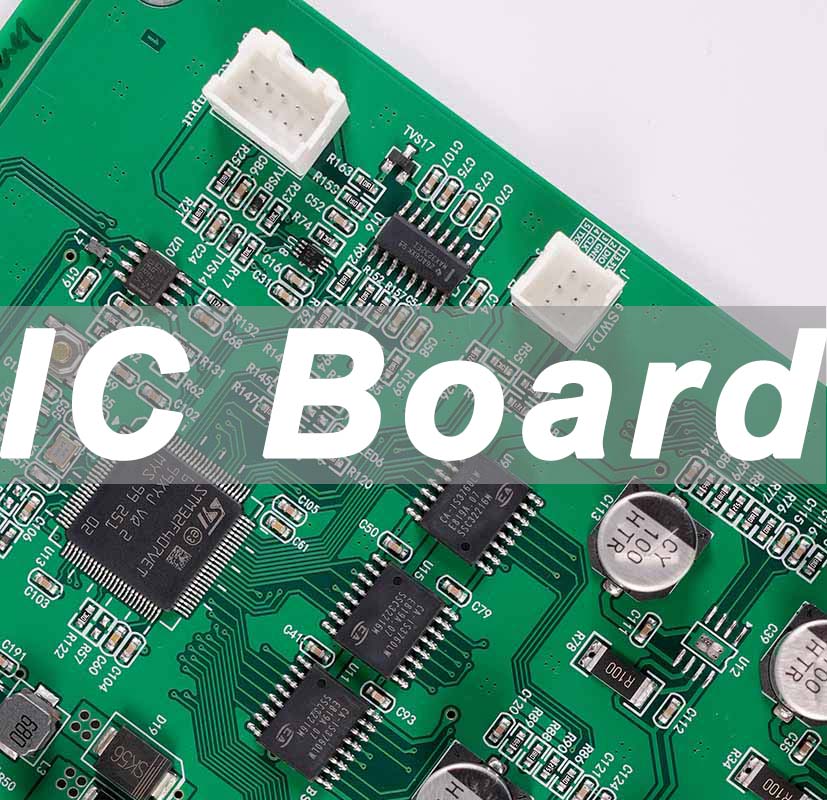
What Are the Essential IC Board Components on an IC PCB Board?
A fully assembled IC PCB board is a miniaturized ecosystem. Beyond the integrated circuit itself, numerous supporting components are essential for stable operation. Understanding these parts is crucial for both IC board design and troubleshooting circuit board with IC issues.
The Supporting Cast for the IC:
The IC is the “brain,” but it cannot function alone. Key supporting components include:
- Decoupling Capacitors: Placed close to the IC’s power pins, these are arguably the most critical supporting components. They filter high-frequency noise on the power rail, providing a local, stable charge reservoir to prevent digital switching noise from causing malfunctions. A missing or faulty decoupling cap is a common cause of erratic IC behavior.
- Crystal Oscillators & Resonators: For ICs that require a precise timing reference (like microcontrollers and communication chips), these components provide the essential clock signal. They determine the speed and synchronization of the system’s operations.
- Voltage Regulators: Most ICs require a specific, clean voltage (e.g., 3.3V, 1.8V). Voltage regulator modules (VRMs) or linear regulators convert the board’s main input power (e.g., 12V or 5V) to these required levels with high stability.
- Resistors & Pull-up/Pull-down Networks: These set bias points, limit current, and define default logic states on IC pins (especially for configuration and I/O pins), ensuring the circuit starts and operates in a known, intended state.
- Connectors & Headers: Provide the interface for power input, programming, debugging (like JTAG), and communication with other boards or peripherals (USB, Ethernet). They are the gateway to the outside world.
- Protection Components: Transient Voltage Suppression (TVS) diodes, fuses, and ferrite beads protect sensitive IC board components from electrostatic discharge (ESD), voltage spikes, and electromagnetic interference (EMI).
In essence, the reliability of the integrated circuit board depends as much on the correct selection and placement of these supporting components as on the IC itself. A holistic IC board design approach considers this entire ecosystem.
How Does an IC Board in Mobile Devices Support Core Functions?
The IC board in mobile phones, often called the main logic board or motherboard, is a marvel of miniaturization and high-density integration. It is the central nervous system that orchestrates all core functions within an extremely constrained space, making its design critical for performance and reliability.
Enabling Core Mobile Functions Through Advanced PCB Technology:
Modern smartphone PCBs are typically high-density interconnect (HDI) boards with multiple layers (often 10+), micro-vias, and fine-pitch components. Here’s how this specialized IC board supports key functions:
- Processing & Memory: The Application Processor (AP) and Memory (RAM, Flash) are the largest ICs on the board, connected via hundreds of ultra-high-speed traces. The PCB design must ensure signal integrity for these data buses running at GHz speeds to prevent crashes and data corruption.
- Radio Communication (RF): Sections of the board dedicated to WiFi, Bluetooth, and cellular modems are carefully isolated and impedance-controlled. Specific IC board materials with stable dielectric constants (like Rogers laminates) are often used here to ensure clear signal transmission and reception.
- Power Management: A complex Power Management IC (PMIC) distributes and regulates multiple voltage levels to different subsystems from the single battery source. The IC board design uses thick power planes and careful routing to minimize losses and heat.
- Sensor Integration: The board hosts smaller ICs for the accelerometer, gyroscope, proximity sensor, etc., requiring precise placement and stable connections for accurate data.
- User Interface: The touchscreen controller IC and audio codec IC are critical. Faults in connections to these, like a damaged touch IC or audio IC, directly impact user experience, often necessitating IC board repair.
This dense integration means a single point of failure—a cracked solder joint, a damaged trace, or a faulty IC on circuit board—can disable the entire device. Therefore, manufacturing quality and robust IC board design are paramount for mobile reliability.
What Makes an Integrated Circuit Board Different From a Breadboard?
While both are used to build circuits, an integrated circuit board (PCB) and a breadboard serve completely different roles in the development cycle. The distinction between them marks the shift from idea to real product.
Prototype vs. Product
A breadboard is built for quick experimentation.
An IC PCB board is engineered for long-term reliability and real-world performance.
| Feature | Breadboard | Integrated Circuit Board (PCB) |
|---|---|---|
| Purpose | Temporary prototyping | Permanent, product-grade use |
| Construction | Plastic grid, no solder | FR-4 board with copper traces |
| Connections | Clip-based, easy to loosen | Soldered, fixed, controlled impedance |
| Reliability | Low, noise-prone | High, stable, durable |
| Speed Capability | Poor for high-frequency | Excellent for high-speed/RF |
| Form Factor | Bulky | Compact, customized |
| Cost | Low, reusable | Higher upfront, low volume cost |
Summary
You use a breadboard to verify concepts.
You use an integrated circuit board to build real, reliable electronics.
The transition from breadboard to PCB is the essential turning point from idea → manufacturable product.
What Should Engineers Consider During IC Board Design for Better Reliability?
IC board design is where reliability is either built-in or compromised. Moving from a functional schematic to a robust, manufacturable layout involves critical engineering decisions that directly impact system performance and longevity.
Designing for Reliability: Key Principles.
Reliable IC board design proactively addresses electrical, thermal, and mechanical challenges. Here are essential considerations:
- Stack-up & Material Selection: The choice of layer count, copper weight, and substrate material (standard FR-4 vs. high-frequency laminates) sets the foundation. A proper stack-up ensures controlled impedance for high-speed signals and manages power distribution.
- Power Integrity (PI): Use dedicated, solid power and ground planes. Implement a robust network of decoupling capacitors of varying values close to each IC’s power pins. Simulate the Power Distribution Network (PDN) to avoid voltage droop and noise.
- Signal Integrity (SI): Route critical high-speed traces (clocks, differential pairs, DDR memory) with controlled impedance, appropriate length matching, and minimal via transitions. Provide adequate spacing to prevent crosstalk. Simulation tools are invaluable here.
- Thermal Management: Identify heat-generating ICs (processors, power regulators). Use thermal relief pads, arrays of thermal vias under packages to conduct heat to inner planes, and plan for heatsinks or airflow. Proper IC board design prevents hotspots that accelerate failure.
- Electromagnetic Compatibility (EMC): Minimize loop areas for high-current paths. Use guard traces or ground pours for sensitive analog sections. Proper filtering on all I/O lines is crucial to pass emissions and immunity standards.
- Design for Manufacturing (DFM): Adhere to your manufacturer’s capabilities (min trace/space, hole sizes, solder mask clearances). This prevents costly fab issues and ensures high yield. This is where partnering with an expert like EBest Circuit provides immense value.
- Testability: Include test points for critical signals and voltages to facilitate production testing and future troubleshooting circuit board with IC faults.
By rigorously applying these principles during the IC board design phase, engineers create the blueprint for a Great IC Board Solution that ensures Reliable ElectronIC Systems from the start.
How are IC Boards Produced?
The production of a reliable IC PCB board is a precise, multi-stage process that turns digital Gerber files into a fully functional circuit board. Each step plays a direct role in electrical performance, durability, and long-term system stability.
From Design Files to Finished Assembly
Manufacturing an integrated circuit board involves two main phases: Fabrication (creating the bare PCB) and Assembly (mounting components to complete the board).
Streamlined Production Overview
| Stage | Key Processes | Impact on Reliability |
|---|---|---|
| Fabrication | Imaging, etching, lamination, drilling, plating | Establishes trace accuracy, via quality, and overall board integrity |
| Assembly (PCBA) | Solder paste printing, pick-and-place, reflow soldering, inspection | Ensures strong solder joints and consistent electrical/mechanical stability |
To conclude, although the workflow appears straightforward, every stage requires tight process control—temperature profiles, alignment accuracy, plating quality, soldering parameters, and automated inspection. A manufacturer’s capability in executing these steps with precision is what separates a basic prototype from a truly product-grade, high-reliability IC board.
How to Remove IC Chip From Circuit Board Without Damaging Traces?
Removing an IC from a circuit board is a common task in IC board repair, rework, or salvage. Doing it correctly is crucial to avoid damaging the delicate PCB traces, which can render the board unusable.
Safe Desoldering Techniques for IC Removal.
The goal is to simultaneously melt all solder joints of the IC so it can be lifted off cleanly. Here are effective methods:
- Hot Air Rework Station (Best for SMD ICs): This is the most common professional tool.
- Use the appropriate nozzle to concentrate heat on the IC.
- Apply flux around the pins to aid heat transfer and clean old solder.
- Use a low-to-medium airflow to avoid blowing away small components.
- Heat the IC evenly in a circular motion until the solder melts (visible shift/shine), then gently lift it with tweezers.
- Soldering Iron with Solder Wick (For Through-Hole or few-pin SMD):
- Apply flux to the braid.
- Place the hot iron and braid over a pin to wick up the molten solder.
- Repeat for all pins. This can be slow for multi-pin ICs and risks pad damage from prolonged heat.
- Specialized Desoldering Tools:
- Desoldering Pump (Solder Sucker): Effective for through-hole components. Melt solder on a pin, then quickly place the pump tip and trigger suction.
- Desoldering Tweezers: A specialized tool with two heated tips designed to grip and heat both sides of an SMD component (like a SOP) simultaneously for easy removal.
Critical Tip: Always test IC on circuit board to confirm it’s faulty before attempting removal. Pre-heating the entire board (with a preheater) can reduce thermal shock and make desoldering easier, especially for large, ground-plane-connected ICs. Patience and the right tool are key to successful IC board repair.
How to Test IC on Circuit Board to Identify Faulty IC Boards?
Testing an IC on a circuit board is a diagnostic art, essential for identifying the root cause of failure in what appears to be a faulty IC board. A systematic approach saves time over guesswork.
A Systematic Diagnostic Approach.
Start broad and narrow down. Always begin by verifying power and basic board conditions before blaming the IC.
- Visual Inspection: Look for obvious signs: burnt marks, cracked IC packages, bulging capacitors, or poor solder joints (cracks, bridging). Use a magnifier or microscope.
- Basic Power Checks:
- Measure Voltage: Use a multimeter to verify the correct voltage is present at the IC’s power pins (VCC, VDD). Check against the datasheet.
- Check for Shorts: Test resistance between power and ground pins. A near-zero reading could indicate a shorted IC or capacitor.
- Thermal Check: Power the board briefly and carefully feel (or use a thermal camera) for overheating components. An abnormally hot or cold IC can be a clue.
- Signal Analysis (Requires Oscilloscope):
- Check Clock & Reset: Verify the presence, frequency, and shape of critical input signals like clock and reset lines.
- Monitor Inputs/Outputs: Compare the actual signals on the IC’s pins with the expected behavior from the schematic or datasheet. A good input with a bad/no output suggests a faulty IC.
- Compare & Substitute:
- Compare with a Known Good Board: If available, compare voltage and signal readings between a faulty and a working board.
- IC Substitution: If you have determined with high confidence that an IC is faulty and have the skill to replace it, swapping in a new one is the definitive test.
Remember, the problem isn’t always the most complex chip. Often, a failed passive component (like a decoupling capacitor) can cause the IC to malfunction. This methodical troubleshooting circuit board with IC process helps accurately isolate the true fault.
In conclusion, IC boards form the essential, reliable backbone of all modern electronics, from the simplest gadget to the most complex system. This guide has detailed their components, design principles, production, and maintenance, providing a roadmap for creating robust electronic solutions.
Achieving this reliability requires expertise at every stage. EBest Circuit (Best Technology) is your partner in this mission. We combine advanced manufacturing capabilities with deep technical knowledge to produce high-quality IC PCB boards that meet stringent reliability standards. For more information or if you would like to send us any inquiry, please send us an email through the contact form at the bottom of our Contact Page.
FAQs
1. How to Troubleshoot a Circuit Board with an IC?
Follow a structured process:
1) Visual Inspection for physical damage.
2) Power Analysis – verify all supply voltages and check for shorts.
3) Signal Probing – use an oscilloscope to check critical inputs (clock, data) and outputs against expected behavior.
4) Thermal Imaging can reveal overheating components.
5) Isolate Sections – if possible, disconnect subsections to localize the fault.
6) Compare readings with a known-good board. Start with the simple, external factors (power, connections) before concluding the IC itself is dead.
2. How to Solder IC Board?
For through-hole ICs, insert the IC, tack one corner pin to hold it, then solder all pins quickly with a fine-tip iron, avoiding bridges. For Surface Mount (SMD) ICs, the preferred method is reflow soldering:
- Apply solder paste accurately to pads using a stencil.
- Place the IC carefully with tweezers or a pick-and-place machine.
- Heat the board in a controlled reflow oven or with a hot air rework station (for hand soldering), following the paste’s temperature profile. Use plenty of flux to ensure clean, reliable joints and prevent tombstoning. For hand-soldering fine-pitch ICs, the “drag soldering” technique with a chisel tip and flux is effective.