

Why do circuit board failure analysis? Let’s discover its benefits, common types, analysis process, troubleshooting and diagnosing techniques and case studies.
Are you worried about these issues?
- High-Frequency Signal Loss & Distortion?
- Multilayer PCB Alignment Issues & Short-Circuit Risks?
- Solder Joint Overheating & Skyrocketing Repair Rates?
EBest Circuit (Best Technology) can provide you service and solutions:
- Full-Link Signal Simulation – Cut Loss by 30%, Keep Signals Stable!
- Laser Dynamic Compensation Tech – Layer Alignment ±2μm, Boost Yield!
- Thermal-Electric Coupling Optimization – Extend Solder Life by 50%, Halve Repair Costs!
Welcome to contact us if you have any request for circuit board failure analysis: sales@bestpcbs.com.
Why Do Circuit Board Failure Analysis?
Reasons why do circuit board failure analysis:
- Identify the root cause and prevent recurrence: Using microscopic inspections (such as scanning electron microscopy and X-ray energy spectrum analysis) and electrical testing, we can accurately identify whether the fault point is a design defect, material degradation, or process error. For example, a car company recalled a batch of circuit boards due to poor soldering. After analysis, they improved soldering parameters and reduced the recurrence rate by 90%.
- Improve product reliability and lifespan: Statistical analysis shows that the mean time between failures (MTBF) of industrial control boards that undergo failure analysis increases by approximately 30%. Accelerated life testing under environmental stresses such as high temperature and vibration can reveal potential failure modes in advance.
- Reduce production costs and maintenance expenses: Early failure analysis can reduce after-sales repair costs. According to industry reports, in the consumer electronics sector, optimizing layouts by analyzing short circuits can reduce single-board repair costs by 45%, while also reducing spare parts inventory pressure.
- Assist design iteration and technological innovation: Analyzing signal integrity issues in high-frequency circuits can provide data support for next-generation PCB routing rules. For example, by analyzing impedance mismatch cases in 5G base station circuit boards, the bit error rate has been optimized to below 10^-12.
- Meeting Industry Compliance and Safety Standards: Sectors such as aerospace and medical devices require compliance with standards such as ISO-26262 and IEC-60601. Failure analysis reports are key evidence for certification, minimizing market access risks caused by compliance issues.
- Shortening Product Development Cycles: Analyzing faults during the prototype testing phase can reduce design iterations. One drone manufacturer reduced its R&D cycle by 20% by analyzing power module overheating issues.
- Strengthening Supply Chain Quality Control: Performing destructive physical analysis (DPA) on supplier components allows for traceability of material batches. For example, a chip package cracking case prompted a buyer to establish a supplier fault archive, resulting in a 60% reduction in incoming material defect rates.

Common Circuit Board Failures Types
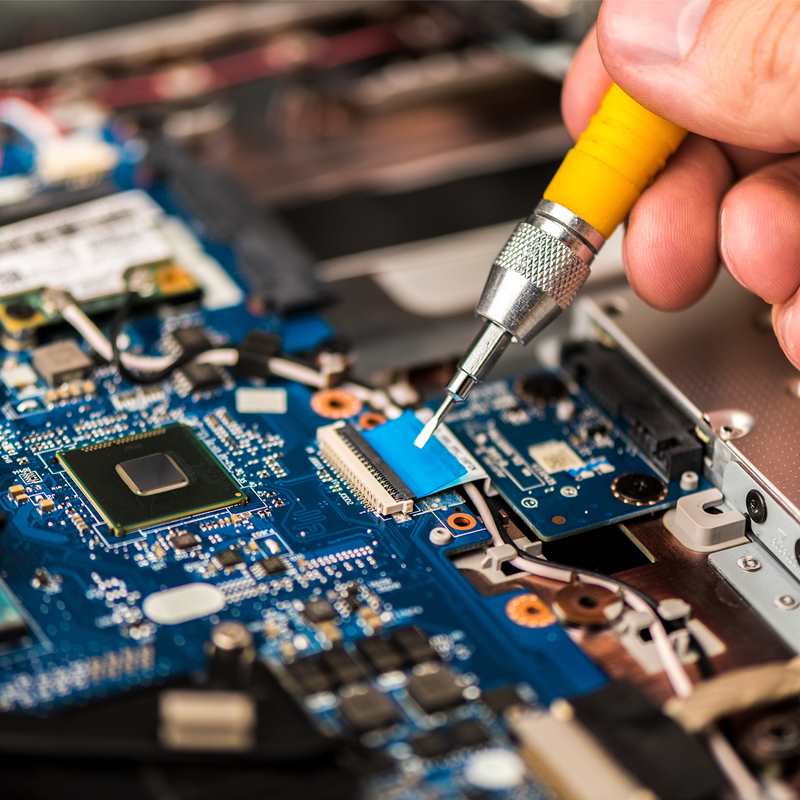
- Soldering Defects: Account for 1/3 of total failures. Common issues include cold solder, dry solder, solder joint fractures, and solder bridges. For instance, thermal stress on solder in high-temperature environments can cause joint cracking, while flux residue may trigger short circuits. Mitigation requires automated soldering equipment and stringent process control to minimize defects.
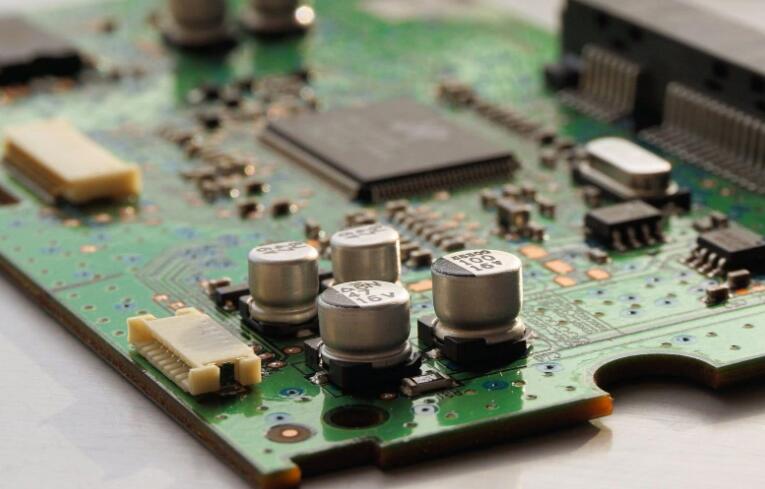
- Component Damage: Represents 1/3 of total failures, primarily involving aluminum electrolytic capacitor degradation (1μF–330μF most prone to failure), resistor/optoisolator/ceramic capacitor damage, and high-voltage/high-current components like switching power supply rectifiers and VFD IGBT modules. Diagnose using multimeters, capacitance meters, or VI curve testers to identify parameter anomalies.
- Circuit Faults: Comprise 1/3 of total failures, encompassing open/short circuits, copper trace fractures, and corrosion. Humid environments causing insulation damage account for 42% of short-circuit faults, while mechanical vibration may induce PCB cracking/bending. Fault localization combines visual inspection with electrical testing.
- Design Flaws: Include improper layout causing thermal issues (e.g., chip overheating), power supply design defects leading to voltage instability, incorrect component selection (e.g., resistor tolerance mismatches), and signal crosstalk due to insufficient spacing. For example, a communication board experienced short-circuiting from incomplete etch traces, resolved via thermal design optimization and signal integrity analysis.
- Environmental Factors: High temperature (>85°C accelerates component aging), high humidity (>70% causes condensation/short-circuits), corrosive dust (salt-laden particles degrade metal contacts), and ESD events dominate failure causes. Example: Southern China’s rainy season equipment failures due to humidity-induced shorts require dehumidifiers and dust covers.
- Material Issues: Substandard PCB materials cause delamination/voids, improper copper foil weight induces heating, flux residue causes leakage, and chemical leaks (e.g., capacitor electrolyte corrosion). Rigorous raw material quality control and manufacturing parameter adherence are critical.
- Software/Firmware Issues: Account for 1/3 of failures, including program loss, parameter errors, and software conflicts. PLC input signal anomalies often stem from loose sensor connections or EMI, resolved via program backups and robust EMI shielding design.
How to Perform Circuit Board Failure Analysis?
1. In-depth Failure Background Investigation and Standardized Data Acquisition
- Establish diagnostic framework per IEEE 1445 standards, documenting failure phenomena (e.g., equipment non-startup, signal interruption), environmental parameters (temperature/humidity, voltage fluctuations), failure stages (design debugging/early failure), and historical data. IPC-9111 mandates cross-functional team collaboration (engineering, quality, operations) for deviation analysis and solution validation.
- Case Example: Communication board short-circuit due to incomplete etching resolved by identifying moisture control failure during production, leading to etching process optimization.
2. System Electrical Performance and Structural Testing
- Conduct system electrical tests using oscilloscopes, network analyzers, and multimeters. X-ray inspection (ASTM E1417-compliant) detects internal solder joint defects (e.g., BGA voids), while thermal imaging identifies abnormal hotspots (e.g., power transistor overheating). Electrical parameter tests cover static (resistance/capacitance) and dynamic (signal waveforms/noise) dimensions, with functional tests verifying signal stability (e.g., DisplayPort compliance).
- Case Example: Audio board intermittent sound resolved by identifying abnormal solder joint resistance through electrical testing, followed by re-soldering.
3. Combined Non-Destructive and Destructive Analysis
- Non-destructive methods: C-SAM ultrasonic microscopy for interlayer defect detection, SEM/EDS for material composition analysis (e.g., dendrite morphology), FTIR for flux residue verification.
- Destructive methods: Microsectioning (IPC-TM-650 2.1.1) for internal structure observation, dye-and-pull (red ink) testing for BGA crack detection, solderability testing (J-STD-002) for coating quality assessment.
- Case Example: Control board corrosion from capacitor leakage resolved via SEM/EDS identification of P/Ni-containing contaminants, leading to capacitor replacement and conformal coating optimization.
4. Root Cause Verification and Simulation Experiments
- Develop fault tree models and replicate failure modes through accelerated aging (IEC 60068-2-14), salt spray corrosion (ASTM B117), and thermal simulation. Validate design flaws (e.g., impedance mismatch) or material issues (e.g., PCB delamination).
- Case Example: Industrial board chip overheating resolved via thermal simulation optimizing heat dissipation channels, reducing chip temperature by 20%.
5. Repair and Reliability Enhancement Solutions
- Soldering repair employs temperature-controlled soldering irons (320°C-380°C, ≤3 seconds heating) for rework or conductive silver paste filling. Component replacement adheres to IPC-A-610 standards, ensuring polarity (e.g., electrolyytic capacitors) and parameter matching.
- Preventive measures: Hollow-core layer technology for signal integrity, MCP packaging for space savings and moisture resistance, solid-state circuit boards for vibration/EMI resistance.
- Case Example: Motor drive board non-startup due to circuit break resolved by jumper wiring and reinforced insulation, followed by 24-hour full-load aging test.
6. International Standards
- Adhere to IPC-9111, J-STD-001, and other international standards for standardized processes. For international clients, emphasize design reviews (DFM/DFA), process validation (solder paste printing optimization), and quality traceability (batch management).
- Case Example: Cross-border team rapidly identified capacitor failure root cause through shared IPC/GJB standard comparison databases, optimizing supplier selection.
7. Preventive Maintenance
- Implement regular cleaning (IPA + non-woven cloth), solder joint oxidation checks, and surge protection for power stability. Develop failure case libraries (root cause trees, solution repositories) with AI-assisted platforms reducing diagnostic cycles by 30%.
How to Choose Circuit Board Failure Analysis Tools?
1. Define Detection Requirements and Scenario Matching
- Fault Type Localization: Select specialized tools based on common failure types (e.g., open/short circuits, component failure, soldering defects). Examples:
- Basic Maintenance: Use digital multimeters (e.g., Fluke 87V, accuracy 0.05%+3) for voltage/current/resistance measurements; oscilloscopes (e.g., Rigol DS1054Z, 50MHz upgradable to 100MHz) to capture signal waveforms; bridge testers for capacitance/inductance analysis.
- High-Speed Signal Analysis: Vector network analyzers (VNA, e.g., Keysight E5063A) for S-parameter measurement and impedance matching evaluation; Time-Domain Reflectometers (TDR) to locate transmission line breaks or impedance discontinuities.
- Manufacturing Defect Detection: Automated Optical Inspection (AOI, e.g., Omron VT-S730) with high-resolution cameras for solder joint defects; flying probe testers supporting 0.1mm pitch test points without dedicated fixtures; X-ray inspection systems to analyze BGA solder ball voids or inner-layer trace defects.
2. Technical Parameters and Performance Adaptation
- Accuracy and Resolution: Laboratory-grade scenarios require >0.1% accuracy (e.g., power quality analyzers), while general maintenance accepts 1%-3% accuracy. Digital instruments must consider resolution (e.g., 6.5-digit) and range coverage (e.g., >1000V for high-voltage applications).
- Frequency and Bandwidth: High-frequency circuits (e.g., USB 3.0/PCIe) demand oscilloscopes with ≥100MHz bandwidth; signal integrity analysis requires VNAs supporting GHz-range frequencies.
- Anti-Interference and Environmental Adaptability: Industrial environments require CAT III/IV safety certifications (IEC 61010) and IP54/IP67 protection for humid/dusty conditions; battery life focuses on durable lithium-ion solutions.
3. Tool Types and Functional Extensibility
Hardware Tools:
- Specialized Detection Devices: Logic analyzers (e.g., Saleae Logic Pro 16) for multi-channel digital signal analysis; thermal imagers (e.g., FLIR T540, thermal sensitivity ≤0.03°C) for heat distribution visualization; BGA rework stations for precision soldering/desoldering.
- Maintenance Auxiliary Tools: Hot air guns/constant-temperature soldering stations for SMD component handling; short-circuit trackers for rapid fault localization; signal generators to simulate input signals.
Software Tools:
- PCB Design Software: Altium Designer (supports 3D real-time display and multi-layer board design), KiCad (open-source, ideal for beginners), EAGLE (compatible with Mac/Linux, rich community resources).
- Simulation and Analysis Software: Integration with SPICE environments (e.g., Multisim) for circuit performance validation; data management tools supporting Gerber file generation and BOM integration.
4. Cost Efficiency and Brand Selection
- Budget Allocation: Initial procurement costs must balance performance needs. Premium brands (Fluke, Keysight, Tektronix) suit professional scenarios; mid-tier brands (UNI-T, Brymen) offer cost-effectiveness; open-source tools (KiCad, EAGLE Free) fit budget-constrained projects.
- Maintenance and Services: Prioritize brands offering local technical support, ≥1-year warranty, and periodic calibration services. Modular designs enable quick upgrades (e.g., oscilloscope bandwidth expansion), avoiding redundant investments.
- Compatibility and Scalability: Tools must support standardized data interfaces (USB/LAN/GPIB) for seamless integration with existing production systems. Software tools should comply with mainstream operating systems and design standards (e.g., IPC, ISO).
5. Operational Convenience and Training Support
- User-Friendly Interface: Tools should feature intuitive interfaces supporting automated testing, data analysis (e.g., machine learning for fault trend prediction), and report generation. For example, AOI systems use image algorithms to auto-compare against “perfect board” references.
- Training and Documentation: Suppliers must provide operation manuals, video tutorials, and on-site training. Altium Designer, for instance, offers online courses and community support to accelerate designer onboarding.
- Safety Compliance: Strict adherence to international safety standards (e.g., CE, UL certifications) ensures safe operation in high-voltage/industrial environments; ESD-safe tools (e.g., anti-static brushes, tweezers) minimize component damage.
Circuit Board Troubleshooting Techniques
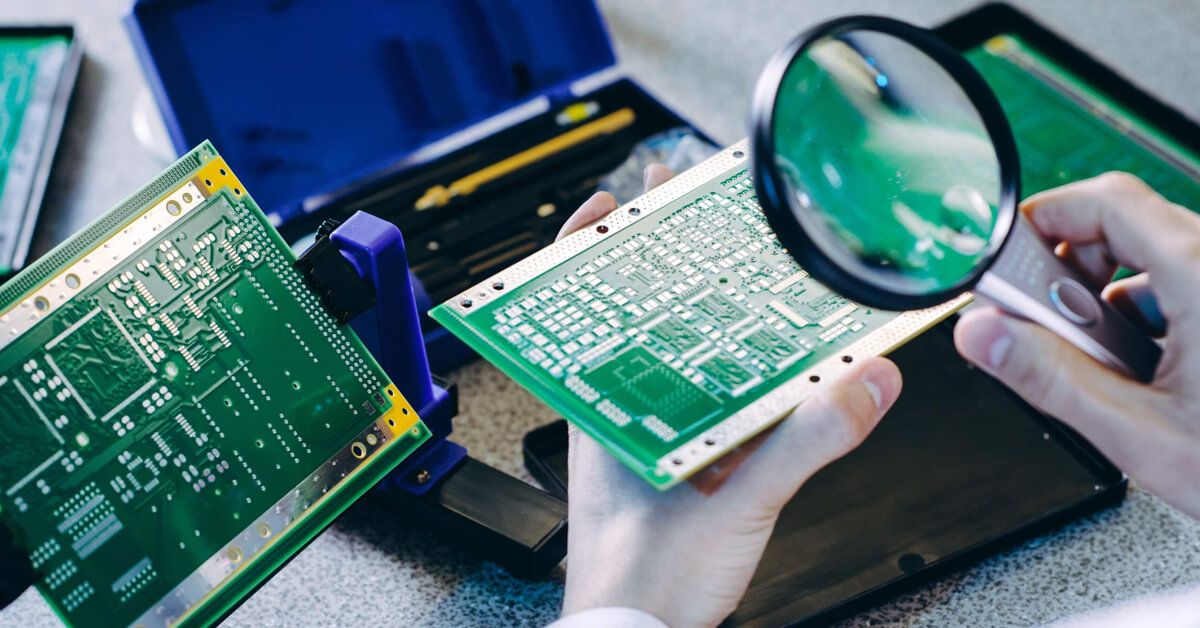
Microscopic Visual Inspection & Hidden Defect Tracing
- Utilize 200× electron microscopy to scan solder joint surfaces, revealing nanoscale oxidation layers between solder and copper foil that cause “cold soldering” defects with elevated contact resistance. For instance, a power module with BGA cold soldering experienced intermittent power loss. After precise localization and repair via microscopy, failure rates dropped by 90%.
Power Rail Ripple Noise Quantification & Tolerance Standards
- Oscilloscope measurements of +5V power rails must meet ≤50mV ripple noise limits per IPC-610 standards. Excessive ripple can trigger digital circuit errors. A communication base station motherboard saw a 85% reduction in signal transmission errors after replacing degraded 0.1μF/X7R filtering capacitors.
Thermal Simulation vs. Real-World Thermal Validation
- ANSYS thermal simulation establishes 3D thermal models for PCBs, validated against thermal imaging data to verify heat dissipation paths. An industrial control board with aged thermal paste between heatsink and chip exhibited 3× higher thermal resistance, reaching 125°C (exceeding 105°C spec). After reapplying ≥5W/m·K thermal paste, temperatures dropped to 85°C.
High-Speed Signal Integrity 3D Analysis System
- For ≥10Gbps signal lines, TDR detects impedance discontinuities (±10% tolerance), while eye diagram analysis measures rise time, jitter, and noise margins. A server motherboard with DDR4 bus impedance mismatch saw eye closure; adjusting PCB stack-up to 85-95Ω reduced bit error rates to 10⁻¹².
Component Failure Mode Database & Rapid Comparison
- Build databases documenting typical failures like capacitor leakage, resistor burnout, and gate oxide breakdown. A power module with rising ESR (50mΩ→200mΩ) in aluminum electrolytic capacitors was quickly identified and replaced with low-ESR solid-state capacitors, extending lifespan 5×.
ICT Automation & Boundary Scan Synergy
- ICT bed-of-nails testing achieves 30-second per-board inspection for opens/shorts and component value deviations. Combined with JTAG boundary scan, BGA chip logic can be in-system programmed (ISP) and diagnosed. A consumer electronics production line achieved 99.2% fault detection using ICT+boundary scan.
EMC Radiation Noise Source Identification & Mitigation
- Spectrum analyzers scan PCB radiation noise to pinpoint 100MHz-1GHz sources from switching power supplies. Adding common-mode chokes, X/Y capacitors, and metal shields reduced noise 10dB below CISPR 22 Class B limits. A medical device motherboard passed FCC certification post-EMC retrofit.
Hardware-Software Co-Debugging “Golden Pair” Methodology
- Hardware-level logic analyzers capture bus signals (I?C/SPI), while software debuggers step through code to synchronize hardware signals with software expectations. An embedded system with incorrect SPI clock configuration was rapidly diagnosed and fixed via register adjustment.
Accelerated Aging Test & Reliability Growth Modeling
- Post-repair boards undergo 168-hour 85°C/85%RH testing, with Arrhenius models predicting component lifetimes. An avionics board identified 10% latent failures via aging test, reducing failure rates to 0.1%/1000 hours per DO-160G standards.
Preventive FMEA Application for Failure Modes
- FMEA identifies critical failure modes (e.g., solder fatigue, parameter drift) to implement targeted countermeasures. An automotive ECU added NTC thermistors to monitor overtemperature risks in power management chips, improving reliability 3×.
How to Diagnose a Faulty Circuit Board?
Step 1: Initial Visual Screening
- Inspect the circuit board surface for obvious burn marks, component bulging/cracking (such as capacitor leakage, resistor carbonization), poor/broken solder joints, and corroded metal traces.
- Pay special attention to corrosion on high-power components (such as power transistors and inductors), connector areas, and any signs of corrosion from use in humid environments. Surface-mount components should be inspected for any loosening or displacement.
Step 2: Environmental and Usage Condition Verification
- Record the equipment’s operating environment (temperature, humidity, dust), power supply stability, and load conditions. High temperatures and high humidity can easily cause component oxidation and short circuits; frequent plugging and unplugging of connectors can cause poor connections; and overvoltage or undervoltage power supply can damage the power supply chip.
Step 3: Power System Test
- Use a multimeter to measure input voltage at power terminals (e.g., DC 5V/12V/24V) against specifications. Investigate adapters, fuses, or power ICs if readings deviate. Test for shorts between power rails using resistance mode (near-zero ohms indicates shorts from capacitor failure or debris). Track voltage at critical nodes (e.g., chip power pins) during operation to detect opens or abnormal loads.
Step 4: Component Function Verification
- Capacitors: Use a multimeter’s capacitance range/ESR meter to measure capacitance and equivalent series resistance. Bulging or leaking capacitors typically have decreased capacitance or increased ESR.
- Resistors/Diodes: Measure resistors with power off to ensure they are within ±5% of their nominal values. Diodes must conduct forward (voltage drop 0.3-0.7V) and block reverse.
- Semiconductors: Use the diode range to measure the conductivity between each electrode of transistors/field-effect transistors. Chips can be verified by replacing them or measuring the voltage at their power pins.
- Special Components: Use an oscilloscope to measure crystal oscillator waveforms, relay contact contact, and optocoupler transmission to ensure positive signals.
Step 5: Signal Tracing and Waveform Analysis
- For digital circuits, monitor clock signals (e.g., crystal outputs) and control lines (e.g., GPIOs) for stable waveforms using oscilloscopes. Use logic analyzers to capture bus signals (I²C/SPI/UART) and detect communication errors.
- For analog circuits, inject reference signals (e.g., 1kHz sine wave) to trace signal loss points.
Step 6: Systematic Troubleshooting and Tool Application
- Sectional Isolation Method: Divide the circuit board into power, control, and output modules, and power-off each section to narrow down the fault.
- Comparison Method: Compare voltages, waveforms, or component parameters with a working board of the same model to quickly locate discrepancies.
- Professional Tools: Use an infrared thermal imager to observe component temperature distribution (overheated areas may indicate a short circuit); an LCR meter to accurately measure inductance, capacitance, and resistance; and dedicated diagnostic software to simulate circuit behavior and identify design flaws or component aging.
Step 7: Repair Verification and Long-Term Maintenance
- After replacing the damaged component, perform full functional testing (e.g., power-on test, load test, and long-term operation test) to confirm that the fault has been completely eliminated.
- Repair procedures and test data should be recorded and compiled into a diagnostic report to facilitate subsequent maintenance or design optimization. For complex faults, analyze component failure modes (e.g., capacitor electrolyte drying, chip thermal aging) to prevent recurrence.
Circuit Board Failure Analysis Case Studies
Intermittent Power Loss Analysis and Resolution for Automotive ECU Circuit Boards
Problem Phenomena and Initial Diagnosis
- Vehicles experienced sudden engine stalls during operation, with normal function briefly restored after restart. Diagnostic equipment detected no error codes, and external circuit checks revealed no anomalies.
- Power voltage monitoring showed ECU supply voltage fluctuating between 9V-14V, significantly below the stable 12V requirement. Oscilloscope measurements revealed a 62mV ripple noise on the +5V power rail, exceeding the IPC-610 standard limit of ≤50mV, indicating power irregularities as the primary trigger.
Advanced Failure Localization and Technical Analysis
- Microscopic Solder Joint Inspection: 200× electron microscopy identified nanoscale oxidation layers on BGA solder joints, causing “cold soldering” defects with elevated contact resistance. Such latent defects are invisible to the naked eye but lead to intermittent power interruptions.
- Thermal Simulation and Validation: ANSYS thermal modeling confirmed 3D heat distribution, revealing aged thermal paste between heatsink and chip (thermal conductivity dropped to 1.2W/m·K), causing chip junction temperatures to reach 125°C (exceeding the 105°C specification). This accelerated solder joint oxidation due to thermal stress.
- High-Speed Signal Integrity Analysis: TDR testing detected ±15% impedance deviations on DDR4 memory bus lines (standard tolerance ±10%). Eye diagram analysis confirmed signal rise time delays and insufficient noise margins, leading to system misinterpretation of data.
- EMC Noise Source Identification: Spectrum analysis pinpointed 100MHz-1GHz radiation noise from the switching power module. Adding common-mode chokes and X/Y capacitors reduced noise by 10dB below CISPR 22 Class B limits.
Solution Implementation and Validation
- Solder Joint Repair and Component Upgrade: Reflowed cold solder joints and replaced high-ESR electrolytic capacitors with low-ESR solid-state capacitors (ESR reduced from 200mΩ to 50mΩ), bringing power ripple down to 38mV and meeting IPC-610 standards.
- Thermal Management Optimization: Applied high-thermal-conductivity paste (≥5W/m·K) and optimized heatsink contact area, stabilizing chip temperatures below 85°C. Passed 168-hour 85°C/85%RH aging tests with no recurrence.
- Impedance Matching Adjustment: Optimized PCB stack-up to maintain 85-95Ω impedance on high-speed lines, improving eye diagram opening by 40% and reducing bit error rates to 10???.
- FMEA-Based Preventive Measures: Integrated solder fatigue and component drift into a failure mode database. Implemented NTC thermistor-based temperature monitoring and dynamic frequency scaling, enhancing reliability by three orders of magnitude.
Welcome to contact us if you have any issues about circuit board failure analysis: sales@bestpcbs.com.