

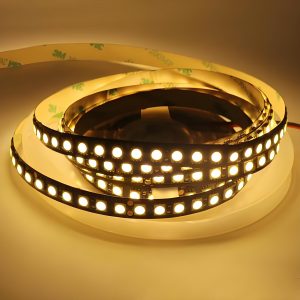
If you’re upgrading your lighting system, you’ve probably come across the term chip on board LED strip. It’s not just another LED strip—it’s a major step forward in lighting design. These strips provide continuous, smooth light with no visible dots, perfect for people who want clean lines, consistent brightness, and high efficiency.
In this guide, we’ll walk through everything you need to know about COB LED strips, from how they’re built to how they compare to other LED types, and even how to spot issues or repair them. Whether you’re working on a custom LED project or just curious about your options, this guide is for you.
What Is a Chip on Board LED?
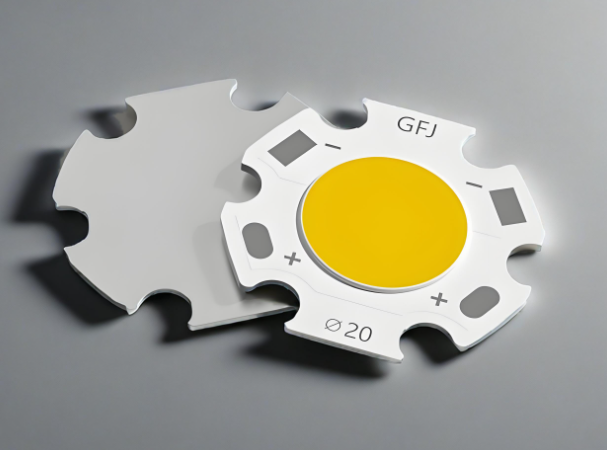
A Chip on Board (COB) LED is a type of LED package where many tiny LED chips are directly bonded to the surface of an aluminum circuit board. Unlike traditional LEDs, which are placed and packaged individually (often referred to as SMD or Surface Mounted Devices), COB technology groups multiple LEDs into a single, dense lighting module.
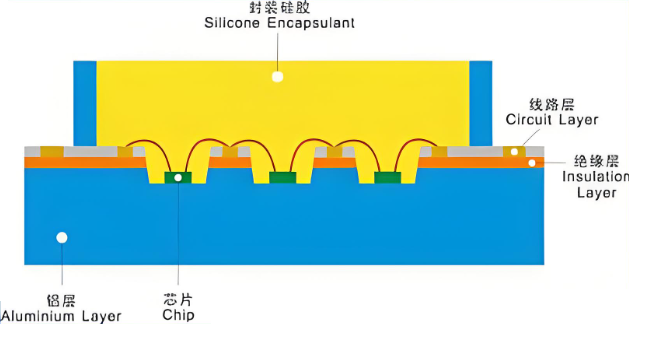
COB packaging technology is a manufacturing process that bonds the main body of the bare chip and the I/O terminals onto a PCB (printed circuit board) using conductive/thermal adhesives. The core steps of this process include using an ultrasonic hot-press welding equipment (such as a Bonder machine) to connect the metal wires (aluminum or gold) between the chip and the PCB pads. After passing the test, the resin adhesive is then applied.
LED Strip Chip Types
When you look at the specifications of any LED strip, you’ll likely come across numbers like 3528, 5050, or 2835. These refer to the chip sizes in tenths of millimeters, and each has different brightness, efficiency, and application benefits. Let’s break them down:
- 3528 LED Chips
These are some of the oldest LED chips still in use. They are compact and energy-efficient but offer low brightness. They’re ideal for soft lighting or background accents.
- 5050 LED Chips
Much larger and brighter than 3528s, 5050 chips are often used in RGB LED strips because each chip can hold three diodes (red, green, and blue). They’re great for color-changing applications.
- 2835 LED Chips
A newer design that’s slimmer than 5050s but offers improved heat dissipation and better brightness efficiency. These are increasingly popular in commercial lighting.
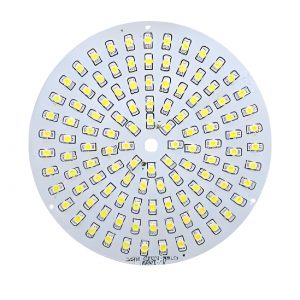
- COB LED Chips
Rather than a single chip, COB is a collection of many tiny LED dies directly mounted on the board. Their design creates a dot-free beam of light, and they perform extremely well in tight spaces or close-range lighting tasks.
If you’re after seamless lighting or professional installations, COB LED strips are your best bet. They’ve become especially popular in modern architectural and display lighting.
COB LED Strip vs SMD LED Strip
If you’re debating between COB and SMD strips, it helps to look at how they differ in function and appearance. Here’s a detailed comparison:
| Feature | COB LED Strip | SMD LED Strip |
| Light Appearance | Smooth, continuous with no visible dots | Dotted light, noticeable gaps between LEDs |
| Beam Uniformity | Excellent | Depends on LED pitch (spacing) |
| Flexibility | More flexible due to compact design | Slightly less flexible, especially with larger chips |
| Brightness | Very bright with even diffusion | Varies by chip type (2835, 5050, etc.) |
| Repairability | Harder to repair due to compact chip bonding | Easier to replace individual components |
| Heat Dissipation | Better thermal performance | May require heat sinks for high power strips |
| Applications | High-end design, task lighting, seamless decor | General-purpose, ambient, or RGB lighting |
Use COB LED strips for premium results in high-visibility areas. Choose SMD strips when budget is tighter or when you want color-changing effects that don’t require smooth lighting.
Can an LED Light Strip Be Repaired?
Yes, LED strips can be repaired, but the method depends on the type of strip you’re using.
For SMD LED strips, it’s relatively straightforward. If a section stops working, you can usually cut it out and solder in a new section. Most SMD strips are modular, with cut marks every few LEDs.
For COB LED strips, repairs are more complex. The chips are not easily accessible, and due to the dense configuration and phosphor coating, individual chip replacement isn’t practical. However, if there’s a damaged copper trace, connector issue, or visible burnt spot, basic soldering can still fix it.
It’s also worth checking if a segment is simply underpowered or affected by a voltage drop—especially in longer strips, which lose voltage near the end. In those cases, adding a second power input at the far end often solves the problem.
How to Check if a LED Strip Is Bad?
Diagnosing a bad LED strip doesn’t require fancy tools—just a little patience and a multimeter. Here are some ways to check:
1. Visual Inspection:
This is the most easy way to check. Look for signs of physical damage—burn marks, cracked coatings, loose connectors, or broken solder joints.
2. Power Supply Testing:
Sometimes the strip is fine, but the power adapter is faulty. Test your power source first. Make sure your 12V COB LED strip is getting the right voltage.
3. Voltage Drop Test:
If only part of the strip is dim, measure voltage at different points along the strip. Significant voltage drop means you need to power the strip from both ends.
4. Continuity Check:
Use a multimeter to check for continuity across copper pads. No signal means the path is broken.
5. Cut and Test Small Segments:
If one part is failing, cut a working piece off and connect it to power. If it lights up fine, the issue is likely with a specific segment or connector.
Pro tip: Always double-check your polarity. Reversing positive and negative wires is a common mistake and can damage certain strips.
What Is the Lifespan of a COB Light?
One of the biggest advantages of COB LEDs is their long lifespan. On average, COB LED strips last 30,000 to 50,000 hours, depending on the operating environment and quality of components.
Factors that influence lifespan:
- Ambient Temperature: High temperatures can shorten LED life.
- Power Regulation: Using a high-quality constant voltage power supply protects the strip from surges.
- Usage Patterns: Long continuous use without cooling may reduce performance over time.
Some well-designed COB LED PCB assemblies use aluminum-core boards (MCPCBs) to pull heat away from the chips, which extends their service life significantly.
Which Is Better: LED Strip or LED COB?
So, which is better—traditional LED strip or COB LED strip? It really depends on your lighting goals.
- Choose LED COB strips when you want smooth light, especially for under-cabinet lighting, mirrors, workbenches, or architectural edges.
- Stick to traditional LED strips (SMD) if you need RGB lighting, dynamic color control, or a cheaper solution for background or ambient lighting.
RGB COB LED strips now offer the best of both worlds—color mixing plus seamless appearance—though they’re still less common than standard RGB strips.

Key Parts in Chip on Board LED Strip
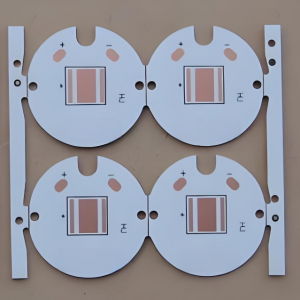
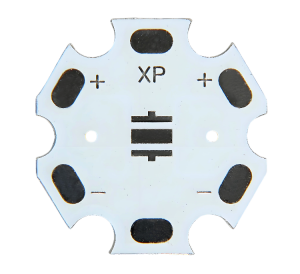
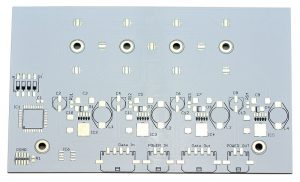
One of the most critical components in a chip on board (COB) LED strip is printed circuit board (PCB) base. COB LED strips commonly use aluminum-core printed circuit boards (aluminum PCBs) as their foundation because of their excellent thermal conductivity and structural stability. In COB design, multiple LED chips are densely mounted on the same board, which generates a significant amount of heat during operation. Without proper heat dissipation, the LEDs can overheat, resulting in reduced brightness and shorter lifespan.
The main function of the aluminum PCB is to efficiently transfer heat away from the LED chips to the aluminum base layer, which then releases it into the surrounding air or mounting surface. This built-in heat dissipation capability makes aluminum PCBs especially suitable for compact and enclosed lighting applications such as cove lighting, display cabinets, and vanity mirrors.
Additionally, aluminum PCBs provide mechanical strength to the strip, preventing it from bending too easily during installation or operation, which helps protect the internal components and ensures consistent performance.
COB LED PCB Wire Bonding Process
The wire bonding process for COB (Chip on Board) LED PCBs involves several critical steps to ensure reliable chip mounting and electrical connection. Below is a detailed breakdown of the full procedure:
Step 1: Wafer Expansion
Using a wafer expander, the LED wafer film provided by the supplier is stretched evenly. This process separates the closely packed LED chips on the film, making it easier to pick up individual chips during die bonding.
Step 2: Silver Paste Application
Place the expanded wafer ring onto a dispensing platform coated with silver paste. For loose (unmounted) LED chips, a dispenser applies precise amounts of silver paste directly onto the PCB’s bonding pads. This paste serves as the conductive adhesive for mounting the chips.
Step 3: Die Placement (Die Bonding)
Insert the silver-pasted wafer ring into a die bonding fixture. Under a microscope, the operator uses a precision tool to pick and place each LED chip onto the PCB, positioning it accurately on the pre-applied silver paste.
Step 4: Pre-Curing (Silver Paste Curing)
Place the die-mounted PCB into a thermal oven for controlled heating. This cures the silver paste and secures the LED chips in place. It’s important not to over-cure the board—prolonged heating may oxidize the LED chip surface (turning it yellow), which makes wire bonding difficult. Note: If only IC chips are bonded, this LED die bonding step may be skipped.
Step 5: IC Die Attachment
For IC bonding, dispense a small amount of red or black epoxy adhesive onto the PCB at the designated IC mounting location. Use anti-static tools (e.g., vacuum pen or tweezers) to place the IC die accurately onto the adhesive.
Step 6: Epoxy Curing
Place the IC-mounted PCB into a thermal oven or on a large heated platform to cure the adhesive. This process can also be done via natural curing at room temperature, although it takes longer.
Step 7: Wire Bonding (Aluminum Wire Connection)
Using an aluminum wire bonder, connect fine aluminum wire between the bonding pads on the LED chips or IC die and the corresponding pads on the PCB. This forms the internal wire connections for the COB assembly.
Step 8: Electrical Testing (Pre-Test)
Use dedicated testing tools (depending on the COB product type) to check each PCB for electrical functionality. A high-precision regulated power supply is commonly used. Any defective boards are flagged and sent for repair.
Step 9: Encapsulation (Dispensing Epoxy or Silicone)
Dispense a carefully measured amount of AB epoxy over each bonded LED chip using a dispensing machine. For ICs, a black encapsulant is typically used. Additional protective packaging is applied depending on customer requirements.
Step 10: Final Curing
Place the encapsulated PCB into a thermal oven and allow it to cure under controlled temperature and time settings. The curing schedule may vary depending on the type of encapsulant and the final product’s environmental requirements.
Step 11: Final Testing
After curing, perform a final round of electrical testing using specialized equipment to verify performance. Boards are sorted based on quality, and any issues are identified for rework or rejection.
EBest Circuit (Best Technology) – Your Trusted COB LED Strip Aluminum PCB Manufacturer
At EBest Circuit (Best Technology), we’re proud to provide advanced PCB manufacturing for lighting applications—including COB LED strips and custom MCPCB designs. Our engineers understand thermal performance, phosphor consistency, and bonding reliability.
Our COB LED PCB services include:
- One-stop solution: from layout to finished PCBs
- Flexible voltage support: including 12V COB LED strips
- Customized color temperatures and CRI ratings
- Support for RGB COB LED strip designs
- Advanced thermal management with MCPCB options
If you are interested in COB LED PCB manufacturing, welcome to email us at sales@bestpcbs.com or leave your comments below this blog.
FAQs
Q1: Can COB LED strips be dimmed?
Yes, most COB strips support PWM dimming. Make sure your power supply and controller are compatible.
Q2: Are COB LED strips waterproof?
Many are! Look for IP65 or higher if you’re using them outdoors. Silicone-coated versions offer good protection.
Q3: How do I install a COB LED strip?
Clean the surface, peel the adhesive backing, and press the strip in place. Use aluminum channels for better heat dissipation.
Q4: Can I use COB LED strips with smart home systems?
Yes! Pair them with a compatible dimmer or RGB controller connected to your smart hub.
Q5: What voltage do COB LED strips use?
Most commonly 12V or 24V. Always match your power supply to the strip’s input rating.
You may also like


Tags: 12v cob led strip, chip on board led strip, rgb cob led strip