

A perf board, often referred to as a perforated board, is a type of printed circuit board (PCB) that’s widely used in prototyping and DIY electronics. Unlike fully fabricated PCBs, a perf board offers a flexible way to mount and wire components before committing to a finalized design. If you’ve ever wondered how electronics hobbyists or engineers test ideas quickly, perf board printed circuit boards (PCBs) are often the answer.
What is Perf Board Printed Circuit Boards PCBs?
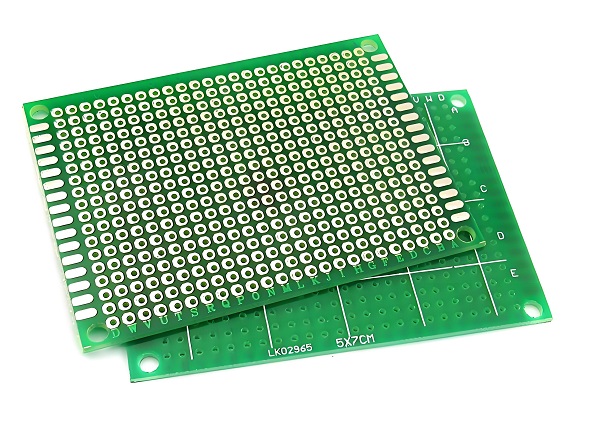
Perf boards are thin boards made from an insulating material like fiberglass or phenolic resin, pre-drilled with evenly spaced holes. These holes are laid out in a grid pattern and are designed to hold through-hole electronic components. The term “perf board printed circuit boards PCBs” refers to this category of PCBs that lack pre-designed traces but allow for custom circuit construction.
Unlike standard PCBs, perf boards don’t come with etched copper paths. You can design your own connections using wires or solder bridges, offering full control of your circuit layout.
What is Another Name for a Perfboard?
Perfboards are also known as prototyping boards, dot boards, or project boards. In some circles, they’re casually called “proto boards.” While names vary, their purpose remains the same: to provide a quick, hands-on way to build, test, and modify circuits during the design phase.
What is Perf Board Made Of?
Most perf boards are made from one of two materials:
- FR4 (Fiberglass Reinforced Epoxy): Durable and commonly used in professional settings.
- Phenolic Resin: More affordable but slightly brittle, usually found in budget DIY kits.
The board has a grid of holes, and in some cases, those holes are surrounded by copper pads, especially in copper-clad perf boards. These pads allow easy soldering of components and jumpers.
What Does a Perf Board Do?
A perf board allows engineers and hobbyists to construct electronic circuits manually. You mount components through the holes and connect them with wire or solder to form the circuit. It’s especially useful for:
- Rapid prototyping
- Small-scale production
- Educational projects
- Repair or replacement circuits
Perf boards eliminate the wait time and cost associated with custom PCB fabrication during early design phases.
What is the Difference Between a Perf Board and a Breadboard?
This is a common question for beginners, and the differences are worth understanding:
| Feature | Perf Board | Breadboard |
| Reusability | Single-use | Reusable |
| Soldering | Required | Not needed |
| Electrical Conductivity | Manual with wires/solder | Internal metal strips |
| Component Stability | Permanent | Temporary |
| Best for | Finalizing prototypes | Initial testing & concept design |
If you’re experimenting with a new idea, start with a breadboard. When you’re ready to make it permanent, switch to a perf board.
Perf Board Dimensions
Perf boards come in various standard sizes, typically measured in holes (e.g., 60×40 holes) or in millimeters. Here are a few common options:
- 3cm x 7cm (30mm x 70mm): Great for small circuits or microcontroller projects
- 5cm x 7cm: A medium size, popular for Arduino-based designs
- 9cm x 15cm: Ideal for complex circuits with more components
The standard hole spacing is 2.54mm (0.1 inch), which aligns perfectly with most DIP (dual in-line package) components.
Perf Board Price
Prices vary based on size, material, and copper coverage. Here’s a general range:
- Small perf board (3×7 cm): $0.20–$1.00 each
- Medium board (5×7 cm): $0.50–$2.00 each
- Large board (9×15 cm): $1.50–$5.00 each
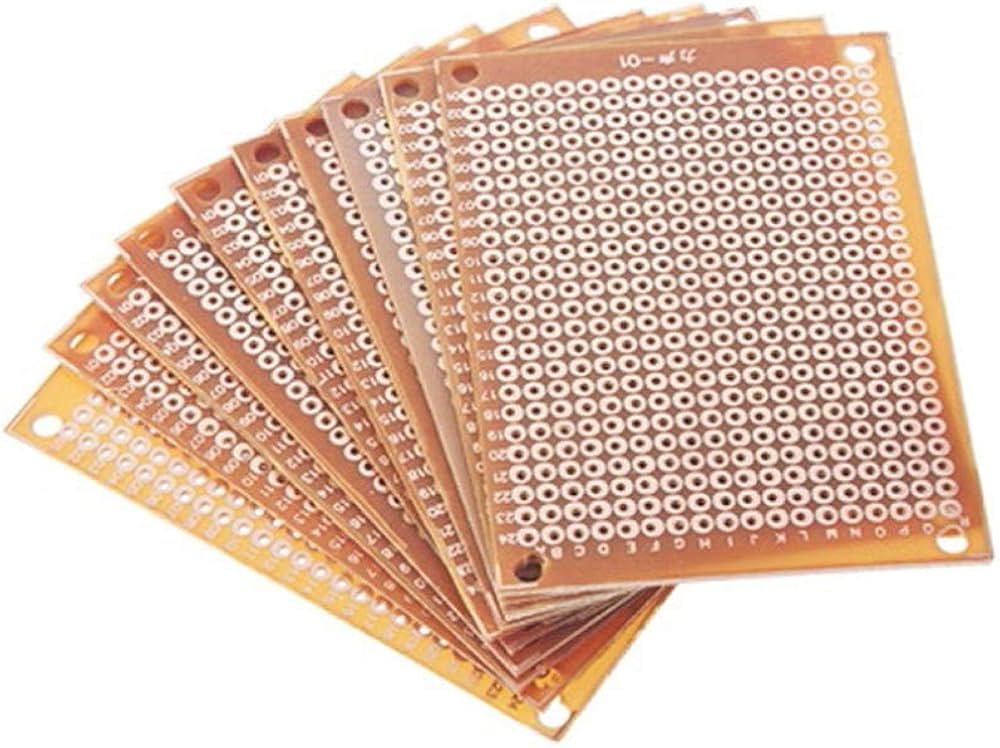
Buying in bulk usually reduces cost. For instance, a 10-pack of medium boards may cost under $10 on platforms like Amazon, AliExpress, or Digi-Key.
How to Use a Perf Board?
Using a perf board is an excellent way to build a permanent version of a prototype circuit. Here’s a step-by-step approach to help you get started—even if you’re new to soldering or circuit design:
1. Plan Your Layout
Before inserting components, sketch your circuit on paper or use software like Fritzing or KiCad. Try to place components in a way that minimizes the number of jumpers and crossing wires. Make sure power and ground rails are easy to access.
2. Insert the Components
Place the components into the holes of the perf board with the leads facing down. Start with the shortest components (like resistors), then work your way up to taller ones (like capacitors or IC sockets). This helps keep the board level while soldering.
3. Secure the Components
Bend the leads slightly on the bottom side of the board to hold components in place. This is especially helpful if you’re working with many parts at once or if the board is going to be moved before soldering.
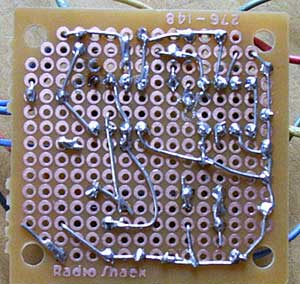
4. Solder the Leads
Once your components are in place, flip the board over and solder each lead to its corresponding pad. Try to heat both the pad and the lead at the same time for a clean solder joint.
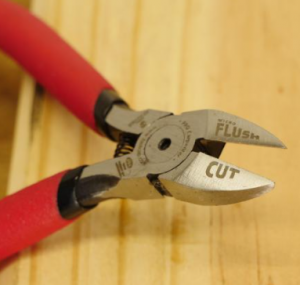
5. Trim Excess Leads
After soldering, use flush cutters to snip off the extra length of the component leads. This prevents shorts and makes the back of the board neat.
6. Make Electrical Connections
Now it’s time to connect the components electrically. You can use:
- Hook-up wire: Strip and bend it to form paths between solder points.
- Solder bridges: Add a small amount of solder to connect two nearby pads.
- Insulated jumper wires: For long connections across the board.
Tip: Color-code your wires for easier troubleshooting later (e.g., red for VCC, black for GND, yellow for signal).
7. Test the Circuit
Before powering up, check all connections with a multimeter. Look for continuity and confirm there are no shorts between adjacent traces or leads.
This process may take a bit of time, but it helps you build a functional and clean circuit that’s much more durable than a breadboard setup.
Perfboard Soldering Tips and Techniques
Soldering is a crucial step when working with perf boards. Good soldering makes your circuit reliable and long-lasting. Here are some essential tips and techniques to get better, cleaner, and more efficient solder joints:
1. Use the Right Soldering Iron
Choose a soldering iron with a fine tip and adjustable temperature, especially for delicate components. A temperature of around 350°C is good for most standard soldering jobs.
2. Select Quality Solder
Use 60/40 tin-lead rosin core solder or lead-free solder if safety or regulations require it. Thin solder (like 0.6mm) is easier to control for small connections.
3. Keep the Tip Clean
Clean the soldering iron tip with a damp sponge or brass wire before and after every few joints. This helps maintain heat transfer and reduces oxidation.
4. Pre-tin the Tip
Apply a small amount of solder to the tip before you start. This thin coating improves heat transfer to the pad and component lead.
5. Solder Quickly and Precisely
Touch the iron to the joint (pad and lead) for about 1–2 seconds, then feed in solder. Pull the iron away once enough solder has flowed. Avoid lingering too long, as overheating can damage the pad or component.
6. Avoid Cold Solder Joints
Cold joints happen when the solder doesn’t melt fully. They appear dull or cracked and can lead to unreliable connections. Always ensure the joint is shiny and slightly concave.
7. Use Heat Shrink or Insulation
When making jumpers or exposed connections, cover them with heat shrink tubing or use insulated wire to prevent accidental shorts.
8. Work in a Well-Ventilated Area
Soldering fumes can be harmful. Work near a window or use a small fume extractor to keep the air clean.
9. Double-Check Your Work
After finishing the soldering, inspect every joint. Use a magnifying glass if needed. A continuity check with a multimeter is also recommended.
10. Practice Makes Perfect
If you’re new to soldering, consider practicing on a spare perf board with some scrap components. Developing steady hands and learning how solder flows will improve your technique quickly.
Why Choose EBest Circuit (Best Technology) for Custom PCBs?
While perf boards are great for prototyping, finalized products need custom-made PCBs. That’s where EBest Circuit (Best Technology) comes in. We specialize in designing and manufacturing high-quality PCBs for various industries, from consumer electronics to automotive and aerospace.
We use a MES traceability system, provide professional engineering support, and offer competitive pricing even for low-volume orders. Whether you’re upgrading from perf board to custom PCB or need help bringing a prototype to life, EBest Circuit (Best Technology) has you covered.
FAQs
1. Can I use surface-mount components on a perf board?
Yes, but it’s trickier. You’ll need to manually create pads using wire or copper tape.
2. Are there perf boards with pre-connected tracks?
Yes, stripboards have rows of connected holes, which help speed up certain circuit designs.
3. Can perf boards handle high current?
Only to a certain extent. For higher currents, wider copper traces or bus bars are preferred.
4. Where can I buy perf boards?
They’re available online on Amazon, eBay, Digi-Key, Mouser, and local electronics stores.
5. What’s the best way to plan a circuit on a perf board?
Use grid paper or software like Fritzing to lay out components before building.
You may also like


Tags: perf board dimensions, perf board vs breadboard, perf board printed circuit boards pcbs