Why does PCB DFM matter for reliable manufacturing? This guide covers design rules, layout strategies, and verification methods for optimized PCB production.
- Does each engineering confirmation take 3-5 working days, slowing down the overall progress?
- Do you know that more than 40% of the additional cost comes from process omissions in the design stage?
- Can you afford the loss of the entire batch being scrapped due to undiscovered impedance deviation?
EBest Circuit (Best Technology) Can Provide:
- Lightning DFM diagnosis: issue a 3D simulation report containing 267 process parameters in 12 hours (compared with peers in the industry in an average of 48 hours.
- Cost sandbox simulation: use big data to predict the utilization rate of the board material, helping you save 8-15% of material loss.
- Free engineering service: 24-hour online engineers answer your questions and avoid impedance deviation.
Welcome to contact us if you have any request for PCB design: sales@bestpcbs.com.
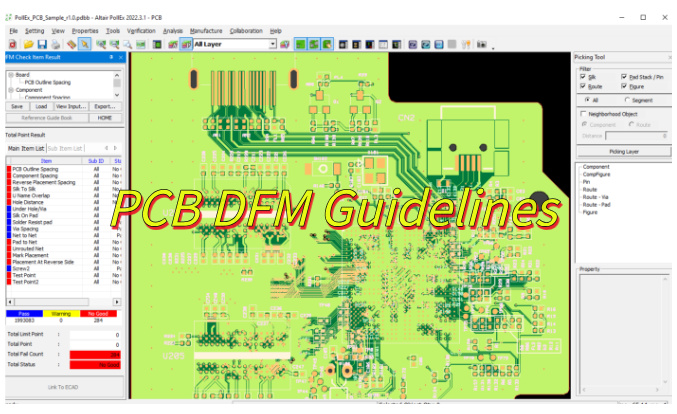
What Is PCB DFM?
PCB DFM (Design for Manufacturability) is a proactive approach to circuit board development that ensures designs can be efficiently and reliably manufactured. It involves analyzing layout elements such as trace widths, component spacing, via placement, and material choices to align with production capabilities while maintaining electrical performance.
By implementing DFM principles, designers avoid common pitfalls like insufficient solder mask clearance or unrealistic drill hole sizes that could lead to fabrication defects. The methodology also considers assembly requirements, ensuring proper thermal relief and component orientation for automated soldering processes.
This systematic verification reduces prototyping iterations, lowers production costs, and improves yield rates by addressing potential issues before manufacturing begins. Industry guidelines provide standardized benchmarks for implementing these checks throughout the design workflow.
PCB DFM Guidelines
Adopting DFM principles ensures PCB designs align with production capabilities, reducing errors and costs. Below are actionable guidelines for optimized manufacturing:
1. Layout Planning
- Maintain ≥0.15mm (6mil) clearance between copper features to prevent solder bridges.
- Place high-speed/RF components away from noise sources (e.g., switching regulators).
- Use standard aspect ratios (e.g., 1:1 for SMT pads) to simplify assembly.
2. Component Placement
- Position polarized components (e.g., electrolytic capacitors) with clear orientation markers.
- Group similar parts (resistors, capacitors) to minimize pick-and-place time.
- Avoid placing tall components (e.g., connectors) near board edges to prevent handling damage.
3. Solder Pad Design
- Follow IPC-7351B standards for pad sizes (e.g., 0.5mm pitch QFN pads: 0.3mm solder mask opening).
- Extend thermal pads on power components (e.g., MOSFETs) to improve heat dissipation.
- Add solder paste stencils with 1:1 aperture-to-pad ratios for fine-pitch parts.
4. Trace Routing
- Use ≥0.15mm (6mil) trace width for signals and ≥0.2mm (8mil) for power lines.
- Avoid acute angles (<90°) to prevent acid traps during etching.
- Isolate analog/digital grounds with single-point connections.
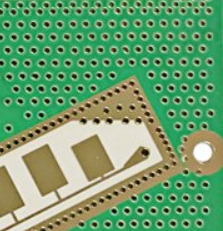
5. Via Design
- Limit via-in-pad usage to reduce solder wicking (use filled/capped vias for BGA escape).
- Maintain ≥0.25mm (10mil) annular ring to ensure via reliability.
- Keep via aspect ratio (hole diameter: board thickness) ≤1:6 for plating consistency.
6. Thermal Management
- Add ≥1mm² copper pours under power components (e.g., voltage regulators).
- Include thermal vias (0.3mm diameter, 1mm pitch) to connect top/bottom layer heat sinks.
- Avoid placing vias in thermal pad regions to prevent solder voiding.
7. Drill File Accuracy
- Specify drill sizes in increments of 0.05mm (e.g., 0.2mm, 0.25mm).
- Use separate files for plated (PTH) and non-plated (NPTH) holes.
- Include a drill chart with tolerances (e.g., ±0.05mm for ≤0.5mm holes).
8. Silkscreen & Marking
- Place reference designators ≥0.5mm away from pads to avoid solder mask interference.
- Use high-contrast ink for silkscreen (e.g., white on green solder mask).
- Include polarity marks for diodes, LEDs, and electrolytic capacitors.
9. Design for Assembly (DFA)
- Minimize component count by using integrated devices (e.g., PMICs instead of discrete regulators).
- Align SMT and THT components on the same side to reduce reflow passes.
- Avoid mixing lead-free and leaded solder processes without manufacturer approval.
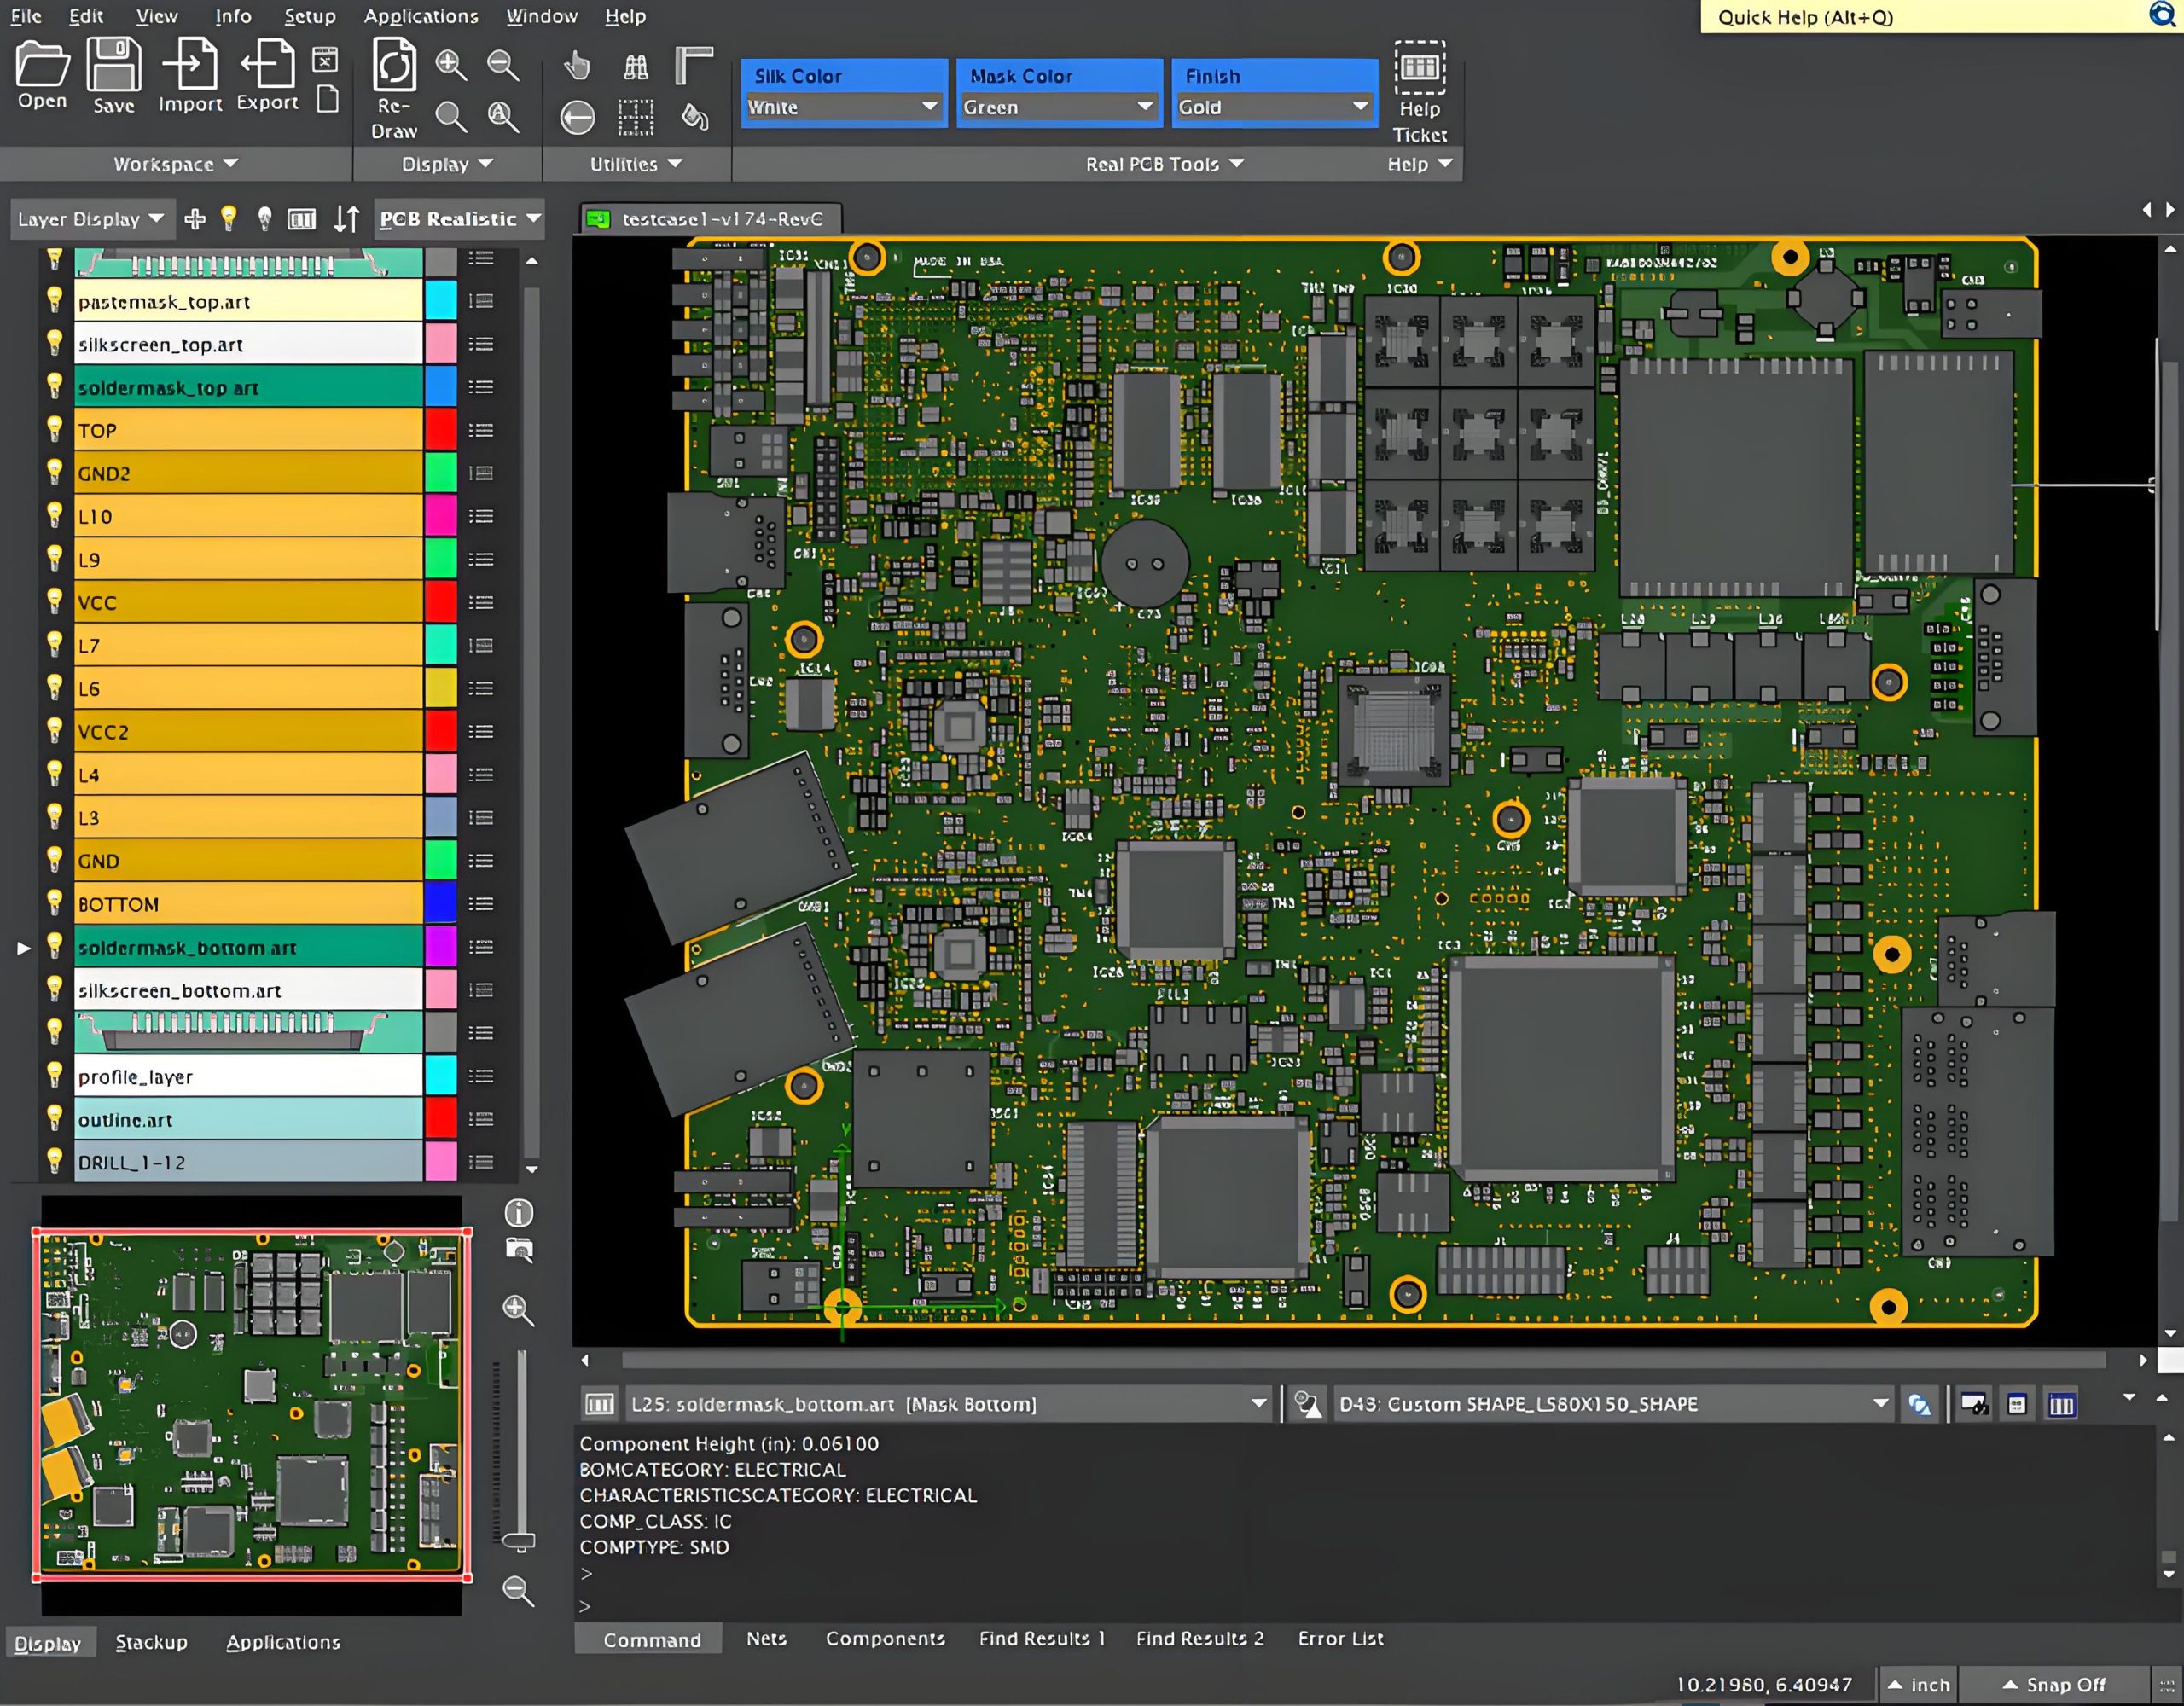
10. File Output & Validation
- Generate Gerber files in RS-274X format with layer-specific extensions (e.g., .GTL for top copper).
- Include a fabrication drawing with board outline, cutouts, and special instructions.
- Run DFM checks using software tools (e.g., Valor NPI) to flag errors.

PCB DFM Layout Optimization Strategies
Component Placement Methodology
- Functional grouping: Cluster components by circuit function (power, analog, digital) with at least 100 mil spacing between groups
- Assembly considerations: Maintain 50 mil clearance around all components for pick-and-place machines
- Thermal management: Position heat-generating components (voltage regulators, power ICs) with 200 mil spacing and access to thermal vias
- Connector placement: Locate all board-to-board connectors within 300 mil of board edges
Signal Routing Best Practices
- Trace geometry: Use 45° angles with minimum 3x width radius for bend transitions
- Impedance control: Maintain consistent 5 mil spacing for differential pairs and reference planes
- High-current paths: Implement 20 mil minimum width for 1A current carrying capacity
- Noise isolation: Separate analog and digital grounds with at least 50 mil gap
Manufacturing Enhancement Features
- Via standardization: Use 8 mil/16 mil (hole/pad) via sizes throughout the design
- Solder mask: Apply 4 mil expansion on all SMD pads with 2 mil web minimum
- Fiducial markers: Place three 40 mil diameter markers in L-shape pattern
- Test points: Include 32 mil diameter test points every 5-10 components
Documentation Standards
- Silkscreen: Use 45 mil height fonts with 7 mil line width
- Layer identification: Mark all layers with orientation indicators
- Version control: Include datecode and revision near board edge
- Assembly drawings: Provide 1:1 scale component location diagrams
Design Validation Process
- Run DRC checks with 6 mil minimum spacing rules
- Verify annular rings meet 5 mil minimum requirement
- Cross-check against manufacturer’s capability matrix
- Generate 3D model for mechanical fit verification
PCB DFM Rules for Board Outline
PCB DFM rules for board outline:
Panel Compatibility
- Design board outlines to fit standard panel sizes (e.g., 450mm × 610mm) with breakaway tabs or V-grooves.
- Avoid complex shapes; use rectangles or simple polygons to minimize cutting waste.
Edge Clearance
- Maintain ≥5mm spacing between components/traces and board edges to prevent damage during depaneling.
- Keep connectors, tall parts, and solder joints ≥3mm from edges.
Tolerance Compliance
- Adhere to manufacturer’s routing tolerance (e.g., ±0.1mm for board outline dimensions).
- Specify slot/hole positions with ±0.05mm accuracy for precise registration.
Slot & Cutout Design
- Ensure slots/cutouts have ≥1mm width to avoid manufacturing limitations.
- Round corners with ≥1.5mm radius to reduce stress during routing.
Fiducial Markers
- Place 1mm diameter fiducials at board corners (≥5mm from edges) for assembly alignment.
- Use bare copper or solder mask-defined pads for fiducials.
File Representation
- Define board outlines in Gerber files using .GKO or .GM1 layer extensions.
- Avoid overlapping lines or open polygons in outline definitions.
Material Edge Handling
- Specify plated or non-plated edges for boards requiring conductive perimeters.
- Avoid placing vias or traces within 2mm of board edges.
PCB DFM Checklist for Trace and Spacing
Focus on these trace-specific checks to ensure manufacturability and signal integrity:
1. Trace Width & Thickness
- Verify minimum trace width matches manufacturer’s capability (e.g., ≥0.1mm for standard processes).
- Increase trace width for high-current paths (e.g., ≥0.2mm for 1A+ currents).
- Use consistent trace thickness (e.g., 1oz copper for uniform etching).
2. Spacing Between Traces
- Maintain ≥0.15mm (6mil) clearance between adjacent traces to prevent solder bridges.
- Increase spacing for high-voltage traces (e.g., ≥0.25mm for 50V+ applications)
3. Angle Management
- Avoid angles <90°; use 45° or curved bends to prevent acid traps during etching.
- Ensure sharp corners (e.g., for right-angle bends) are ≥0.2mm from pads.
4. Impedance Control
- Define controlled impedance traces (e.g., 50Ω for RF, 90Ω for differential pairs).
- Maintain consistent trace width/spacing and dielectric thickness for impedance stability.
5. Isolation & Cross-Talk Prevention
- Separate analog/digital traces by ≥2mm or use ground planes to block noise.
- Avoid parallel routing of high-speed and low-speed signals; use orthogonal routing where possible.
6. High-Temperature Areas
- Widen traces near power components (e.g., MOSFETs, regulators) to handle thermal stress.
- Avoid placing traces under thermal pads or heat sinks to prevent delamination.
PCB DFM Review of Via Design
Via Size Standardization
- Establish uniform via dimensions (8 mil hole/18 mil pad recommended).
- Maintain 5 mil minimum annular ring for reliability.
- Limit aspect ratio to 8:1 for standard fabrication.
- Implement 10 mil minimum pad-to-pad spacing.
Placement Guidelines
- Position vias no closer than 15 mil from component pads.
- Distribute vias evenly across ground planes.
- Place return path vias within 50 mil of signal transitions.
- Avoid stacking vias unless necessary for high-density designs.
Manufacturing Considerations
- Specify tented vias for solder mask coverage.
- Implement via filling for thermal management applications.
- Maintain 20 mil clearance from board edges.
- Include test vias for debugging purposes.
High-Current Applications
- Use multiple vias (minimum 4) for power connections.
- Increase via size to 12 mil hole/24 mil pad for >3A currents.
- Implement thermal relief connections for heatsinking.
- Space parallel vias at least 30 mil apart.
Signal Integrity Practices
- Place ground vias adjacent to high-speed signal vias.
- Maintain consistent via spacing in differential pairs.
- Avoid via stubs in high-frequency designs.
- Implement back-drilling for >5GHz applications.
Documentation Requirements
- Include via specifications in fabrication notes.
- Provide separate drill charts for different via types.
- Mark special via treatments (filled, plugged, etc.).
- Document any non-standard via implementations.
Free PCB DFM Report – EBest Circuit (Best Technology)
EBest Circuit (Best Technology) offers complimentary PCB DFM analysis reports to streamline your manufacturing process. Our automated system performs comprehensive design verification, checking 200+ manufacturing parameters against industry standards. You’ll receive detailed feedback on component spacing, trace widths, via placement, and other critical factors within 24 hours. This free service helps identify potential production issues before fabrication, reducing costly redesigns and delays. Simply upload your design files to receive a customized report with actionable recommendations. Our analysis covers all major fabrication aspects while maintaining strict data confidentiality. Take advantage of this professional evaluation to optimize your PCB design for manufacturability. Contact us now to get a free PCB DFM report: sales@bestpcbs.com.
You may also like


Tags: PCB DFM, PCB DFM Guidelines