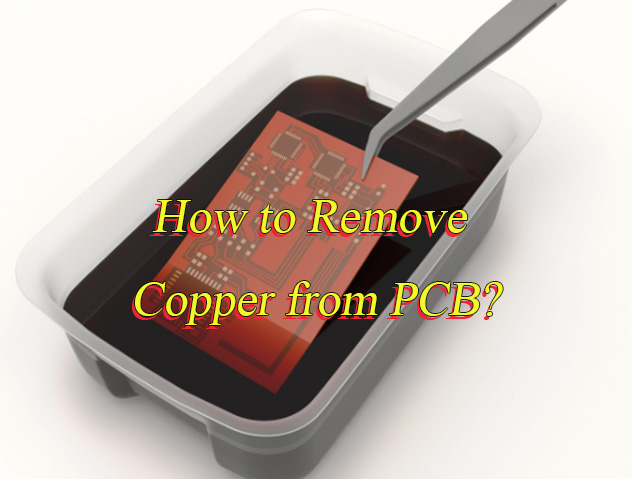
How to remove copper from PCB? This guide compares chemical, mechanical, and eco-friendly removal techniques, plus safety tips to help you choose wisely.
Are you worried about these issues?
- Is 5G signal distortion plaguing your circuit?
- Is PCB cost overrun eating profits?
- Is impedance mismatch ruining RF designs?
As a PCB manufacturer, EBest Circuit (Best Technology) can provide service and solution:
- High-Frequency Copper Removal: Laser-etch to eliminate parasitics, boost 5G signal speed by 15%.
- Cost Efficiency Surgery: AI-driven copper trimming cuts waste, slashes unit cost by 8%.
- Impedance Control Mastery: Micron-level precision + real-time testing ensures ±5Ω tolerance, passes ISO 9001 first try.
Welcome to contact us if you have any request for PCB design and manufacturer: sales@bestpcbs.com.
How to Remove Copper from PCB?
A Guide to how to remove copper from PCB:
1. Pre-Preparation and Pattern Transfer
- Surface Cleaning: Clean the copper-clad laminate using fine sandpaper (400-600 grit) or isopropyl alcohol/ultrasonic cleaning to eliminate oil, oxides, and contaminants. Mechanical cleaning involves scrubbing with a brush and mild detergent, followed by rinsing with deionized water. Ensure complete drying to prevent etching unevenness from residual moisture.
- Pattern Transfer: Employ photolithography or thermal transfer techniques. For photolithography, apply photoresist (dry film or liquid) and expose it under UV light through a mask film. Develop with a 0.8-1.2% sodium carbonate solution to remove unexposed resist. For thermal transfer, use laser-printed mirrored patterns on transfer paper, heat-press at 150-180°C onto the board, and dissolve the paper in warm water.
- Resist Curing: Post-exposure baking at 80-100°C for 10-15 minutes or UV curing (365nm, 50-100mJ/cm²) ensures resist adhesion and chemical resistance.
2. Etchant Selection and Preparation
- Acidic Etchant: A mixture of copper chloride (CuCl₂), hydrochloric acid (HCl), and hydrogen peroxide (H₂O₂). The reaction is Cu + H₂O₂ + 2HCl → CuCl₂ + 2H₂O. Optimal conditions: 1-1.5M Cu²⁺, pH 1-2. Add stabilizers (e.g., urea) to prevent H₂O₂ decomposition.
- Alkaline Etchant: Ammoniacal copper chloride system (CuCl₂ + NH₃ + NH₄Cl), forming [Cu(NH₃)₄]²⁺ complexes. Maintain pH 8.0-8.8, temperature 45-55°C, and Cu²⁺ concentration 18-22 oz/gallon (7.5-8.5 g/L). Add NH₄Cl at 150-200 g/L for enhanced regeneration.
- Preparation Protocol: Use deionized water for mixing. Adjust HCl to 2-3M for acidic etchant; maintain NH₃:NH₄Cl ratio at 3:1 for alkaline etchant. Stir continuously to avoid precipitation.
3. Etching Operation and Control
- Method Selection: Spray etching (preferred for uniformity), bubble etching, or immersion etching. Spray systems operate at 0.2-0.4 MPa; immersion tanks require 200-300 rpm stirring.
- Parameter Optimization:
- Temperature: Acidic etchant ≤60°C (prevents H₂O₂ volatilization); alkaline etchant 45-55°C (avoids NH₃ loss).
- Time: Adjust based on copper thickness (e.g., 18μm Cu requires 2-5 min). Thick copper (>35μm) may need multiple passes.
- Side Etch Control: Use additives (e.g., benzotriazole) to maintain an etch factor ≥3. Reduce spray pressure for fine lines (<75μm) to minimize undercut.
- Monitoring: Use inline sensors to track Cu²⁺ concentration, pH, and temperature. Automatic systems replenish etchant via titration or density control.
4. Post-Processing and Quality Inspection
- Cleaning and Neutralization: Rinse with deionized water for 2-3 minutes. Neutralize acidic residues with 5-10% Na₂CO₃; acid-wash alkaline residues with 1-2% HCl.
- Resist Removal: Dissolve dry film in 3-5% NaOH at 50°C; liquid resist requires acetone or commercial stripper. Gently scrub to avoid damaging copper traces.
- Quality Checks:
- Microscopic Inspection: Use 50-200X optical microscopy to verify line integrity, width tolerance (±10μm), and absence of pinholes.
- Electrical Testing: Perform continuity and isolation tests with a multimeter or flying probe tester.
- Repair: Fill gaps with conductive ink or re-plate copper for broken traces.
5. Safety and Environmental Protection
- Personal Protection: Wear nitrile gloves, chemical goggles, acid-resistant aprons, and respirators in ventilated fume hoods. Ensure access to emergency eyewash and shower stations.
- Waste Management: Collect spent etchant in labeled containers. Acidic waste precipitates Cu(OH)₂ with lime; alkaline waste recovers Cu via electrolysis. Dispose through licensed facilities adhering to EPA/ROHS standards.
- Equipment Maintenance: Clean etching tanks weekly with 5% HNO₃ to remove residues. Inspect pumps, nozzles, and heaters monthly to prevent leaks or clogging.
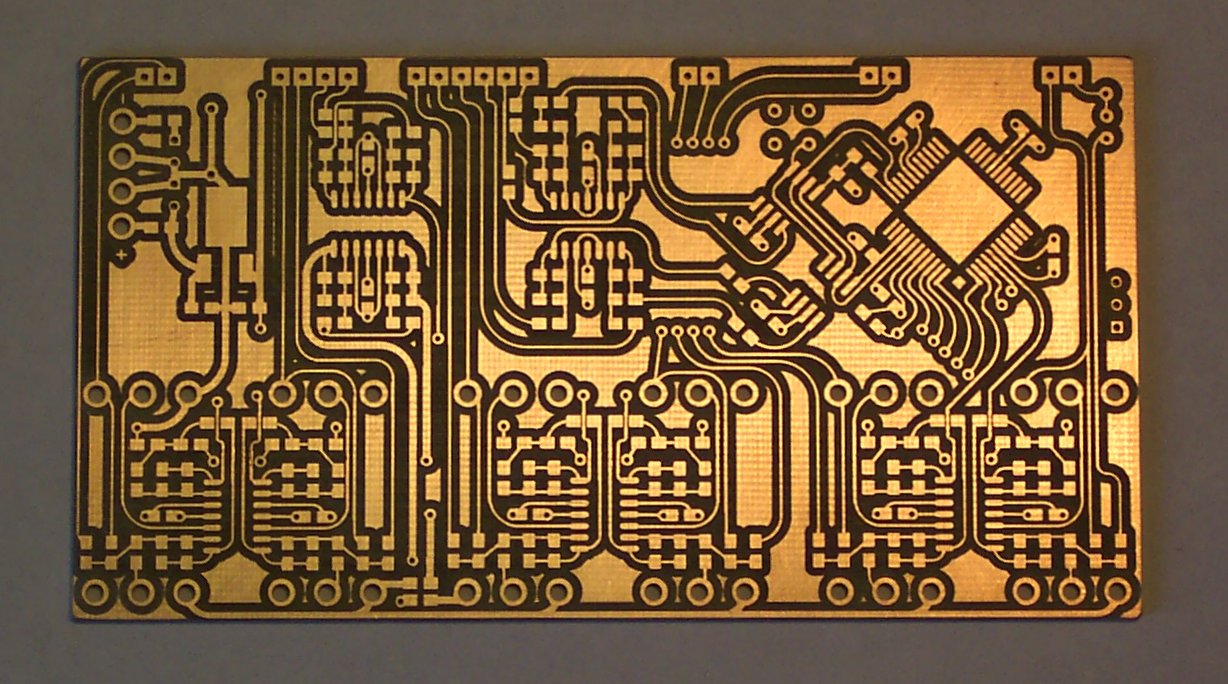
What Chemical Solutions Dissolve Copper from PCBs?
Chemical Solutions for Dissolving Copper from PCBs
Acidic Copper Chloride Etchant
- Composition & Principle: Primarily composed of copper chloride (CuCl₂), hydrochloric acid (HCl), and hydrogen peroxide (H₂O₂). The reaction is Cu + H₂O₂ + 2HCl → CuCl₂ + 2H₂O, forming soluble complexes.
- Application Scenarios: Suitable for fine-line PCBs (e.g., HDI boards) due to fast and uniform etching rates.
- Operation Points: Maintain Cu²⁺ concentration at 1–1.5 M, pH 1–2, and temperature ≤60°C to prevent H₂O₂ decomposition. Regularly monitor ORP (500–600 mV) and specific gravity (1.3 ± 0.03) to avoid excessive side etching.
Alkaline Copper Chloride Etchant
- Composition & Principle: Contains copper chloride, ammonia (NH₃), and ammonium chloride (NH₄Cl), forming [Cu(NH₃)₄]²⁺ complexes. Slower etching but high precision.
- Application Scenarios: Ideal for multilayer boards, flexible PCBs (FPCs), and scenarios requiring high etch factor (≥3).
- Operation Points: Maintain pH 8.0–8.8, temperature 45–55°C, and Cu²⁺ concentration 18–22 oz/gallon (~7.5–8.5 g/L). Add NH₄Cl (150–200 g/L) to enhance regeneration and prevent ammonia volatilization.
Sodium Persulfate Etchant
- Composition & Principle: Sodium persulfate (Na₂S₂O₈) reacts with acid (e.g., sulfuric acid) to produce CuSO₄ and Na₂SO₄. Etching rate adjustable via temperature (40–60°C) and pH (2–5).
- Application Scenarios: Small-batch production, flexible boards, and inner-layer etching for HDI boards, with environmental advantages (easy copper recovery from waste liquid).
- Operation Points: Use activators (e.g., iron powder) to improve efficiency and reduce side etching. Neutralize waste liquid for copper precipitation or recovery via electrolysis.
Ferric Chloride Etchant
- Composition & Principle: Ferric chloride (FeCl₃) reacts with copper via redox reaction, generating Cu²⁺ and Fe²⁺. Suitable for screen-printed PCBs and liquid photoresists.
- Application Scenarios: Low-cost, widely available, but prone to side etching. Not recommended for nickel/tin-resistant layers.
- Operation Points: Regularly replenish the solution. Neutralize waste liquid with lime to precipitate Cu(OH)₂ for disposal.
Fluoroboric Acid Etchant
- Composition & Principle: Mixture of fluoroboric acid (HBF₄) and nitric acid, dissolving copper to form fluoride complexes. Used for special alloy etching (e.g., magnesium alloy demolding, IC wafer trenches).
- Application Scenarios: High-precision microstructures and OLED substrate etching, requiring strict corrosion control.
- Operation Points: Wear acid-resistant protective gear. Neutralize waste liquid with soda ash to precipitate calcium fluoride, meeting environmental standards.
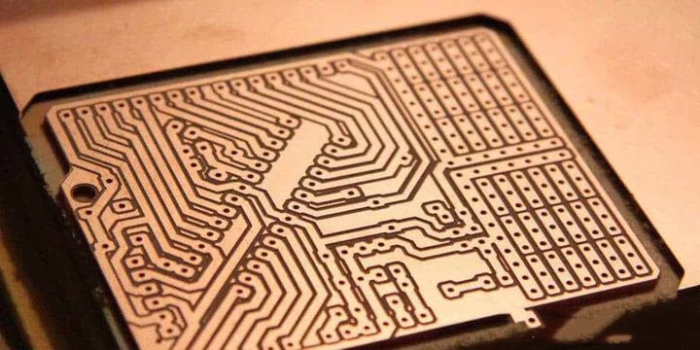
How Does Mechanical Grinding Remove Copper from PCB Effectively?
1. Pre-Surface Treatment and Assessment
- Cleaning and Inspection: Remove surface oils, oxides, and residues using anhydrous ethanol or ultrasonic cleaning to ensure full contact between abrasive media and copper layers. Measure copper thickness (typically 18-70μm), uniformity, and substrate durability (e.g., FR4, polyimide) via optical microscopy or XRF spectroscopy to prevent substrate damage from over-grinding.
- Area Marking: Protect critical circuit areas (e.g., pads, traces) with high-temperature tape or solder mask to avoid accidental damage during grinding.
2. Tool and Media Selection
- Manual Grinding: Use silicon carbide/alumina sandpaper (80-1200 grit) with handheld blocks or rotary tools (e.g., Dremel) for localized, fine-area grinding.
- Automated Grinding: Employ planar grinders, belt sanders, or CNC machines equipped with diamond wheels, ceramic discs, or nylon brushes for large-scale, batch processing. Adjust belt grit (P120-P400) and pressure (0.2-0.5MPa) to control efficiency.
- Sandblasting: Utilize compressed air-driven alumina/glass bead blasting with adjustable pressure (0.4-0.8MPa), nozzle distance (10-30cm), and angle (45°-90°) for uniform copper removal on complex surfaces or multi-layer board edges.
3. Precise Parameter Control
- Pressure and Speed: Optimize grinding pressure (0.1-0.3MPa) based on copper thickness and substrate hardness to avoid deformation or delamination. Balance speed (e.g., belt linear speed 15-30m/s) with surface quality, excessive speed causes thermal damage, while low speed reduces efficiency.
- Cooling and Lubrication: Continuously apply coolant (deionized water or specialized grinding fluid) to reduce friction heat, minimize dust, and extend media life.
- Multi-Stage Strategy: For thick copper (>35μm), adopt “coarse-medium-fine” multi-step grinding with progressively finer grits to prevent uneven substrate exposure or burrs.
4. Process Monitoring and Quality Inspection
- Real-Time Monitoring: Use inline thickness gauges or laser sensors to track copper removal thickness and uniformity. Inspect surfaces visually or via magnifiers for residual copper, scratches, or substrate damage.
- Post-Process Inspection: Clean surfaces with compressed air and ethanol, then verify roughness (Ra ≤1.6μm), copper residue, and substrate integrity using optical/electron microscopy (50-200X) per IPC-A-600 standards.
- Electrical Testing: Perform continuity and isolation tests (e.g., flying probe testing) to confirm circuit functionality and rule out shorts/opens caused by grinding.
5. Environmental and Safety Measures
- Dust Control: Operate within negative-pressure dust chambers or enclosed systems with HEPA filtration to capture copper particles, preventing environmental contamination and operator exposure.
- Personal Protection: Wear dust masks, safety goggles, earplugs, cut-resistant gloves, and anti-static clothing to shield against debris, noise, and electrostatic discharge.
- Waste Recovery: Recover copper powder via magnetic separation or chemical precipitation; treat waste fluids through neutralization/sedimentation to meet discharge standards (e.g., GB 8978-1996).
Can Ultrasonic Cleaning Remove Copper from PCB without Damaging Substrates?
No, ultrasonic cleaning alone cannot remove copper from PCBs without damaging substrates. Ultrasonic cleaning primarily utilizes cavitation bubbles to dislodge surface contaminants like oils, oxides, or residues, but it does not chemically or mechanically etch copper. Effective copper removal requires dedicated methods such as chemical etching (e.g., acidic/alkaline solutions) or mechanical grinding, which directly dissolve or abrade the copper layer while substrate protection depends on precise parameter control (e.g., temperature, pressure, time) and protective coatings.
Are There Eco-Friendly Alternatives to Remove Copper from PCB?
Yes, there are eco-friendly alternatives to remove copper from PCB, with several technologies already achieving industrial-scale application. Below is a detailed analysis with enhanced technical specifics:
1. Mechanical Stripping (Physical Eco-Solution)
- Technical Enhancement: Utilize precision tools like 80-120 grit sandpaper for coarse removal, followed by 2000-grit polishing for fine finishing. Laser ablation employs 355nm UV lasers at 5-10W power with 100-500mm/s scanning speeds, achieving ±5μm edge precision.
- Eco-Advantage: Zero chemical waste generation; copper dust collected via HEPA filters can be smelted into 99.9% pure copper ingots.
- Case Example: A prototyping lab reduced chemical waste by 85% using laser stripping for 0.5oz copper layers.
2. Electrochemical Etching (Circular Economy Model)
- Process Innovation: Electrolytic recovery systems operate at 0.5-2A/dm² current density with pH control between 2-3. Pulse power supply technology reduces energy consumption by 30% compared to DC systems.
- Recovery Efficiency: Copper ions precipitate as CuSO₄·5H₂O crystals, achieving 98% purity for direct reuse in PCB plating lines.
- Industrial Application: A manufacturer recovered 15 tons of copper annually through closed-loop electrolysis, cutting raw material costs by 40%.
3. Bio-Etching (Cutting-Edge Biotechnology)
- Microbial Action: Acidithiobacillus ferrooxidans bacteria oxidize copper at 30-35℃ in nutrient-rich solutions. Laboratory tests show complete dissolution of 20μm copper layers within 48 hours.
- Byproduct Handling: Fermentation broth undergoes simple pH adjustment (to 7-8) before discharge, meeting municipal wastewater standards.
- Scalability Challenge: Current pilot-scale systems process 100m² PCBs/day at $15/m² cost, 3x higher than chemical methods but decreasing with R&D advances.
4. Dry Etching Technologies (Waste Minimization)
- Vacuum Etching: Patented flat-jet nozzles deliver etching solution at 20m/s velocity, reducing liquid usage by 30% while maintaining ±1μm uniformity for ≤30/30μm lines.
- Plasma Etching: Inductively coupled plasma (ICP) systems use SF₆/O₂ mixtures to sputter copper at 50-100nm/min rates, ideal for ultra-thin flexible PCBs.
5. Eco-Friendly Etchant Formulations
- Sodium Persulfate System: Enhanced with 0.5% sodium dodecyl sulfate for improved wetting, achieving 15% faster etching rates than conventional recipes. Wastewater treatment involves precipitation with 2g/L Na₂S, reducing copper to <0.5mg/L.
- Citric Acid Blend: A 15% citric acid solution with 5% H₂O₂ provides biodegradable etching at 40℃, with ozone post-treatment degrading residual organics to CO₂/H₂O.
What PPE is Mandatory When Remove Copper from PCB with Acids?
Mandatory Personal Protective Equipment (PPE) When Removing Copper from PCB with Acids
Acid-Resistant Gloves (Nitrile Material)
- Necessity: Acidic etching solutions are highly corrosive; direct contact can cause chemical burns or tissue necrosis.
- Recommended Standard: Nitrile gloves compliant with EN374 standards, thickness ≥0.5mm, ensuring flexibility for dexterous operations. Inspect gloves for integrity before use; replace immediately if damaged.
Full-Face Protective Goggles (with Facial Shield)
- Necessity: Splash hazards pose risks of permanent eye/facial injuries.
- Recommended Standard: ANSI Z87.1-certified goggles with anti-splash coating, clear distortion-free vision. Optimize for models with integrated facial shields for 360° protection.
Acid-Resistant Raincoat/Chemical Apron
- Necessity: Torso and lower limbs are high-risk areas for accidental acid splashes; regular clothing offers no protection.
- Recommended Standard: PVC or neoprene material, covering knee-length with sealed seams. Choose knee-high designs to prevent entanglement during operations.
Dust Mask (for Powder Handling)
- Necessity: Powdered reagents like ferric chloride generate inhalable dust, risking respiratory diseases with prolonged exposure.
- Recommended Standard: N95/FFP2-certified masks with exhalation valves for reduced breathing resistance. Replace filters regularly to maintain efficiency.
Corrosion-Resistant Boots (Rubber Material)
- Necessity: Acid penetration through footwear can cause severe foot burns.
- Recommended Standard: Knee-high rubber boots with anti-slip soles, boot height ≥30cm. Must pass acid-resistance tests for prolonged use without leakage.
Emergency Eyewash/Shower Station
- Necessity: Immediate rinsing is critical for acid exposure to skin/eyes; delays risk irreversible damage.
- Installation Requirements: Eyewash flow ≥1.5L/min, full-body shower accessible within 10 seconds. Regularly inspect equipment functionality and water purity.0
FAQs of Copper from PCB Removal
Q1: How do differences in etchant corrosion to PCB substrates influence process selection?
A1: Acidic etchants (e.g., copper chloride systems) exhibit lower corrosion to FR4 epoxy substrates, ideal for fine-pitch circuits. Alkaline ammonia-based etchants are gentler to polyimide flexible substrates but require ammonia volatilization control. Sodium persulfate systems, free of ammonia, suit odor-sensitive environments. Selection depends on substrate type, line precision, and environmental regulations.
Q2: How to adjust grinding parameters to prevent substrate delamination during mechanical removal?
A2: For thick copper (>35μm), adopt multi-stage grinding: coarse (80-grit) → medium (240-grit) → fine (400-grit) with progressive grit reduction. Maintain low pressure (0.1-0.3MPa) and belt speed (15-30m/s) to avoid over-grinding. Real-time thickness monitoring ensures uniform removal.
Q3: How to ensure copper ion concentration meets discharge standards during waste liquid treatment?
A3: Neutralize waste liquid to pH 6-9 (lime for acids, sulfuric acid for alkalis), then precipitate copper as CuS/Cu(OH)₂ using Na₂S/NaOH. Separate solids via filter press. Further purify filtrate via ion exchange/electrolysis to achieve Cu²⁺ <0.5mg/L, compliant with GB 8978-1996.
Q4: How to control undercut for line precision during acidic etching?
A4: Maintain Cu²⁺ at 1-1.5M, pH 1-2, temperature ≤60°C. Monitor ORP (500-600mV) and specific gravity (1.3±0.03). For high precision, alkaline ammonia etchants form [Cu(NH₃)₄]²⁺ complexes to reduce undercut, requiring etching factor ≥3.
Q5: What environmental compliance factors should prioritize when selecting copper removal methods?
A5: Evaluate waste treatment costs and copper recovery efficiency (e.g., >99.9% purity via electrolysis). Ensure facilities have negative-pressure dust control, HEPA filtration, and emergency showers. Comply with OSHA/local regulations for chemical exposure and wastewater COD (<100mg/L).